When you click on links to various merchants on this site and make a purchase, this can result in this site earning a commission. Affiliate programs and affiliations include, but are not limited to, the eBay Partner Network.
Tools needed: Philips Stubby and Regular Screwdriver
Flat Head Screwdriver
Fingers
So Lets start!!
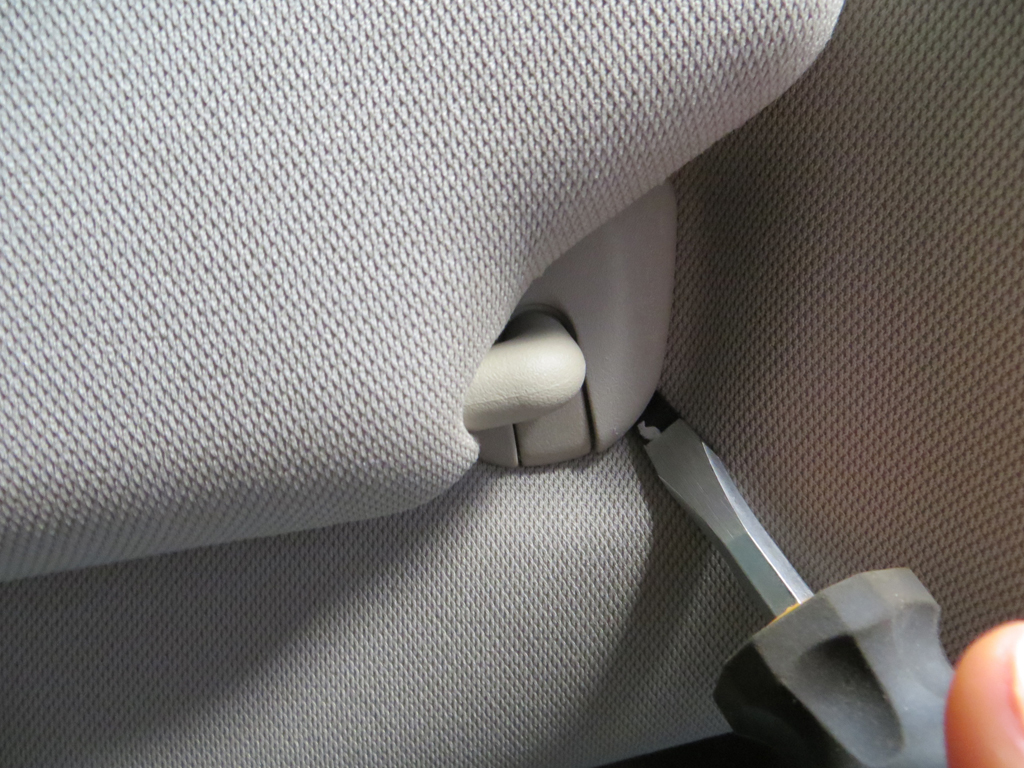
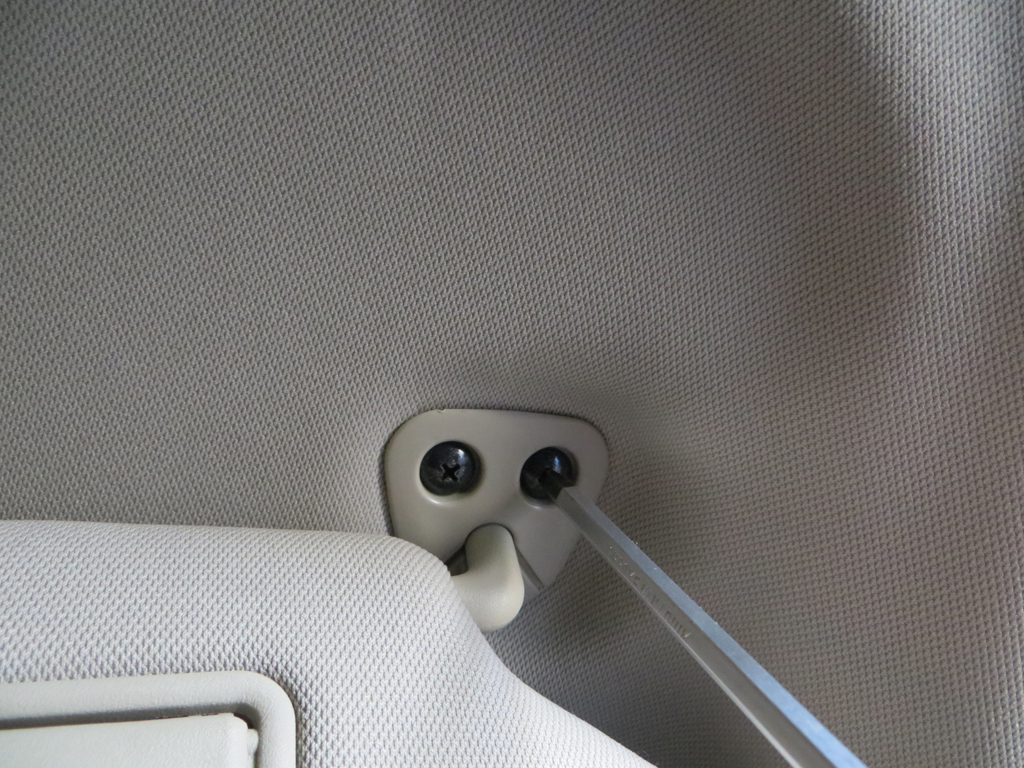
1) We will star by taking off the sun visors. Super easy just use a flat head screw driver needed. Pray the cover off with a flathead screwdriver and loosen the 2 screws with a Philips Screwdriver.
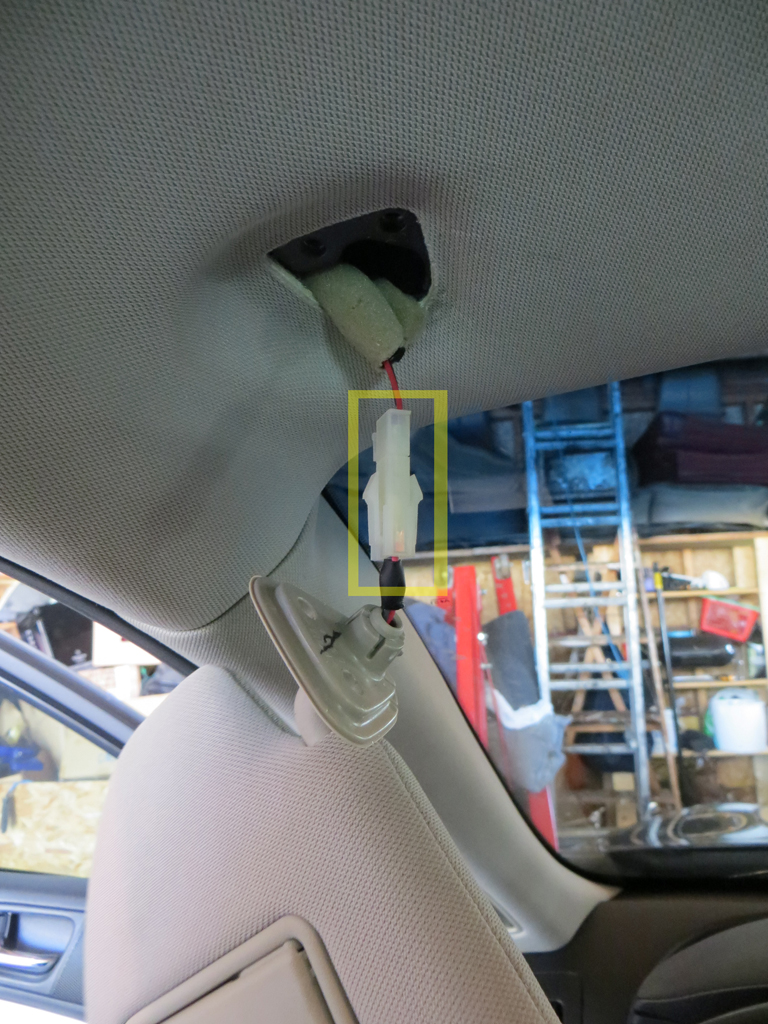
You will need to disconnect the power supply.
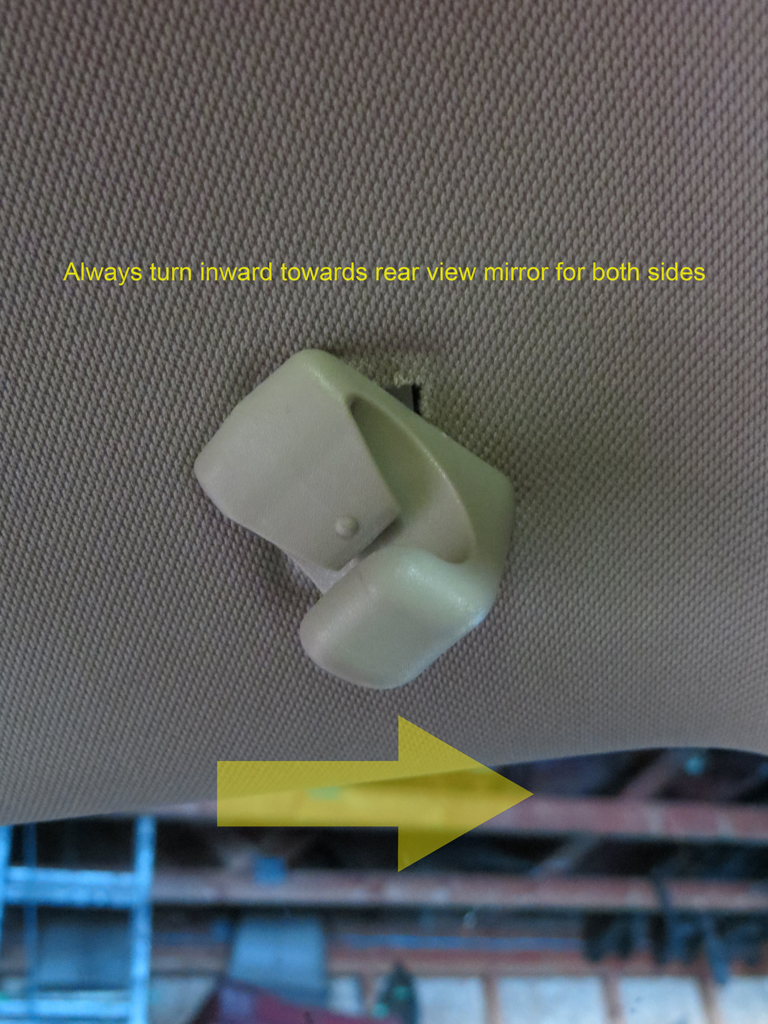
2) To remove the sun visor clips turn the inward towards the rearview mirror. For driver side counter clockwise and clockwise for passenger side
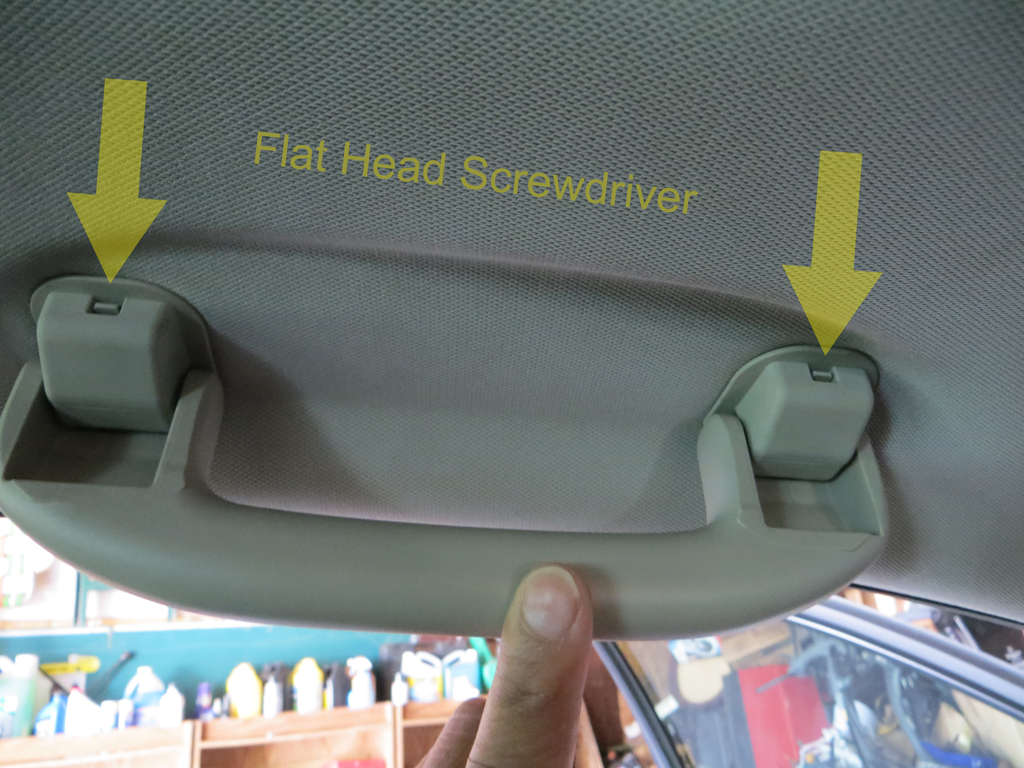
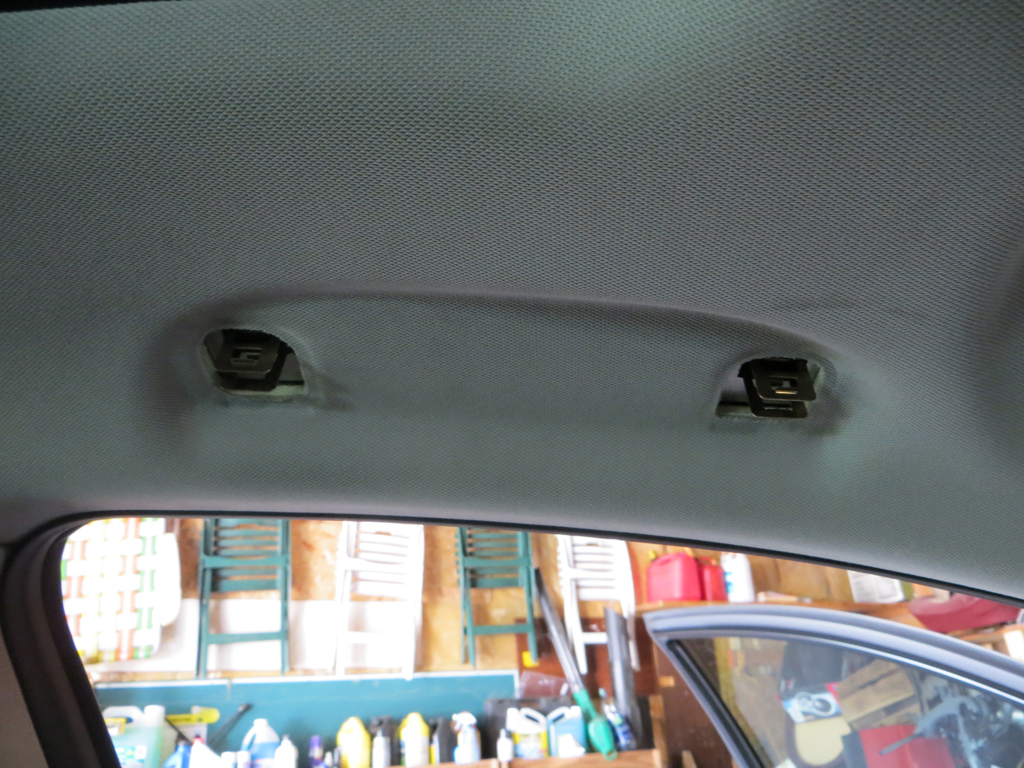
3) Next lets remove the “oh **** handles” You will need to depress the tab with a flat head screwdriver. Pull the tabs towards the headliner and they will just slide out. The handle will just slide out once the clips have been removed.
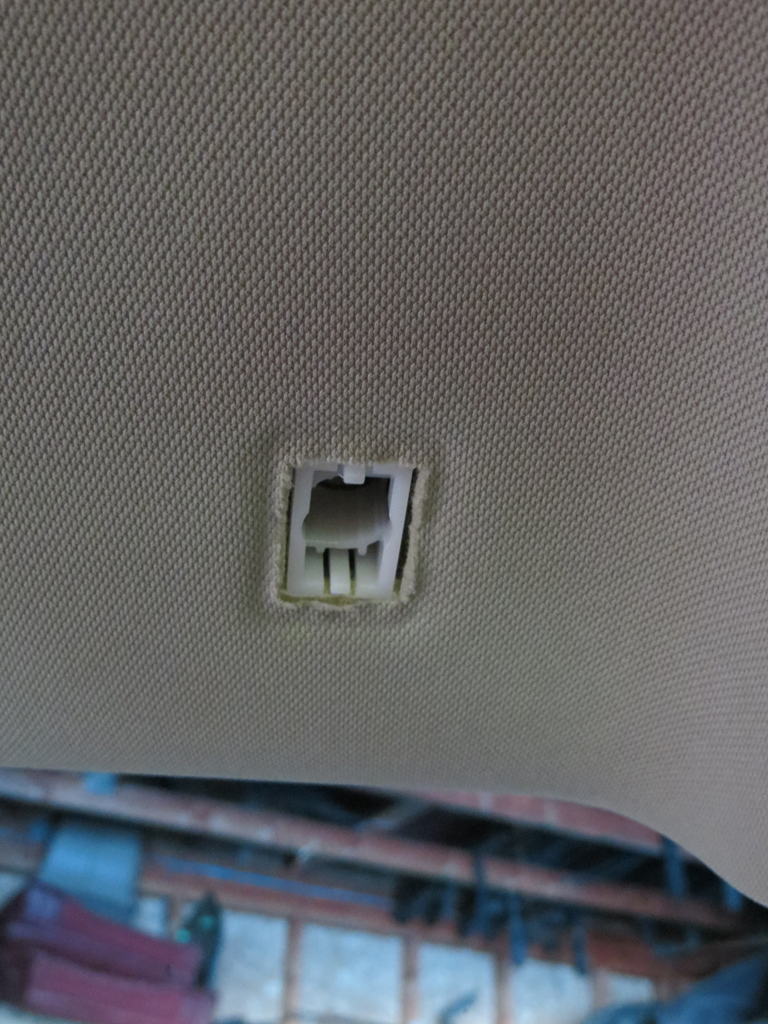
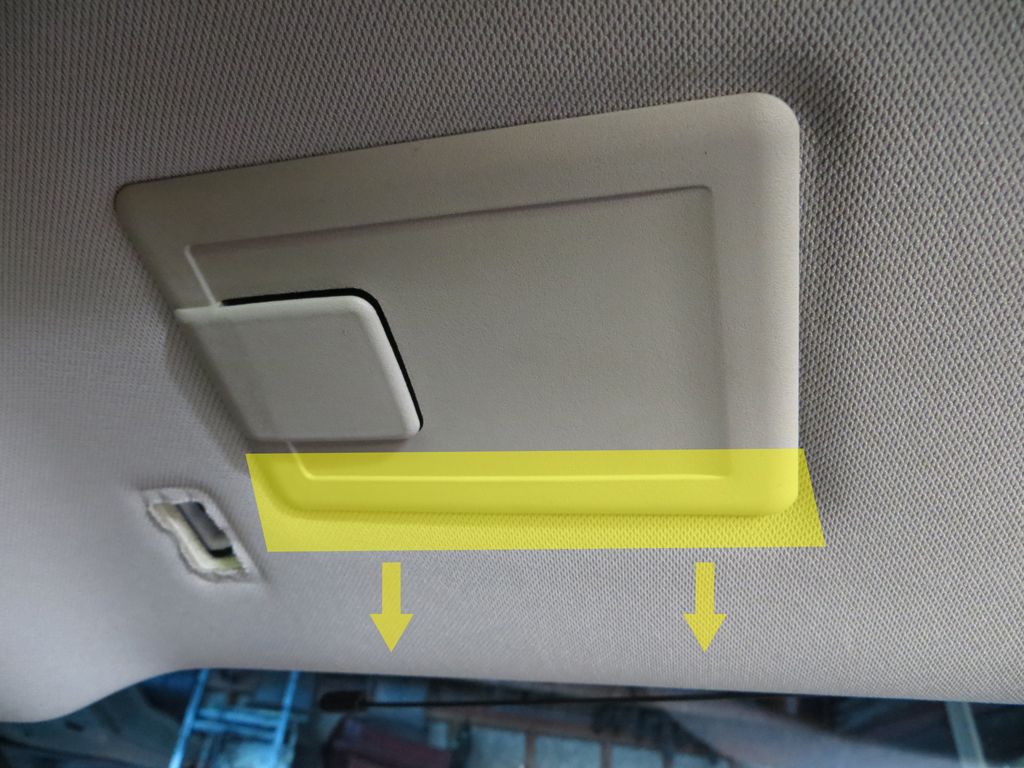
4) New there is an insurance holder slot under the passenger’s side sun visor. Insert a flat head screw driver under the plastic on the windows side. Should come out quite easily
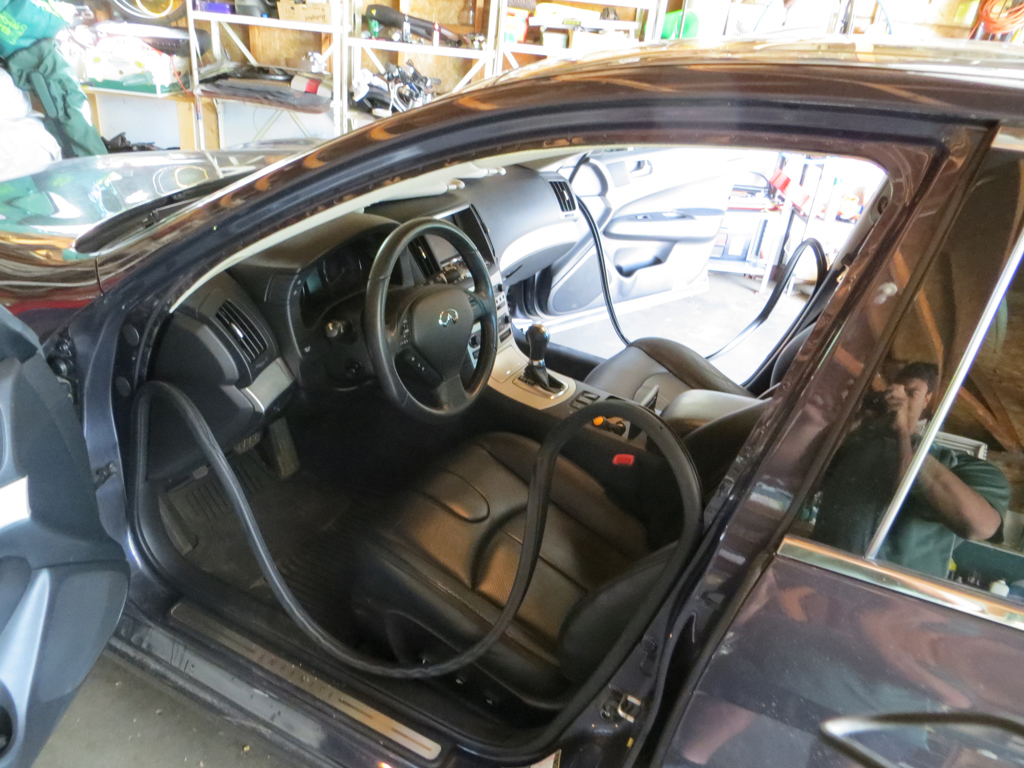
5) Now it’s time to remove the weather stripping around the doors and pillars.
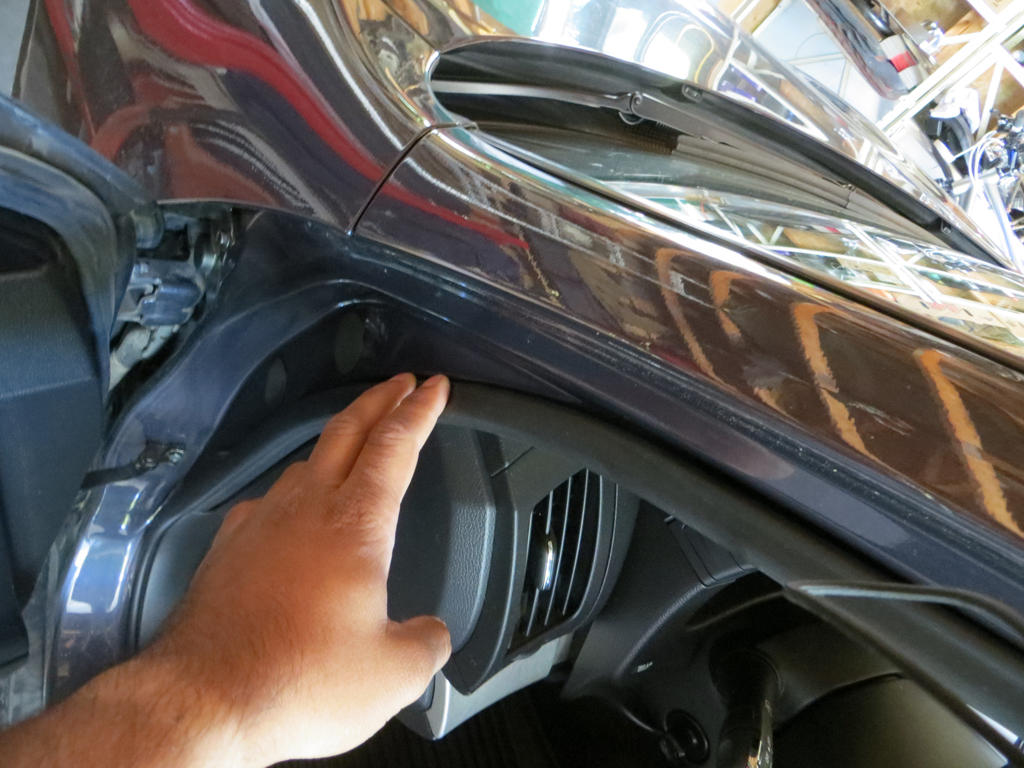
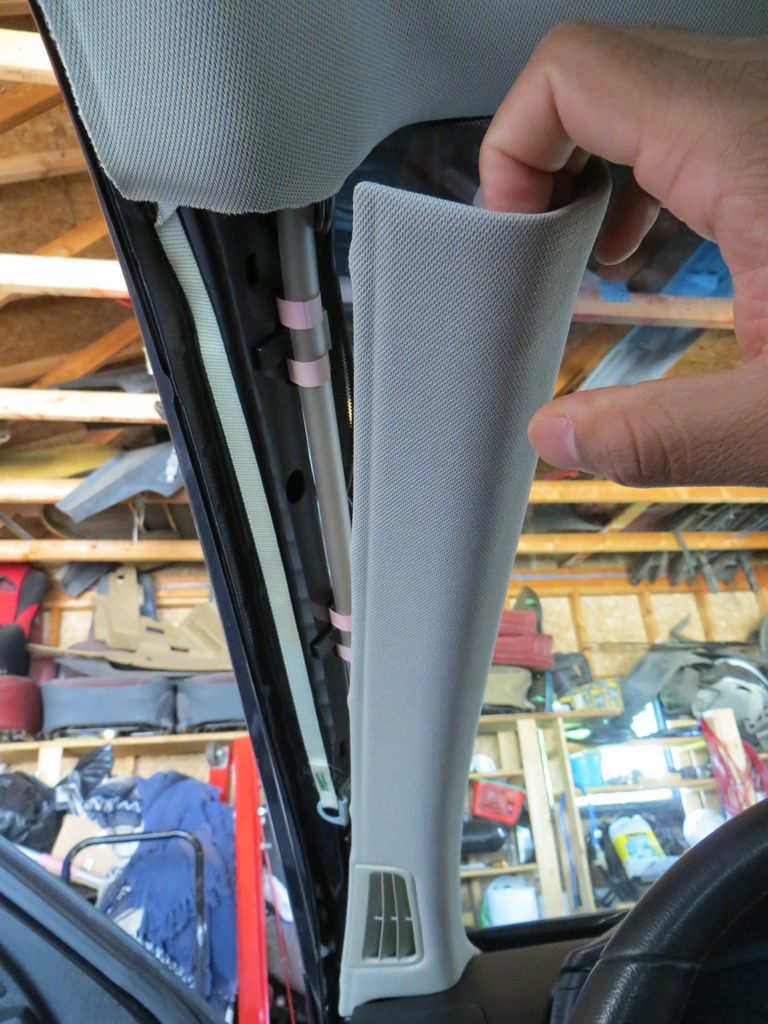
6) Lets unclip the A and B pillars.
A is quite easy just insert you fingers behind and pull. Be careful not to pull the air bag string out.
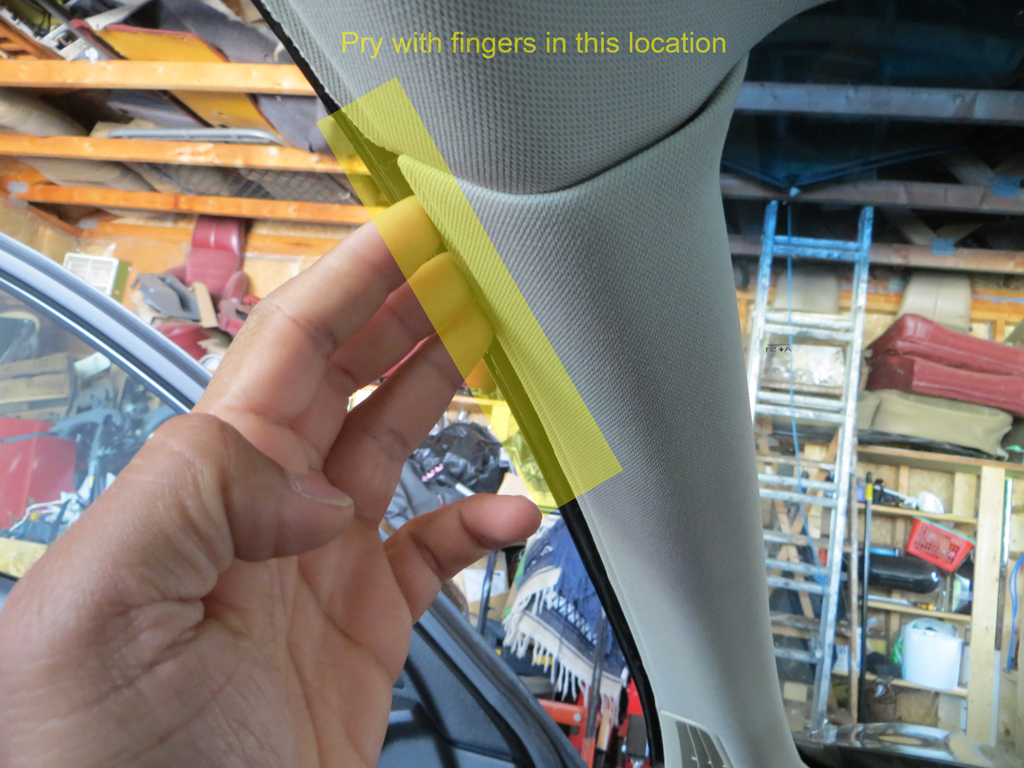
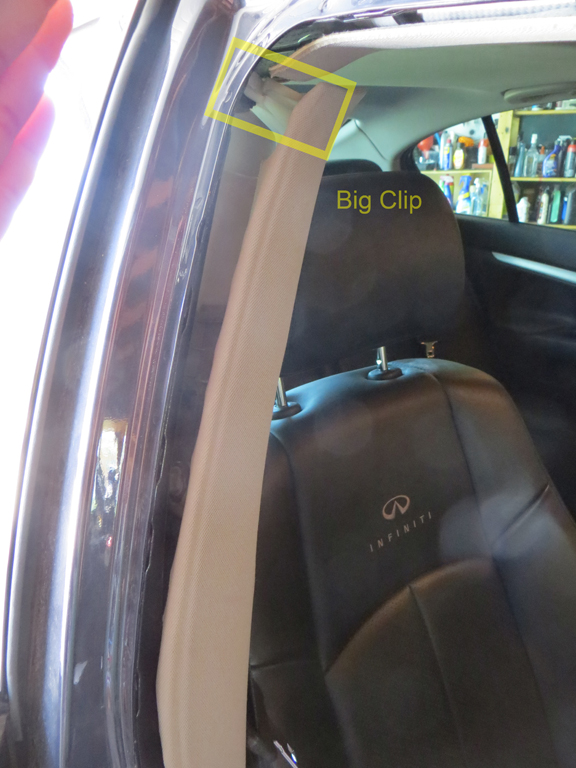
B is a little bit harder. You will need to grab from the top of the pillar to get the big clip out. After that its quite easy.
I did not remove them I just let them hang.
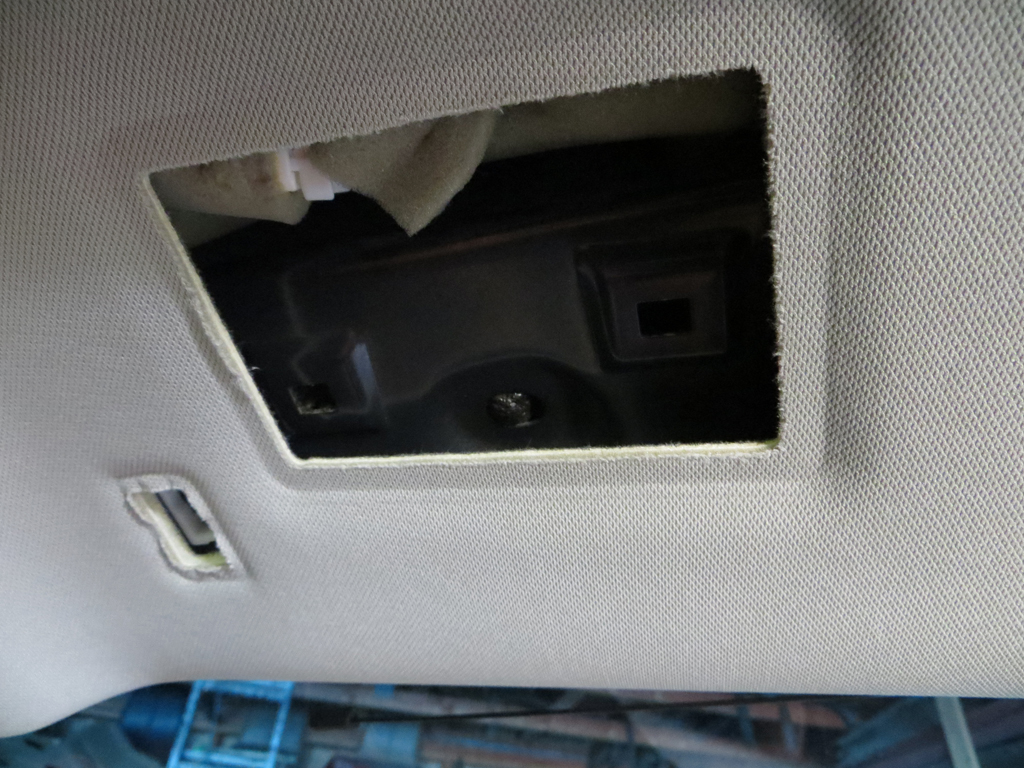
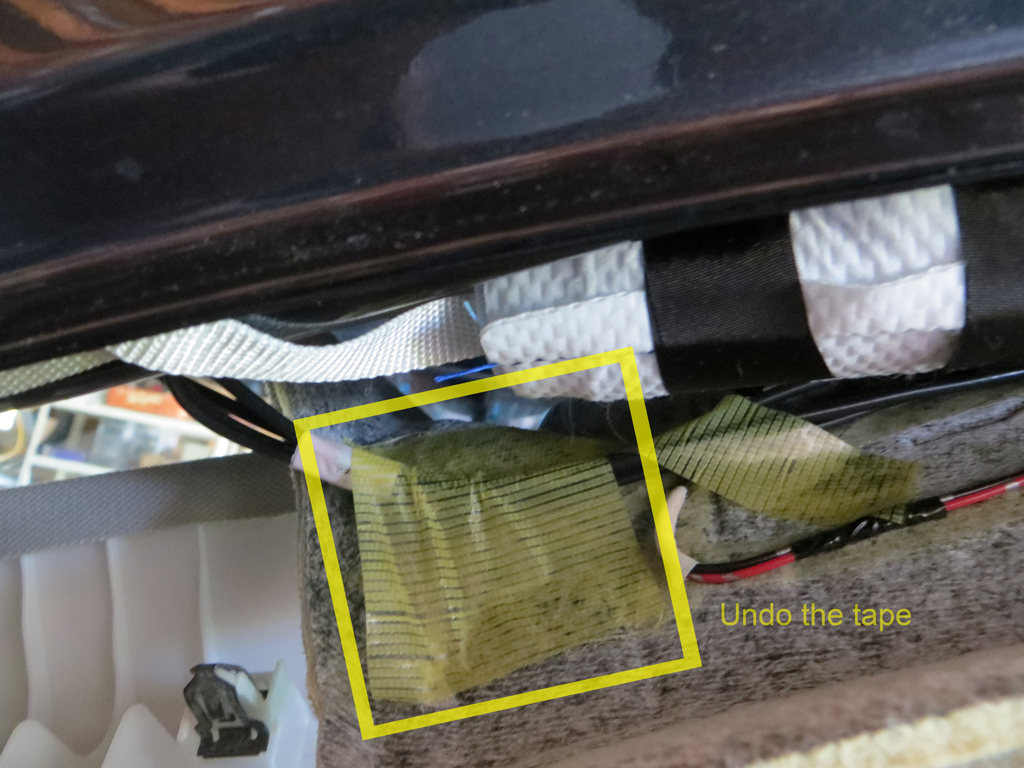
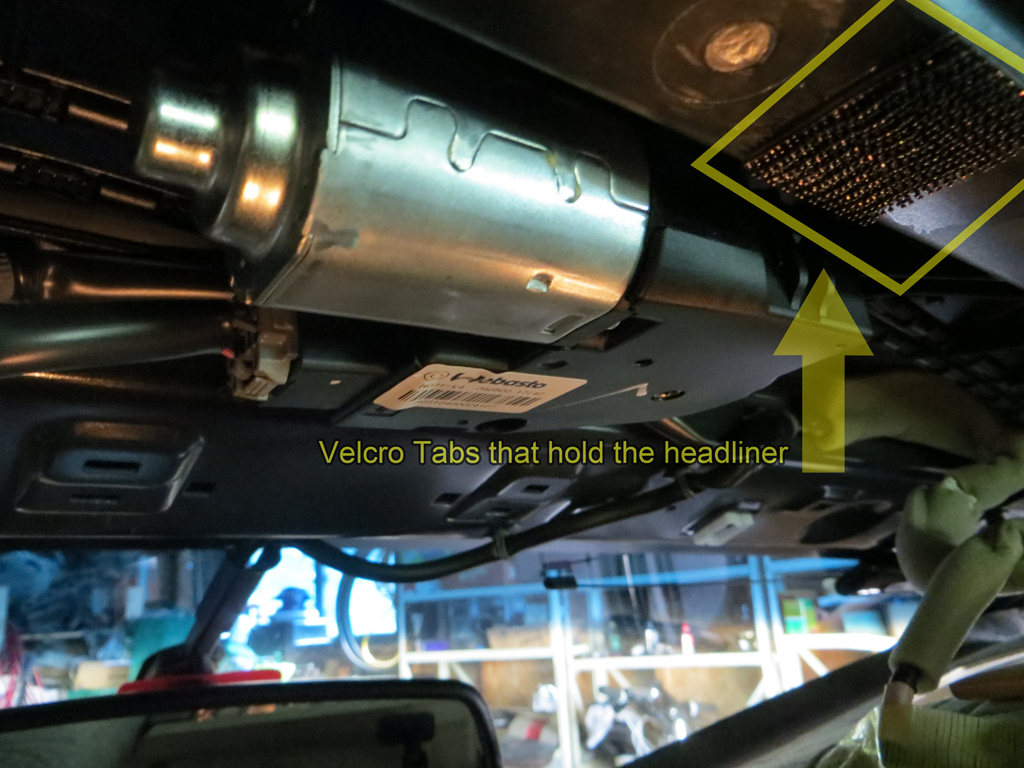
7) Once those are free we can now lower the front of the roof liner. Just lightly grab around the edges and pull. Everything is held in by Velcro tabs. There is a piece of tape on the driver’s side that will need to be removed to drop the liner further.
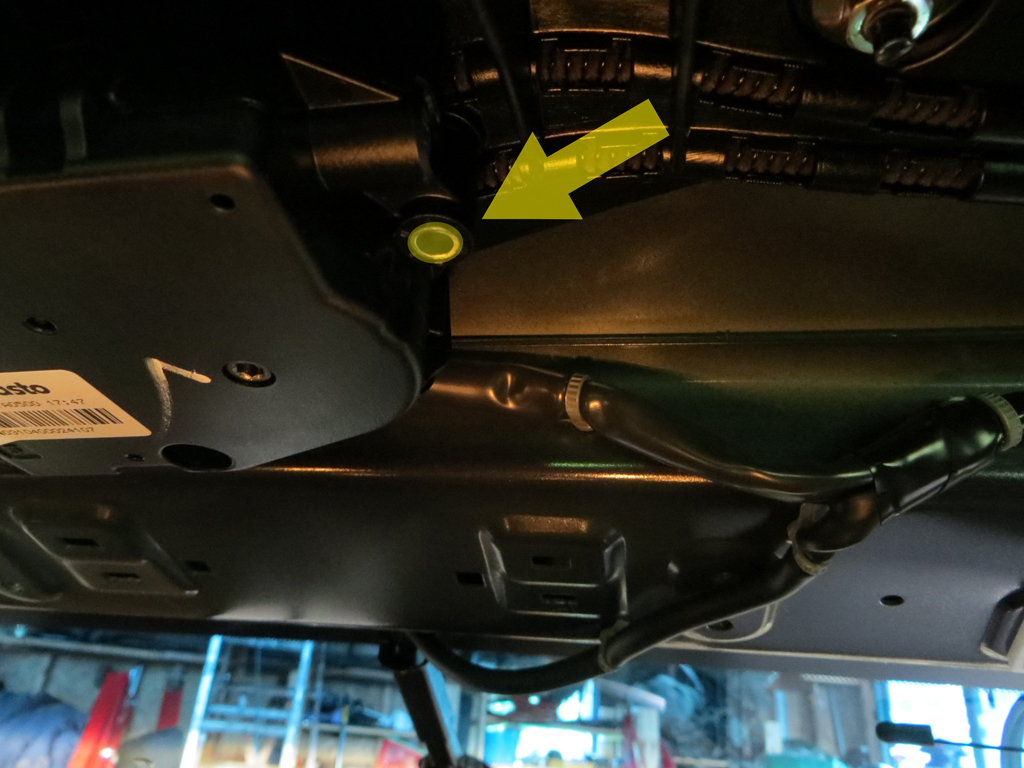
8) Now you can see the Sun Roof Motor.
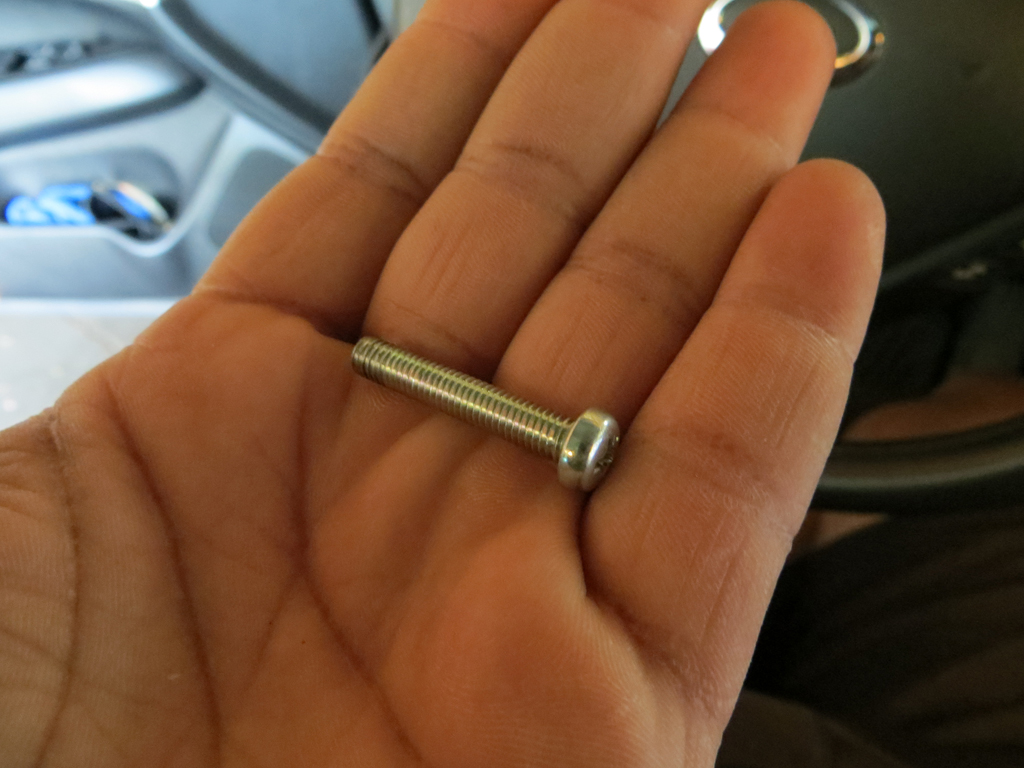
Notice how mine is missing the screw. It has fallen and it sitting onto of the map light.
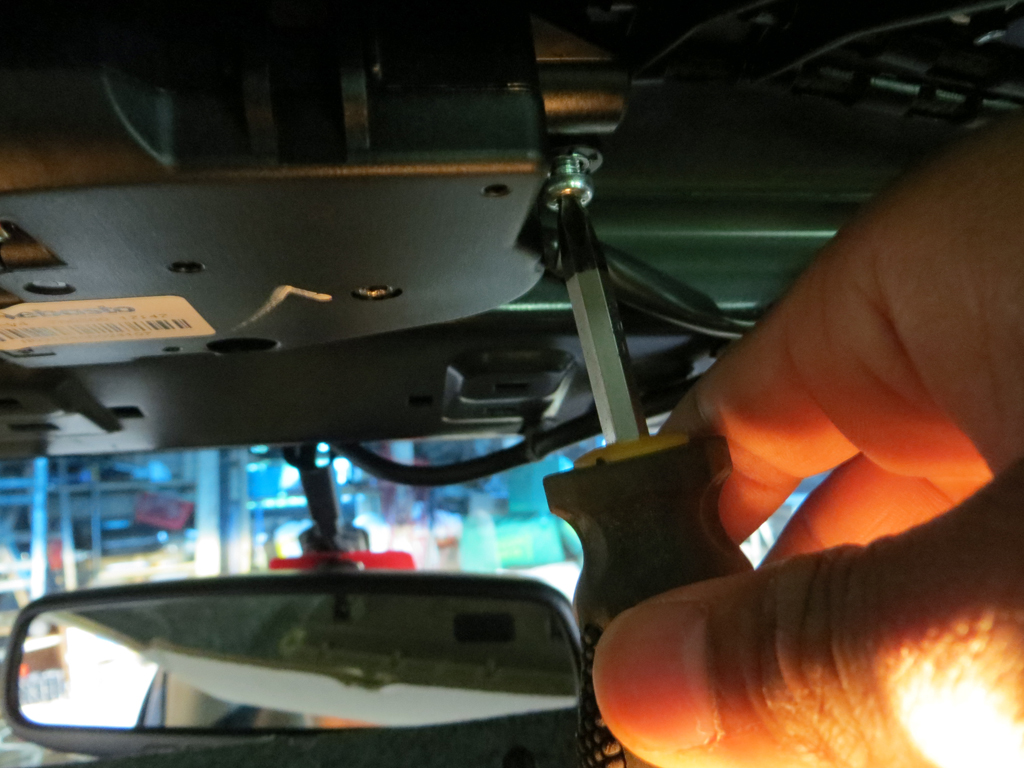
9) add a little loctite blue reinstall the screw and reassemble.
10) Now we just do the relearn procedure and we are done.
1. If the moonroof is open, close it fully by repeatedly pushing the CLOSE side of the moonroof switch.
2. Push and hold the CLOSE side of the moonroof switch to tilt the moonroof up.
3. Release the moonroof switch after the moonroof moves slightly up and down.
4. Push and hold the OPEN side of the moonroof switch to fully tilt the moonroof down.
5. Check if the moonroof switch operates normally.
As was mentioned in your post in another thread by rpm&my_G35, be sure to add some (blue) LocTite to the threads on that screw, or you may have to repeat.
Awesome Write Up bro! IS there a way to just dorp the Map Light's. and get to the screw from there? Instead of dropping the Headliner? Jus wondering?
You can drop the map light after the headliner is down. You will brake the map light if you try from the bottom. If someone finds a better way feel free to post it. This took all of 30 min to do. Not as hard as it looks.
what do I do if one side of the sunroof is crooked after this repair?
After doing this repair, when the sunroof is tilted up, the passenger side is lower than the driver's side (not sure if you can tell from the picture attached). When the sunroof is retracted, the driver's side seals correctly, but the passenger's side is indented about 3/4 of an inch (and obviously doesn't seal correctly).
Is there a way to get this aligned correctly? I removed the motor and I can see the cable that is pushed/pulled by the motor's gear, but it seems impossible to move. Is there an easier way to realign this?
Nevermind, I was able to fix it. Removing all the screws to the motor, you can tilt the motor forwards or backwards so it engages only one of the two cables. Work the motor back and forth using the retract switch until you hit the limit stops for both sides, then do the relearn method as stated in previous posts on this thread.
Just wanted to preemptively thank you for posting this! Last night on my way home my sunroof was stuck tilted forward and made that dreaded grinding sound, I thought for sure I was soon to be out several hundred dollars in replacing my motor or part of the cables/runners, but this seems to be the fix I need. As soon as I got back to my parking garage out of the snow I pulled down the liner and I can see the screw laying all of the way out of its socket, completely limp and useless. I have two subwoofers running at 1000watts so I'm sure that they helped ease the screw out of its spot, thank you in advance! Will post tonight/tomorrow with hopefully positive results, you guys rock even if it doesn't help me after seeing how many others it has helped!
Update: This did the trick, it's a shame Infiniti doesn't take ownership for this fault as others stated above. Thank you for saving me a good chunk of change, although the relearn process for the sunroof was a real PITA for some reason haha
Last edited by Demandedace; Feb 27, 2014 at 08:42 AM.
This was very easy to do. One motor screw was loose and the other came out completely. I am pretty sure my bass eased them out over time. My moonroof worked as soon as everything was put back together. Thanks again for the write up.
Wow. Thanks so much for taking the time to do this. I have virtually zero experience working on cars, but was able to follow your instructions perfectly. (BTW, there were some minor differences with my FX35 but still very similar.)
I would also note that, after dropping the roof, I initially thought this wasn't my problem: I inspected both screws with my fingers, and they appeared to be not only intact but also perfectly flush/tight. After several minutes of despair, I decided to double-check the screws with my stubby phillips screwdriver -- turns out looks can be deceiving, and both screws could be tightened significantly using a screwdriver.
There is NO WAY I could've done this without such a thorough and useful guide. Based on what I've read elsewhere, I could've been looking at a very expensive repair (I have a feeling dealership would've insisted on new motor and rail assembly) without your help. Thanks again!
Thank you for this useful post. My sunroof made the grind on Friday, then Saturday it wouldn't close. I tackled it Saturday using your guidelines and got it working fully today. At first it would not close after I tightened the screws in, (one came out completely and one was loose) so I had to use my hand to maneuver the motor and with some trial and error got it to close somewhat. It would tilt up and down and stop like it was trying to open. I was stuck there until today. Today I held the tilt button for like 30s with the car in the on position just not started then held the back button for like 30s and it seems it seems to be working now. Awesome!
My buddy was trying to help and broke the B pillar clips on both sides at the top. Do you think this is a safety hazard? They are just snugged in place now.
You can drop the map light after the headliner is down. You will brake the map light if you try from the bottom. If someone finds a better way feel free to post it. This took all of 30 min to do. Not as hard as it looks.
When the screw fell out of the sunroof motor a few months ago, I thought there was a coin in my headliner. I went in through the map light and removed it. A few days ago when the roof stopped working and stuck in the tilted open position, I was thrilled to find such a thorough post for exactly the issue I was having, but i wondered if my way would work. I removed the map light lenses, pulled the sunroof switch assembly down and removed the trim piece around the sunroof opening. That allowed me to pull headliner down enough to reinstall the screw. I was done in 20 or 30 minutes. I still appreciated the walk through instructions for removing the headliner though. We have to stick together, G35 Driver!
Thank you MrRage for this guide. The other day when closing my sunroof from the tilted up position only one side of the sunroof would go down and it sounded like there was a jackhammer in the ceiling of my car. Using this guide I was able to fix it! I do have a couple things to add.
1. I was unable to get the trim off the B-pillars in my vehicle. The massive clips at the top would not release for me--perhaps I was doing something wrong. On both sides I could see the plastic clip beginning to actually rip from the amount of force I was applying. I'd say try to remove the trim from the B-pillar but if you feel that you're forcing it too much know that you can still perform the repair with them in place. You won't be able to drop the roof liner down as much so it'll be a tighter working area but it's not too bad. I just used a socket wrench with a philips head bit in a 1/4 inch socket since I didn't have enough space to fit a screwdriver in there. Also, when you drop the roof liner down the area near the B-pillars will likely start to crush a little and you'll see a nasty crease in the fabric. It's not ideal but once I put everything back together the crease in the fabric went away for me.
2. Once I got to the assembly I found that only one of the three mounting screws was in place. I couldn't find the other two anywhere. I almost wonder if they were ever installed since I can't see where they could have gone other than sitting on the roof liner where everyone usually finds them. If you have the same problem the screws you'll need are M5-0.8 x 30.
3. Like ncitrdude above the sides of my sunroof were not even. In my case one of the sides was actually further down than it should be when closed and the other side was all the way in the tilted up position. You have to correct this issue before reassembling everything; it will not be fixed in the relearn process. The way these units work is the sunroof motor is attached to a gear. Which makes contact with two grooved cables. Each cables goes to one side of the sunroof. See the picture below (sorry for bad image quality). The cable nearest the windshield goes to the left side of the sunroof and the other cable goes to the right side of the sunroof. I followed ncitrdude's solution. Remove all the screws from the assembly. At this point I think it's a good idea to let the motor assembly drop down so you can get a good sense of how it all works. Then contact the gear on the motor assembly with only one of the cables and use the sunroof control to run the motor in the necessary direction. You may run into the case where the motor hits it's limit before you've been able to correct the issue fully. In this case just drop the motor assembly out so it's not making contact with the cable and run the motor in the opposite direction and then continue.
Thanks again MrRage for the detailed instructions and to ncitrdude for uneven sides fix. Hopefully my additions will be of use to someone as well.
Last edited by blcArmadillo; Jul 19, 2015 at 12:50 PM.