
DIY: Change/Dry Out Your Headlight Ballast


Thread Starter
|
Registered User
Joined: Jan 2007
Posts: 842
Likes: 50
From: Dutchess County, NY
DIY: Change/Dry Out Your Headlight Ballast
I apologize in advance because I really should have done this last year because I'm sure a lot of you need it. I hit a dear about 12-13 months ago and after having the car repaired as soon as it rained my headlight went out. I argued with the insurance company that the damage cracked the headlight but they just didn't care. My last resort was to remove the ballast, disassemble it and dry it out. I even had an issue where I bought a new ballast and it still didn't work because the headlight harness was waterlogged too. Oh well. So this should work on 2007 through present G35/G37s. It's not hard just takes some time. As always i'm not responsible for any damage you do to your vehicle but this is easy enough that you shouldn't have to worry.
Essentially you only need a small flathead screwdriver (for removing the plastic clips on the fender liner) a long phillips-head screwdriver and a tamper-proof torx bit for opening the ballast (I bought these at autozone).
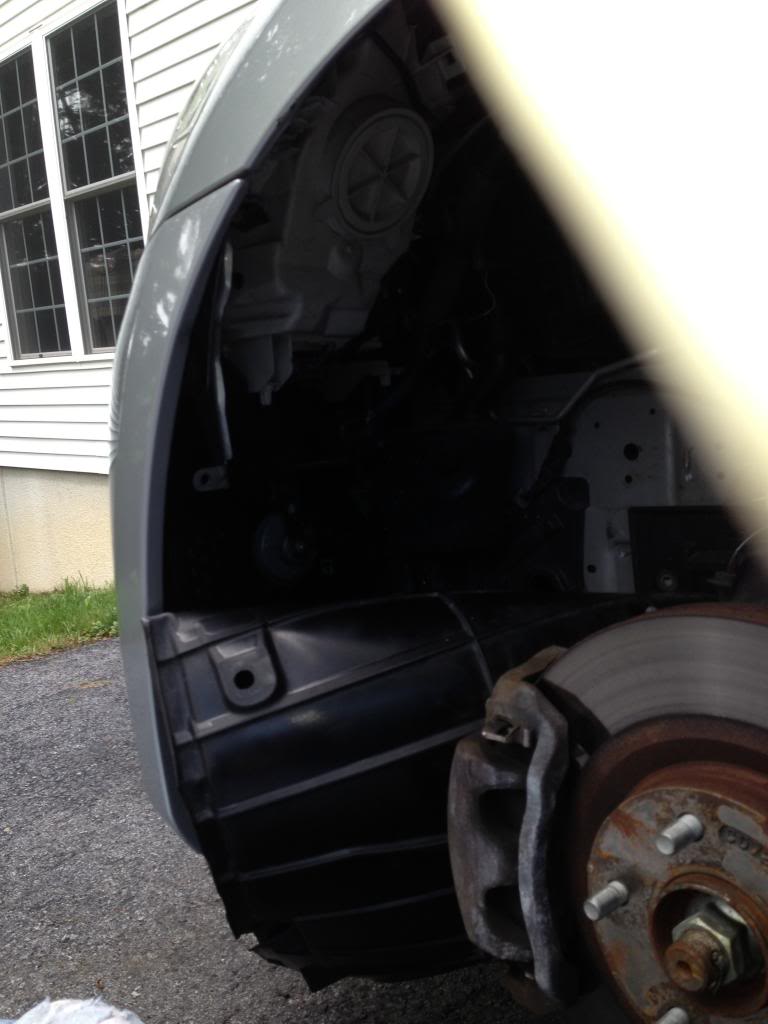
Peel back the fender liner (I took the tire off to make life easy).
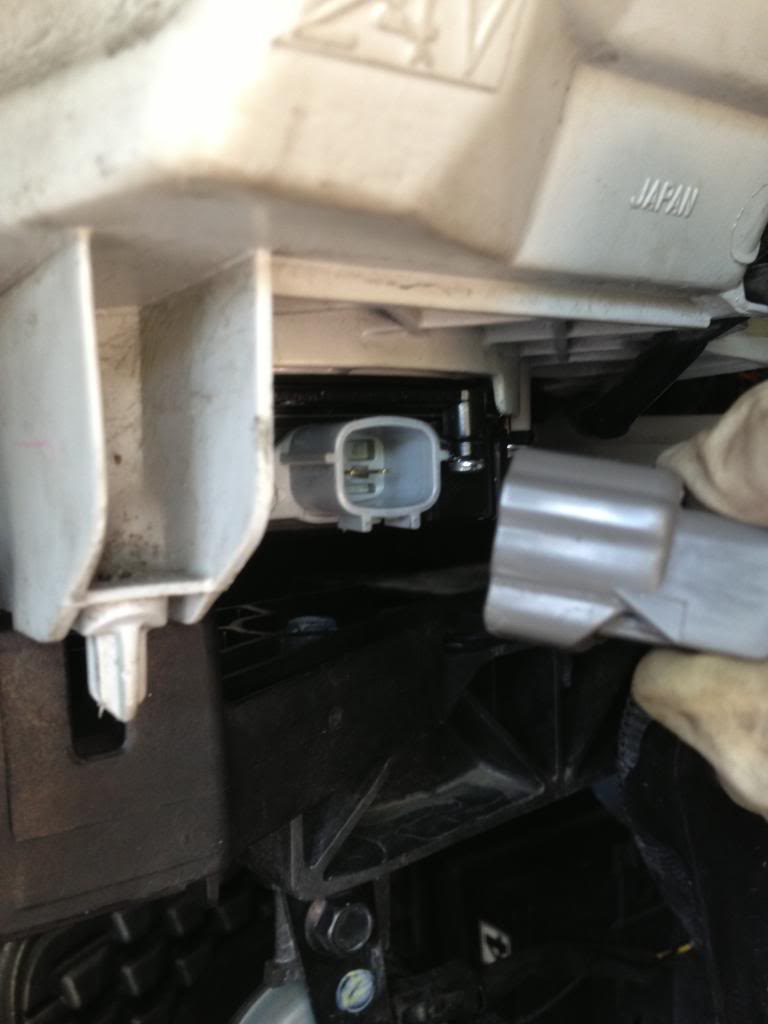
Unplug the harness from the ballast
Now there are three screws holding the ballast in. Two in front and one in back...here are the front two. You can't see the other one but it's in the same place on the opposite side.
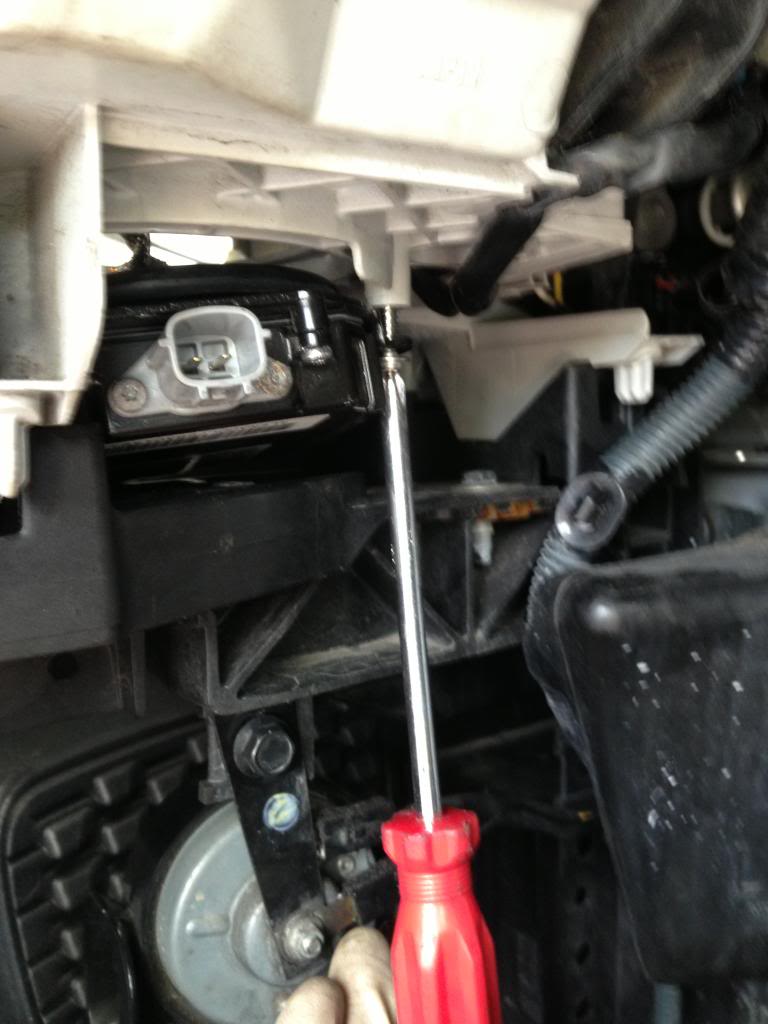
The back one you can't see but you can still access it with the screwdriver (this is where the extra long screwdriver comes in handy). It's a bit of a pain to get this one out but still easier than removing the headlight. You'll notice it's towards the engine, not the fender.

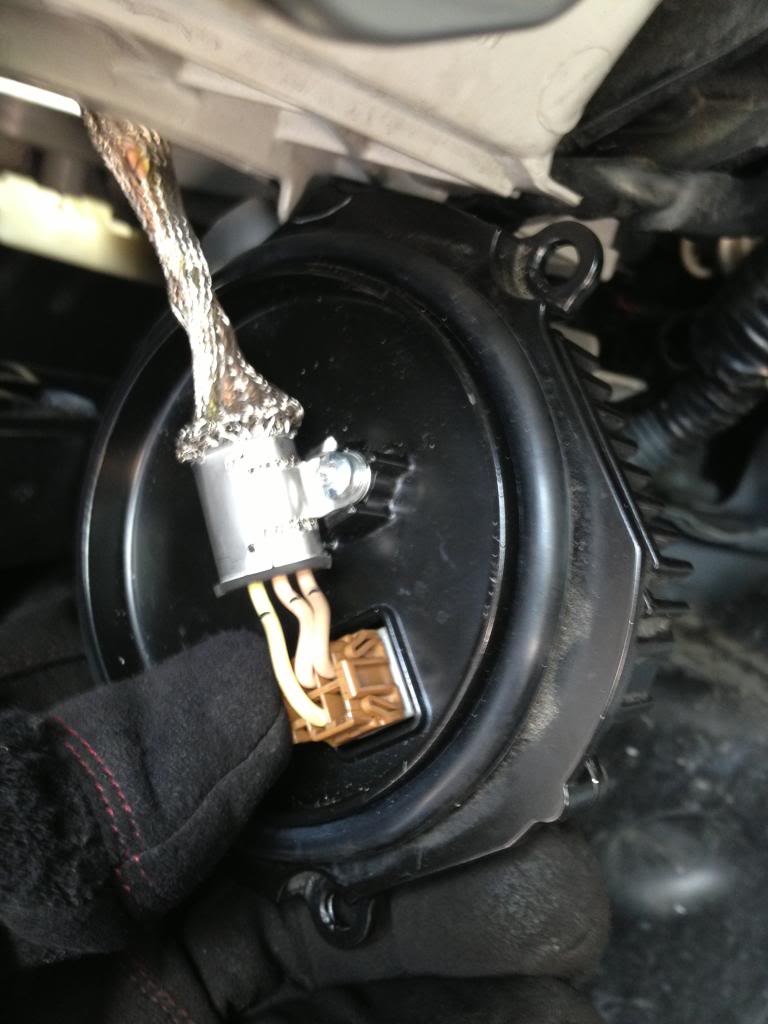
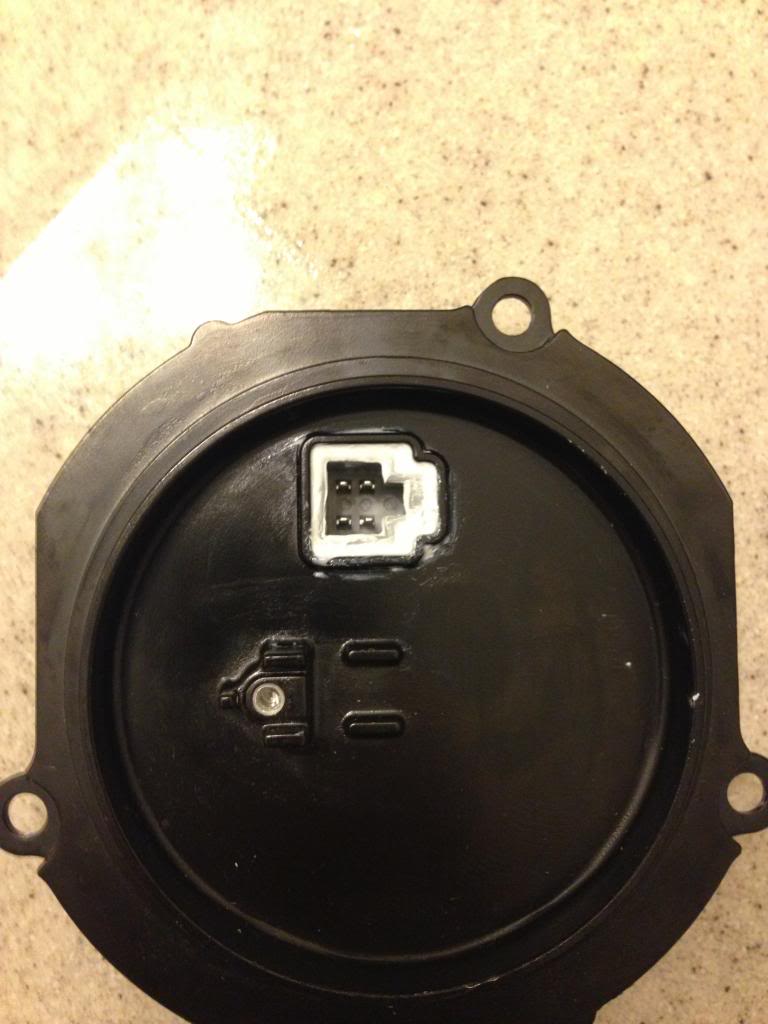
Pull the ballast down and carefully unscrew the retainer clip and unclip the harness.
At this point I turned the ballast over and maybe 2-3 full tablespoons of water came out so it was obvious there was a short circuit in there. I opened it up and carefully dried it out with a hair dryer. Don't concentrate heat in one place too long because there's a chance something in there could warp or get damaged.
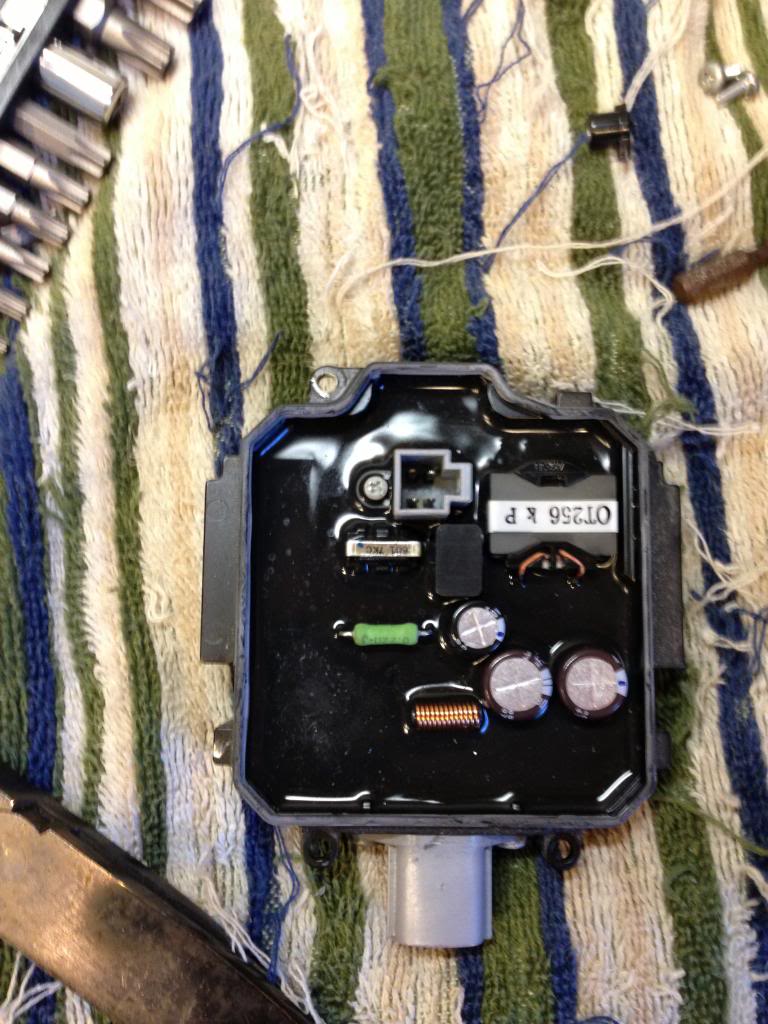
I let it sit out for another hour or so then I put the cover back on and caulked the opening around the harness plug
I reinstalled it in reverse order and everything has been fine since and it's been over a year. To make sure I didn't flood the headlight though I drilled 3 weepholes in the bottom of the housing before putting the ballast back in. I don't have pics of this but it certainly solved my issue.
Hopefully this will help some of you now that the rainy season is here.
- Bob
Essentially you only need a small flathead screwdriver (for removing the plastic clips on the fender liner) a long phillips-head screwdriver and a tamper-proof torx bit for opening the ballast (I bought these at autozone).
Peel back the fender liner (I took the tire off to make life easy).

Unplug the harness from the ballast

Now there are three screws holding the ballast in. Two in front and one in back...here are the front two. You can't see the other one but it's in the same place on the opposite side.

The back one you can't see but you can still access it with the screwdriver (this is where the extra long screwdriver comes in handy). It's a bit of a pain to get this one out but still easier than removing the headlight. You'll notice it's towards the engine, not the fender.

Pull the ballast down and carefully unscrew the retainer clip and unclip the harness.

At this point I turned the ballast over and maybe 2-3 full tablespoons of water came out so it was obvious there was a short circuit in there. I opened it up and carefully dried it out with a hair dryer. Don't concentrate heat in one place too long because there's a chance something in there could warp or get damaged.

I let it sit out for another hour or so then I put the cover back on and caulked the opening around the harness plug

I reinstalled it in reverse order and everything has been fine since and it's been over a year. To make sure I didn't flood the headlight though I drilled 3 weepholes in the bottom of the housing before putting the ballast back in. I don't have pics of this but it certainly solved my issue.
Hopefully this will help some of you now that the rainy season is here.
- Bob
Last edited by RemmyZero; Apr 13, 2014 at 05:31 PM.


shot in the dark as this thread is old, but what kind of drill bit did you use to take out the 3 screws holding the ballast cover on? I dont have anything that fits in these screws
https://i.imgur.com/ib7uVV6.png
https://i.imgur.com/ib7uVV6.png
Thread Starter
|
Registered User
Joined: Jan 2007
Posts: 842
Likes: 50
From: Dutchess County, NY
I already replied to this one via PM but for anyone who wants to know it's a security torx bit. I bought a whole set at autozone but you can get them in other places too.

Registered User
Joined: Aug 2017
Posts: 5
Likes: 0
Any recommendation on brand or OEM ballast. Have an intermittent working ballast. Worked for a year, on and off for a few weeks, then working normally now. Tried new HID and not the prob. Thanks for all you have posted
BANNED!!!

Joined: May 2017
Posts: 14,837
Likes: 2,497
From: Washington State
Coupe 6MT Premium RAS

Trending Topics


Registered User
Joined: Apr 2017
Posts: 177
Likes: 14
Just an FYI to anyone considering doing this.
These steps will ONLY work for the Drivers side. To remove the ballast from the passenger side the bumper must come off due to no access to the last screw holding the ballast. (windshield washer bottle etc)
I used a $45 dollar kit off Amazon that had good reviews, includes ballast, igniter and even a spare el-cheapo bulb thrown in which was a nice unexpected bonus.

Thread
Thread Starter
Forum
Replies
Last Post