DIY: Paint your wheels with plasti dip. No sanding!


DIY: Paint your wheels with plasti dip. No sanding!
DISCLAIMER:
I'm not responsible for the outcome of your wheels, or if you somehow (no idea how you would) ruin your wheel.
All videos and pictures are mine, they were taken by me unless noted otherwise.
This is also my first HOW TO that i've ever made, so go easy on me.
Only one wheel had minor sanding done to it.
What you'll need for four wheels:
Microfiber towels
Painters tape $3.93 ea.
Index Cards (67 cents for one pack of 100 at Kmart)
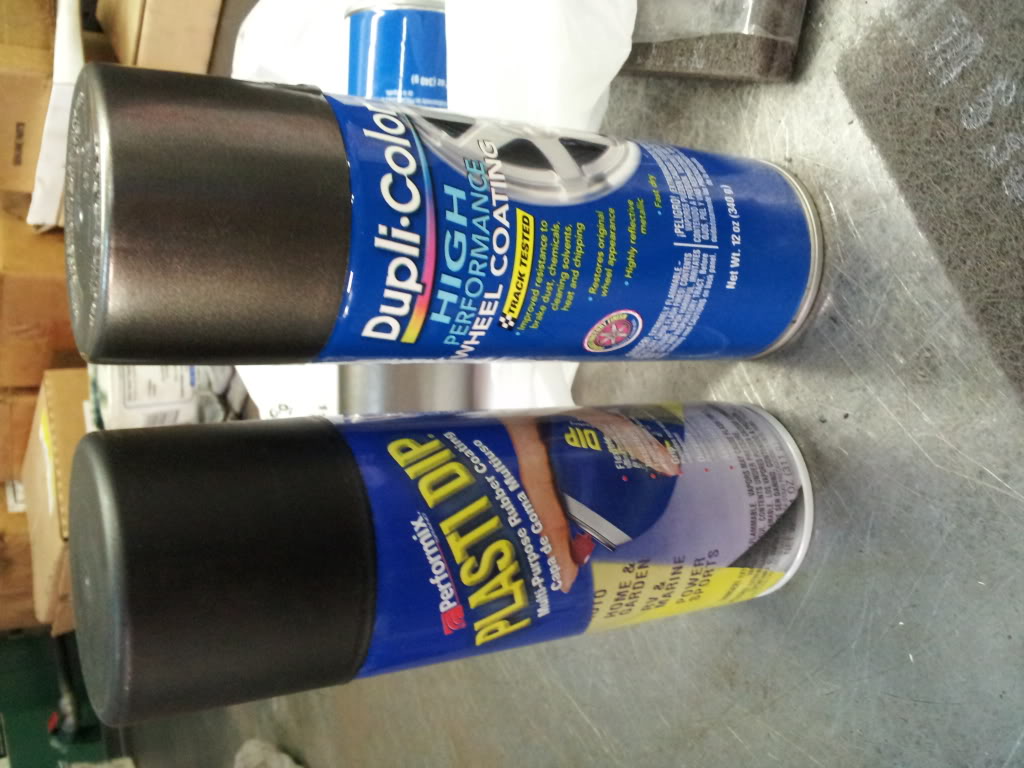
2 Cans of black plastic dip from Lowes or Home Depot. $5.95 ea.
2 Cans of Duplicolor Wheel paint from Advanced auto, or anywhere that sells duplicolor wheel paint. $6.49 ea.
Total cost for my 4 wheels:
$29.48 without tax.
Step 1:
Prep the wheels by slightly wetting one microfiber towel and cleaning the wheel of all dirt, grime, and spots.
Dry the wheels with another microfiber towel.
This really isn't difficult, it should only take about 10 minutes per wheel. You can use soap if you want to and really clean them, but all i did was use water.
Step 2:
Put the index cards around the wheel to prevent spraying the tires. Stick them under the lip of the wheel. Again, pretty straight forward.
Tape off the air cap and the TPMS sensors

Step 3:
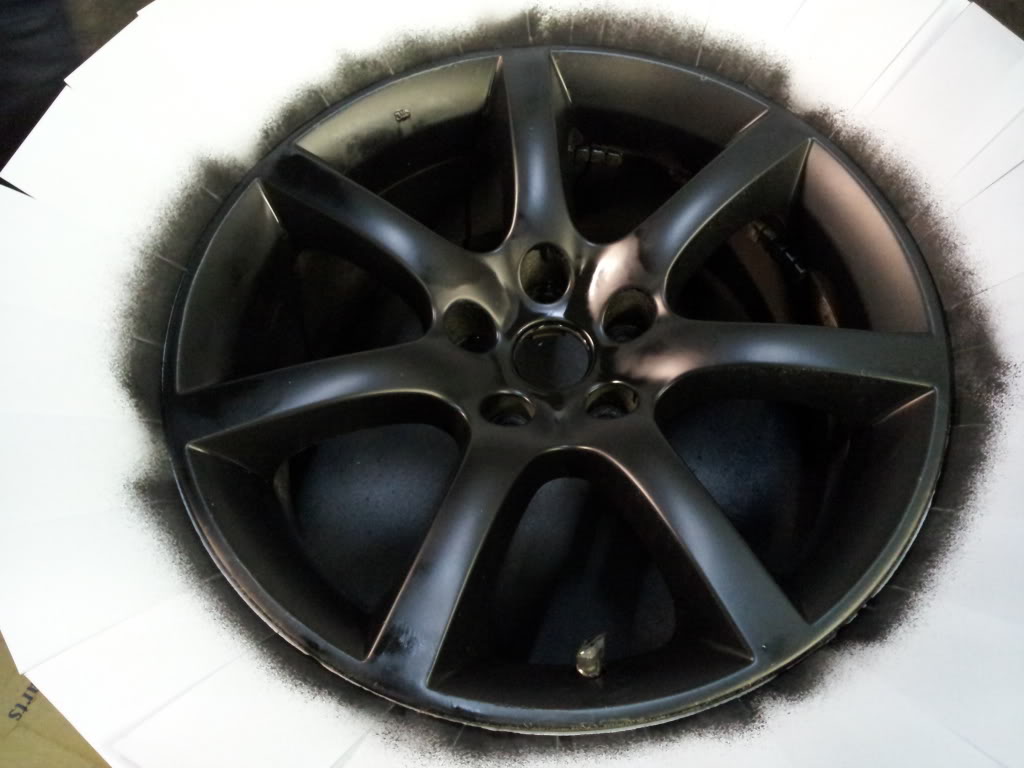
Get your first can of plastic dip and shake it well. After you've shaken it, apply one even coat on the wheel. Allow it to fully dry. The coat of plastic dip will be very glossy, but will turn flat black when they dry.
The method we used to spray mine were the side of the spokes first, then the middle of the spokes, and then the top of the spokes and the center. Holding the can about 5 inches from the wheel, and spraying two bursts.
First coat mostly dried:
Step 4:
Go get a nice cold beverage while coat 1 dries.
I did it in around 50 degree weather inside, it took a while for the paint to dry.
Step 5:
Apply coat 2 the same way you applied coat 1.
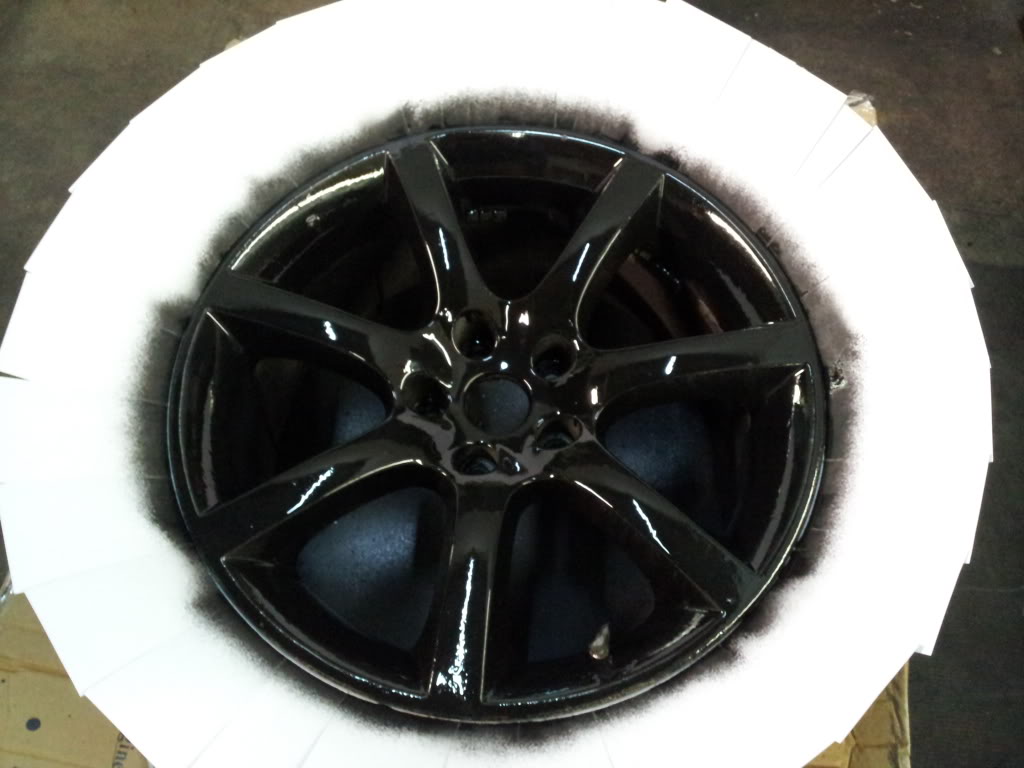
Right after coat 2:
Step 6:
Wait for coat 2 to dry by twiddling your thumbs.
Step 7:
Apply coat 3.
Step 8:
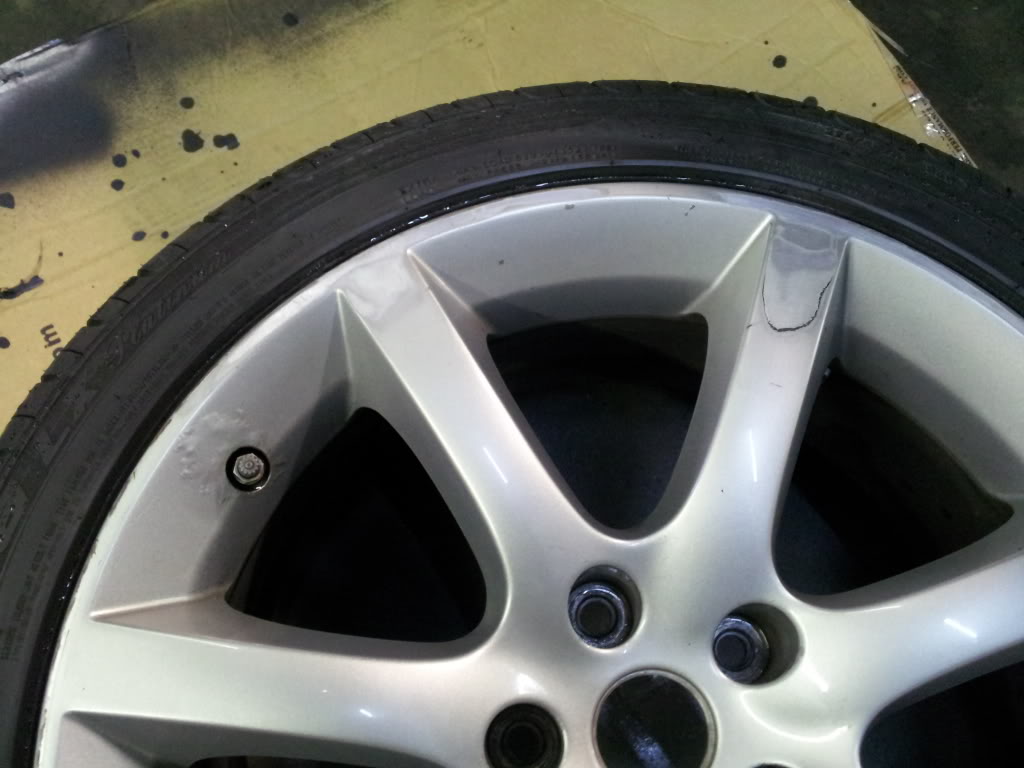
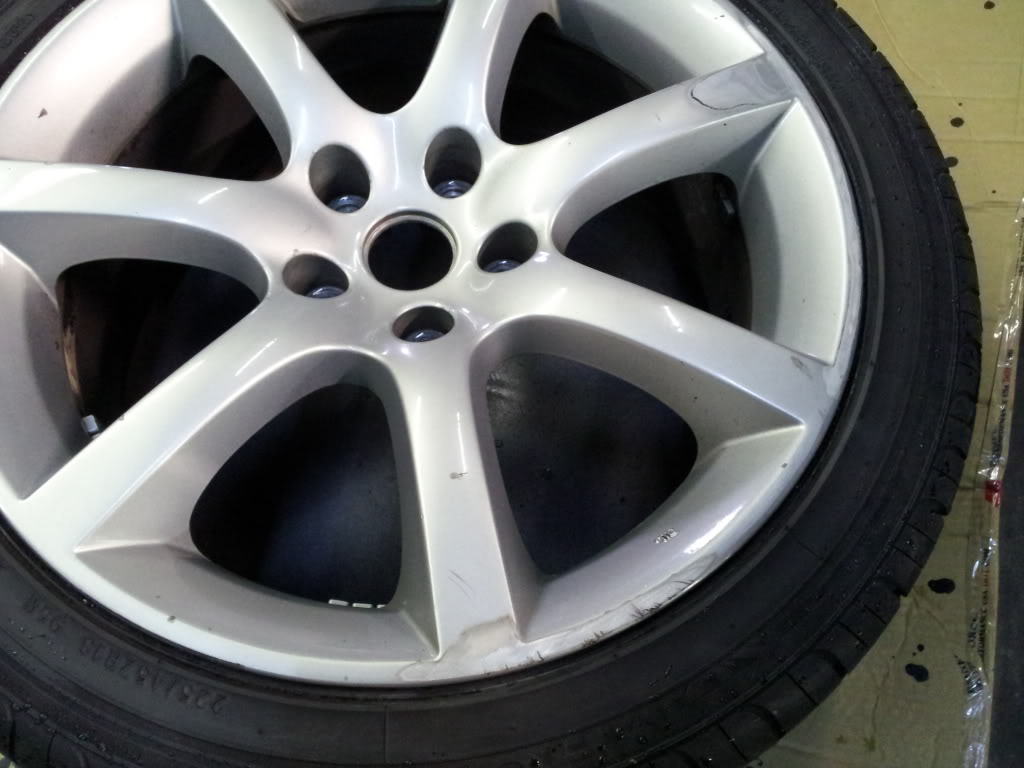
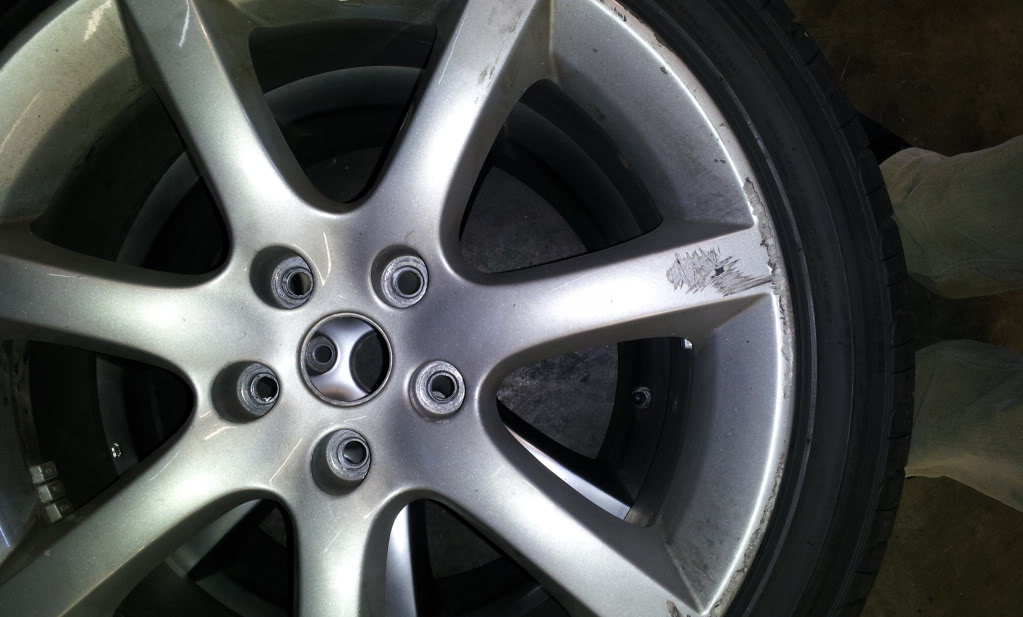
If you have a good amount of curb rash on a wheel, i suggest sanding it down as much as possible.
One of my wheels (pictured below) had a good amount of rash from the previous owner, so we used a metal bristle disk to smooth out the rash.
If it's just minor rash, this isn't really necessary. the plastic dip does a great job of filling the rash in.
With a good amount of rash, I would also suggest 4 coats. For minor rash or no rash, three coats of plastic dip should be enough. You could do 4 regardless if you really want, but it isn't necessary.
Step 9:
Once your plastic dip base coat is fully dried, shake up your wheel paint really well and apply it the same way you applied the plastic dip coats.
Let coat 1 dry.
Step 10:
Apply coat 2.
Step 11:
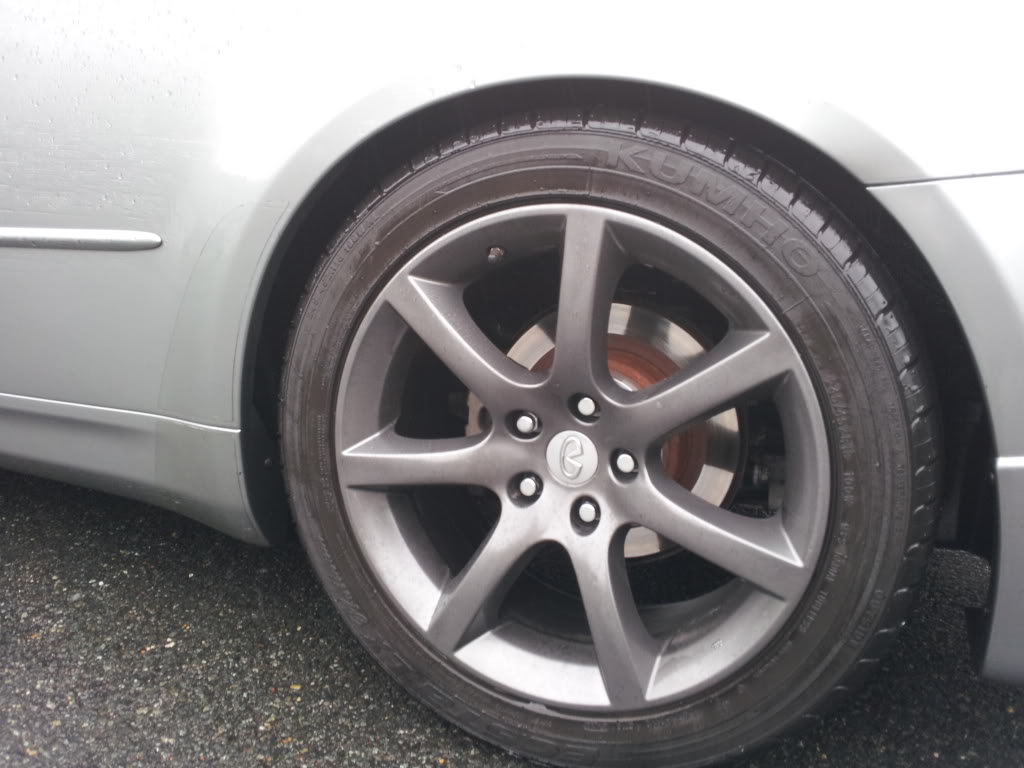
I only applied two coats of wheel paint. And the pictures below were my result. Again, you can apply more coats of wheel paint if you want.
Let everything dry for a day.
Step 12:
You're done! Congrats! Now you've painted your wheels easily without any major sanding or prepping.
Addition:
The two cans of plastic dip, and the two cans of wheel paint are enough to do 3 coats on each wheel (except the one we did 4 on), and 2 coats of wheel paint on each wheel. You MIGHT get a third coat out of the wheel paint on each wheel, but i'm not sure. So if you want to do 4 coats plastic dip on all wheels, you'd probably need three cans.
Coming soon:
More pictures of before and after
Pictures of each coat
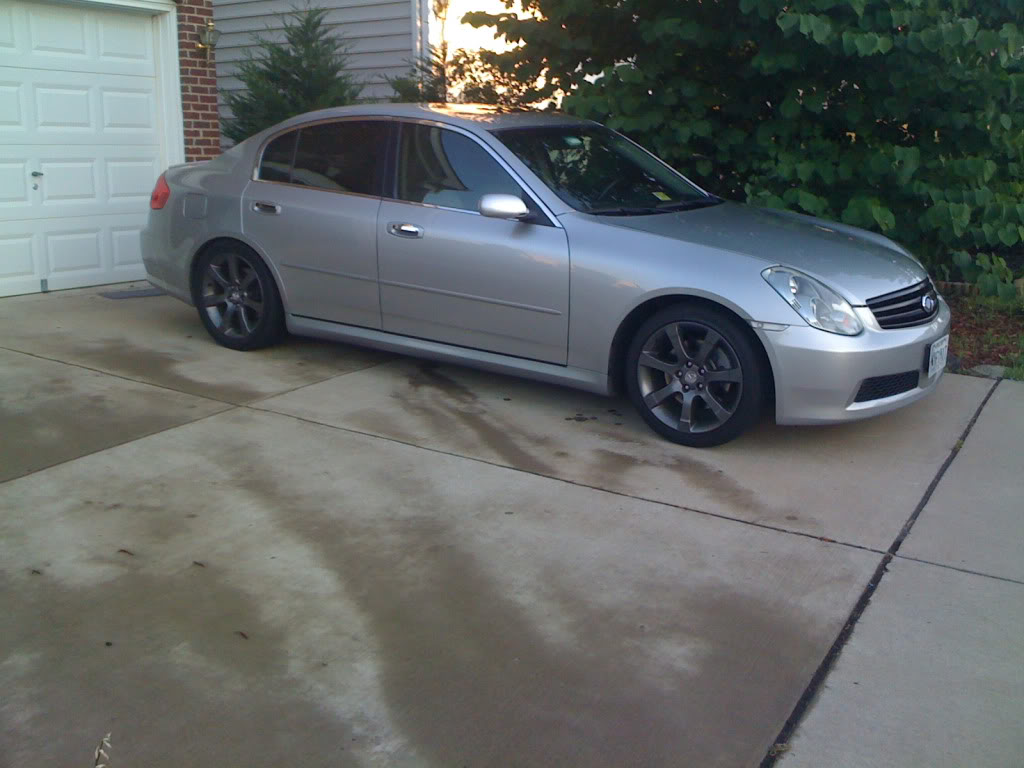
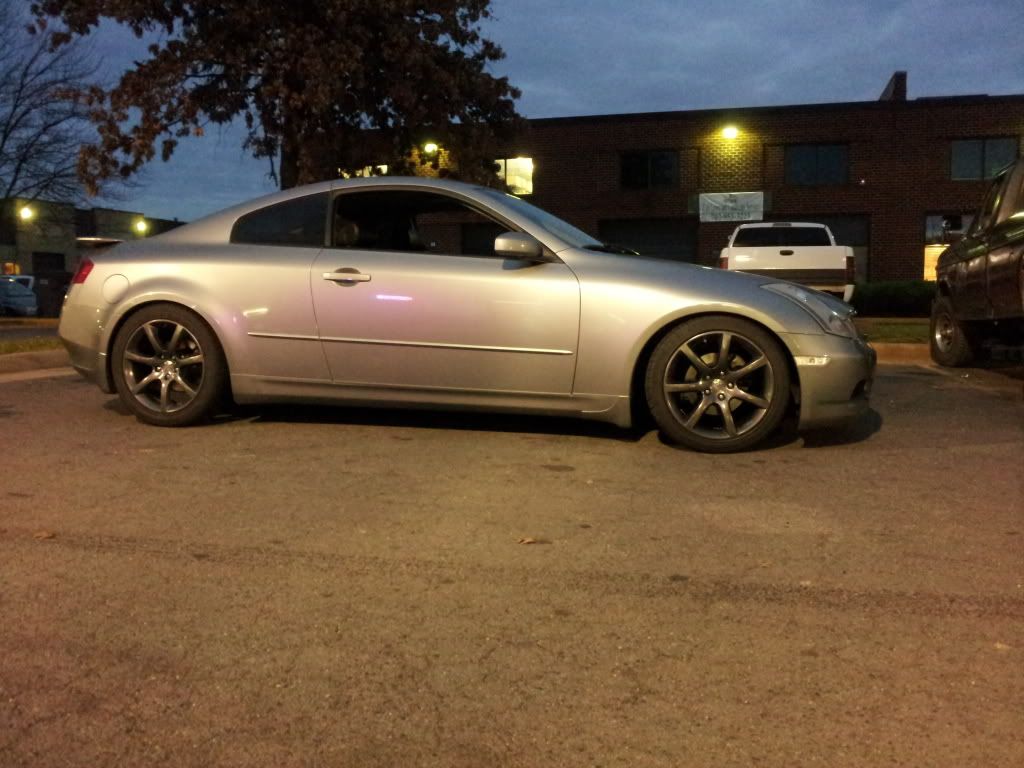
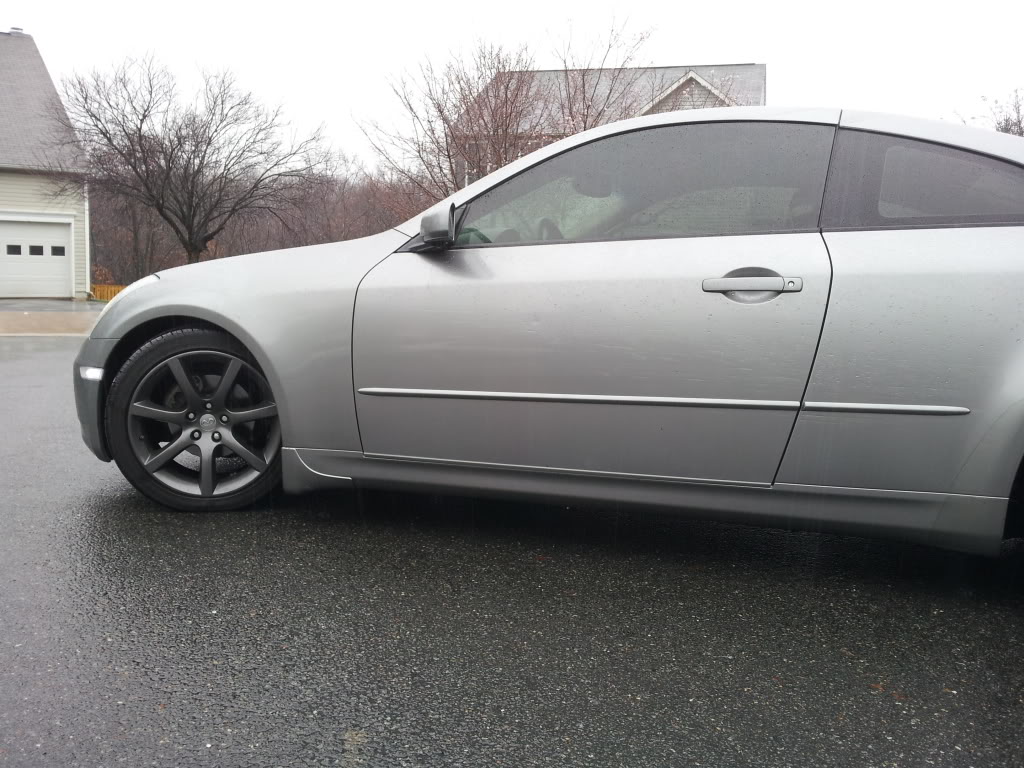
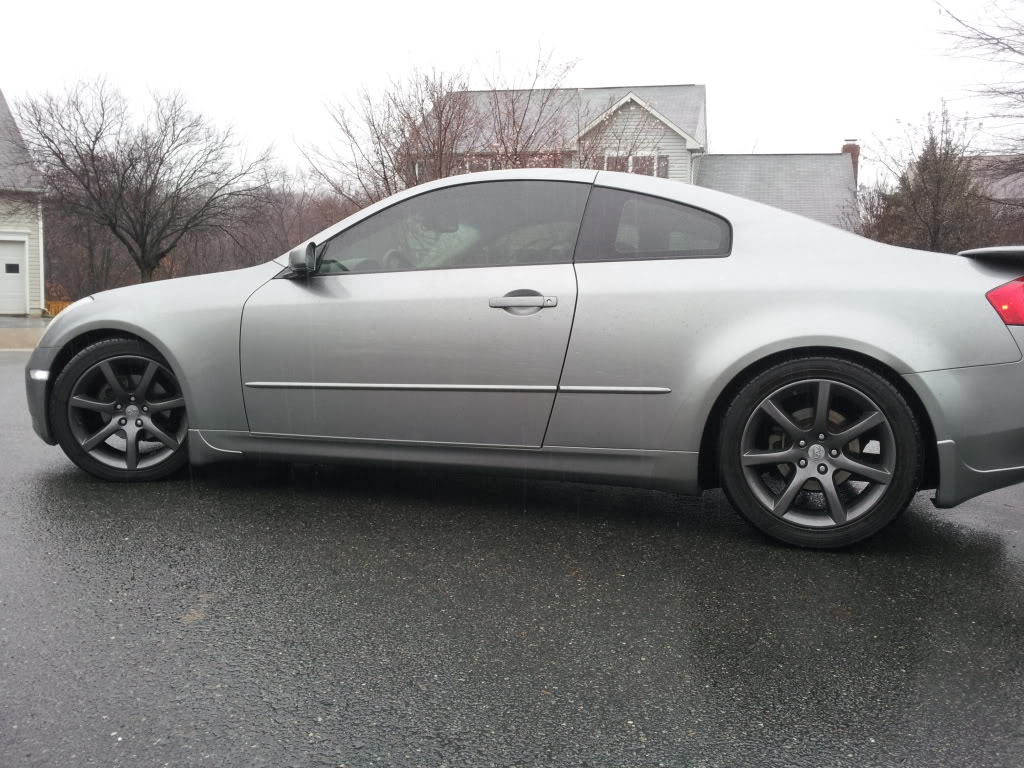
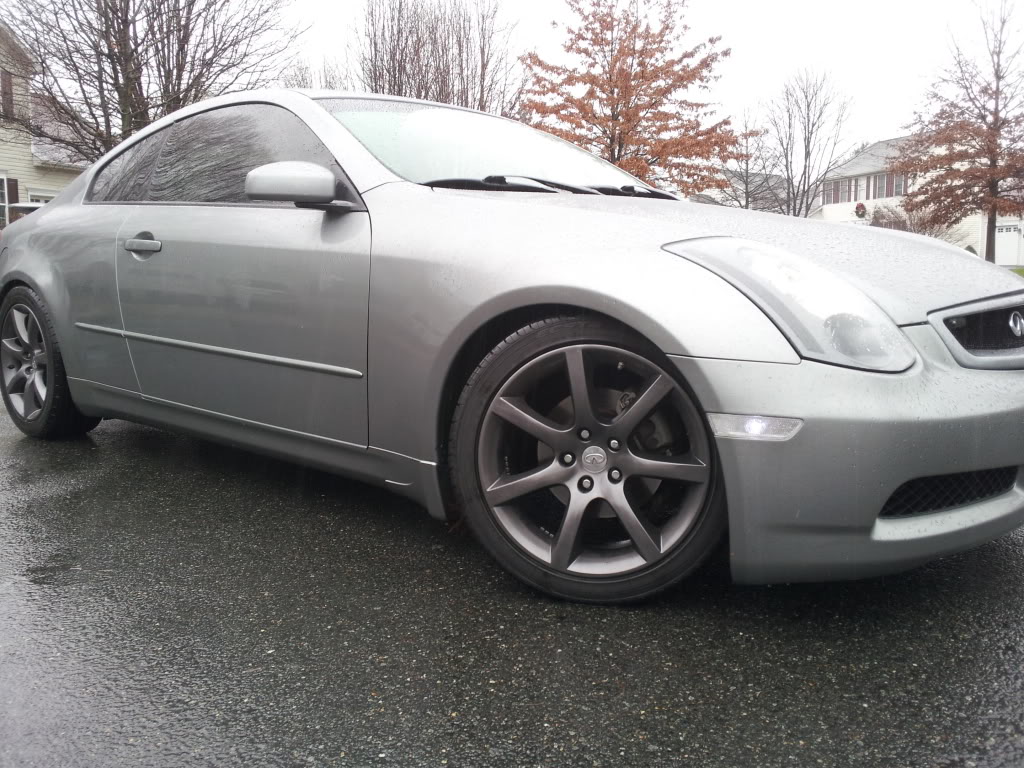
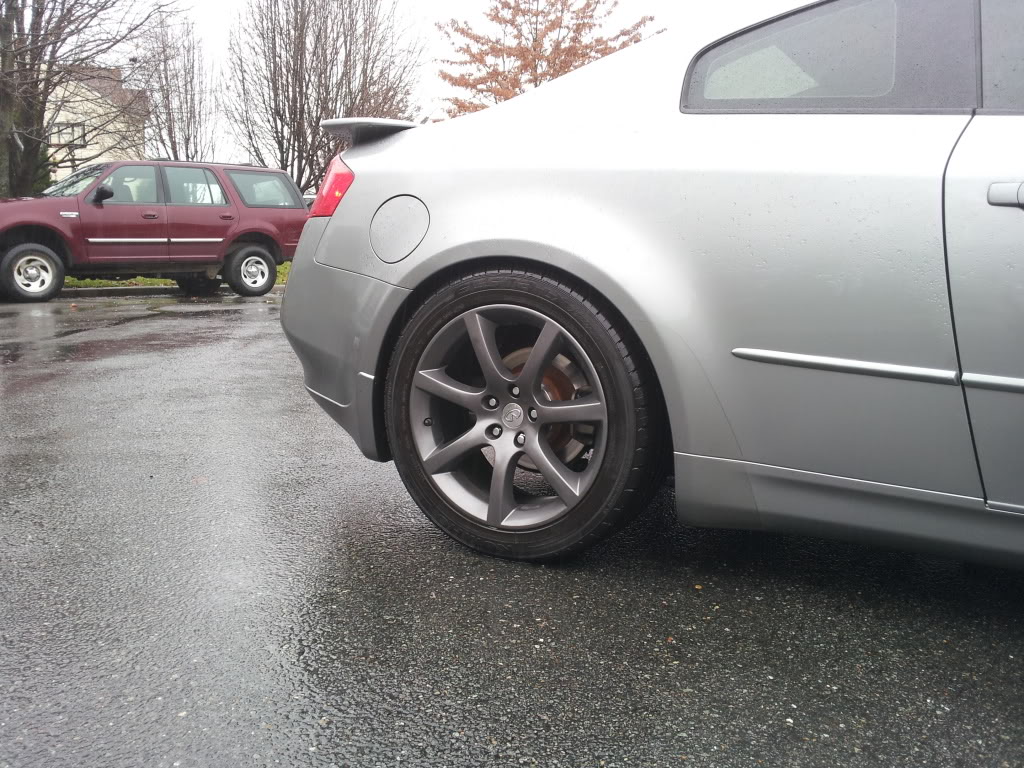
Pictures of them mounted on the car (final product)
Stay tuned!
Before:
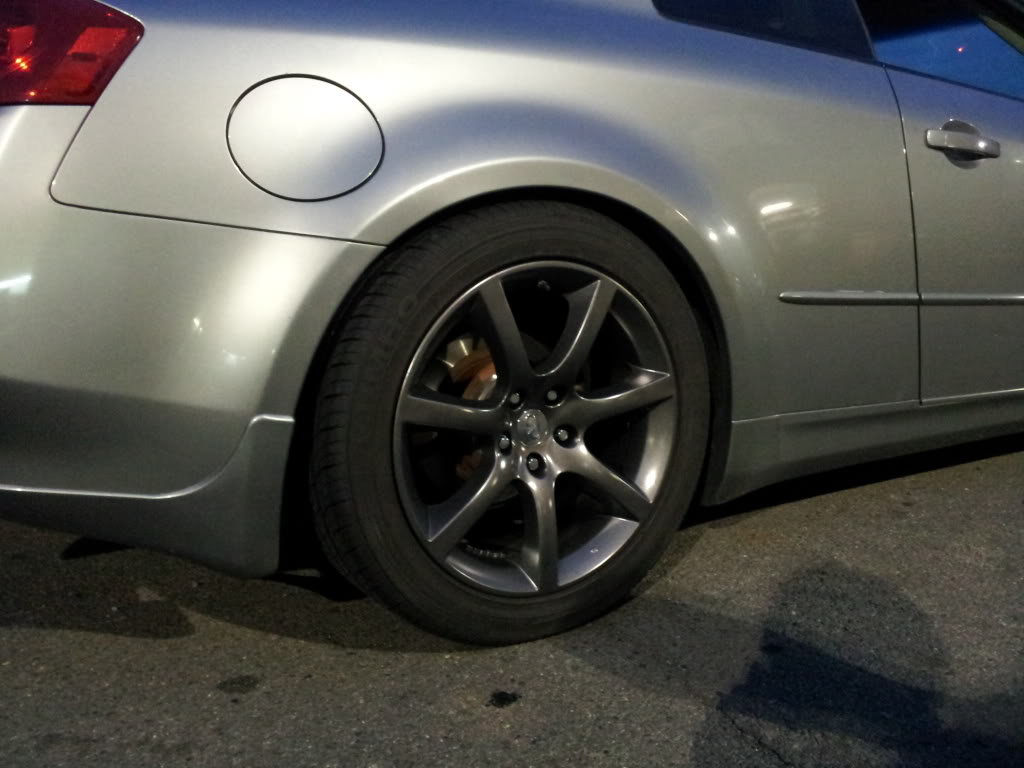
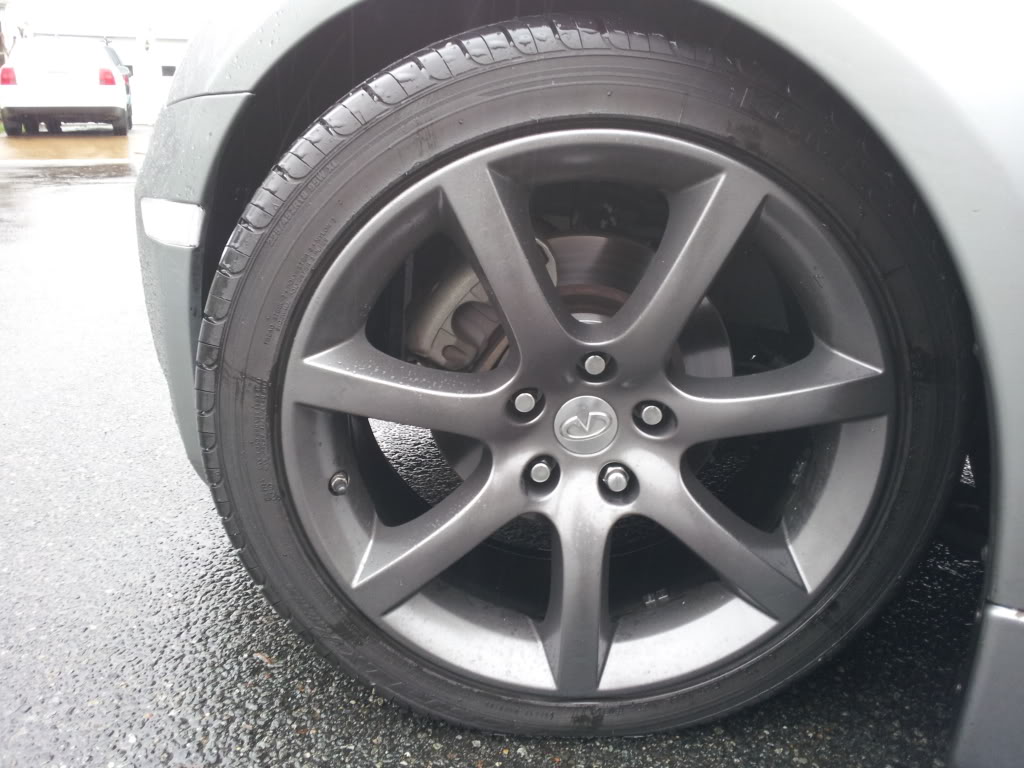
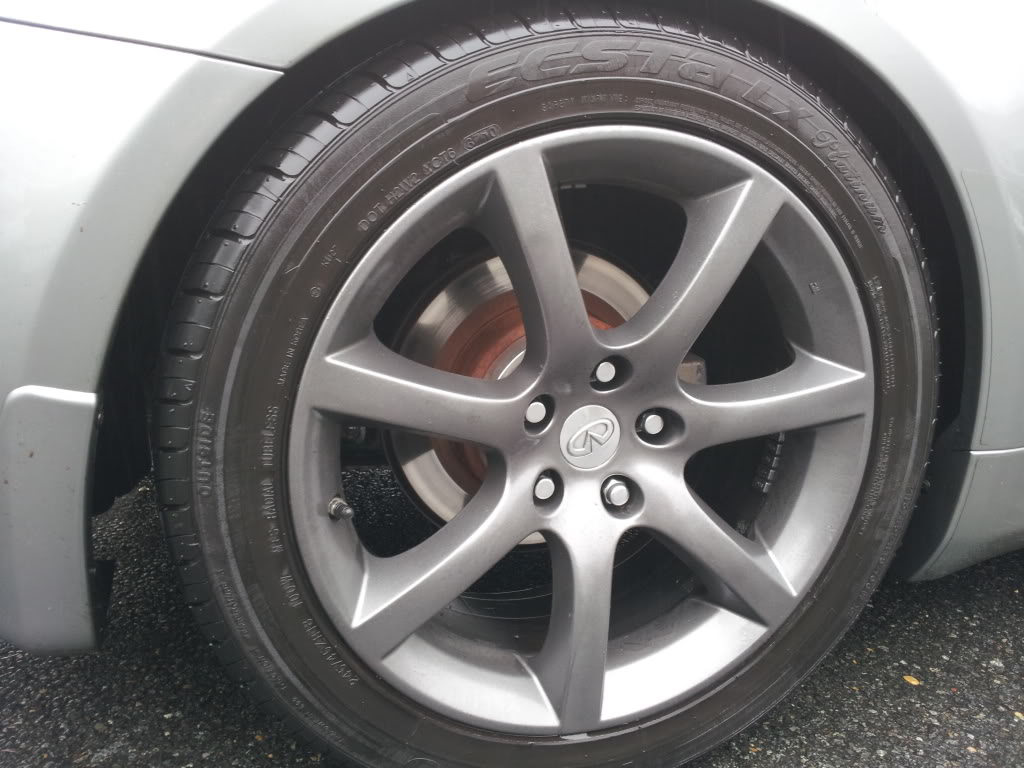
After:


Final product:

Photo credit: 054DRG35
Thanks to:
Hammad from HM Auto in Chantilly, VA for helping me with EVERYTHING. This DIY wouldn't of been possible without his painting skills and him letting me use his shop.
I'm not responsible for the outcome of your wheels, or if you somehow (no idea how you would) ruin your wheel.
All videos and pictures are mine, they were taken by me unless noted otherwise.
This is also my first HOW TO that i've ever made, so go easy on me.
Only one wheel had minor sanding done to it.
What you'll need for four wheels:
Microfiber towels
Painters tape $3.93 ea.
Index Cards (67 cents for one pack of 100 at Kmart)
2 Cans of black plastic dip from Lowes or Home Depot. $5.95 ea.
2 Cans of Duplicolor Wheel paint from Advanced auto, or anywhere that sells duplicolor wheel paint. $6.49 ea.
Total cost for my 4 wheels:
$29.48 without tax.
Step 1:
Prep the wheels by slightly wetting one microfiber towel and cleaning the wheel of all dirt, grime, and spots.
Dry the wheels with another microfiber towel.
This really isn't difficult, it should only take about 10 minutes per wheel. You can use soap if you want to and really clean them, but all i did was use water.
Step 2:
Put the index cards around the wheel to prevent spraying the tires. Stick them under the lip of the wheel. Again, pretty straight forward.
Tape off the air cap and the TPMS sensors
Step 3:
Get your first can of plastic dip and shake it well. After you've shaken it, apply one even coat on the wheel. Allow it to fully dry. The coat of plastic dip will be very glossy, but will turn flat black when they dry.
The method we used to spray mine were the side of the spokes first, then the middle of the spokes, and then the top of the spokes and the center. Holding the can about 5 inches from the wheel, and spraying two bursts.
First coat mostly dried:
Step 4:
Go get a nice cold beverage while coat 1 dries.
I did it in around 50 degree weather inside, it took a while for the paint to dry.
Step 5:
Apply coat 2 the same way you applied coat 1.
Right after coat 2:
Step 6:
Wait for coat 2 to dry by twiddling your thumbs.
Step 7:
Apply coat 3.
Step 8:
If you have a good amount of curb rash on a wheel, i suggest sanding it down as much as possible.
One of my wheels (pictured below) had a good amount of rash from the previous owner, so we used a metal bristle disk to smooth out the rash.
If it's just minor rash, this isn't really necessary. the plastic dip does a great job of filling the rash in.
With a good amount of rash, I would also suggest 4 coats. For minor rash or no rash, three coats of plastic dip should be enough. You could do 4 regardless if you really want, but it isn't necessary.
Step 9:
Once your plastic dip base coat is fully dried, shake up your wheel paint really well and apply it the same way you applied the plastic dip coats.
Let coat 1 dry.
Step 10:
Apply coat 2.
Step 11:
I only applied two coats of wheel paint. And the pictures below were my result. Again, you can apply more coats of wheel paint if you want.
Let everything dry for a day.
Step 12:
You're done! Congrats! Now you've painted your wheels easily without any major sanding or prepping.
Addition:
The two cans of plastic dip, and the two cans of wheel paint are enough to do 3 coats on each wheel (except the one we did 4 on), and 2 coats of wheel paint on each wheel. You MIGHT get a third coat out of the wheel paint on each wheel, but i'm not sure. So if you want to do 4 coats plastic dip on all wheels, you'd probably need three cans.
Coming soon:
More pictures of before and after
Pictures of each coat
Pictures of them mounted on the car (final product)
Stay tuned!
Before:
After:
Final product:
Photo credit: 054DRG35
Thanks to:
Hammad from HM Auto in Chantilly, VA for helping me with EVERYTHING. This DIY wouldn't of been possible without his painting skills and him letting me use his shop.
Last edited by aa2033; Jan 25, 2012 at 09:44 AM.


Looks pretty decent.
I've got my winter set up plastidipped right now but I may do this to my 18" OEM I have sitting around that are only plastidipped.
Hell, I may plastidip everything.
I've got my winter set up plastidipped right now but I may do this to my 18" OEM I have sitting around that are only plastidipped.
Hell, I may plastidip everything.

Registered User
Joined: Feb 2011
Posts: 197
Likes: 0
From: ft. lauderdale, fl.
good job on the DIY... ive been curious about trying this...i think im going to try it out this weekend! (MAYBE) lol i have 3 wheels with road rash so im gunna sand that out first and go from there!
picture of all 4 finished wheels up. more will be taken before they're mounted, and more taken when they're mounted on the car.
Trending Topics
Registered User
Joined: Feb 2011
Posts: 197
Likes: 0
From: ft. lauderdale, fl.
those look amazing bro! i chickened out plus i had no time since i was away with mt unit all weekend...but damn good job man!!! im going to use this DIY thread when i man up to do my wheels....
i have a question tho...what was the cost of everything u used? like a final price tag? bcuz i was going to buy like 4 cans of everything and mutiple buys on sandpaper and etc...
i have a question tho...what was the cost of everything u used? like a final price tag? bcuz i was going to buy like 4 cans of everything and mutiple buys on sandpaper and etc...
I updated the original post with the prices of everything i used. I already had sandpaper, so i didn't include it in my expenses.
Way cheaper than powder coating.
I worked all day today, and when i got out it was too dark to take any pics. Tomorrow guys! I promise.