DIY - Painting Your Headlights

#61
 07-15-2009, 08:14 PM


When I put them back together before putting them in the oven, I borrowed a hair dryer from my sister and used that to get the goop a little bit soft. This allowed me to press them together almost all the way. After 10-12 minutes in the oven they went together very easily.
A word of warning to everyone. Be VERY careful about touching the inside of the lens. I noticed a small fingerprint on the inside after I re-installed the lights. It's barely noticeable, but I might re-bake that one so I can clean it.
#62
07-16-2009, 01:06 AM
#63
07-21-2009, 11:00 AM

finally got mine done after sittin on it forever lol.. i used high heat semi gloss black engine enamel gives a nice sheen but not overly shiny, also you some nightshades to tint out the signals im happy with the results.
thanks papa for your sticky, i used it and it helped me get through it without any flop ups!
thanks papa for your sticky, i used it and it helped me get through it without any flop ups!
#64
07-24-2009, 02:05 PM

 It was so thorough, for a minute, I almost believed even I could do this myself!

#65
07-24-2009, 02:23 PM
finally got mine done after sittin on it forever lol.. i used high heat semi gloss black engine enamel gives a nice sheen but not overly shiny, also you some nightshades to tint out the signals im happy with the results.
thanks papa for your sticky, i used it and it helped me get through it without any flop ups!
thanks papa for your sticky, i used it and it helped me get through it without any flop ups!
The following users liked this post:
Crsallen77 (04-07-2013)
#66
07-26-2009, 06:21 PM
Here's the pic of my finished work. Probably going to open up the passenger side one again and clean the lens from the inside. Got a fingerprint in there and I want to make sure everything is seated properly.
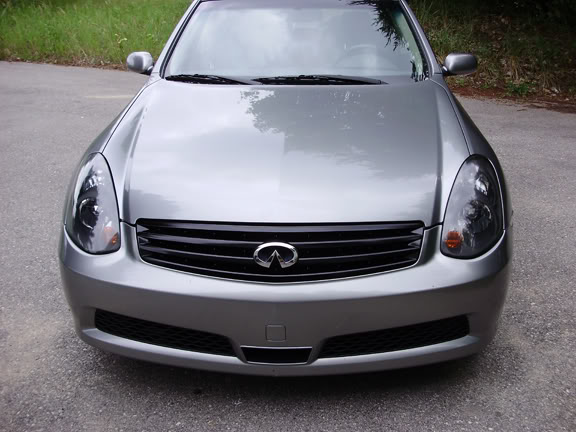
The grille and headlights really changed the overall look of the car. I love it. Thanks papa for the DIY.
The grille and headlights really changed the overall look of the car. I love it. Thanks papa for the DIY.
#68
07-27-2009, 06:46 AM

#69
07-27-2009, 07:52 AM
When you remove the outer clear cover, aka the lens, you don't want to touch the inside of it because you can't clean it once it's put back together. As for removing the orange signal cover, I think G35papa did it by dremeling out the orange and cutting a circle out of a plastic fluorescent light cover to replace it. I'd consult with him on this, and I think he said it was pretty stressful doing it. I considered it, but it will have to wait for the next headlight upgrade I do, which might be adding an HID kit for the fogs or going all out with quad projectors.
#70
07-27-2009, 01:04 PM
#72
07-27-2009, 09:10 PM

Join Date: Jan 2009
Location: Tallahassee, FL
Posts: 823
Likes: 0
Received 0 Likes
on
0 Posts
Personally what I did with the signal lenses was, I dremeled out the existing amber sections, and then I cut out circular pieces from a sheet of fluorescent lighting cover (the stuff that's textured which covers the fixture). I then epoxied those clear pieces into the little black piece on the inside that's right behind the original lens. I don't know if I have pictures of them.... I think I do hold on.
Here: Then I just screwed the black parts back int and viola you're done. It is indeed a pain in the ass, but it's worth it to me.
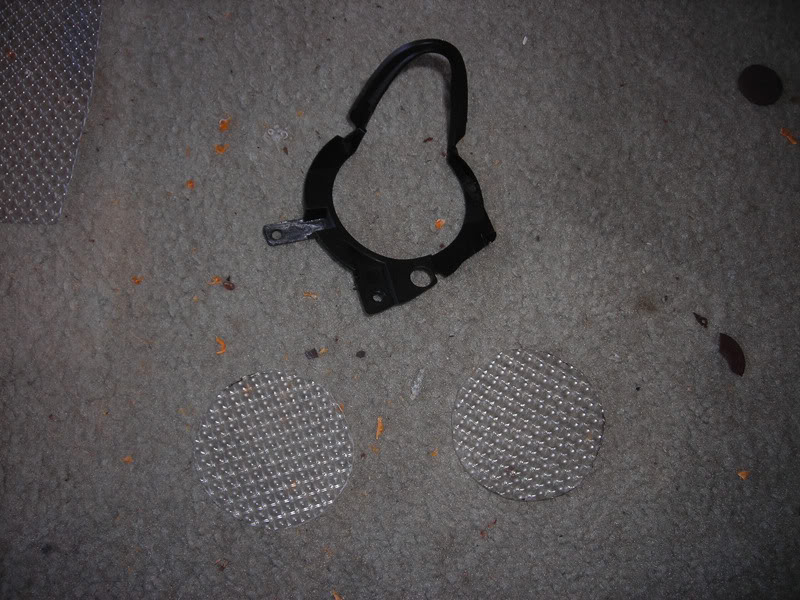
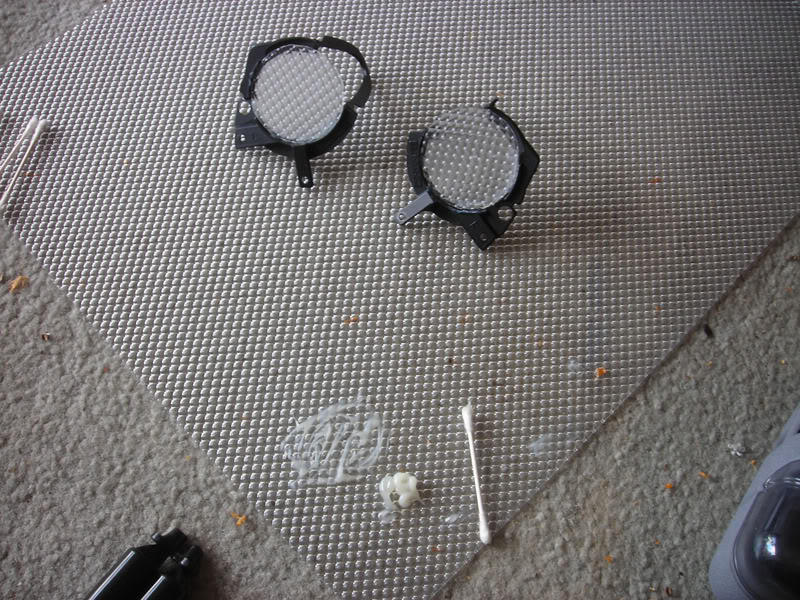
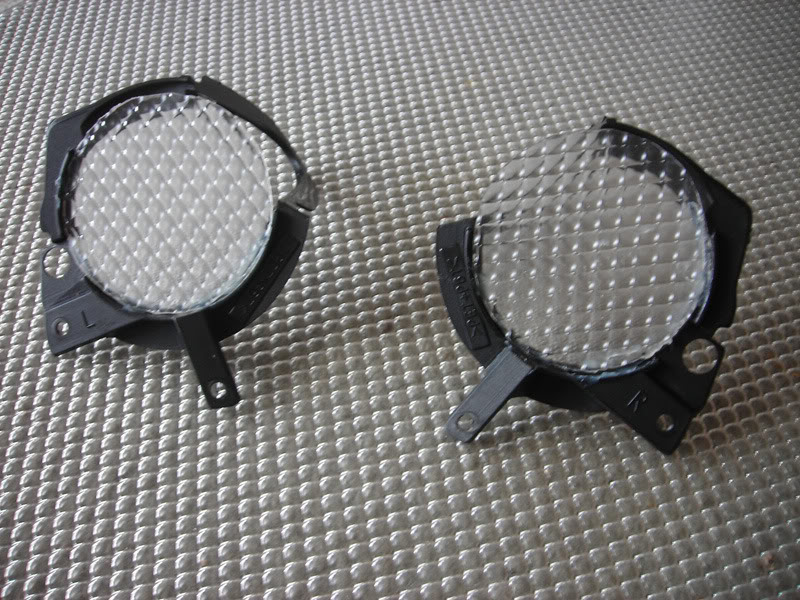
Here: Then I just screwed the black parts back int and viola you're done. It is indeed a pain in the ass, but it's worth it to me.
Last edited by NaiveRapture; 07-27-2009 at 09:20 PM.
#73
08-10-2009, 10:10 PM
Nice! That would look really good if you did orange lights in there. Giving you the non amber look parked and still functional to not get hastled from the police  . Hey papa, do you have any tips on wiring the CCFL clearance strips? I got mine today but they're arent any instructions. I'm gonna attempt the setup in the next week or 2. Hard with a daily driver and working almost everyday
. Hey papa, do you have any tips on wiring the CCFL clearance strips? I got mine today but they're arent any instructions. I'm gonna attempt the setup in the next week or 2. Hard with a daily driver and working almost everyday
#74
08-10-2009, 11:14 PM
Personally what I did with the signal lenses was, I dremeled out the existing amber sections, and then I cut out circular pieces from a sheet of fluorescent lighting cover (the stuff that's textured which covers the fixture). I then epoxied those clear pieces into the little black piece on the inside that's right behind the original lens. I don't know if I have pictures of them.... I think I do hold on.
Here: Then I just screwed the black parts back int and viola you're done. It is indeed a pain in the ass, but it's worth it to me.


Here: Then I just screwed the black parts back int and viola you're done. It is indeed a pain in the ass, but it's worth it to me.
Now I wanna see them all put back together.

#75
08-10-2009, 11:30 PM
