
Custom Trunk Build with Pics. Advice/Opinions.


Joined: May 2008
Posts: 2,232
Likes: 162
From: South Miami


Make sure you use a good wood glue. Then reinforce with screws, or staples/nails with an air nailer. It's also a good idea to silicone all the joints inside to ensure an air tight enclosure. It looks good so far! 
Joined: May 2008
Posts: 2,232
Likes: 162
From: South Miami
Update: Below the trunk lid. All the wires are not properly spliced and tucked in yet because I'll only do that once the sub is in, all of the other wires are installed, and the amp is tuned + ready to go. Ghetto duct tape will be changed to proper bracket also
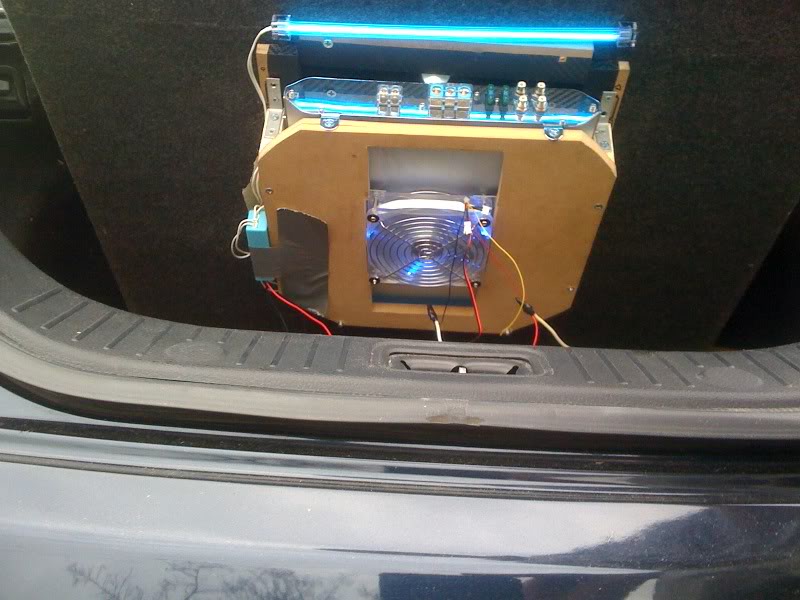
You can see the LED 120MM fan I installed underneath to blow air on the amp and stop it from overheating it. The fan also has a control **** to adjust its speed.
You can see the LED 120MM fan I installed underneath to blow air on the amp and stop it from overheating it. The fan also has a control **** to adjust its speed.

Joined: May 2008
Posts: 2,232
Likes: 162
From: South Miami
Updates...
Making a box that would fit and still have enough enclosed space to produce bass is been soooo hard... and on top of that I got a new job, which really slowed down how much time I have to play around with this...
This is the first box... ended up being too small:
Second box:
(it sucked so I got so frustrated I destroyed it before I took pics)
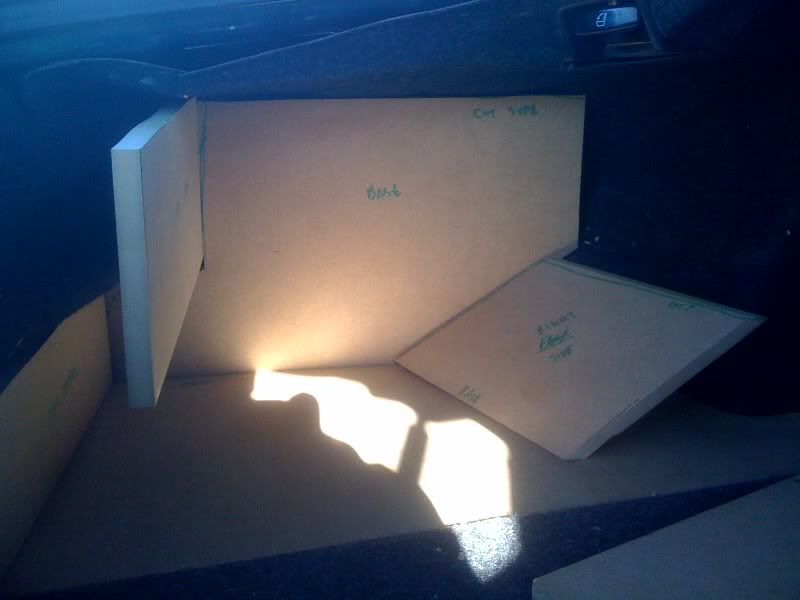
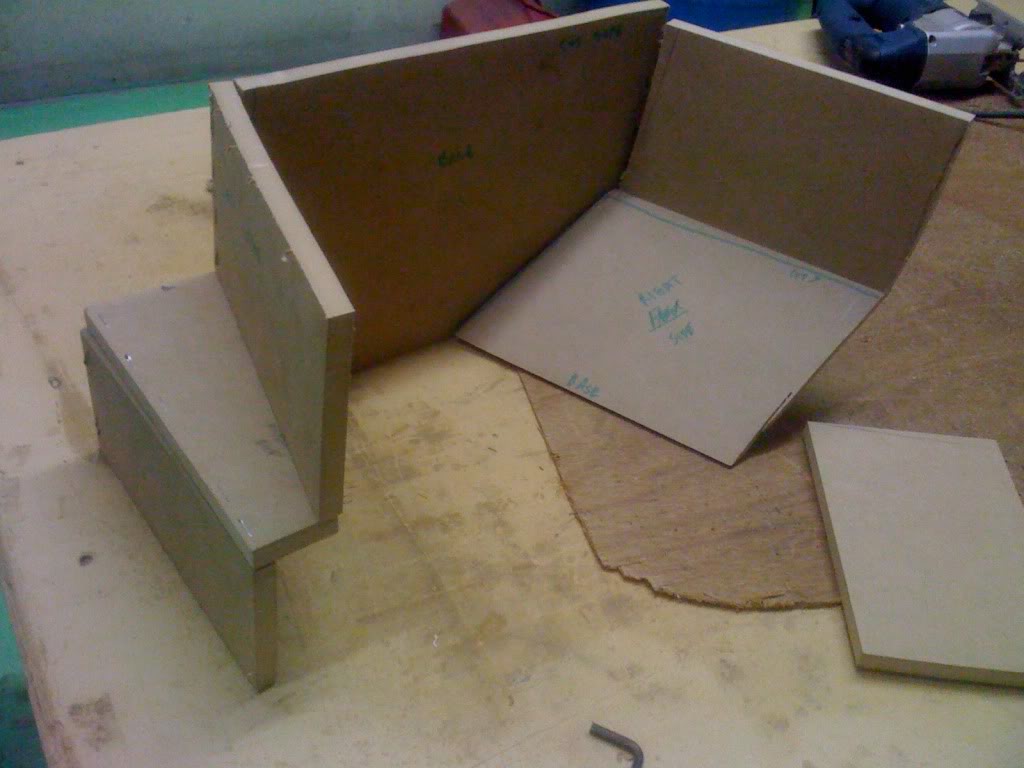
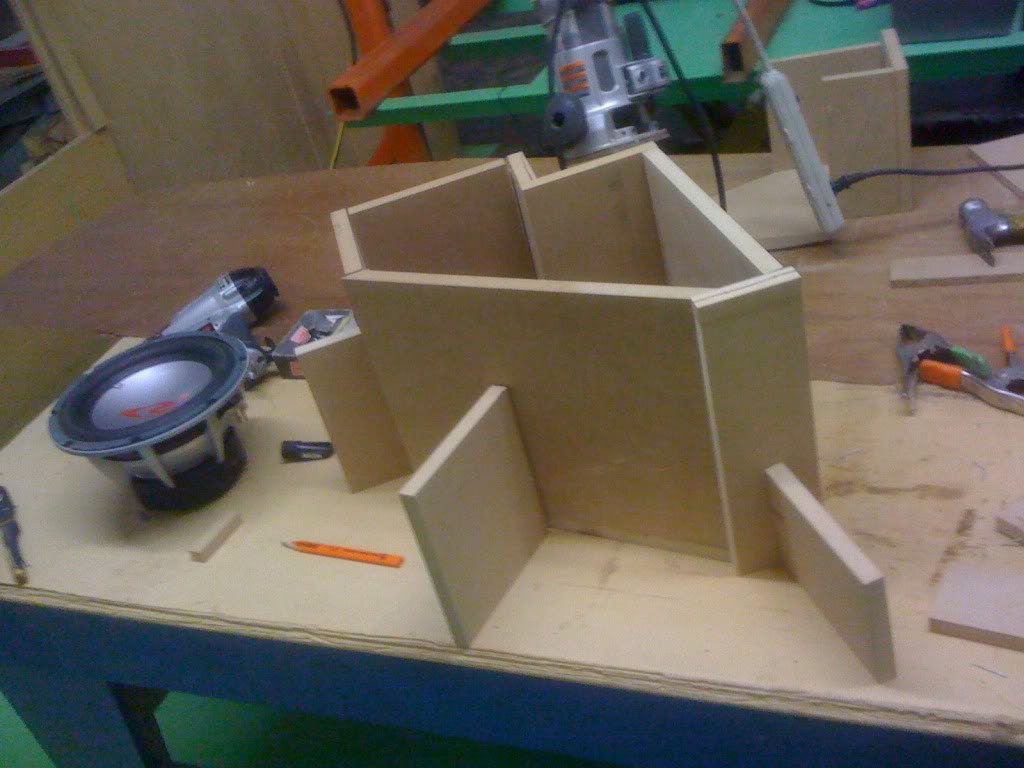
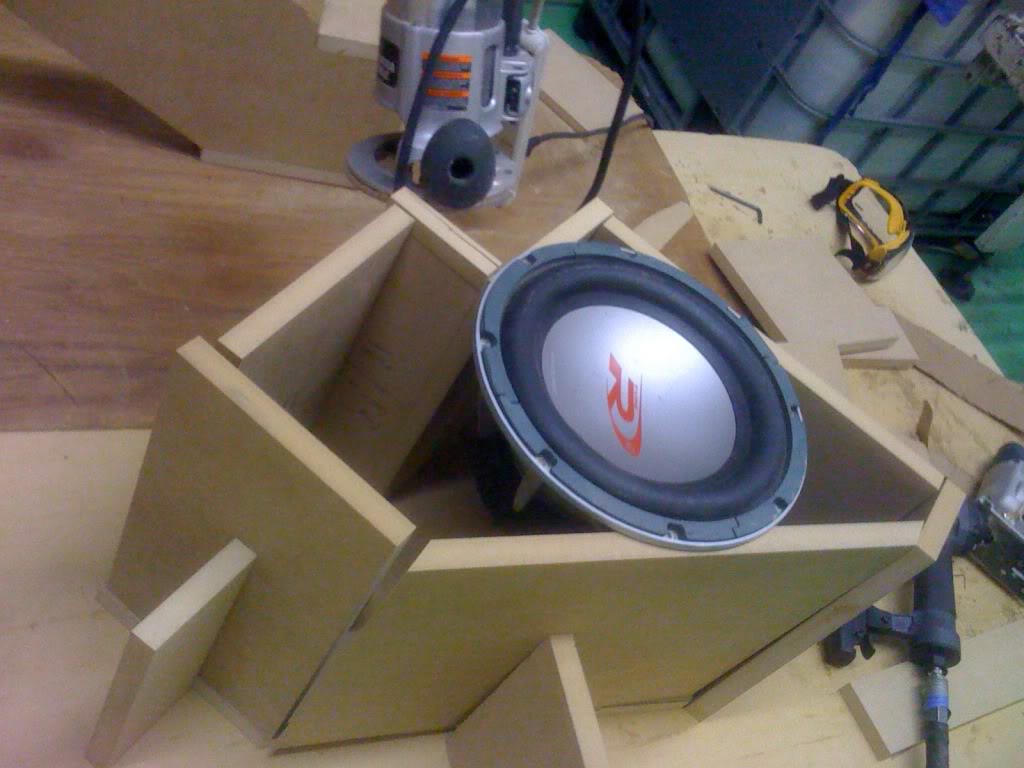
Third and final box:
I decided to make a big box, and it will fit with modifications to the floor from the other pictures... cutting the floor to the shape of the box won't be complicated, and this way I was able to make a box big enough for 0.7 cubic feet of enclosed space, which is perfect for the sub.
Rough draft... to figure out the wall area, so I could find out how high to cut it.


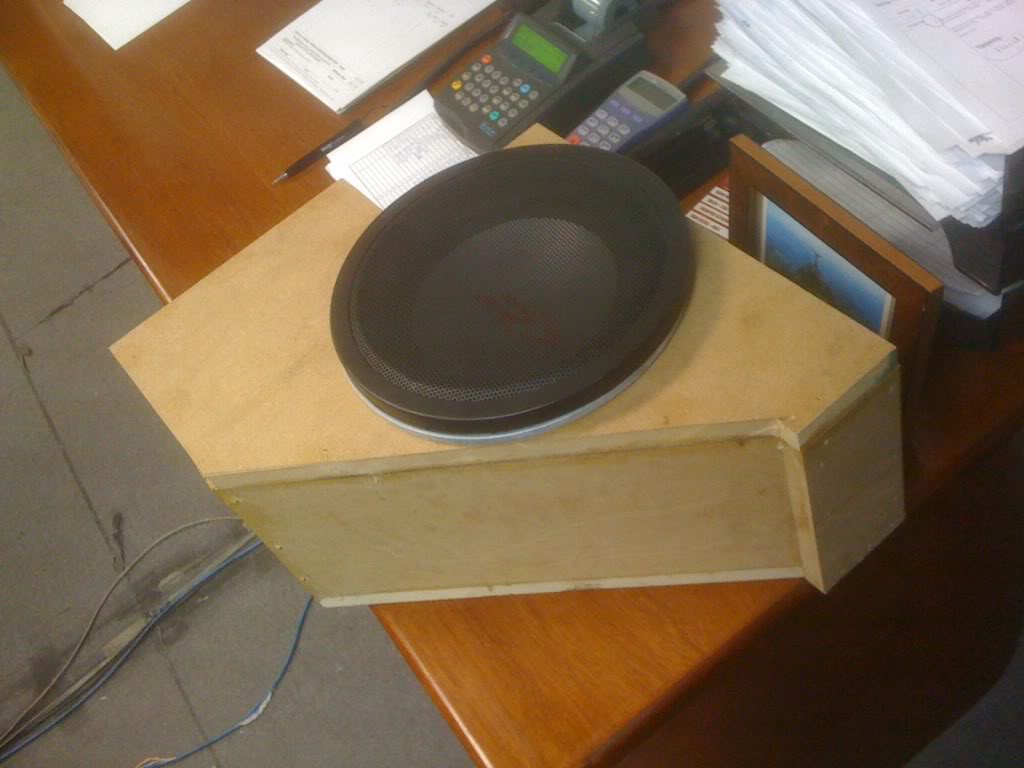
Now that the box is sealed, and ready, I just need to install all the necessary sound deadener on the walls, then mount the box properly, and finish carpeting the floor... should be done in about 2 weeks, depending on how much I decide to work on it... (I've been doing a little every few days, taking my time).
BTW to the people that who planning on doing this, just be aware that the process is extremely time consuming. So make sure to give yourself a lot of time to get it done. Also, having all the proper tools is the only way to end up with a professional looking setup.
Making a box that would fit and still have enough enclosed space to produce bass is been soooo hard... and on top of that I got a new job, which really slowed down how much time I have to play around with this...
This is the first box... ended up being too small:
Second box:
(it sucked so I got so frustrated I destroyed it before I took pics)
Third and final box:
I decided to make a big box, and it will fit with modifications to the floor from the other pictures... cutting the floor to the shape of the box won't be complicated, and this way I was able to make a box big enough for 0.7 cubic feet of enclosed space, which is perfect for the sub.
Rough draft... to figure out the wall area, so I could find out how high to cut it.
Now that the box is sealed, and ready, I just need to install all the necessary sound deadener on the walls, then mount the box properly, and finish carpeting the floor... should be done in about 2 weeks, depending on how much I decide to work on it... (I've been doing a little every few days, taking my time).
BTW to the people that who planning on doing this, just be aware that the process is extremely time consuming. So make sure to give yourself a lot of time to get it done. Also, having all the proper tools is the only way to end up with a professional looking setup.
Last edited by ConradoR; May 25, 2010 at 10:39 PM.
damn hurry up i wanna see the final. haha.
and yes it is very time consuming. i did mine all in 1 day but it took me about 16 hours of solid work without stopping. oh and then my car got broken into and they took everything.
and yes it is very time consuming. i did mine all in 1 day but it took me about 16 hours of solid work without stopping. oh and then my car got broken into and they took everything.
Joined: May 2008
Posts: 2,232
Likes: 162
From: South Miami
will do. It took me a long time to get back to doing progress cuz I went broke for a while and didn't feel like spending the 135 dollars of sound deadener i needed. Now im back on track, I'll get some pics of the sound deadening process later on today
Joined: May 2008
Posts: 2,232
Likes: 162
From: South Miami
yeah I almost want to, but this sub hits so hard already, and im expecting the sound deadener to make it even hit even harder, so there's really no need. Also, I'm trying to keep the added weight down to a minimum.
