
Bel Sti and Blinder M47 - Radar Detector / Laser Jammer


Bel Sti and Blinder M47 - Radar Detector / Laser Jammer
UPDATED
Step 1: Doing the back
Fit the dual lock velcro to the back of the brackets or screw them in, unlike the front brackets these need no modification.
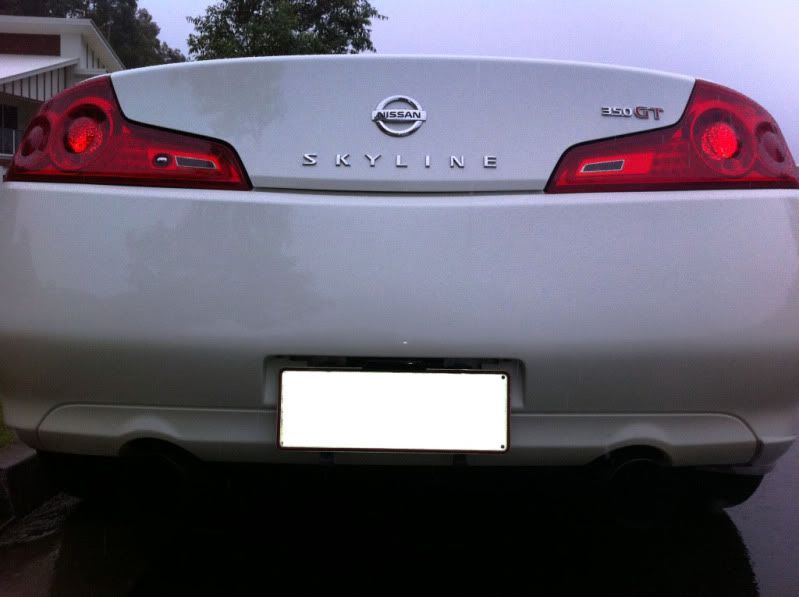
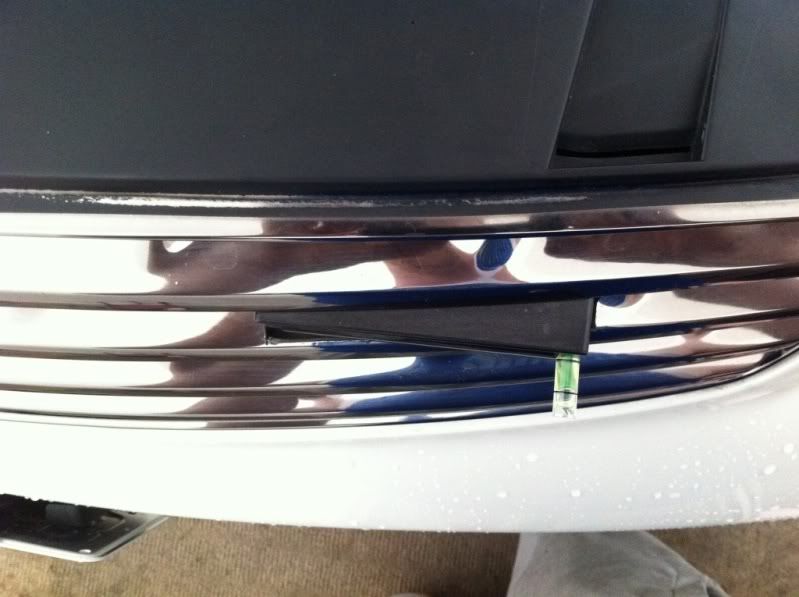
Since you can only fit one head in the rear mount it so the Blinder label is facing up, i found that to better at sensing things. Mount it directly in between the two licence plate lights.
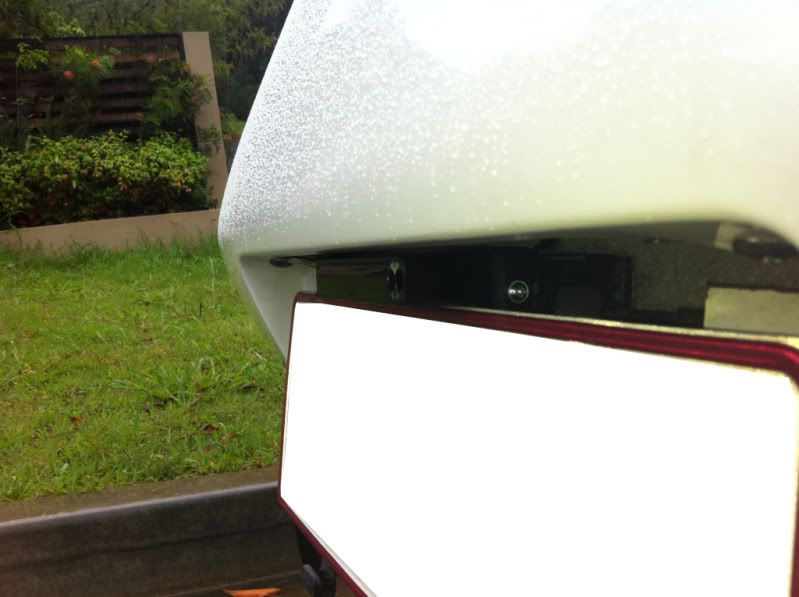
Shot from the back
Step 2: Running the blinder in the boot
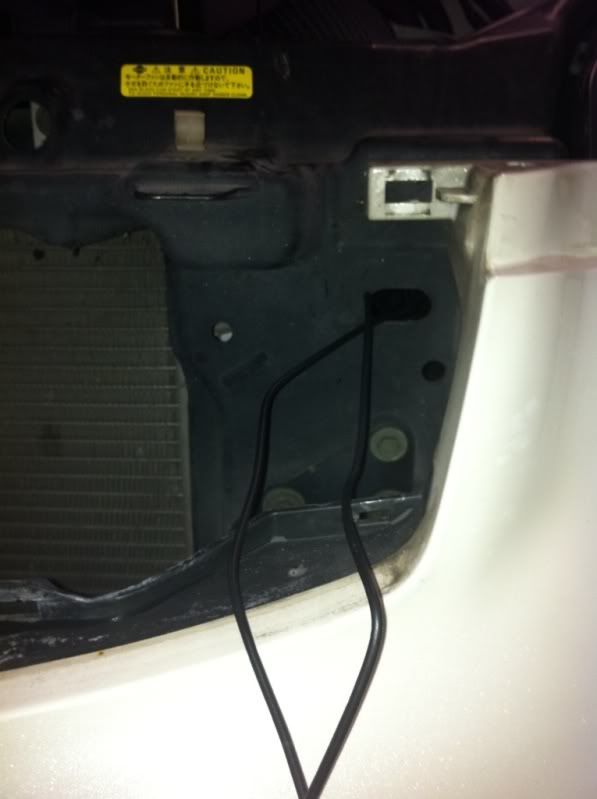
When running the wire there is a plug on the right hand side of the bumper, you will have to take out the lining of the boot to get to it. When pulling out the plug you will have enough room to put the blinder lead plug in the hole and still have room... So you will need to get a little rubber grommet to plug the rest of it up. *Keep the boot plug, you will need this rectangle piece later. Keep some excess in case you need to adjust the sensor.
Run it along the edge towards the passenger side of the car and cable tie to existing wires as you go along and then pass through to the back.
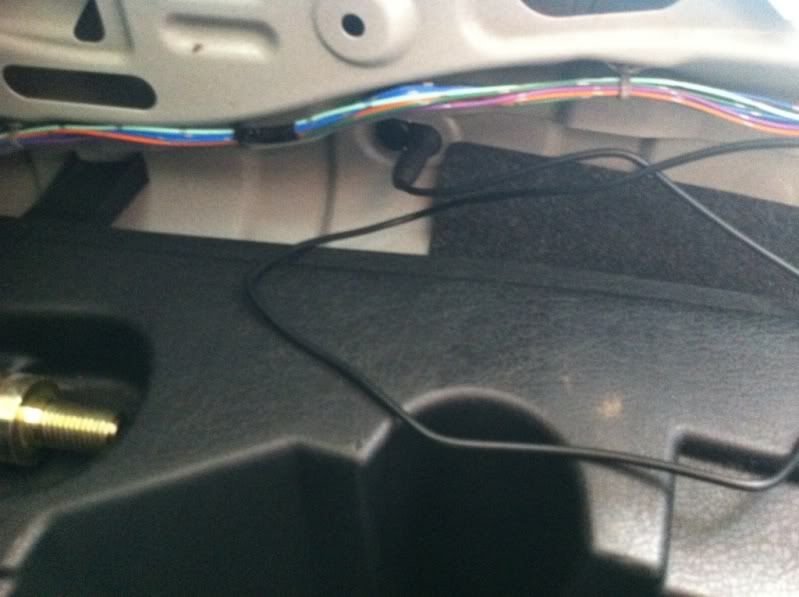
Step 3: Pass the wire from the inside of the back alongside the rear seat.


Step 4
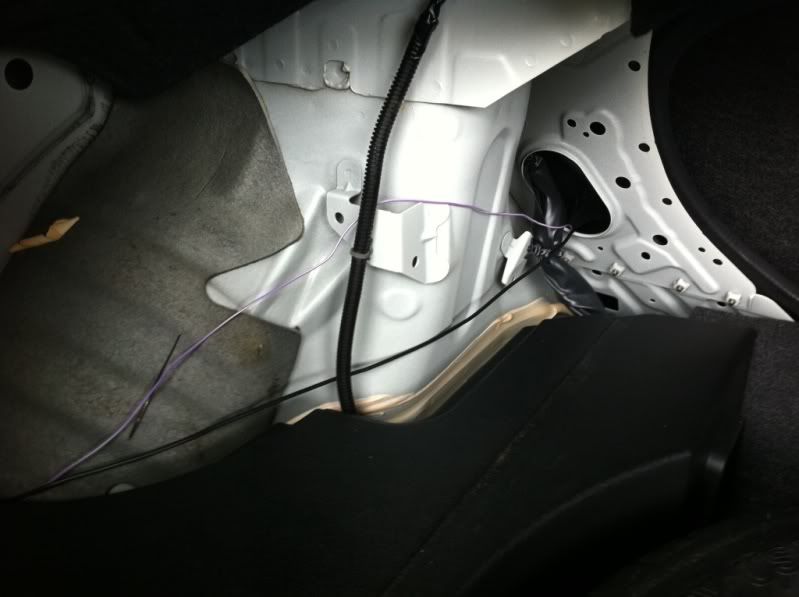
Losen the pillar plastic cover and run the wire from the seat down to the floor.
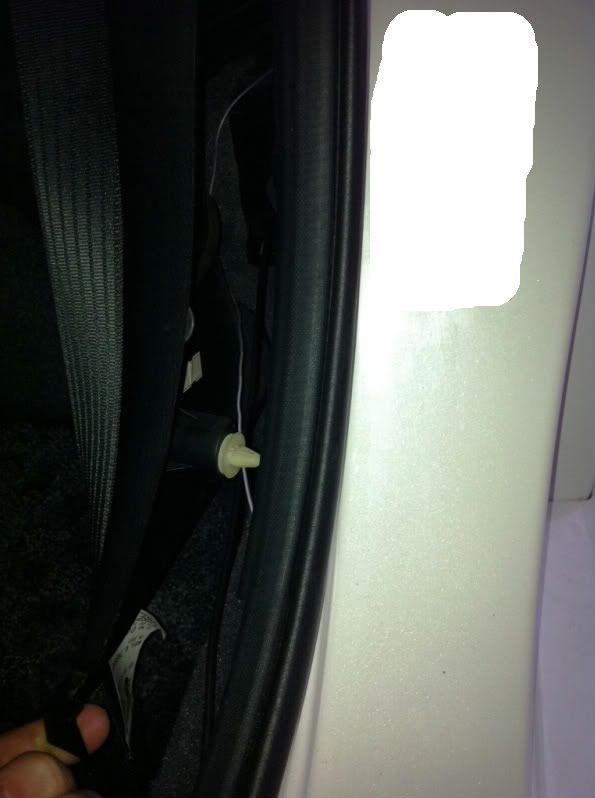
Now pull the door trim off and pull the carpet up a bit and rung the wires along
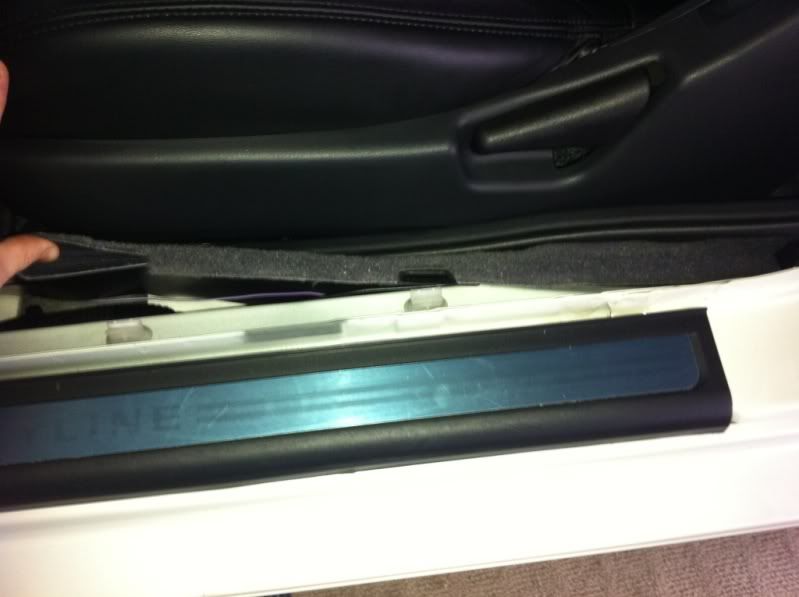
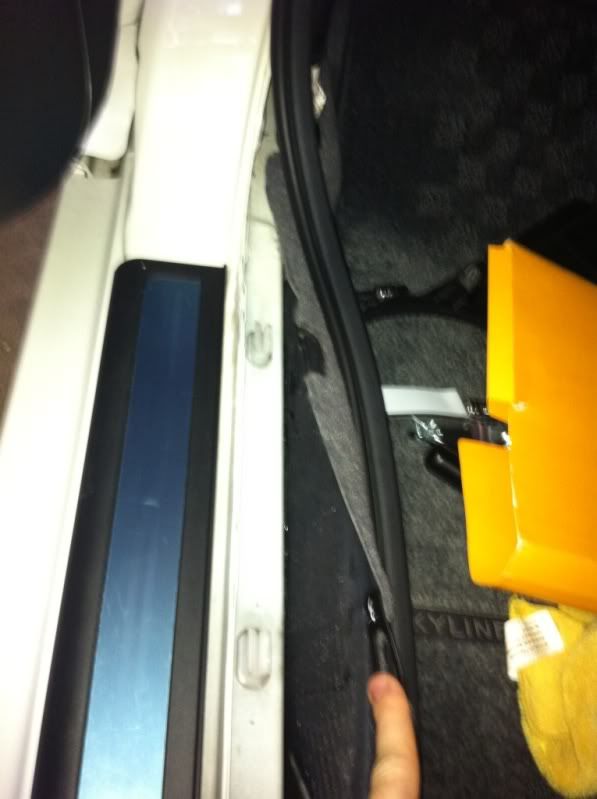
Step 5: Run the wires under the carpet, sort of where the skyline or infiniti symbol is on the floor mat, across to the edge of the center console and up into the area under the BOSE unit. To get access to under the bose unit remove the gear box leaver cover by putting the stick into 4th and pulling up at the top edge of the leather boot. Then spin the cover out the way by disconnecting the cables. You dont have to completely remove it.
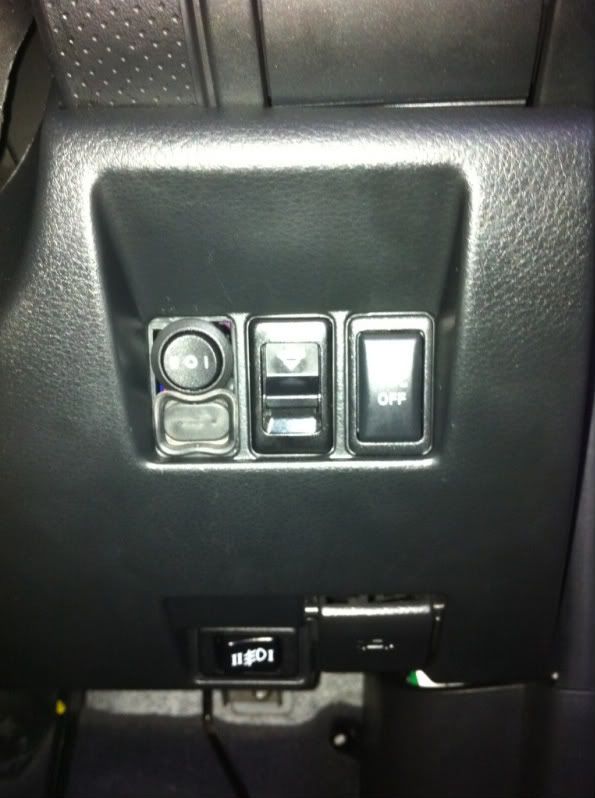
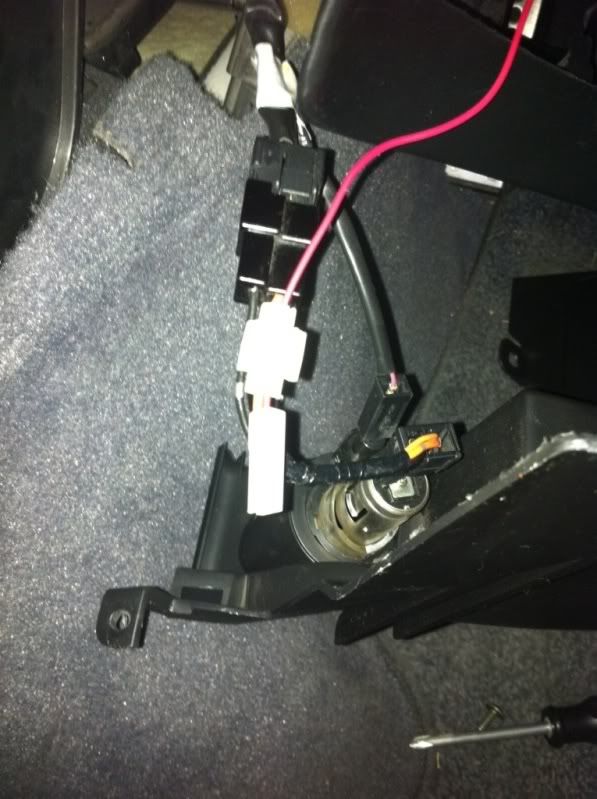
Step 6: Installing the switch
Remove the blank cover near the boot release and install the switch. This is where that plug from the boot comes in, its a perfect fit to go below the switch.
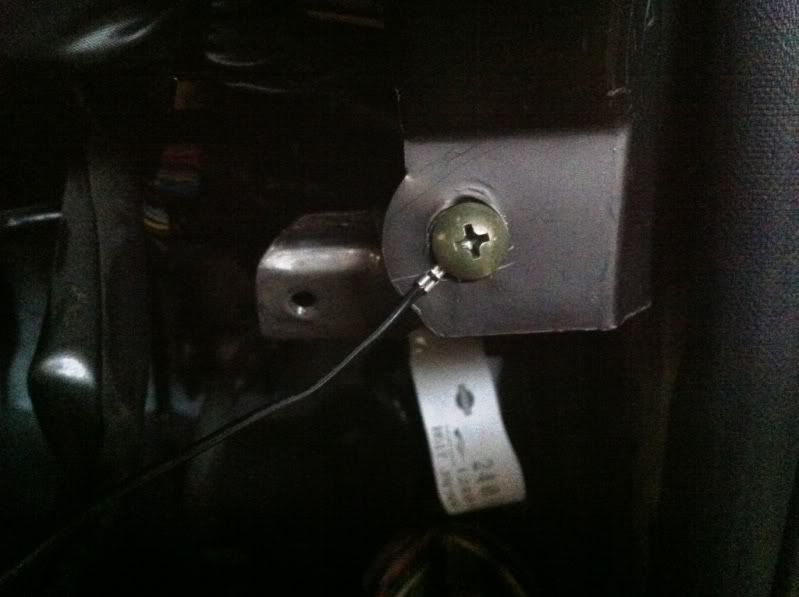
Run the Ground wire to the mount near where the under plastic steering wheel cover goes on. Dont know if you guys have this mount on the right like me or on the left since your left hand drive...
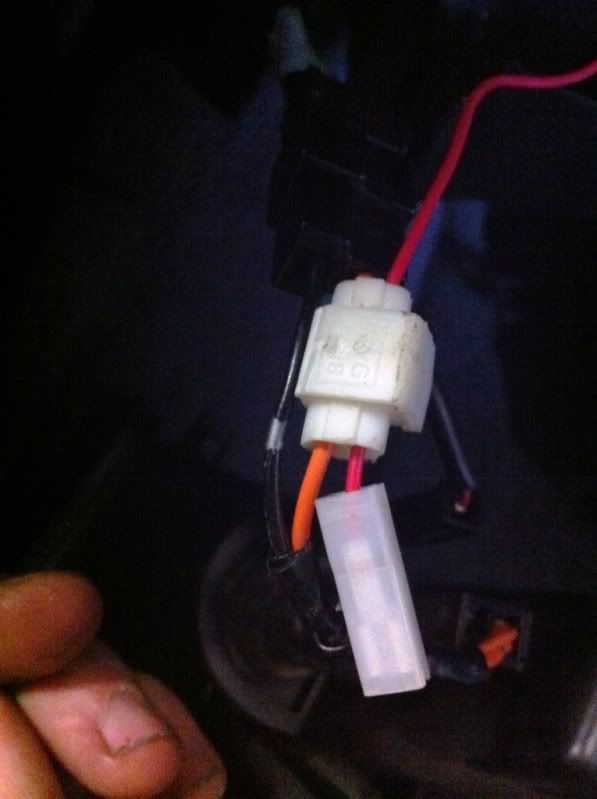
Then run the mute wire (i dont have one, pretty sure no stock BOSE units do) and then the positive wire which i used the cigarette lighter for.
Use a crimp (not the gay ones supplied) and splice the two positive wires together.
Continue the remaining plug behind the trim of the center console into the area under the BOSE where you ran the other blinder head cables.
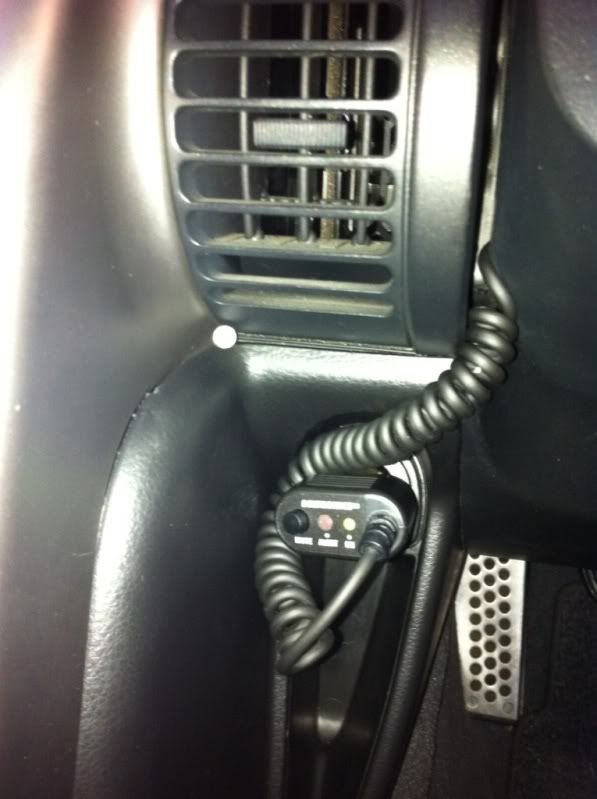
Step 7: Mount the led and speaker
I didnt take a pic but i mounted the speaker with double sided tape on this metal unit thing, cant remember what it was but its hidden when you put the plastic steering wheel cover back on.
The LED i mounted in the edge of the air grill, just pull the vent up a bit and run the wire in between the gill and cigarette cover.
Once you do the front you can then attach the head leads, connect all the other leads to the cpu box and push the box in under closest edge of the gear box stick, sort of where the little sliding cover hole is in front of the arm rest.
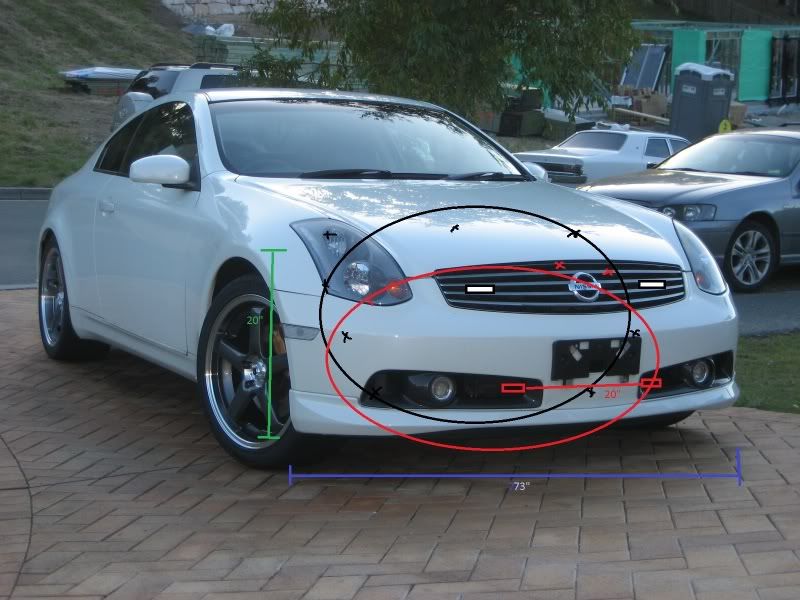
NOW FOR THE FRONT, if you have the stock grill then its going to be hard but doable. If you have a mesh grill then good luck coming up with a way to mount them!!!! But you gotta cut your grill for these to fit in.
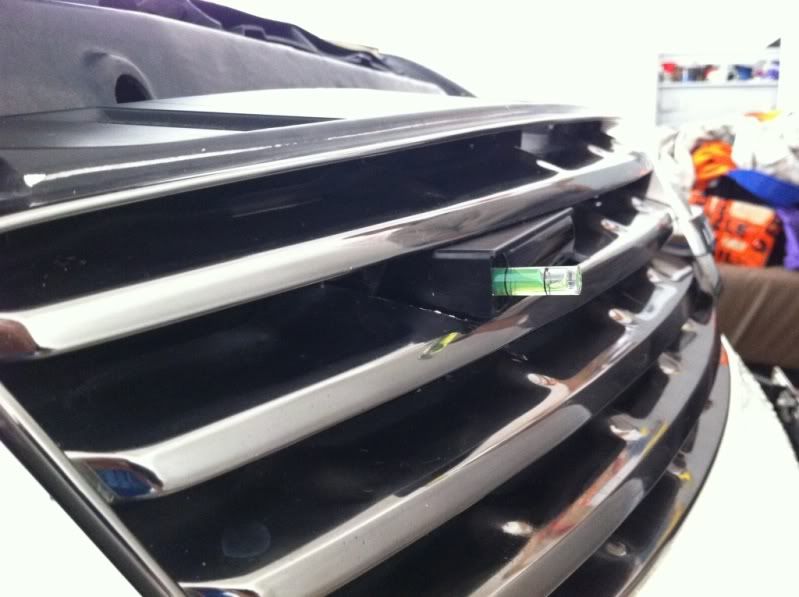
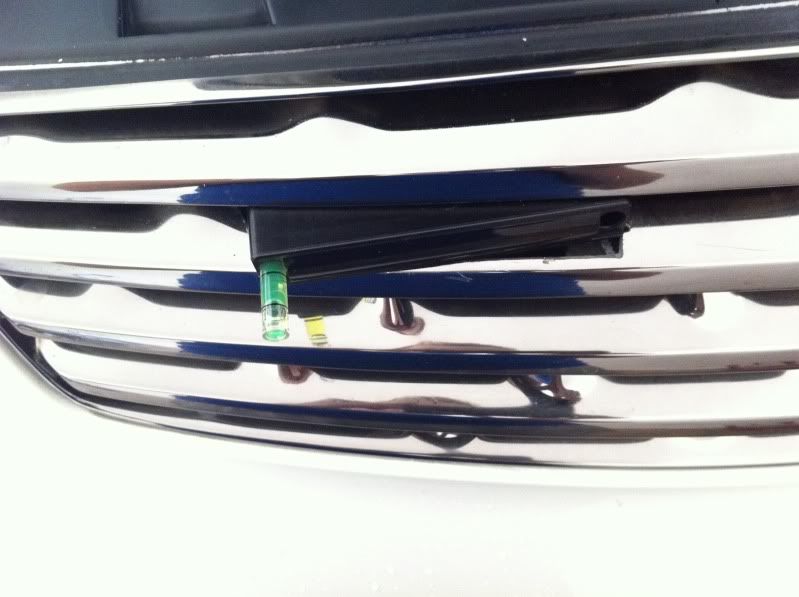
Note: They HAVE to protrude the grill and be centered.
You will need a angle grinder, a file and a mini hack saw. I will take a pic of one you need to buy to make it easy.
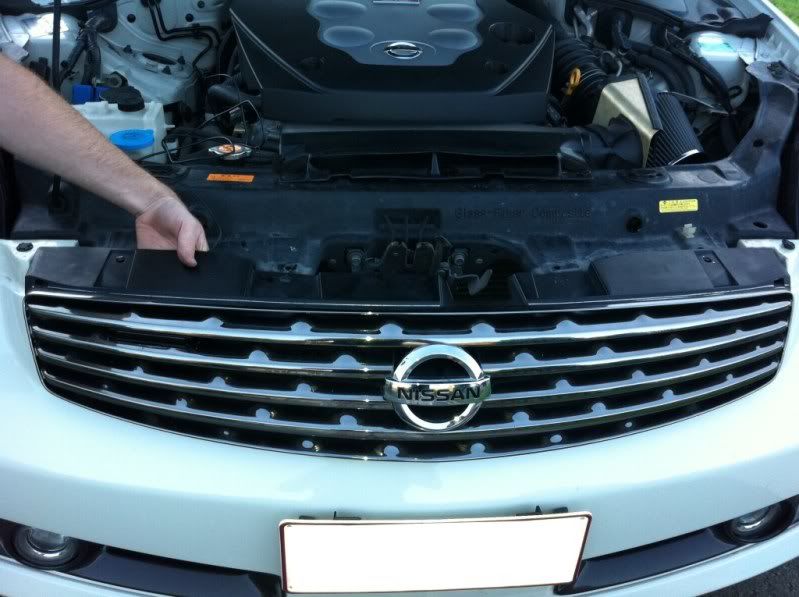
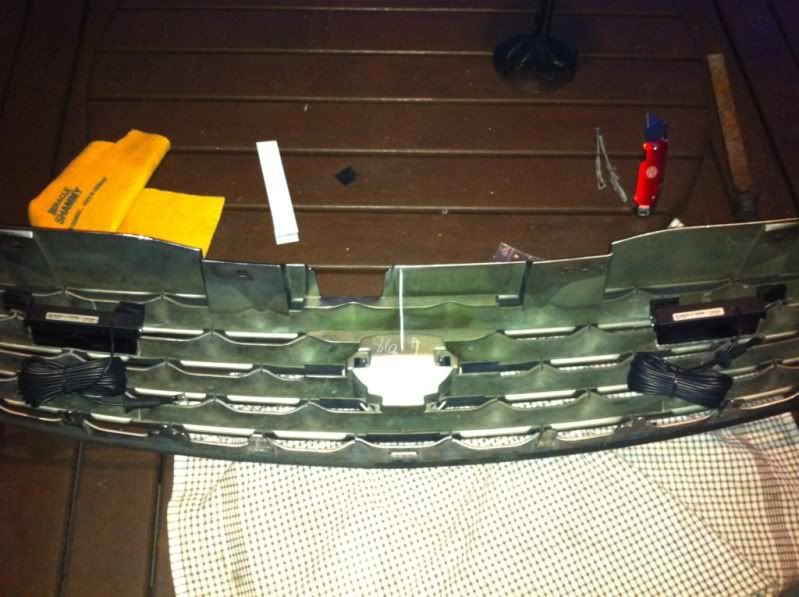
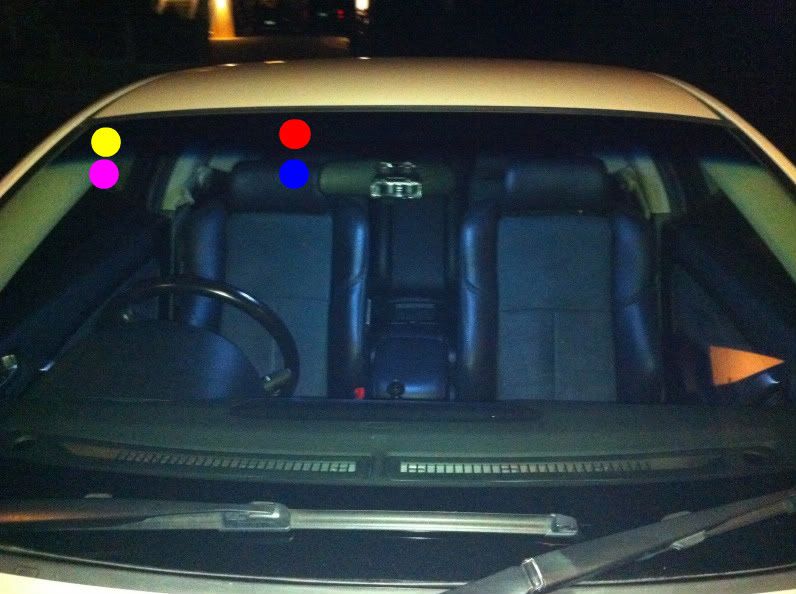
Step 8: Remove the push pins and pull out your grill.
This is where you need to mount it (in the white spots) if you dont plan to cover the back then do the red ones also.
Step 9: Spend hours cutting
This is the left side, you will need to cut this much out
This is the right side, you will need to cut this much out
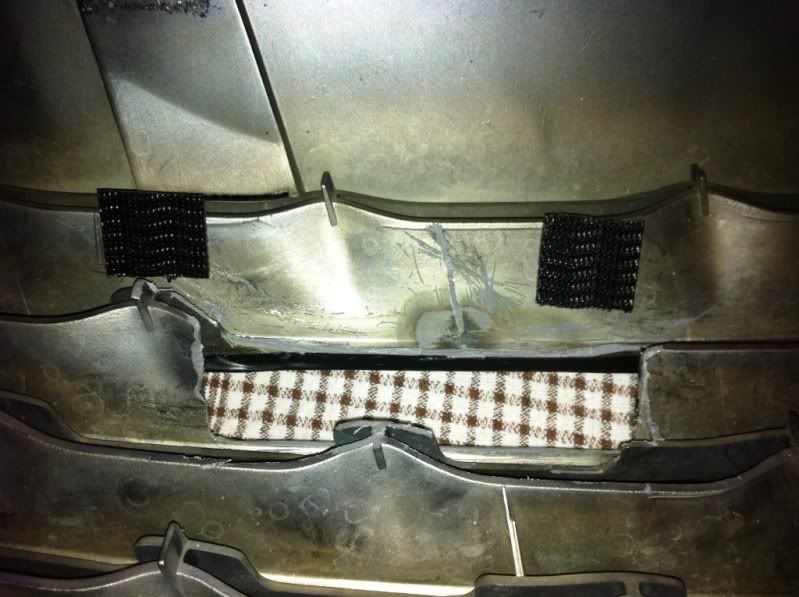
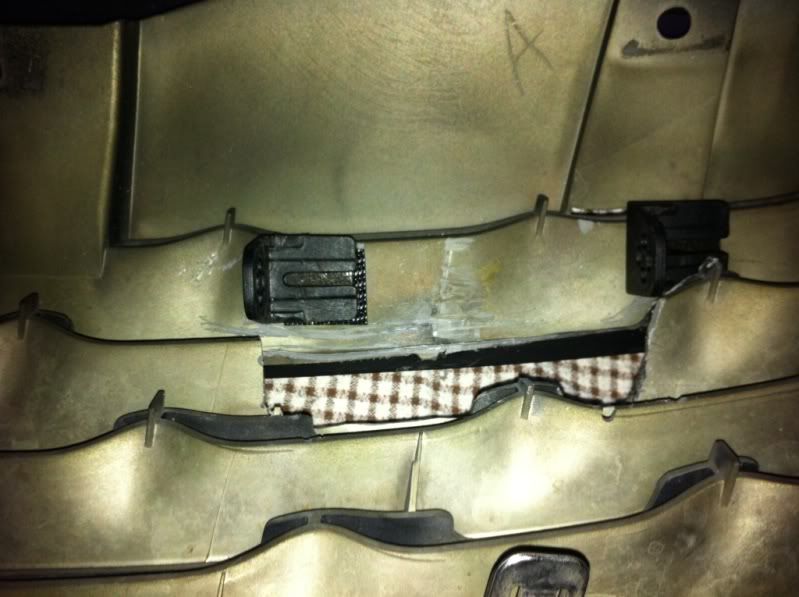
You will need to modify the brackets by filing, cutting and angle grinding the edges of the brackets so the 90degree angle is gone.
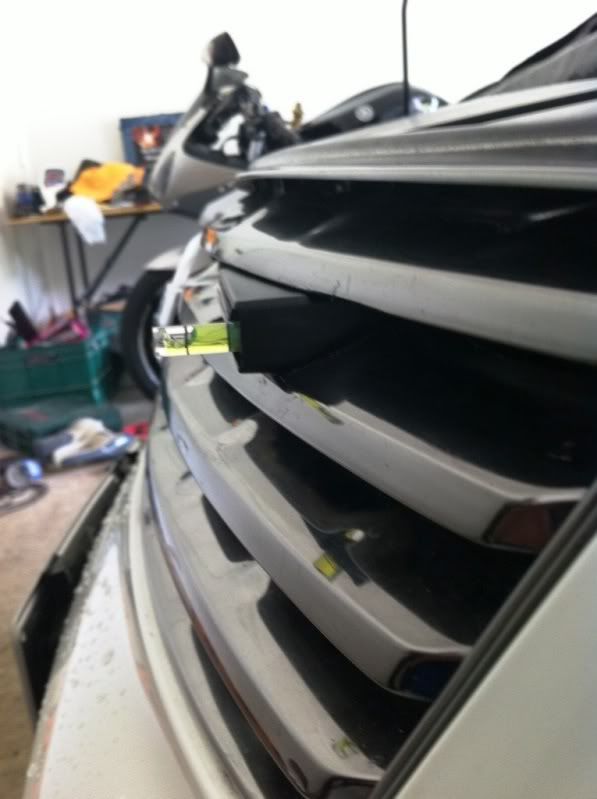
You will need to make sure that the two brackets on the inside go inside the bracket and the outside face out... look at the pic u will see what i mean. You need to do it like this so you get a flat surface to mount the bracket.
You will also need to make sure that the cables from the heads face each other NOT LIKE IN THE PIC, i got it wrong and had to change it.
From the outside left
Top left
From the outside right
Top right
Step 10: Routing the cables
On the left of the radiator there is a hole, route them through there
Leave a bit of slack so in case you have to take off the grill/bumper you can.
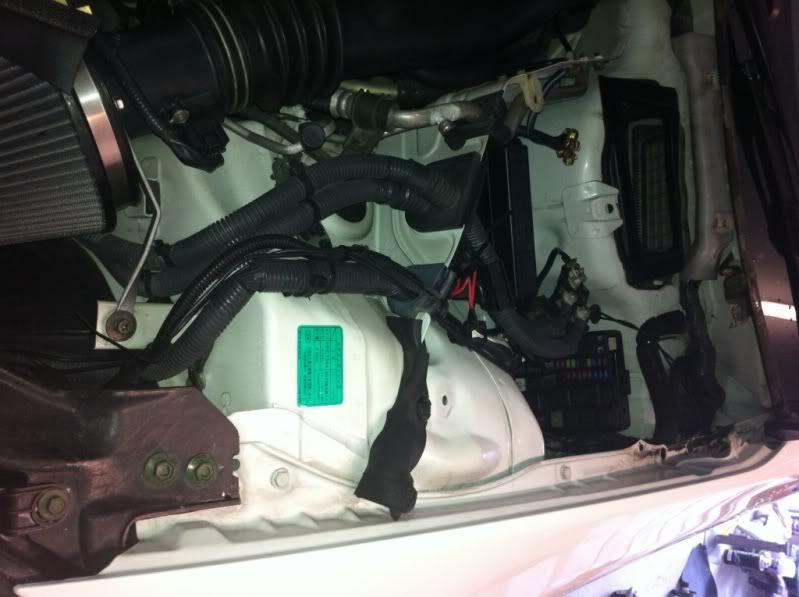
Run the cable along the inner hose and through the rubber inside the battery cover.
Step 11: Take out the battery, the battery plate, fuse box cover and plastic edge that runs along the windscreen. You will then need to drill, i think i used 1/2" holes through the fire wall. USE A SMALL drill bit first to make sure you are not drilling in the wrong position.
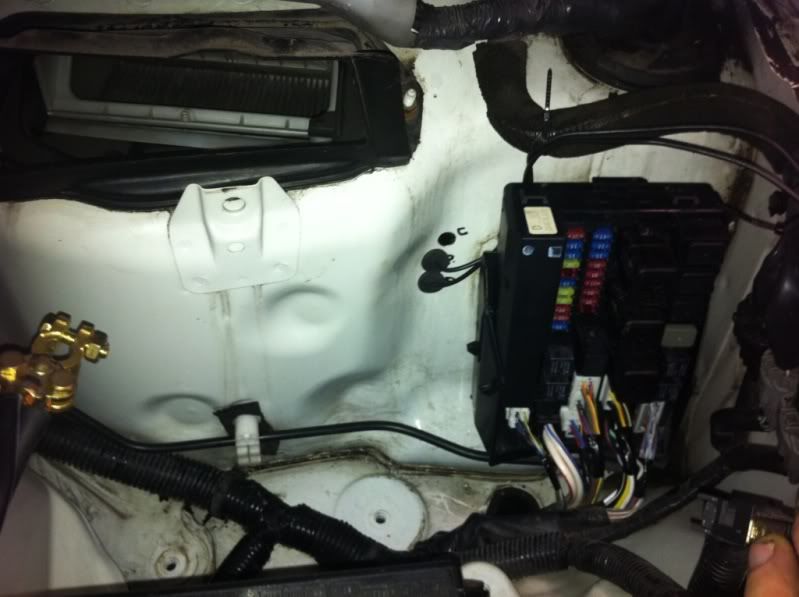
It will look like this from the inside
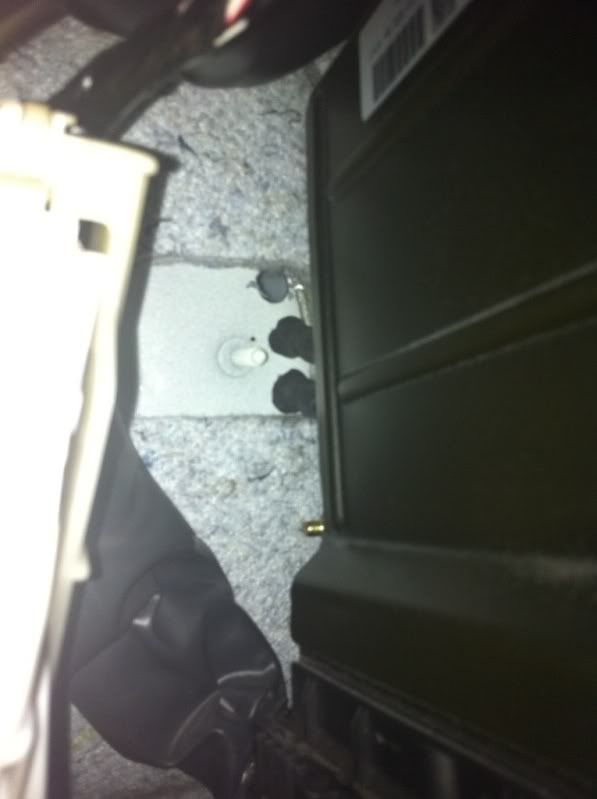
Plug the rubber caps in and pull any excess through into the cabin. Put battery and fuse box plus cover back in
Step 12: Running the cables from in the cabin to the cpu box
You will need to remove the plastic kick cover, the glove box, the side of the center console and then. Pass the cable along the back of the glove box and then behind the plastic trim of the center console.
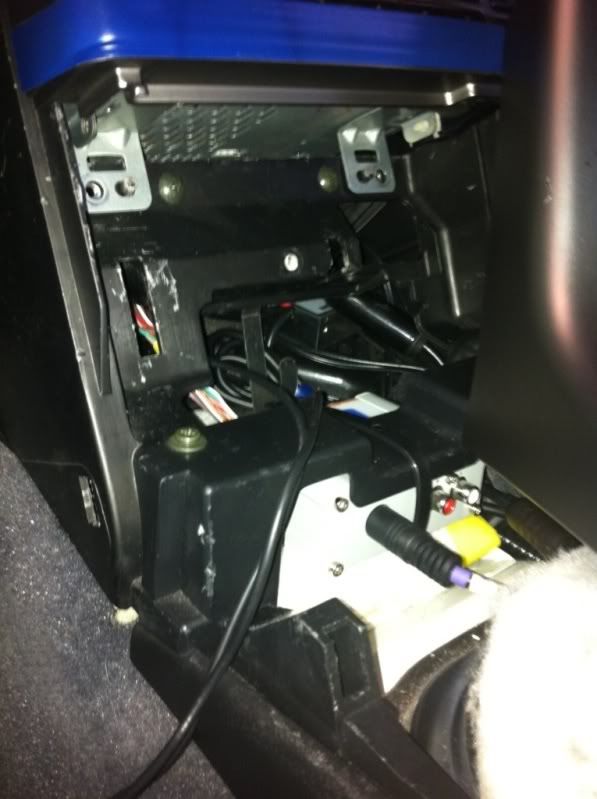
Step 13: Now just connect these 2 cables to the cpu box and follow instructions in the book. Your all done!!
Now i have one head left to place somewhere on the front, i am unsure where to put it... Any ideas are welcome
I will post a quick video on how to do the Radar Dector also !
Step 1: Doing the back
Fit the dual lock velcro to the back of the brackets or screw them in, unlike the front brackets these need no modification.
Since you can only fit one head in the rear mount it so the Blinder label is facing up, i found that to better at sensing things. Mount it directly in between the two licence plate lights.
Shot from the back
Step 2: Running the blinder in the boot
When running the wire there is a plug on the right hand side of the bumper, you will have to take out the lining of the boot to get to it. When pulling out the plug you will have enough room to put the blinder lead plug in the hole and still have room... So you will need to get a little rubber grommet to plug the rest of it up. *Keep the boot plug, you will need this rectangle piece later. Keep some excess in case you need to adjust the sensor.
Run it along the edge towards the passenger side of the car and cable tie to existing wires as you go along and then pass through to the back.
Step 3: Pass the wire from the inside of the back alongside the rear seat.
Step 4
Losen the pillar plastic cover and run the wire from the seat down to the floor.
Now pull the door trim off and pull the carpet up a bit and rung the wires along
Step 5: Run the wires under the carpet, sort of where the skyline or infiniti symbol is on the floor mat, across to the edge of the center console and up into the area under the BOSE unit. To get access to under the bose unit remove the gear box leaver cover by putting the stick into 4th and pulling up at the top edge of the leather boot. Then spin the cover out the way by disconnecting the cables. You dont have to completely remove it.
Step 6: Installing the switch
Remove the blank cover near the boot release and install the switch. This is where that plug from the boot comes in, its a perfect fit to go below the switch.
Run the Ground wire to the mount near where the under plastic steering wheel cover goes on. Dont know if you guys have this mount on the right like me or on the left since your left hand drive...
Then run the mute wire (i dont have one, pretty sure no stock BOSE units do) and then the positive wire which i used the cigarette lighter for.
Use a crimp (not the gay ones supplied) and splice the two positive wires together.
Continue the remaining plug behind the trim of the center console into the area under the BOSE where you ran the other blinder head cables.
Step 7: Mount the led and speaker
I didnt take a pic but i mounted the speaker with double sided tape on this metal unit thing, cant remember what it was but its hidden when you put the plastic steering wheel cover back on.
The LED i mounted in the edge of the air grill, just pull the vent up a bit and run the wire in between the gill and cigarette cover.
Once you do the front you can then attach the head leads, connect all the other leads to the cpu box and push the box in under closest edge of the gear box stick, sort of where the little sliding cover hole is in front of the arm rest.
NOW FOR THE FRONT, if you have the stock grill then its going to be hard but doable. If you have a mesh grill then good luck coming up with a way to mount them!!!! But you gotta cut your grill for these to fit in.
Note: They HAVE to protrude the grill and be centered.
You will need a angle grinder, a file and a mini hack saw. I will take a pic of one you need to buy to make it easy.
Step 8: Remove the push pins and pull out your grill.
This is where you need to mount it (in the white spots) if you dont plan to cover the back then do the red ones also.
Step 9: Spend hours cutting
This is the left side, you will need to cut this much out
This is the right side, you will need to cut this much out
You will need to modify the brackets by filing, cutting and angle grinding the edges of the brackets so the 90degree angle is gone.
You will need to make sure that the two brackets on the inside go inside the bracket and the outside face out... look at the pic u will see what i mean. You need to do it like this so you get a flat surface to mount the bracket.
You will also need to make sure that the cables from the heads face each other NOT LIKE IN THE PIC, i got it wrong and had to change it.
From the outside left
Top left
From the outside right
Top right
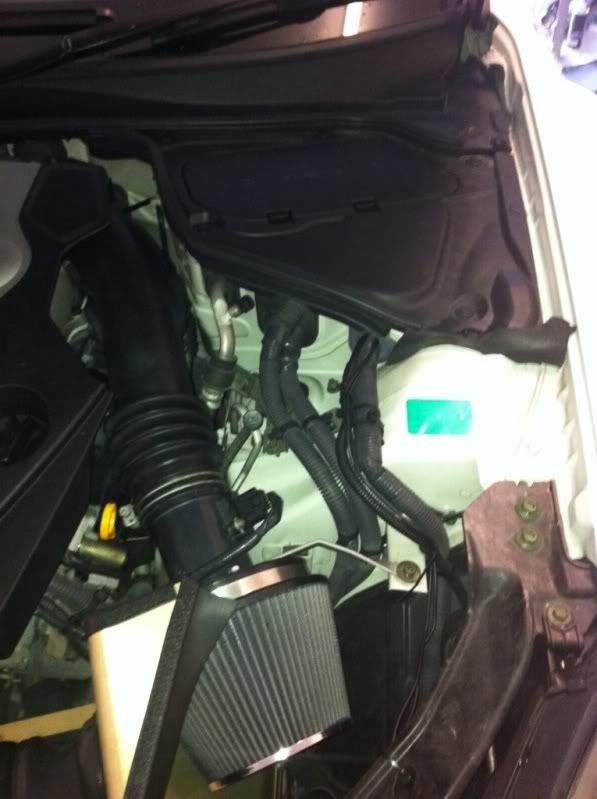
Step 10: Routing the cables
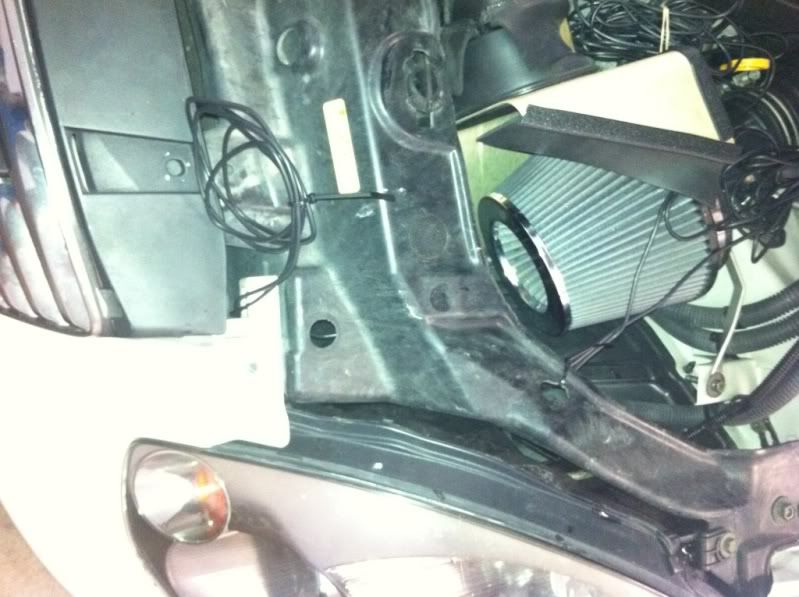
On the left of the radiator there is a hole, route them through there
Leave a bit of slack so in case you have to take off the grill/bumper you can.
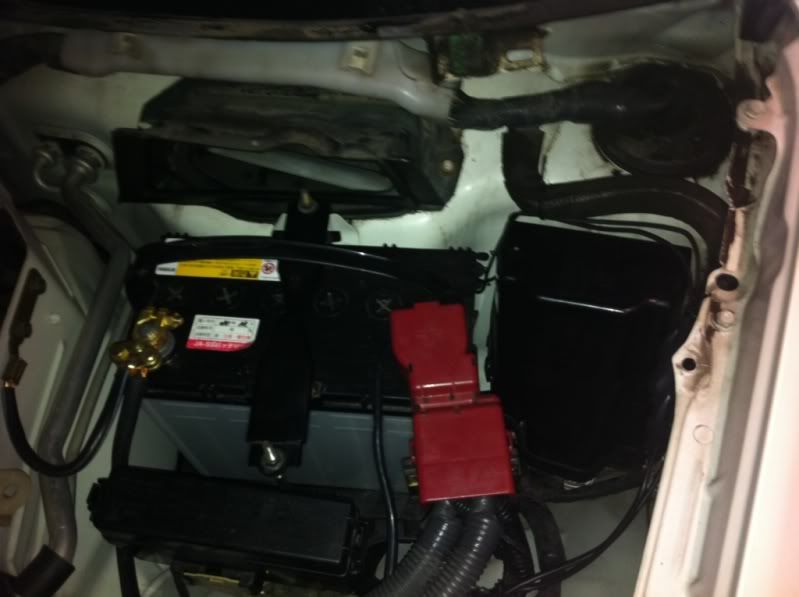
Run the cable along the inner hose and through the rubber inside the battery cover.
Step 11: Take out the battery, the battery plate, fuse box cover and plastic edge that runs along the windscreen. You will then need to drill, i think i used 1/2" holes through the fire wall. USE A SMALL drill bit first to make sure you are not drilling in the wrong position.
It will look like this from the inside
Plug the rubber caps in and pull any excess through into the cabin. Put battery and fuse box plus cover back in
Step 12: Running the cables from in the cabin to the cpu box
You will need to remove the plastic kick cover, the glove box, the side of the center console and then. Pass the cable along the back of the glove box and then behind the plastic trim of the center console.
Step 13: Now just connect these 2 cables to the cpu box and follow instructions in the book. Your all done!!
Now i have one head left to place somewhere on the front, i am unsure where to put it... Any ideas are welcome
I will post a quick video on how to do the Radar Dector also !
Last edited by R6n350GT; Jan 10, 2011 at 05:20 PM.


Put the detector under the sun visor on driver's side. The sunshield on the windshield will hide it. Get a stealth cord ( goes from your mirror to the detector) instead of a 3 ft coiled cord. My V1 is invisible from outside the car.


Yep and i took step by step photos as well!
Just gotta do a quick write up and i will make it a DIY guide.
Just gotta do a quick write up and i will make it a DIY guide.
Trending Topics
Detailed enough!!?
I got them from: http://www.needfultoyz.com/ and there is a awesome support forum at http://www.radardetector.net
I got them from: http://www.needfultoyz.com/ and there is a awesome support forum at http://www.radardetector.net
Email Kim, sales@needfultoyz.com she will look after you.
or Micah from blinderguy@aol.com www.blinderxtremeoutlet.com
Both been very help full to me!
or Micah from blinderguy@aol.com www.blinderxtremeoutlet.com
Both been very help full to me!