
DIY: Ionic Grill Installation


DIY: Ionic Grill Installation
*Note: Mods, feel free to move this to DIY if necessary.
Step 1: Remove the top 4 pop rivets at the top of the OEM grill (you will need a flathead screwdriver). Be sure to hold onto these pop rivets, they will be needed to secure the Ionic grill.
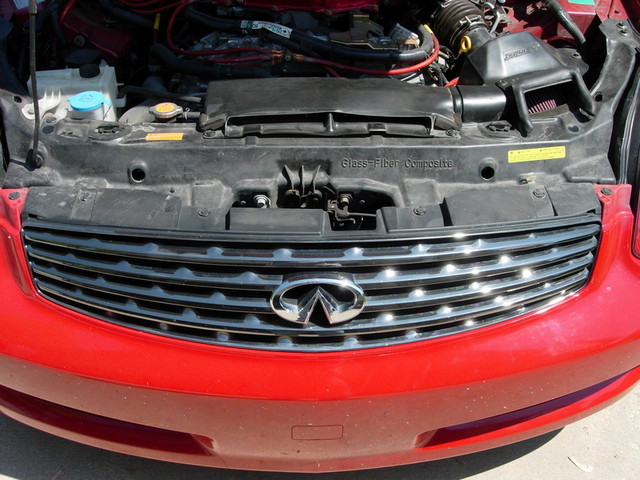
Step 2: there are 4 tabs at the bottom of the grill, sneak your hand down the opening by the hood latch to pinch the tabs and pull gently on the grill. It will slide out of the front fascia mount.

Step 3: You can now remove the grill, there are two tabs at the edges that are left holding the grill in place, some small amount of force is enough to remove the grill from the tabs.
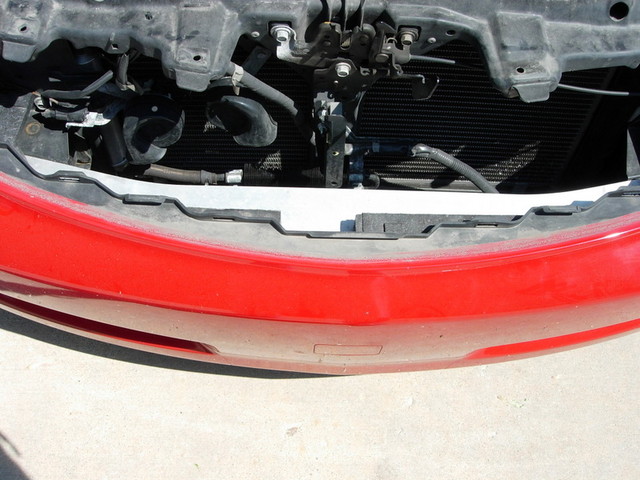
Below: grill removed. Be sure to clean the grill mount area, you will need to place all weather tape there to secure the Ionic.
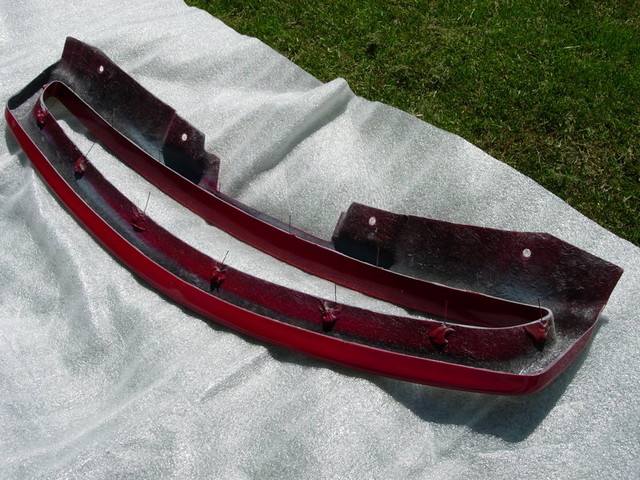
Step 4: Place the grill face down on a soft surface (like carpet, or in this case, grass. You can use the packing foam for added protection from scratching). Take all the clips and have them face the upright position.
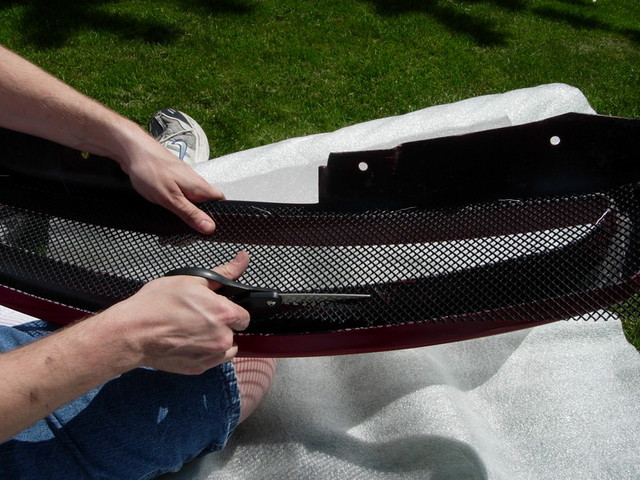
Step 5: Place the mesh on the grill. Now there are two ways to cut the mesh to fit. After placing the mesh, you can secure some of the clips and use a marker (a bright colored permenant marker) and mark where to cut. Or, in this example, you can secure all the clips on the mesh and cut while the mesh is on the grill (this is actaully a bit easier IMHO since it creates less work).
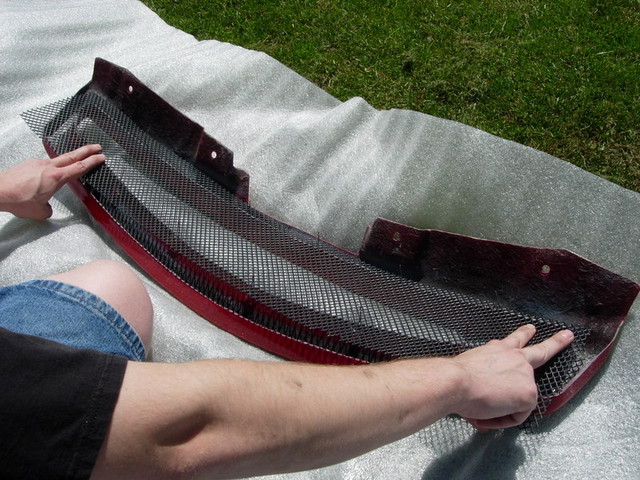
Step 6: Once the clips are secured and the mesh is flat against the curves of the grill, begin cutting with a pari of scissors (any decent office scissors will do the job)
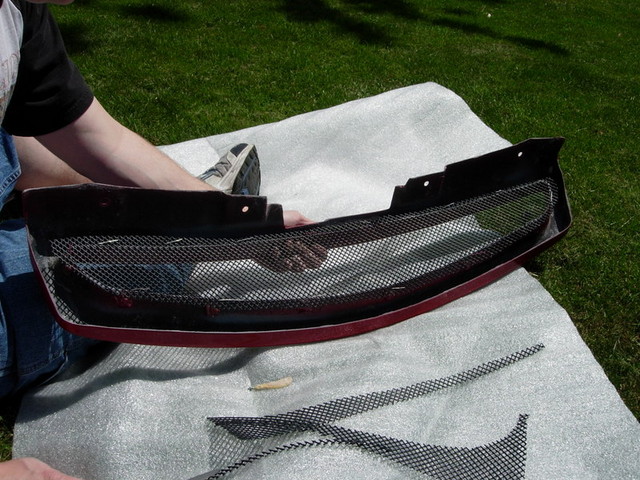
Below: Mesh on and cut
Step 7: Place the grill on the front fascia. Do not apply the double sided tape yet. This will be a test fit.
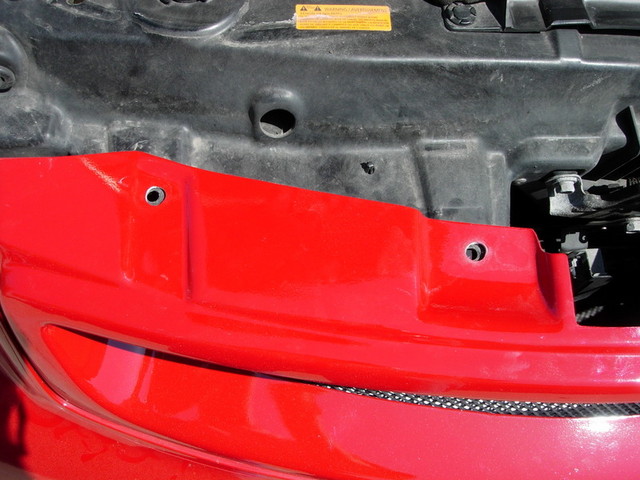
Step 8: Check the pre-drilled holes, they should match up pretty good. If not, jsut make a mark with a marker on where to cut and use a dremel or drill to adjust the hole
Step 9. Once the holes are adjusted, place the grill back on the car for another test fit. If everything lines up, take the grill off and place 3M ALL-WEATHER double sided tape on the bottom of the Ionic grill to secure it on the bottom. Install the grill on the front fascia, secure the top of the grill with the four pop rivets from the OEM grill.
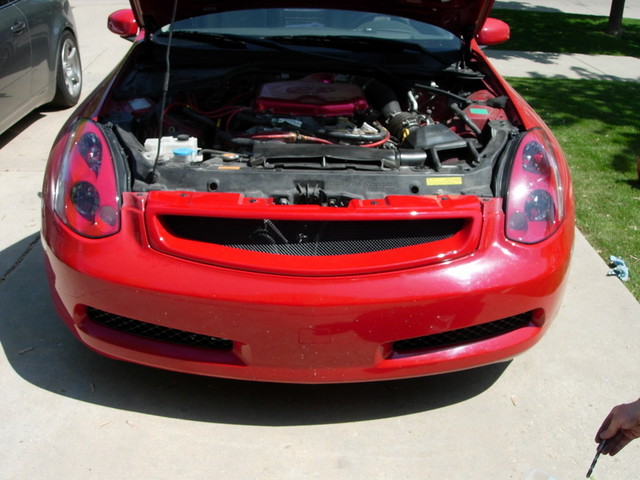
Install complete!
Thanks to Mark for using his car and grill for this install and major props to Jose for making a great product!!!!!
Step 1: Remove the top 4 pop rivets at the top of the OEM grill (you will need a flathead screwdriver). Be sure to hold onto these pop rivets, they will be needed to secure the Ionic grill.
Step 2: there are 4 tabs at the bottom of the grill, sneak your hand down the opening by the hood latch to pinch the tabs and pull gently on the grill. It will slide out of the front fascia mount.
Step 3: You can now remove the grill, there are two tabs at the edges that are left holding the grill in place, some small amount of force is enough to remove the grill from the tabs.
Below: grill removed. Be sure to clean the grill mount area, you will need to place all weather tape there to secure the Ionic.
Step 4: Place the grill face down on a soft surface (like carpet, or in this case, grass. You can use the packing foam for added protection from scratching). Take all the clips and have them face the upright position.
Step 5: Place the mesh on the grill. Now there are two ways to cut the mesh to fit. After placing the mesh, you can secure some of the clips and use a marker (a bright colored permenant marker) and mark where to cut. Or, in this example, you can secure all the clips on the mesh and cut while the mesh is on the grill (this is actaully a bit easier IMHO since it creates less work).
Step 6: Once the clips are secured and the mesh is flat against the curves of the grill, begin cutting with a pari of scissors (any decent office scissors will do the job)
Below: Mesh on and cut
Step 7: Place the grill on the front fascia. Do not apply the double sided tape yet. This will be a test fit.
Step 8: Check the pre-drilled holes, they should match up pretty good. If not, jsut make a mark with a marker on where to cut and use a dremel or drill to adjust the hole
Step 9. Once the holes are adjusted, place the grill back on the car for another test fit. If everything lines up, take the grill off and place 3M ALL-WEATHER double sided tape on the bottom of the Ionic grill to secure it on the bottom. Install the grill on the front fascia, secure the top of the grill with the four pop rivets from the OEM grill.
Install complete!
Thanks to Mark for using his car and grill for this install and major props to Jose for making a great product!!!!!


Registered User
iTrader: (3)
Joined: May 2007
Posts: 4,383
Likes: 27
From: pinellas county FLA, queens N.Y.
Trending Topics


Once you use the double-sided tape on the grille, this essentially becomes a "permanent" installation right?
I will need to take the bumper off a later time to replace the headlights and factory mesh.
Does having the double-sided tape make a huge difference in the way it looks? And will the grille rattle without it??
I will need to take the bumper off a later time to replace the headlights and factory mesh.
Does having the double-sided tape make a huge difference in the way it looks? And will the grille rattle without it??

Originally Posted by jimmyshaker
Once you use the double-sided tape on the grille, this essentially becomes a "permanent" installation right?
I will need to take the bumper off a later time to replace the headlights and factory mesh.
Does having the double-sided tape make a huge difference in the way it looks? And will the grille rattle without it??
I will need to take the bumper off a later time to replace the headlights and factory mesh.
Does having the double-sided tape make a huge difference in the way it looks? And will the grille rattle without it??

Originally Posted by elayman
just making sure, you adjust the holes on the grill, not on the car correct? if they don't match up?