
Coupe Window Motor removal / repair


Joined: Jun 2008
Posts: 200
Likes: 0
From: pemBROKE pines
Coupe Window Motor removal / repair
So after finding all of the threads on the window motor trick and getting it to operate again. I figure I will add pictures to help out those who don't know where to look.
It took me a total of an hour from removal to reinstall (DON'T RUSH YOURSELVES).
Do NOT ATTEMPT IF YOU DON'T think you CAN REASSEMBLE
Follow the pictures and you won't break any parts off.
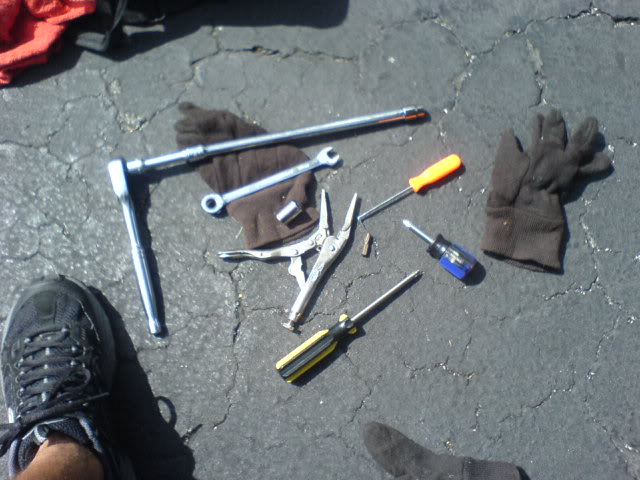
Tools Used:
10MM Socket and ratchet wrench
12MM Socket and ratchet wrench
Short and long #2 phillips screwdrivers
Right angle pick
Needle nose vise grips and #2 Phillips bit (I think one of the screws was hard to get to).
Gloves (unless you like graphite grease all over your hands.
It took me a total of an hour from removal to reinstall (DON'T RUSH YOURSELVES).
Do NOT ATTEMPT IF YOU DON'T think you CAN REASSEMBLE
Follow the pictures and you won't break any parts off.
Tools Used:
10MM Socket and ratchet wrench
12MM Socket and ratchet wrench
Short and long #2 phillips screwdrivers
Right angle pick
Needle nose vise grips and #2 Phillips bit (I think one of the screws was hard to get to).
Gloves (unless you like graphite grease all over your hands.
Last edited by obex26; Dec 27, 2009 at 09:15 AM.
Joined: Jun 2008
Posts: 200
Likes: 0
From: pemBROKE pines
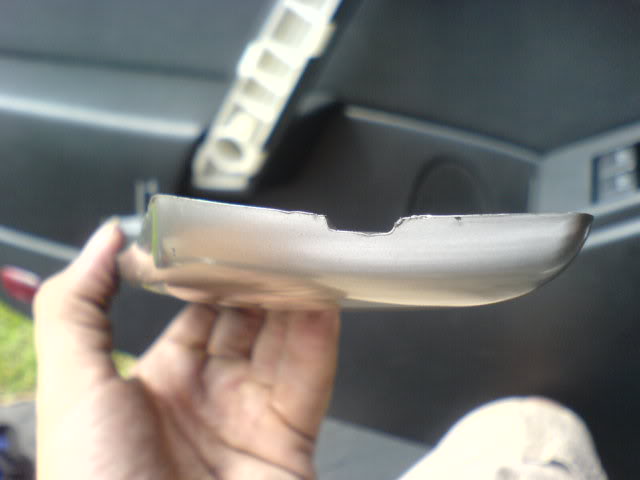
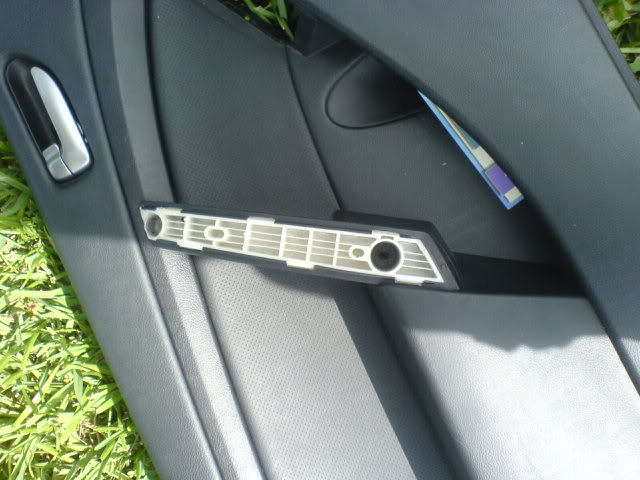
First remove the silver cover of the grab handle:
Picture showes the tab to use the pick to pop it up. There are 6 clips along the sides that snap in and out of place. You can also use a flat head #1 screwdriver to pop this up.

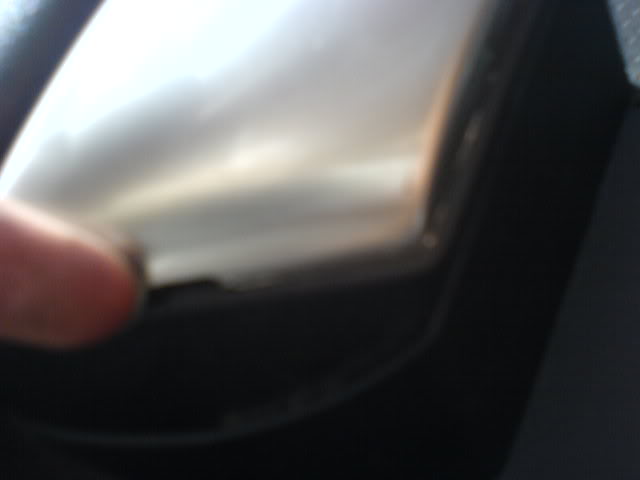
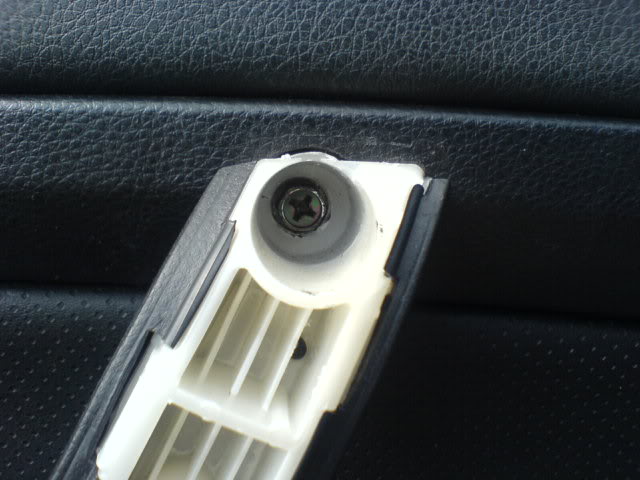
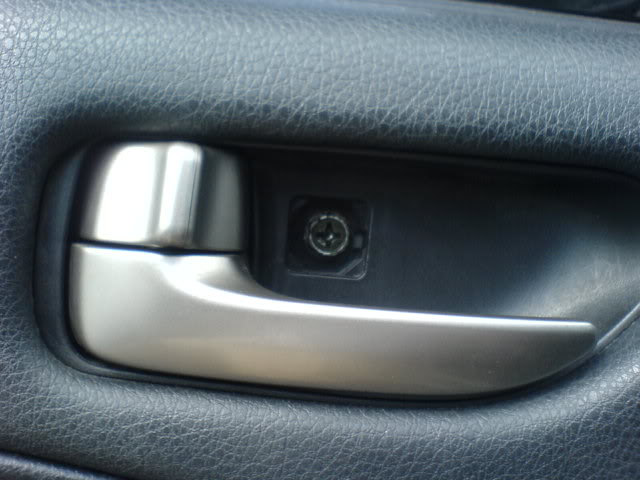
Once removed you will see two holes these are the first screws you need to remove I recommend using the socket as to not strip out the heads.
Picture showes the tab to use the pick to pop it up. There are 6 clips along the sides that snap in and out of place. You can also use a flat head #1 screwdriver to pop this up.
Once removed you will see two holes these are the first screws you need to remove I recommend using the socket as to not strip out the heads.
Joined: Jun 2008
Posts: 200
Likes: 0
From: pemBROKE pines
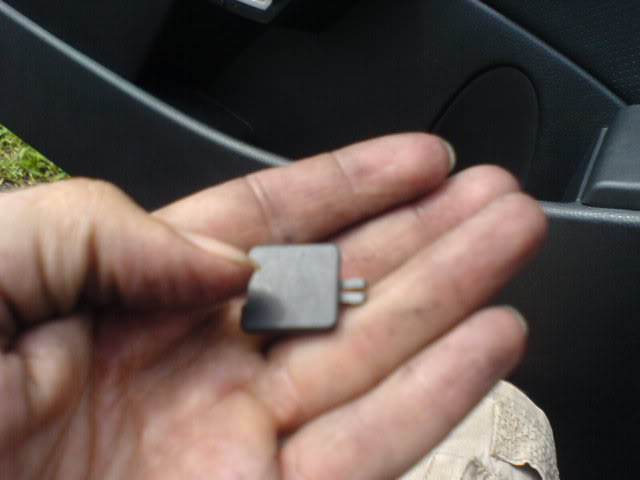
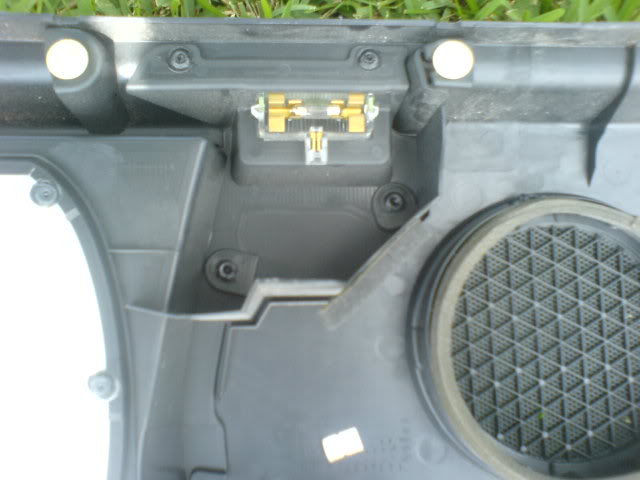
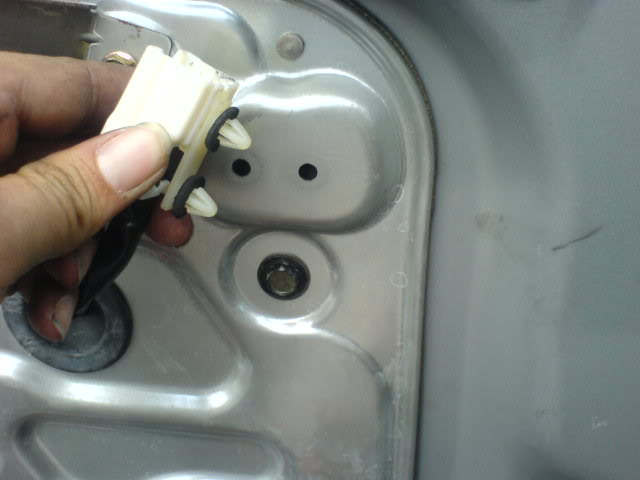
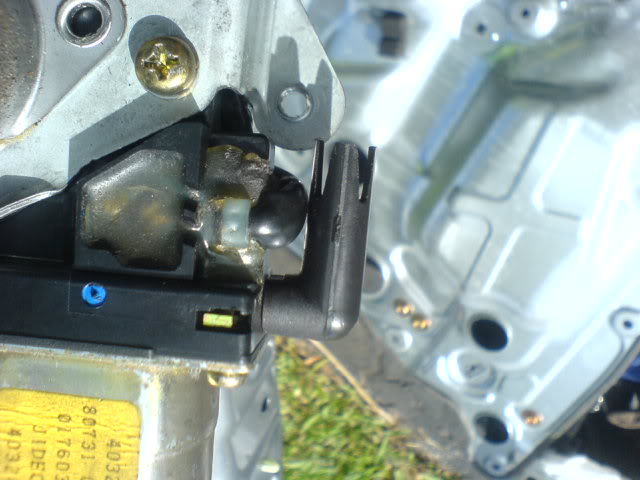
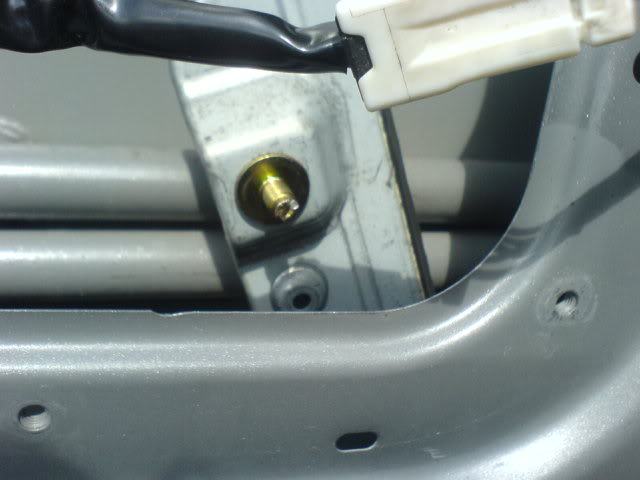
In the pocket for the door release is a little square remove this with the pick or your fingernail. Here is the third screw that needs to be removed.

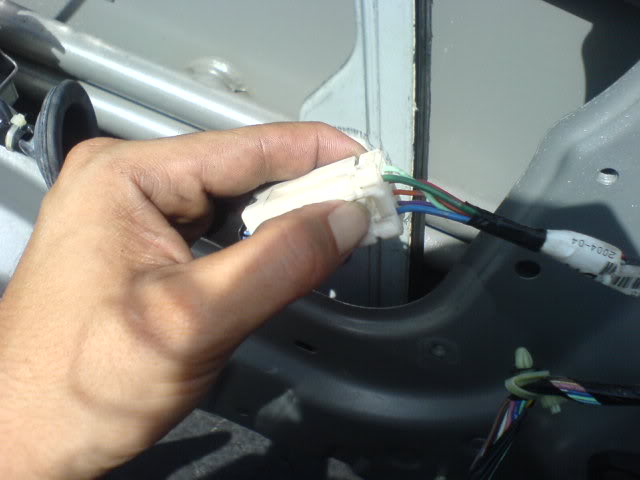
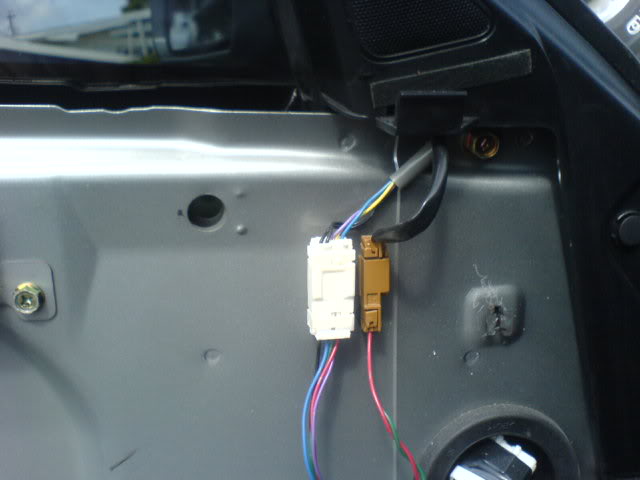
Next you need to lift up on the window controls (It will come out by lifting on it and you need to unplug the plastic harness clip.
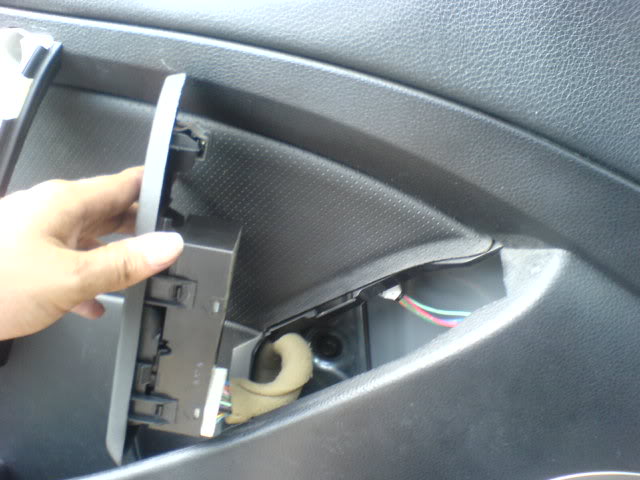
The bottom plug is the one from the window controls
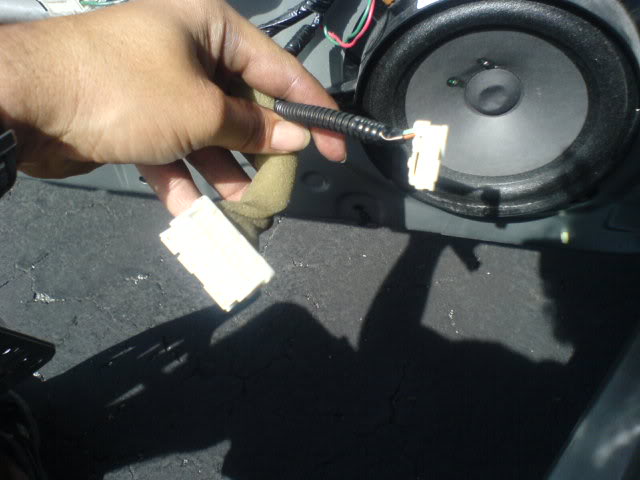
Next you need to lift up on the window controls (It will come out by lifting on it and you need to unplug the plastic harness clip.
The bottom plug is the one from the window controls
Joined: Jun 2008
Posts: 200
Likes: 0
From: pemBROKE pines
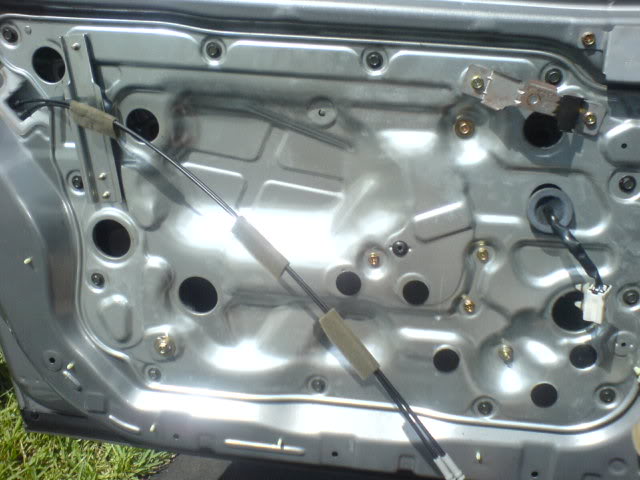
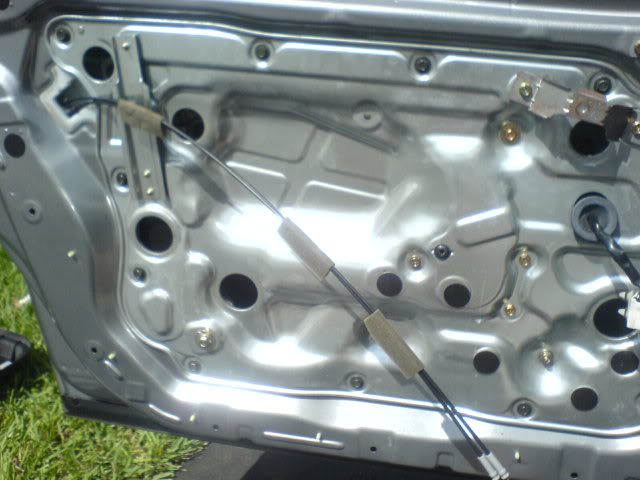
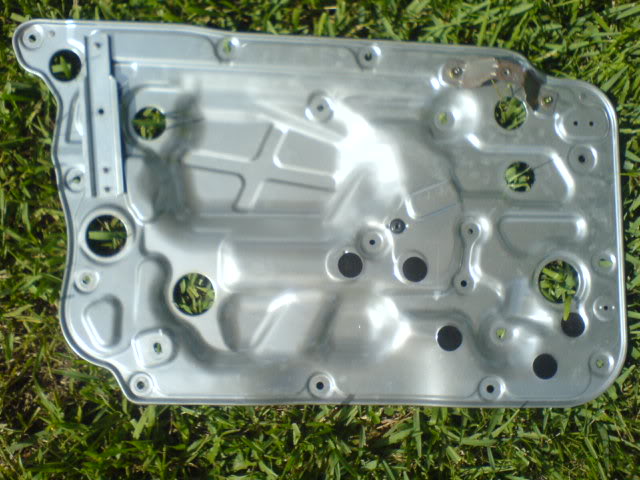
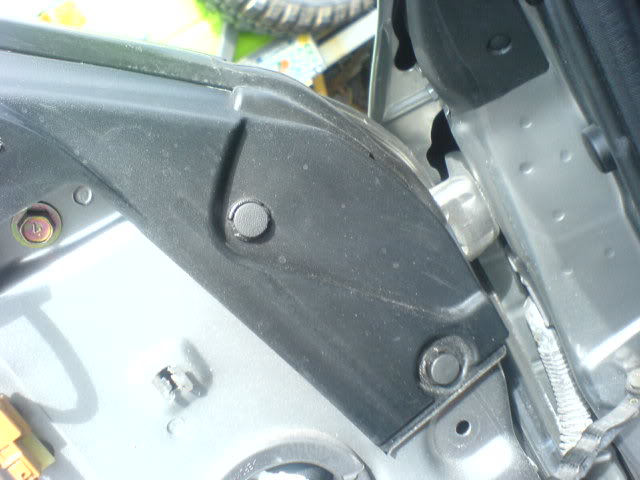
The door panel should now lift up and off of the window line.
Do NOT yank on the panel on the back side there are two cables that attach to the lock and to the lever those are on cables kind of like a bicycle brake. Remove those and also the white plug for the light that is on the bottom of the door panel.
Once those three parts are loose you will be able to put the panel out of your way.
Joined: Jun 2008
Posts: 200
Likes: 0
From: pemBROKE pines
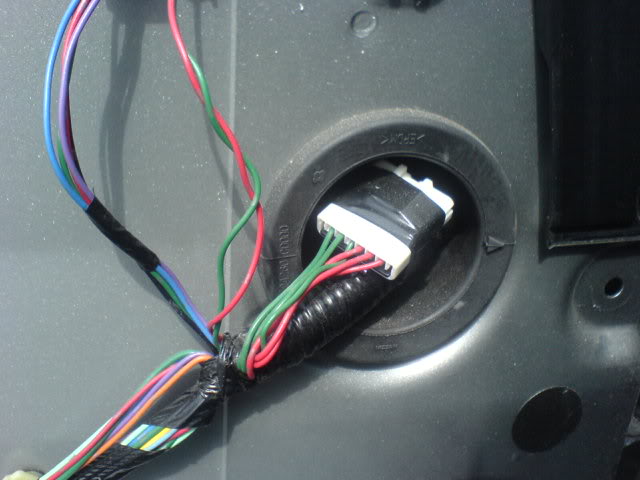
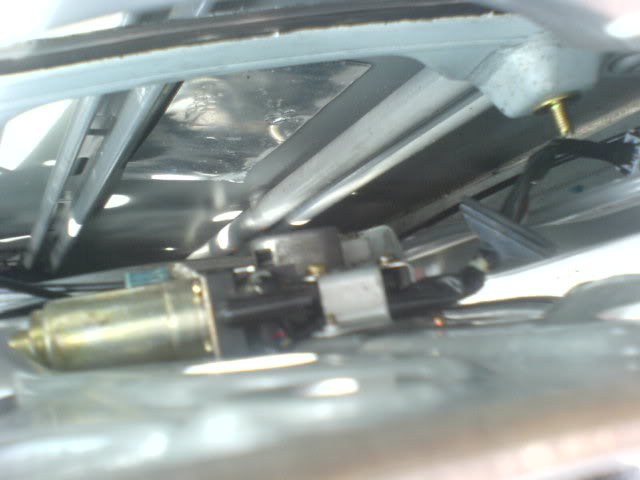
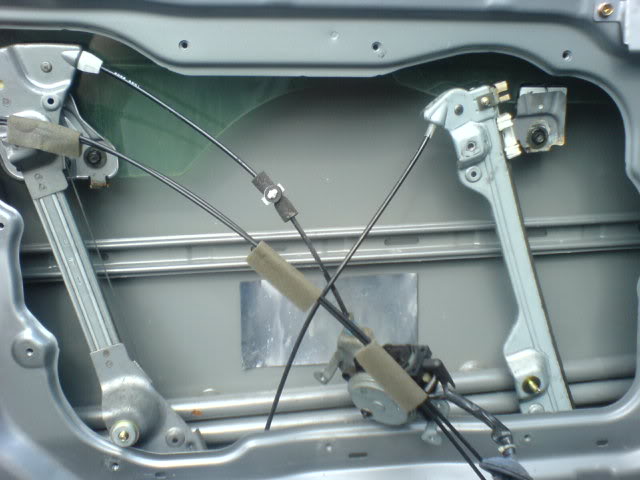
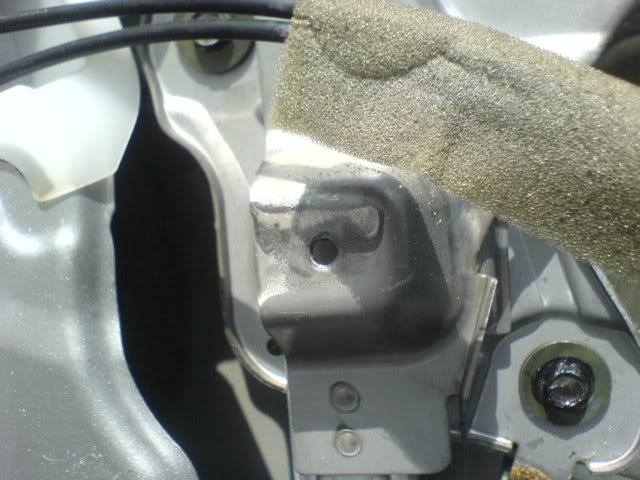
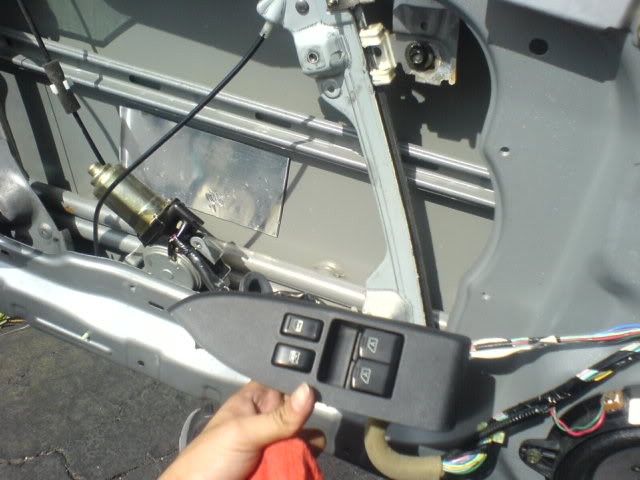
Your door should look something like this now.
Yes cables hanging and you will need to release a couple of plugs for wiring.

And a couple of tabs.

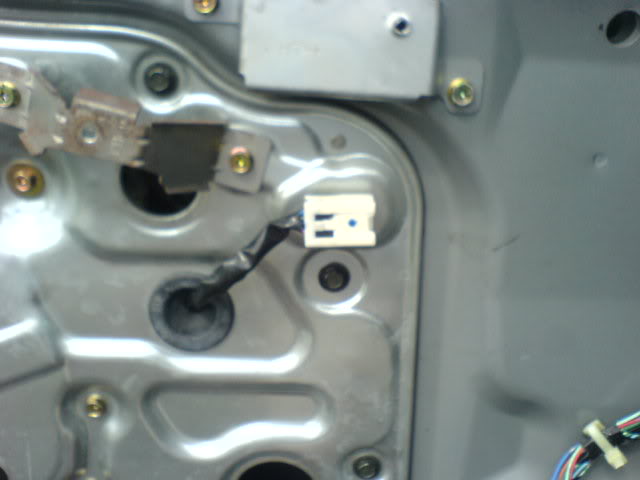
This one can stay.
Yes cables hanging and you will need to release a couple of plugs for wiring.
And a couple of tabs.
This one can stay.
Joined: Jun 2008
Posts: 200
Likes: 0
From: pemBROKE pines
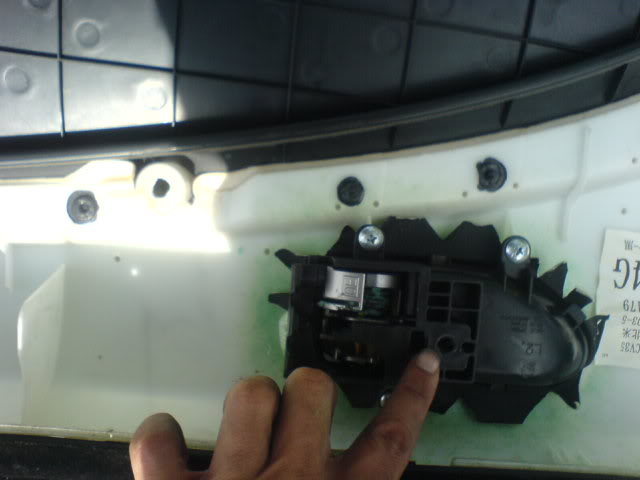
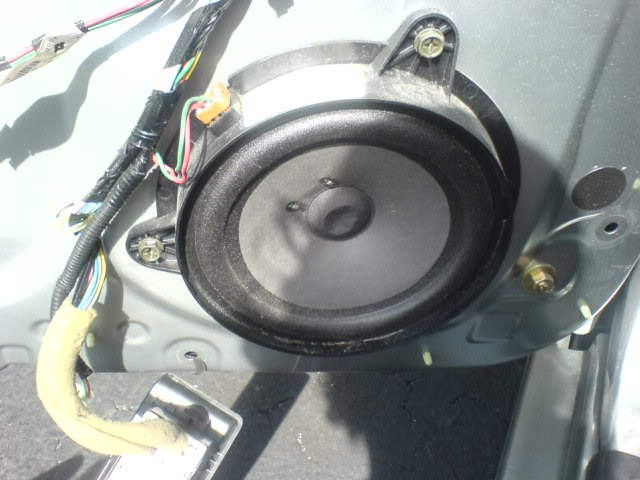
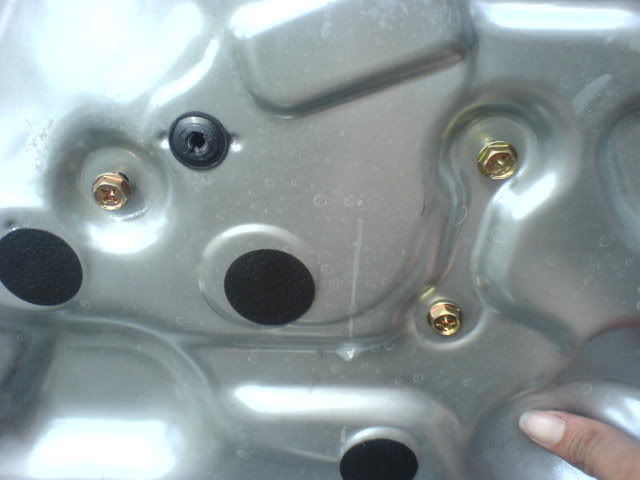
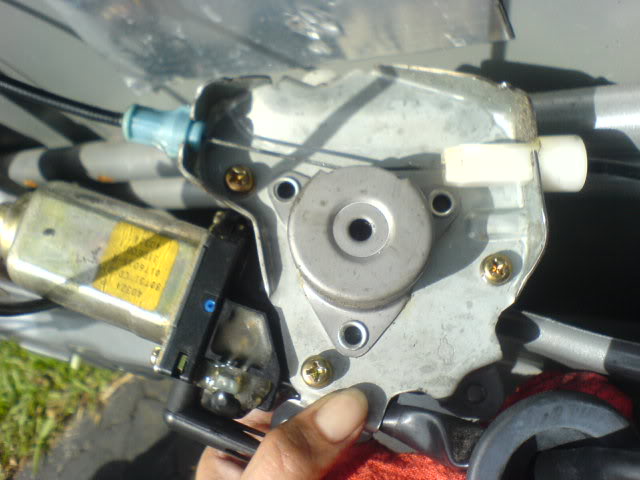
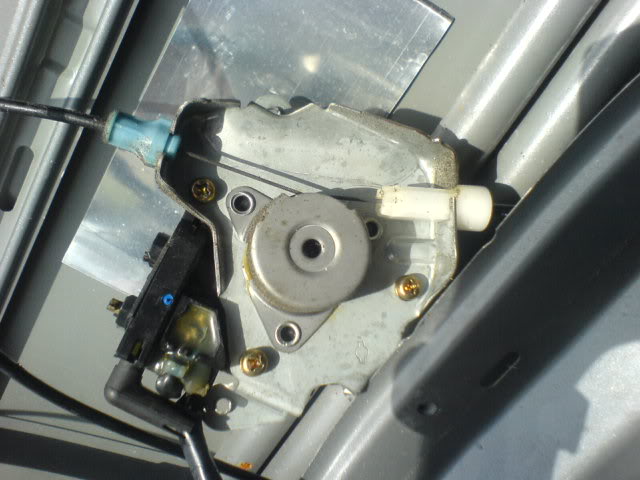
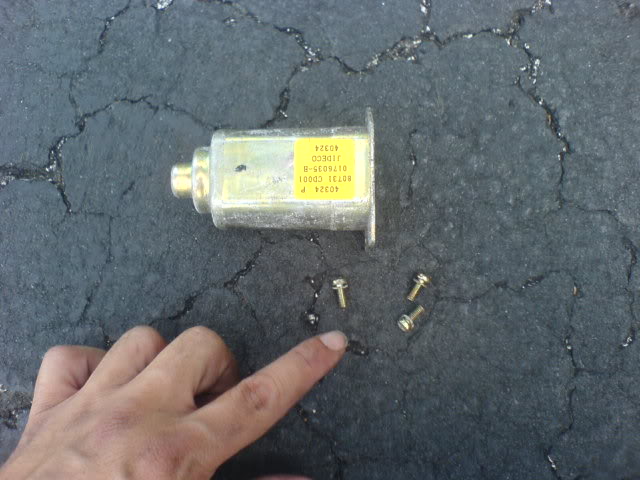
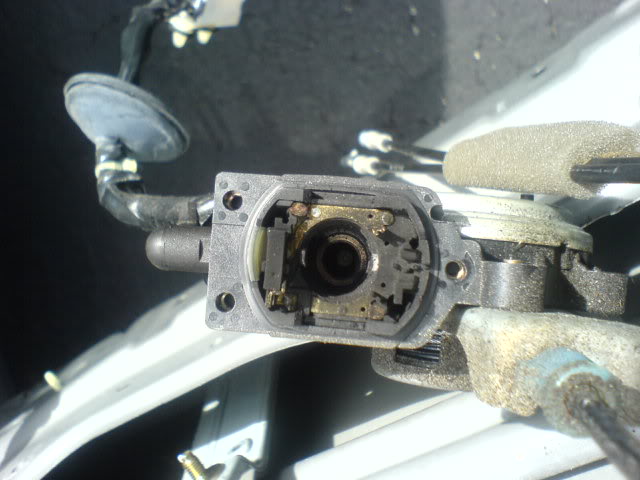
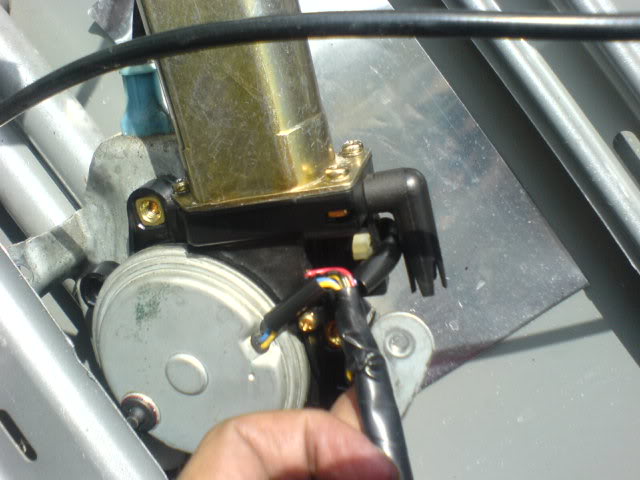
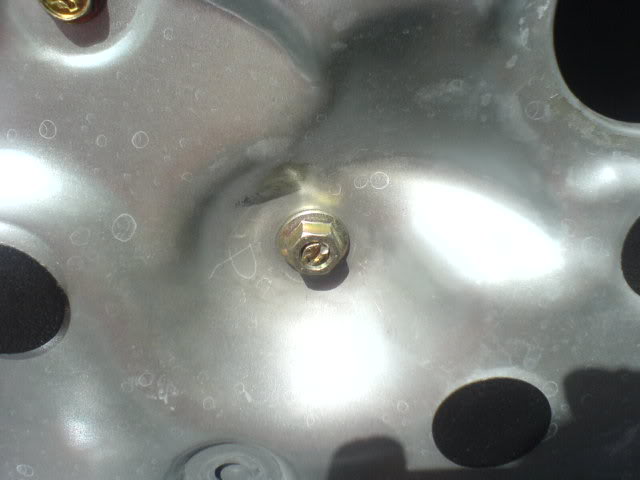
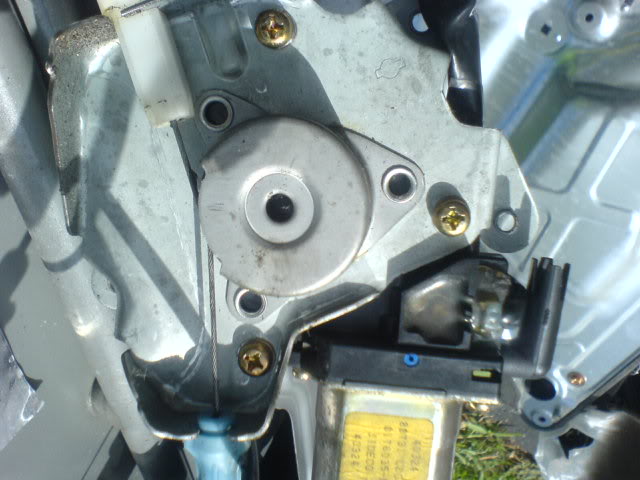
To remove the shield you need to remove the black screws first.
The gold screws hold the arms and the window motor.
The window motor is screwed to the shield

The gold screws hold the arms and the window motor.
The window motor is screwed to the shield
Joined: Jun 2008
Posts: 200
Likes: 0
From: pemBROKE pines

Trending Topics
Joined: Jun 2008
Posts: 200
Likes: 0
From: pemBROKE pines
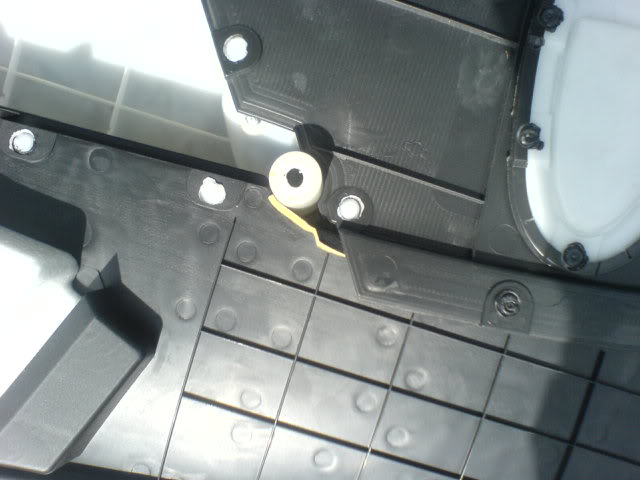
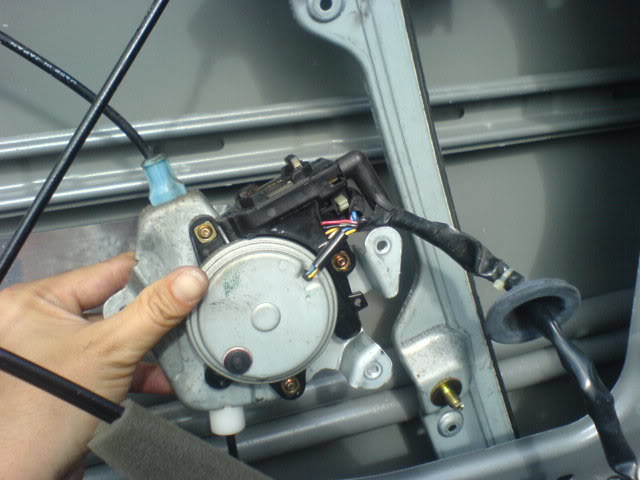
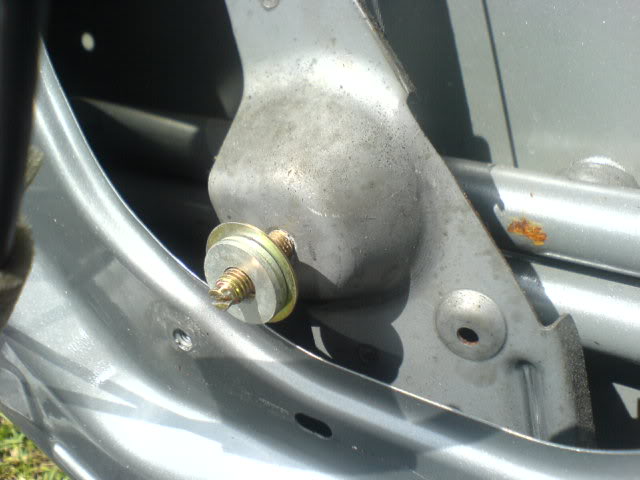
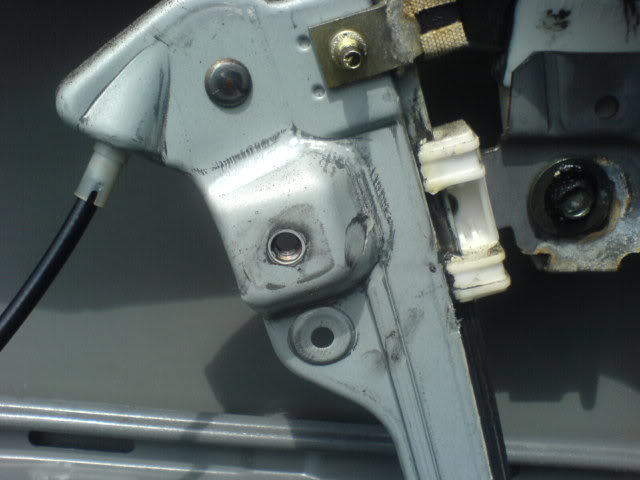
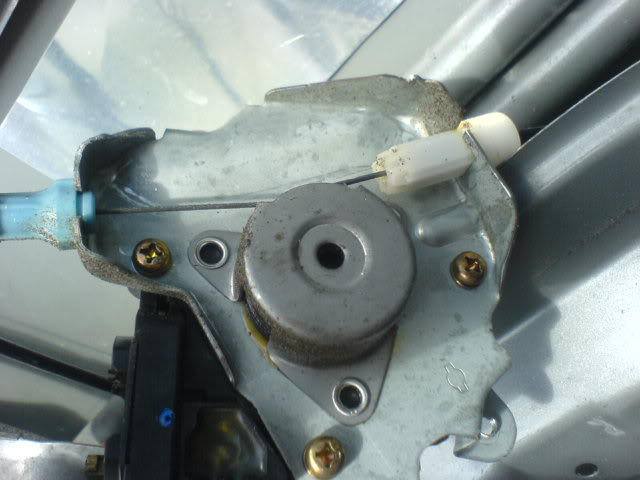
Make sure the washers stay on these areas.
They are what keep the window arms in track and keep it from shifting.

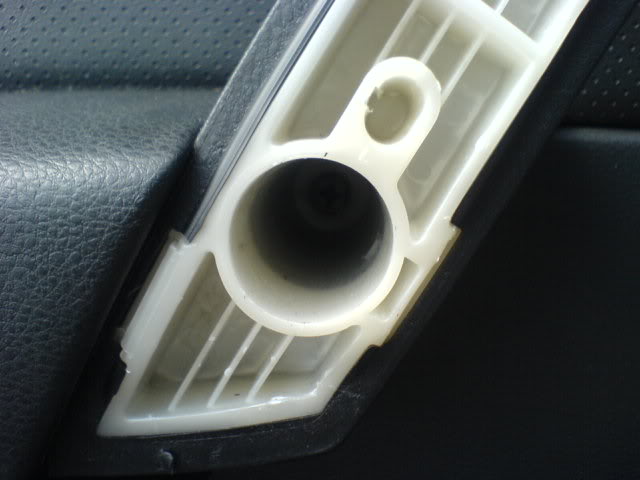
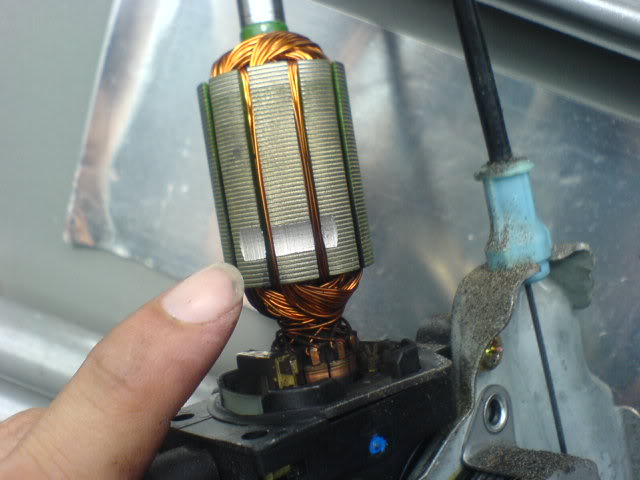
I removed the cover of the turbine to see if there was carbon build up.
Not much. Only clean with compressed air no liquid. NO LIQUID...
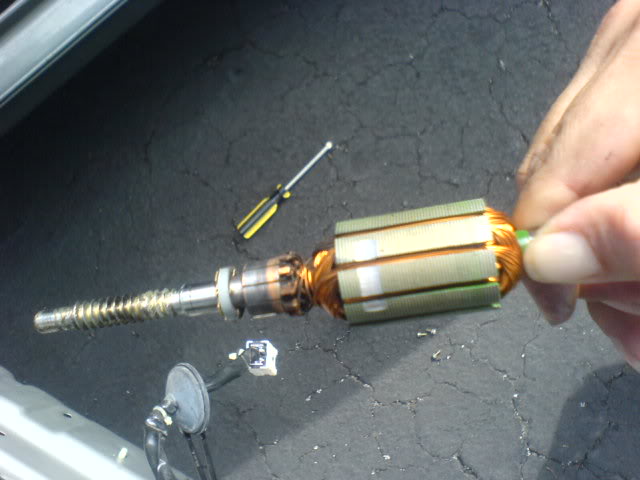
I did have a bit of a hassel getting the turbine to sit back into the motor gear. Be careful and where the three screws for the cover are you have to make sure it is aligned and tighten down equally. Don't force tighten one side it will break the plastic.
Before complete reassembly I plugged in my window controls and cycled through the up and down motion.
If the motor is running you know its the sensors that set the peramiter that are failing and not the window motor.
In full once I confirmed that it was not the motor I reassembled.
Make sure the washers are in place, and there should be no loose nuts or screws I used clear nail polish on all of the gold screws kind of like lock tight.
Now for the drawback. I can power up in manual mode I can power down in manual mode. I can also auto power down in auto. But for some reason if I auto up it gets to the top of the window and sends the window about halfway down and stops.
I have tried doing the reset trick of holding it in the up position for 10 seconds and the down position for 10 seconds but it has not corrected the issue for me.
I myself can live with the auto up feature not working properly I have cycled through up and down for the last 2 months before I decided to post this to ensure that it would still work properly.
Just follow through the pictures to reassemble.
They are what keep the window arms in track and keep it from shifting.
I removed the cover of the turbine to see if there was carbon build up.
Not much. Only clean with compressed air no liquid. NO LIQUID...
I did have a bit of a hassel getting the turbine to sit back into the motor gear. Be careful and where the three screws for the cover are you have to make sure it is aligned and tighten down equally. Don't force tighten one side it will break the plastic.
Before complete reassembly I plugged in my window controls and cycled through the up and down motion.
If the motor is running you know its the sensors that set the peramiter that are failing and not the window motor.
In full once I confirmed that it was not the motor I reassembled.
Make sure the washers are in place, and there should be no loose nuts or screws I used clear nail polish on all of the gold screws kind of like lock tight.
Now for the drawback. I can power up in manual mode I can power down in manual mode. I can also auto power down in auto. But for some reason if I auto up it gets to the top of the window and sends the window about halfway down and stops.
I have tried doing the reset trick of holding it in the up position for 10 seconds and the down position for 10 seconds but it has not corrected the issue for me.
I myself can live with the auto up feature not working properly I have cycled through up and down for the last 2 months before I decided to post this to ensure that it would still work properly.
Just follow through the pictures to reassemble.


Registered User
Joined: Jan 2007
Posts: 503
Likes: 2
The reset button is under one of the black sticky circles of the door when you have the door panel removed.
You have to use that button to do the reset procedure or your auto up will not work properly. Basically the window is getting to the top and pressuing against the window sill and thinking it is a person's hand and it backs the window down as a safety feature.
You have to use that button to do the reset procedure or your auto up will not work properly. Basically the window is getting to the top and pressuing against the window sill and thinking it is a person's hand and it backs the window down as a safety feature.

Can you point out this reset button? I installed my own window motor a lil while ago and am having this auto roll up problem. And opened it back up, and put it back together a few times trying to figure out what is wrong with the auto up sensor.
-Josh
-Josh
Registered User
Joined: Jan 2007
Posts: 503
Likes: 2
take the door panel off and right in the middle of the door there are black round hold covers. a medium sized one covers the reset button. Start peeling them off til you find the one that has a black button behind it.
Joined: Jun 2008
Posts: 200
Likes: 0
From: pemBROKE pines
Well its been what 6 months the window is acting up again so I guess I am back to rebuilding the motor once more. But I am starting to lean to an electrical gremlin.
I have 3 motors waiting to get cleaned up and tested. Lots of graphite in there.
Is it ok to clean it out with WD40? And then just regraphite the moving shaft and put it back together?
Is it ok to clean it out with WD40? And then just regraphite the moving shaft and put it back together?