
DIY: 03-06 G35x AWD Front wheel bearings


Joined: Jul 2005
Posts: 8,818
Likes: 468
From: Taxachusetts
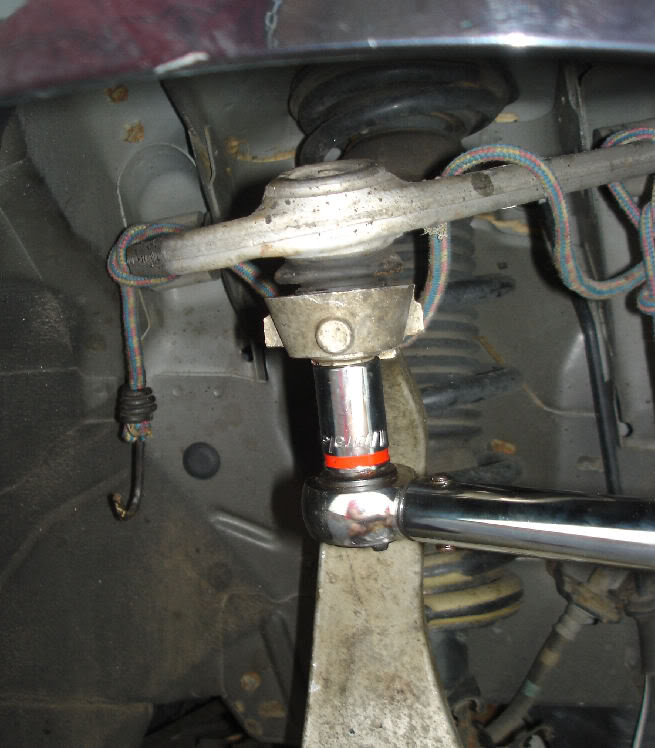
Put the spindle on the lower control arm, and put the nut on. Place the compression rod into the spindle and put the nut on as well.
With the jack, put light pressure under the spindle to lift up the lower control arm slightly. With the 22mm socket, tighten down. Don't torque just yet, but just make sure it's tight. Same with the compression rod. Connect and tighten down. Just make sure the ball-joints seat and you can torque them later without having them spin.
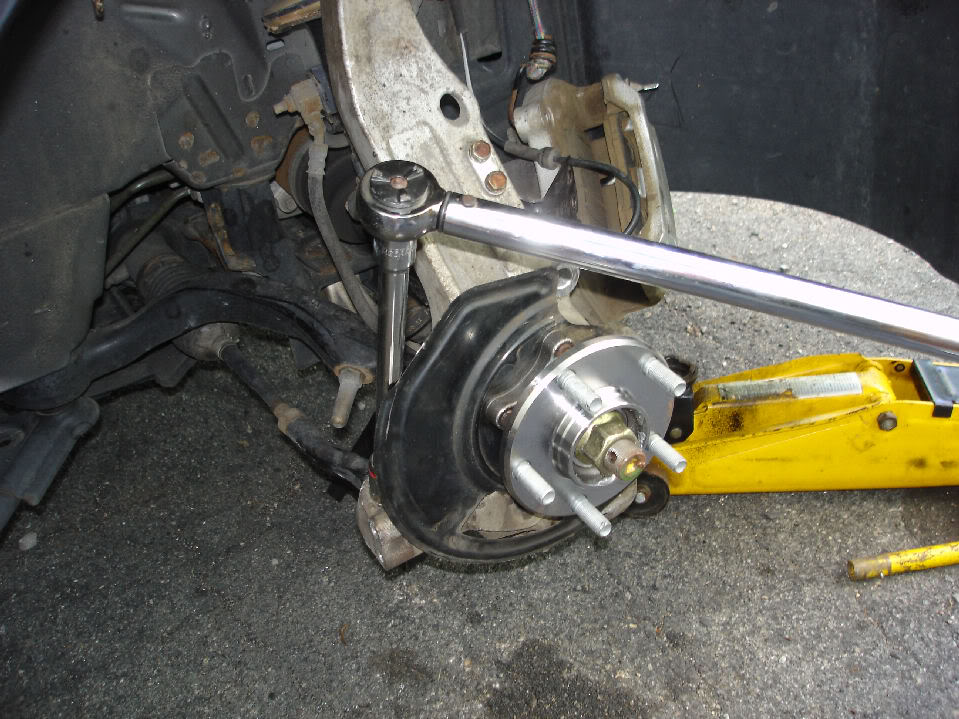
If you moved the caliper to the other side earlier, move it back now. Make sure it's located where it will be bolted on.
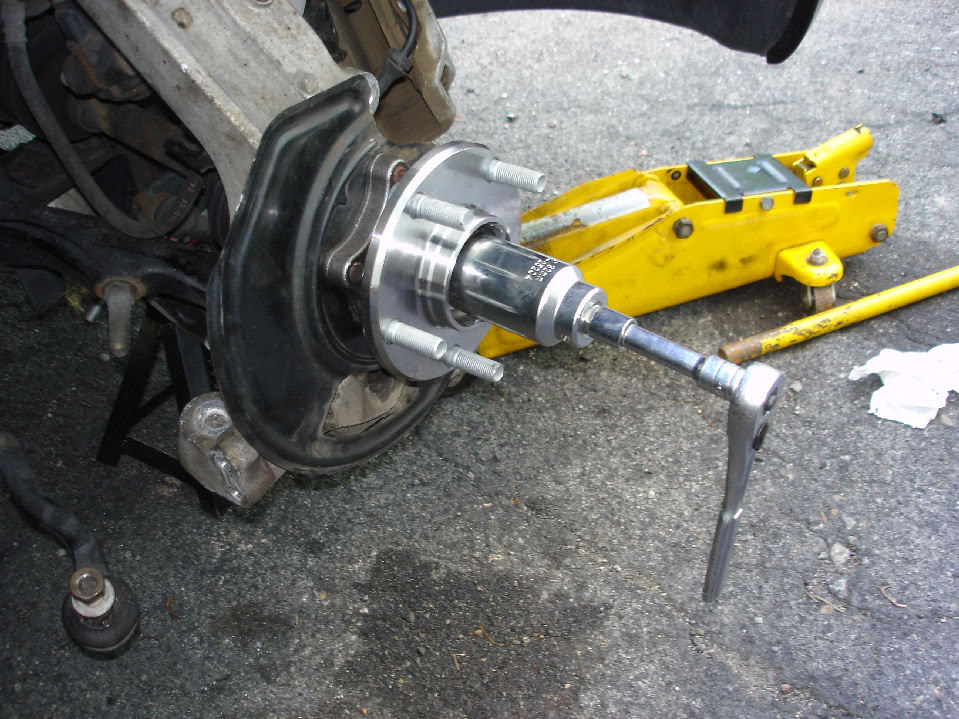
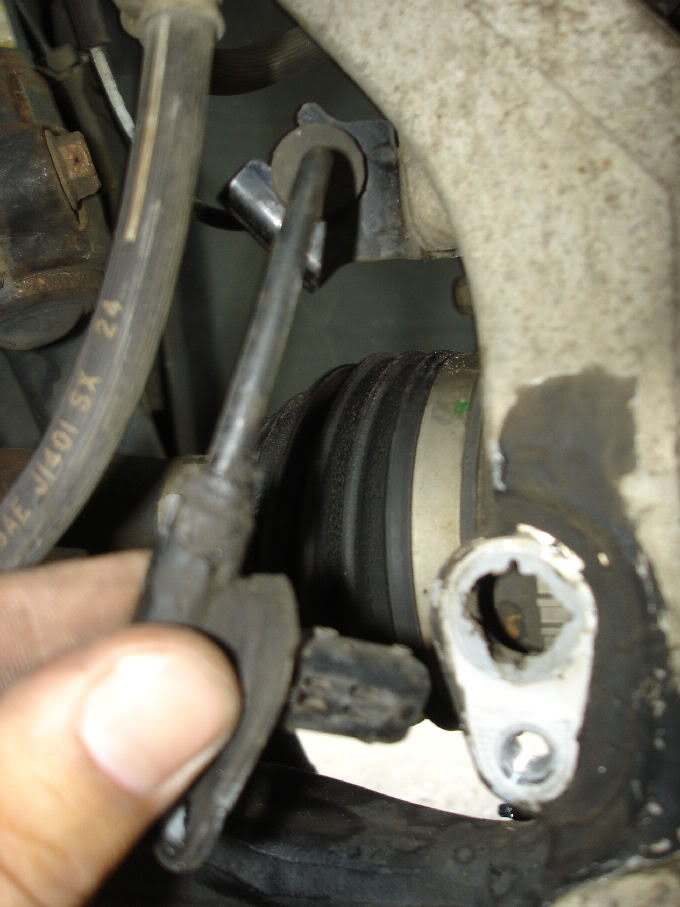
Pull the spindle out slightly and insert the CV axle. Push it in as far as it will go while pushing the spindle back. With a socket, tighten up by hand as much as you can to draw up some slack.
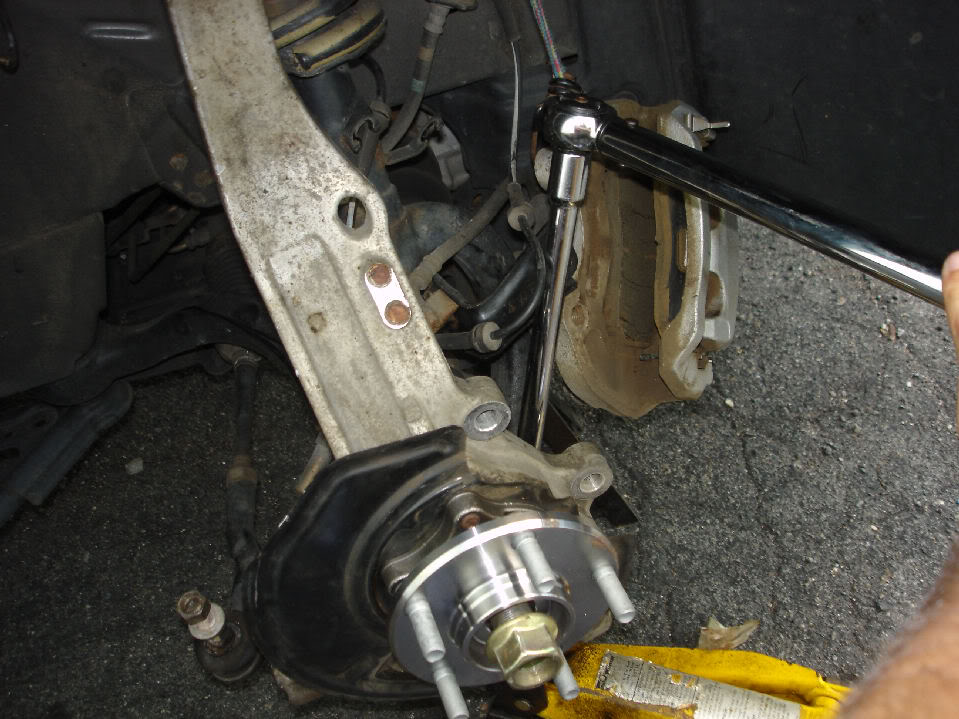
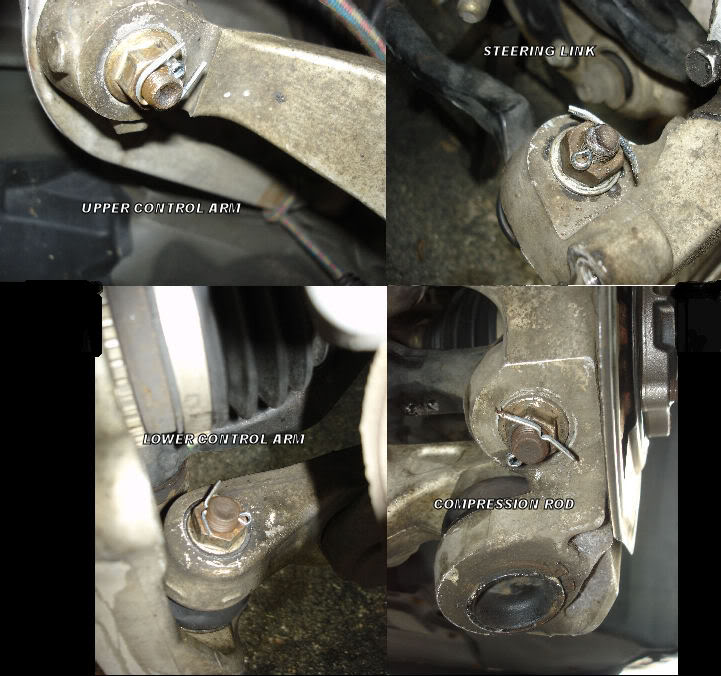
temporarily connect the upper control arm and steering link to hold everything secure while you torque the control arm and compression rod.
Torque spec for lower control arm is 62-77 ft-lbs.
Torque spec for compression rod is 59-69 ft-lbs
Before you process to next step, make sure this is what you see with the brake caliper hanging on the correct side (if you moved it previously)
With the jack, put light pressure under the spindle to lift up the lower control arm slightly. With the 22mm socket, tighten down. Don't torque just yet, but just make sure it's tight. Same with the compression rod. Connect and tighten down. Just make sure the ball-joints seat and you can torque them later without having them spin.
If you moved the caliper to the other side earlier, move it back now. Make sure it's located where it will be bolted on.
Pull the spindle out slightly and insert the CV axle. Push it in as far as it will go while pushing the spindle back. With a socket, tighten up by hand as much as you can to draw up some slack.
temporarily connect the upper control arm and steering link to hold everything secure while you torque the control arm and compression rod.
Torque spec for lower control arm is 62-77 ft-lbs.
Torque spec for compression rod is 59-69 ft-lbs
Before you process to next step, make sure this is what you see with the brake caliper hanging on the correct side (if you moved it previously)
Last edited by Mustang5L5; Jul 31, 2011 at 10:12 PM.
Joined: Jul 2005
Posts: 8,818
Likes: 468
From: Taxachusetts
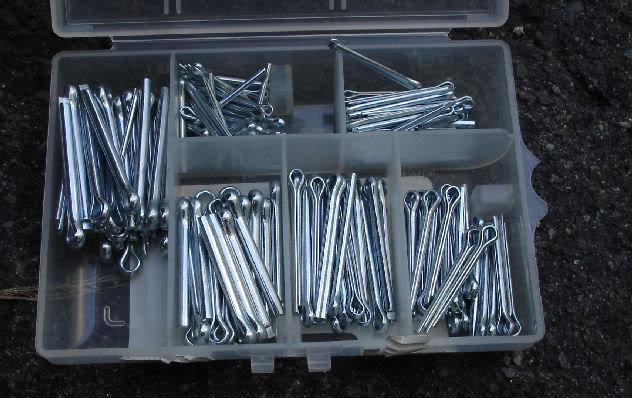
Cotter pins....use NEW ones. This kit was $5 at home depot, but you could probably source out individual pins. I don't know the sizes, but use the biggest pins you can fit in the holes
Joined: Jul 2005
Posts: 8,818
Likes: 468
From: Taxachusetts
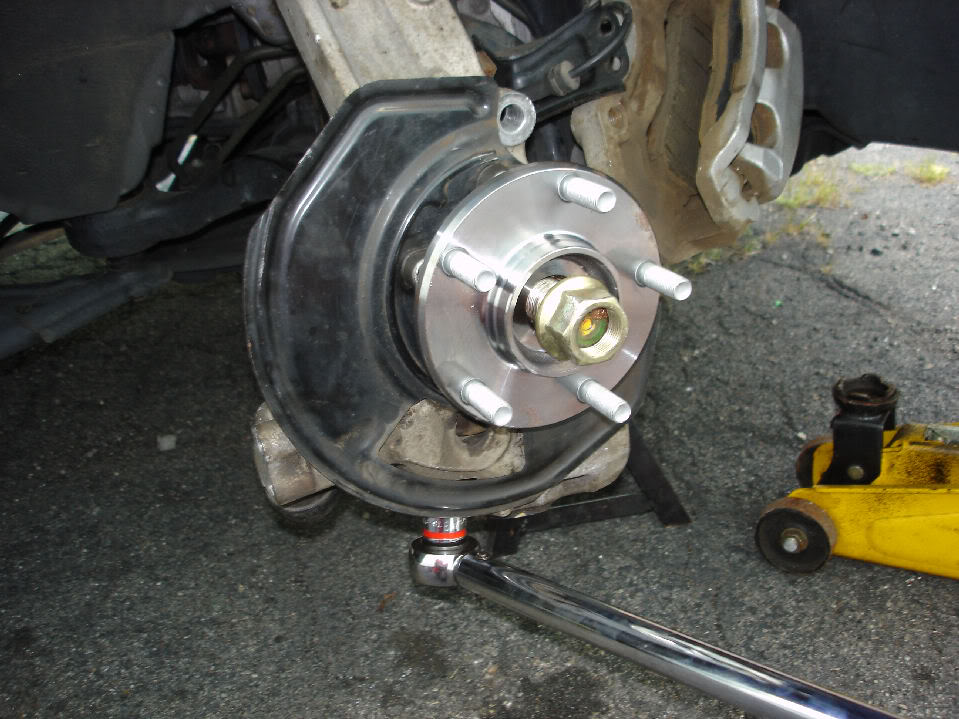
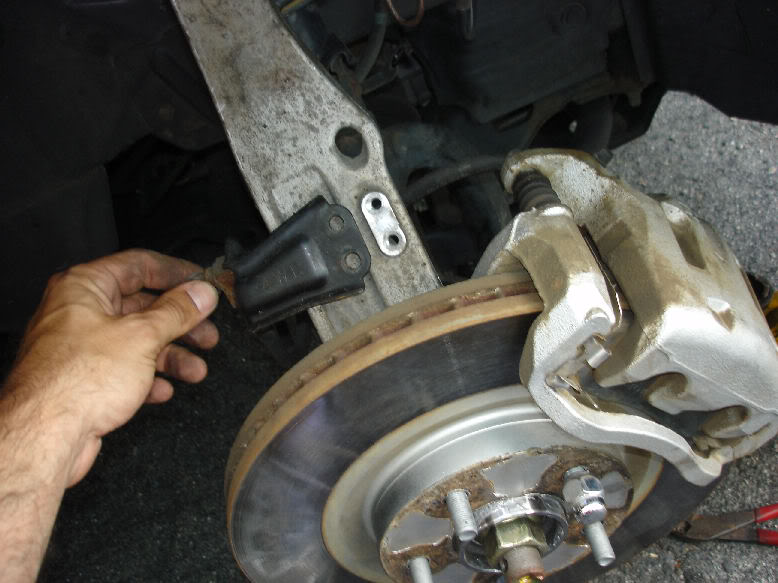
Reconnect this dohickey if you took it off earlier. Torque spec is 45-51 ft-lbs
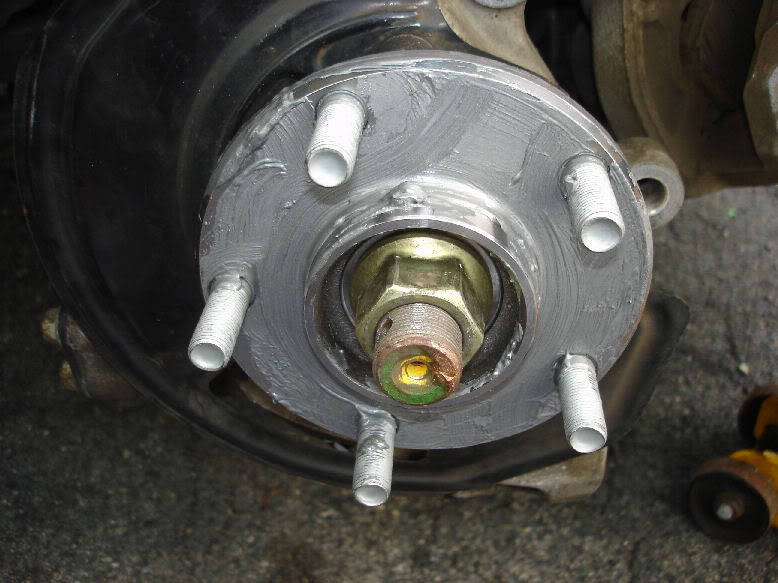
Before sliding the rotor back on, i highly recommend putting anti-seize on the hub face. That way, the next time you take the rotor off, it will come off easily rather than seizing to the hub.
Slide the rotor back on, use a few lug nuts to secure it

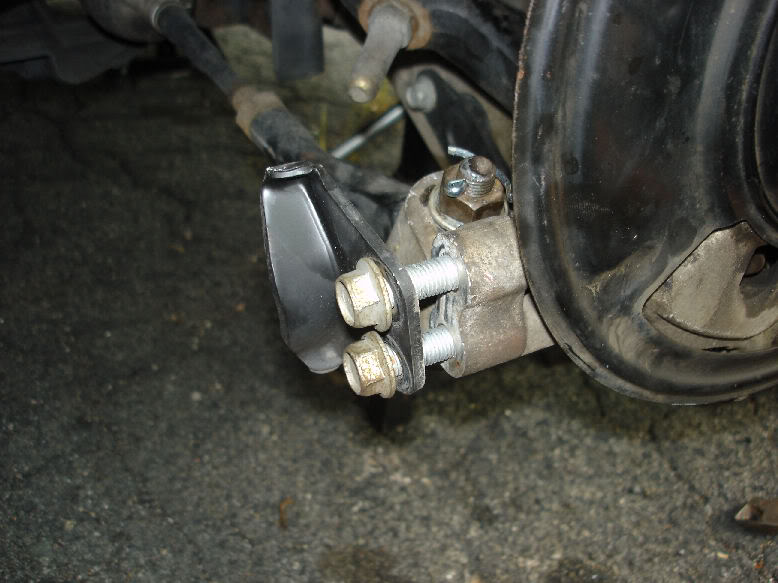
Bolt the caliper back on. Torque spec is 113 ft-lbs Make sure the brake line is loose and not hung up on anything before you bolt it back to spindle The torque spec for the bracket is 8-11 ft-lbs
Before sliding the rotor back on, i highly recommend putting anti-seize on the hub face. That way, the next time you take the rotor off, it will come off easily rather than seizing to the hub.
Slide the rotor back on, use a few lug nuts to secure it
Bolt the caliper back on. Torque spec is 113 ft-lbs Make sure the brake line is loose and not hung up on anything before you bolt it back to spindle The torque spec for the bracket is 8-11 ft-lbs
Last edited by Mustang5L5; Jul 31, 2011 at 10:22 PM.
Joined: Jul 2005
Posts: 8,818
Likes: 468
From: Taxachusetts
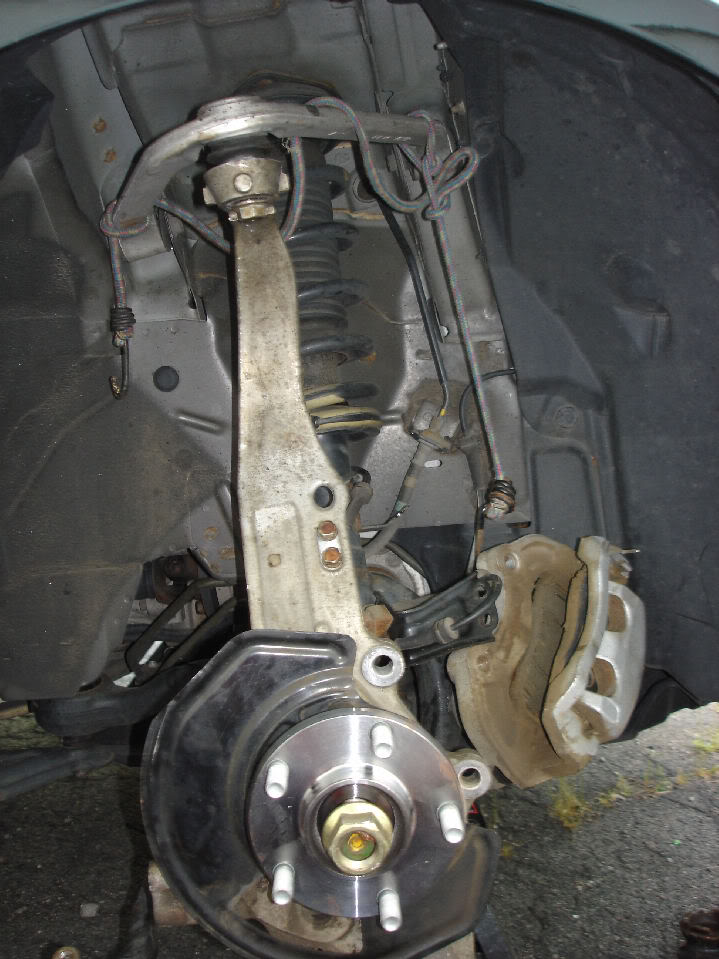
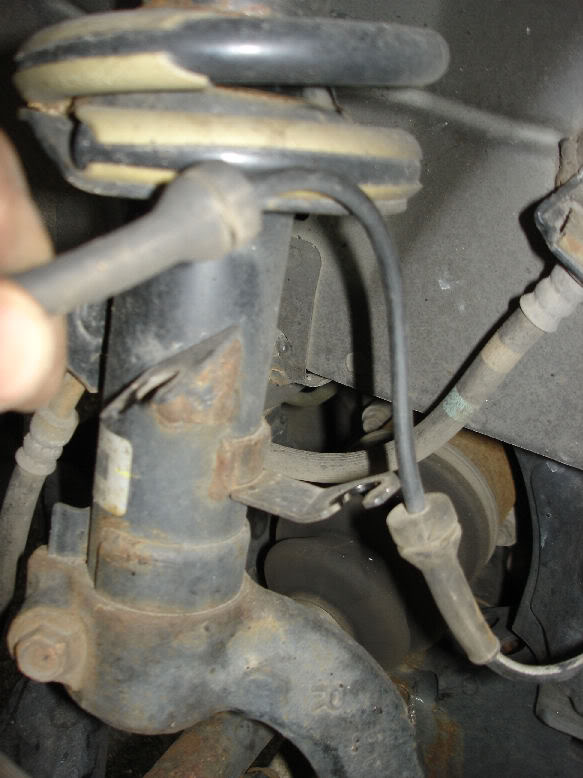
At this point, double check EVERYTHING. Make sure you tighten everything up and didn't miss a thing. Turn the steering wheel side to side and make sure nothing is interfering (mainly the ABS sensor and brake lines)
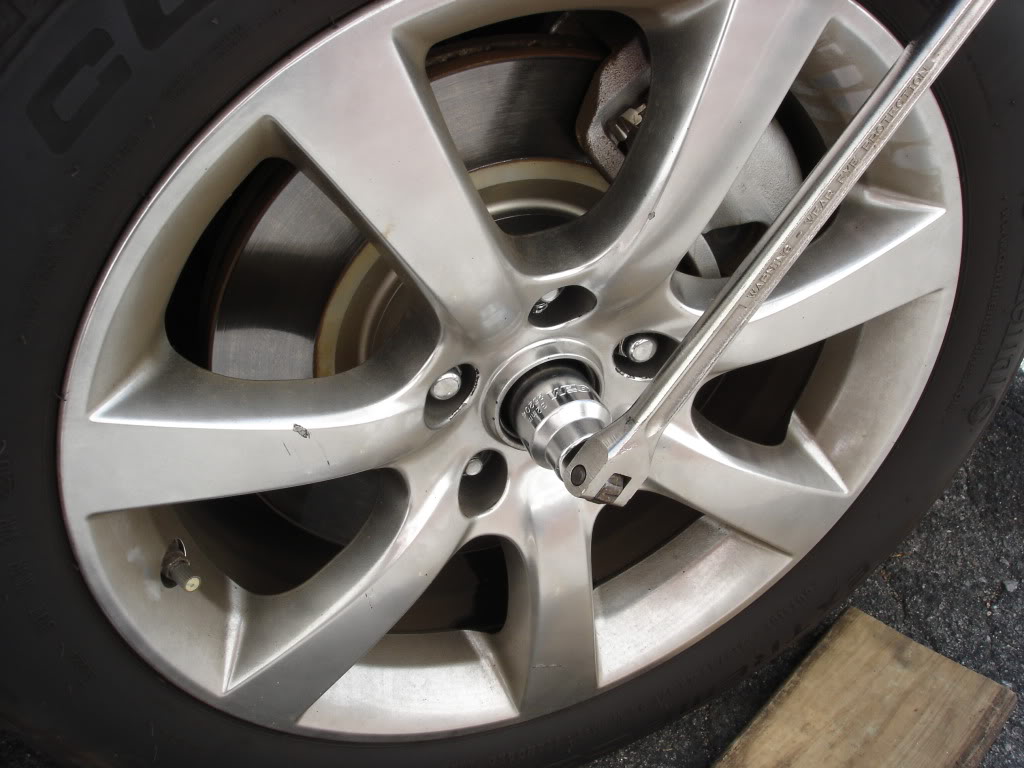
Place wheel back on car without center cap. DO NOT LOWER CAR DOWN. Torque the axle nut using the same "through the center cap hole" trick as before with the wheel off the ground. Have a passenger sit in car pressing foot on brake pedal to hold all wheels still while torqueing. On some other makes, damage can occur if a wheel bearing is torqued on the ground with weight on it. I didn't see reference to this in the FSM, but it doesn't hurt to be a bit cautious.
Torque spec is 174-230 ft-lbs. Use a torque wrench here....don't overtorque with an impact gun.
Remove wheel and install a NEW cotter pin. It's a big one, so make sure you have the right size.
Reinstall wheel and torque lug nuts to 80 ft-lbs. Road test vehicle. Hopefully you have a nice quiet ride now!
After 50 miles, retorque the wheel. You have a new hub and new lugs so there is potential for it to loosen slightly as the lugs seat all the way in.
Last edited by Mustang5L5; Jun 4, 2018 at 03:50 PM.
Joined: Jul 2005
Posts: 8,818
Likes: 468
From: Taxachusetts
DONE!! Open to comments/questions and feedback
I tried to post this in the DIy forum, but apparent a mod needs to move it. So I'm sure it will end up in the tech forums soon enough.
I tried to post this in the DIy forum, but apparent a mod needs to move it. So I'm sure it will end up in the tech forums soon enough.
Last edited by Mustang5L5; Jul 31, 2011 at 10:53 PM.


Joined: Jul 2005
Posts: 8,818
Likes: 468
From: Taxachusetts
Just to update. I set to work to try and remove the old hub from the bad bearing tonight. I used a 3-jaw puller, with a washer centered on the end of the hub's shaft on the backside. I couldn't push it out with the puller.
I'll need to use a press, but grabbing the bearing might be tricky as i don't have a bearing separator the right size.
Stay tuned, but for the other side, i think i'm just going to order a new hub. Like i said before, the extra pain and aggrivation of doing this with your car potentially apart is not worth it. I'm doing it for the opposite side and I don't even think it's worth it.
Who know what i'll do with the old hub/bearing assembly at this point. The hub is prob good...
EDIT: I ended up ordering a new hub. I tried to mess around with various press and puller fixtures and could not pull the old hub out. For now, i'll save both the old hub/bearing assemblies and work on pulling the hubs out in the future. But I definitely wouldn't want to rely on pulling the hub out with my car all pulled apart.
Last edited by Mustang5L5; Aug 9, 2011 at 02:18 PM.


Registered User
Joined: Jun 2008
Posts: 43
Likes: 0
From: New Jersey
Thats a great DIY, Thank you! This has inspired me to do this project this weekend.
Question: With the AWD sedan, cant you just remove the tire, brake, and then without removing the control arm unbolt the hub from the back of the control arm and slide the bearing and assembly out?
Question: With the AWD sedan, cant you just remove the tire, brake, and then without removing the control arm unbolt the hub from the back of the control arm and slide the bearing and assembly out?

Registered User
Joined: May 2011
Posts: 72
Likes: 1
From: Queens Ny
great writeup bro I am changing mine right now and the shop had the hardest time taking out the knuckle/spindle i will be reusing the hub as it was not in too bad condition but we will see if this comes to bite me in the bum later on. Dis you change ball joints at all since they were right in the open or were they good???
Joined: Jul 2005
Posts: 8,818
Likes: 468
From: Taxachusetts
The bearing doesn't just slip into the hub. It's a tight clearance fit. Add in corrosion due to moisture and it's near impossible to get out without pressing.
When i installed the new bearing, i had to press it in. Wouldn't go very far at all by hand