
Ask a Professional Detailer...


Here's some quick pics:
Wash with PB Super Slick
Dry with a waffle weave towel.
I used an old Zaino clay bar I had sitting around
For Polish:
PO203S with a yellow pad on the deep scratch places.
Intensive Polish with an orange pad on the whole car.
PO106FF with a white pad on the whole car.
PO85RD with a black pad on the whole car.
Wipe down the car with Top Inspection Spray
Then for Sealant:
FMJ with a blue pad on the whole car.
Wax tomorrow or Tuesday with a coat or two of Natty's red wax by hand.


Registered User
Joined: Jan 2009
Posts: 262
Likes: 0
From: newburgh ny
hey had a few questions.
1, i only use a mf towl to dry my car is it safer to just use the blotter method so i odnt induce scrathes?
2, what are the best detailing products such as soap,polish and wax to use on my dg coupe
1, i only use a mf towl to dry my car is it safer to just use the blotter method so i odnt induce scrathes?
2, what are the best detailing products such as soap,polish and wax to use on my dg coupe
I just got my order in from you yesterday and now I'm wishing I bought a couple more things. I hate how that works out. You should open up a store on the west coast  . Preferably around San Francisco, so I can just go to the store to pick up products.
Anyways, after doing more research I've come across a few questions. I have been trying to get some info on detailing the engine bay. I was hoping you might have some tips/tricks that could share. Also, what kinda things do I have to be careful of? (i.e. I read somewhere saying to cover the alternator with a plastic baggie). Also, I purchased the foamaster gun from you and was wondering if it would be ok to put some poorboys APC in it and use it under the hood.
While I was considering doing this, I wanted to know if the poorboys APC would be ok on the paint as well. If it is, will it remove sealant/wax? This may be a good thing for me if it does, since I will be polishing a waxing at this time as well.
The last question that I had was regarding polishing. At this time, I don't have the funds to purchase pc, so I will be doing it by hand. I wanted to know what kind of applicator I should apply with. I bought a few of those microfiber applicators from you. Will those work?
. Preferably around San Francisco, so I can just go to the store to pick up products.Anyways, after doing more research I've come across a few questions. I have been trying to get some info on detailing the engine bay. I was hoping you might have some tips/tricks that could share. Also, what kinda things do I have to be careful of? (i.e. I read somewhere saying to cover the alternator with a plastic baggie). Also, I purchased the foamaster gun from you and was wondering if it would be ok to put some poorboys APC in it and use it under the hood.
While I was considering doing this, I wanted to know if the poorboys APC would be ok on the paint as well. If it is, will it remove sealant/wax? This may be a good thing for me if it does, since I will be polishing a waxing at this time as well.
The last question that I had was regarding polishing. At this time, I don't have the funds to purchase pc, so I will be doing it by hand. I wanted to know what kind of applicator I should apply with. I bought a few of those microfiber applicators from you. Will those work?
Sorry for not replying to this post with my last one, not sure how I missed it. West coast idea could be a long term goal for our company, I've certainly thought of it and there's a good chance I'm going to be moving out to California in the next year or so. Orders could reach anywhere in the US in 3 days or less. Anyways, back to reality for now...
For engine bay detailing, the best advice I can recommend is, don't flood the engine bay with water, cover any intake with a bag, cover any exposed connections or anything you are worried about with a bag or aluminum foil does a good job molding around things. Don't use a high pressure stream of water either, this can potentially disconnect something or make something loose.
The process in a nutshell is the following:
- Degrease the engine, let sit for a few minutes
- Rinse the engine bay, while not trying to flood anything
- Turn the engine on to ensure the car turns over and to help dry the engine bay
- Dry any other areas with towel or air compressor
- Dress the engine bay
- Polish and protect any exposed painted surface
- Polish and protect any metal surfaces
Once you complete a more thorough engine bay detail, I'd recommend using the foam gun to easily maintain your work. Simply foam the engine bay instead of degreasing it, then rinse, turn over, and dry. If you think the dressing is fading you can reapply it as needed.
Here's a link to some posts on detailing engine bays as well as a few examples of how people perform engine bay details.
Regarding putting the Bio APC in the foam gun, you may not see good results as it may not foam up too well. IMO you'd be better off just putting it in a spray bottle and saving the foam gun for automotive shampoo. Also, it's hard to clean out a container 100% of a product and you don't want any Bio APC mixed with your shampoo if you plan on keeping your protection on the paint. Yes, Bio APC will strip off previous coats of protection on your paint, so use as needed.
Microfiber applicators aren't ideal for polishing via hand I found. When I need to polish a tight area by hand, I typically just use a standard foam applicator pad. To get results out of a polish, you need to break down the abrasive particles in the polish and the cushion from the MF applicator pad hinders your ability to put good pressure on the polish when working it into the paint.
You'll thank yourself when you invest in a quality buffer. The time and energy saved pays for itself in the first use. If you go the PC route, invest in the 4" pads, they work faster and more effectively than the 6.5" pads. If you end up saving up quickly, go for the Flex, as it's another big jump in time and effort saved, and the results are that much better.
Hope this helps, if you have any other questions, let me know. Thanks again for your support, greatly appreciated

Few Questions.
I bought a PC and it came with a whole bunch of pads.
When i was trying it out, i used a white one. It didnt work very well for the deeper scratches, or very many scratches as well.
I have an orange one, black ones, and i think a couple other colors. I think the white is a finishing pad, correct?
This brings me to my second question, how do i clean it? When i tried cleaning my white one, it was stained and the stuff wouldnt come out unless i sat there for like, an hour.
White pads are for polishing, they are right in the middle in terms of aggressiveness as Tim mentions in the post below.
As far as cleaning the pads, what you want to do is soak them in water and some sort of degreaser as soon as you are done using the pads. The longer you let it sit on the pad the harder it's going to be to clean. How many pads did you use during the detail? If you used one the entire time, chances are you saturated that pad and it's going to be tough to clean it. Stained pads are fine as long as they are clean and any product is removed from the pad.
Starting with softest.
Blue - finish (I use sealant with this one)
Black - finish (I use final polish with this one)
White - Polish, use with medium to light polish
Orange - Polish, use with medium polish
Yellow - Polish, use with heavy polish
__________________________________________________
In fact I just finished my detail about 20 minutes ago.
I use this setup:
Wash with either PB Super Slick & Suds or Maxi Suds and have found the Foamaster Foam gun saves a lot of time.
What works well with it is a hose splitter and another spray gun to wash it off as the foamaster gun does not have different spray patterns.
Dry with a waffle weave towel.
I used an old Zaino clay bar I had sitting around
For Polish:
PO203S with a yellow pad on the deep scratch places.
Intensive Polish with an orange pad on the whole car.
PO106FF with a white pad on the whole car.
PO85RD with a black pad on the whole car.
Wipe down the car with Top Inspection Spray
Then for Sealant:
FMJ with a blue pad on the whole car.
Wax tomorrow or Tuesday with a coat or two of Natty's red wax by hand.
-Tim
My favorite products for diamond graphite would be:
Maintenance shampoo - Maxi Suds II
Med. Cut Polish - Super Intensive Polish
Finishing Polish - PO106FF
Wax - Dodo Juice Blue Velvet
Hope this helps, if you have any other questions on anything, please do not hesitate to ask.
George
Thanks George 
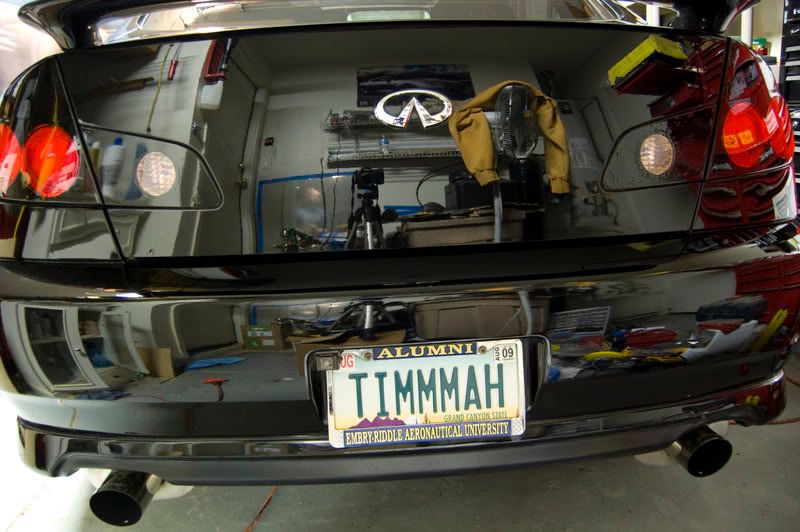
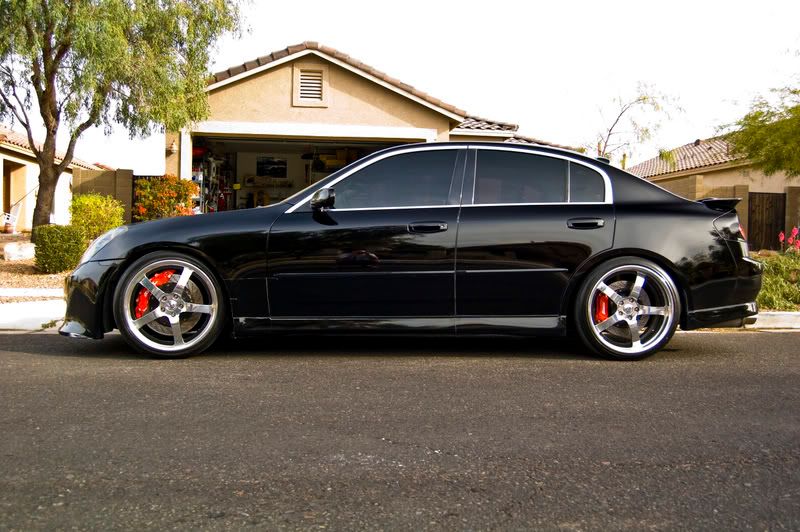
I put one coat of Natty's red on this morning and will do more as the week goes on and get some pics this weekend.
Overall I was very happy with the results. There are a few deep scratches here and there that the PO203S with a yellow pad didn't take out but they are very hard to see. For some reason I found the PO85RD much more difficult to remove than any of the other polish/sealant. It seems to come off the easiest if I removed it as soon as I set the PC down. When polishing, sometimes I move on to the next section and then go back to remove multiple (2-3) sections at the same time. The PO85RD didn't like that but overall wasn't too bad. In fact I find Natty's Red to act similar and like to only do a maximum of one panel at a time with it as well.

Thanks George
I put one coat of Natty's red on this morning and will do more as the week goes on and get some pics this weekend.
Overall I was very happy with the results. There are a few deep scratches here and there that the PO203S with a yellow pad didn't take out but they are very hard to see. For some reason I found the PO85RD much more difficult to remove than any of the other polish/sealant. It seems to come off the easiest if I removed it as soon as I set the PC down. When polishing, sometimes I move on to the next section and then go back to remove multiple (2-3) sections at the same time. The PO85RD didn't like that but overall wasn't too bad. In fact I find Natty's Red to act similar and like to only do a maximum of one panel at a time with it as well.
Thanks for the feedback and supplying the additional pictures, your car looks outstanding!
PO203S is considered a medium cut polish, so it has it's limitations on how deep of imperfections it can remove. On a scale of 1 - 10 in terms of aggressiveness, I'd rate it a 5. If you wanted to tackle those deeper imperfections in the future, I'd suggest something like Optimum Hyper Compound or Menzerna Power Gloss as far as the next jump up in aggressiveness.
I'm surprised to hear that the PO85RD was difficult to remove. How much product did you apply? For any polish, I'll typically only use 3 pea sized drops on the pad and work the product in until it's a clear milky haze over the finish. Perhaps it was the wait time as you said though, I'll typically remove it right after applying it.
I find the same with Natty's Red, the longer I let it sit, the harder it is to remove. The key is applying it as thin as possible and removing it right away. Let me know if you see increased depth and gloss with the 2nd or 3rd coat if you add them.
Car is looking amazing once again. You have a head turning G that's for sure! Keep up the great work
George
Thanks George.
I did find both were a lot easier to remove right after they first dried. Back when I first purchased the Natty's red I did my whole car and then went to remove it. That was not fun LOL.
Another question, how much compound do you put on the pad when you first start? Do you just start with 3 drops or do you prep the pad with some first? I have always put a decent amount on the pad at first and then just added a little with each new section.
Also, any chance the Dodo supernatural or two step wax will ever make the daily special? I think I want to try one of those when the Natty's red runs out unless there is something else you would recommend.
Thanks
Tim
I did find both were a lot easier to remove right after they first dried. Back when I first purchased the Natty's red I did my whole car and then went to remove it. That was not fun LOL.
Another question,
how much compound do you put on the pad when you first start? Do you just start with 3 drops or do you prep the pad with some first? I have always put a decent amount on the pad at first and then just added a little with each new section.Also, any chance the Dodo supernatural or two step wax will ever make the daily special? I think I want to try one of those when the Natty's red runs out unless there is something else you would recommend.
Thanks
Tim
I did that once with Natty's Blue, applied the whole car then went back to remove, I know the pain you must have been in! You'd remove a section, think you got it all, then the light would catch and you'd see more product still on the paint. The best thing I found for either of the Natty's when it dries up is to mist some cold distilled water on your removal towel, it really helps remove it much easier. When you get a chance to use the Dodo Juice wax, it'll be night and day in terms of ease of use both applying and removing. You'll be kicking yourself that you didn't switch earlier
When it comes to any sort of polishing: compounding, polishing, finishing, burnishing, etc. I usually give a distant mist of distilled water on my pad, just so that it provides a little extra lubrication, but still start with the 3 pea sized drops, like this:

Then, as I complete 1 working area, say 18" x 18", I'll put 3 more drops in different locations around the pad. When the pad is filled with dots and you can't put on any more drops of product without overlapping previous drops, I swap it out for a new pad. This keeps your cut and finish at a maximum, increases the life of your pad because your not saturating it and you can clean it much easier and you are getting the best possible finish. As you swap the pad, have a bucket of water and Snappy Clean (or some sort of degreaser) ready and have your pads start soaking as soon as you are done using them. It will help restore them to like new condition each and every time.
PM coming your way in a second as well.
Cheers,
George


TTrank your car's shine is the ISH!!!
Hi George while you're still on the topic of Natty's paste wax. I seem to get streaking after applying Natty's Blue in a thin coat...How do i prevent that? Thanks for the info!
Hi George while you're still on the topic of Natty's paste wax. I seem to get streaking after applying Natty's Blue in a thin coat...How do i prevent that? Thanks for the info!
Hopefully this will provide you some pointers, if you have any questions on anything after giving that a read, please do not hesitate to ask.
George
Thanks
I think next it will be time to step up to the Dodo line of waxes and see if they can live up to the reputation.

Registered User
Joined: Jun 2008
Posts: 20
Likes: 0

Oops, that was my type-o. I also used the power gloss on the deep scratches.
I don't even have any PO203S. I made that post and went back to the DI site to make a list of what I used not looing at my actual order. Duh...
I don't even have any PO203S. I made that post and went back to the DI site to make a list of what I used not looing at my actual order. Duh...