
DIY: Auxiliary Transmission Cooler w/ Inline Filter Install


DIY: Auxiliary Transmission Cooler w/ Inline Filter Install
Items
Optional 3/8th Magnefine Filter - $15 (For power steering)
Tools I Used
Message from Thescreensavers
This DIY guide will attempt to walk you through installing a supplemental transmission cooler and inline Filters install which will extend the life of the unit. You will be removing the front bumper and cutting, bending and routing lines. You will also be drilling some holes to route the hoses, We used factory bolt up points so that we did not have to do too much drilling. We wanted the best bends for optimal flow. This guide is aimed at the DIY mechanics of G35driver and beyond, it will attempt to show you most of the steps. There will have to be some improvising and general knowledge on working on cars to succeed. If you just started changing your oil I�d advise you to ask a friend who is more knowledgeable in this area to help. Installing this cooler if you know what you are doing is relatively easy.
Please familiarize yourself with this DIY guide and ensure you are ready to do this to your car.
From the 2005 Sedan Service Manual
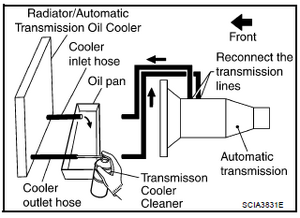
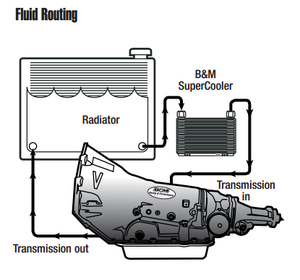
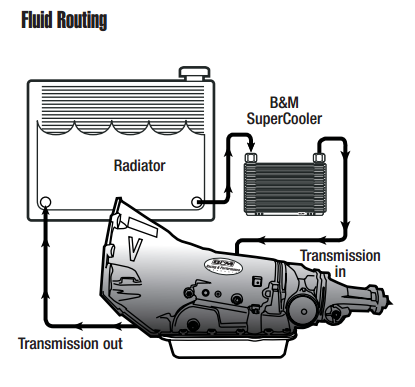
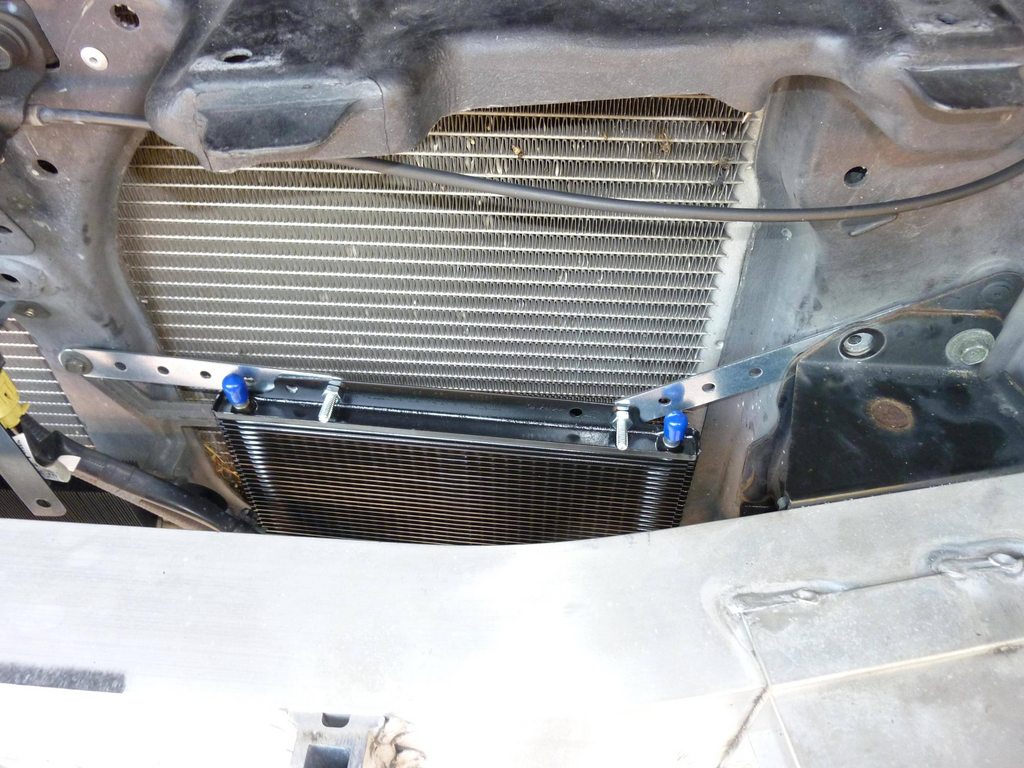
We are going to install the B&M Cooler after the Factory Cooler (Return line)
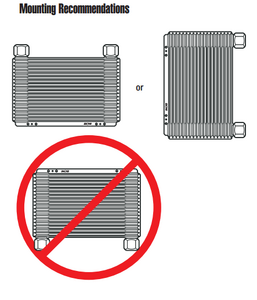
As Per B&M Instructions we will mount the with the recommended orientation, if you mount it sideways the Inlet must be on the bottom
I have chosen to go with a B&M supercooler as it has an internal fluid bypass which means when your transmission is cold and it will bypass the fluid until it gets up to temperature. This ensures the fluid does not get over cooled.
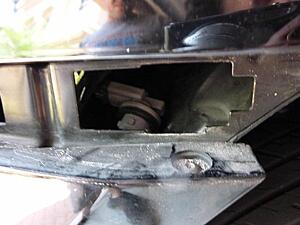
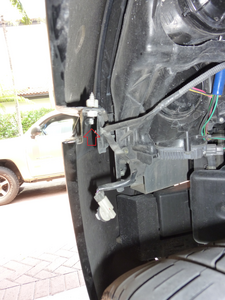
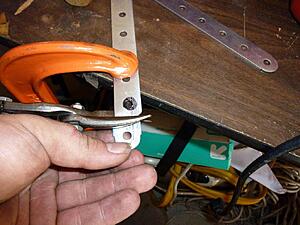
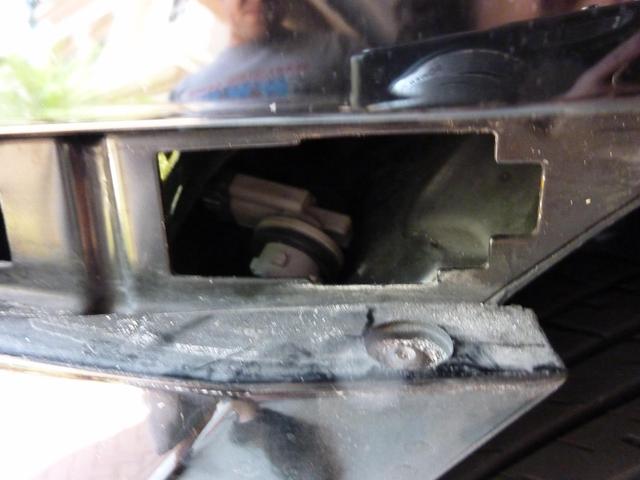
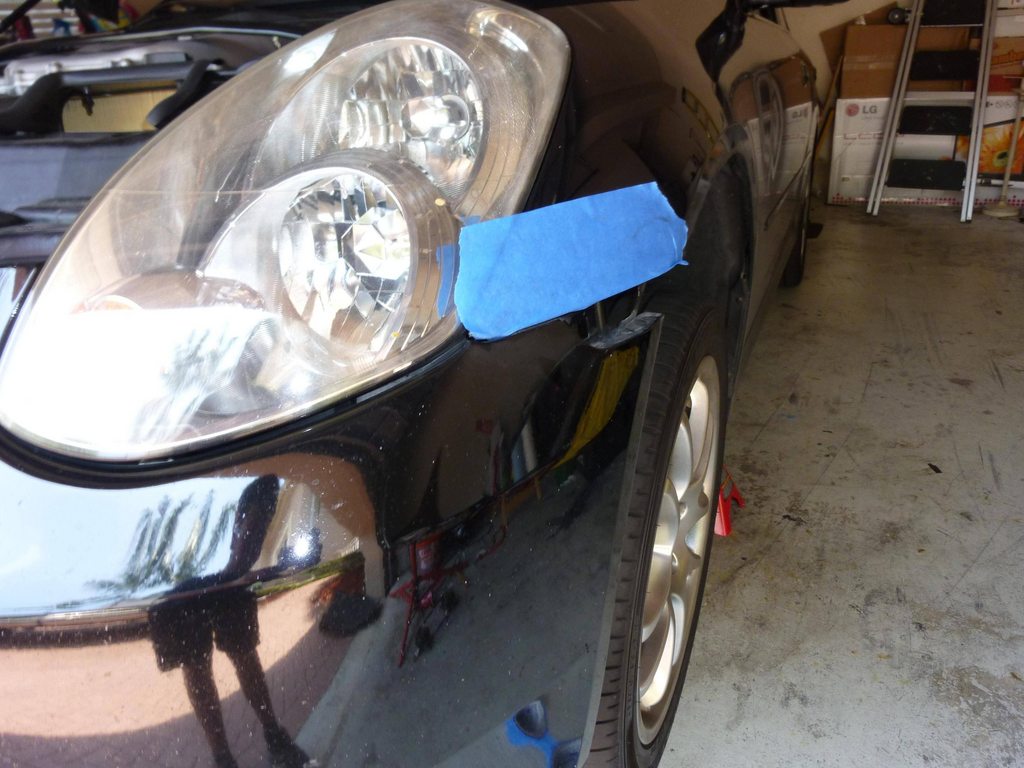
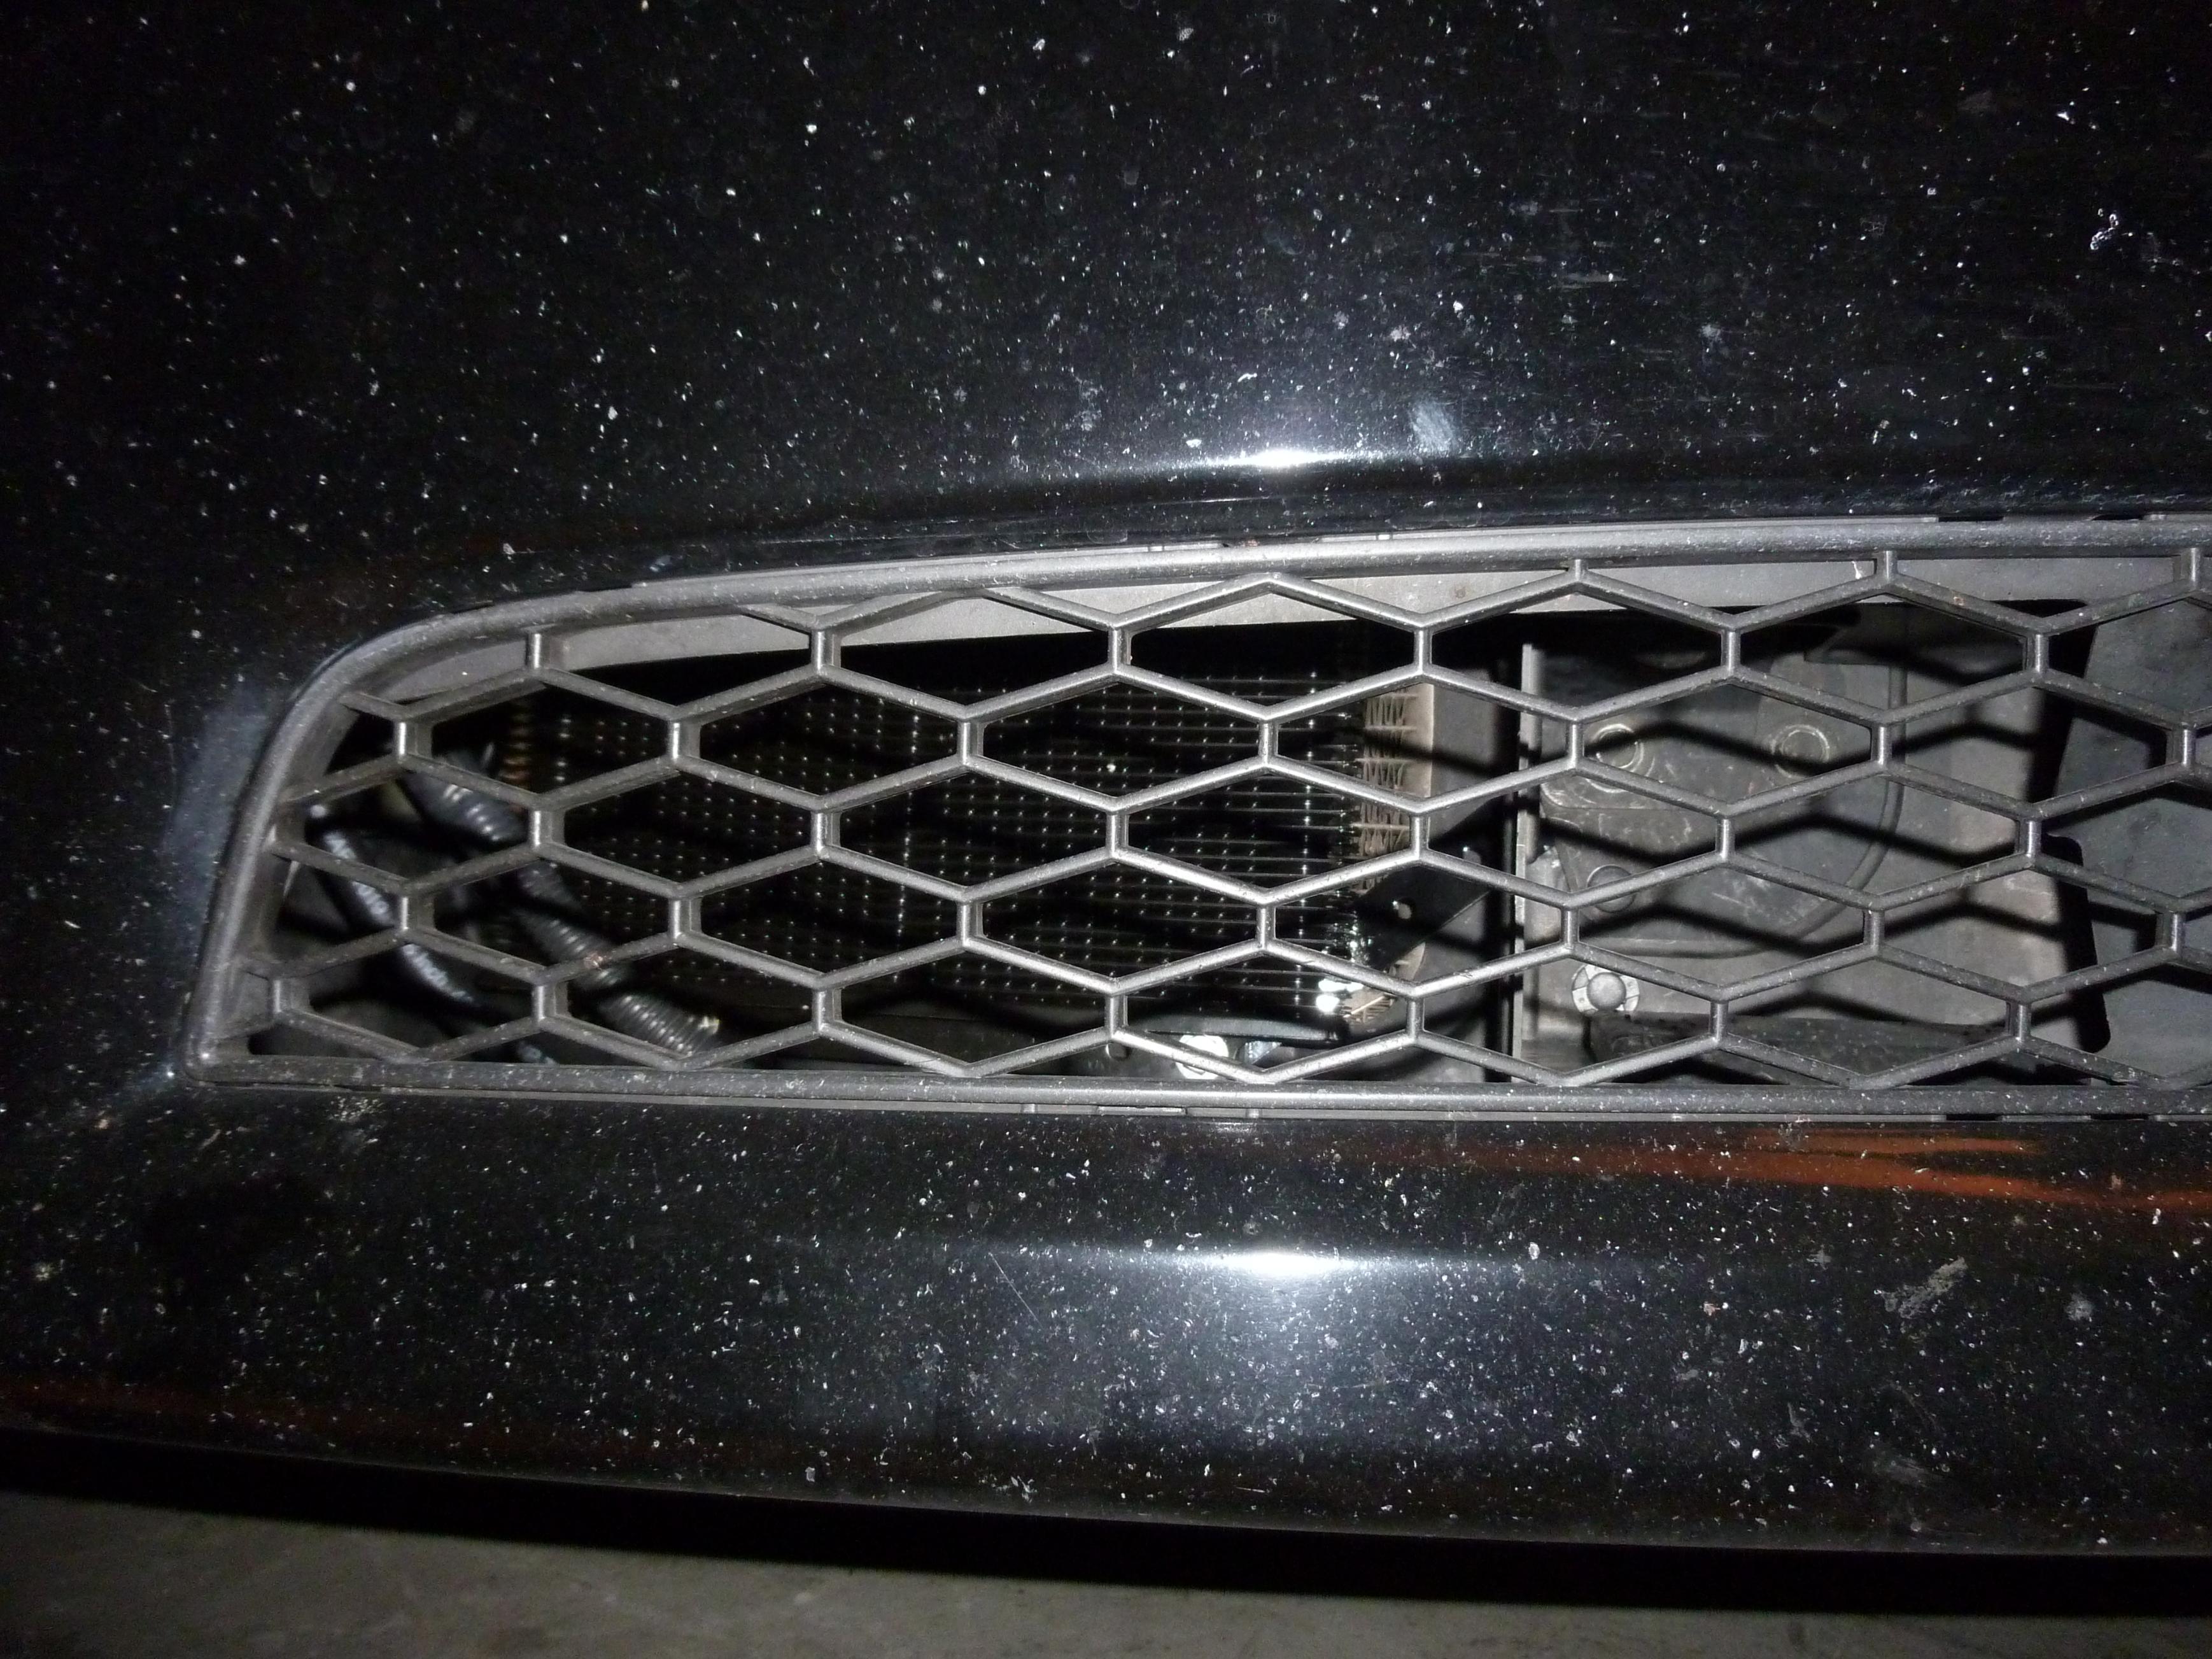
Take your Corners out and push the connector though the bumper
Jack up your Car
If you do not know how watch
It�s a great video.
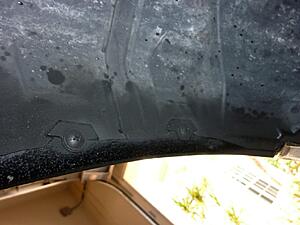
Once the Front of the car is lifted, you may now start taking the fender liners out
This is the driver side; just turn your wheel all the way to the right and the opposite for the other side. You will need a flat head to pry these three clips out. Some will break its normal.
Now with a Philips Head Screwdriver loosen these two, these are on the top of the fender inside
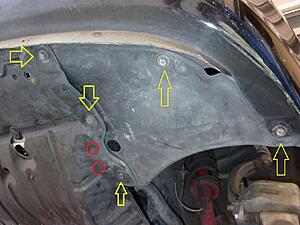
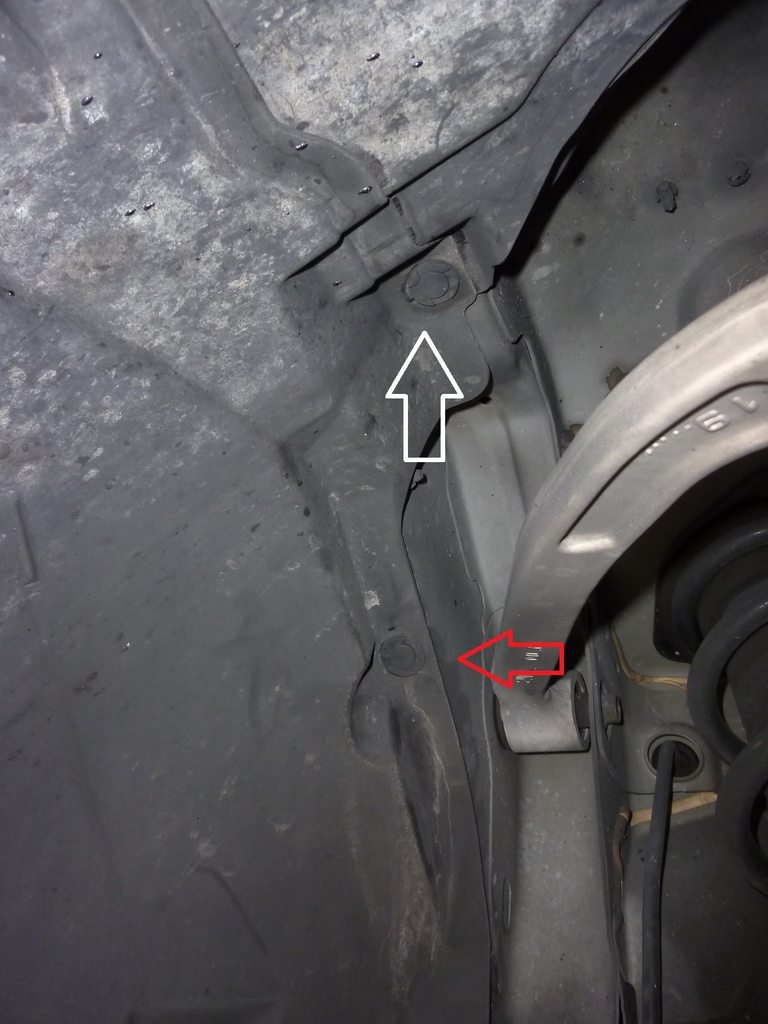
Remove the under body and then remove the fender liners by removing the 10MM bolts, there will also be two clips like we encountered in the Fender Liner in RED, with the under body removed its easy to get to them.
Up to this point,
1. Your car should be in the air Supported by jack stands or ramps, never go under the car with just the hydraulic jack or the cars scissor jack they can fail.
2. You should have the underbody off and both driver and passenger wheel liners as well. You don't really have to take the Passenger wheel liner off, but you should if you would like to do the Optional Power Steering In line filter show later in this DIY.
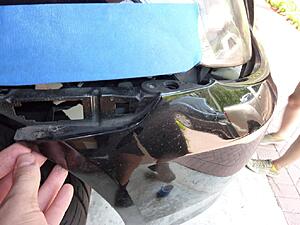
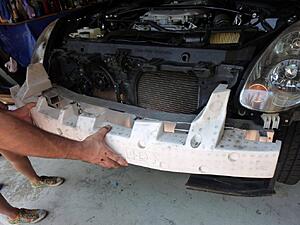
Now we are going to remove the bumper
With a Flat head remove these clips
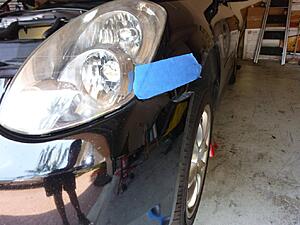
Add some Tape to the end of the front fenders to protect them
Now go down to your front fenders and now you should see two 10MM Bolts.
Do this on both sides of the car. Now the bumper should be free
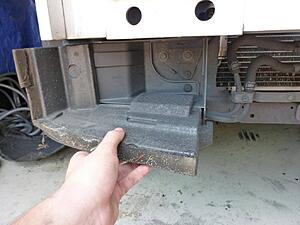
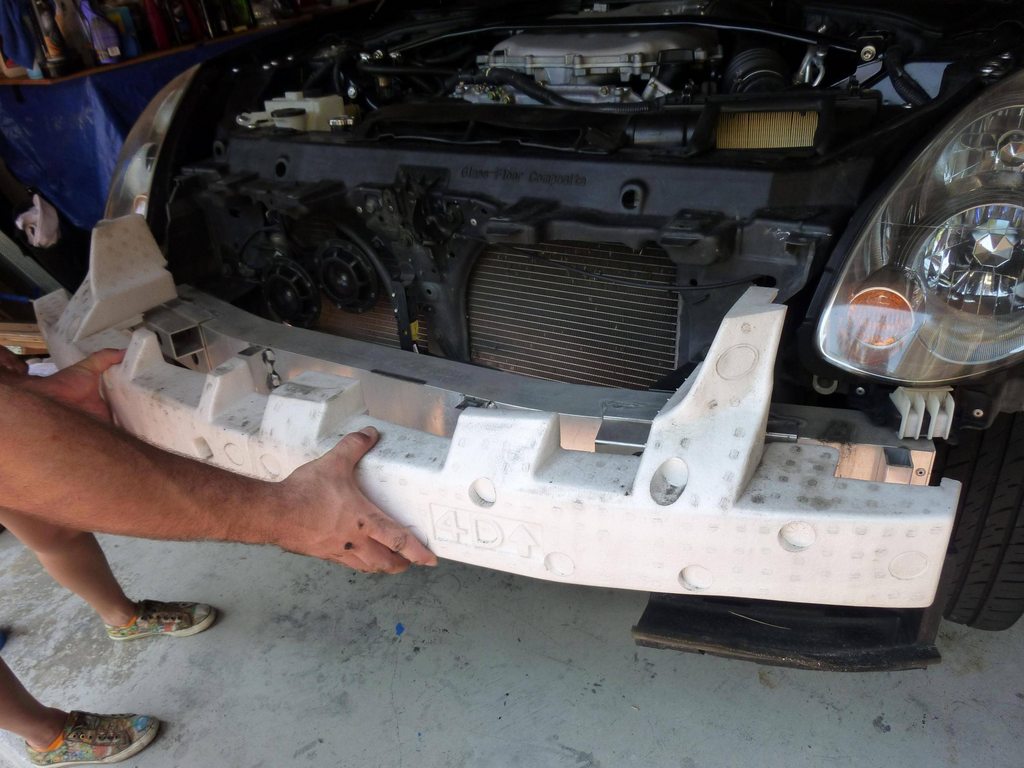
Remove the Foam by pulling it off
Also remove these air dams as well (You really only need to take the Driver side off)
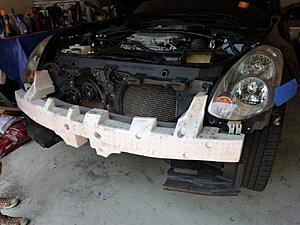
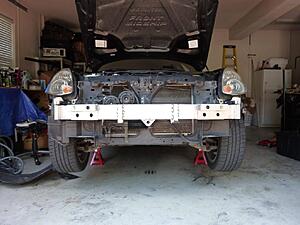
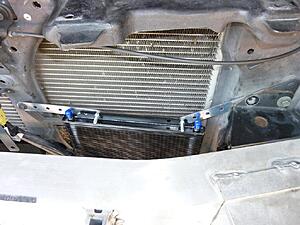
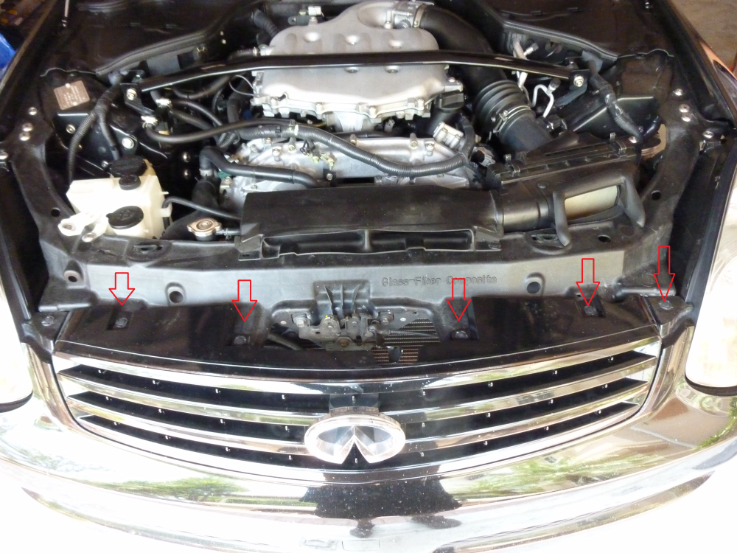
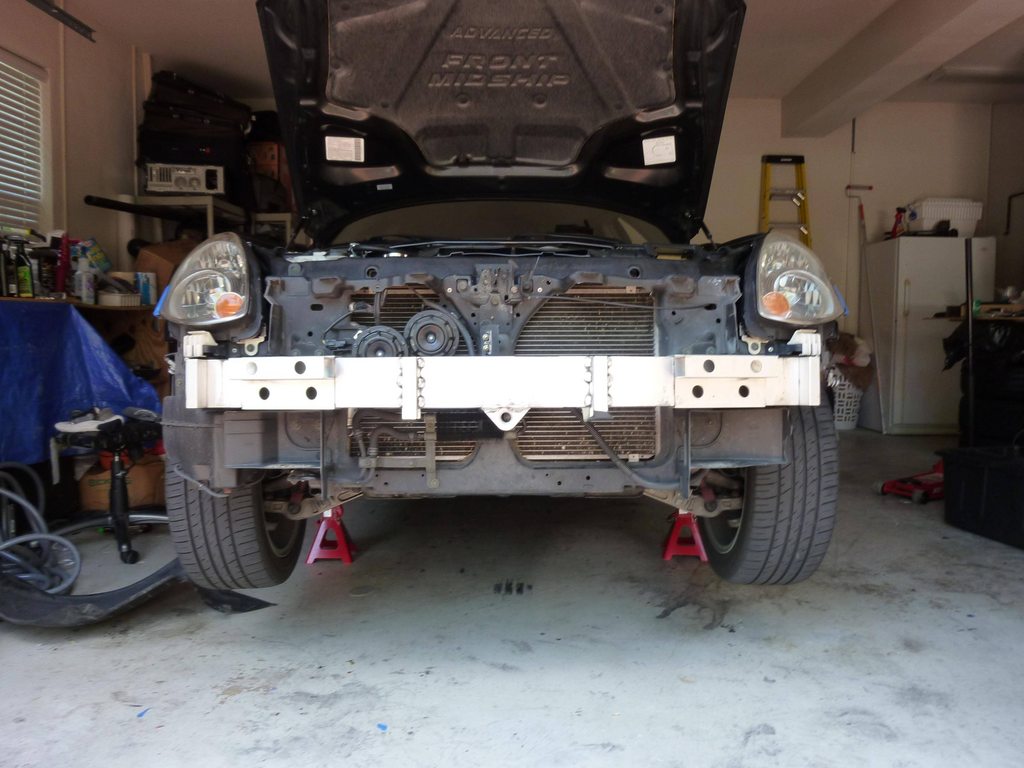
Now your car should look similar to this
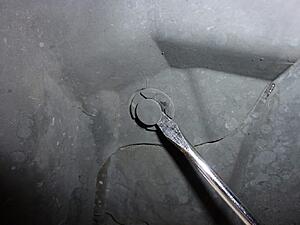
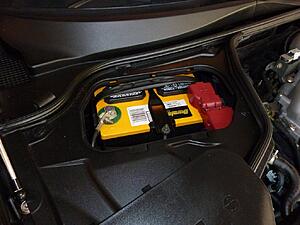
Go ahead and disconnect the battery using a 10mm Open ended wrench
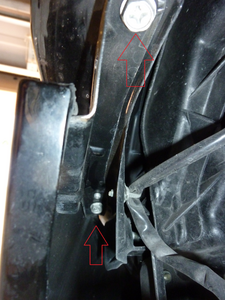
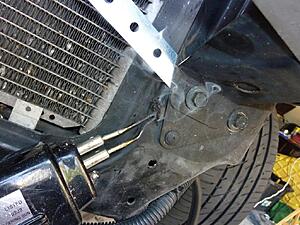
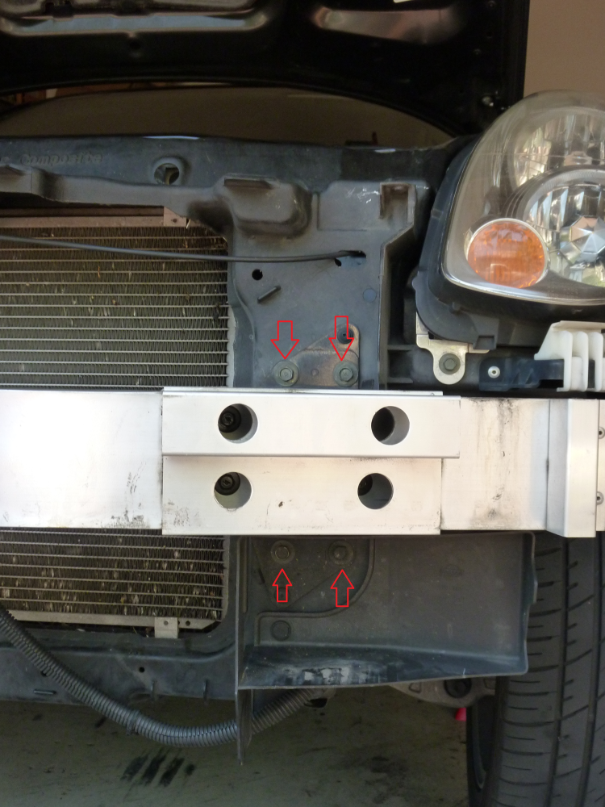
We will be using this factory mounting point for the radiator its 10MM, get some pliers and pull the wire from the bracket.
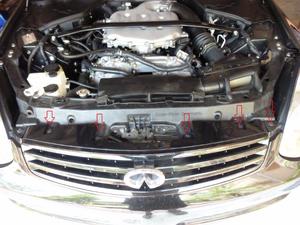
Now we want to loosen these 4, 12MM bolts that hold the crash bar. Remember I said loosen not off.

Keep one of the bolts still threaded in but loose (Like in the picture below) and start figuring out how you will bolt up the radiator. (Brackets come with the B&M Supercooler kit)
If you notice the silver bracket, the hole on the brackets supplied with the B&M Cooler is not big enough for the 12mm Bolt. Also take note to the 12MM bolt that still is threaded.
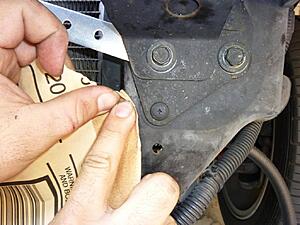
We marked up the hole to cut and drilled it out (used a 23/64) we also used tin snips to cut the extra bit off

Now we removed the Bracket holding the wire from http://s611.photobucket.com/albums/tt193/tsslaporte/Transmission%20Cooler/?action=view¤t=P1020002.png and we are going to cut it, It is no longer needed. The Red/Yellow line is our intended cut

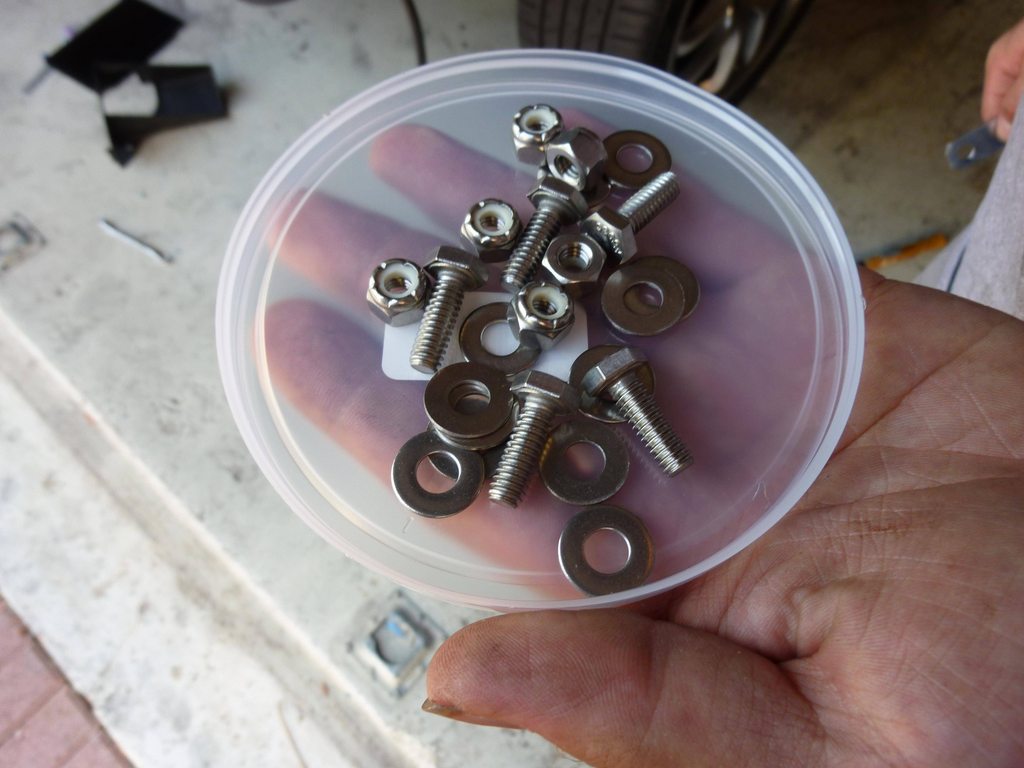
I did not want to use the supplied hardware with the B&M kit and opted to go with shorter Stainless Steel Hardware
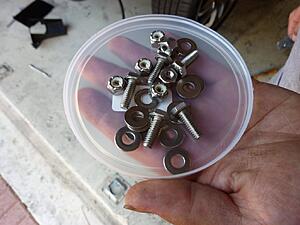
I believe these are 1/4 inch Bolts(forgot exactly), with Washer and Nylon Locking Nuts, Bring one of the B&M Bolts with you to your local hardware store so you can get the same size. We got 6 Bolts/Locking Nuts, and 12 Washers. Always good to have some extras.
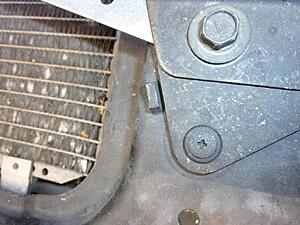
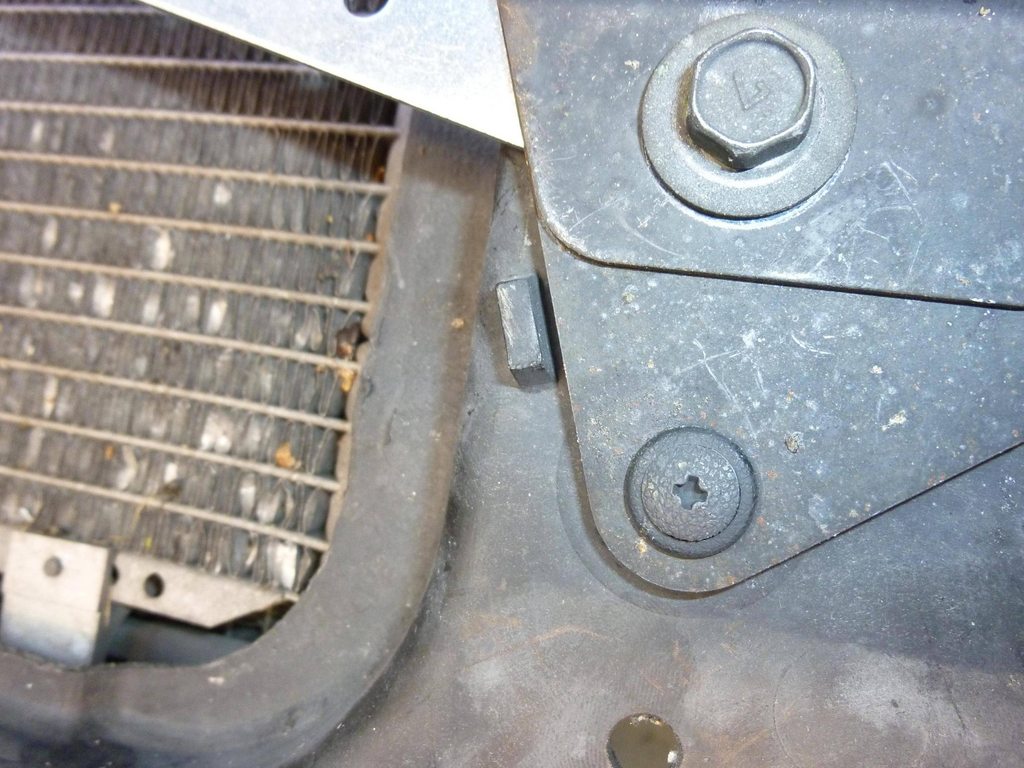
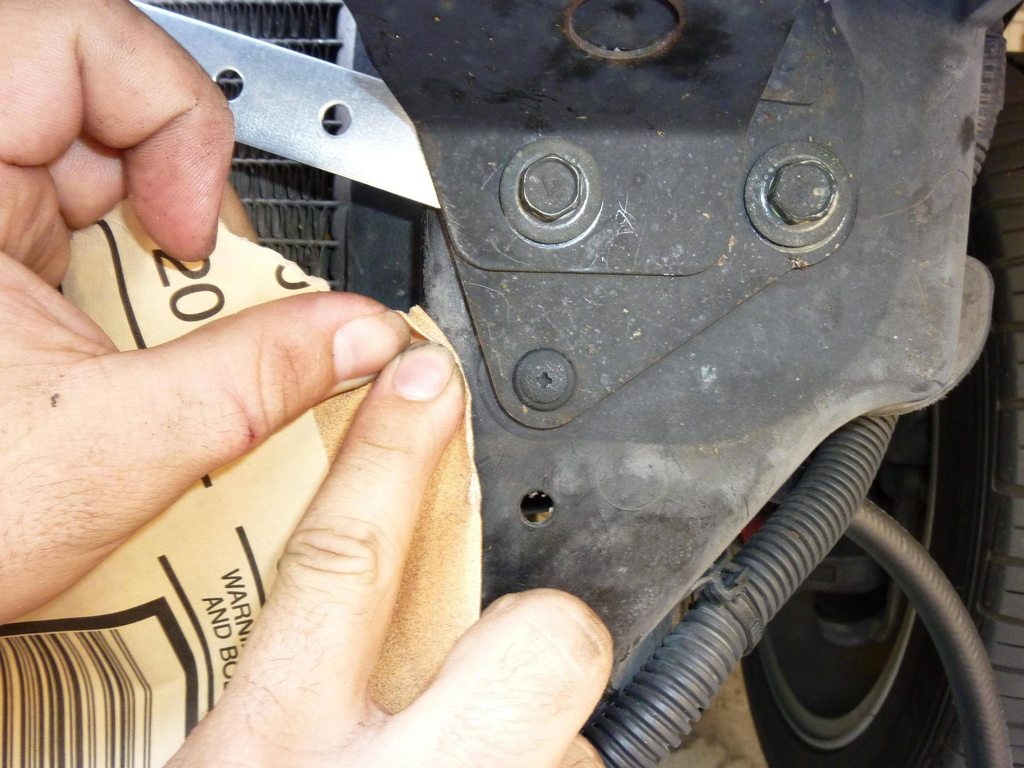
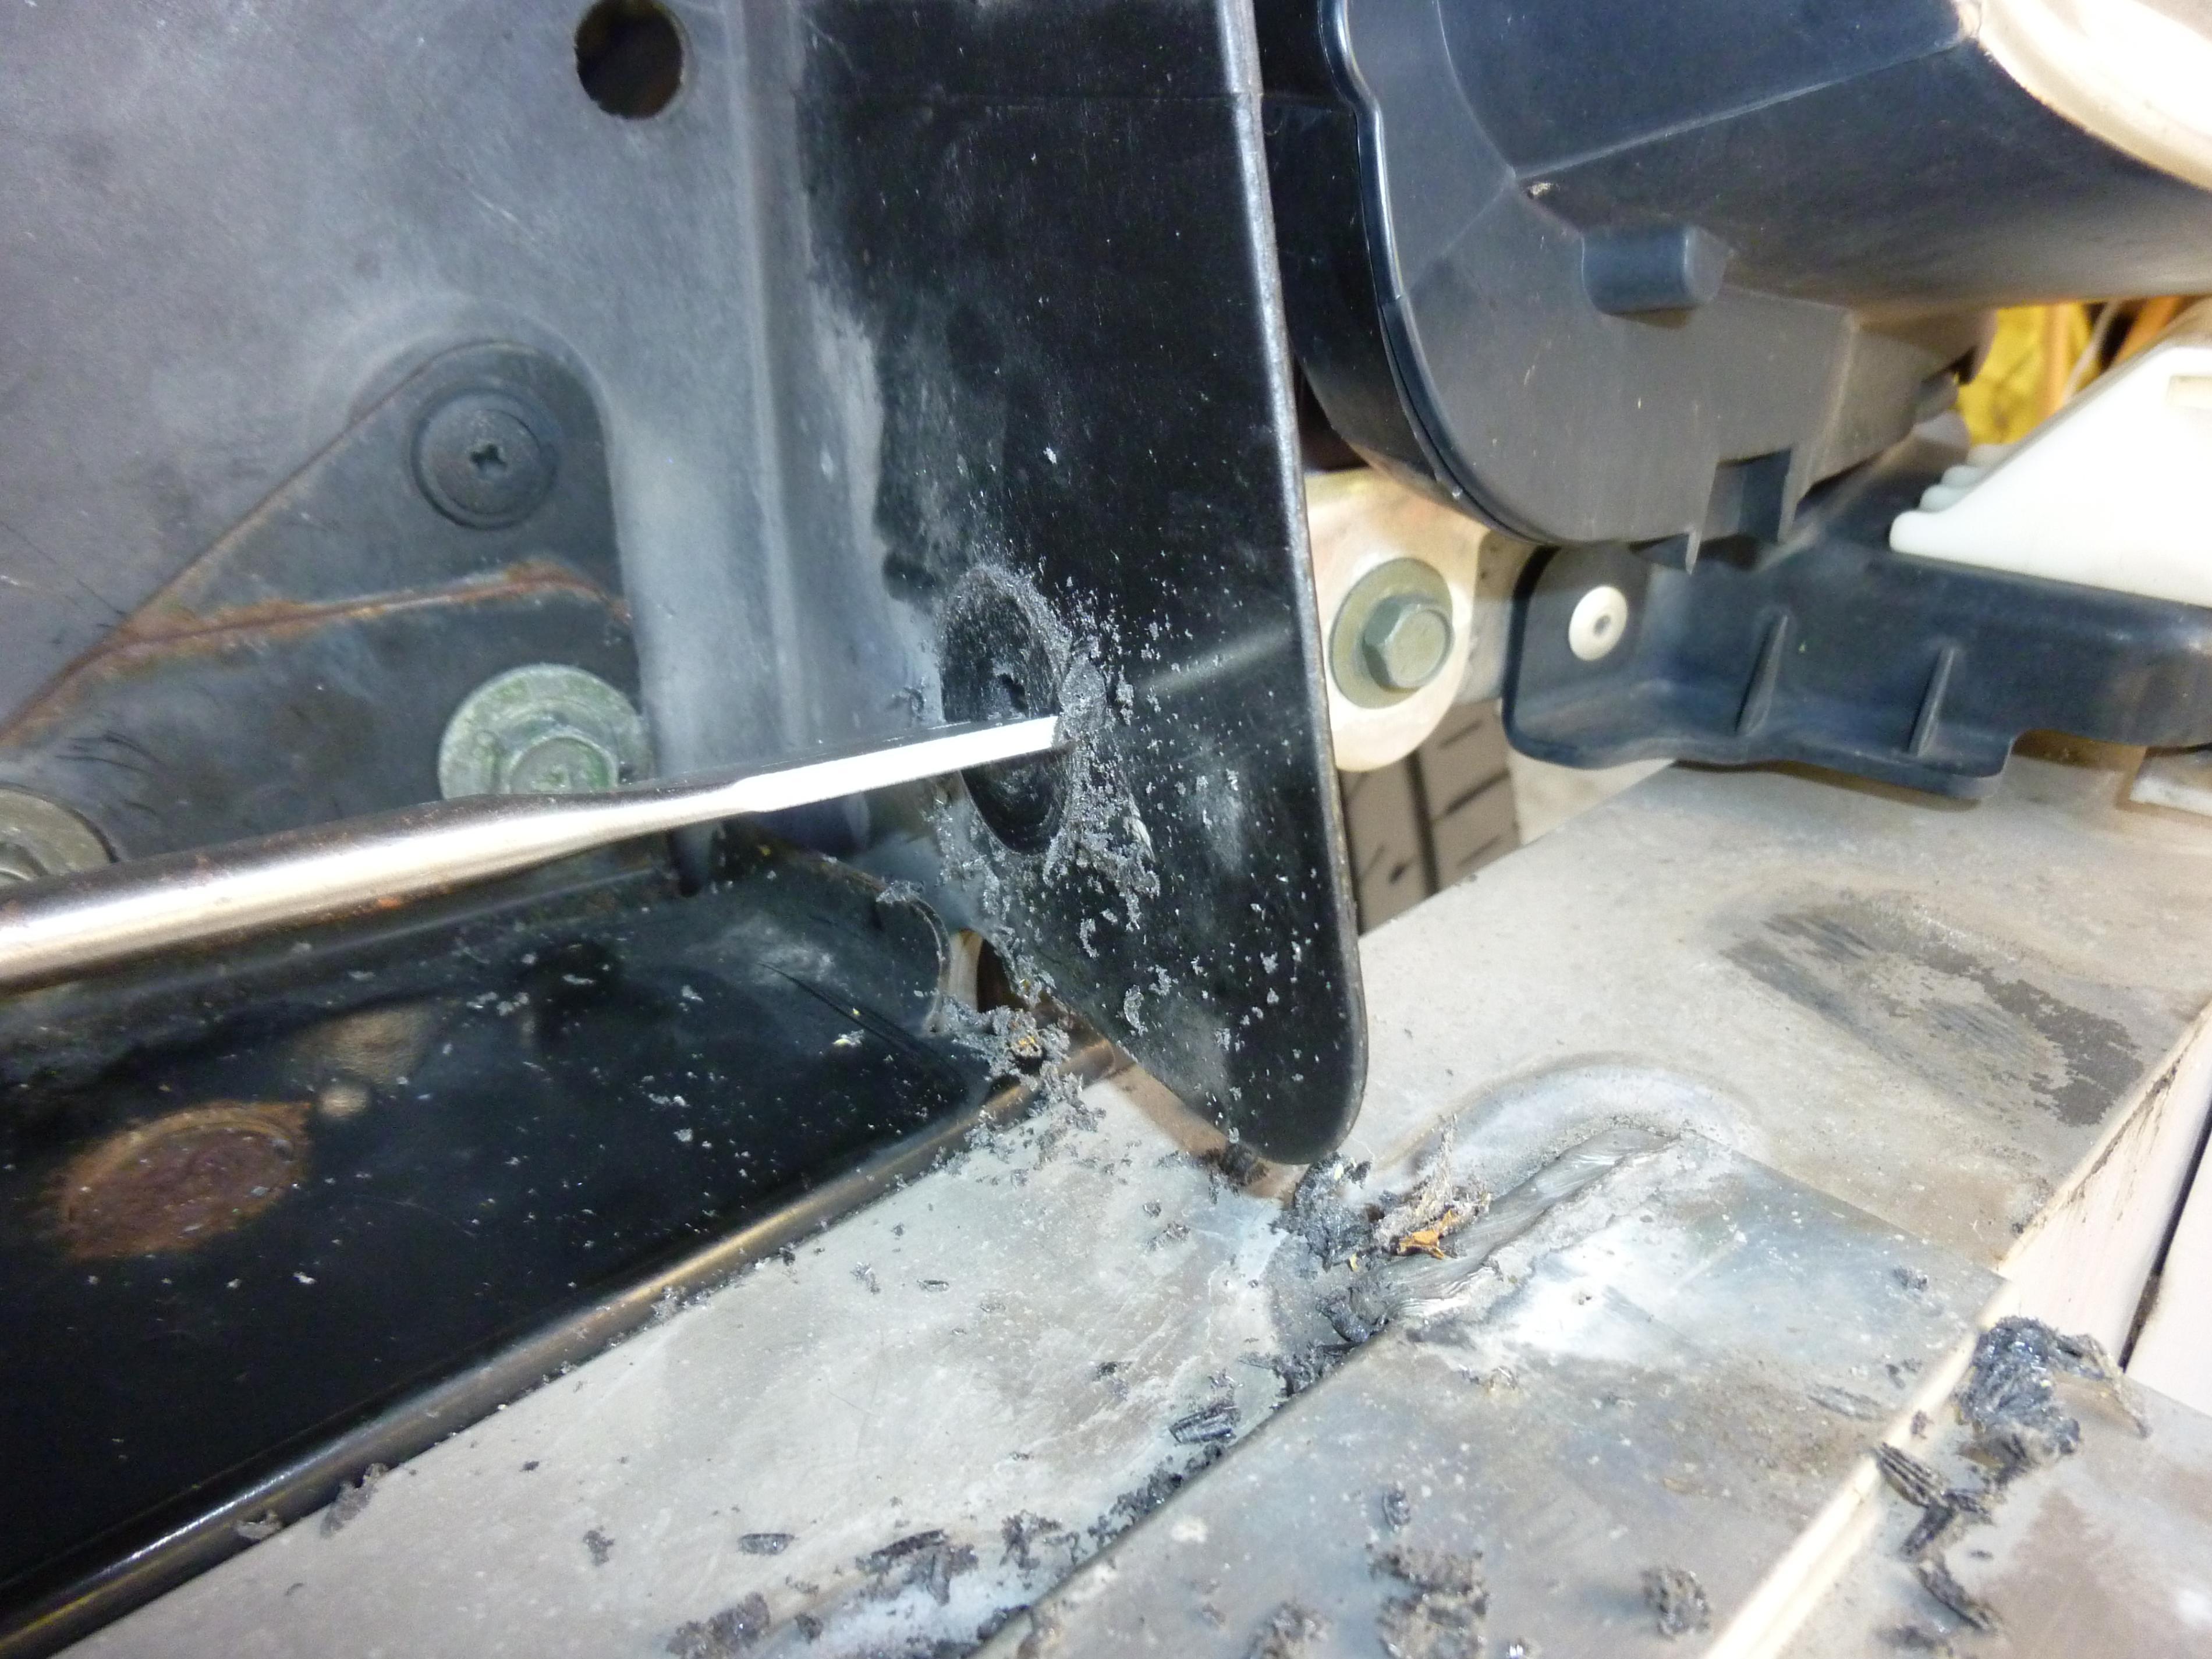
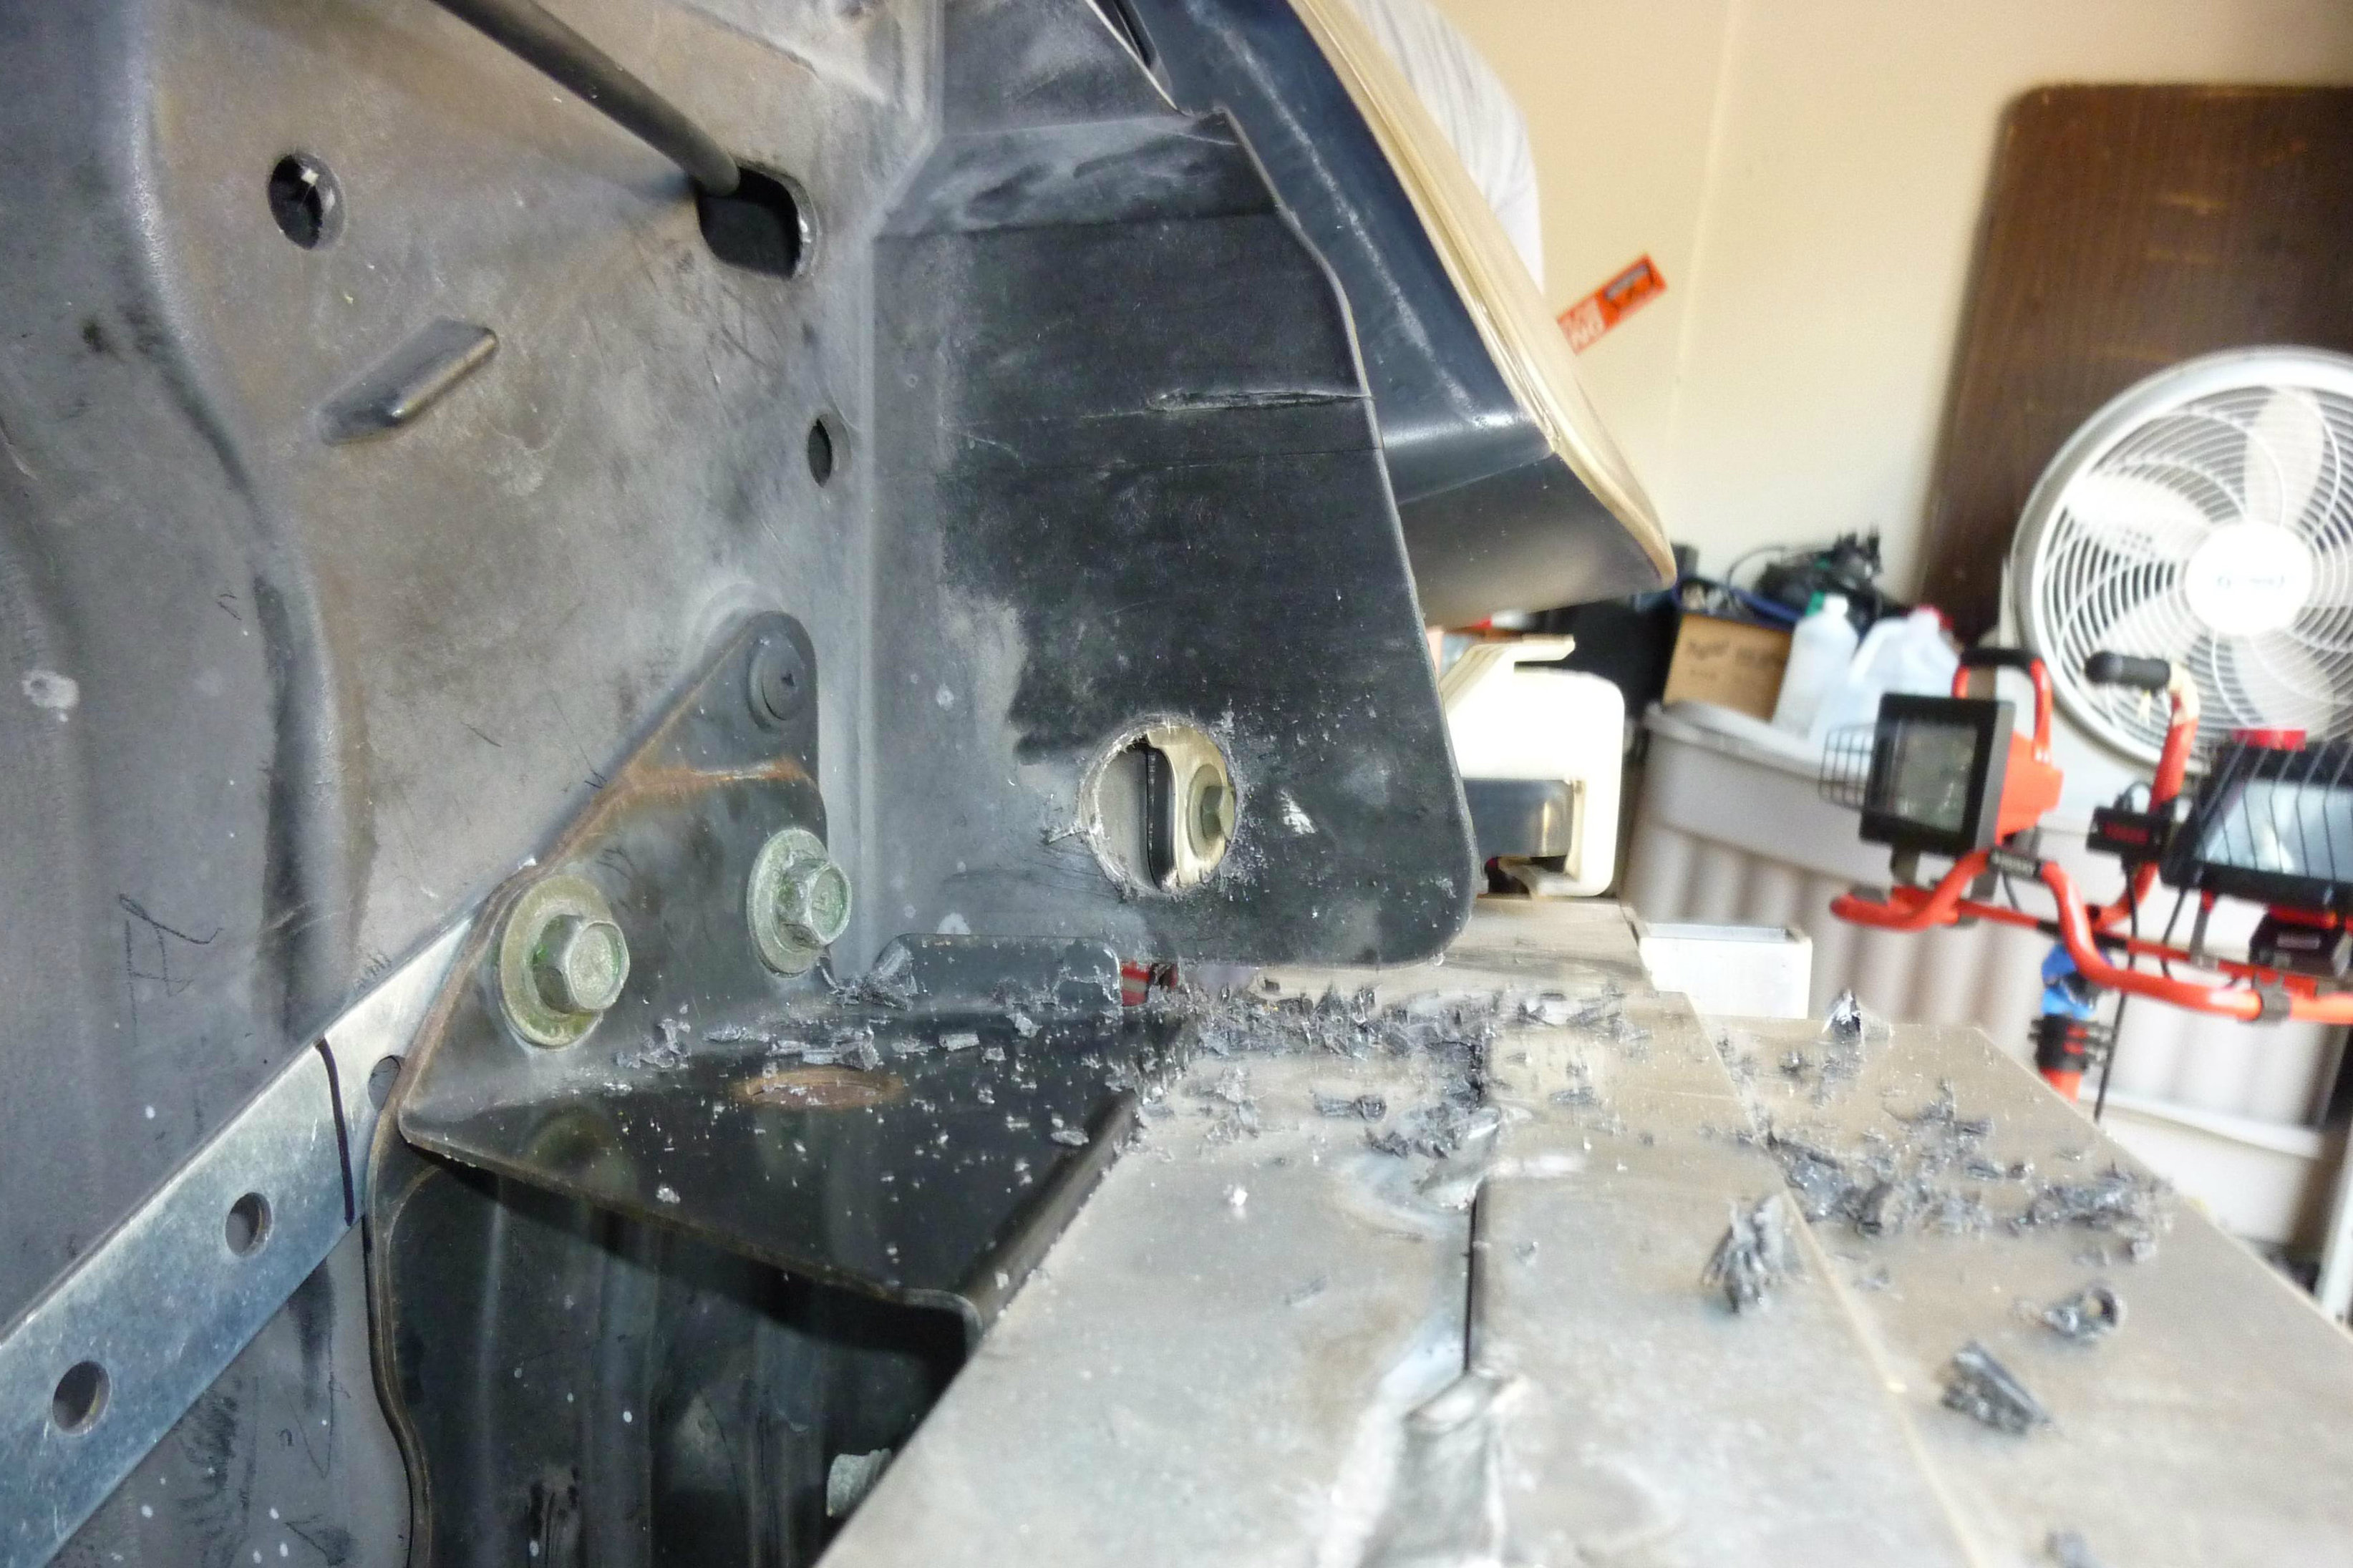
When we were mocking up the radiator we noticed this Tab was in our Way so we took care of it. ( Don't breath the smoke its toxic)
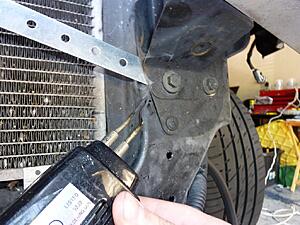
Some 120 Grit Sand Paper to smooth it out, Use diagonal cutters to cut some of the fibers
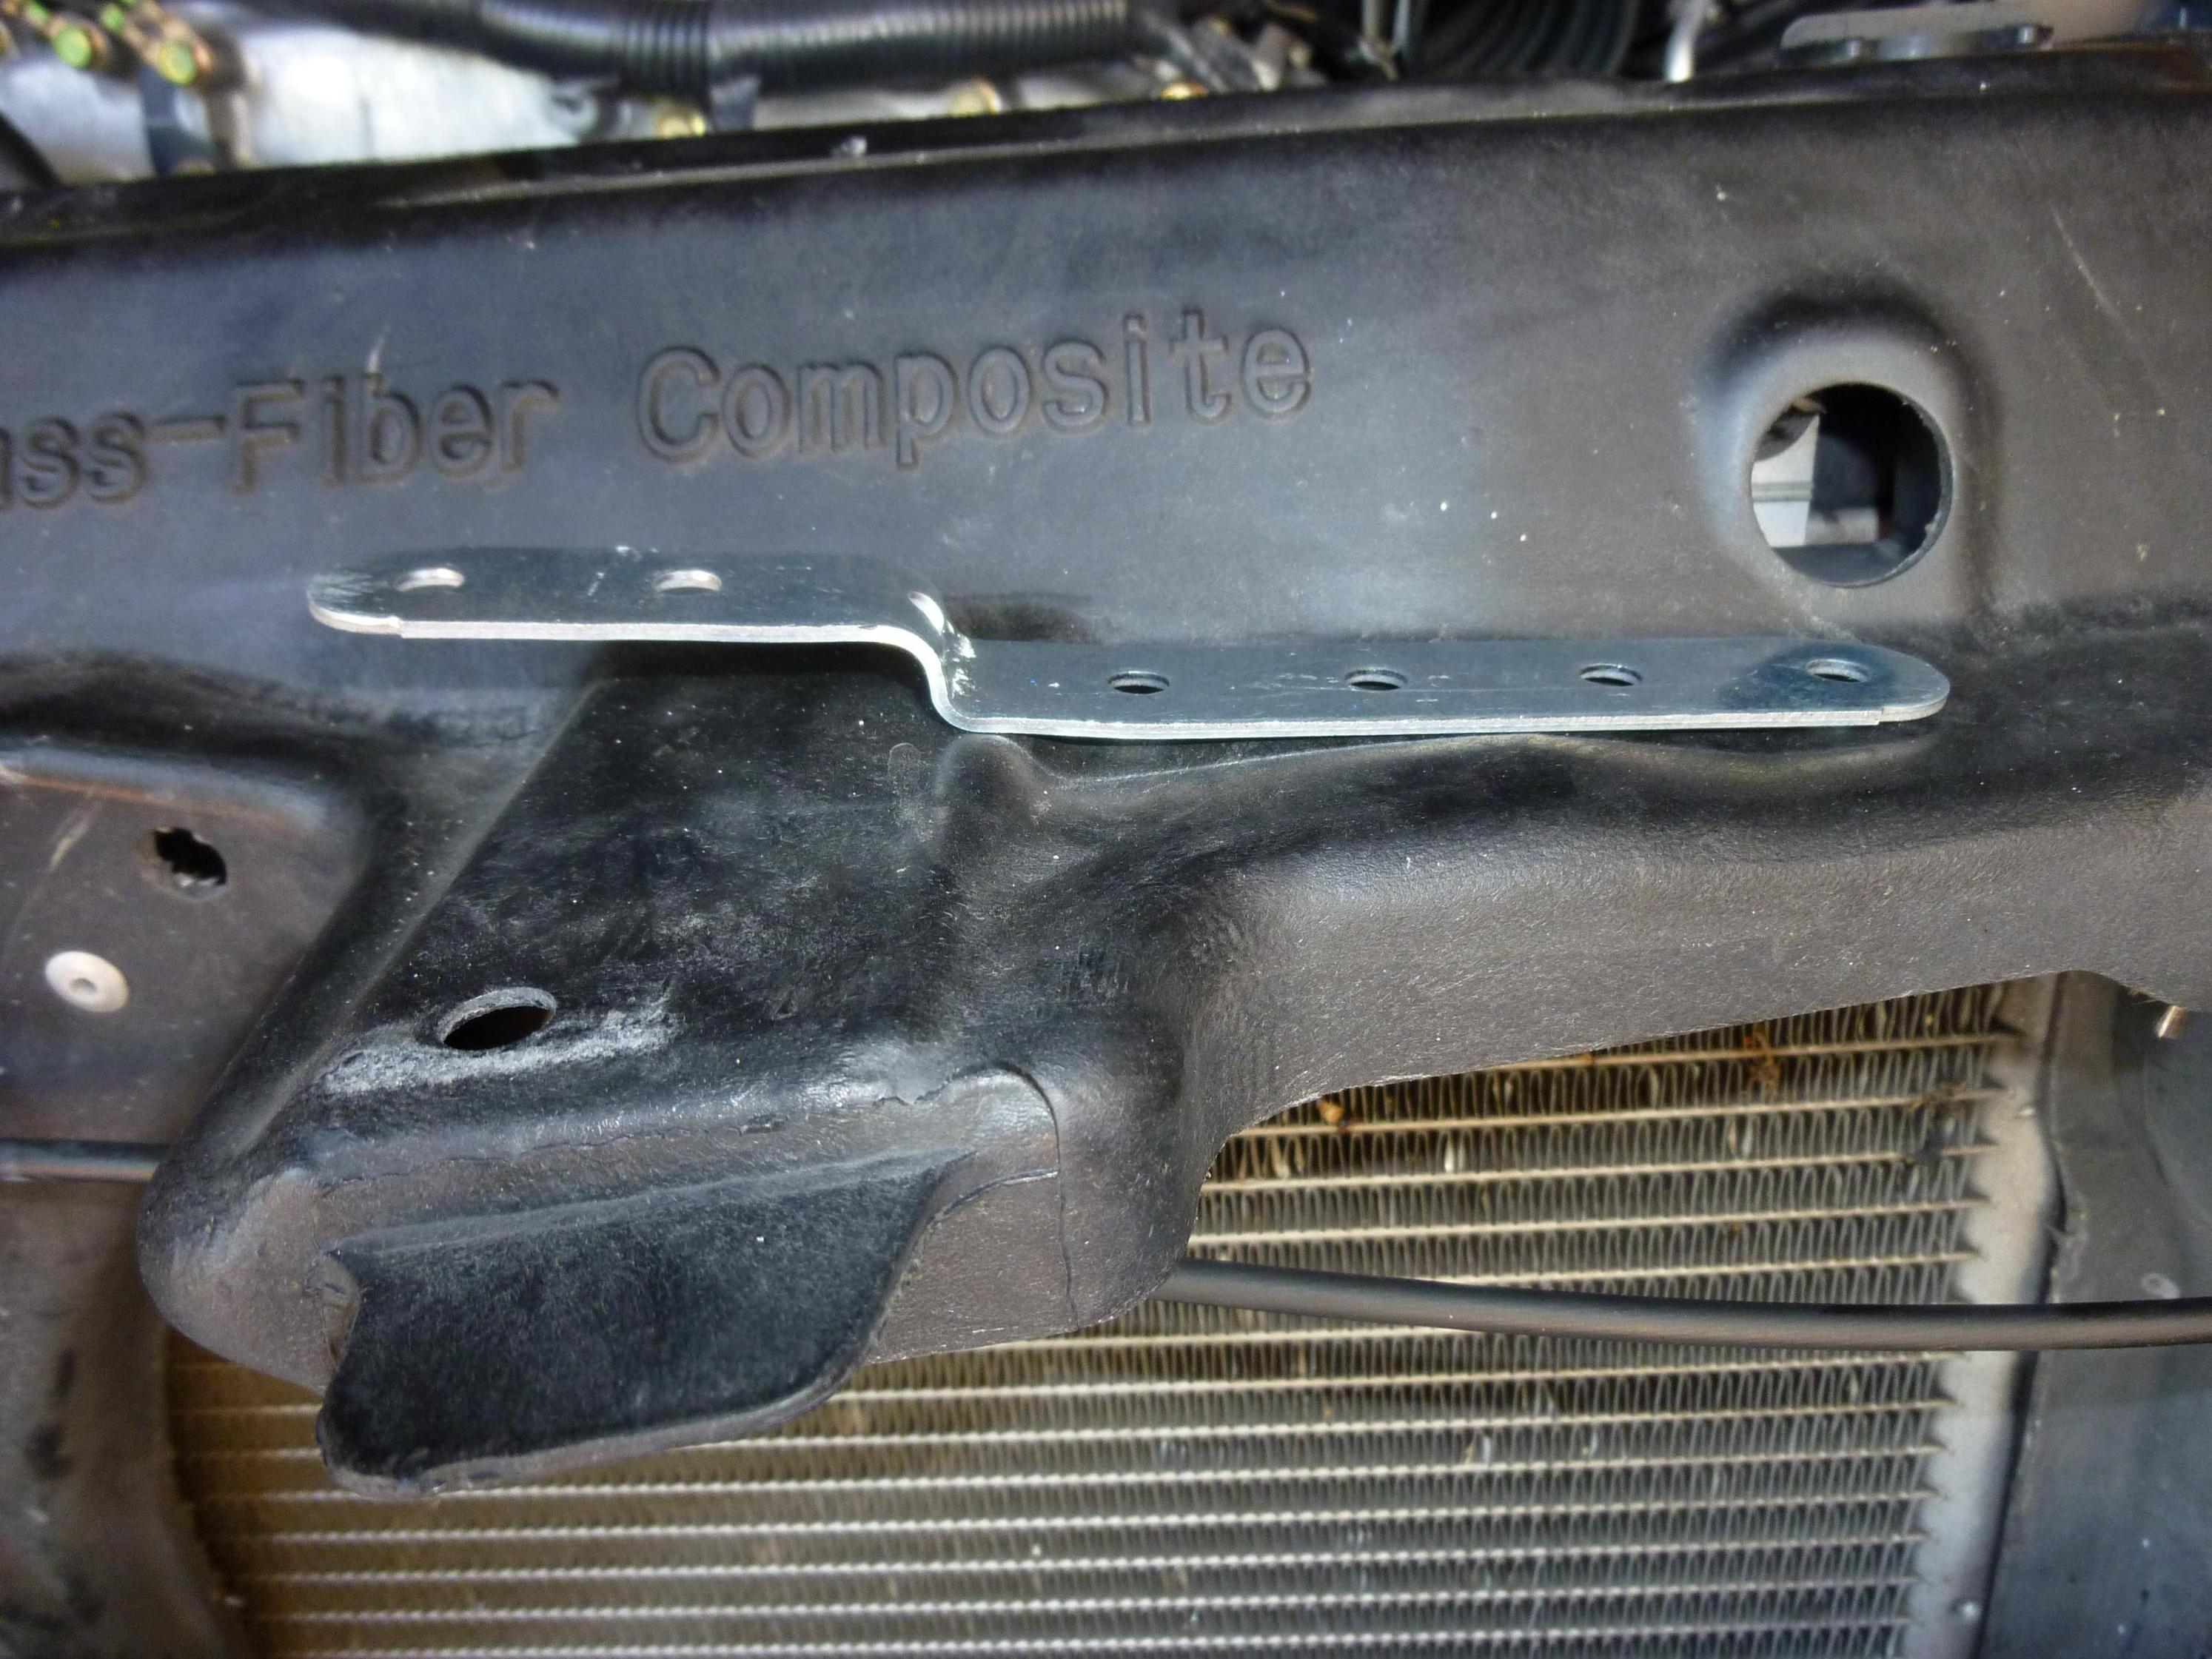
Now we can move the bracket to where we want it.
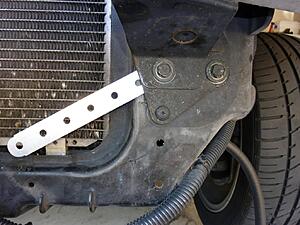
Bending of a bracket so that the radiator sits flat, we used a small bench vice and marked where we needed to bend it

Here is a picture of where we are going to mount a bracket, Using one of the 12mm Bolts that hold the crash bar ( this is the bottom two bolts for the crash bar)
- B&M 70268 SuperCooler Automatic Transmission Cooler - $56
- Gates 27058 Transmission Oil Cooler Hose (5/16 x 25ft) - $48
- You only need about 10 feet, so 11-12 feet to be safe. If you can get another 5/16 hose cheaper, go for it. I went with Gates since its quality. - Precision Brand M6S All Stainless Hose Clamp, 5/16" - 7/8" (Pack of 10) � $8
- Weather Resistant Zip Ties - $8
- 1 Quart of Matic S - $12
- Magnefine 5/16" Inline Magnetic Transmission Filter - $15
- Black Spray Paint - $4
- Local Hardware Store Stainless Supplies $8
*Prices at the time of Purchase
Optional 3/8th Magnefine Filter - $15 (For power steering)
Tools I Used
- Flat and Philips Head Screw Drivers, Stubby Flat Head
- Good Scissors (For Cutting Hose)
- Socket Wrench- 10mm/12mm Socket with Extensions
- Ramps or Jack Stands (to lift the front)
- Something to bend metal with, I used a small bench vise
- Crescent Wrench and a tool for your Stainless Bolts
- Pliers for hose clamps
- Funnel For Transmission Fluid
- Solder Gun ( or other suitable way to cut the tab in the core support)
- 1 Inch Flat bit wood hole cutter
Message from Thescreensavers
This DIY guide will attempt to walk you through installing a supplemental transmission cooler and inline Filters install which will extend the life of the unit. You will be removing the front bumper and cutting, bending and routing lines. You will also be drilling some holes to route the hoses, We used factory bolt up points so that we did not have to do too much drilling. We wanted the best bends for optimal flow. This guide is aimed at the DIY mechanics of G35driver and beyond, it will attempt to show you most of the steps. There will have to be some improvising and general knowledge on working on cars to succeed. If you just started changing your oil I�d advise you to ask a friend who is more knowledgeable in this area to help. Installing this cooler if you know what you are doing is relatively easy.
Please familiarize yourself with this DIY guide and ensure you are ready to do this to your car.
From the 2005 Sedan Service Manual

We are going to install the B&M Cooler after the Factory Cooler (Return line)
As Per B&M Instructions we will mount the with the recommended orientation, if you mount it sideways the Inlet must be on the bottom

I have chosen to go with a B&M supercooler as it has an internal fluid bypass which means when your transmission is cold and it will bypass the fluid until it gets up to temperature. This ensures the fluid does not get over cooled.
Take your Corners out and push the connector though the bumper

Jack up your Car
If you do not know how watch
Once the Front of the car is lifted, you may now start taking the fender liners out
This is the driver side; just turn your wheel all the way to the right and the opposite for the other side. You will need a flat head to pry these three clips out. Some will break its normal.


Now with a Philips Head Screwdriver loosen these two, these are on the top of the fender inside

Remove the under body and then remove the fender liners by removing the 10MM bolts, there will also be two clips like we encountered in the Fender Liner in RED, with the under body removed its easy to get to them.

Up to this point,
1. Your car should be in the air Supported by jack stands or ramps, never go under the car with just the hydraulic jack or the cars scissor jack they can fail.
2. You should have the underbody off and both driver and passenger wheel liners as well. You don't really have to take the Passenger wheel liner off, but you should if you would like to do the Optional Power Steering In line filter show later in this DIY.
Now we are going to remove the bumper
With a Flat head remove these clips
Add some Tape to the end of the front fenders to protect them
Now go down to your front fenders and now you should see two 10MM Bolts.


Do this on both sides of the car. Now the bumper should be free


Remove the Foam by pulling it off
Also remove these air dams as well (You really only need to take the Driver side off)

Now your car should look similar to this
Go ahead and disconnect the battery using a 10mm Open ended wrench

We will be using this factory mounting point for the radiator its 10MM, get some pliers and pull the wire from the bracket.

Now we want to loosen these 4, 12MM bolts that hold the crash bar. Remember I said loosen not off.
Keep one of the bolts still threaded in but loose (Like in the picture below) and start figuring out how you will bolt up the radiator. (Brackets come with the B&M Supercooler kit)
If you notice the silver bracket, the hole on the brackets supplied with the B&M Cooler is not big enough for the 12mm Bolt. Also take note to the 12MM bolt that still is threaded.
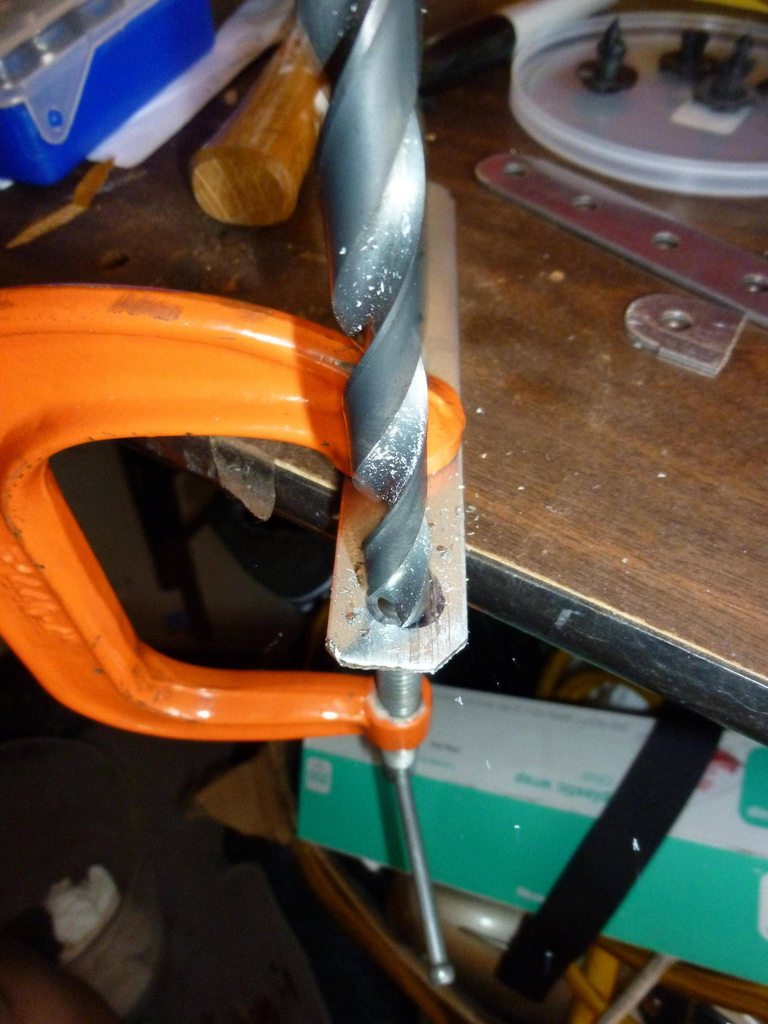
We marked up the hole to cut and drilled it out (used a 23/64) we also used tin snips to cut the extra bit off


Now we removed the Bracket holding the wire from http://s611.photobucket.com/albums/tt193/tsslaporte/Transmission%20Cooler/?action=view¤t=P1020002.png and we are going to cut it, It is no longer needed. The Red/Yellow line is our intended cut
I did not want to use the supplied hardware with the B&M kit and opted to go with shorter Stainless Steel Hardware
I believe these are 1/4 inch Bolts(forgot exactly), with Washer and Nylon Locking Nuts, Bring one of the B&M Bolts with you to your local hardware store so you can get the same size. We got 6 Bolts/Locking Nuts, and 12 Washers. Always good to have some extras.
When we were mocking up the radiator we noticed this Tab was in our Way so we took care of it. ( Don't breath the smoke its toxic)


Some 120 Grit Sand Paper to smooth it out, Use diagonal cutters to cut some of the fibers
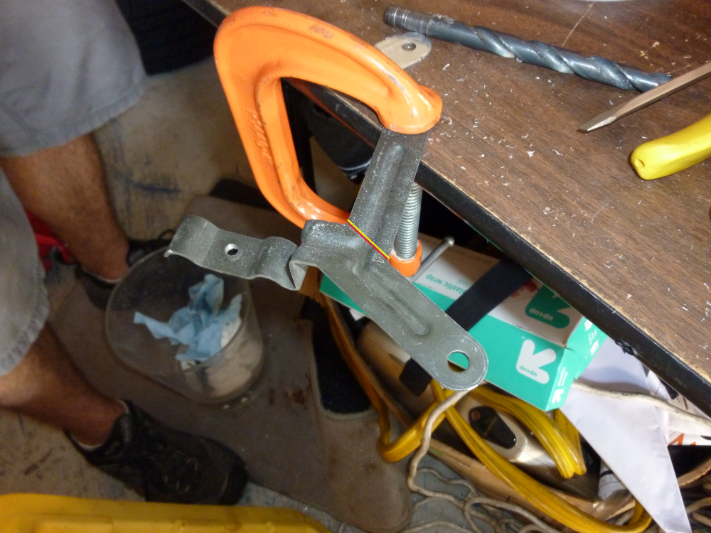
Now we can move the bracket to where we want it.

Bending of a bracket so that the radiator sits flat, we used a small bench vice and marked where we needed to bend it
Here is a picture of where we are going to mount a bracket, Using one of the 12mm Bolts that hold the crash bar ( this is the bottom two bolts for the crash bar)

Last edited by thescreensavers; Aug 8, 2013 at 01:18 PM.
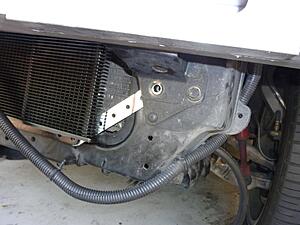
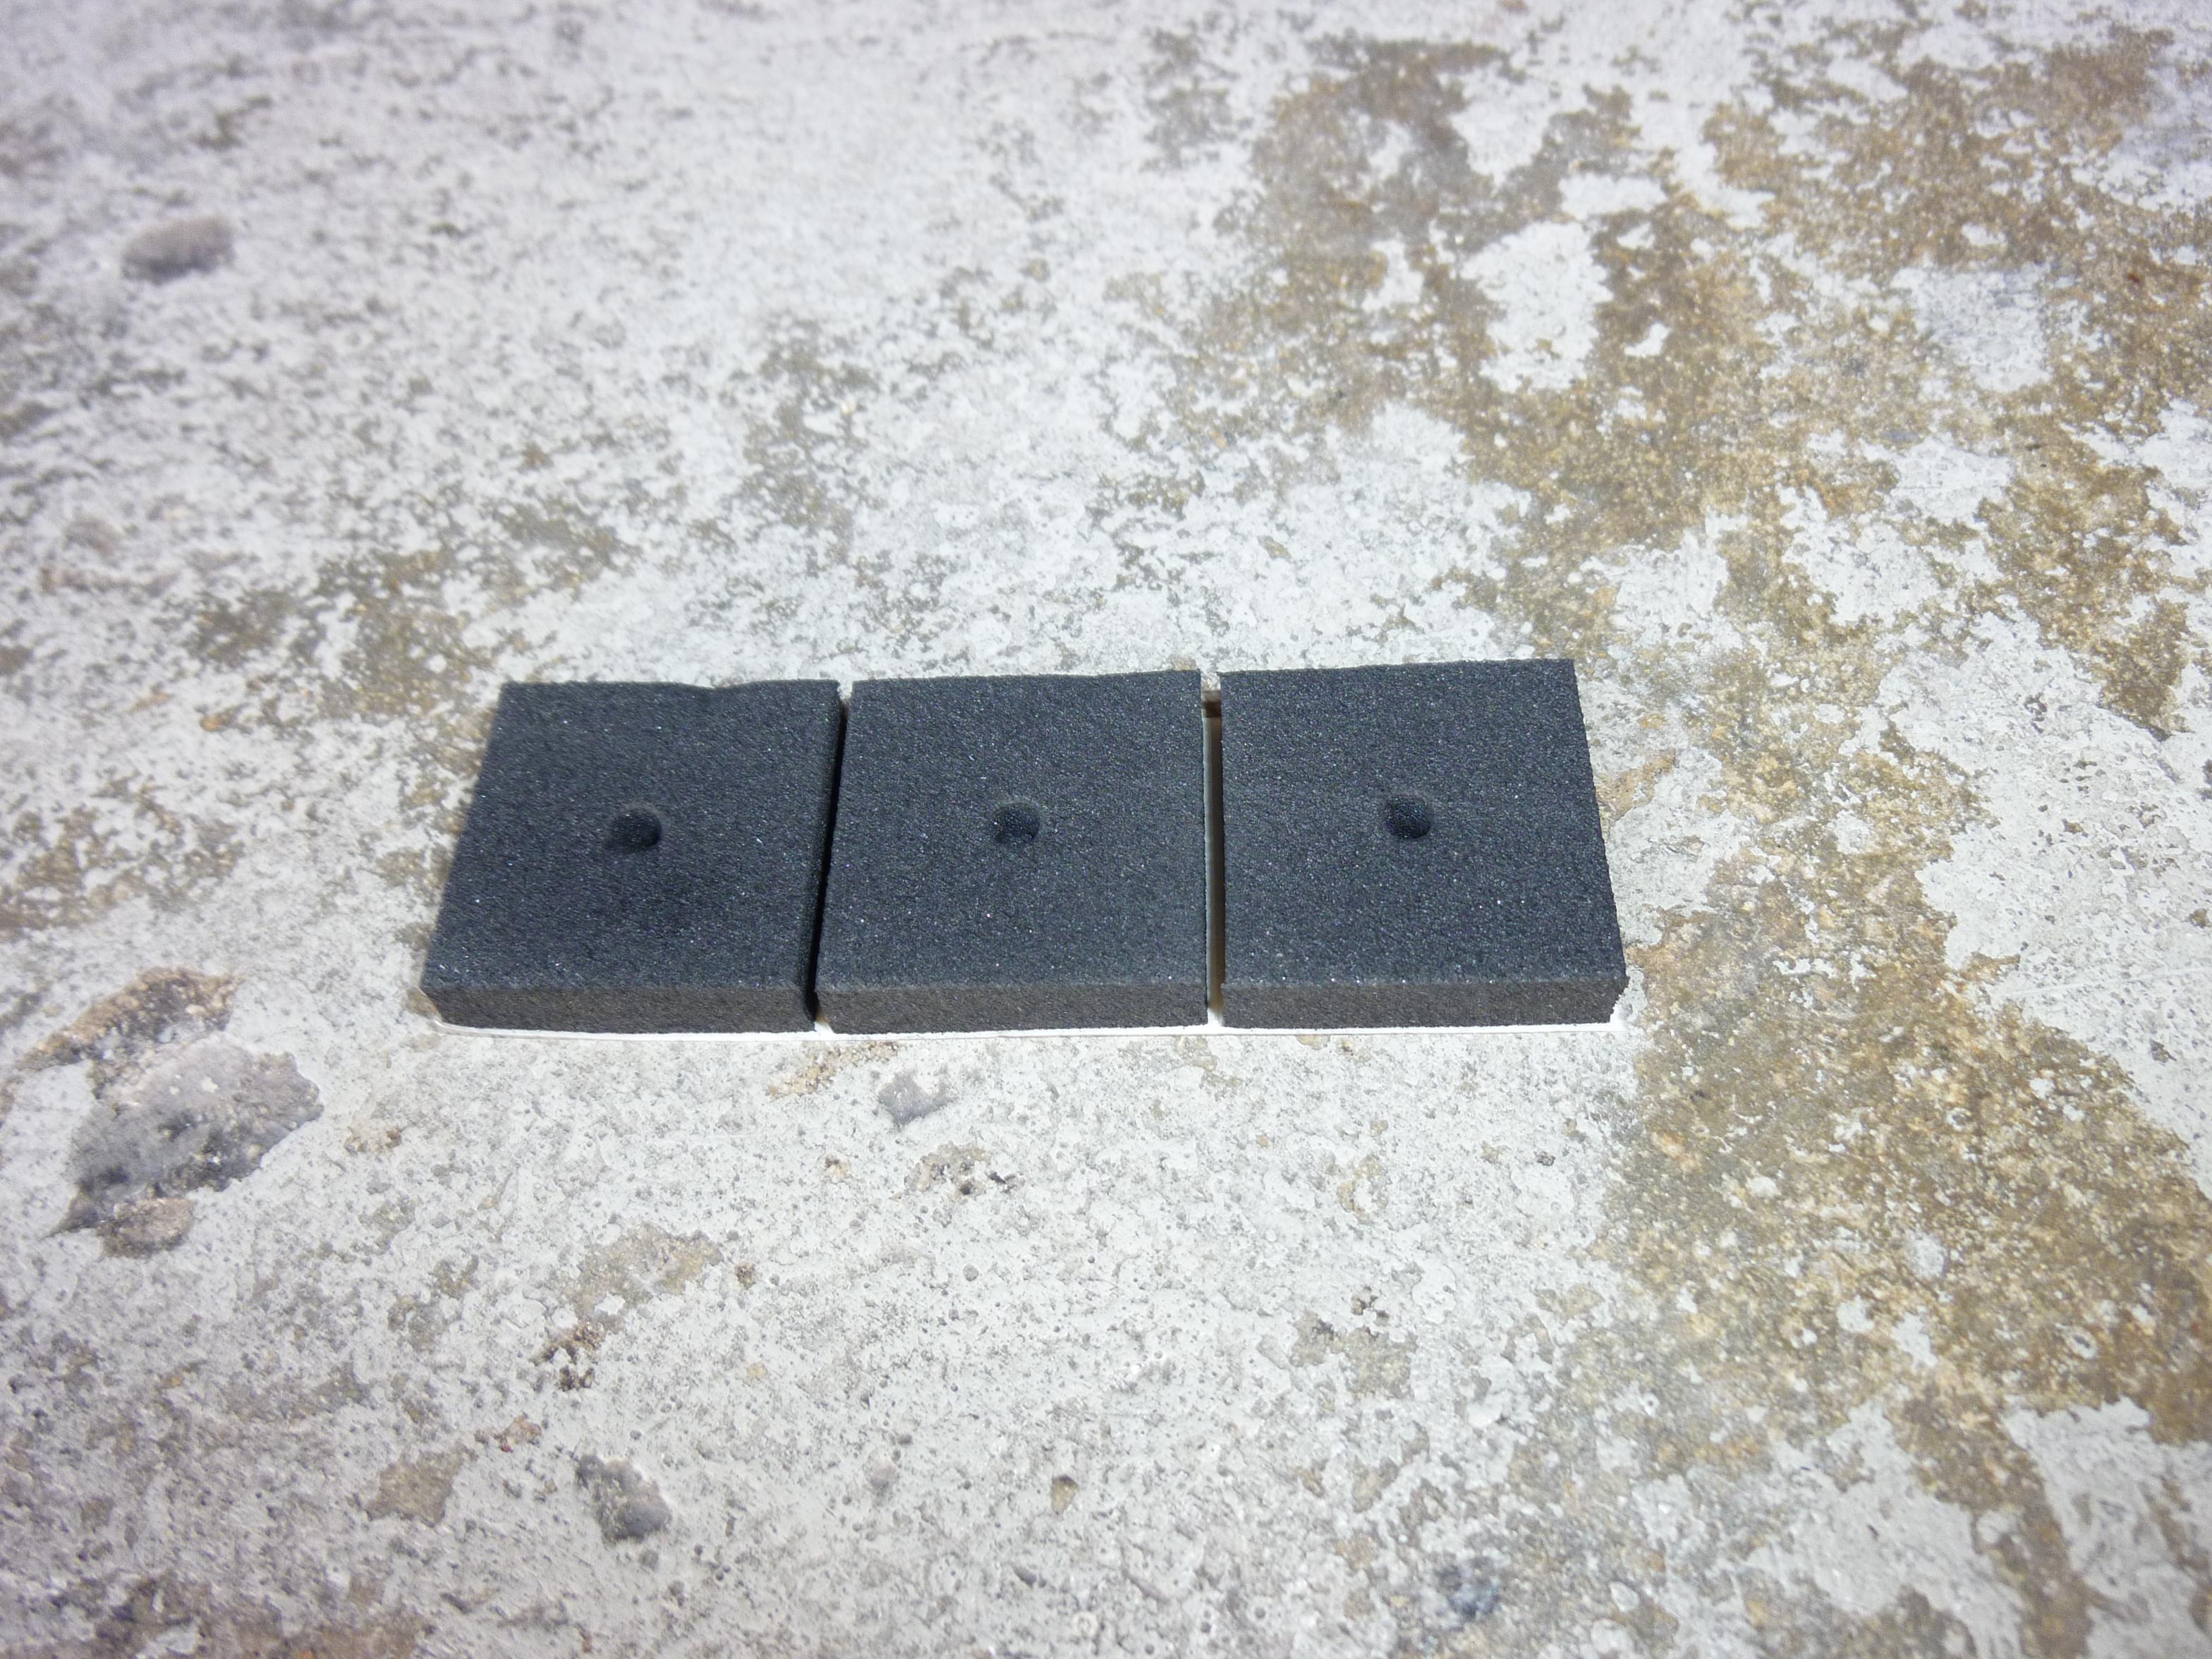
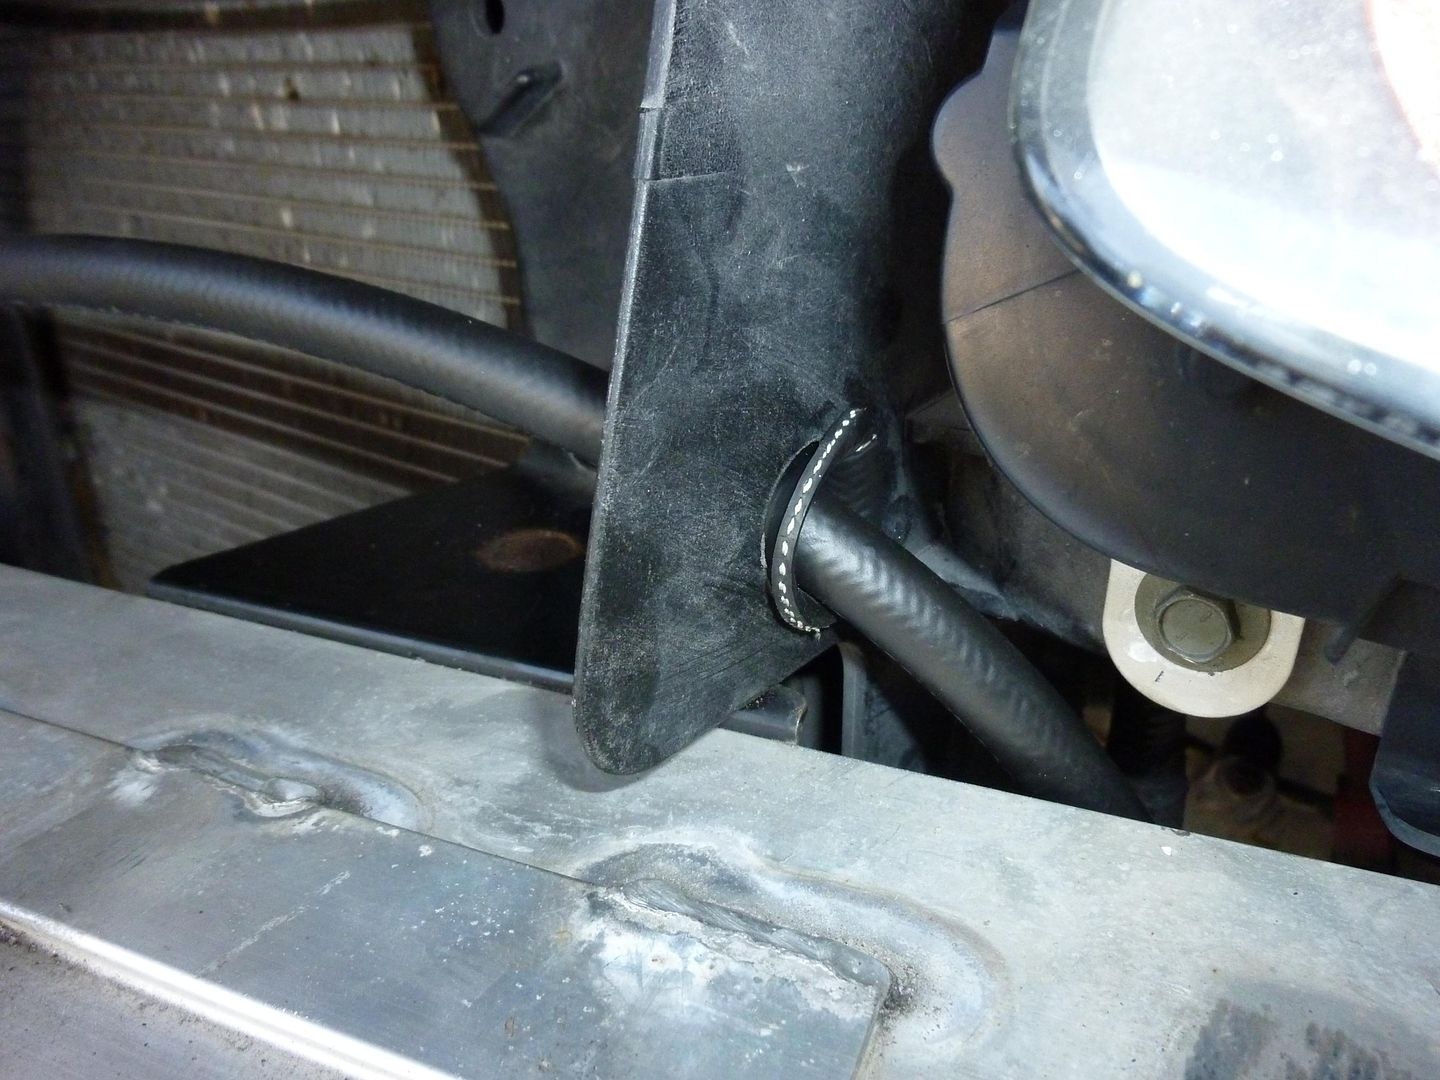
Supplied with the B&M Cooler kit we are going to use this to isolate the B&M cooler a little bit from vibrations.
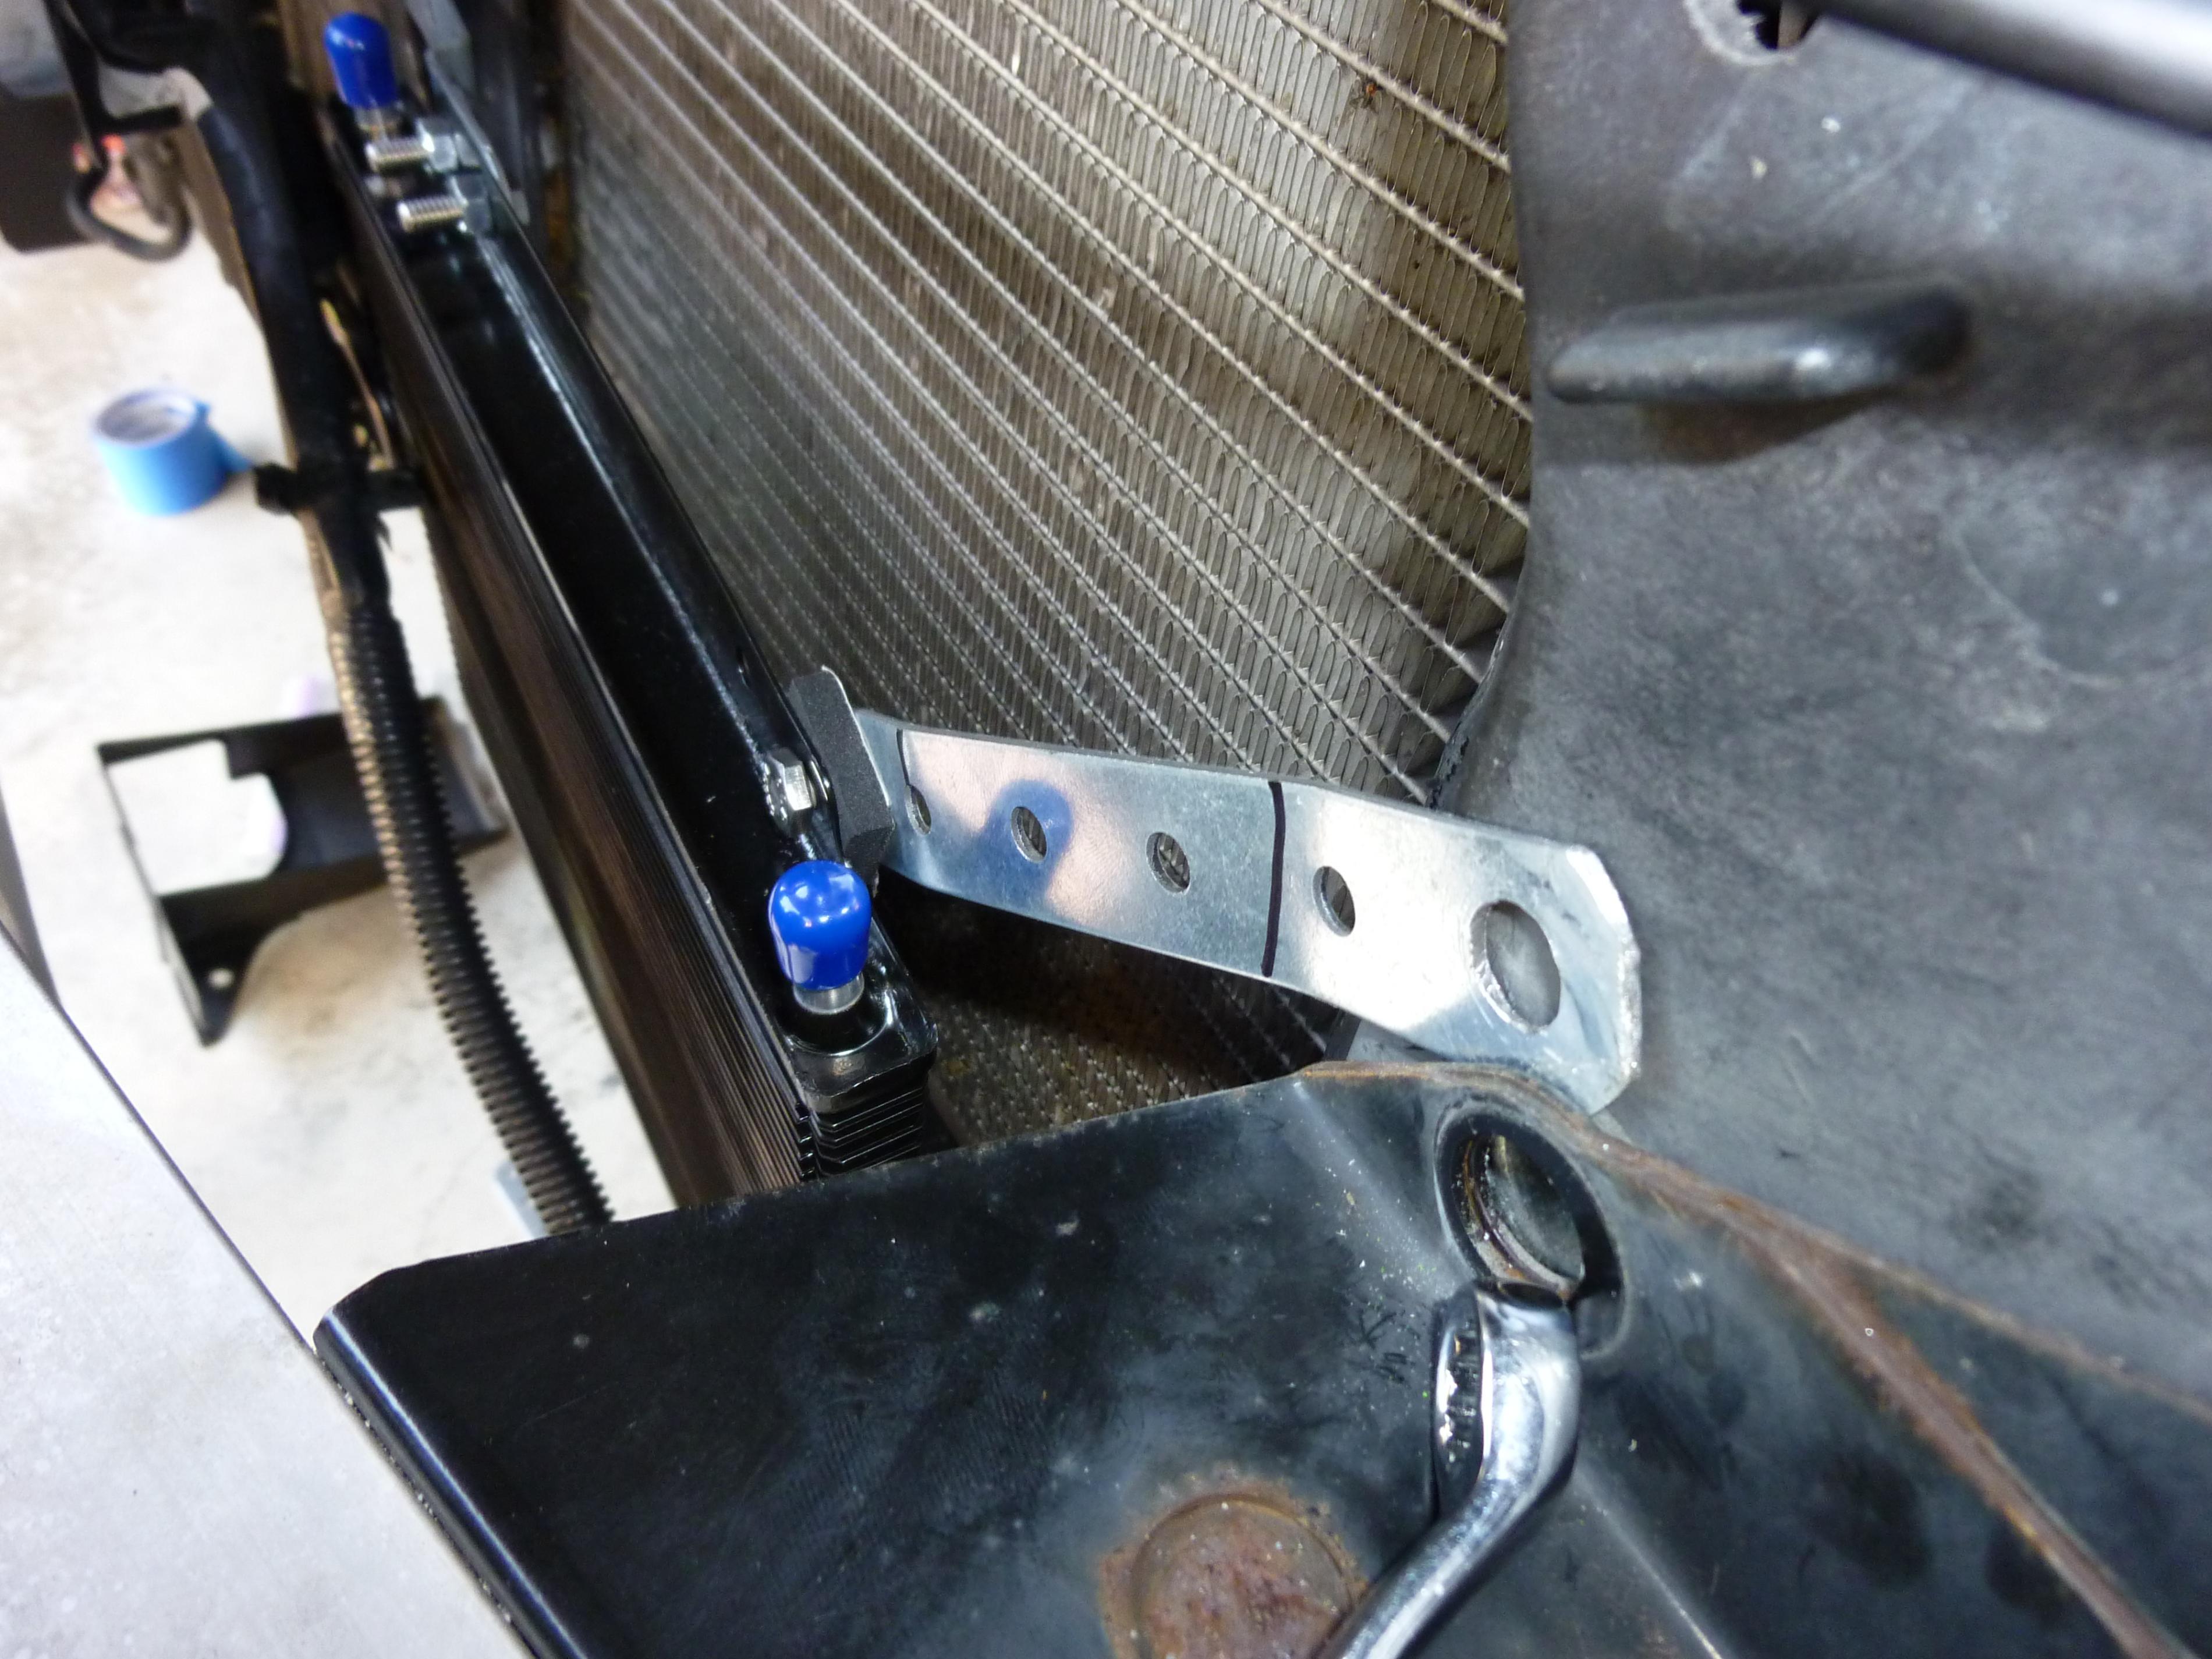
More of how we marked up the bracket, this bracket was drilled out so that the 12mm bolt will go through. (This is the top of the crash support)
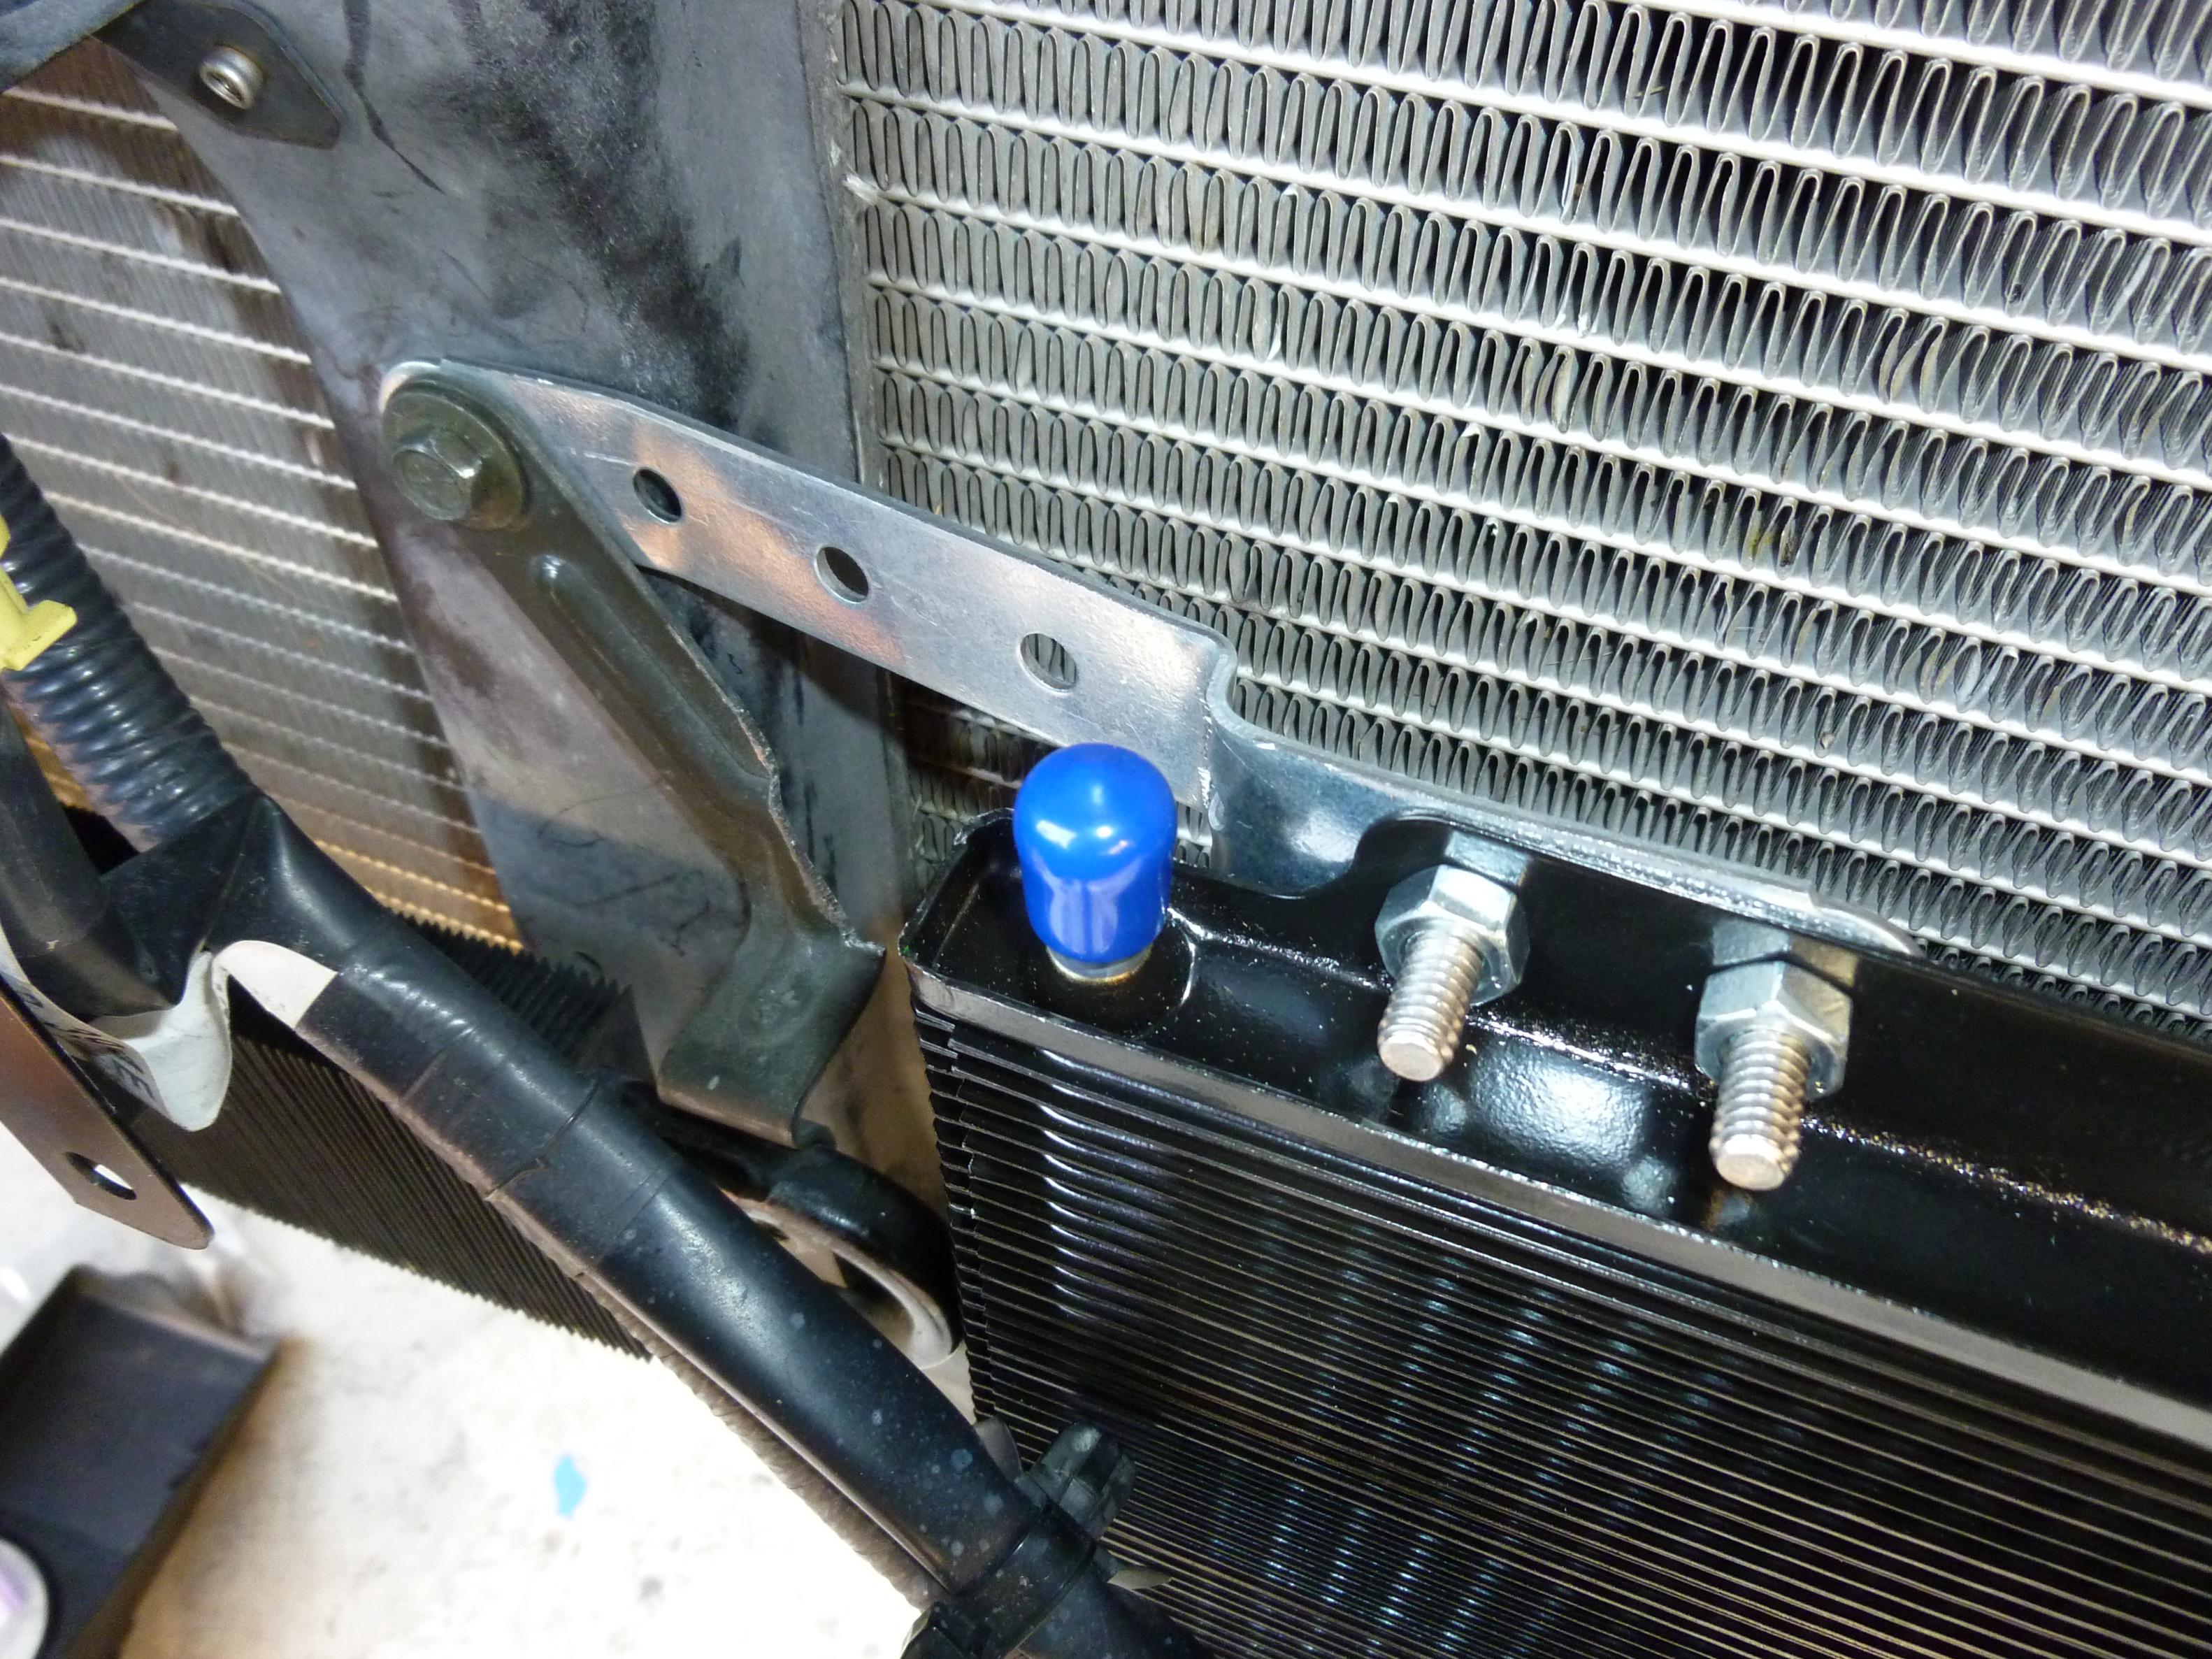
So we got three brackets placed to mount up to but, we don’t know what to do about the last corner, but no problem!
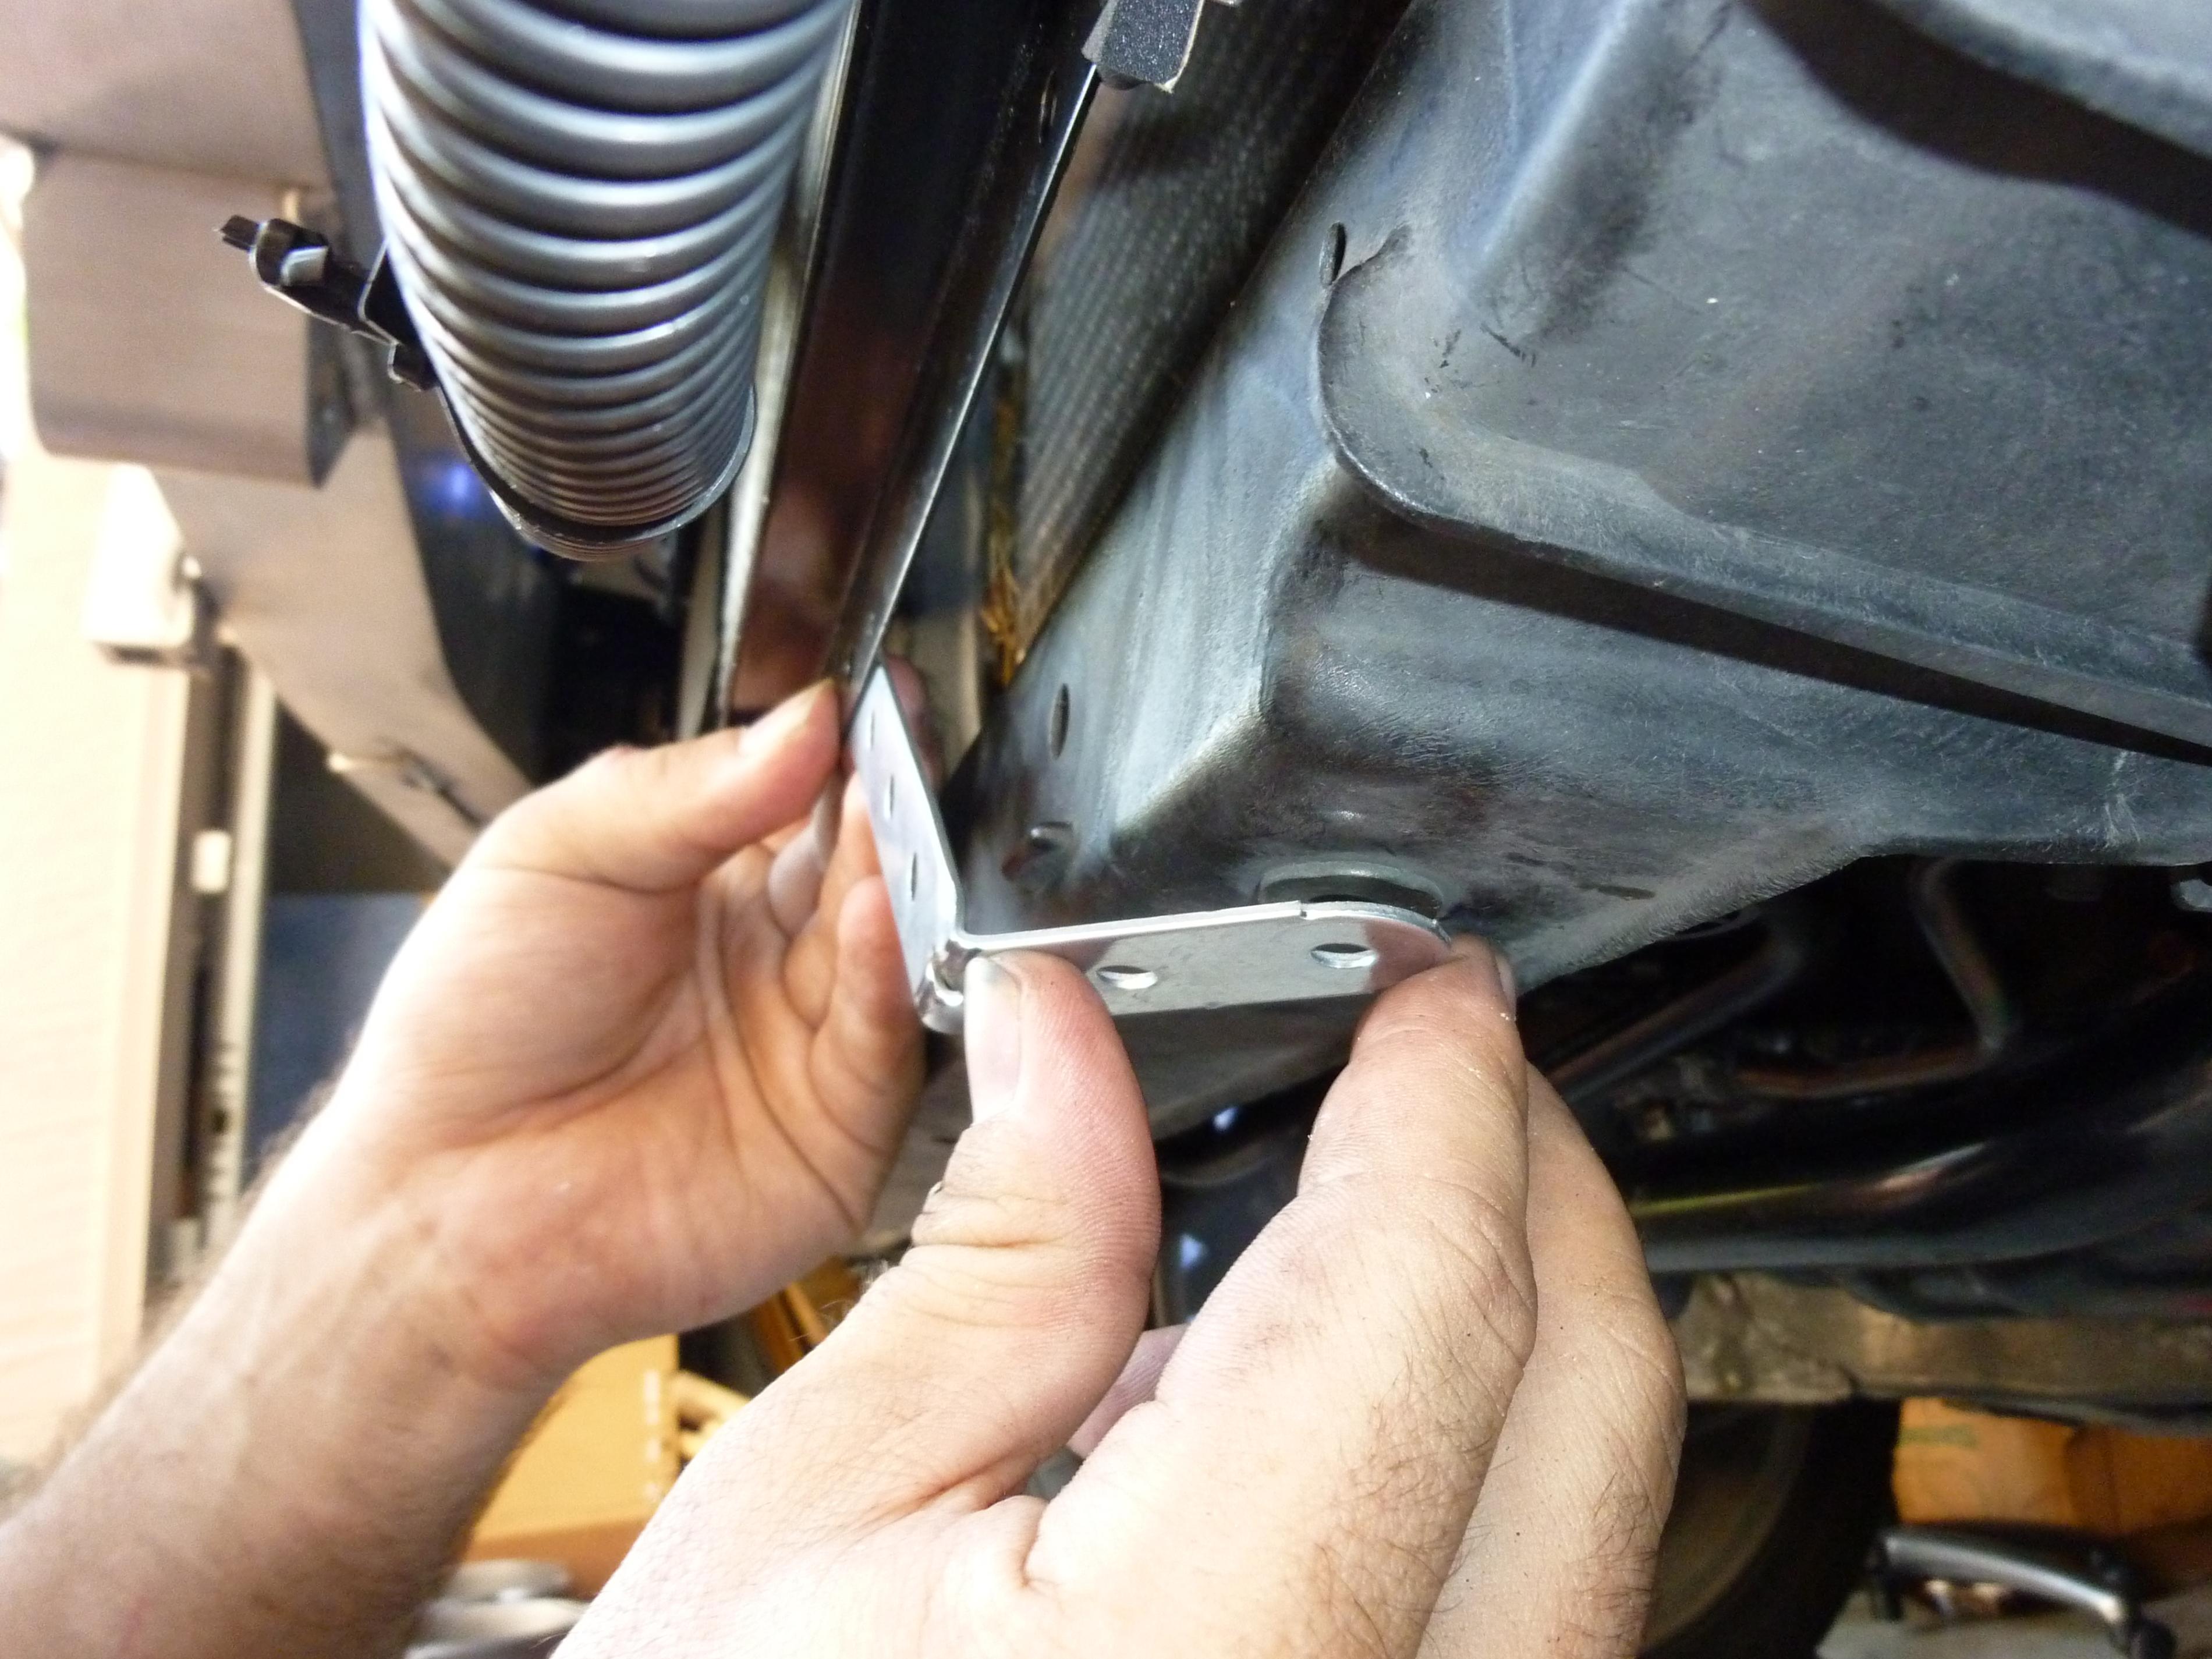
We used one of the bolts that hold the underbody, and yes every time you take off your underbody panel you will be unbolting this bracket. Just make sure you bolt it first when you put the underbody back on, Get one of the bolts so that you can tighten it up and figure out the appropriate bending’s.
More of the bends we use to mount it up


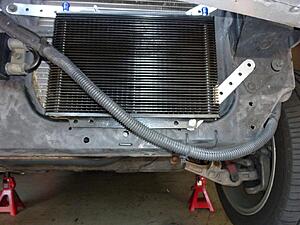
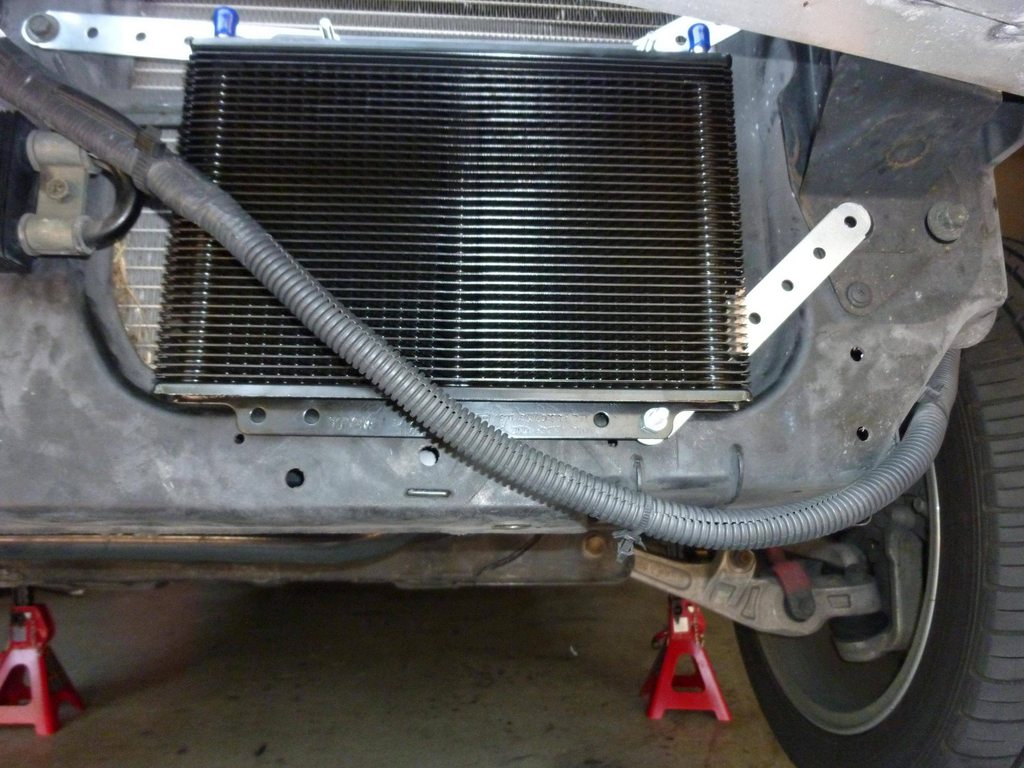
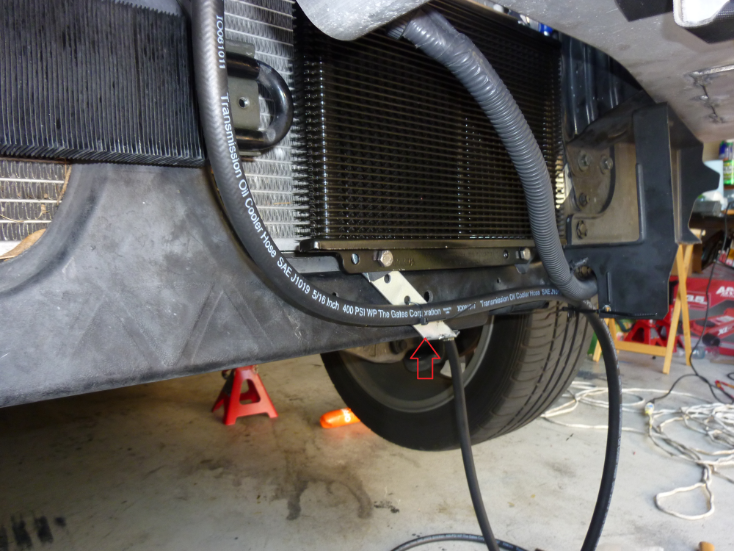
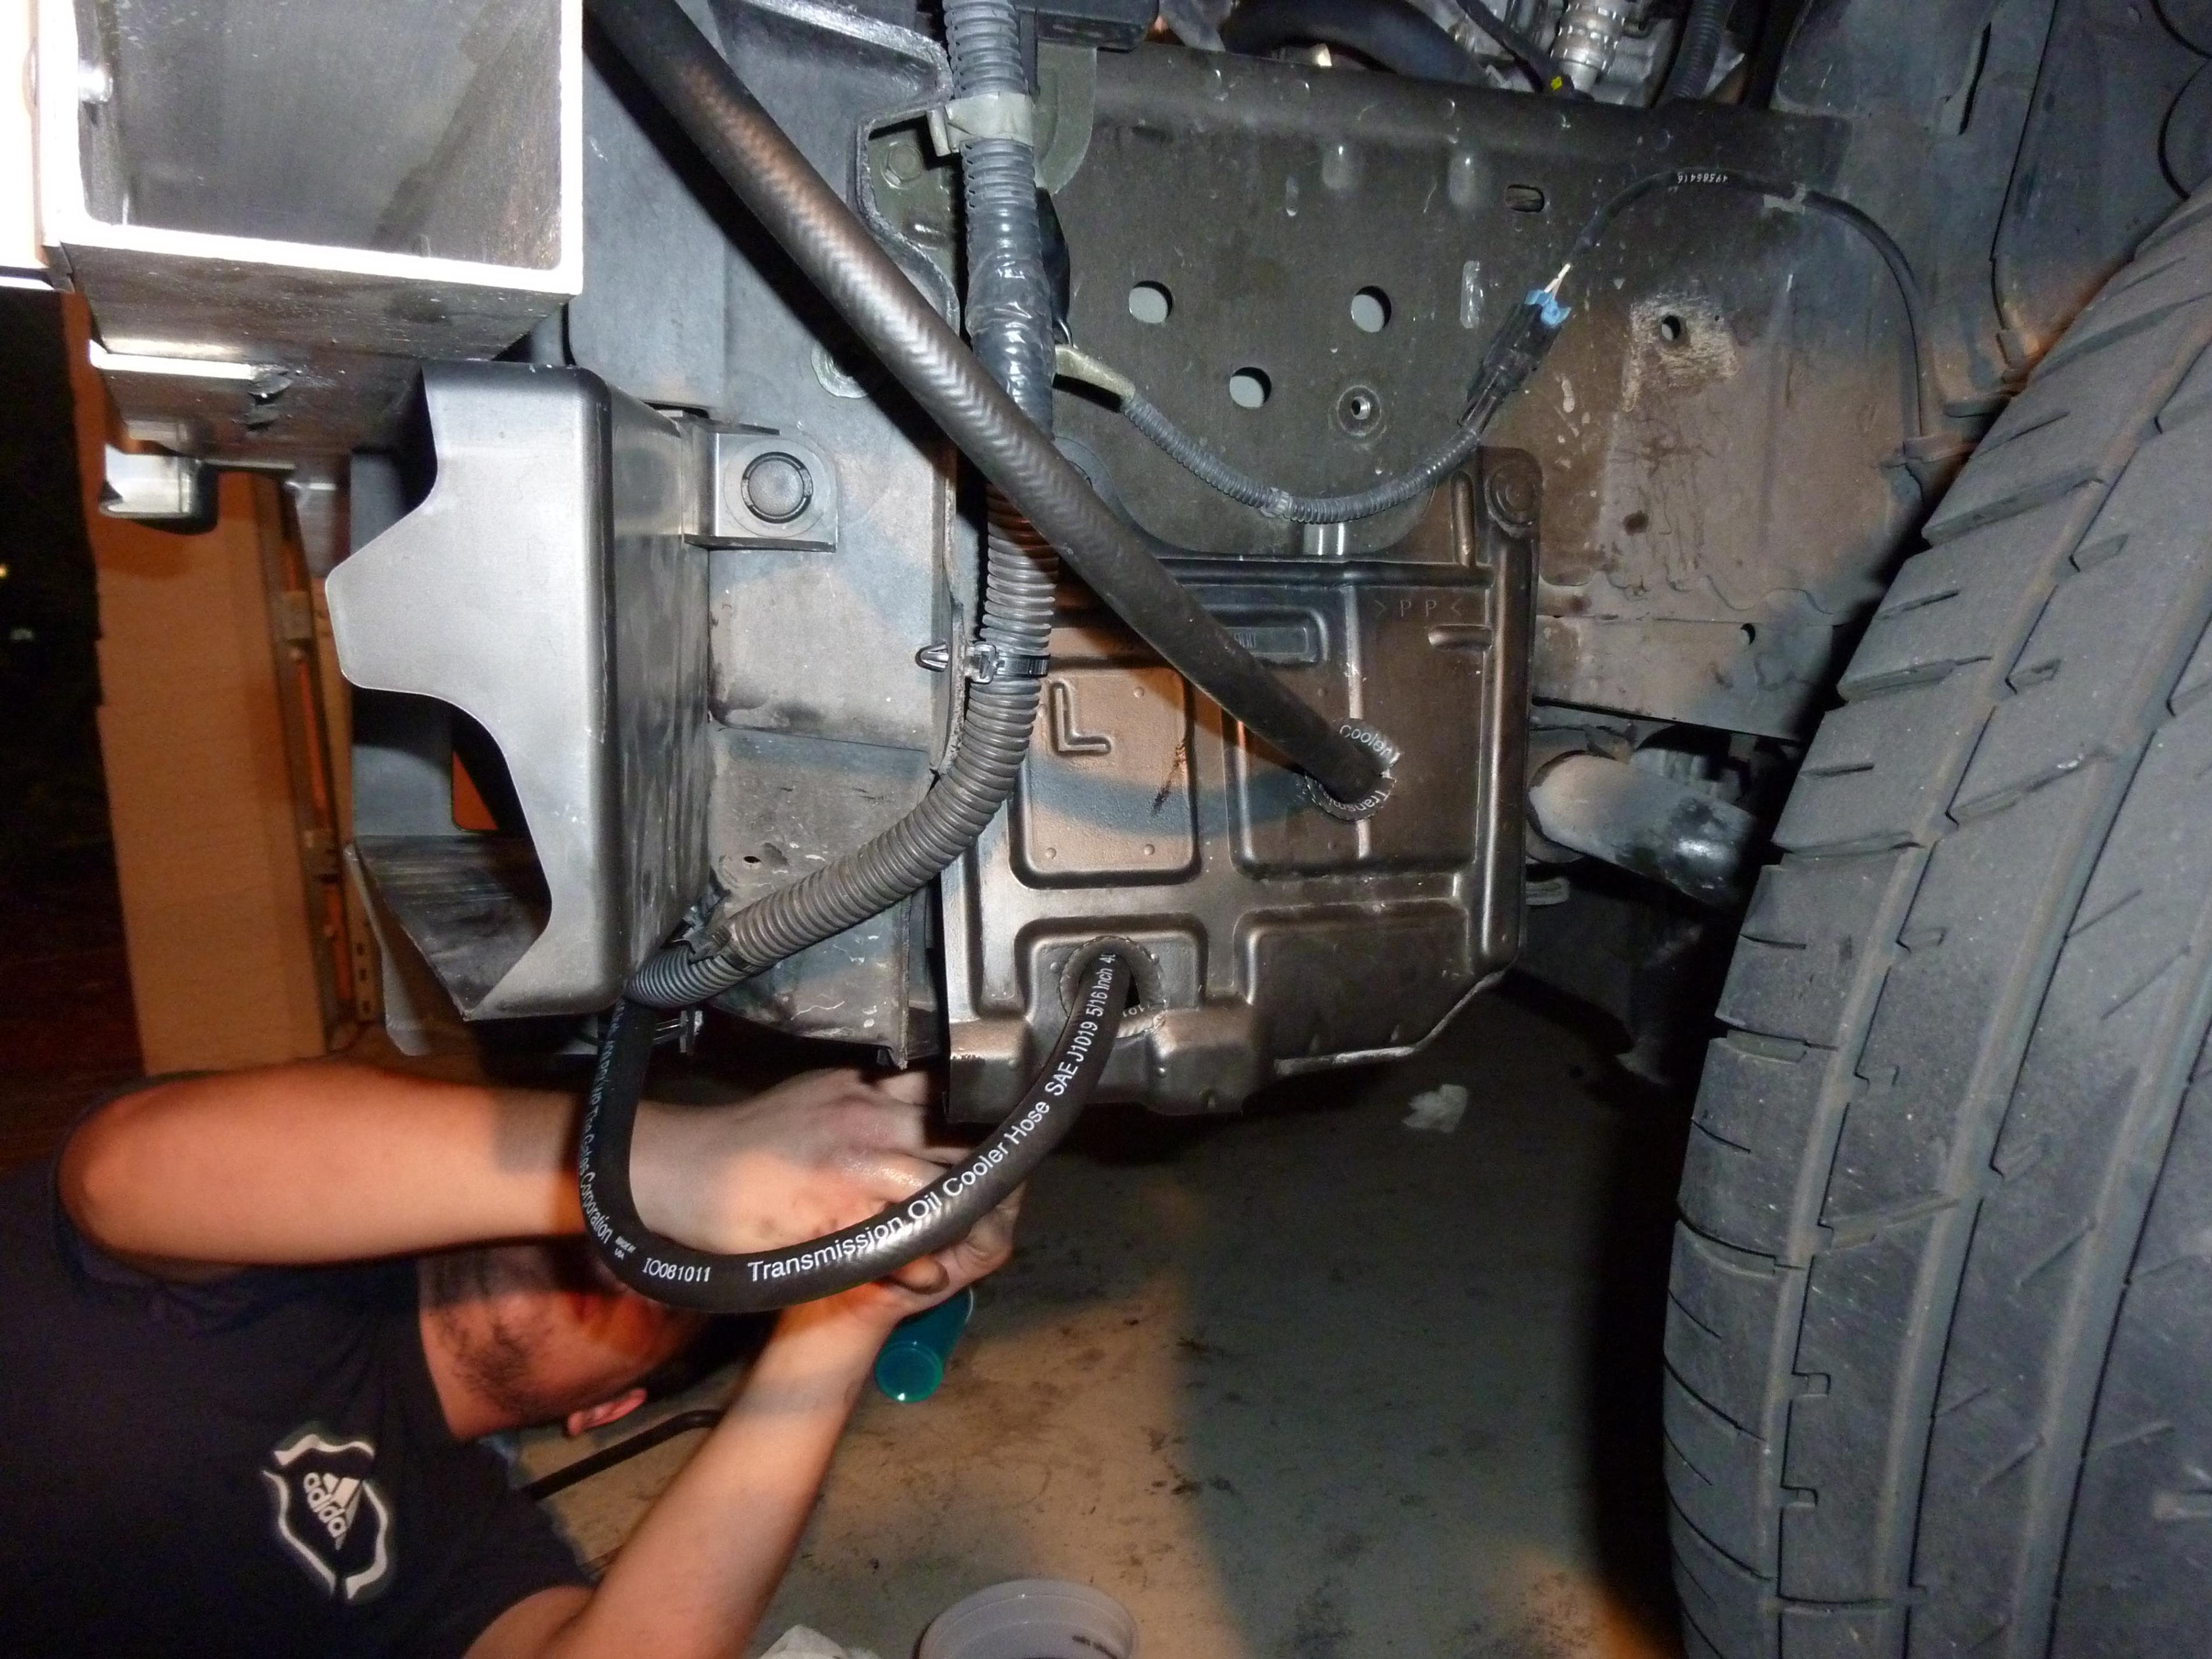
Now that we have mocked the radiator up, we now figure out about the hoses. We now used the Gates 5/16 transmission cooler hose and figured out where we are going to route them. This line is going back to the transmission
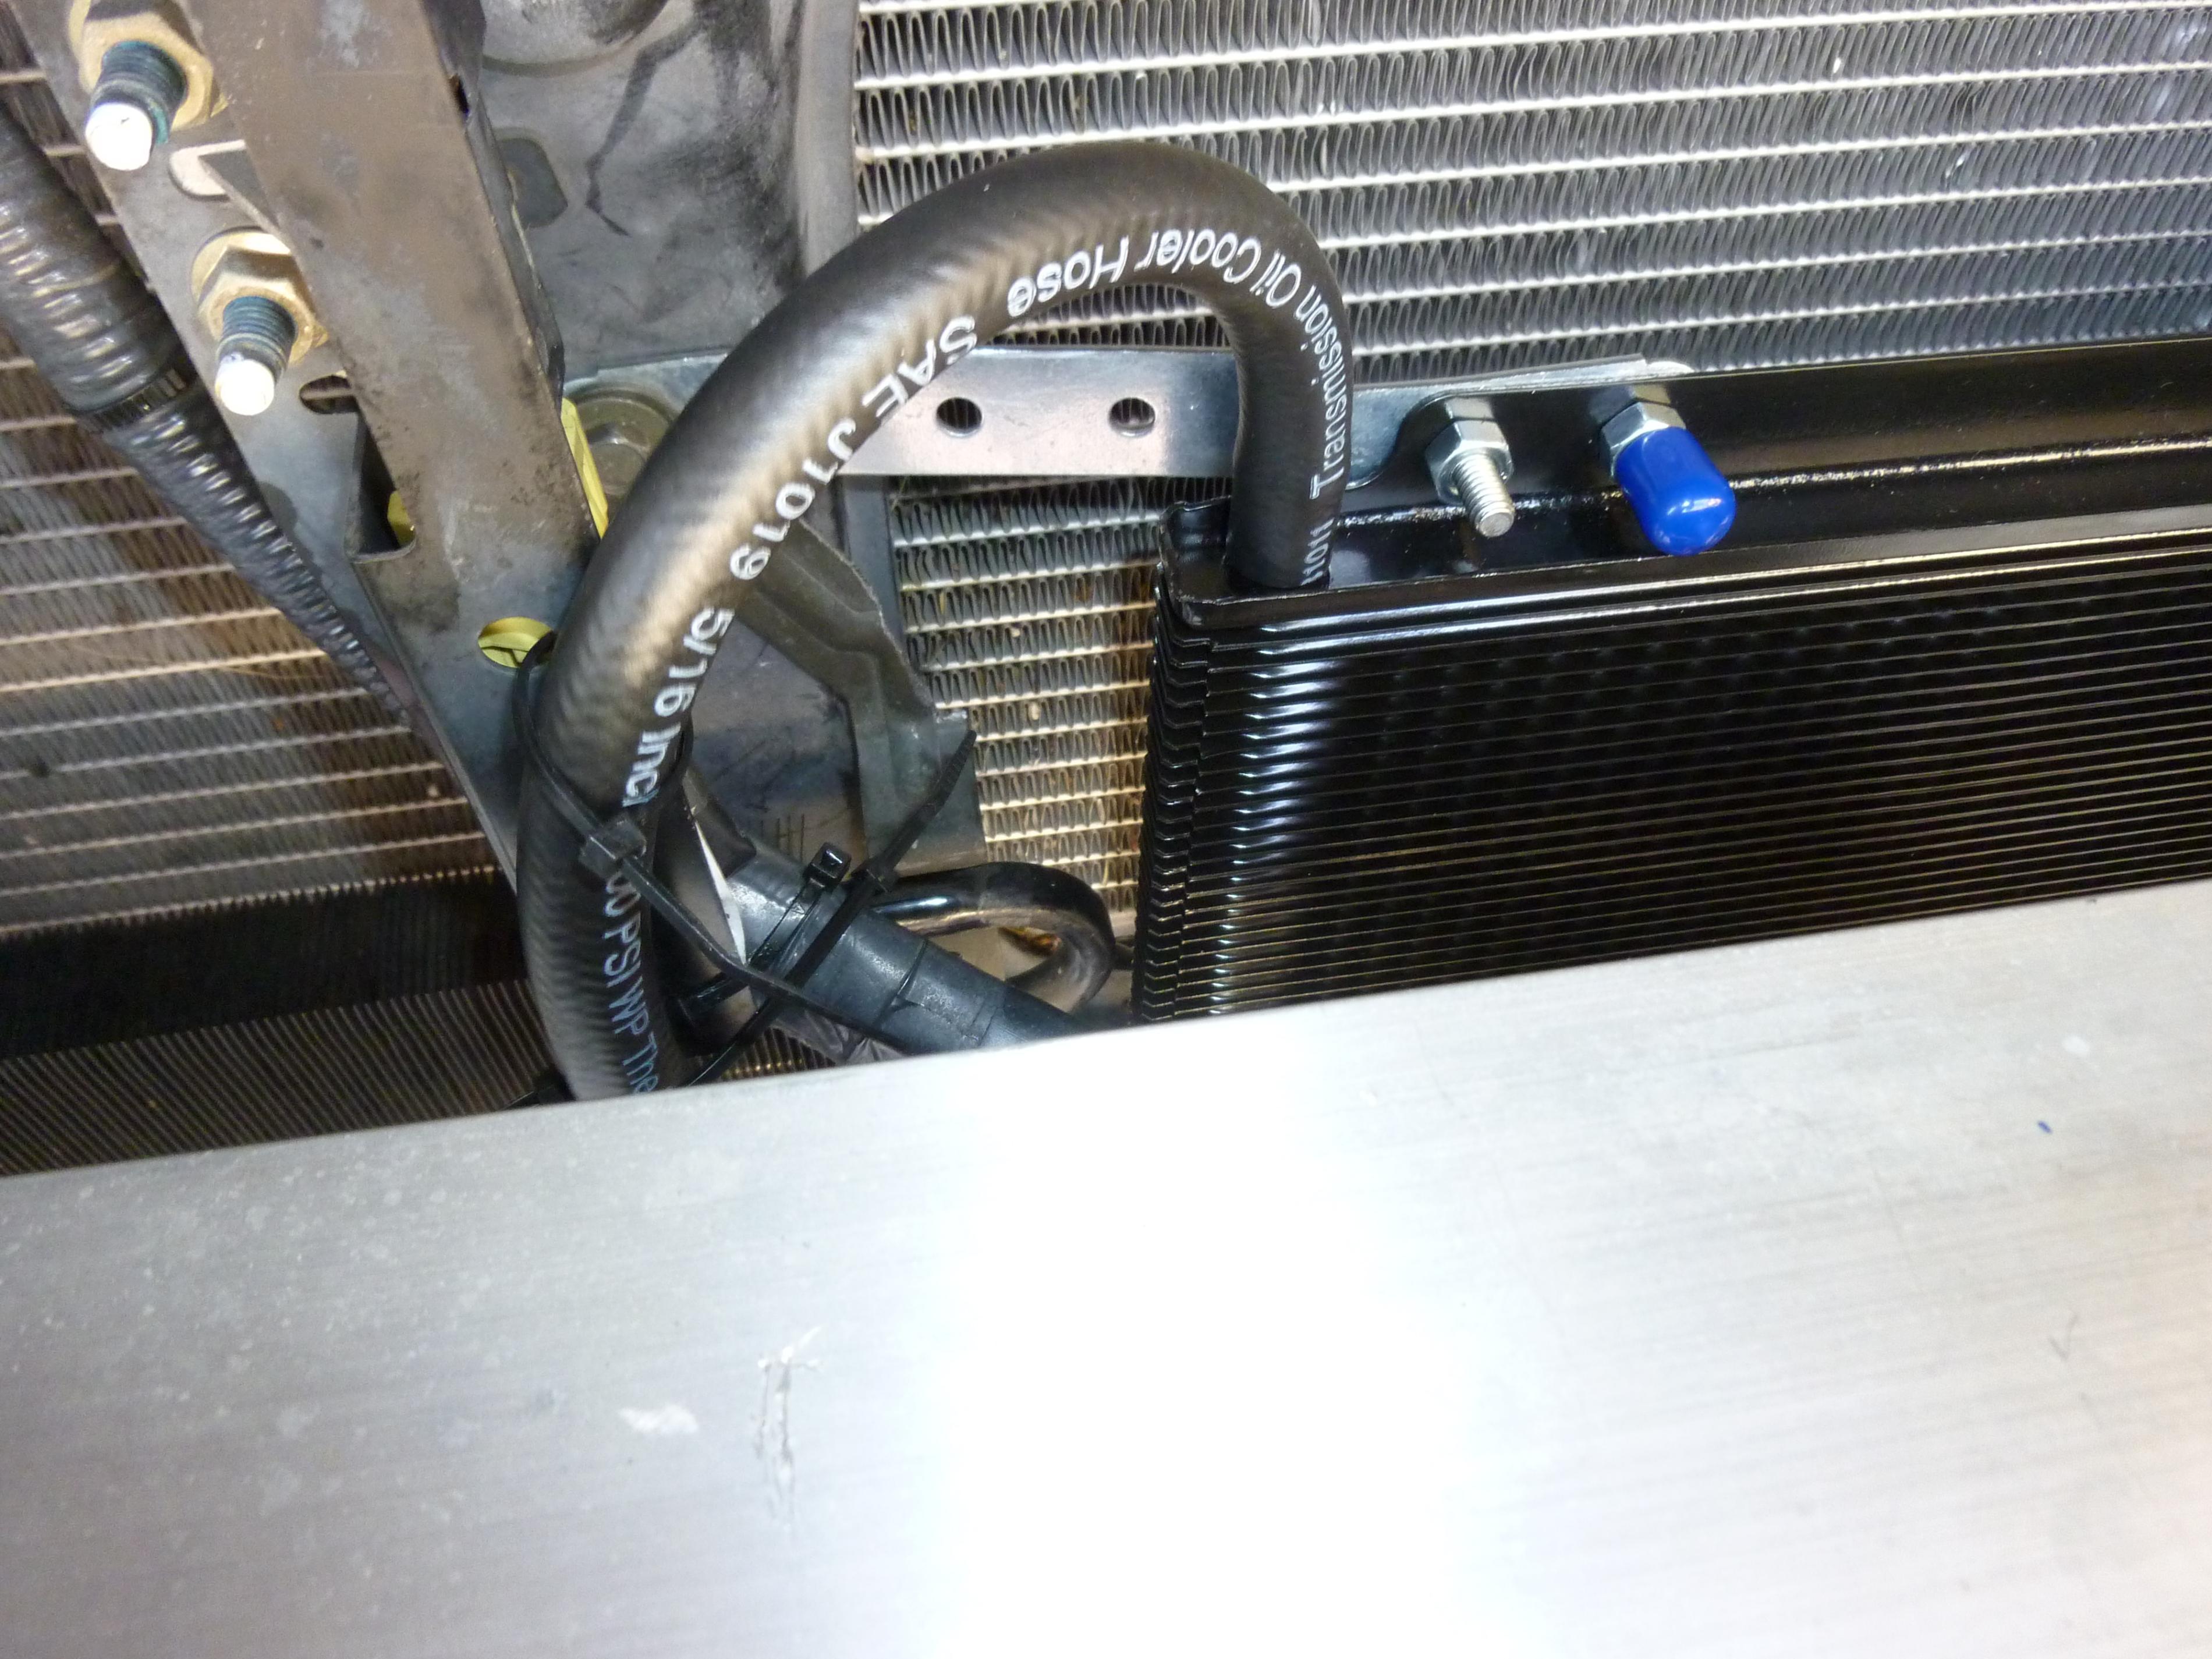
We ended up routing this hose with the wire loom that goes through here, we also drilled two holes and put a weather resistant zip tie to give some ground so that the hose is supported.
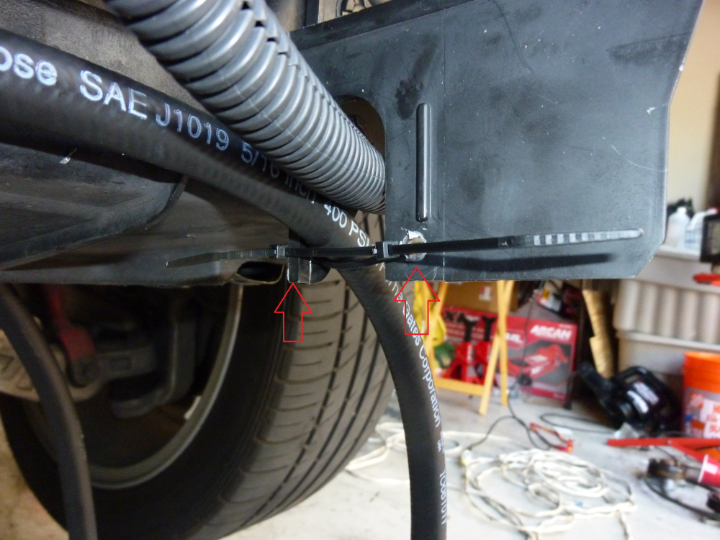
We also put another ziptie here
So now we had that routed, we tried various ways to mount the Inlet to the B&M Cooler which comes from the OEM Radiator.
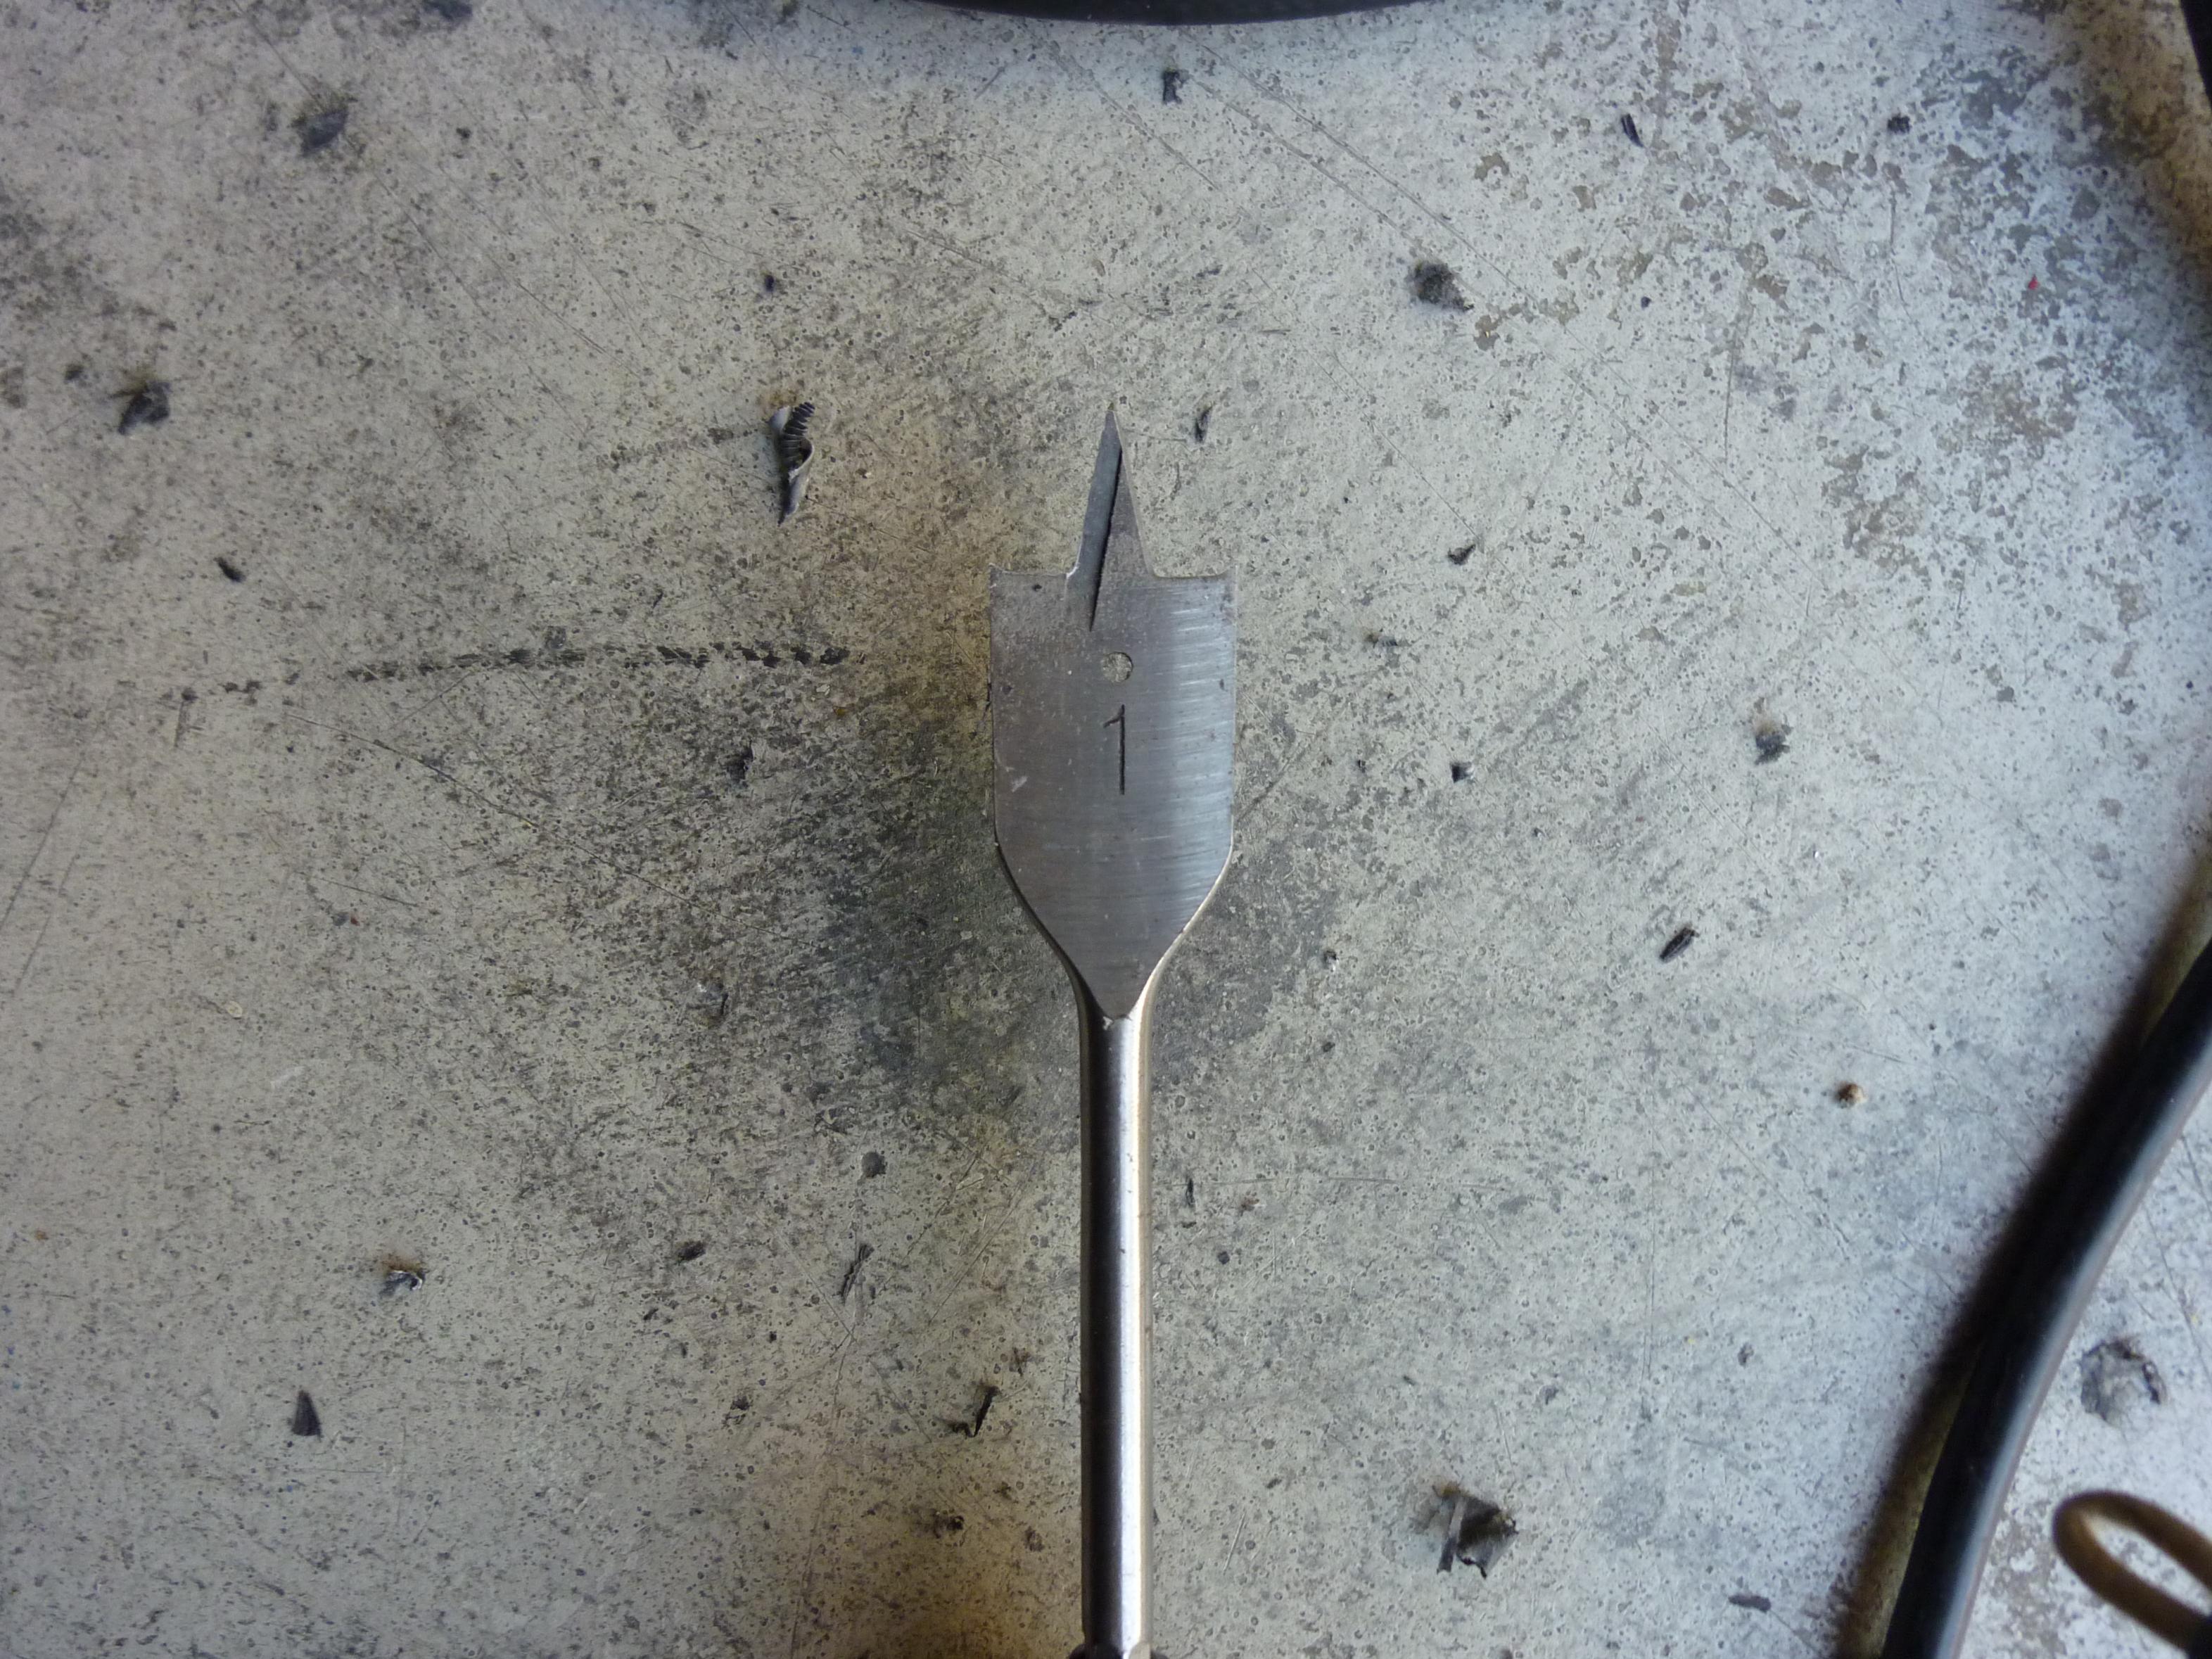
We ended up cutting a 1” hole
Take is Slow
Here you see the hose routed, we also cut a small section of hose and cut it down the center and installed it as you see here, this is so that the hose does not rub on plastic, to prevent Hose Abrasion
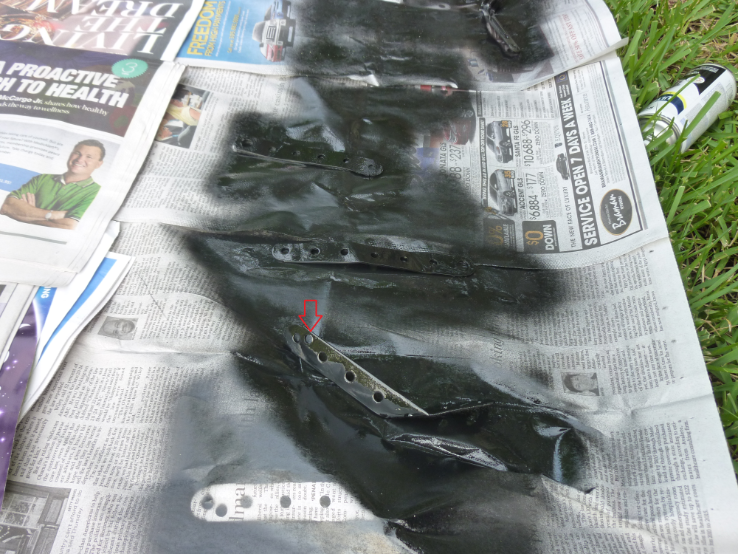
We went ahead and painted the brackets, notice one of the brackets we had to drill out another hole to make it work, this is the bracket that goes with the underbody. You don’t need to use a 23/64 drill bit, as this is for the 1/4 inch Stainless Bolts, get a smaller drill bit for it. Before you do make sure you center punch it( a screw and hammer works)
We werent going for A+ spray painting job here so it’s not perfect, don’t hate lol
Some Comparison of the Gates Transmission 5/16 th hose and the OEM Hose
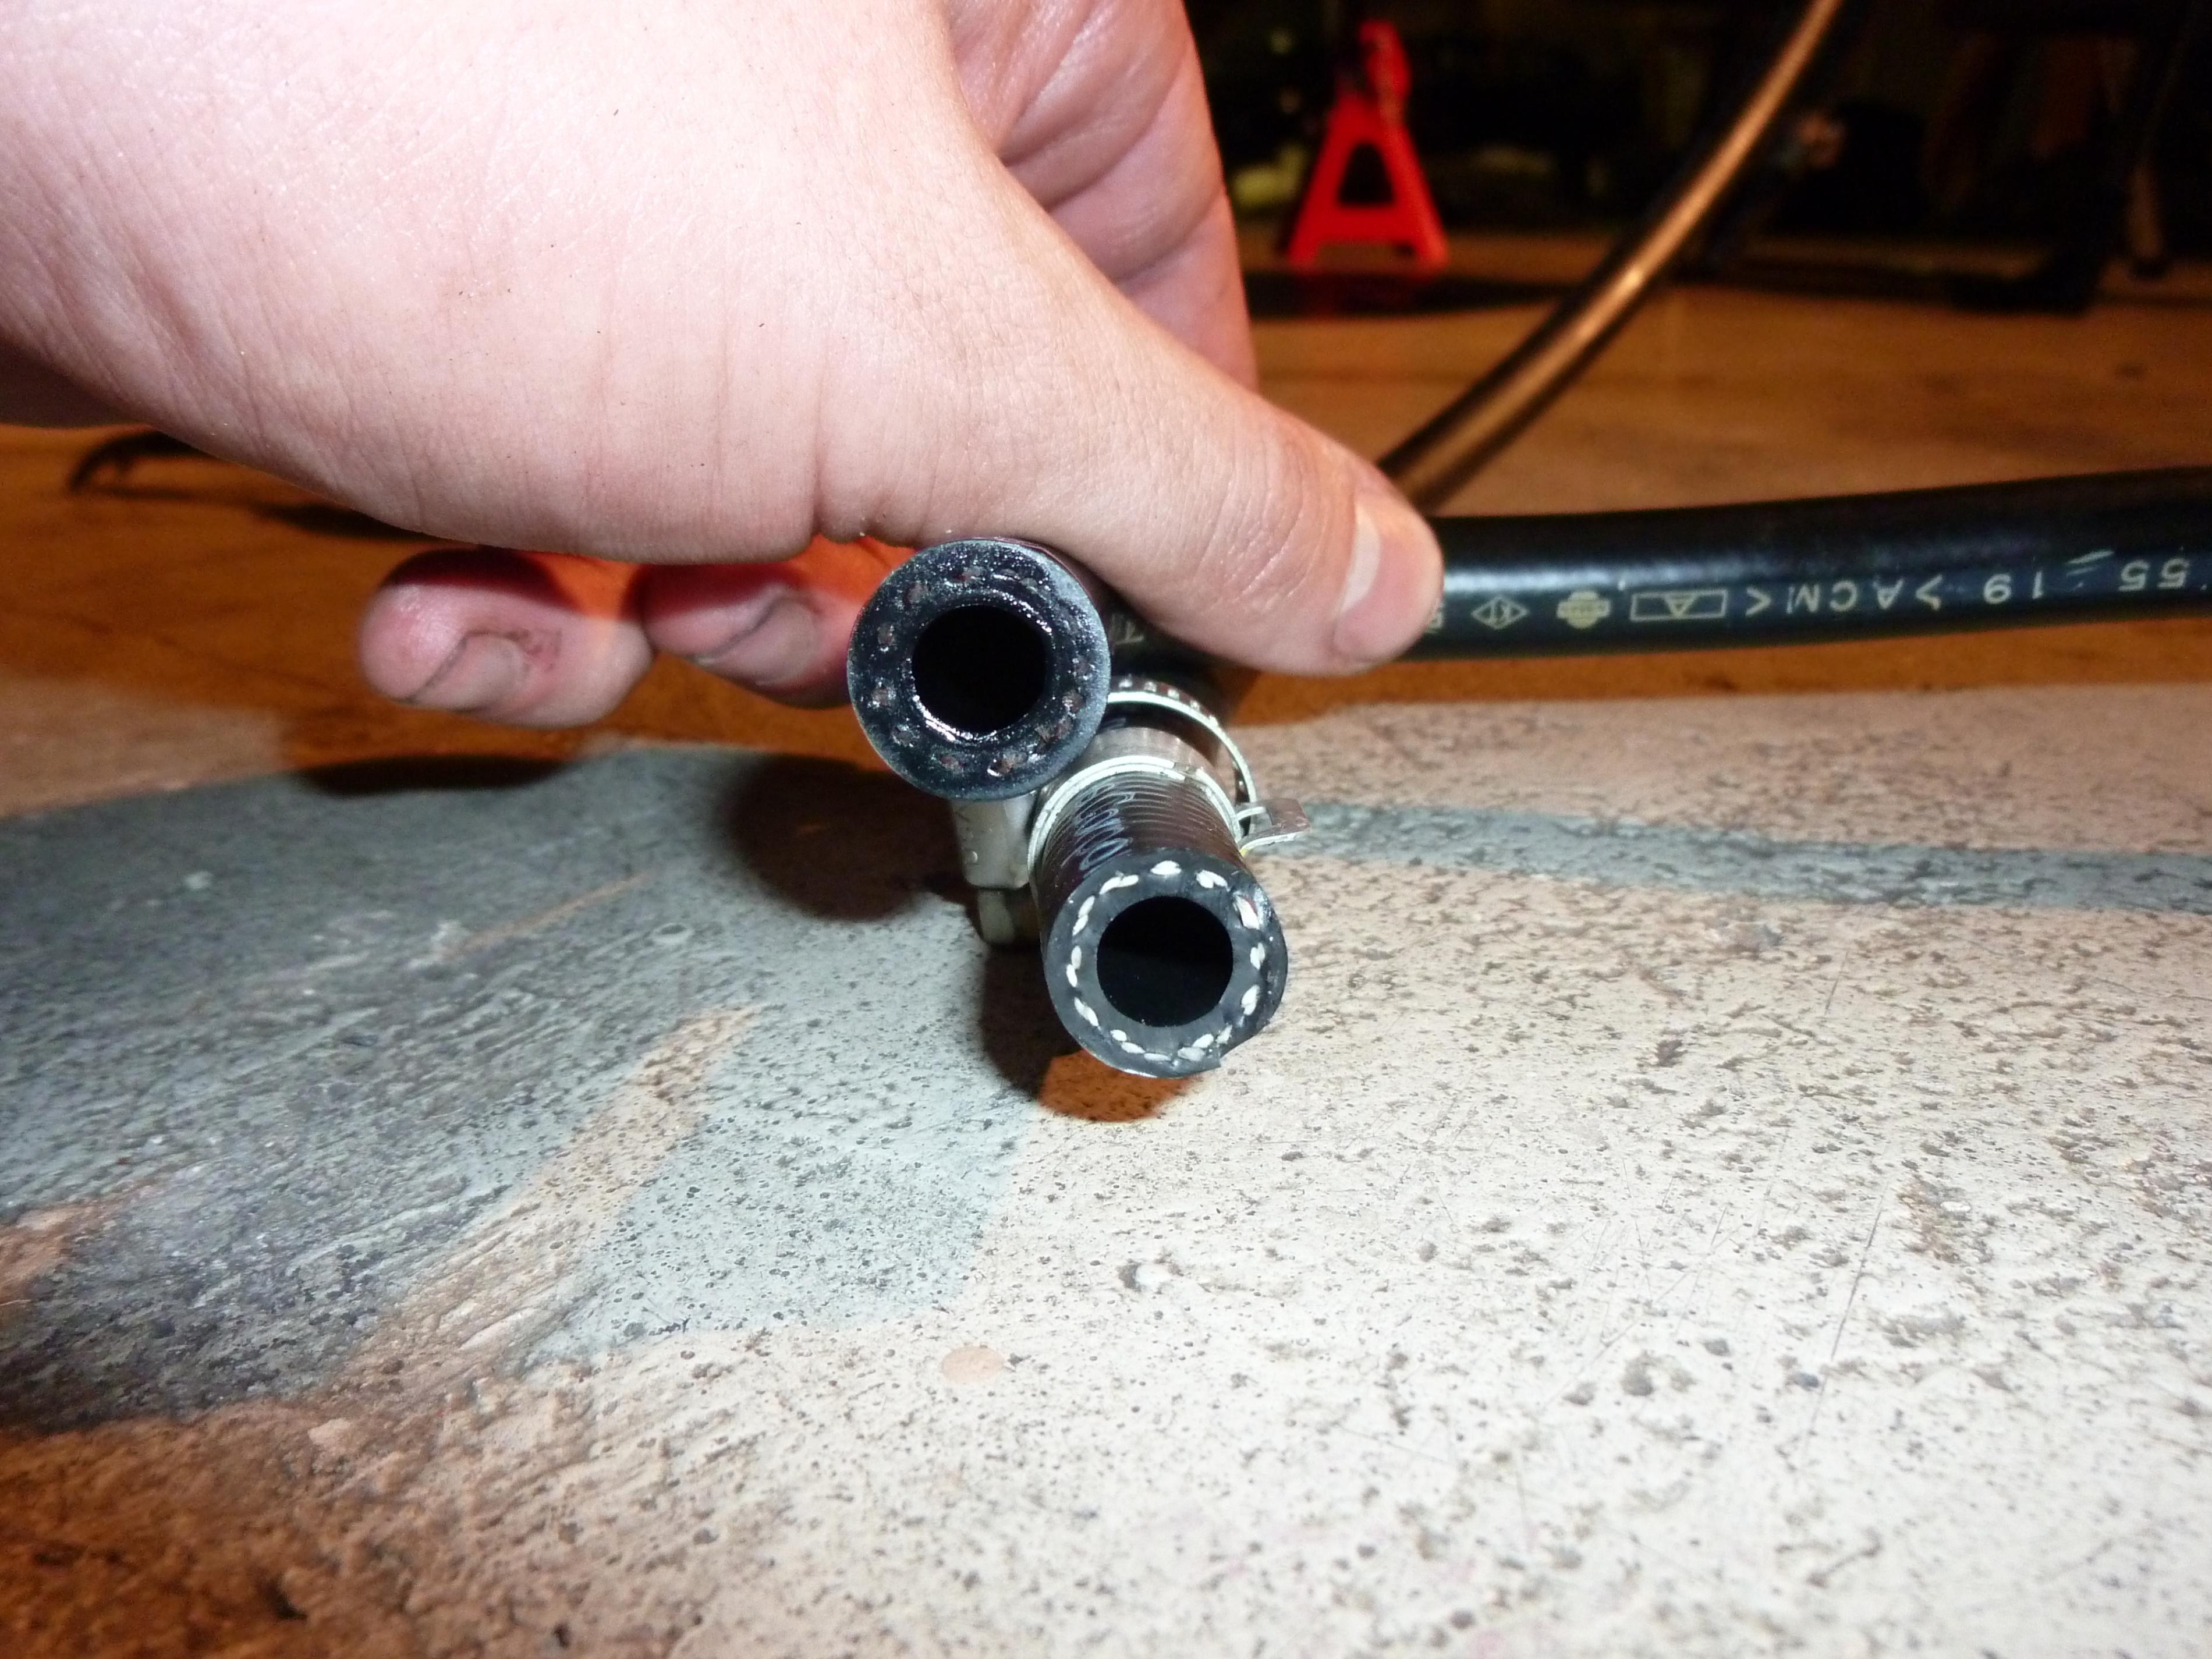
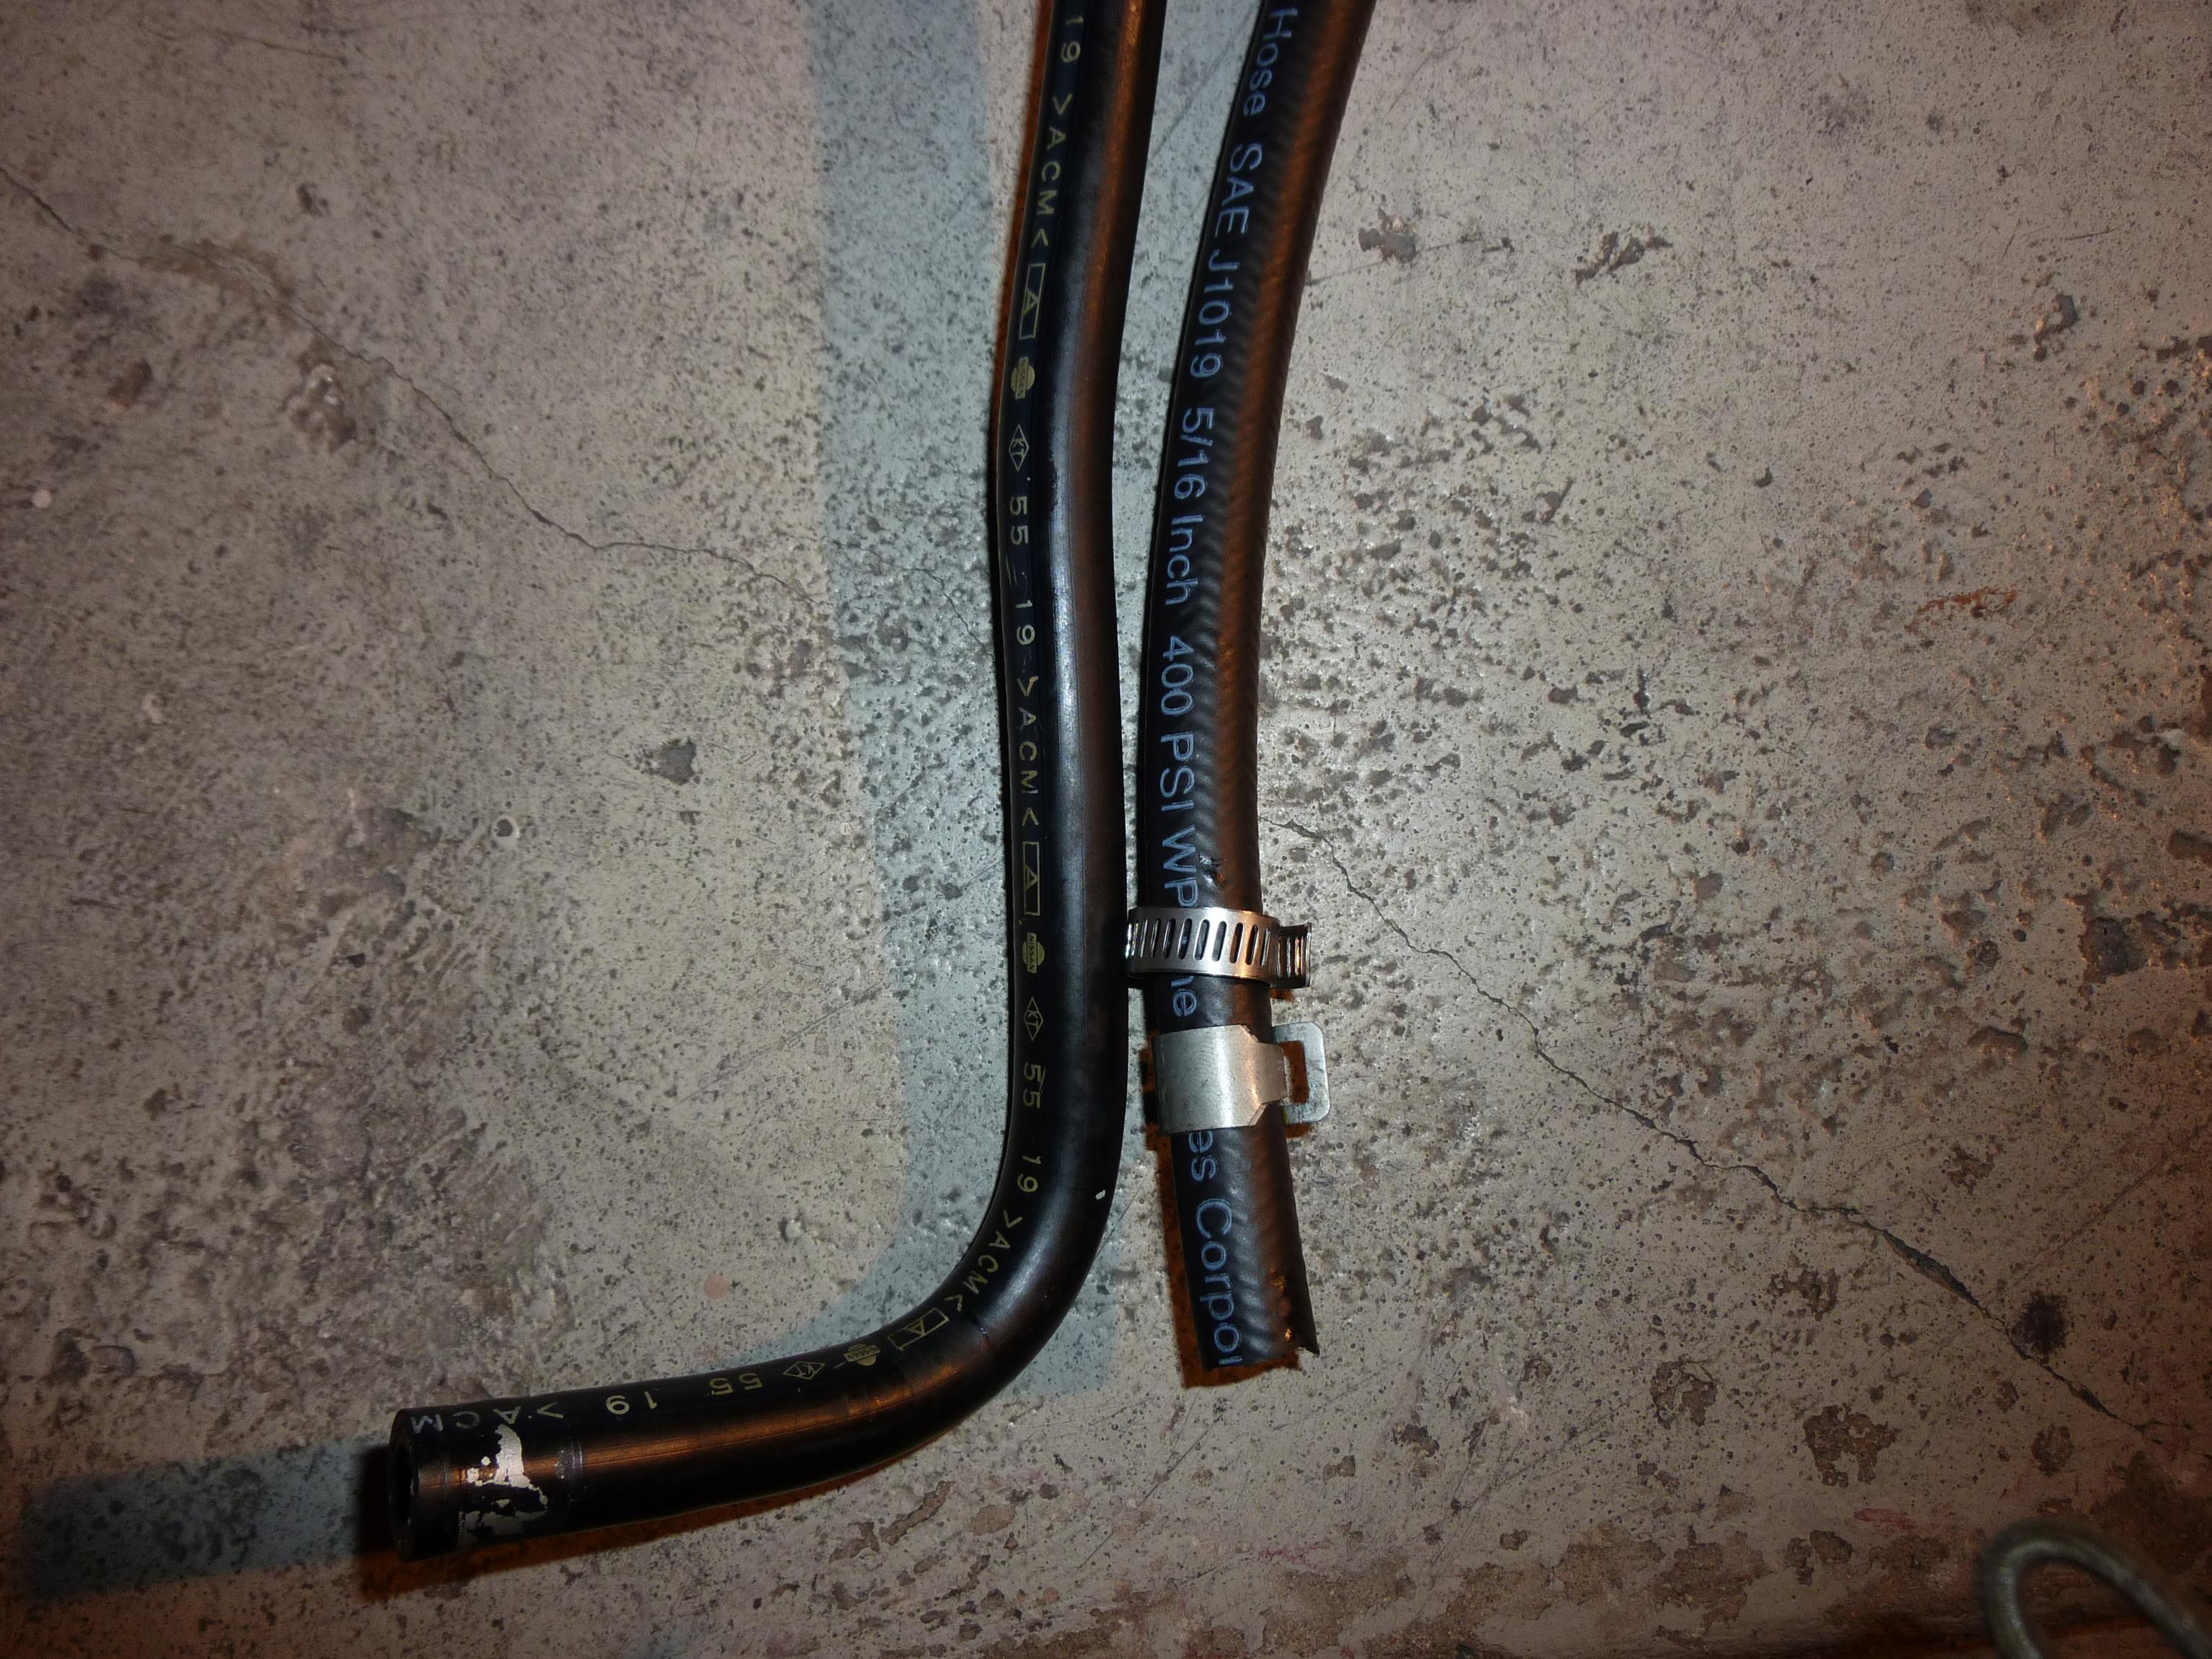
As you can see 5/16ths is the proper size for this application. Using 3/8ths hose for the 5/16ths barbs on the OEM Transmission Cooler can result in leaks or the hose popping off under pressure which can be disastrous
Here you can see the two 1 inch holes (same hole cutter tool we used before and same hose technique to avoid hose abrasion)
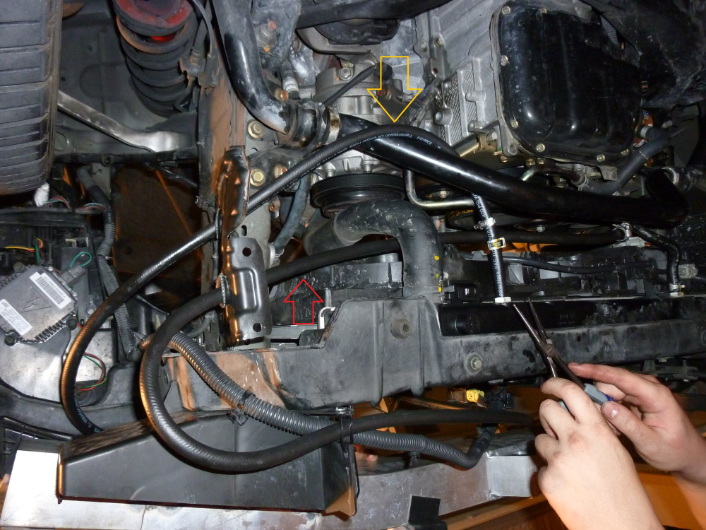
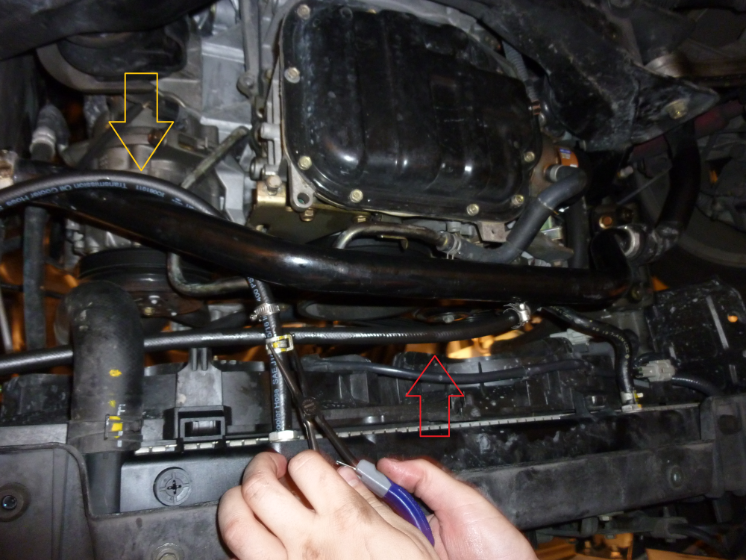
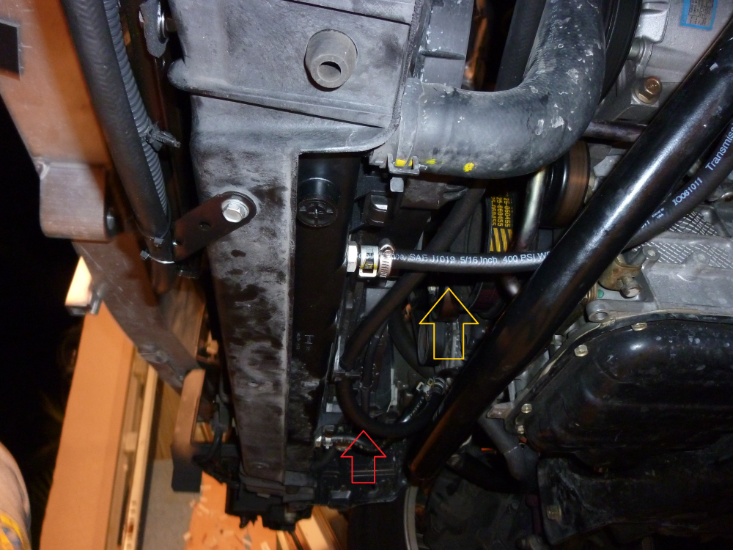
From NOW ON
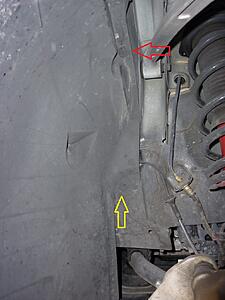
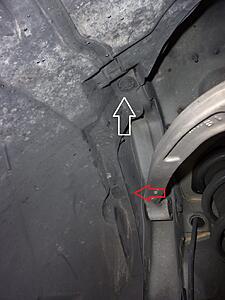
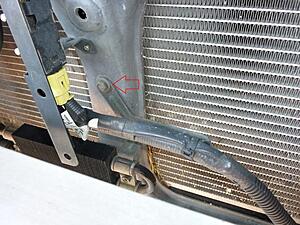
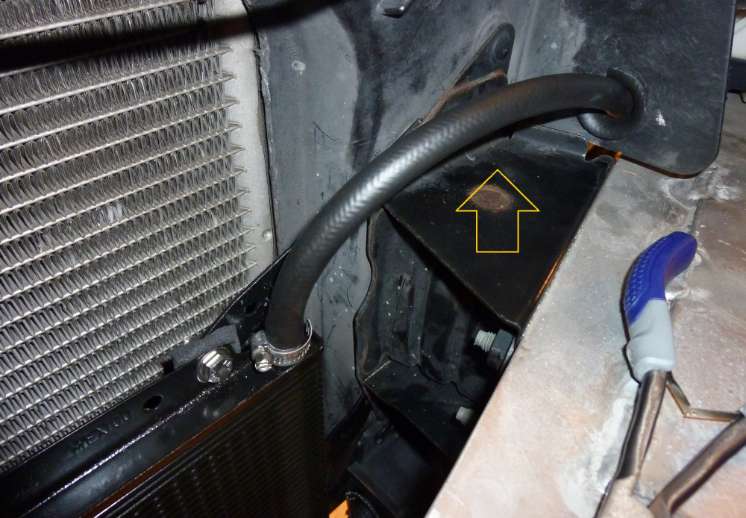
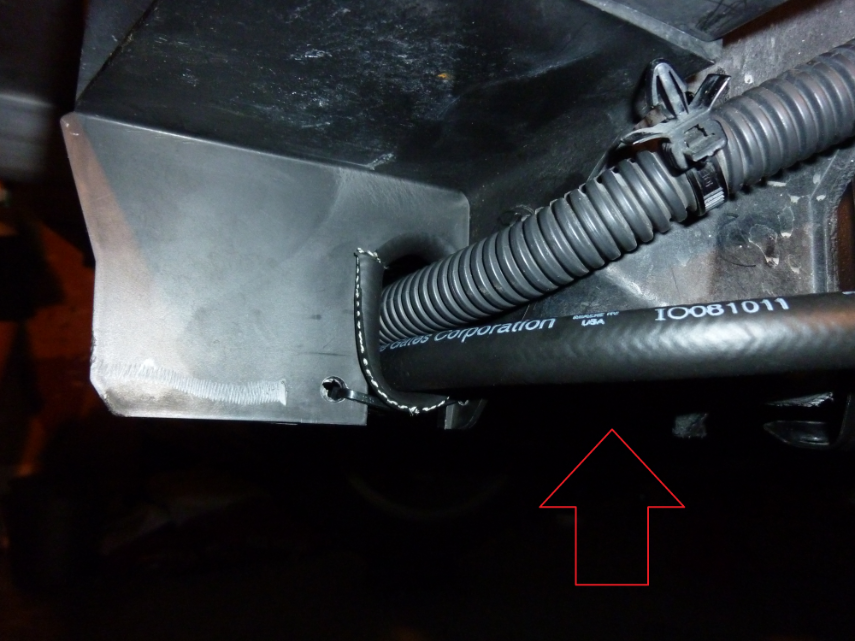
Gold/Yellow Arrows will Point to The Inlet hose to the B&M cooler which comes from the OEM Radiator.
The Red Arrow will point to the return line from the B&M Cooler going to the transmission.
Also everything was mounted to obtain the best bends for fluid flow, make sure the hose does not get kinked. Also the Zip Ties are snug, not super tight.
Tightening the Stainless Steel Bolts we bought earlier
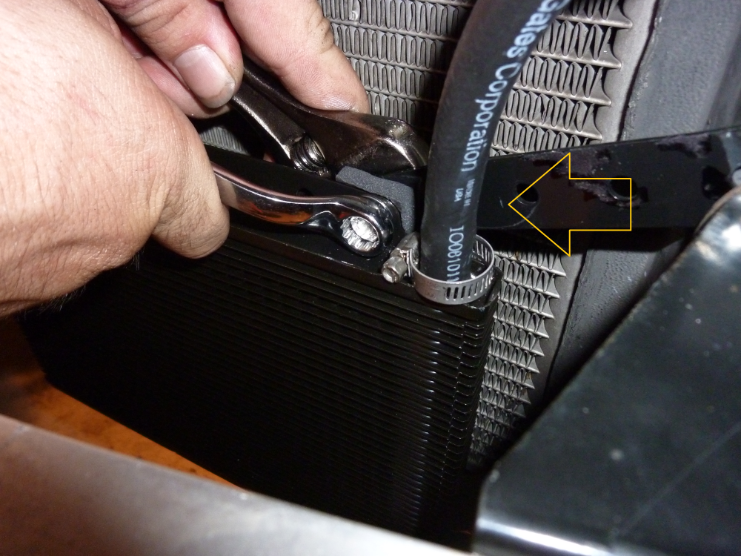
Here I am using the Stubby Flathead to tighten the hose Clamps


More of how we marked up the bracket, this bracket was drilled out so that the 12mm bolt will go through. (This is the top of the crash support)
So we got three brackets placed to mount up to but, we don’t know what to do about the last corner, but no problem!
We used one of the bolts that hold the underbody, and yes every time you take off your underbody panel you will be unbolting this bracket. Just make sure you bolt it first when you put the underbody back on, Get one of the bolts so that you can tighten it up and figure out the appropriate bending’s.
More of the bends we use to mount it up
Now that we have mocked the radiator up, we now figure out about the hoses. We now used the Gates 5/16 transmission cooler hose and figured out where we are going to route them. This line is going back to the transmission
We ended up routing this hose with the wire loom that goes through here, we also drilled two holes and put a weather resistant zip tie to give some ground so that the hose is supported.
We also put another ziptie here
So now we had that routed, we tried various ways to mount the Inlet to the B&M Cooler which comes from the OEM Radiator.
We ended up cutting a 1” hole
Take is Slow
Here you see the hose routed, we also cut a small section of hose and cut it down the center and installed it as you see here, this is so that the hose does not rub on plastic, to prevent Hose Abrasion
We went ahead and painted the brackets, notice one of the brackets we had to drill out another hole to make it work, this is the bracket that goes with the underbody. You don’t need to use a 23/64 drill bit, as this is for the 1/4 inch Stainless Bolts, get a smaller drill bit for it. Before you do make sure you center punch it( a screw and hammer works)
We werent going for A+ spray painting job here so it’s not perfect, don’t hate lol
Some Comparison of the Gates Transmission 5/16 th hose and the OEM Hose
As you can see 5/16ths is the proper size for this application. Using 3/8ths hose for the 5/16ths barbs on the OEM Transmission Cooler can result in leaks or the hose popping off under pressure which can be disastrous
Here you can see the two 1 inch holes (same hole cutter tool we used before and same hose technique to avoid hose abrasion)
From NOW ON
Gold/Yellow Arrows will Point to The Inlet hose to the B&M cooler which comes from the OEM Radiator.
The Red Arrow will point to the return line from the B&M Cooler going to the transmission.
Also everything was mounted to obtain the best bends for fluid flow, make sure the hose does not get kinked. Also the Zip Ties are snug, not super tight.
Tightening the Stainless Steel Bolts we bought earlier
Here I am using the Stubby Flathead to tighten the hose Clamps
Last edited by thescreensavers; Jul 1, 2012 at 05:12 AM.
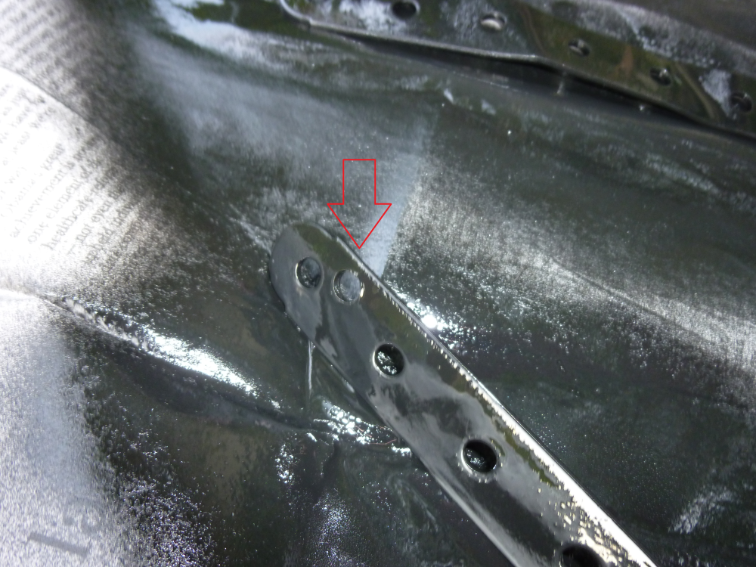
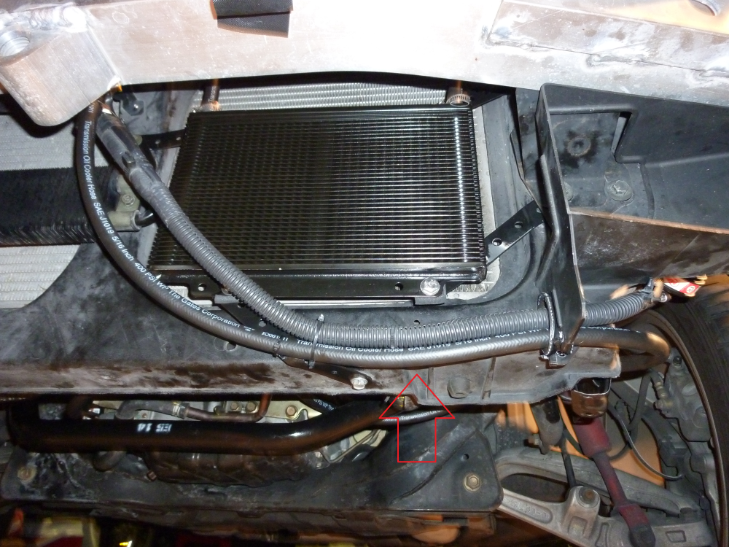
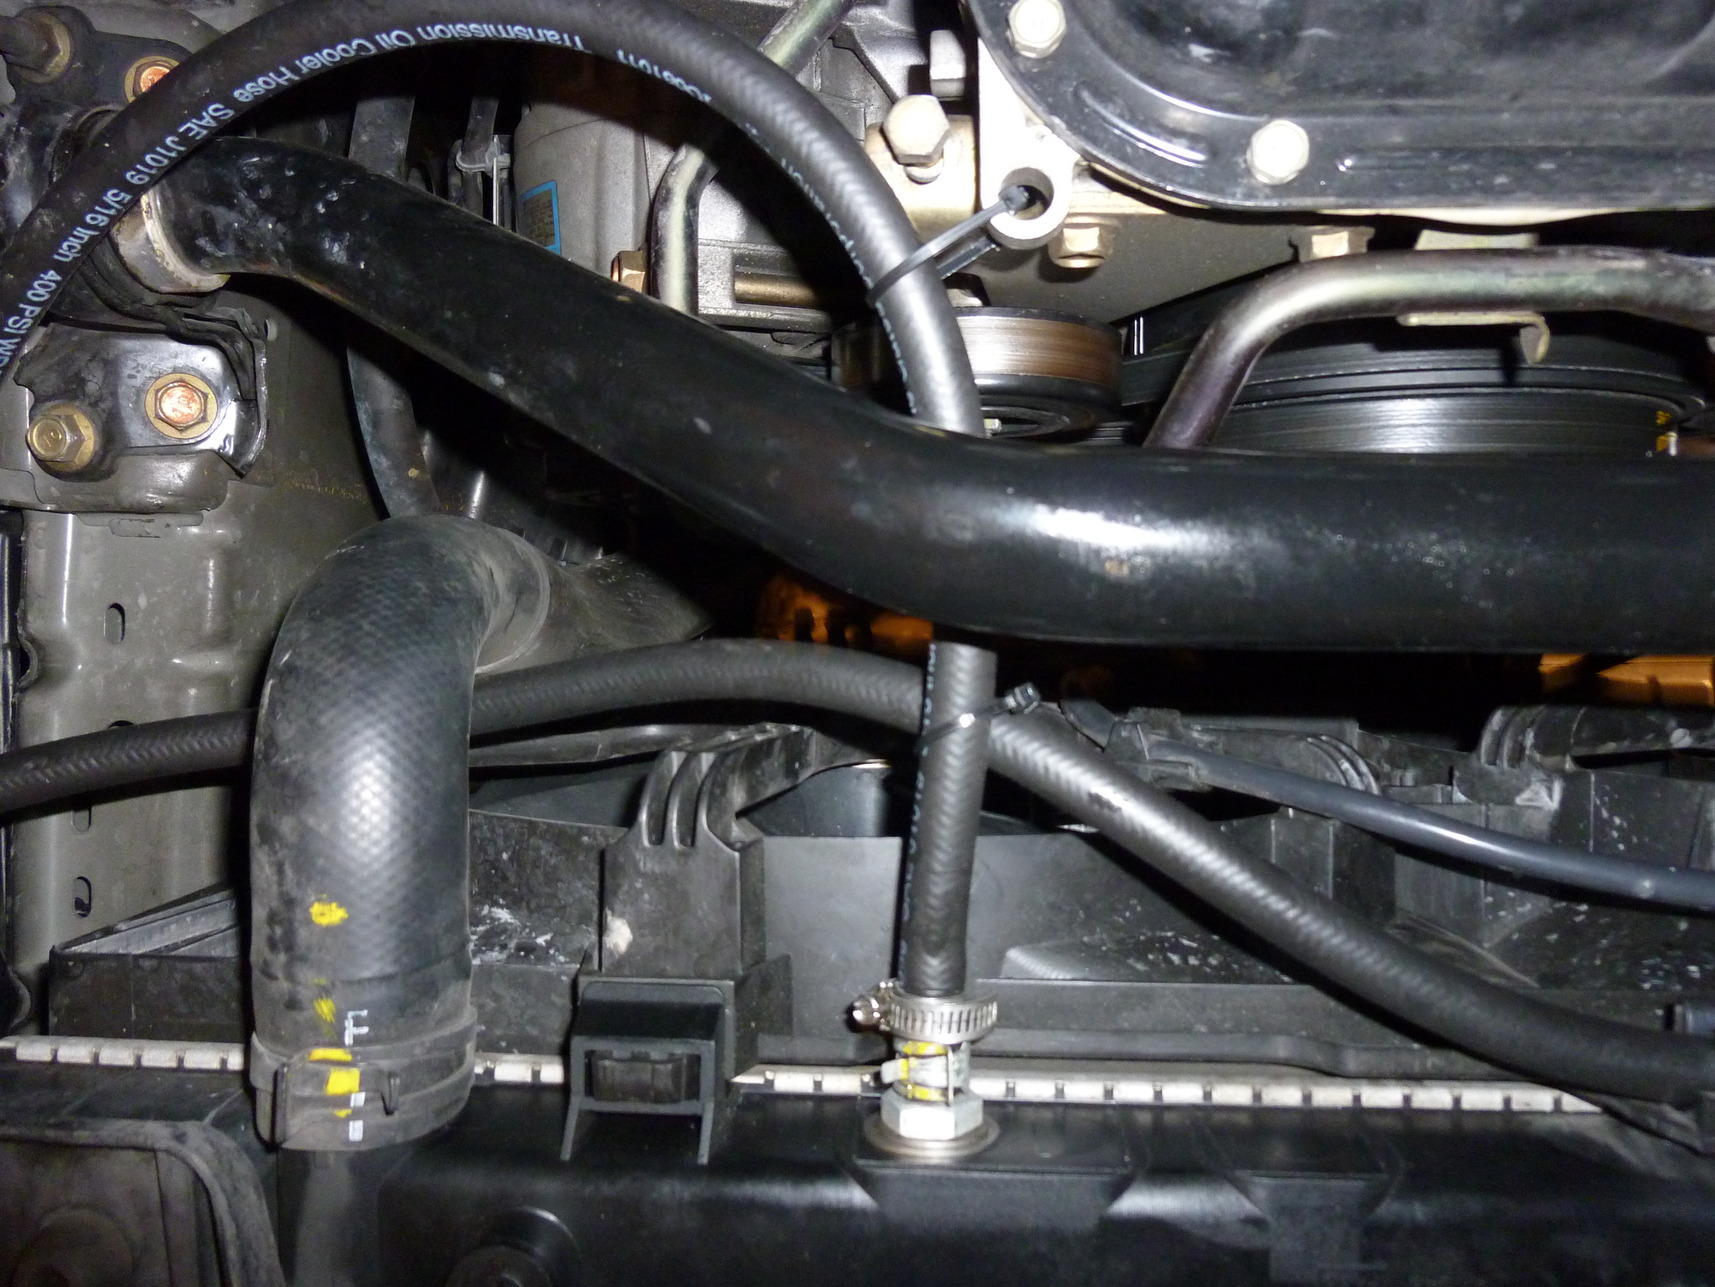
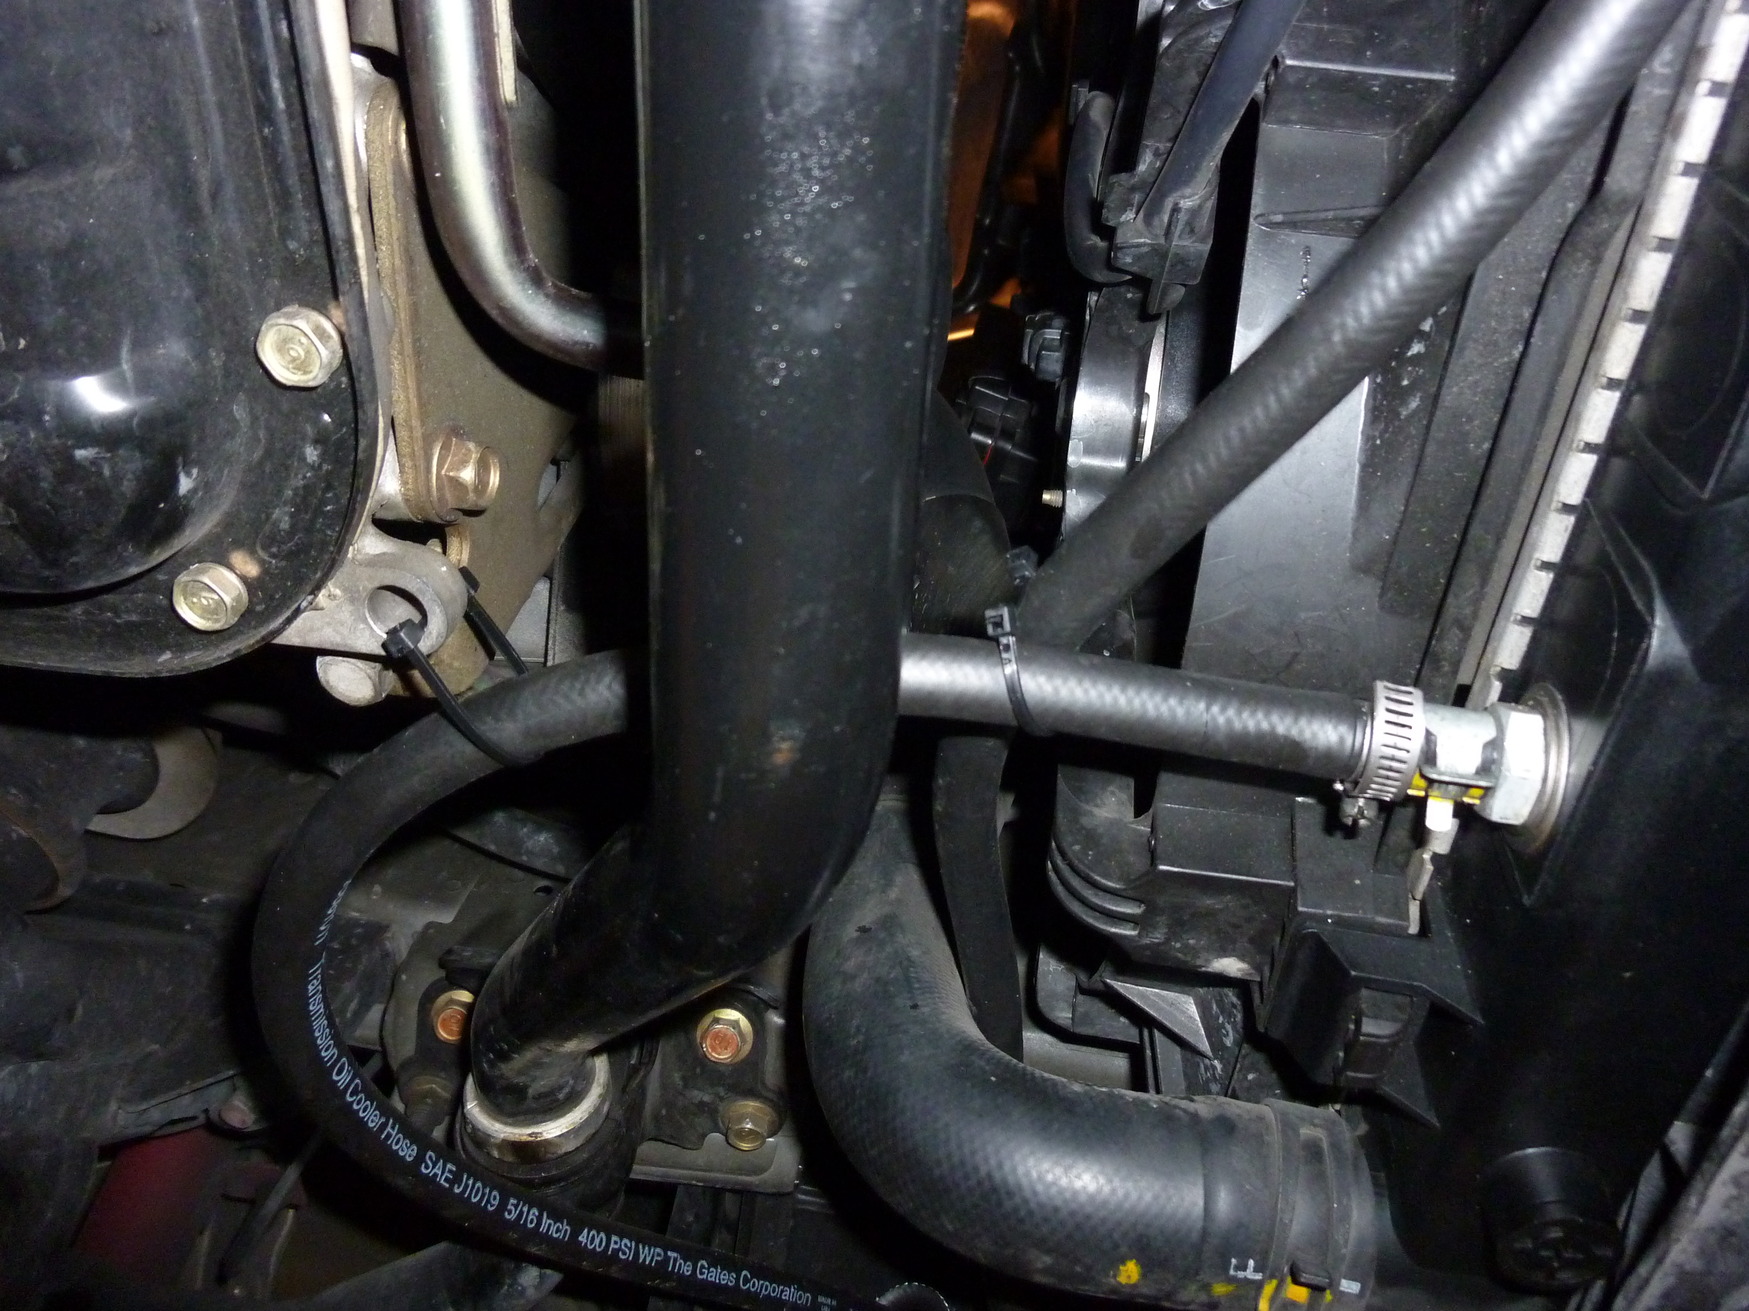
Nissan is So nice to leave us with a 5/16 hose clamp here (Just push it on) , make sure the bends on the hose are good so that it does not restrict flow.
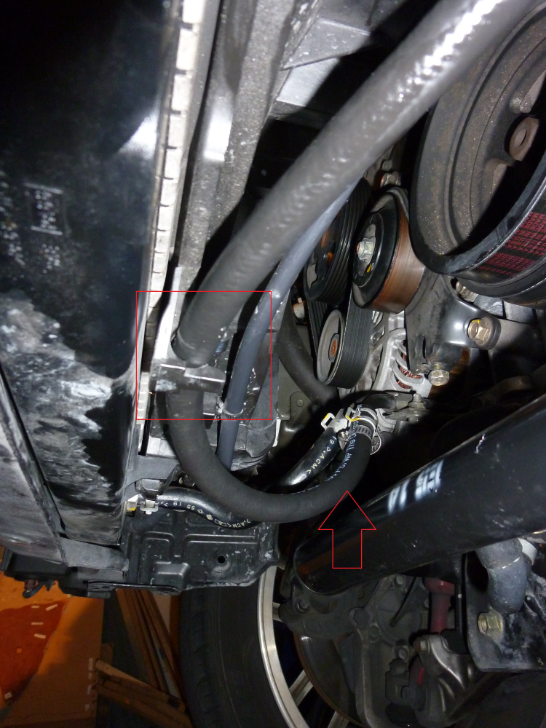
Here we installed the 5/16 Magnefine Inline Filter
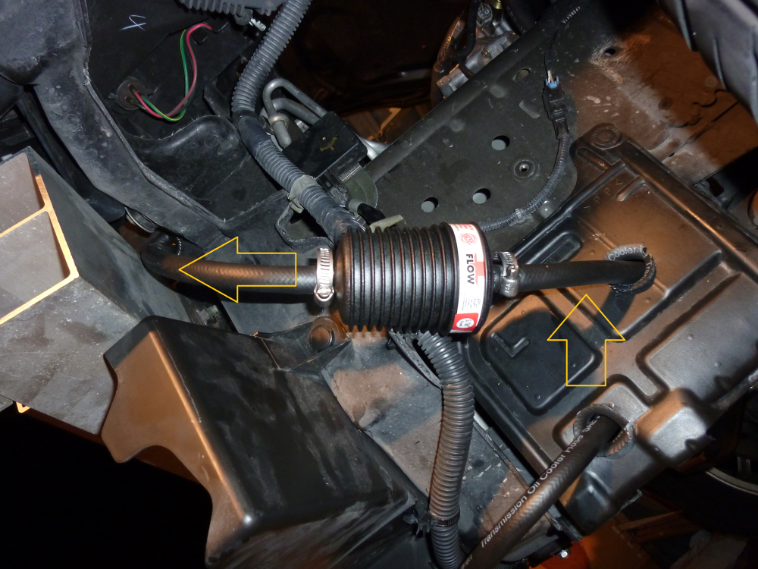

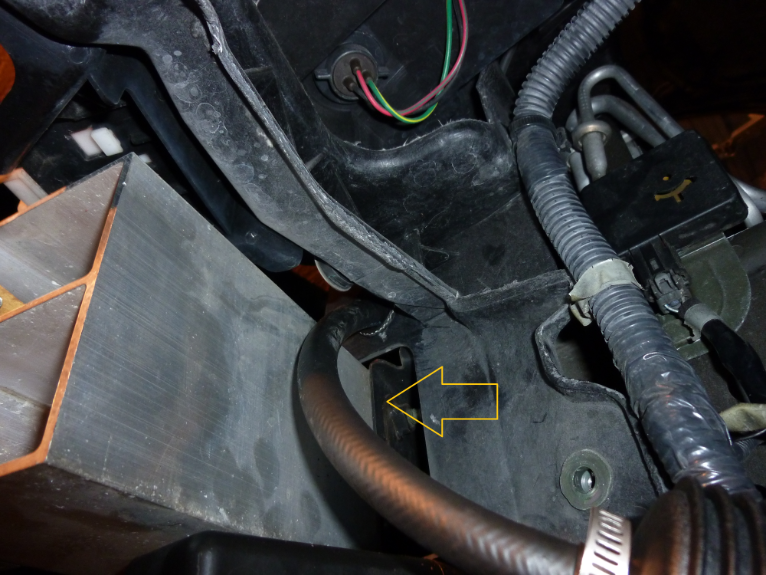

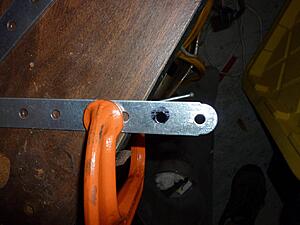
(Yea I used a similar color woops) The Orange Arrow is pointing to the OEM Bracket which we partially cut since it was interfering with the B&M cooler and we did not need it anymore.
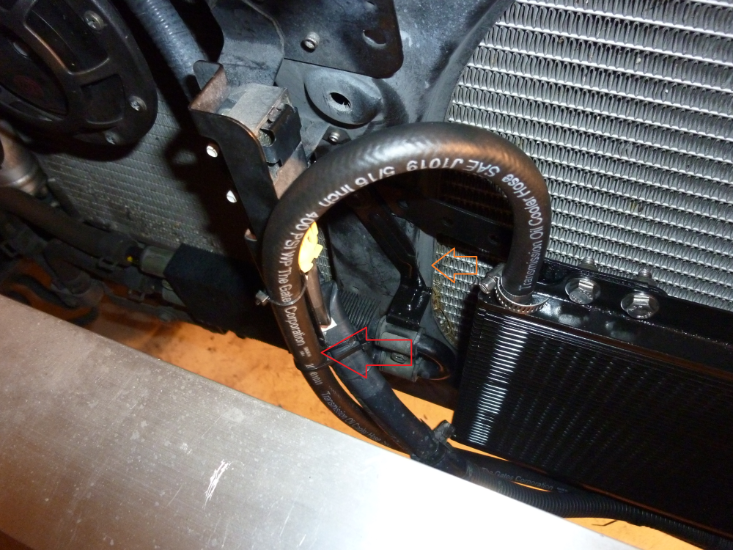
We also used that same hose technique here too ( The zipties holding the return line from the B&M Cooler)

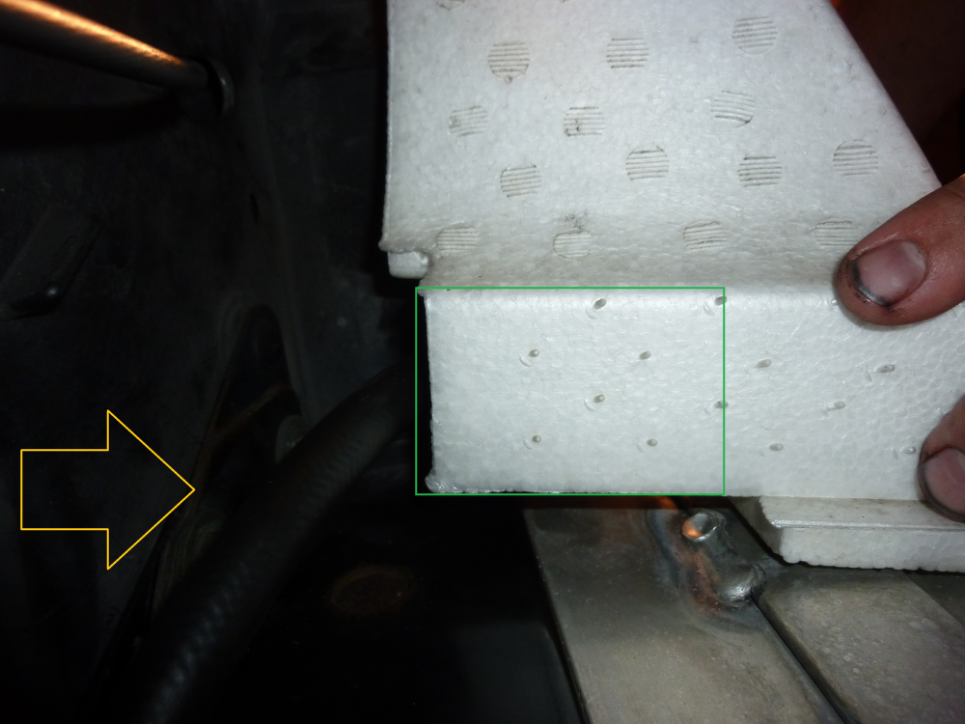
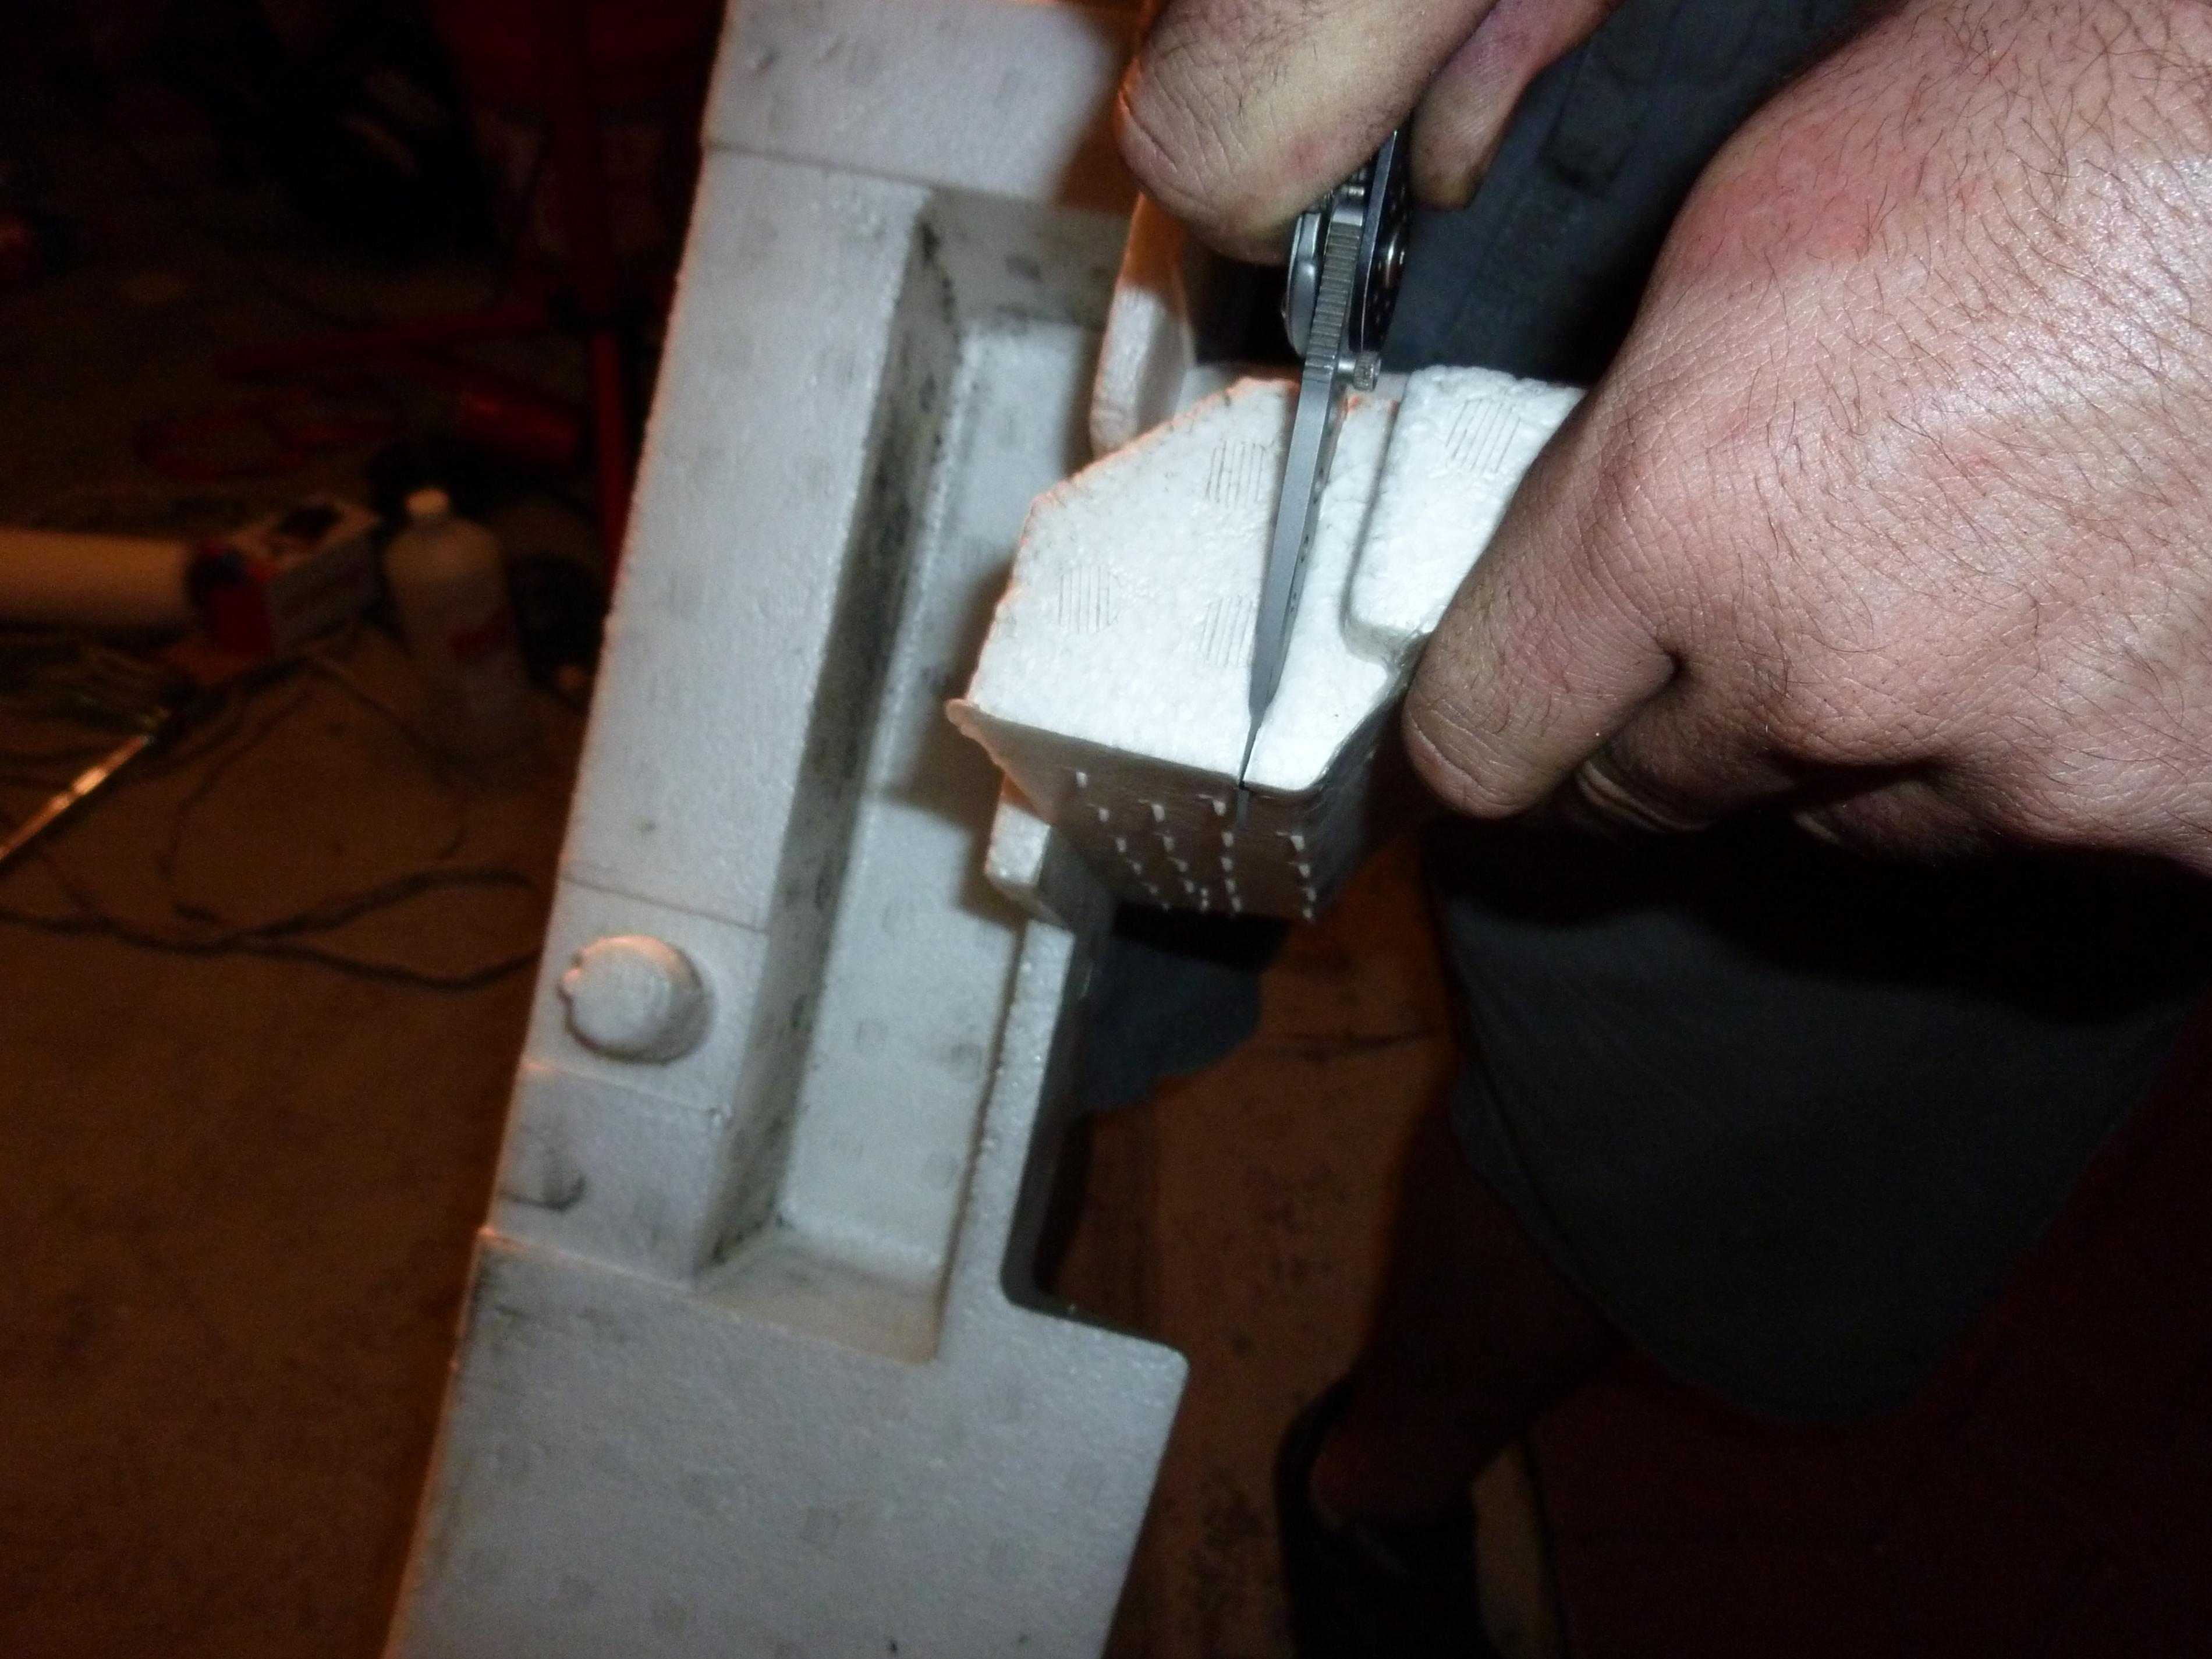
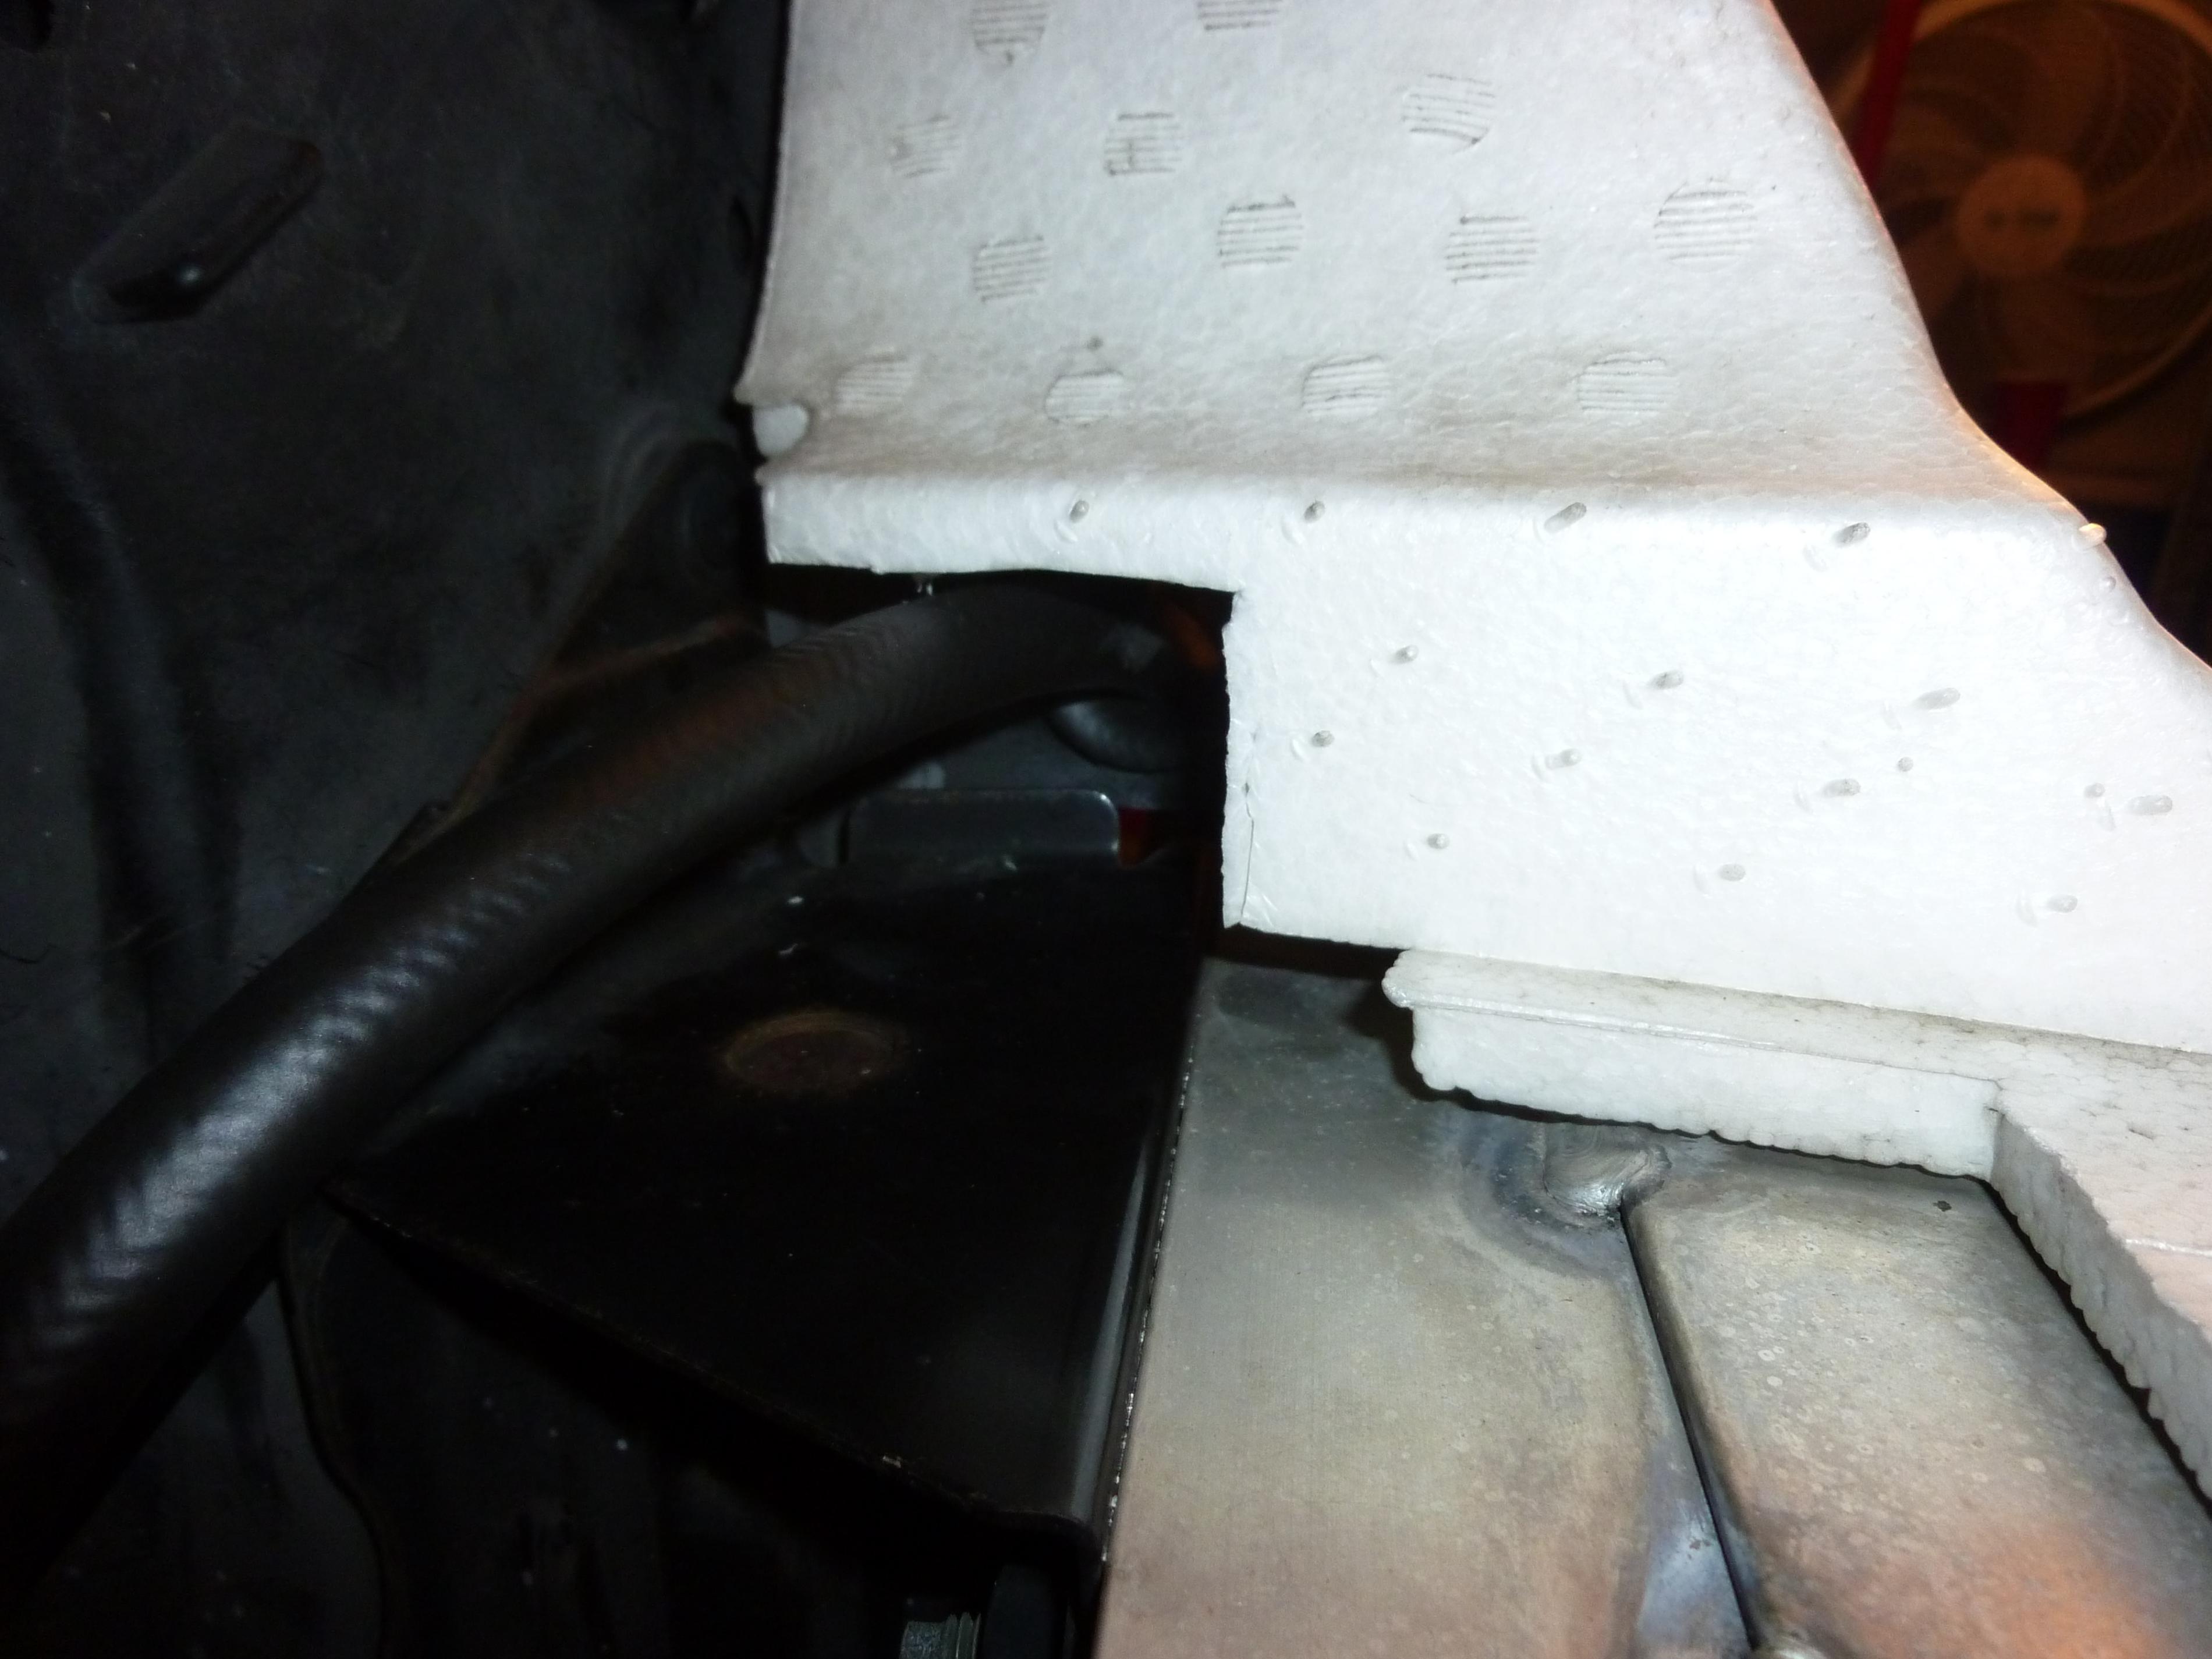
When Putting everything back on we had a little trouble with the foam, no problem. Get a Steak knife or pocket knife and cut out a chunk, shown in the green box.
Now it is time to check fluid levels and such. (After the optional power steering install)
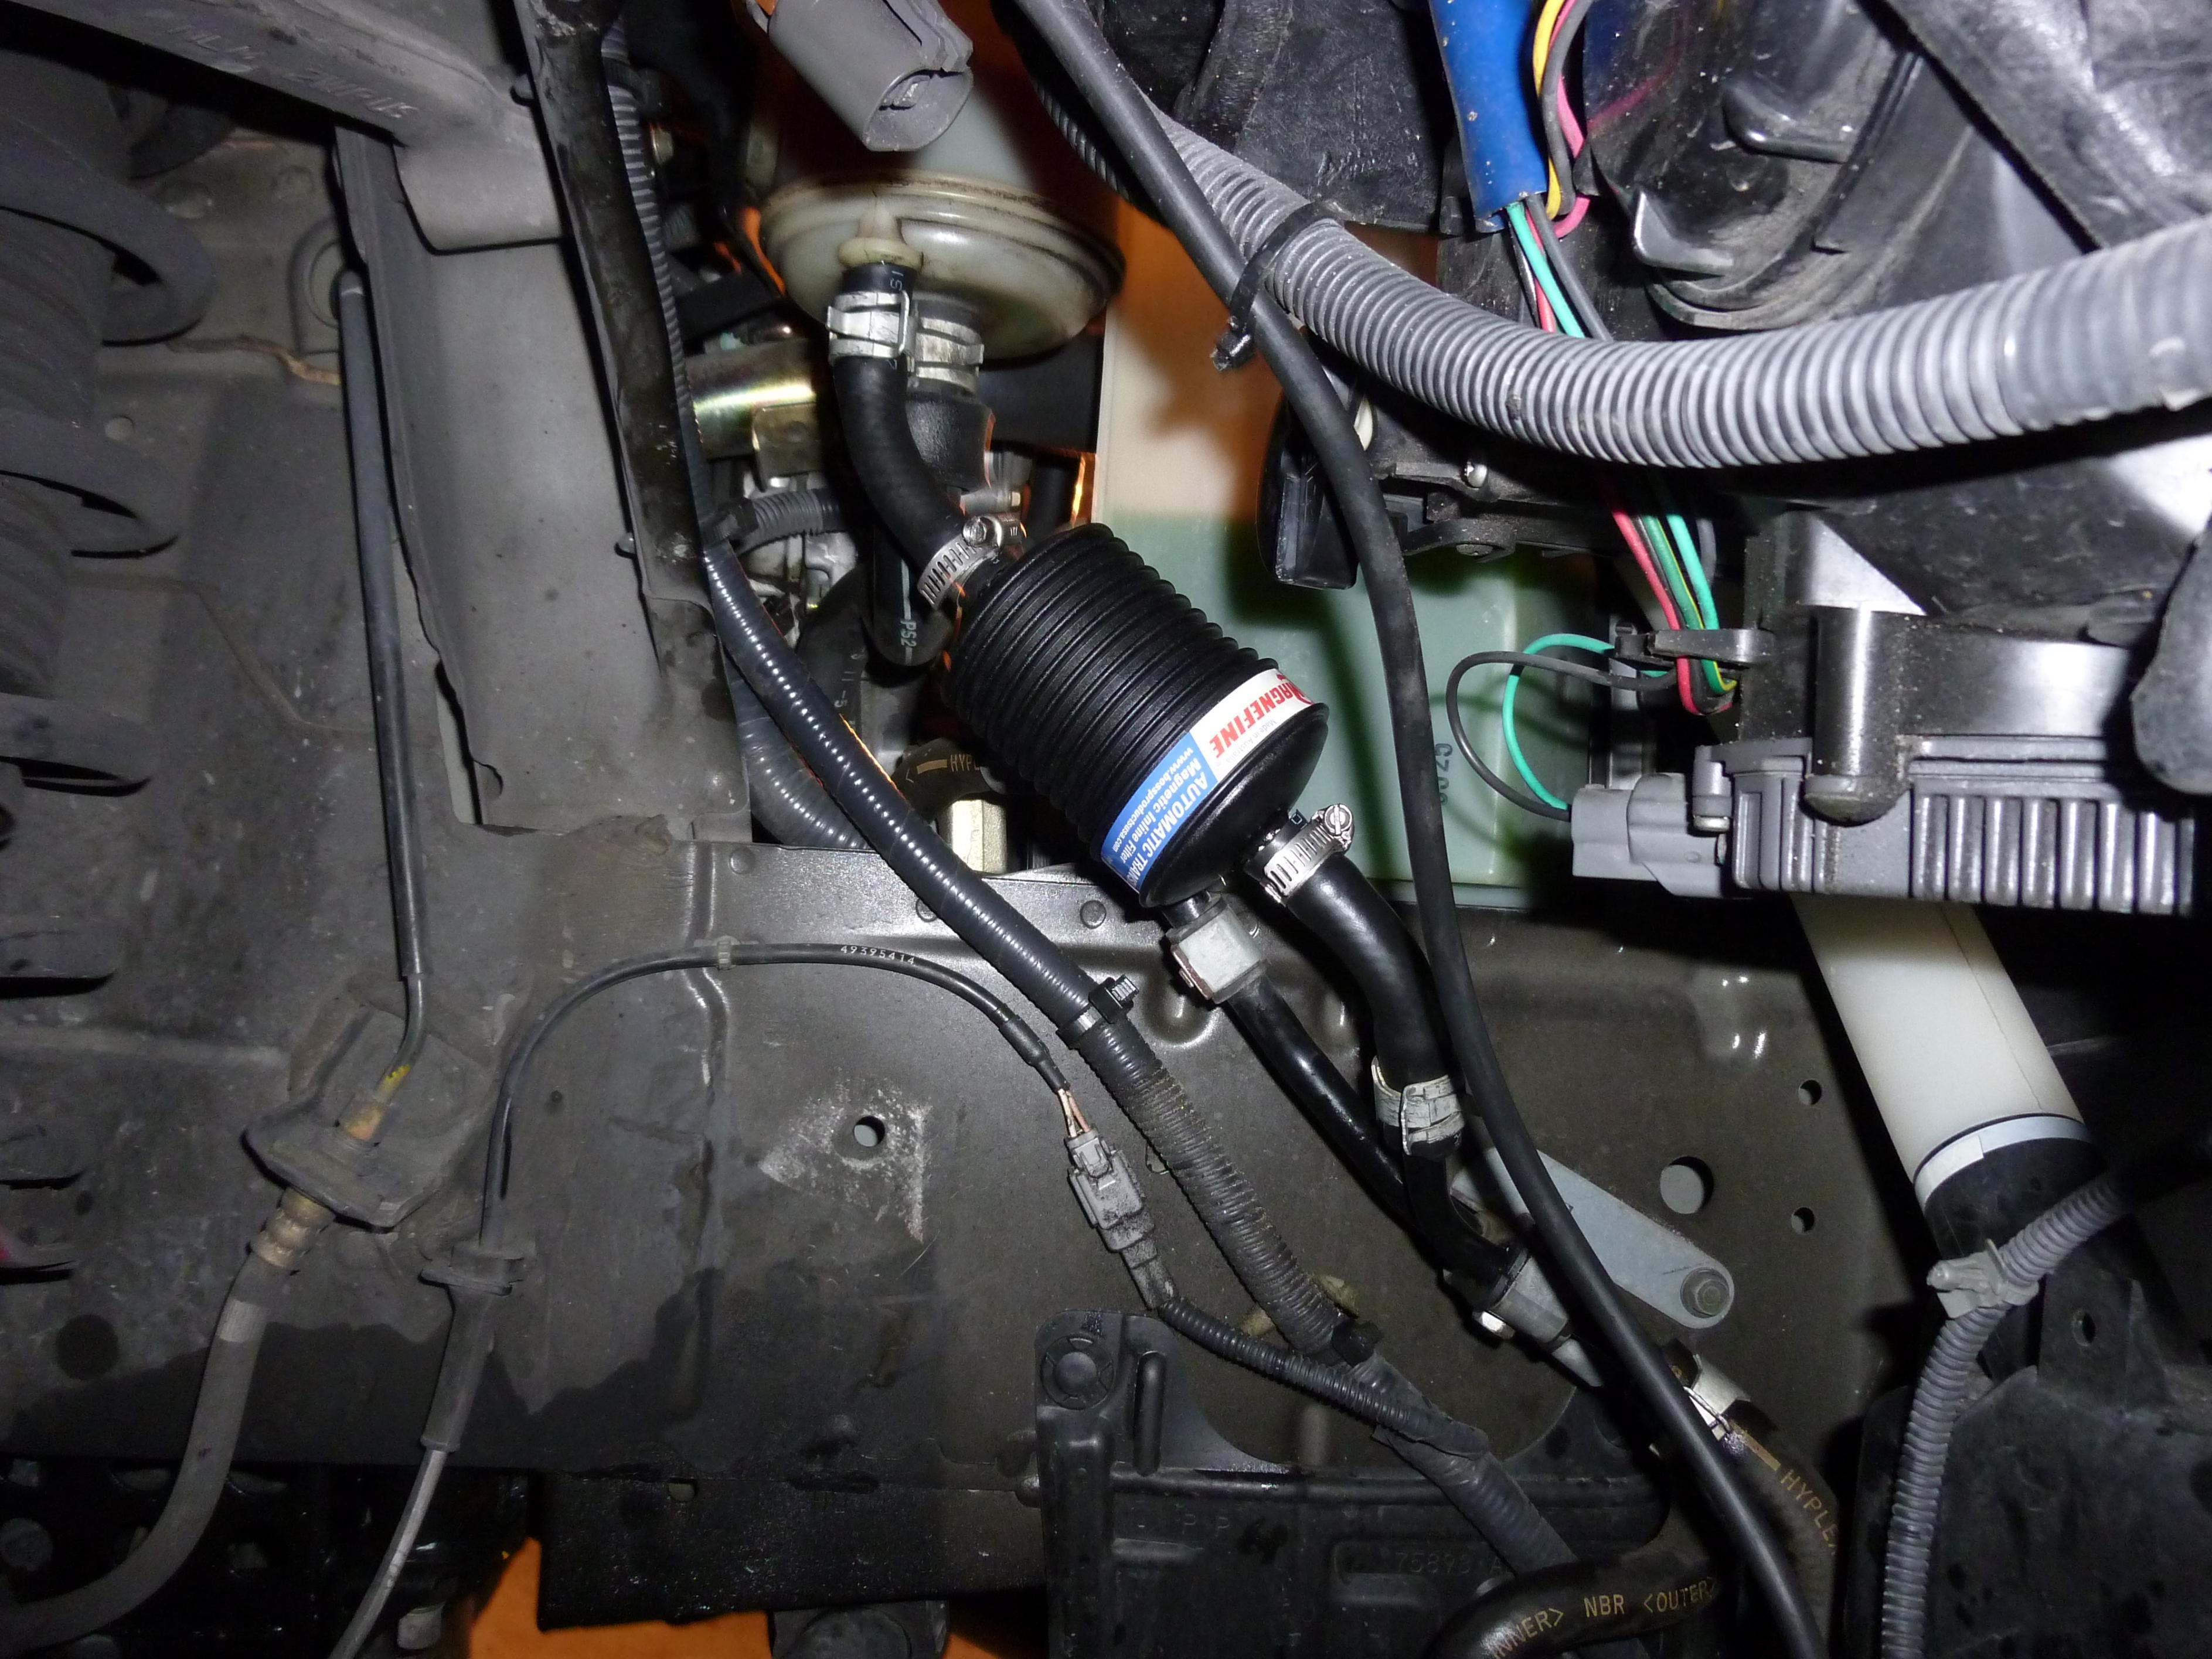
Since you have everything open and accessible why not install a power steering Filter? It’s a 3/8 th Magnefine filter.
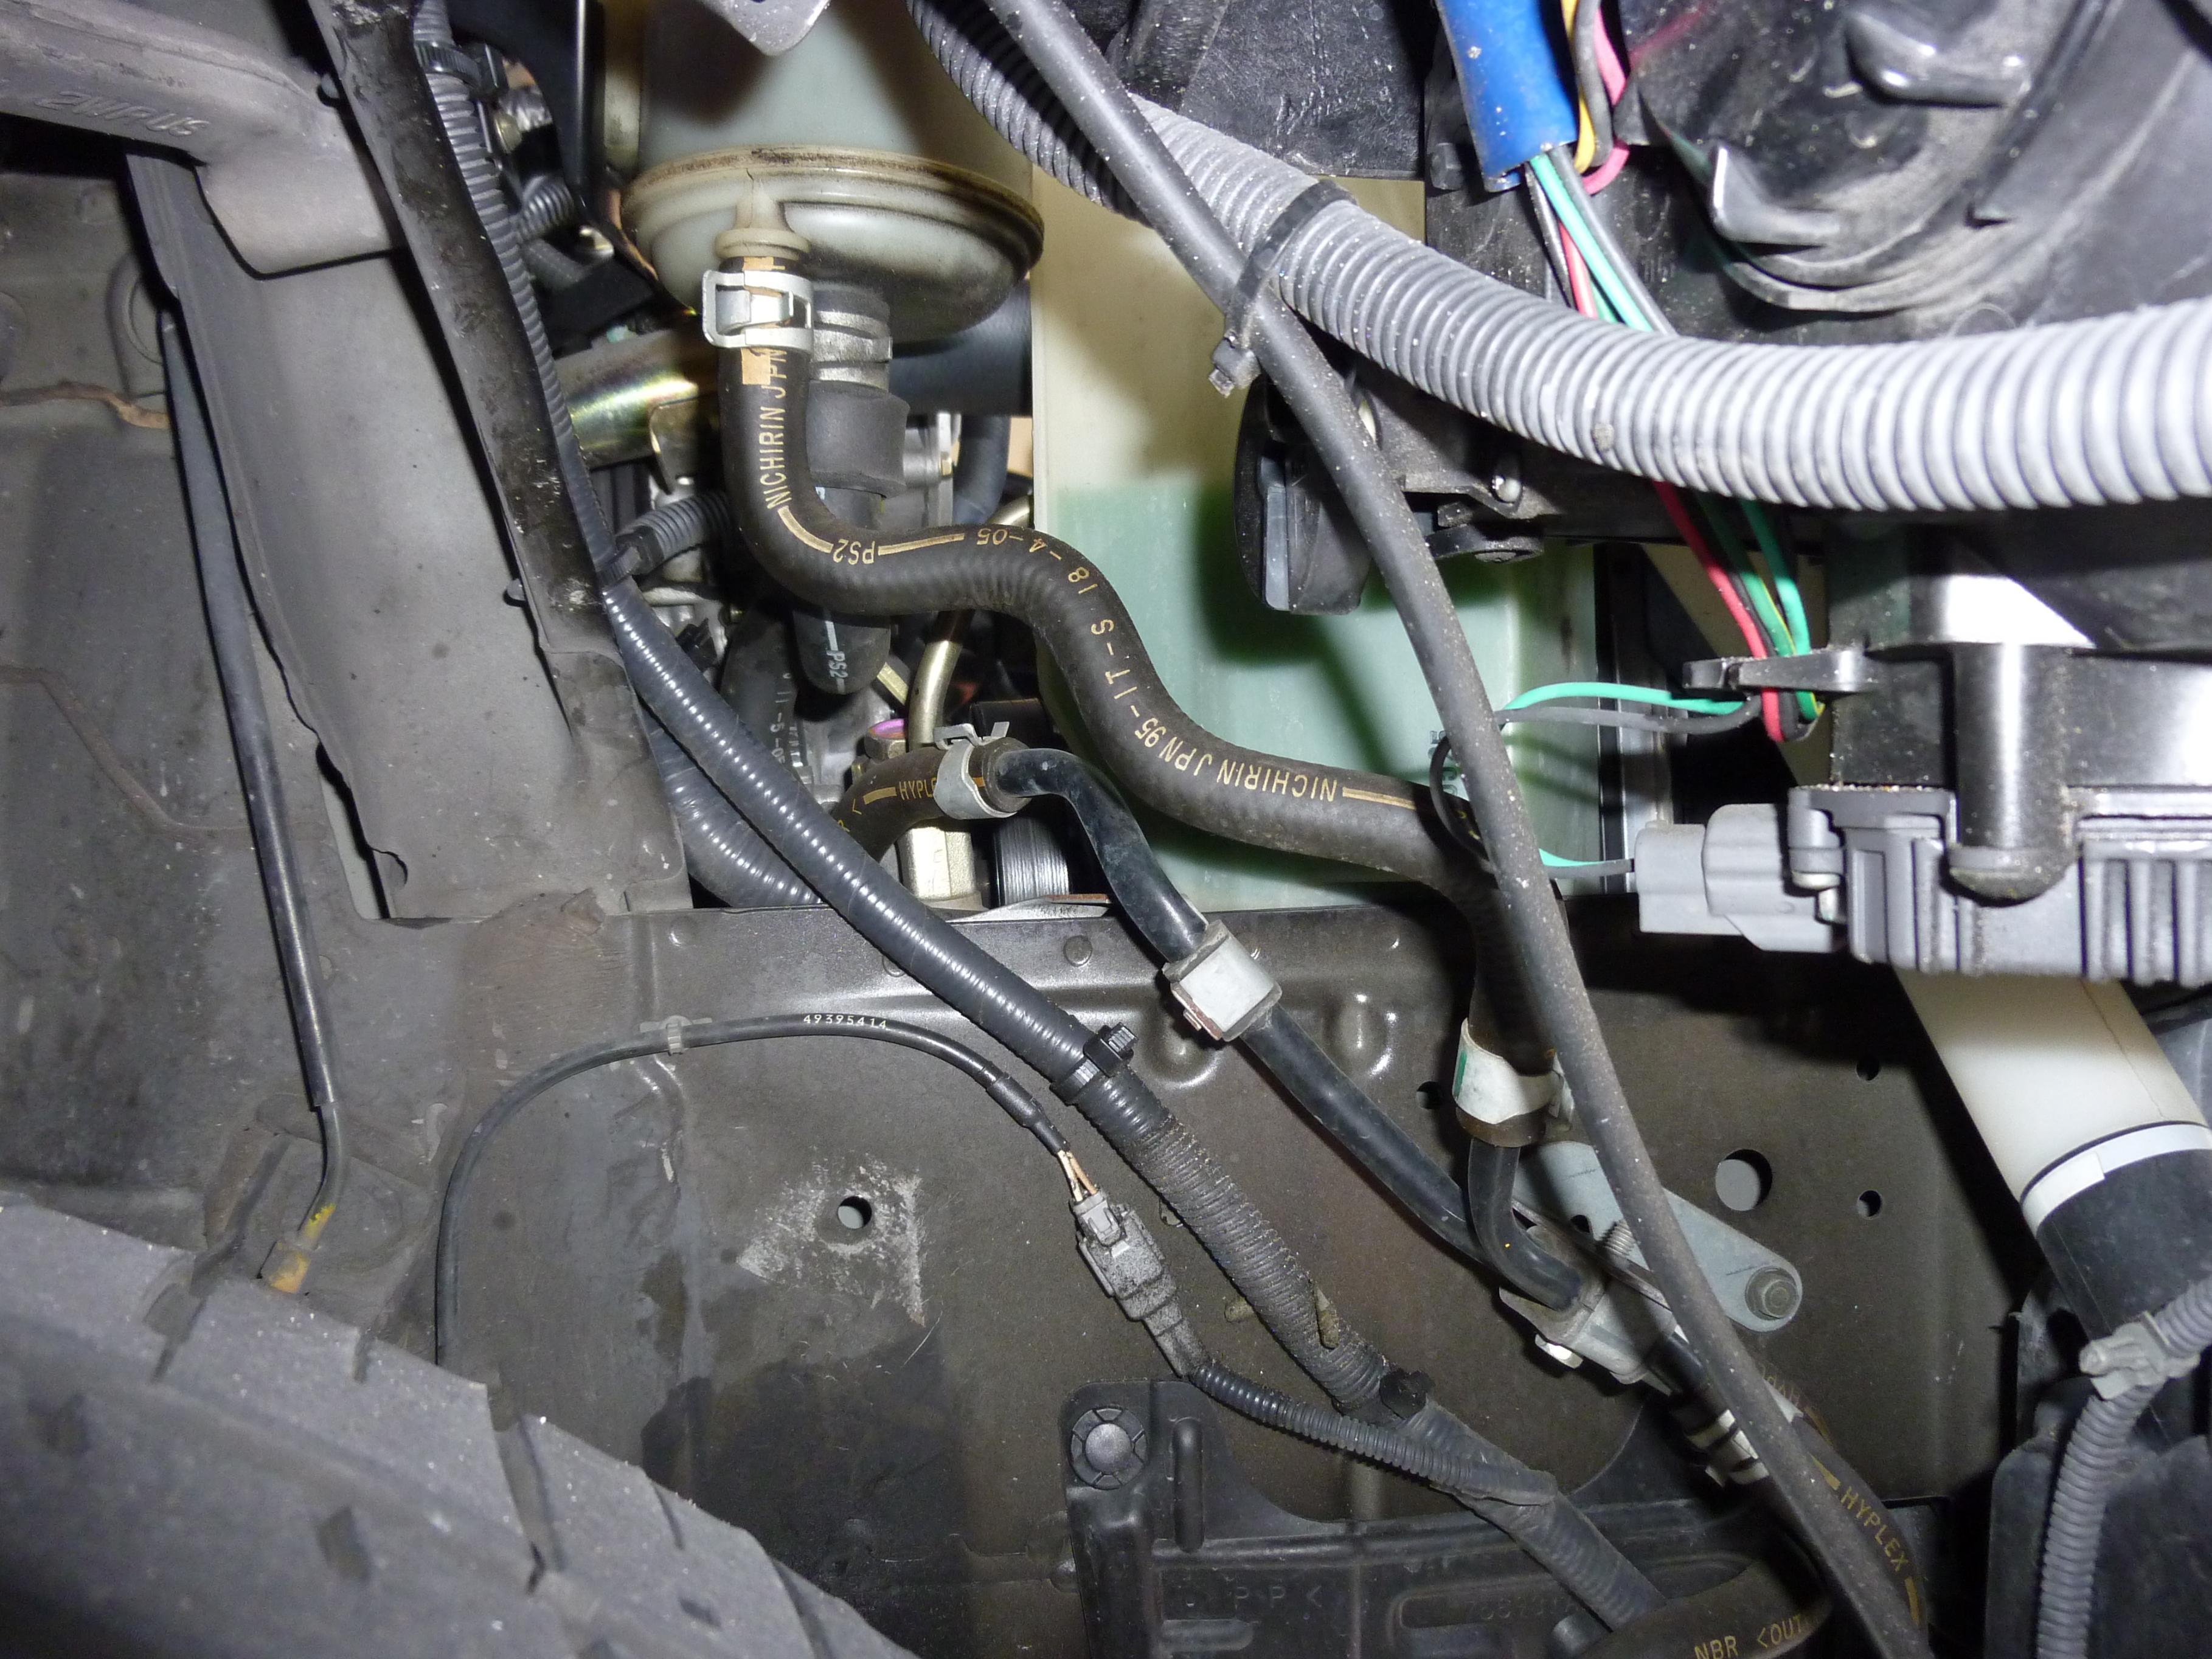
Use the 3/8 ths line that came with the B&M cooler and attach it like this( yes it’s a pain in the butt to get these OEM hoses off)
How much Fluid do I put back?
I used about 10 feet of hose and with the radiator I filled it up with 1/2 a quart. You can calculate if you would like the difference depending on how much tubing you used, just copy and paste this and change to the values you used.
www.wolframalpha.com/input/?i=pi(3.95mm)^2(10feet)
Change the values to what you used, if you kept the gates hose its Diameter is 7.9mm, but the formula asks for the Radius, so we take half of 7.9mm which equals 3.95mm.
This will estimate how much fluid you need, you should use the dipstick.
Here is how we check the fluid level for the transmission.
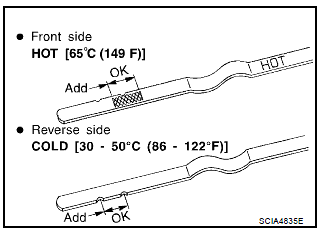
Transmission Dipstick
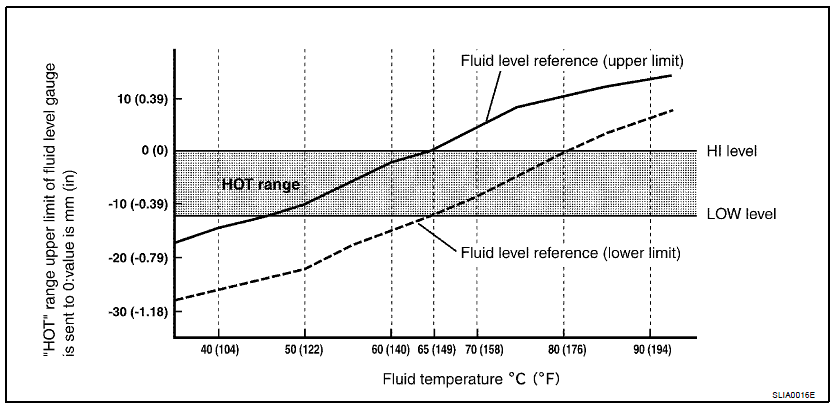
As shown above ATF expands with Temp, the hotter it is the higher the level will read on the dipstick. The Hot side of the dipstick is only good for (149F) the cold side is good for 86-122F
Once everything is put together, start your car, move gear selector though each position, and put it in park, then check the fluid when the engine is idling, let your car sit for at least 4min idling, this should be covered when checking for fluids.
I personally checked my fluid level "cold" as I can guarantee the temp is in that range.( Living in FL ftw )
)
Make sure your Matic- S ATF level is sufficient, and now go for a drive, I left my bumper off so I can drive it around to make sure there were no leaks.
Maintenance
The Magnefine Filter – “Recommended change is every 12 months”
I will be following this interval for the transmission; it’s also a good way to see your fluid condition. For the power steering fluid I will keep it in for 30k miles as it is much lower pressure and does not see as much mileage as the trans sees.
I spend a lot of time making these DIY guides for everyone, and try to do the best I can, if there are any concerns/Issues please let me know by posting in this thread or PMing me
Also a special thanks to my friends who helped me install the cooler.
Here we installed the 5/16 Magnefine Inline Filter
(Yea I used a similar color woops) The Orange Arrow is pointing to the OEM Bracket which we partially cut since it was interfering with the B&M cooler and we did not need it anymore.
We also used that same hose technique here too ( The zipties holding the return line from the B&M Cooler)
When Putting everything back on we had a little trouble with the foam, no problem. Get a Steak knife or pocket knife and cut out a chunk, shown in the green box.
Now it is time to check fluid levels and such. (After the optional power steering install)
OPTIONAL
Since you have everything open and accessible why not install a power steering Filter? It’s a 3/8 th Magnefine filter.
Use the 3/8 ths line that came with the B&M cooler and attach it like this( yes it’s a pain in the butt to get these OEM hoses off)
How much Fluid do I put back?
I used about 10 feet of hose and with the radiator I filled it up with 1/2 a quart. You can calculate if you would like the difference depending on how much tubing you used, just copy and paste this and change to the values you used.
www.wolframalpha.com/input/?i=pi(3.95mm)^2(10feet)
Change the values to what you used, if you kept the gates hose its Diameter is 7.9mm, but the formula asks for the Radius, so we take half of 7.9mm which equals 3.95mm.
This will estimate how much fluid you need, you should use the dipstick.
Here is how we check the fluid level for the transmission.
Transmission Dipstick
As shown above ATF expands with Temp, the hotter it is the higher the level will read on the dipstick. The Hot side of the dipstick is only good for (149F) the cold side is good for 86-122F
Once everything is put together, start your car, move gear selector though each position, and put it in park, then check the fluid when the engine is idling, let your car sit for at least 4min idling, this should be covered when checking for fluids.
I personally checked my fluid level "cold" as I can guarantee the temp is in that range.( Living in FL ftw
) Make sure your Matic- S ATF level is sufficient, and now go for a drive, I left my bumper off so I can drive it around to make sure there were no leaks.
Maintenance
The Magnefine Filter – “Recommended change is every 12 months”
I will be following this interval for the transmission; it’s also a good way to see your fluid condition. For the power steering fluid I will keep it in for 30k miles as it is much lower pressure and does not see as much mileage as the trans sees.
- Most of the Items were purchased on Amazon, Matic-S and the In-line Filter were purchased on Ebay
I spend a lot of time making these DIY guides for everyone, and try to do the best I can, if there are any concerns/Issues please let me know by posting in this thread or PMing me
Also a special thanks to my friends who helped me install the cooler.
Last edited by thescreensavers; Sep 2, 2012 at 11:48 AM.
When I went driving and testing for leaks, I brought my IR Temp Gun with me. I drove easily at first but then gave it hell to heat up the transmission. After a Few min the Hot side on the B&M radiator was seeing 175F and the Cold Side was 155F. Also Driving slow 10mph the inlet was 165F, the outlet was a bit less not much(due to less air flow) ~160F, slower speed but once I stopped ( I had the AC on so the fans where on) in 1 min of sitting idle it dropped 15F, Before with only the stock cooler it would only drop 1F every 30-40 Sec. So for stop and go traffic..etc it will help no matter what.
Our Valve Bodies contain a Cooler bypass valve, at 100F give or take 20F the valve will open at start up. From what I have seen the Transmission warms up very quickly Hits ~120 F within minutes. The Cooler gets bypassed at start up.
Some more Testing(Will edit as more info comes)
Driving 30miles on the highway 95F ambient temps, I drove about a mile into the city and then parked in a garage. Inlet from OEM Radiator was 170F and the outlet to the Transmission was 145F, 25F Temperature difference
I am glad that I have installed this to my car as now my transmission wont be absolutely roasting.
Yea I need to repaint my front bumper, rocks ftl
End result.
Revisions
The Return Hose was touching the fan shroud, also I wanted to pull the B&M Cooler supply off the Sway Bar, so here is the update pics, for just that part.
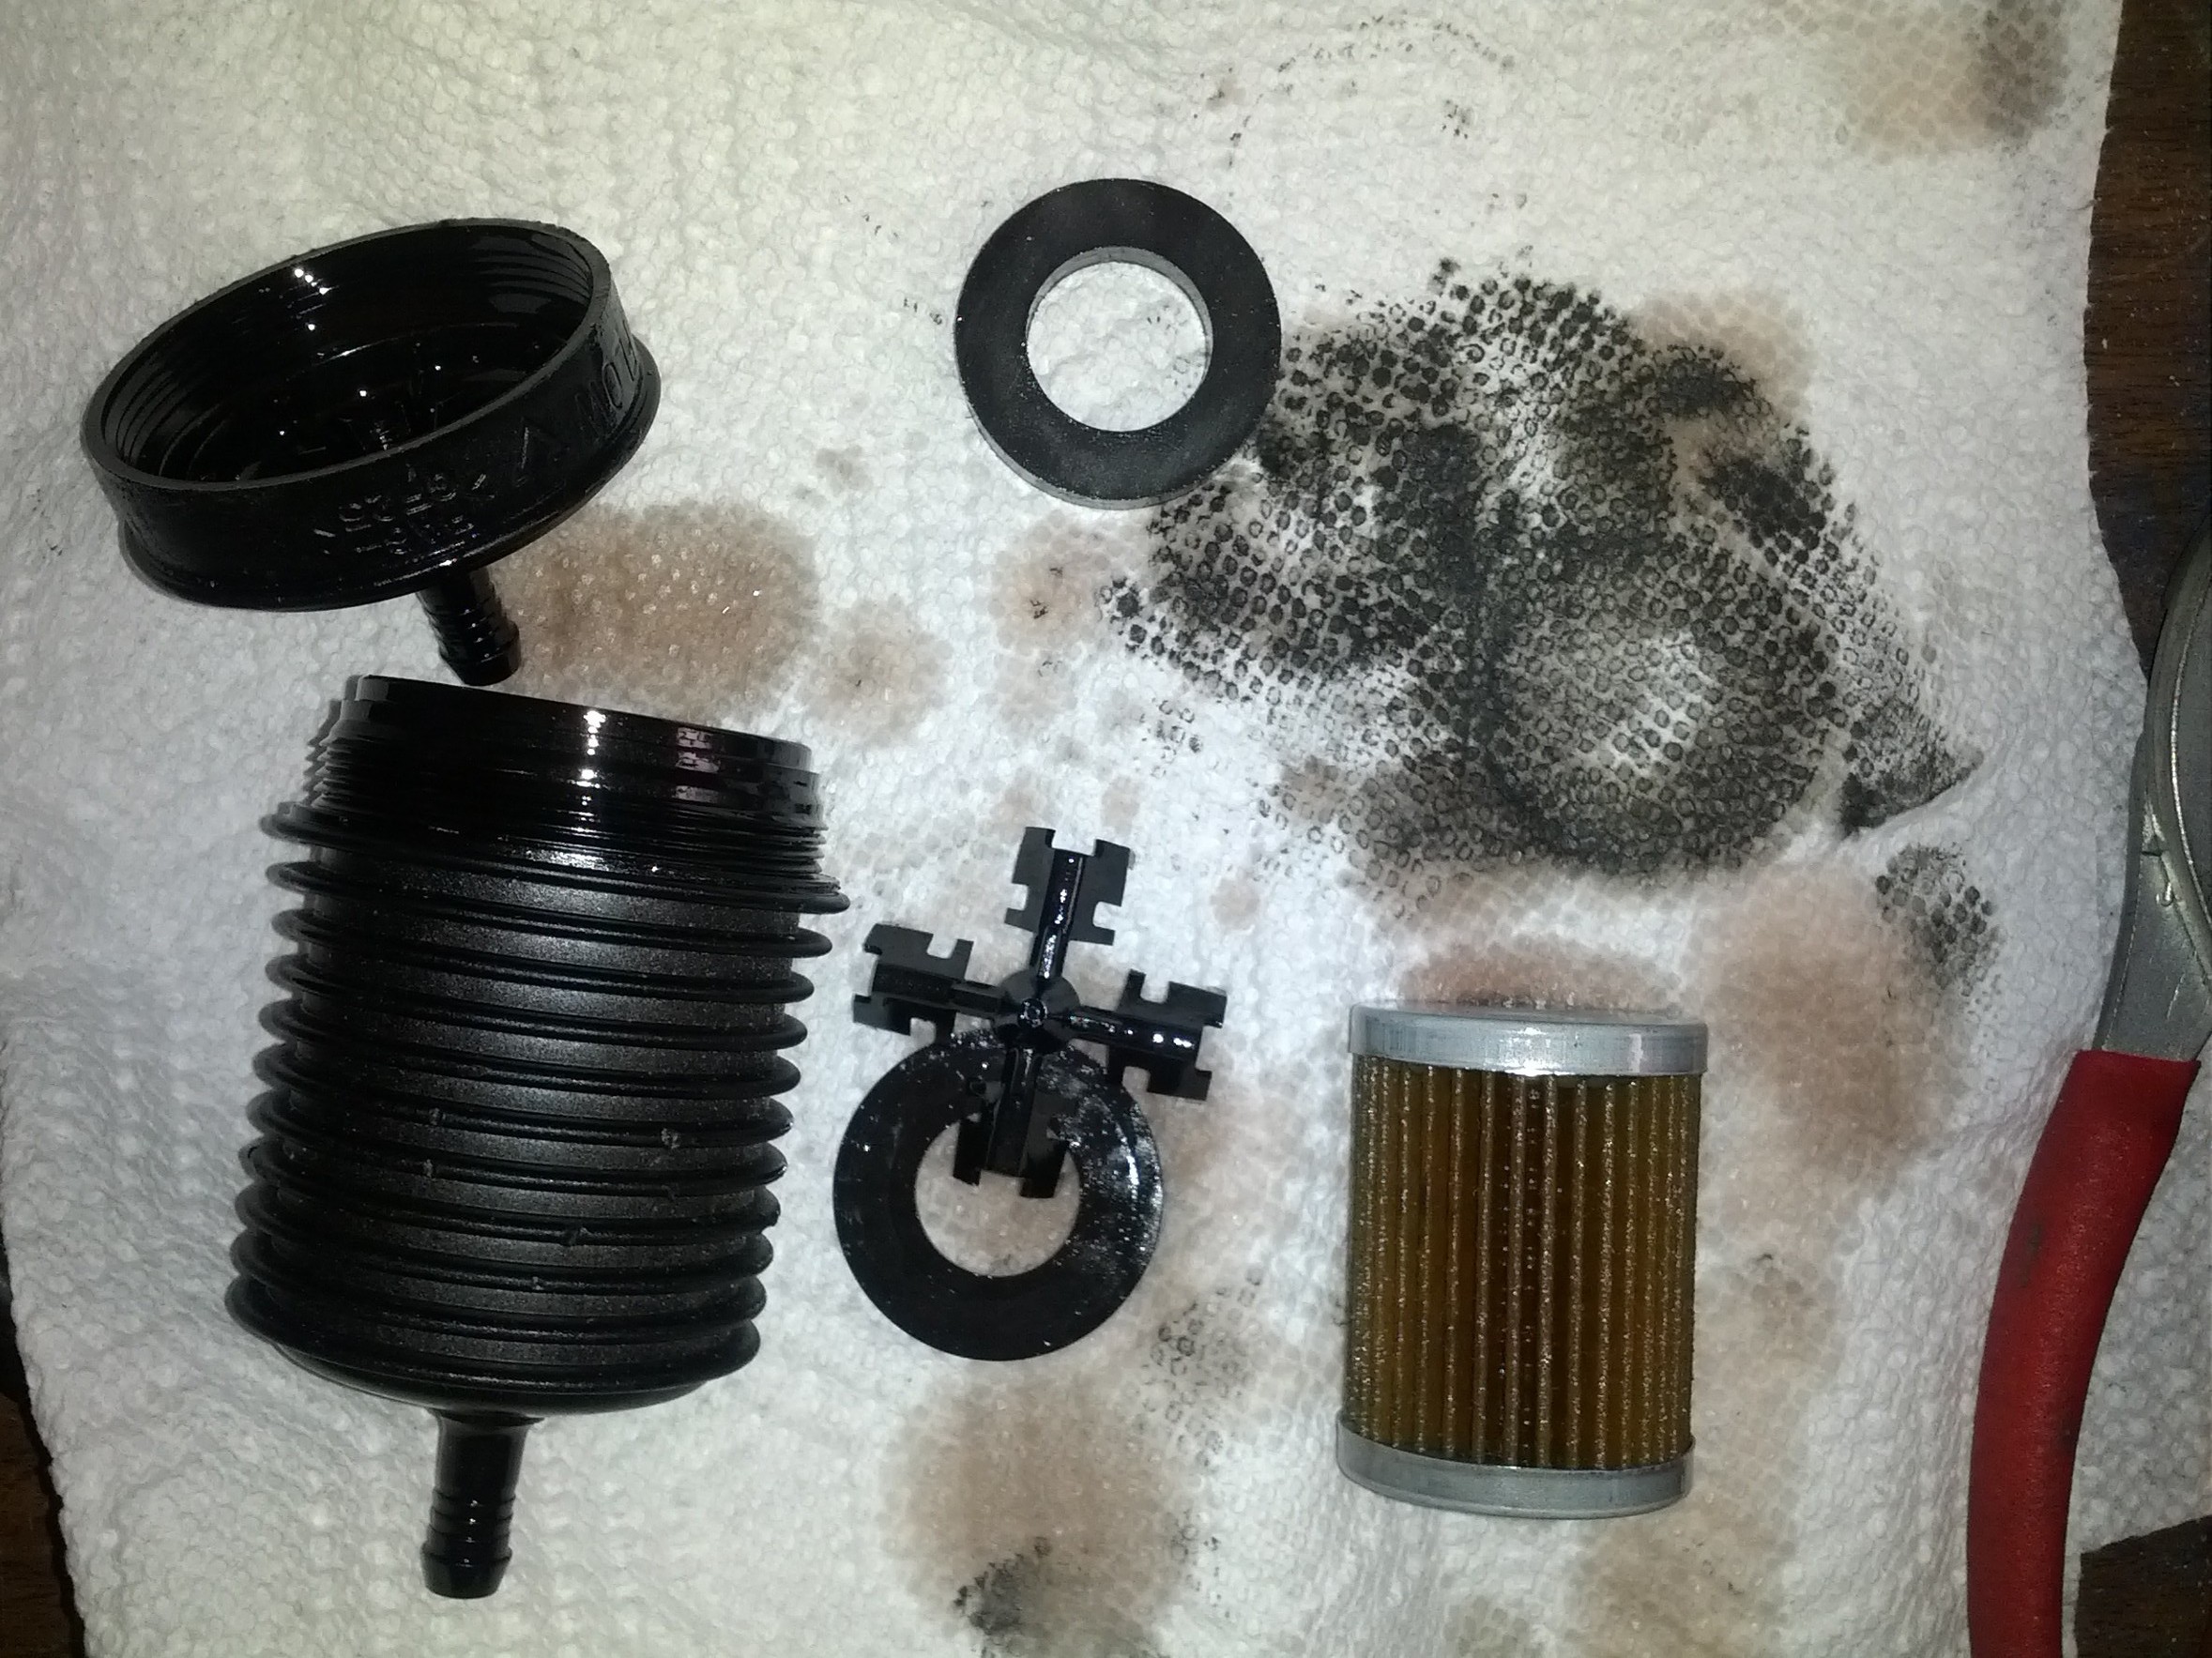
I hit some road debris (sucks) and the cooler took a hit, some fins bent but no leaks, its pretty tough, though the magnefine filter started seaping fluid so I decided to replace it and here is what It looks like disasembled. It appares to have cought a decent amount of metal substance. This definitely makes me feel good to have the filter on.
Our Valve Bodies contain a Cooler bypass valve, at 100F give or take 20F the valve will open at start up. From what I have seen the Transmission warms up very quickly Hits ~120 F within minutes. The Cooler gets bypassed at start up.
Some more Testing(Will edit as more info comes)
Driving 30miles on the highway 95F ambient temps, I drove about a mile into the city and then parked in a garage. Inlet from OEM Radiator was 170F and the outlet to the Transmission was 145F, 25F Temperature difference
I am glad that I have installed this to my car as now my transmission wont be absolutely roasting.
Yea I need to repaint my front bumper, rocks ftl
End result.
Revisions
The Return Hose was touching the fan shroud, also I wanted to pull the B&M Cooler supply off the Sway Bar, so here is the update pics, for just that part.
I hit some road debris (sucks) and the cooler took a hit, some fins bent but no leaks, its pretty tough, though the magnefine filter started seaping fluid so I decided to replace it and here is what It looks like disasembled. It appares to have cought a decent amount of metal substance. This definitely makes me feel good to have the filter on.
Last edited by thescreensavers; Sep 18, 2012 at 06:49 PM.


I did a cooler and magnifine filter on mine last year and it made a huge difference. I also switched all my fluids to amsoil atf with lubegaurd added to it. My tranny shifts much better now... I never touched it after getting the stillen vb and it hated the matic s for some reason.
Trending Topics
Fantastic writeup Danny! 
Only one small problem... some of us have a fan there
http://www.nfspmotorsports.com/forum...em.php?id=1958
Only one small problem... some of us have a fan there
http://www.nfspmotorsports.com/forum...em.php?id=1958


As we all know, the biggest killer of AT is heat. Great job on the pictures and DIY.
Looking at your number would you be a little worried about OVERCOOLING? Guess that thermostat in the cooler should be doing its job. Good item to add if your out in areas like FL/AZ/TX or do towing.
I did this on another car of mines to extend the life of it. Worked out i guess, i didn't blow up a trans.
The Radiator also has an internal fluid bypass so it should send less through the radiator if the temp goes down too much, which should prevent overcooling. Also the fluid is coming though the stock radiator which coolant temp is is 170- 200F. So it does not appears to be an issue.
If anyone thinks its might be an issue, pipe the B&M cooler before the stock radiator so the fluid can warm up again. Just driving easy Its seeing 170F+ so just imagine what it sees if you drive more spiritedly.
I will update the thread when it gets cooler but I do not expect any issues, If anything a piece of cardboard to block airflow would fix this until it gets warmer.
FYI.. anyone considering doing this install should REALLY consider a few things as well.
On the Passenger side the oil line routing is a slight bit easier.
Additionally for added protection and to assist the radiator in bringing water temps down you can re-route the cooler lines into the radiator so that it does two things, A: assures the temps going back into the transmission are close to OEM specs, and B: Assists the Radiant temps from the water to be substantially lower than that of OEM build.
Good Job T.S.S