
DIY: Spark plug change


#258
 06-20-2014 | 03:58 PM

Registered User
Joined: Jun 2014
Posts: 2
Likes: 0
one thing you need too
COPYRIGHT NOTICE: The contents of this post including text and images may not be reproduced, in full or in part, without the express consent of the original poster. All rights reserved.
First, half of the credit for this DIY goes to QuadCam. He posted the instructions for this, which I used to do my own plug change. I just took the pictures, and am making this a separate post. So, THANKS QuadCam!
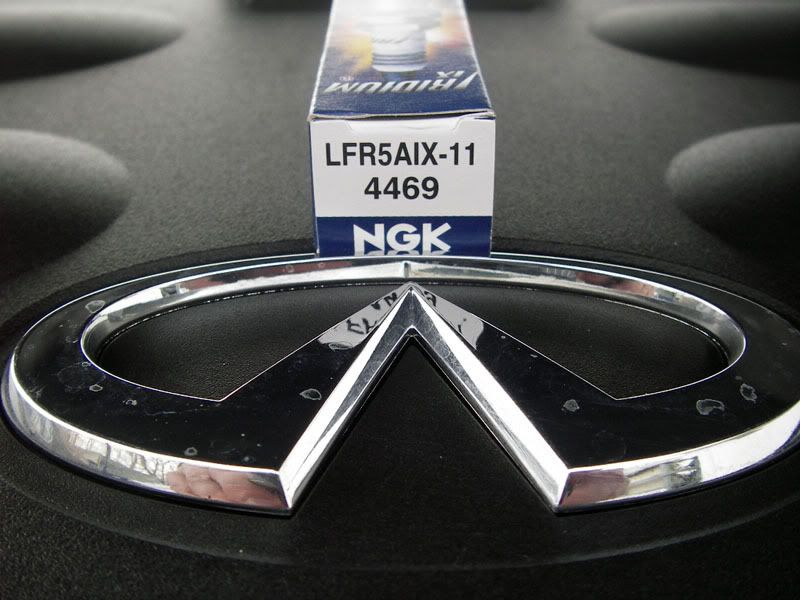
I installed LFR5AIX-11 plugs. They are the same heat range as stock. QuadCam installed the LFR6AIX-11 plugs. The install is the same procedure

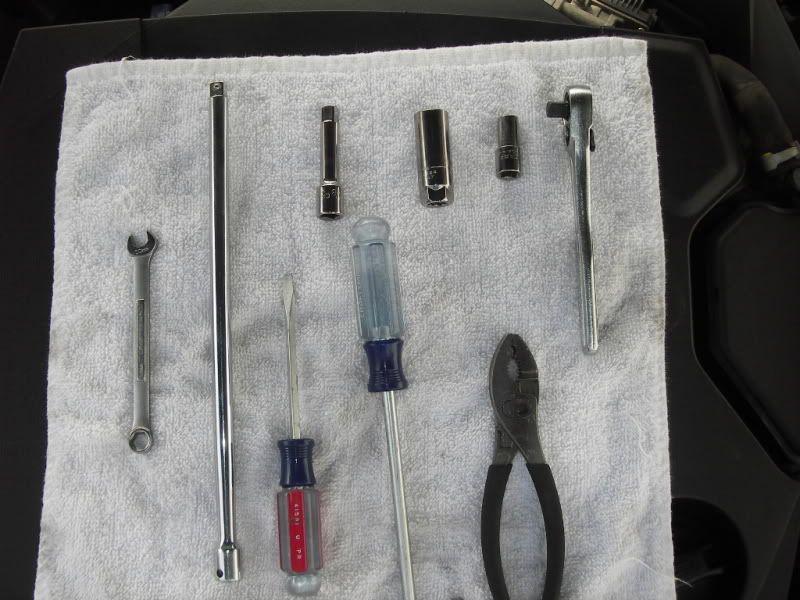
First, the tools you will need:
6 NGK Iridium IX Sparkplugs
3/8" Rachet
3/8" long extension (at least ten inches)
10mm socket
10mm open-end wrench
16mm "deep" socket (or "sparkplug socket")
Magnetic pick up tool
3-prong grabber (optional, you'll need it if you don't have a "sparkplug socket")
Pliers
Torque Wrench
Most people would have these tools in their garage. The long extension is a must. The magnetic and pronged "pickup tools" make this much easier.
PROCEDURE:
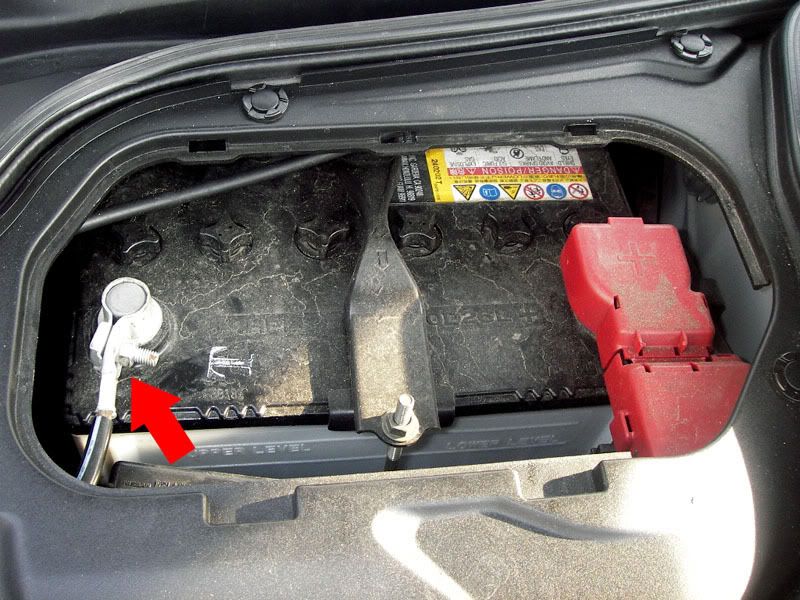
1) DISCONNECT THE NEGATIVE BATTERY TERMINAL! Loosen one 10mm bolt (RED arrow), this is the only step where you will use the open-end wrench.
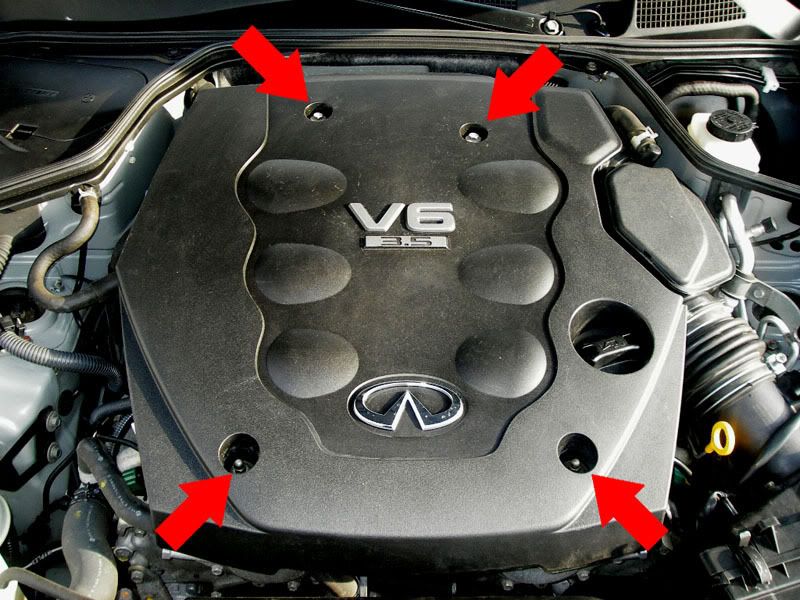
2) Remove the engine cover. It is 2 10mm nuts and 2 10mm bolts (RED arrows)
3) Remove the intake tube. This should require the removal of (2) 10mm bolts (RED arrows) and loosening 3 hose clamps, one on each end of the intake tube and a third clamp on the breather tube (BLUE arrows). Use pliers to loosen this last clamp, then pull the rubber tube away from the intake pipe. Removal of the second 10mm bolt located at the air box will facilitate easier reinstallation of the intake tube later.

4) Let's start on the driver's side first.
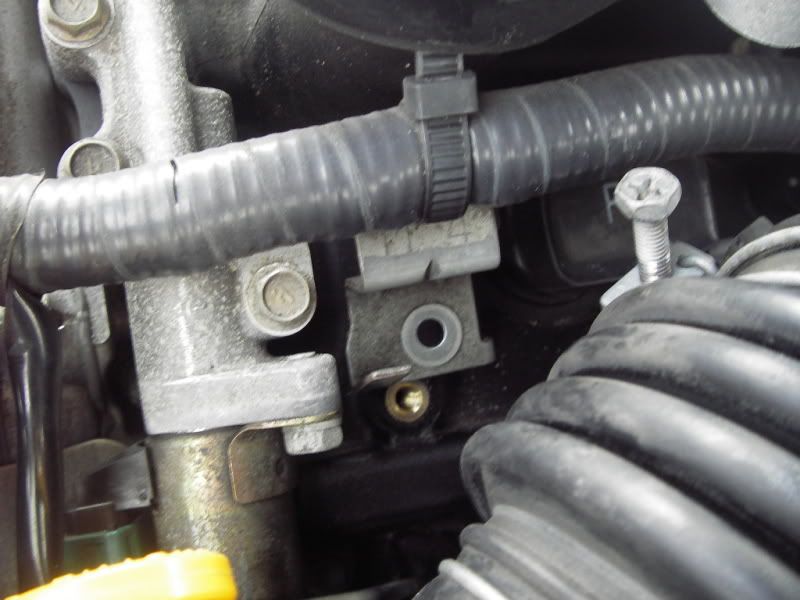
5) To gain better access to the coils, you'll need to remove 3 10mm bolts which hold down an electrical harness just above the coils. All the bolts are easy to get to. You may have to push a couple hoses out of the way to get the back bolt though. Be careful not to drop the bolts!!! The magnetic pick-up tool can be very helpful here!
Front:
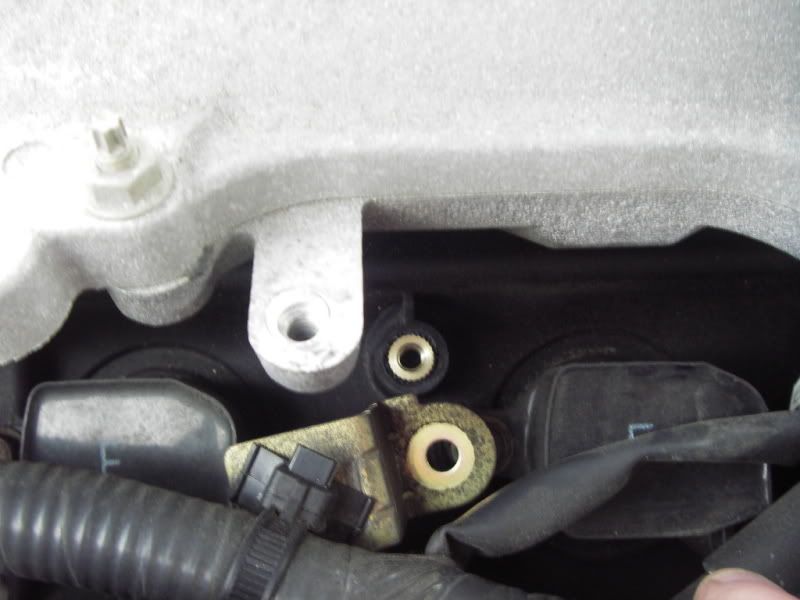
Middle:
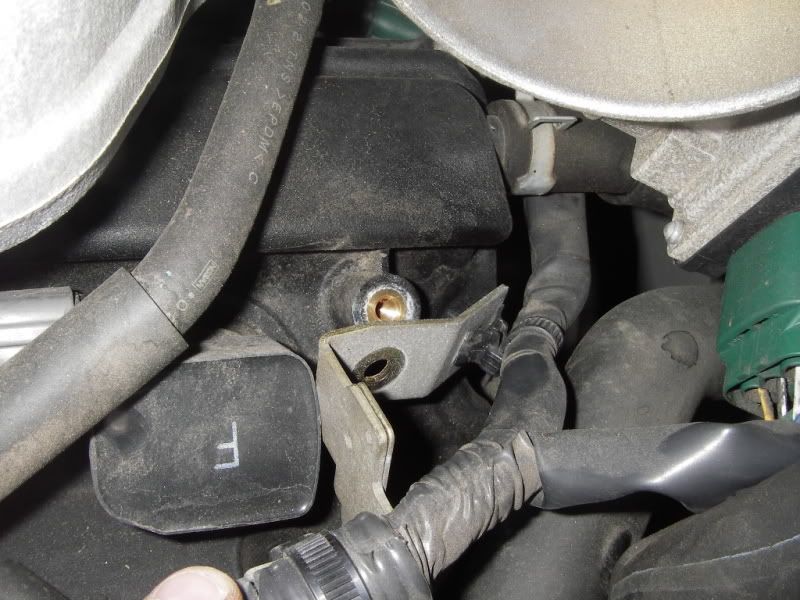
Rear:
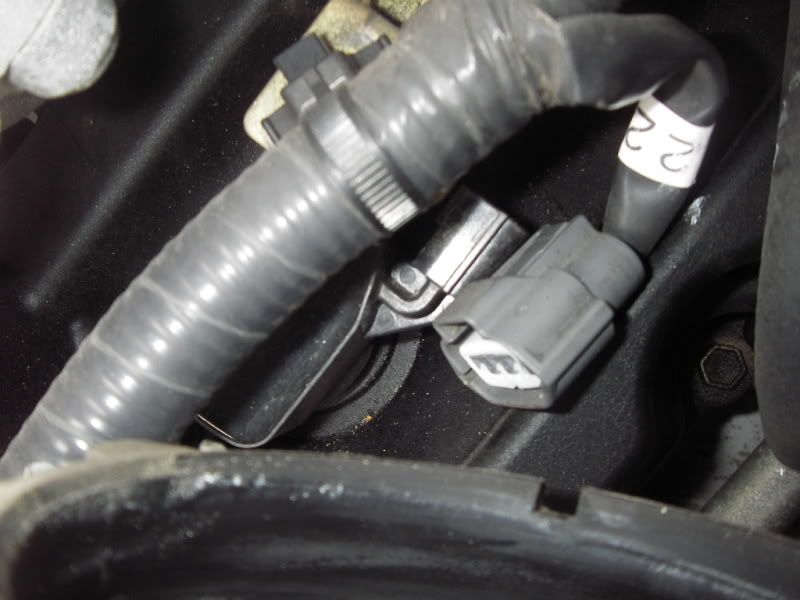
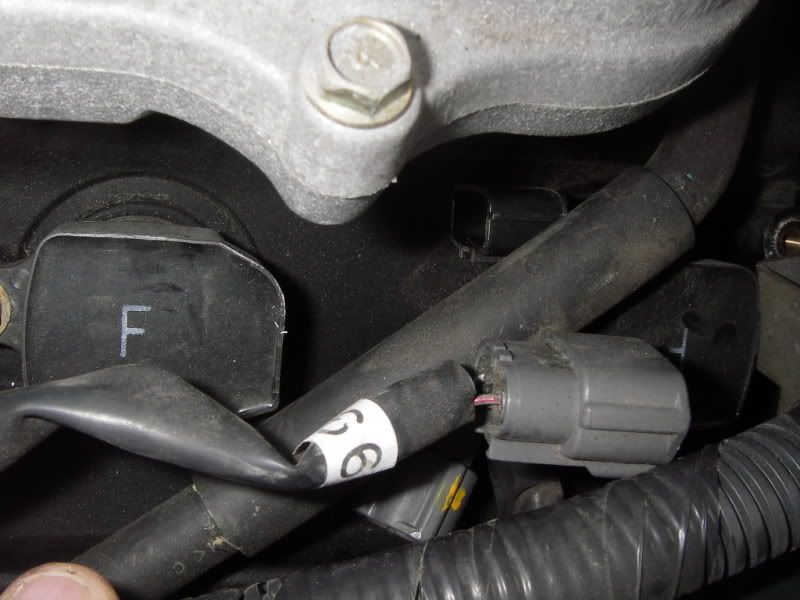
6) After you have removed the bolts for the electrical harness, Disconnect the plugs going to the individual coils. There are 3 plugs to undo. They are snug, but they come off fairly easily with just your fingers. Simply depress the flat lever section, and pull. Do not pull by the wires. Pull only on the gray plastic connector. If necessary, use a flat-blade screwdriver to help the connector come loose. Remember which plug goes to which coil. That is extremely important!!!! (They may be labeled).
Cylinder 2
Cylinder 4 & 6
7) Now you have good access to the coils! Use the 10mm socket to remove the bolt from the coil. Once you have removed the bolt, the coil will pull straight up out of the head. This should be very easy to pullout.
8) You should be able to see the sparkplug in the hole. It is pretty far down there.
9) Use the 16mm socket with the extension to remove the plug. If you aren't using a sparkplug socket, you'll need to use a 3-prong, spring loaded pick-up tool. This tool makes plucking the plug out the head very easy. I'm sure you can come up with some other sort of tool to do the job, but that is what I used.
10) Prepare your new sparkplug. These come pre-gapped! You do not need to gap them, and you will probably cause problems if you do. Coat LIGHTLY the 3-4 threads closest to the non-electrode end of the plug with a coating of Anti-Seize lubricant. A small tube or bottle can be purchased at any automotive store.

11) Replace the sparkplug with your new plug! Torque the plug to 20 FT-LBs! Make sure not to crossthread or overtorque the plugs! Aluminum heads are easy to strip out!
12) relplace the coil; torque its bolt to 95 IN-LBs and plug it back in to the harness.
13) Repeat steps 8-11 for cylinders 4 & 6!
14) Re-secure the wiring harness with its 3 10mm bolts, and the driver's side is complete.
15) You can also replace the intake tube at this time.
16) On to the passenger's side of the engine.
17) This side is slightly harder....only because some of the bolts are difficult to reach by hand.
18) I started by removing 2 10mm bolts which retain the wiring harness. I only removed the 2 bolts closest to the front and middle of the head. The rear bolt is not necessary to remove.
19) You will need to remove the rubber breather tune that runs from the valve cover to the intake manifold. Use the pliers to loosen the clamps; then, slide the tube off of the engine.
20) Now, you should be able to disconnect the electrical plugs from the coils. This is the same as on the driver's side.
21) The coil removal and plugs change is the same as described above. The only difference is that the back (toward firewall) coil bolt is difficult to get to with your fingers. Use the magnetic tool to remove and replace this bolt.
22) After repeating the procedure for all the cylinders, you should be done. Make sure to check that all the electrical connectors are snug and "clicked" tight.
23) Very important, you shouldn't have any extra bolts laying around!!!!
24) put the engine cover back on. Secure it with its 4 fasteners
25) reconnect the negative battery terminal.
26) YOU ARE DONE!!!!!
I think I remembered all the steps. This took me about an hour, going at a leisurely pace. Additionally, I was figuring it out as I went. With some motivation, you could probably do it in 1/2 an hour.
Have fun,
Andrew
[/B]
First, half of the credit for this DIY goes to QuadCam. He posted the instructions for this, which I used to do my own plug change. I just took the pictures, and am making this a separate post. So, THANKS QuadCam!
I installed LFR5AIX-11 plugs. They are the same heat range as stock. QuadCam installed the LFR6AIX-11 plugs. The install is the same procedure
First, the tools you will need:
6 NGK Iridium IX Sparkplugs
3/8" Rachet
3/8" long extension (at least ten inches)
10mm socket
10mm open-end wrench
16mm "deep" socket (or "sparkplug socket")
Magnetic pick up tool
3-prong grabber (optional, you'll need it if you don't have a "sparkplug socket")
Pliers
Torque Wrench
Most people would have these tools in their garage. The long extension is a must. The magnetic and pronged "pickup tools" make this much easier.
PROCEDURE:
1) DISCONNECT THE NEGATIVE BATTERY TERMINAL! Loosen one 10mm bolt (RED arrow), this is the only step where you will use the open-end wrench.
2) Remove the engine cover. It is 2 10mm nuts and 2 10mm bolts (RED arrows)
3) Remove the intake tube. This should require the removal of (2) 10mm bolts (RED arrows) and loosening 3 hose clamps, one on each end of the intake tube and a third clamp on the breather tube (BLUE arrows). Use pliers to loosen this last clamp, then pull the rubber tube away from the intake pipe. Removal of the second 10mm bolt located at the air box will facilitate easier reinstallation of the intake tube later.
4) Let's start on the driver's side first.
5) To gain better access to the coils, you'll need to remove 3 10mm bolts which hold down an electrical harness just above the coils. All the bolts are easy to get to. You may have to push a couple hoses out of the way to get the back bolt though. Be careful not to drop the bolts!!! The magnetic pick-up tool can be very helpful here!
Front:
Middle:
Rear:
6) After you have removed the bolts for the electrical harness, Disconnect the plugs going to the individual coils. There are 3 plugs to undo. They are snug, but they come off fairly easily with just your fingers. Simply depress the flat lever section, and pull. Do not pull by the wires. Pull only on the gray plastic connector. If necessary, use a flat-blade screwdriver to help the connector come loose. Remember which plug goes to which coil. That is extremely important!!!! (They may be labeled).
Cylinder 2
Cylinder 4 & 6
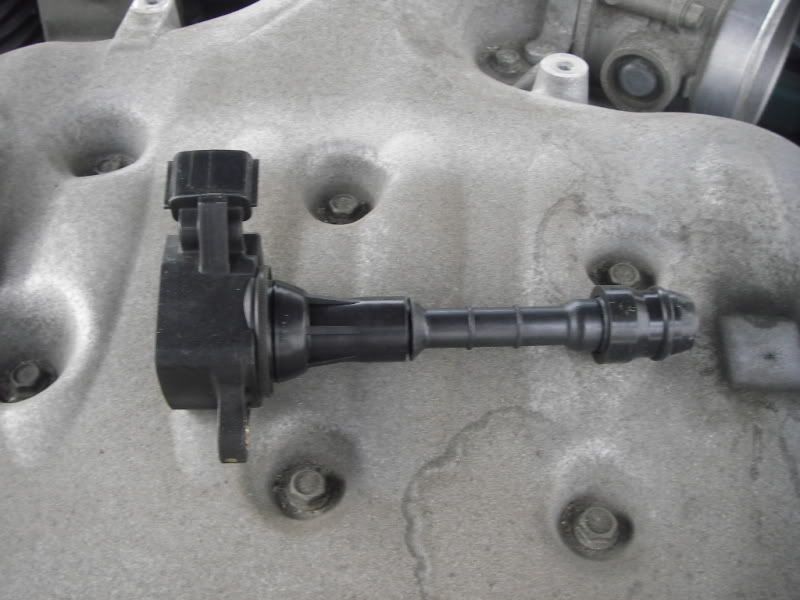
7) Now you have good access to the coils! Use the 10mm socket to remove the bolt from the coil. Once you have removed the bolt, the coil will pull straight up out of the head. This should be very easy to pullout.
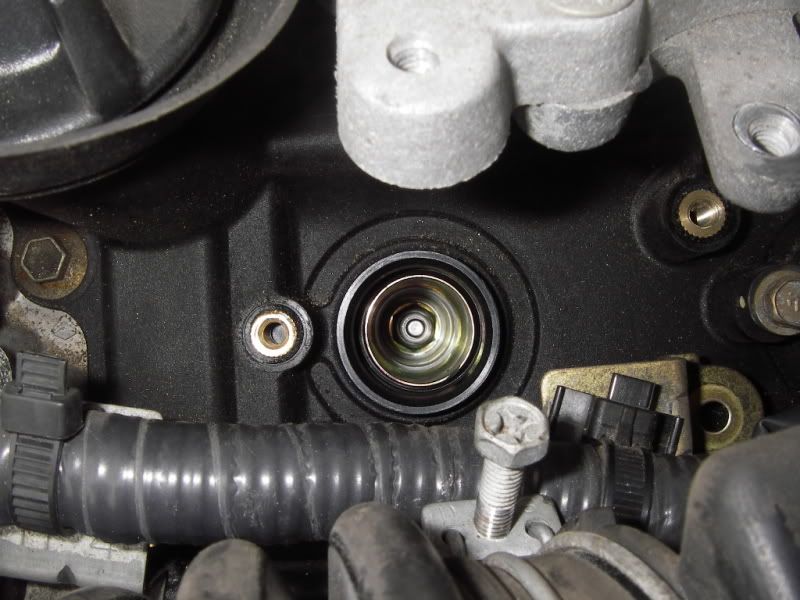
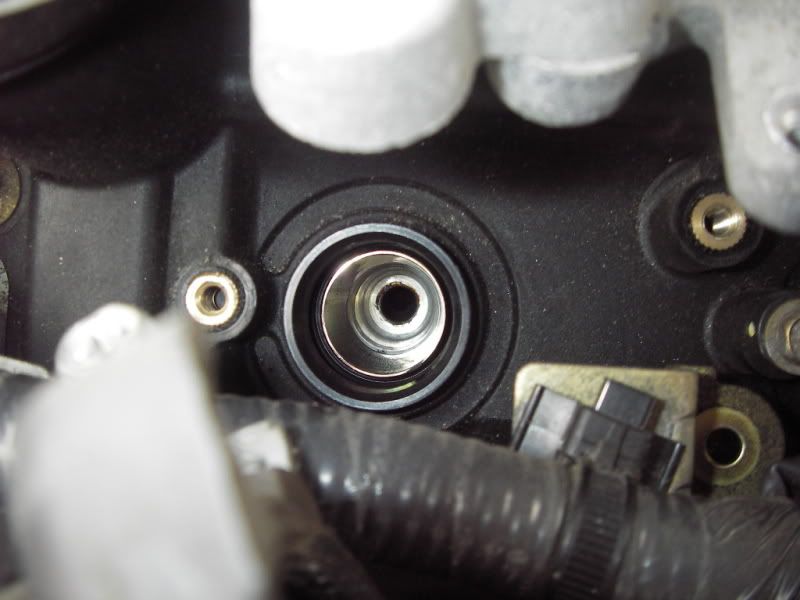
8) You should be able to see the sparkplug in the hole. It is pretty far down there.
9) Use the 16mm socket with the extension to remove the plug. If you aren't using a sparkplug socket, you'll need to use a 3-prong, spring loaded pick-up tool. This tool makes plucking the plug out the head very easy. I'm sure you can come up with some other sort of tool to do the job, but that is what I used.
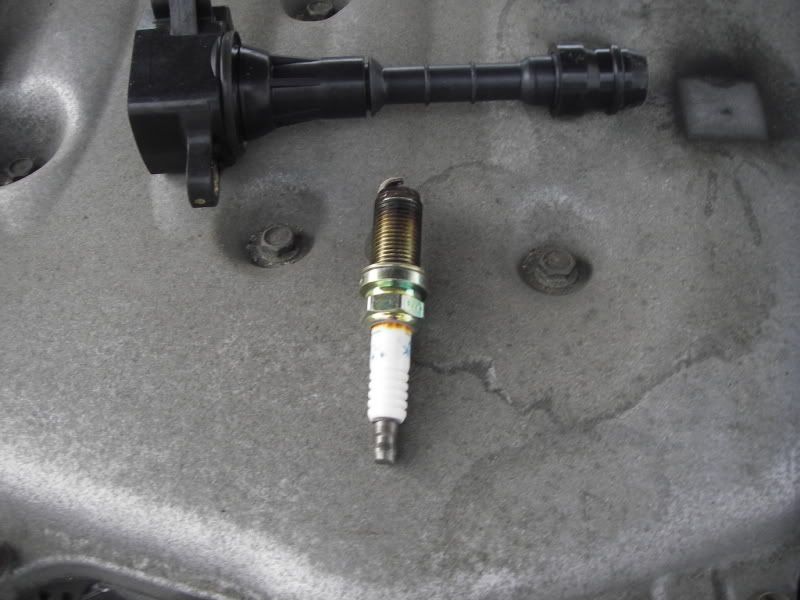
10) Prepare your new sparkplug. These come pre-gapped! You do not need to gap them, and you will probably cause problems if you do. Coat LIGHTLY the 3-4 threads closest to the non-electrode end of the plug with a coating of Anti-Seize lubricant. A small tube or bottle can be purchased at any automotive store.
11) Replace the sparkplug with your new plug! Torque the plug to 20 FT-LBs! Make sure not to crossthread or overtorque the plugs! Aluminum heads are easy to strip out!
12) relplace the coil; torque its bolt to 95 IN-LBs and plug it back in to the harness.
13) Repeat steps 8-11 for cylinders 4 & 6!
14) Re-secure the wiring harness with its 3 10mm bolts, and the driver's side is complete.
15) You can also replace the intake tube at this time.
16) On to the passenger's side of the engine.
17) This side is slightly harder....only because some of the bolts are difficult to reach by hand.
18) I started by removing 2 10mm bolts which retain the wiring harness. I only removed the 2 bolts closest to the front and middle of the head. The rear bolt is not necessary to remove.
19) You will need to remove the rubber breather tune that runs from the valve cover to the intake manifold. Use the pliers to loosen the clamps; then, slide the tube off of the engine.
20) Now, you should be able to disconnect the electrical plugs from the coils. This is the same as on the driver's side.
21) The coil removal and plugs change is the same as described above. The only difference is that the back (toward firewall) coil bolt is difficult to get to with your fingers. Use the magnetic tool to remove and replace this bolt.
22) After repeating the procedure for all the cylinders, you should be done. Make sure to check that all the electrical connectors are snug and "clicked" tight.
23) Very important, you shouldn't have any extra bolts laying around!!!!
24) put the engine cover back on. Secure it with its 4 fasteners
25) reconnect the negative battery terminal.
26) YOU ARE DONE!!!!!
I think I remembered all the steps. This took me about an hour, going at a leisurely pace. Additionally, I was figuring it out as I went. With some motivation, you could probably do it in 1/2 an hour.
Have fun,
Andrew
[/B]
Best to do this on a cold motor due to the dissimilar metals, steel plug and alu. head

#261
08-06-2014 | 04:52 PM

Spark plugs are like oil. A lot of people will give you advice as if it were fact. Truth is there are many different companies that make high quality spark plugs and what you decide on using should be based on your application. Get a brand you trust and the type, whether it be copper, platinum, iridium or whatever all suggest different length of life.
In other words do some research to find out what's right for you.
In other words do some research to find out what's right for you.
Last edited by ScraggleRock; 03-03-2015 at 03:54 PM.
The following users liked this post:
Urbanengineer (10-26-2014)


#263
10-26-2014 | 01:48 AM

Registered User
Joined: Oct 2009
Posts: 93
Likes: 3
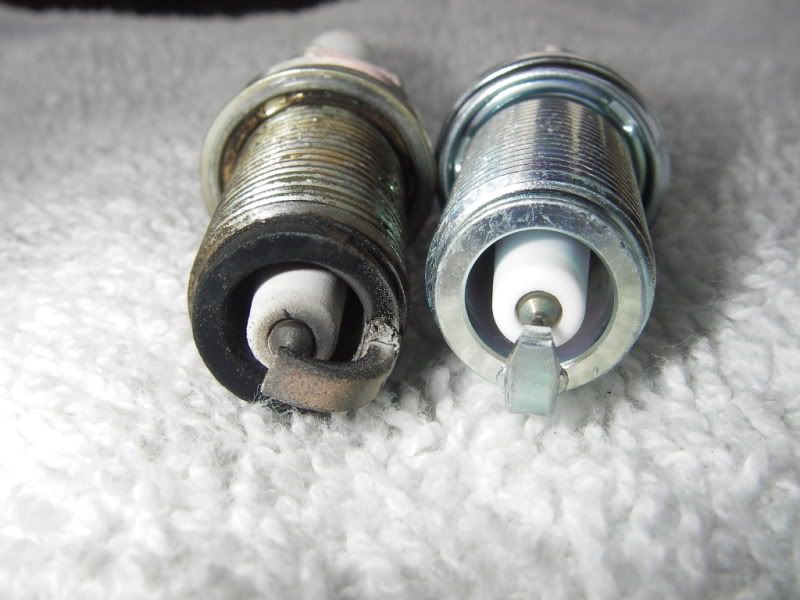
Your picture looks like it still has a point, but it also appears to be worn down to a larger gap than than when fresh. It's about halfway between my best and worst plugs that I removed. Looks like they may be the originals. Replacment might be in order.


#268
01-19-2015 | 02:23 PM

#270
03-03-2015 | 02:04 PM

Registered User
Joined: Mar 2015
Posts: 2
Likes: 0
Thanks for the DIY write, up, I found it too late. 2003 MT sedan, 109xxx miles, First plug change. I changed may plugs to the Irridiums on Sunday, no problems during the change, less than 2 hours. Car started and idled fine. Drove to work Monday, the engine has a slight miss. This is most noticeable under load, such as low RPM in higher gears. I purred like a kitten in same conditions prior to the plug swap. Can also feel the slight miss at idle, especially once the car is warmed up.
Monday night pulled all plugs, color was good. Double checked all connections. Note there is no CEL illuminated on dash, never was. I had not disconnected the battery during the initial change. Went to bed perplexed.
Tues Am surfed net. Disconnected battery for 10 minutes, drove around block. Engine still missing slightly. Drove wife's car to work.
Any ideas? Should I try the ECU reset posted by EvilG on Page 14 of this thread? Thanks for the help