
So for the past week I've been trying to work on my mildly built motor whenever I had the chance, haven't quite finished everything yet, but heres some pics of the progression so far for fun!! 
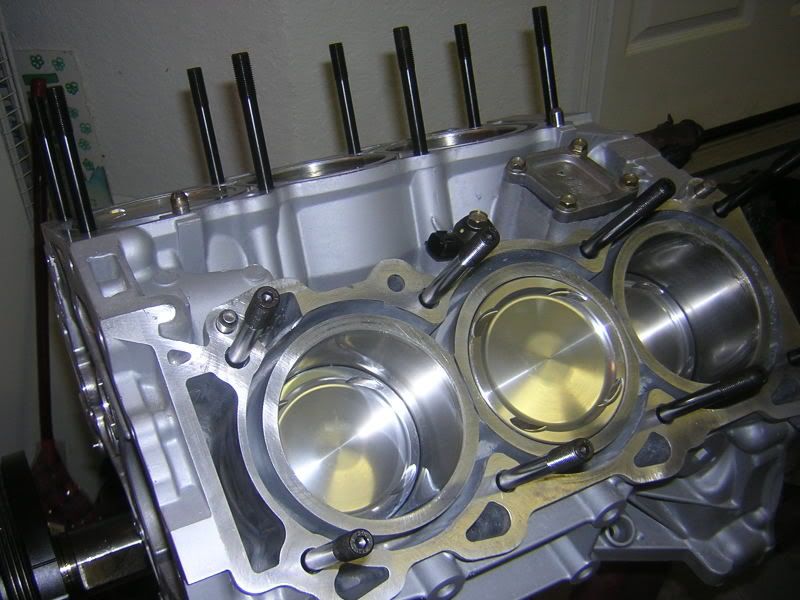
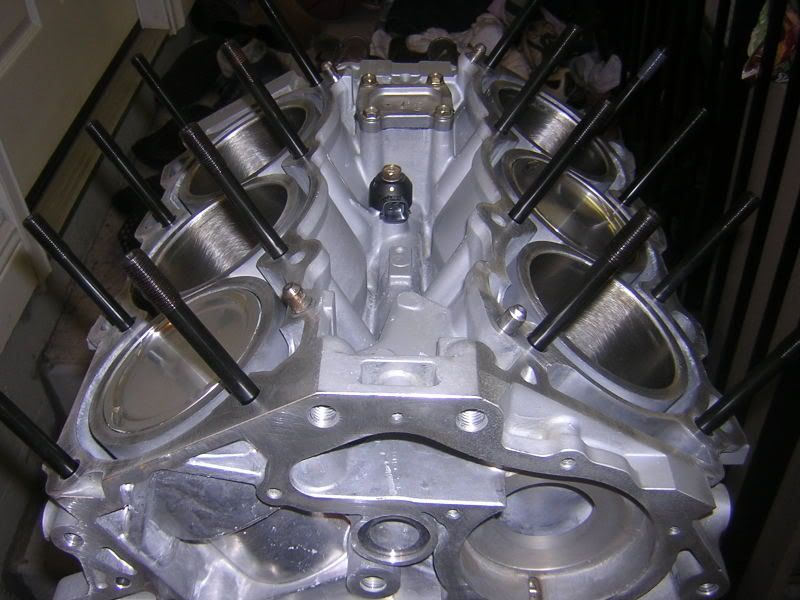
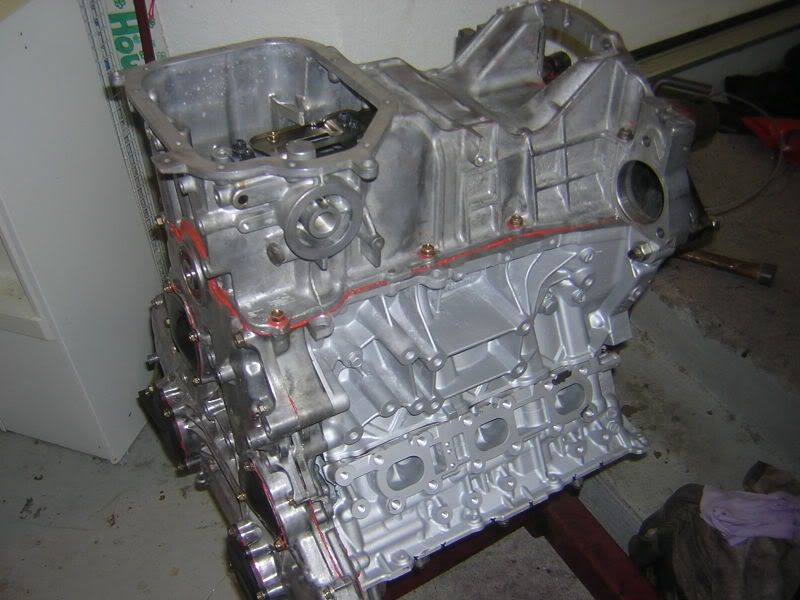
Freshly built shortblock back from the machine shop after I got it on the stand and put in the head studs.
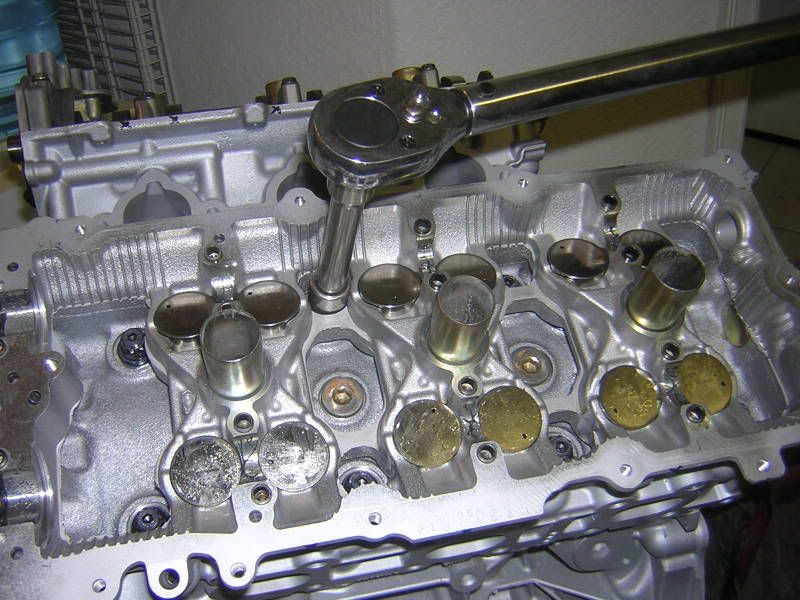
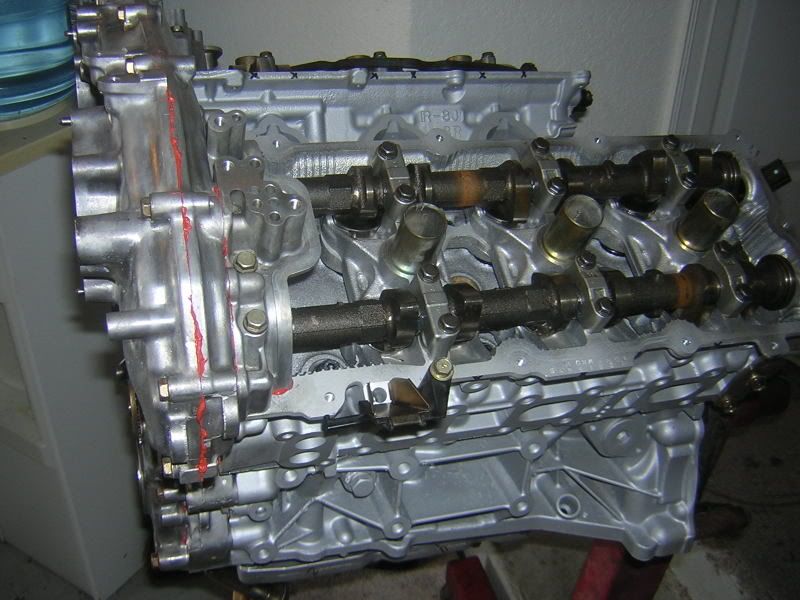
Head gaskets and heads in place ready to be torqued down.
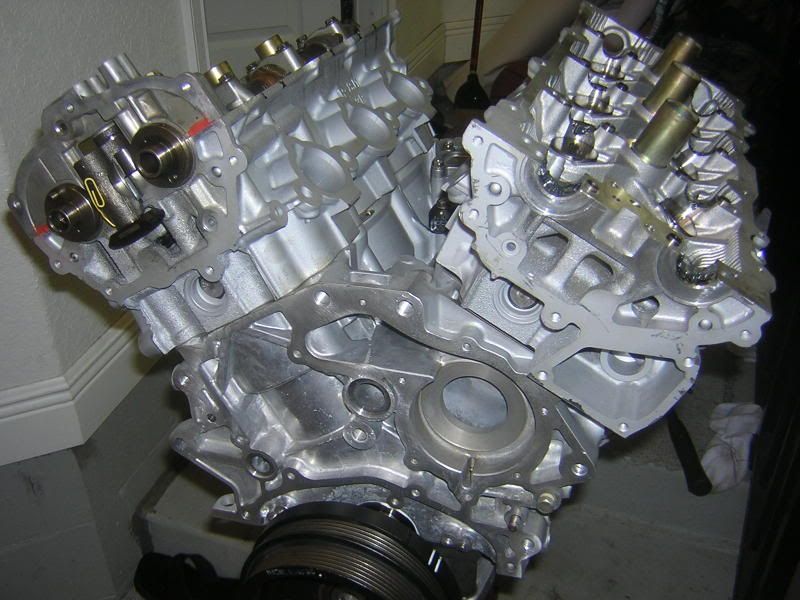
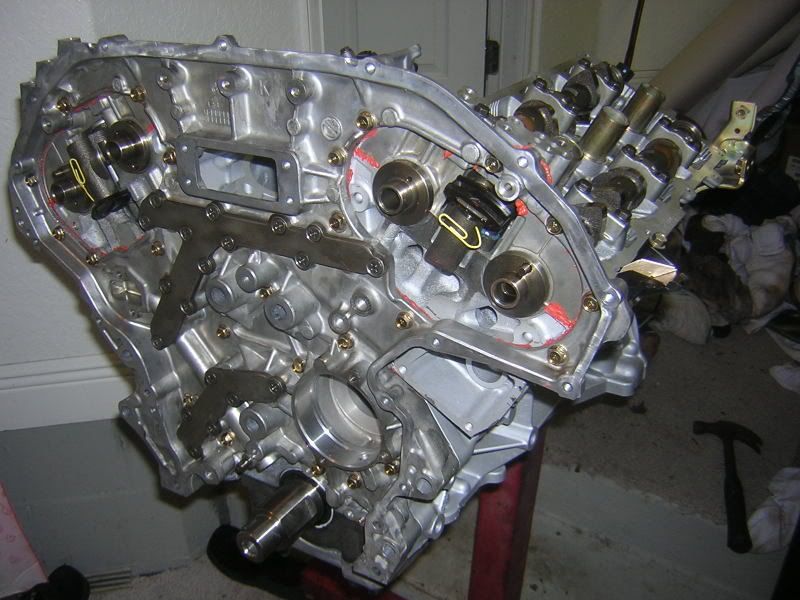
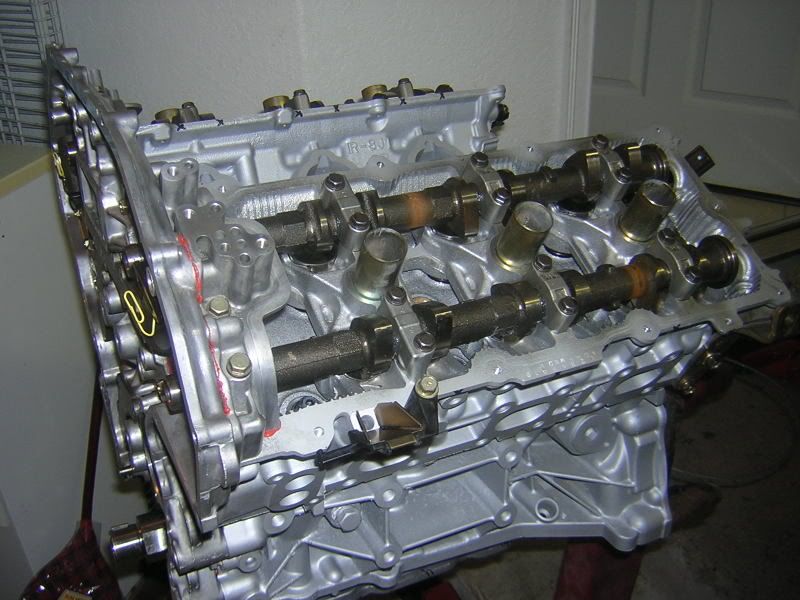
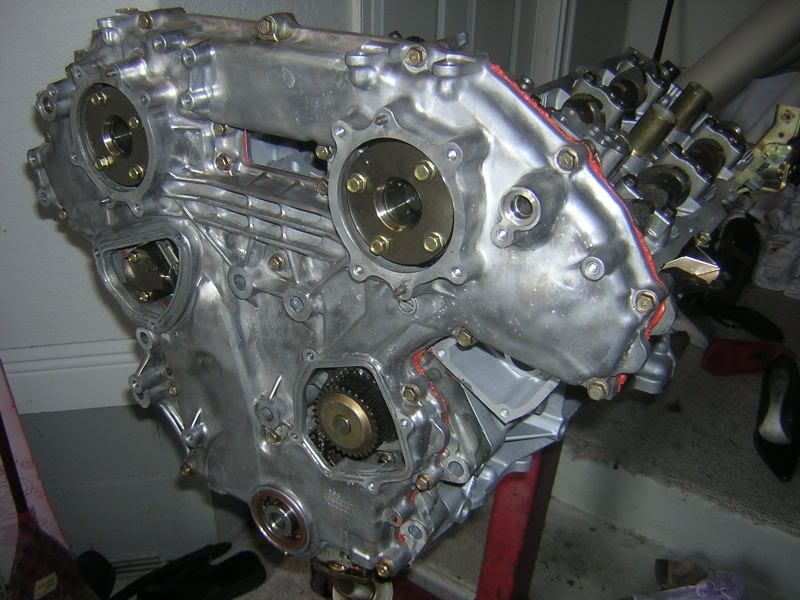
Cams and rear timing case on, I hate liquid gasket maker
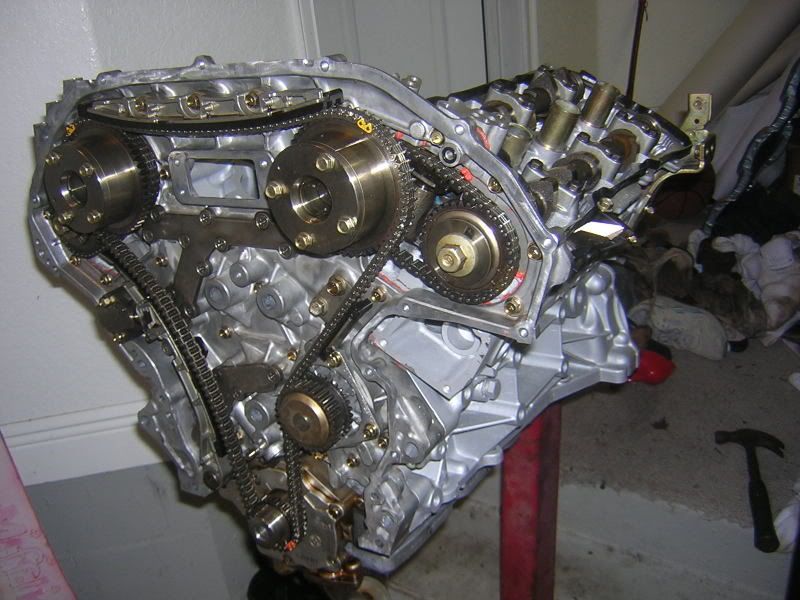
Timing chain on and motor timed!! Wasn't as bad as I thought it was going to be.
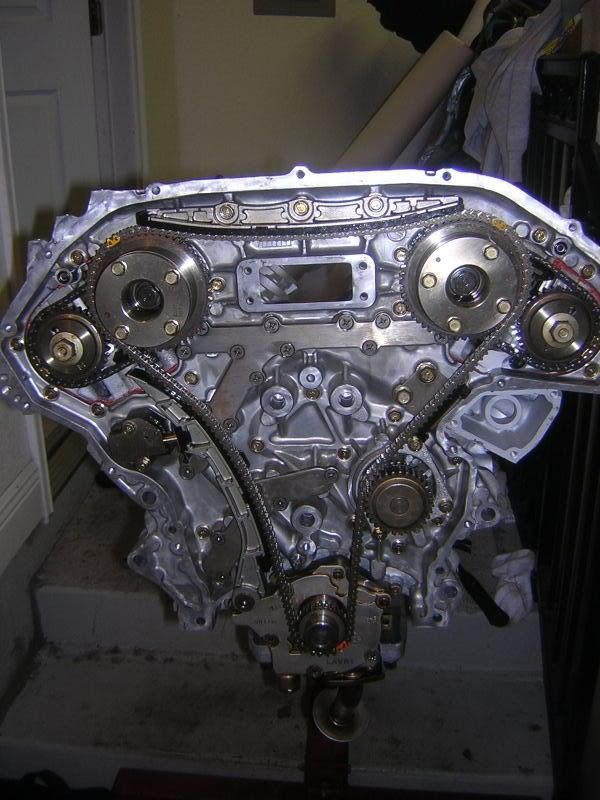
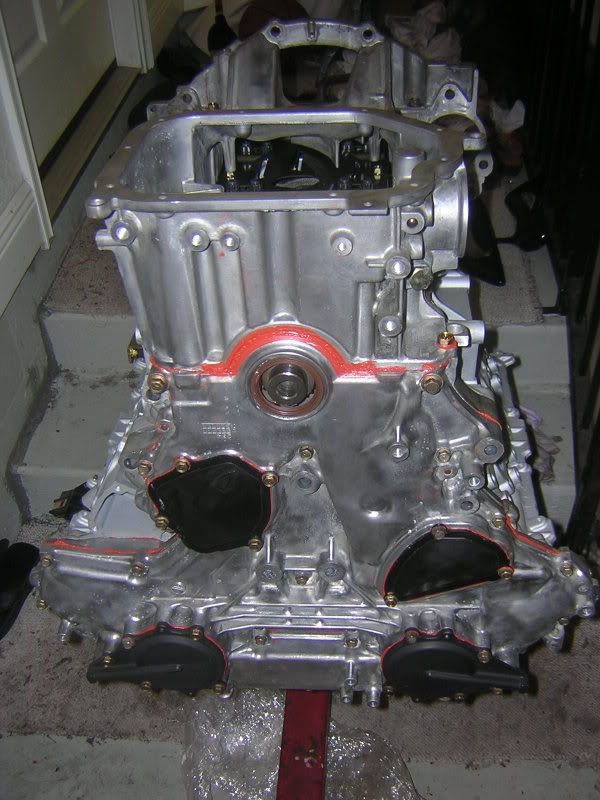
Front timing case on. Water pump, Oil pump in. Again I hate liquid gasket maker.
Freshly built shortblock back from the machine shop after I got it on the stand and put in the head studs.
Head gaskets and heads in place ready to be torqued down.
Cams and rear timing case on, I hate liquid gasket maker
Timing chain on and motor timed!! Wasn't as bad as I thought it was going to be.
Front timing case on. Water pump, Oil pump in. Again I hate liquid gasket maker.
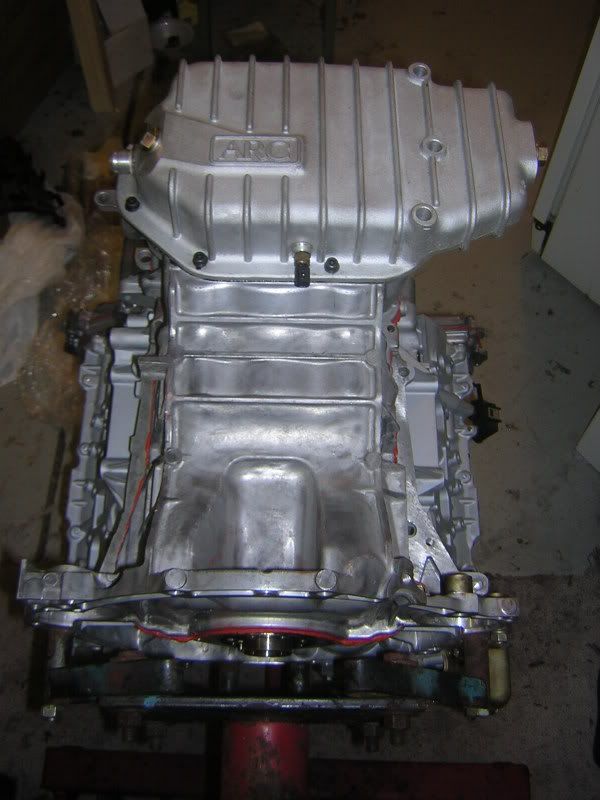
Upper oil pan...
Arc oil pan with turbo oil return bungs welded in.
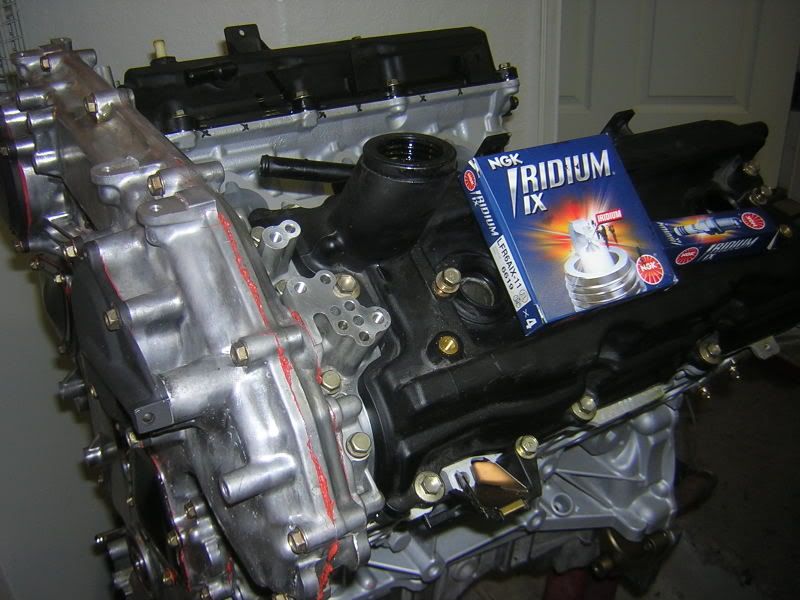
Rocker covers on and putting in spark plugs and ignition packs.
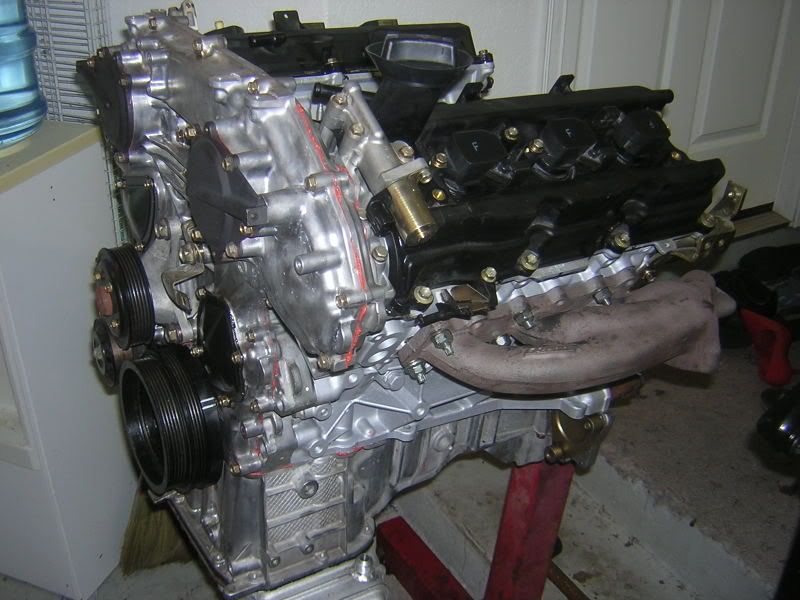
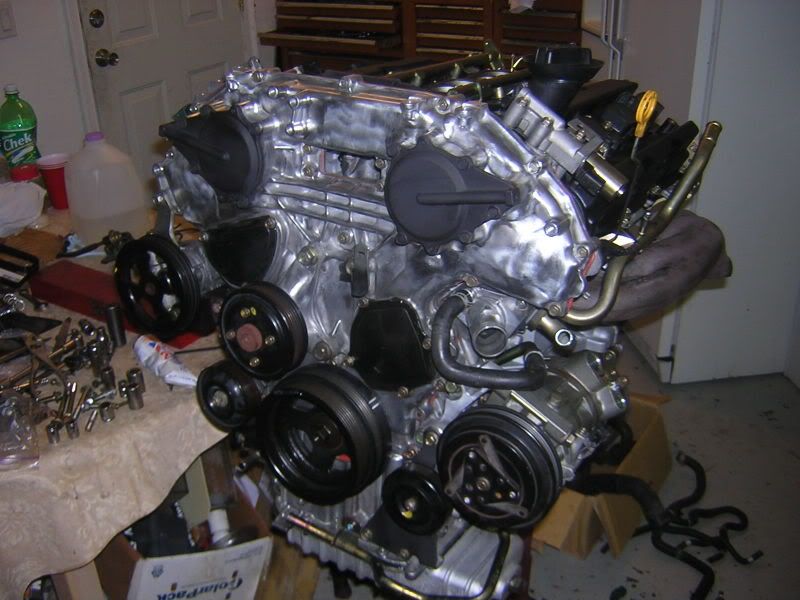
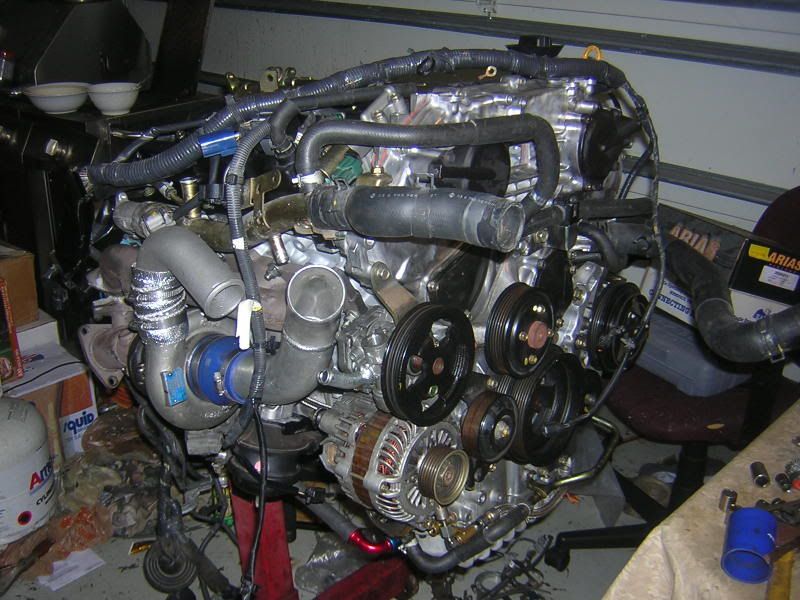
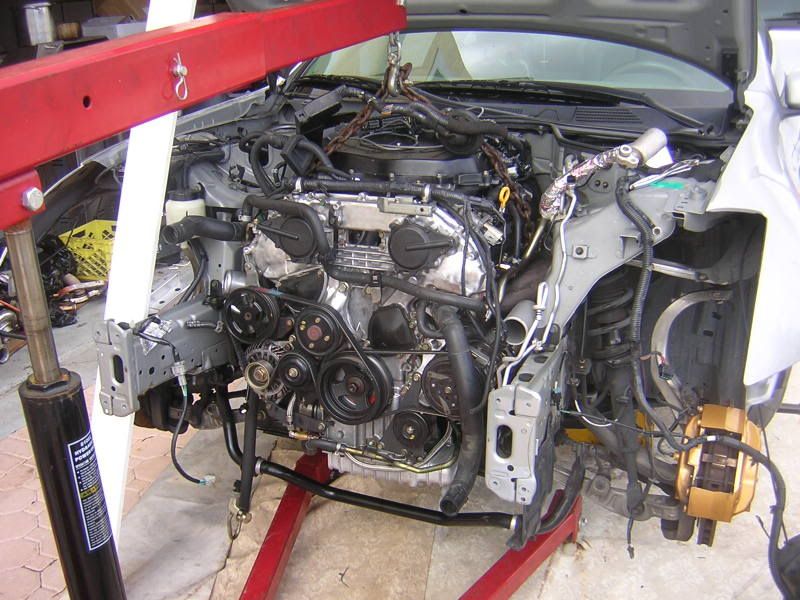
Acessories being put on...
Thats all the pics I have on the comp for now. I'll put up more when its done!! What a Merry Christmas!!!
EDIT: More pics!!
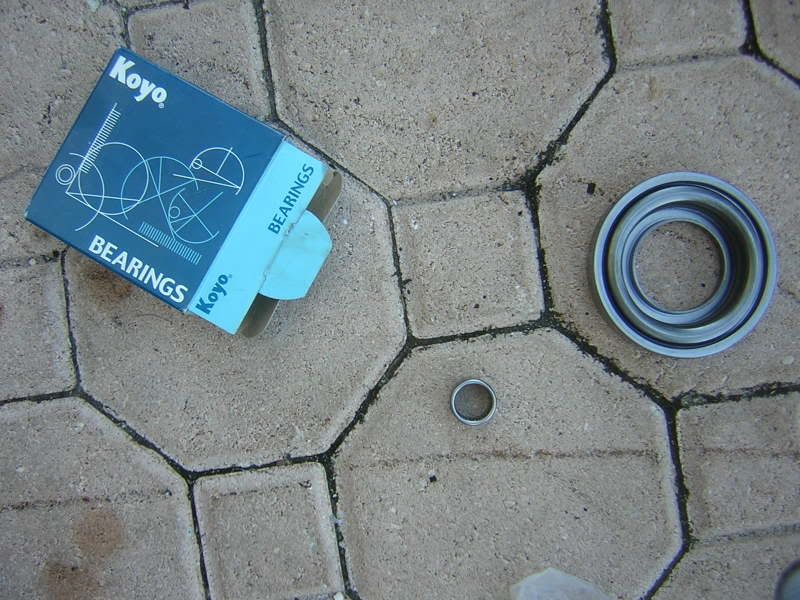
Nismo roller bushing, and stock throwout bearing, didn't do it the first time and got a bunch of chatter.
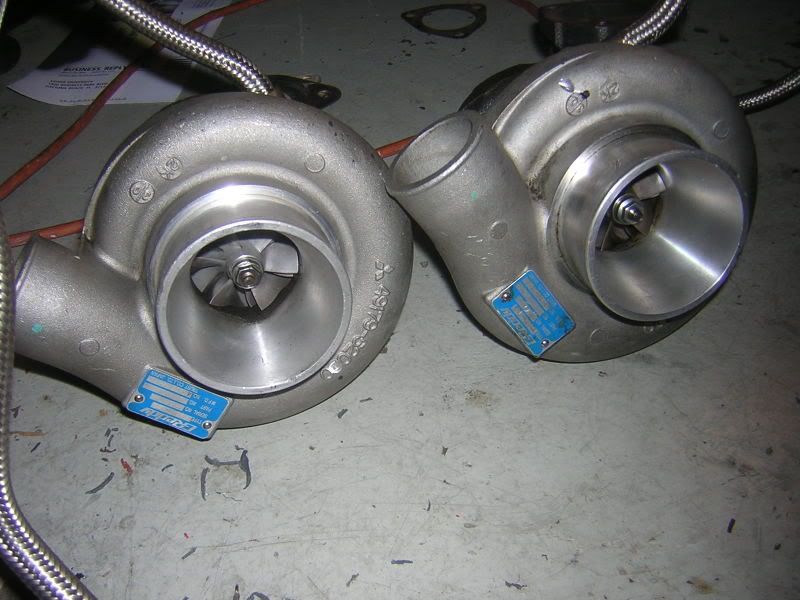
My twin's
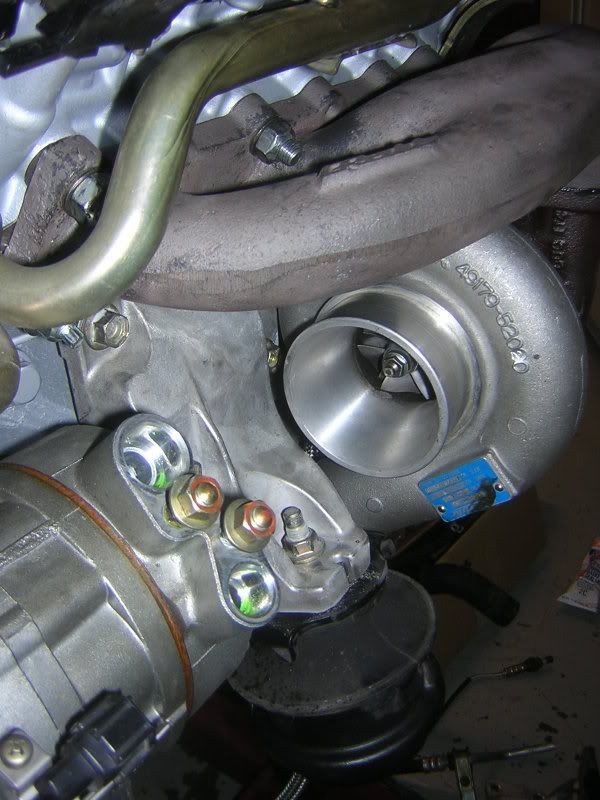
Driver side turbo in...
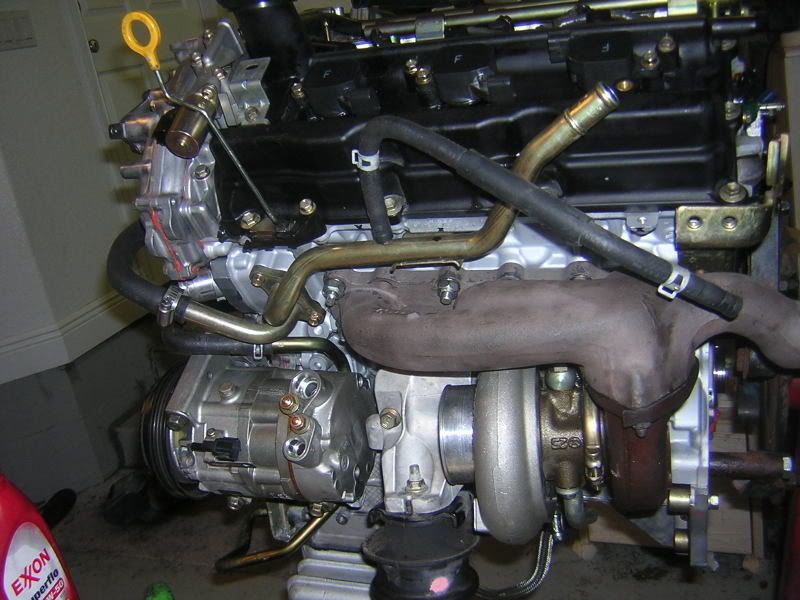
Pass. turbo fitted...
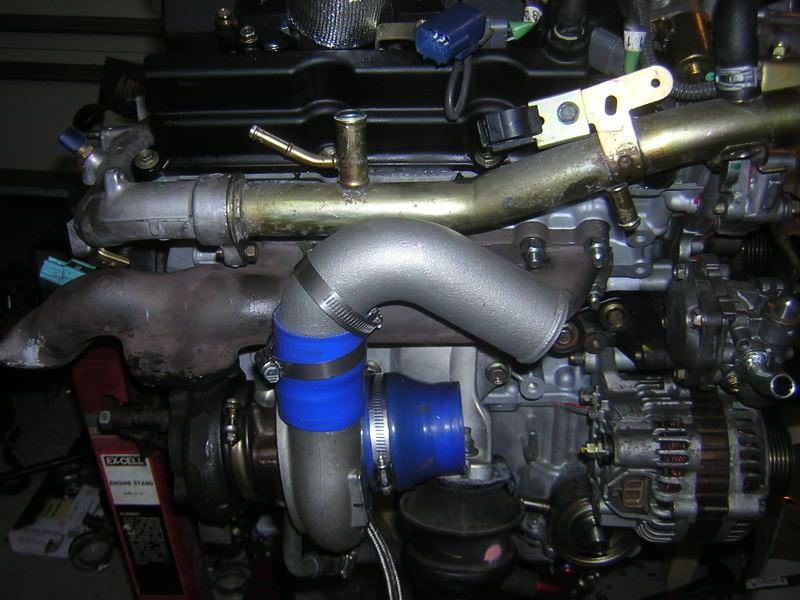
Fitted, in, and the coupling heat wrapped...
Closer view...
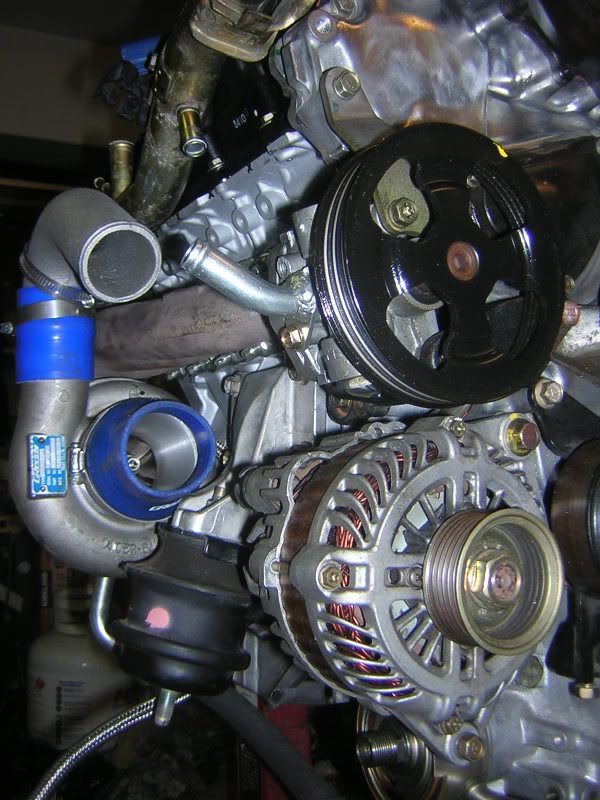
Power steering adapter... i bet it could have worked without this....
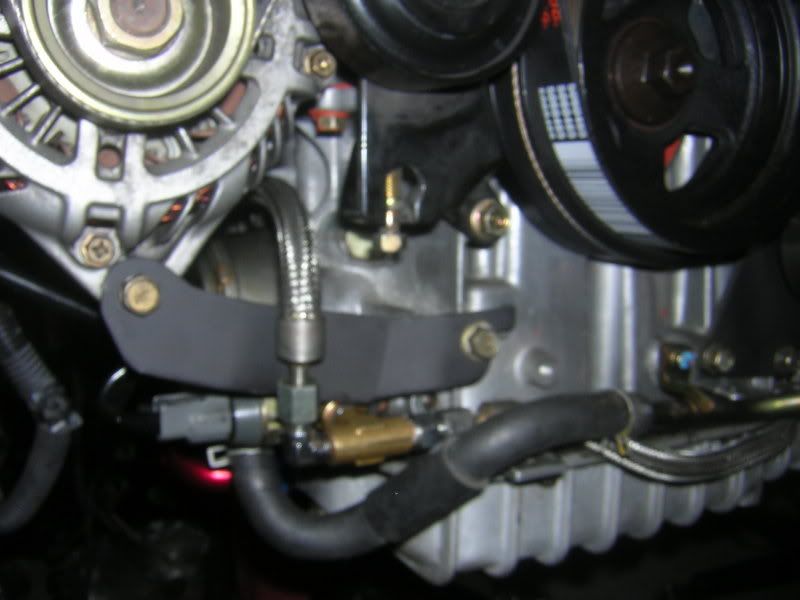
Custom return line, no more banjo bolt crap... still got a leak though, but fixed it

Oil feed lines, got a real nice leak that flooded Jeremy's dyno bay  DAMN banjo bolts!!! My bad.....
Going in.... had a hell of a time without disc steering column.... but squeezed it in there...
On the dyno with the newest technology in reading AFR's, my car don't like the normal way lol 

Got everything running, sprung an oil leak at the ARC oil pan (POS btw, proof that brandnames means nothing), a leak at the driver turbo oil feed line banjo bolt (hate these things), and now I have a leak at the oil drain plug cuz the last person who had it stripped it a little so I finished the job... lol.
Otherwise, its done, oil pan and feed line leaks fixed, butt dyno feels pretty close to my TN kit right now at 5.4 psi.
Next up, break in the engine, connect the e-01 and up boost to 14lbs., then finish the svrt wastegate relocate pipes, test pipes, fuel return, bigger injectors, coil-overs, then i'm done..... finally.....
Hope the pics help anyone wanting to build their own motor, or install their own greddy kit, or at least see why an install costs so much... More to come later....
EDIT:
A few more pics, everything is running good now. I fixed any oil leaks I had, and I'm waiting on a set of test pipes and a connector for my Greddy e-01 so I can turn up the boost. I didn't get a good dyno run at Jeremy's because of the oil leak, so I'll be back there soon enough..... I think Jeremy's craziness rubbed off on me Its not that hard to put together all this stuff anyways...... I say everyone build their motors on their own!!
BEFORE/AFTER
I kinda like before better, but my old one got mess up, so I had this laying around.....


No more BOV here...


No more bling bling under my hood...


Blitz BOV is hidden in here...

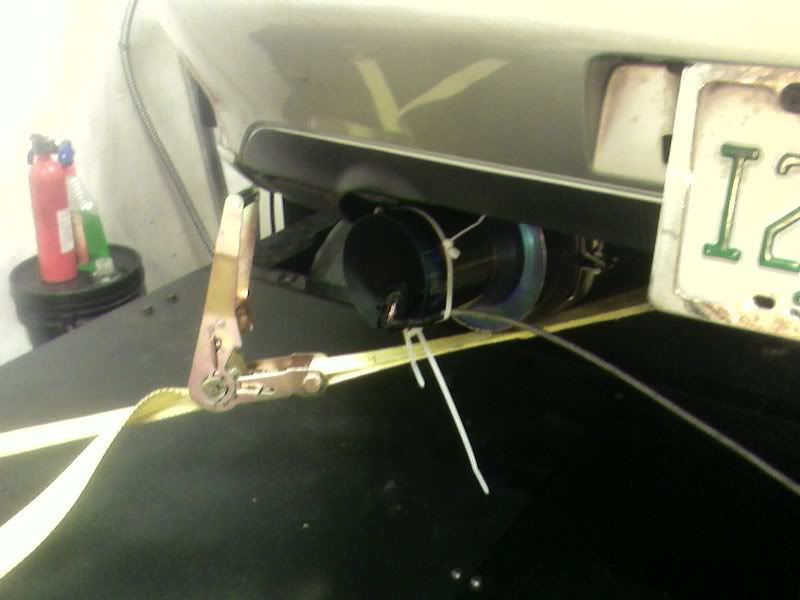
My single exhaust that was supposed to be for my TN kit... oh well, keeping it for now...

AND yes you can keep your brace with Greddy's!! Kinda..

Arc oil pan with turbo oil return bungs welded in.
Rocker covers on and putting in spark plugs and ignition packs.
Acessories being put on...
Thats all the pics I have on the comp for now. I'll put up more when its done!! What a Merry Christmas!!!
EDIT: More pics!!
Nismo roller bushing, and stock throwout bearing, didn't do it the first time and got a bunch of chatter.
My twin's
Driver side turbo in...
Pass. turbo fitted...
Fitted, in, and the coupling heat wrapped...
Closer view...
Power steering adapter... i bet it could have worked without this....
Custom return line, no more banjo bolt crap... still got a leak though, but fixed it
Oil feed lines, got a real nice leak that flooded Jeremy's dyno bay
DAMN banjo bolts!!! My bad.....Going in.... had a hell of a time without disc steering column.... but squeezed it in there...
On the dyno with the newest technology in reading AFR's, my car don't like the normal way lol
Got everything running, sprung an oil leak at the ARC oil pan (POS btw, proof that brandnames means nothing), a leak at the driver turbo oil feed line banjo bolt (hate these things), and now I have a leak at the oil drain plug cuz the last person who had it stripped it a little so I finished the job... lol.
Otherwise, its done, oil pan and feed line leaks fixed, butt dyno feels pretty close to my TN kit right now at 5.4 psi.
Next up, break in the engine, connect the e-01 and up boost to 14lbs., then finish the svrt wastegate relocate pipes, test pipes, fuel return, bigger injectors, coil-overs, then i'm done..... finally.....
Hope the pics help anyone wanting to build their own motor, or install their own greddy kit, or at least see why an install costs so much...
More to come later....EDIT:
A few more pics, everything is running good now. I fixed any oil leaks I had, and I'm waiting on a set of test pipes and a connector for my Greddy e-01 so I can turn up the boost. I didn't get a good dyno run at Jeremy's because of the oil leak, so I'll be back there soon enough..... I think Jeremy's craziness rubbed off on me
Its not that hard to put together all this stuff anyways...... I say everyone build their motors on their own!! BEFORE/AFTER
I kinda like before better, but my old one got mess up, so I had this laying around.....
No more BOV here...
No more bling bling under my hood...
Blitz BOV is hidden in here...
My single exhaust that was supposed to be for my TN kit... oh well, keeping it for now...
AND yes you can keep your brace with Greddy's!! Kinda..

Former G35driver Vendor
nice man!! now how much did your dad help?? hehehe
cant wait to get some power out of that thing on the dyno!!
its funny, you should have put, 2 hours later or 3 hours later between the pictures, cause it looks soooooo easy!!
hehehecant wait to get some power out of that thing on the dyno!!
its funny, you should have put, 2 hours later or 3 hours later between the pictures, cause it looks soooooo easy!!

Registered User
Wow they really are pretty when they are new and clean. 1 question though. Since you went to all this trouble, why are you using the stock headers? Throw some real headers on that sucker to make it breath. Nice work!
Moderator
^he's not using stock headers. If you look closely they're Greddy turbo manifolds
Ahntuan, that just sick. Congrats on all the hard work you've been putting into the new motor. Looks like the Turbonetis just wasn't enough for your boost addiction, eh?
Are you back in Orlando for awhile or still going to school in SFL? You should come to Jeremy's dyno day!
Ahntuan, that just sick. Congrats on all the hard work you've been putting into the new motor. Looks like the Turbonetis just wasn't enough for your boost addiction, eh?
Are you back in Orlando for awhile or still going to school in SFL? You should come to Jeremy's dyno day!

Registered User
Sweet motor. I've wondered what the insides look like. Thanks for sharing the pics.

Florida G35 Club, Premier Member
Quote:
LOL good job man.
Hah, that's pretty awesome. Get a shot of you eating breakfast on your motor or something.Originally Posted by RandomHer0
Are you building a motor in your Kitchen?LOL good job man.
FGC President
awesome fufe
jeremy donate me a motor so when i get my car back i can put in a new one
jeremy donate me a motor so when i get my car back i can put in a new one
Registered User
Quote:
Ahntuan, that just sick. Congrats on all the hard work you've been putting into the new motor. Looks like the Turbonetis just wasn't enough for your boost addiction, eh?
Are you back in Orlando for awhile or still going to school in SFL? You should come to Jeremy's dyno day!
Dam, cant believe I missed that..my bad!Originally Posted by Demonteverde
^he's not using stock headers. If you look closely they're Greddy turbo manifoldsAhntuan, that just sick. Congrats on all the hard work you've been putting into the new motor. Looks like the Turbonetis just wasn't enough for your boost addiction, eh?
Are you back in Orlando for awhile or still going to school in SFL? You should come to Jeremy's dyno day!

Registered User
looks great so far! you should def try to make it to the dyno day if your car is done