
G35 project cage and slam


Joined: Feb 2009
Posts: 335
Likes: 11
From: Queen Creek, Az
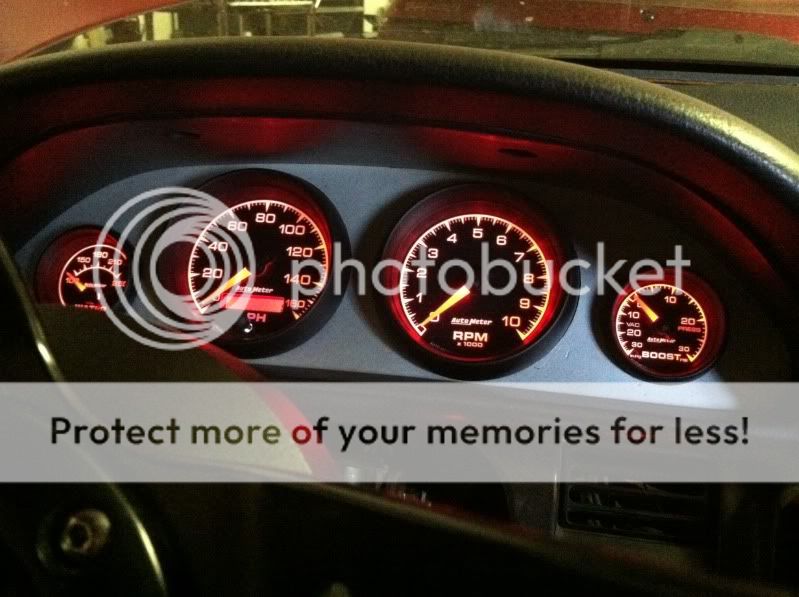
I just got these from a friend. These are the pics in his car. I'm picking them up on Friday.
Autometer ES Gauges included: Speedometer, RPM, Water Temp, Boost, Oil Pressure, Fuel Level, Voltage
Pictures

Autometer ES Gauges included: Speedometer, RPM, Water Temp, Boost, Oil Pressure, Fuel Level, Voltage
Pictures


Joined: Feb 2009
Posts: 335
Likes: 11
From: Queen Creek, Az
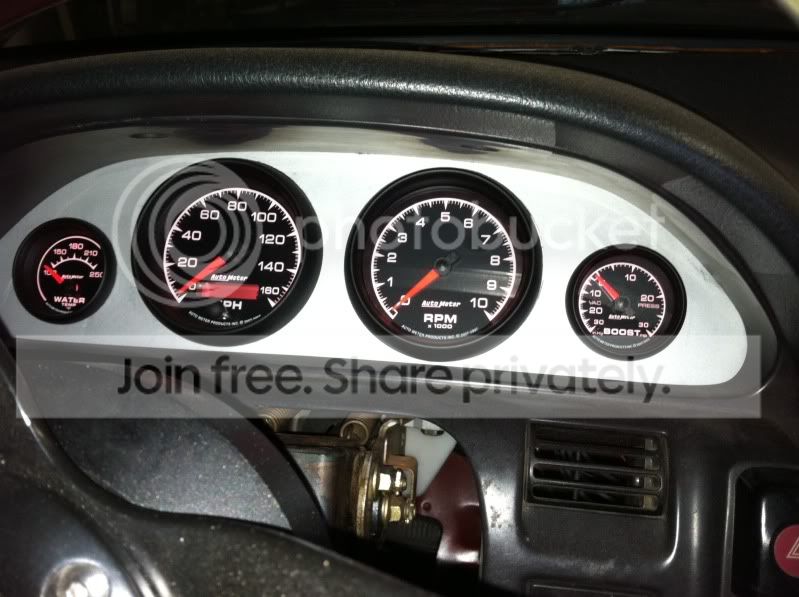
I'm planning on Moving the boost between speed and tach to where the top of the two gauges is the middle line of the Boost gauge. I want that clear as day and fuel as you stated. I just don't know how much room I have yet.


Joined: Feb 2009
Posts: 335
Likes: 11
From: Queen Creek, Az
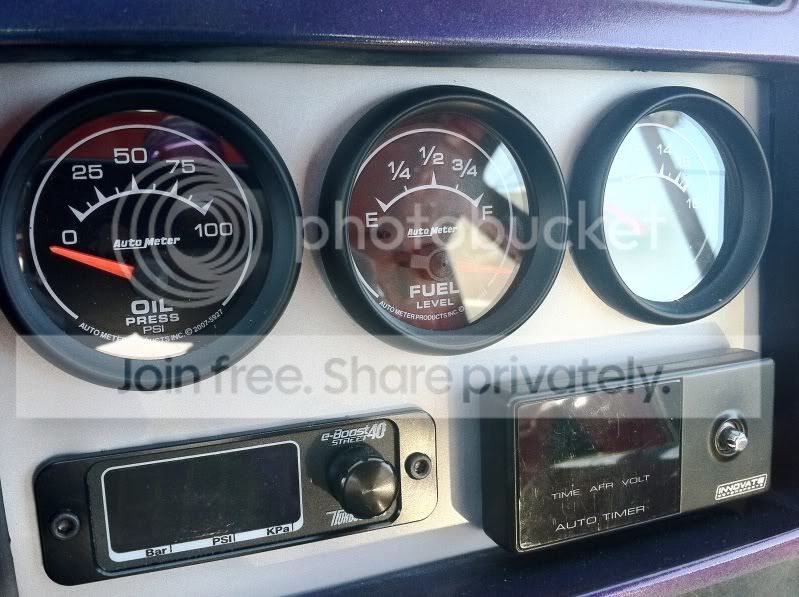
Not perfect yet but it will get there. Doing a couple of test fits. I really thought I would have more room in there. I'm going to put the others down in the center console where the radio was. I'm thinking doing a CF backing or black anodized aluminum. Maybe I just do aluminum and wrapping it with something.

Joined: Feb 2009
Posts: 335
Likes: 11
From: Queen Creek, Az
Well I sold my Painless wiring kit. Going a different route. I just purchased it, it's on it's way and will be here Friday, next week. I hated all the switch panels I've seen. With this I can wire the car with some help. Super easy and takes the guess work out. Ultimately, It's purdy. I've read reviews and the company history. I'd rather do this and not worry. What do you think?
Mega Panel ~ Black

The Mega Panel Switch Panel consists of a switch panel, a wiring kit, and a new, re-designed Relay board. The new Relay Board features a fused +12 Volt output with three of the outputs carrying a 40-Amp rating.
The sleek and compact Switch Panel is the main part of the system and includes 6 labeled switches to control your car's most important functions. The unique starter button and premium grade switches combine a new age design with functionality. The ignition and fuel pump switches are dual position switches while the Fan/Water Pump, Head light/Tail light, and Aux 1/Aux 2 are all three position switches. It is made to easily fit into a dragster's dash (door car/roadster mounting kits soon to come) with the overall size similar to the overall size of the conventional switch panel.
To simplify the wiring process, the Switch Panel plugs into our Relay Board using the supplied heavy duty cable. The Relay Board is the "power distribution board" and was built with durability in mind. It is capable of handling a 75-amp load with the supplied 8 gauge wire that connects from the power stud on the Relay Board to the master cut off switch.
The Relay Board includes dedicated relays for each switch. Each relay includes its own status indicator light to let you know which circuit is on. Each relay also has a dedicated fuse assigned to it with each use also having its own status indicator light to indicate if a fuse is blown. While most outputs are limited to 15-Amps, three are rated up to 40-Amps. They are 'Fuel,' 'Fan,' and 'Aux 2.'
The Relay Board also includes the "Dual Select" feature which allows you to individually customize how to control each of the three position switches. For example; the switch on the Mega Panel Labeled Fan/Water Pump turns on the fan and water pump in one position and the water pump in the other position. By turning on the Dual Select dip switch located on the Relay Board you can change it so that the fan only is on in the fan position and the water pump only is on in the other position.
Features / Specifications
Mega Panel ~ Black
The Mega Panel Switch Panel consists of a switch panel, a wiring kit, and a new, re-designed Relay board. The new Relay Board features a fused +12 Volt output with three of the outputs carrying a 40-Amp rating.
The sleek and compact Switch Panel is the main part of the system and includes 6 labeled switches to control your car's most important functions. The unique starter button and premium grade switches combine a new age design with functionality. The ignition and fuel pump switches are dual position switches while the Fan/Water Pump, Head light/Tail light, and Aux 1/Aux 2 are all three position switches. It is made to easily fit into a dragster's dash (door car/roadster mounting kits soon to come) with the overall size similar to the overall size of the conventional switch panel.
To simplify the wiring process, the Switch Panel plugs into our Relay Board using the supplied heavy duty cable. The Relay Board is the "power distribution board" and was built with durability in mind. It is capable of handling a 75-amp load with the supplied 8 gauge wire that connects from the power stud on the Relay Board to the master cut off switch.
The Relay Board includes dedicated relays for each switch. Each relay includes its own status indicator light to let you know which circuit is on. Each relay also has a dedicated fuse assigned to it with each use also having its own status indicator light to indicate if a fuse is blown. While most outputs are limited to 15-Amps, three are rated up to 40-Amps. They are 'Fuel,' 'Fan,' and 'Aux 2.'
The Relay Board also includes the "Dual Select" feature which allows you to individually customize how to control each of the three position switches. For example; the switch on the Mega Panel Labeled Fan/Water Pump turns on the fan and water pump in one position and the water pump in the other position. By turning on the Dual Select dip switch located on the Relay Board you can change it so that the fan only is on in the fan position and the water pump only is on in the other position.
Features / Specifications
- Mega Panel size: 8" x 3�" x 1�"
- Relay Board size: 7" x 5" x 1"
- Complete color coded Wiring Kit with connectors and color coded diagram professionally wire your race car for years of trouble free racing.

