
Tollboothwilley Transfer Case Shield Installed With Super Easy Directions!


Joined: Jan 2011
Posts: 365
Likes: 35
From: North Jersey, near NYC
Tollboothwilley Transfer Case Shield Installed With Super Easy Directions!
Hey all,
During the summer I hit a NASTY pothole that cracked the plastic shroud covering the steering rack/lines and transfer case. One screw head actually sheared off so the threaded end is still stuck in the crossmember. I rigged the OEM part up with zipties and it was holding up fine, but I figured I should get a replacement to install in the springtime. Fortunately, I had the good sense to order the Tollboothwilley transfer case aluminum shield - it arrived last week, and I wound up needing it sooner than expected.
Anyway, installation is very easy. First up, remove the original. There are 5 10mm screws holding it in place. - 3 are along the crossmember, and then 1 at each rear corner by the compression rod mounts. I didn't have to remove mine - Mother Nature kindly took care of that on my way home from the store pulling into my driveway over a mountain of plowed ice and slush LOL.
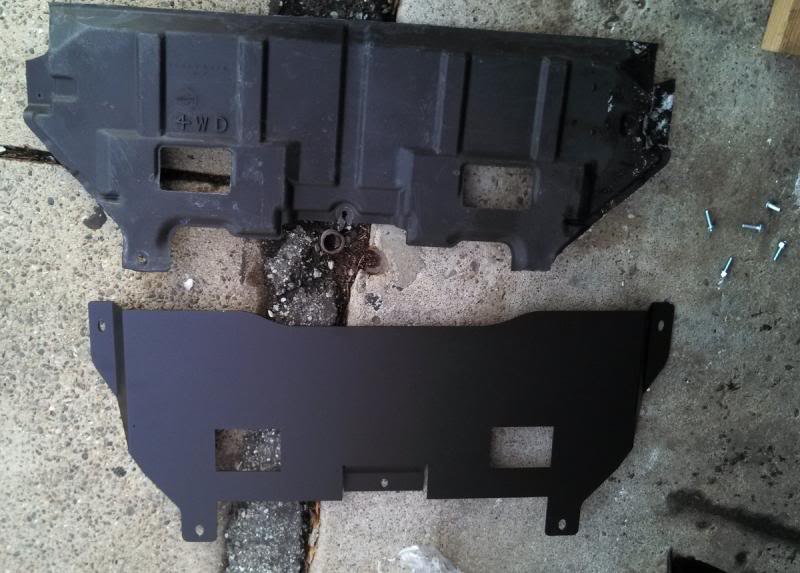
Here's a comparison of the broken plastic OEM one on top, with the Tollboothwilley part below it. Much nicer, and stronger!
And here it is, installed. John also supplied new screws to install it - very nice!
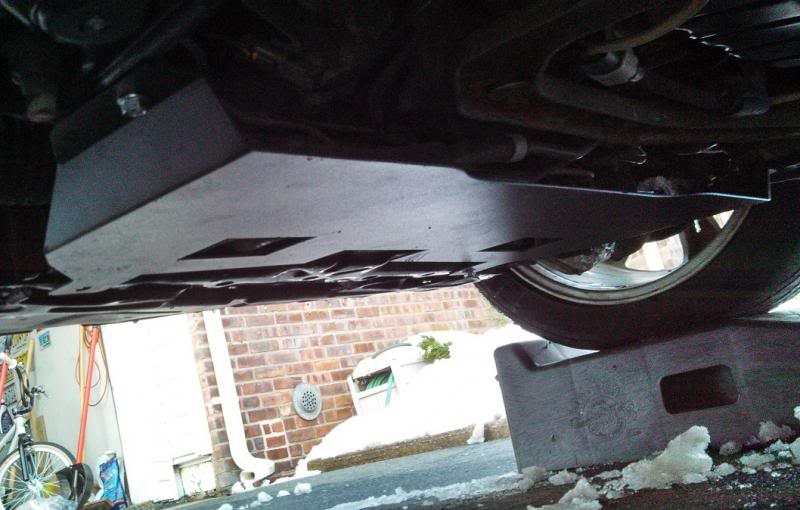
Right now I only have 4 screws holding it in place, since I need to drill out the broken one. That'll have to wait to springtime, since we're getting pummeled this winter with snow. It was 30* out when I installed this in my driveway yesterday, and you can see the piles of snow all around. This part is much stronger than the original, and I don't think I'll have an issue with that missing screw for now.
Enjoy, and for anyone contemplating whether or not to order one - just do it!
During the summer I hit a NASTY pothole that cracked the plastic shroud covering the steering rack/lines and transfer case. One screw head actually sheared off so the threaded end is still stuck in the crossmember. I rigged the OEM part up with zipties and it was holding up fine, but I figured I should get a replacement to install in the springtime. Fortunately, I had the good sense to order the Tollboothwilley transfer case aluminum shield - it arrived last week, and I wound up needing it sooner than expected.
Anyway, installation is very easy. First up, remove the original. There are 5 10mm screws holding it in place. - 3 are along the crossmember, and then 1 at each rear corner by the compression rod mounts. I didn't have to remove mine - Mother Nature kindly took care of that on my way home from the store pulling into my driveway over a mountain of plowed ice and slush LOL.
Here's a comparison of the broken plastic OEM one on top, with the Tollboothwilley part below it. Much nicer, and stronger!

And here it is, installed. John also supplied new screws to install it - very nice!

Right now I only have 4 screws holding it in place, since I need to drill out the broken one. That'll have to wait to springtime, since we're getting pummeled this winter with snow. It was 30* out when I installed this in my driveway yesterday, and you can see the piles of snow all around. This part is much stronger than the original, and I don't think I'll have an issue with that missing screw for now.
Enjoy, and for anyone contemplating whether or not to order one - just do it!


Looks good, should hold up much better than the stock one, and I can attest to the strength of these thanks to this horrible winter we're having. I've lost count at how many ice chunks I've taken off the shrouds this winter driving on the highway each day, and I expected a dent or two, but found none when I had it on the lift last week.


Thread
Thread Starter
Forum
Replies
Last Post
Tolboothwilley�
Exterior-Vendor
6
Jul 28, 2016 12:42 AM
Frostbite91
Audio, Video & Electronics
5
Aug 20, 2015 07:20 PM