

This is off my friends 350Z, does this look right? I wanted a Z tube, but this looks wrong to me?

Me either, I don't know what this is then? it just doesn't look right to me.
Here is a z tube, and a G tube side by side, looks like neither....

Registered User
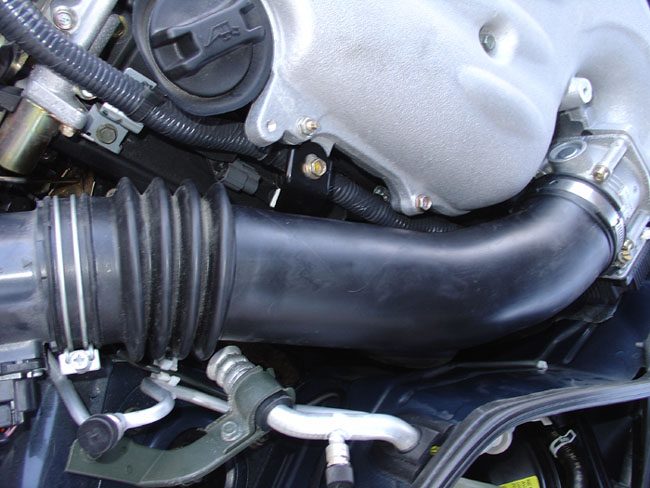
This is a Z-Tube on the left and a G-Tube on the right in the first pic, and the second pic is the Z-Tube installed.
Wayne
EDIT Looks like you beat me with my own picture ^^^^, I took that on my deck when I was changing them out on my 05X.
Wayne
EDIT Looks like you beat me with my own picture
^^^^, I took that on my deck when I was changing them out on my 05X.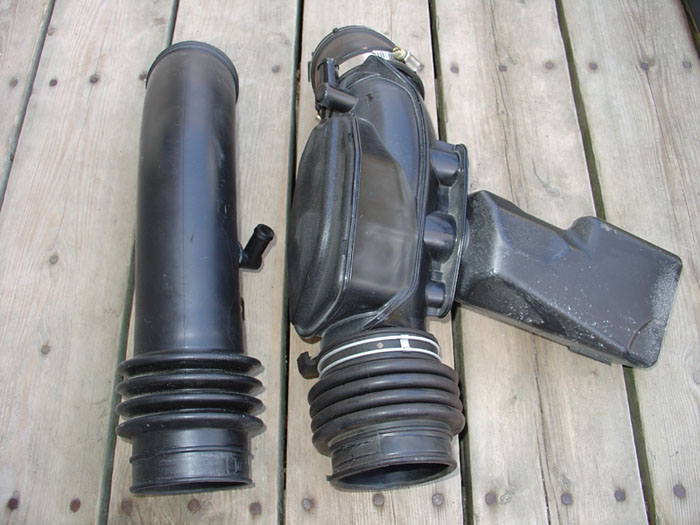
any idea what that is in the first pic then?
Thanks for your input!
Thanks for your input!

a.k.a kleicoupe
That dsn't look like a G or Z tube, are you sure its off a 350z????
It's off an 04, was not on the car when he bought it, but came in the stock parts box.

Registered User
well theres your answer. try to install it and see if it fits. its not going to imma let u know right now
GreenGoblin
The goblin resurrection
close


Feb 23, 2022
- Join DateOct 2006
- LocationIn my garage
- Posts:25,863
-
iTrader Positive Feedback100
-
iTrader Feedback Score(66)
-
Likes:173
-
Liked:187 Times in 95 Posts
its an F tube u failed
He is supercharged, I'm not sure what kit. I am picking up his oem springs tomorrow, and asked if he had a Z tube, he sent me that pic, and said thats what he got with the car.
Registered User
I don't think that is right.
When you do get a proper one , here are some install instructions:
350 Z-TUBE INSTALL
One - First remove the four 10mm bolts on top of the engine cover. Be careful not to lose any of the bushings that are on the bottom of the cover and only held in the rubber grommets by friction. Put the cover and bolts to the side for safe keeping:
Two - Then loosen the clamp for the Plenum intake using an 8mm socket:
Three - Using pliers or channel locks, release the clamp for the tube that is in the middle of the Duct. On the G it is on top. On the 350Z, it will be located on the bottom (keep that in mind) Do not remove the clamp, but keep it on the rubber tube for safe keeping:
Four -Remove the "mid-way" support bolt using a 10mm socket. Place it with your other 4 cover bolts for safe keeping:
Five -Using a Phillips screwdriver, loosen the flexible end of the G's duct and slide the clamp to the front of the car, onto the air box.
Six -Making sure both ends of the G's duct a free of their connections, lift it out -remember it has a bottom portion that needs to come clear:
Seven -Fit the new 350z pipe into place. You may find it helpful to connect the "mid�way" tube (from step 3) first before rotating it into its downward position. Then push the rigid end of the duct onto the plenum and flexible end to the front airbox.
Eight -Connect the duct to the Plenum...get it seated properly or the mid-way connection bolt will not be aligned.
Nine -Tighten down the mid-way connector bracket:
Ten -Tighten the screw clamp to attach the flexible end to the airbox, as well as the Plenum side. Retighten the "mid-way" bracket bolt again.
Eleven -Reinstall the engine cover. Be careful not to drop any of the brass fittings into the engine bay. There a pain to track down!
Twelve - The finished product!
A word of caution... I would carry your tools (8mm & 10mm socket and the Phillips screwdriver, pliers) in event that you did not tighten something properly. Recheck the fittings after your next commute.