
New Carbon Wrapping Project


Hi folks;
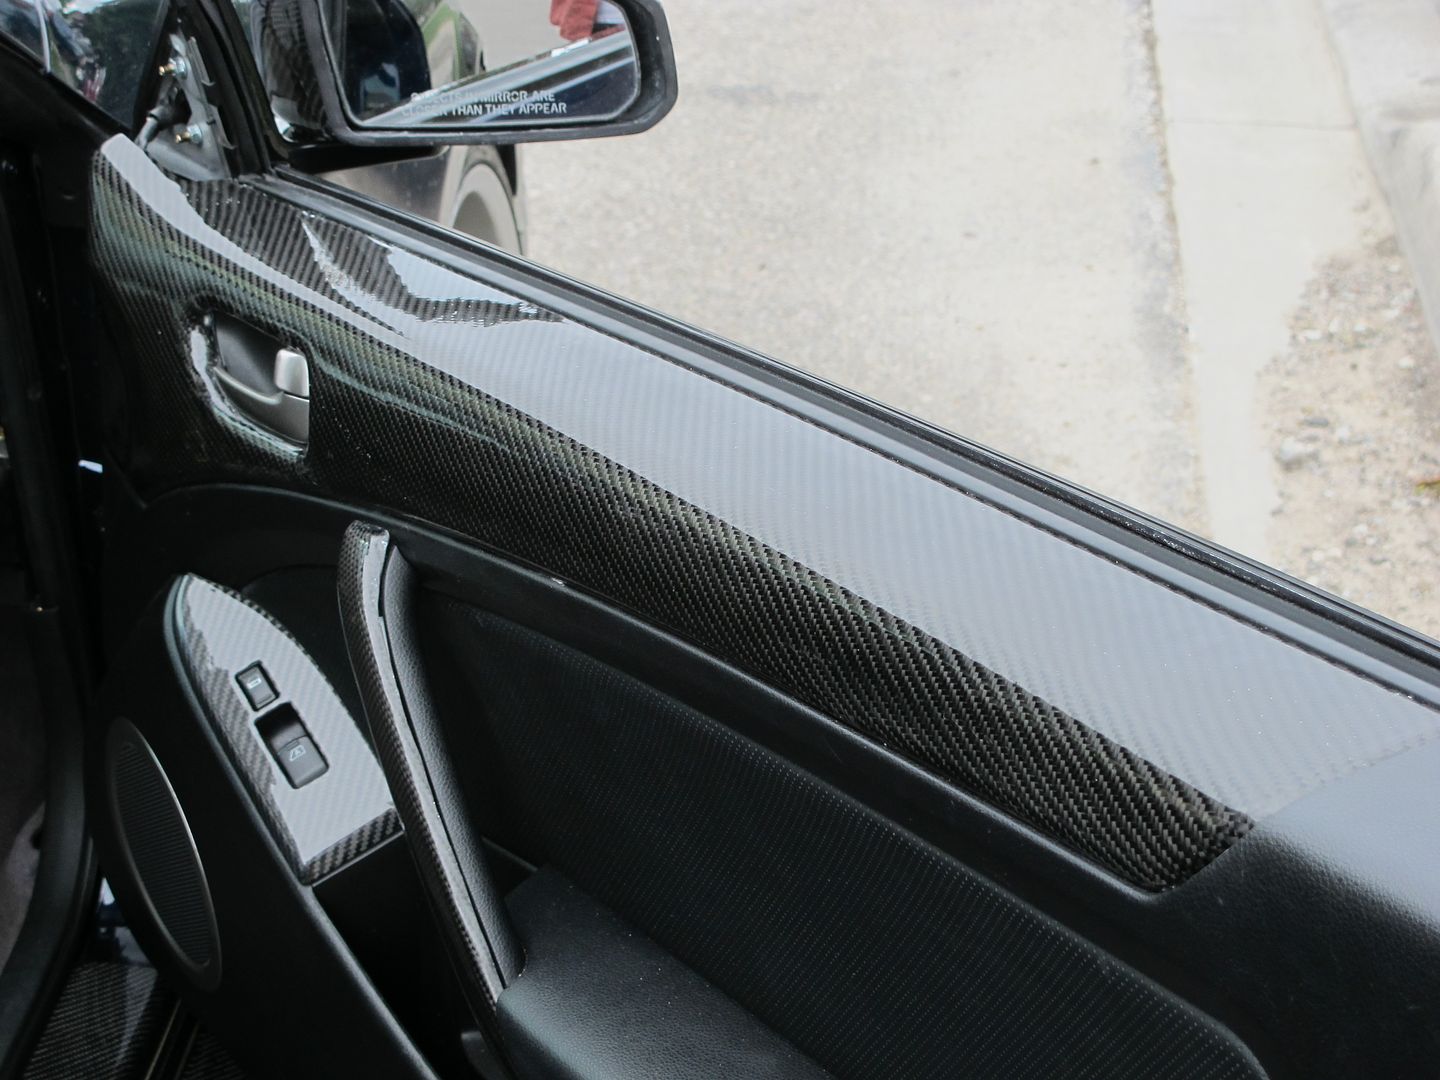
Just finished up Carbon Fibre wrapping my buddies G35. He wanted to go all out and so we did.... Some 25+ pieces later the parts look like this:


Here are some new parts just picked-up last night and to be installed this weekend:


[IMG]http://i905.photobucket.com/albums/ac257/sweetxi/Carbon%20Fibre/Carbon%20Fibre%20Wrapping/Robs%20G35%20Coupe%20Complete%20Interior/IMG-20111030-00130.jpg[/IMG

He's getting his seats done as well.... Everything should be back together for final pictures installed pictures this weekend!!
Just finished up Carbon Fibre wrapping my buddies G35. He wanted to go all out and so we did.... Some 25+ pieces later the parts look like this:
Here are some new parts just picked-up last night and to be installed this weekend:
[IMG]http://i905.photobucket.com/albums/ac257/sweetxi/Carbon%20Fibre/Carbon%20Fibre%20Wrapping/Robs%20G35%20Coupe%20Complete%20Interior/IMG-20111030-00130.jpg[/IMG
He's getting his seats done as well.... Everything should be back together for final pictures installed pictures this weekend!!


Thanks guys..... It's a show car..... Competes in the biggest shows in Canada. Won Best in Class and Best Interior at it's last show....... Guy wanted to make an impression; and DID!
My next project is a similar level build for an imported 1997 RHD Japanese-spec RX-7. another show car in the making this time....I have 20+ pieces to do for him as well.....
My next project is a similar level build for an imported 1997 RHD Japanese-spec RX-7. another show car in the making this time....I have 20+ pieces to do for him as well.....

Trending Topics
Hi.
The short version is sanding and chemically treating the original factory parts to obtain a nice rough surface, priming black if a different colour, resanding and then laying down a coat of resin, embedding the carbon fibre cloth into the resin and forming it to the part. Once the resin has cured, remove the excess cloth and begin to add addditonal layers of resin (typically 4-5 more) until resin is sufficently thick to cover cloth and then samd till level and smooth (I usually light sand between coats as well). Completely smooth with no blemishes as the next step is clear coating.
Finally clear coat and once clear coated, wet sand with 800, 1500 and 2000 grit paper before buffing to a perfect finish.
That's it; simple..... LOL
You're right; it looks even better in person.... Wait till he gets the new seats installed and last 7 pieces installed.... I've asked him to take updated pictures when it's all done... Should be this weekend.

Here a couple of pictures I really liked:


So do as we are just getting into winter up here now.... getting a little frosty for me... get me a place to work; I'll come down and wrap for you.....

