
DIY: Window motor repair


DIY: Window motor repair
Sup guys. Binder over at my350z had this great write up on repairing the window motor for less than a dollar. So thought i'd bring it out to you guys cuz i think the G35 motors are the same as the Z. All you really need to replace to get your motor going up and down again are the brushes in the motor, Binder found some for $0.79 cents each, over here at Cali i had to pay $10 bucks for a pair, still cheaper than $140 at Autozone 
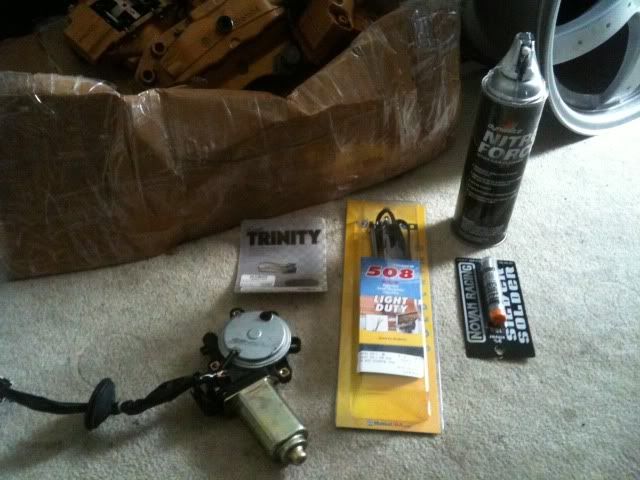
Here's what i got....Window motor, "Trinity" (new window brushes), Soldering iron, Solder, and electronics cleaner.
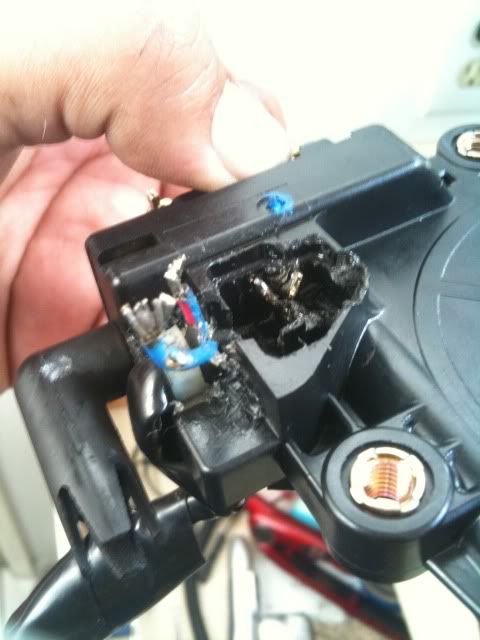
Open up your panel and get to the motor, you guys already have DIY for this part so i wont get to the details:

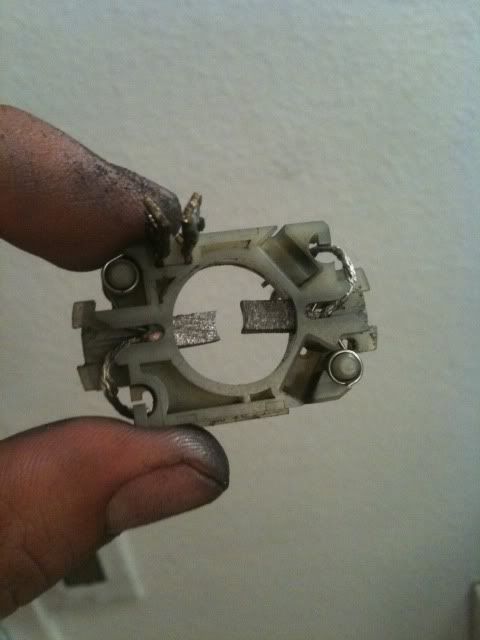
Grab the motor and remove those 3 screws that keeps the cover in place, this is whats inside...dirty
A little clean up.
near the motor cover there's this sticky silicone like substance, remove as much of it as you can to expose the 2 soldered wires.
Desolder the 2 wires. (Gotta make sure all the solder is completely removed or the housing wont slide out from the motor. If you have desoldering thread that will help absorb the old solder)
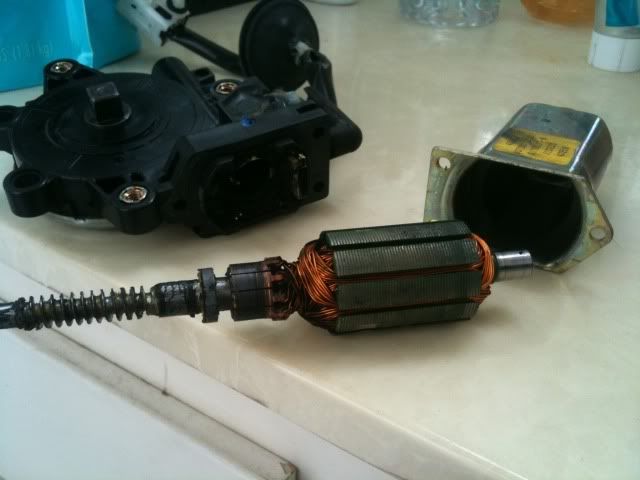
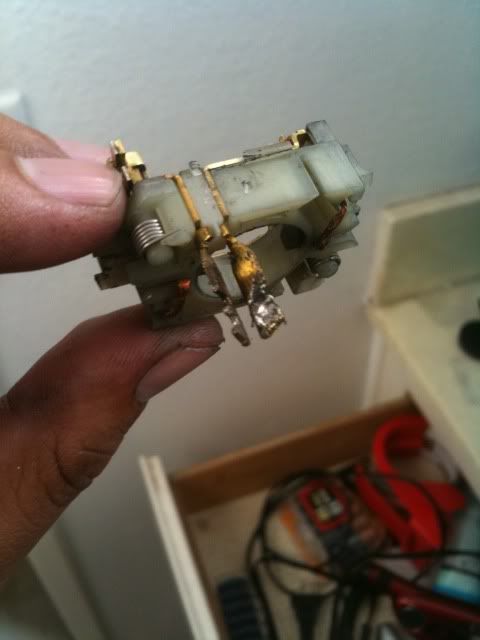
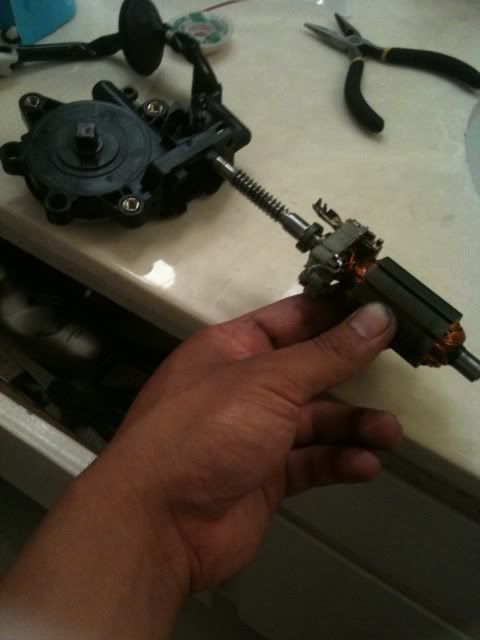
Here's what it looks like after sliding out. the 2 prongs sticking out is where you just unsoldered the 2 wires.
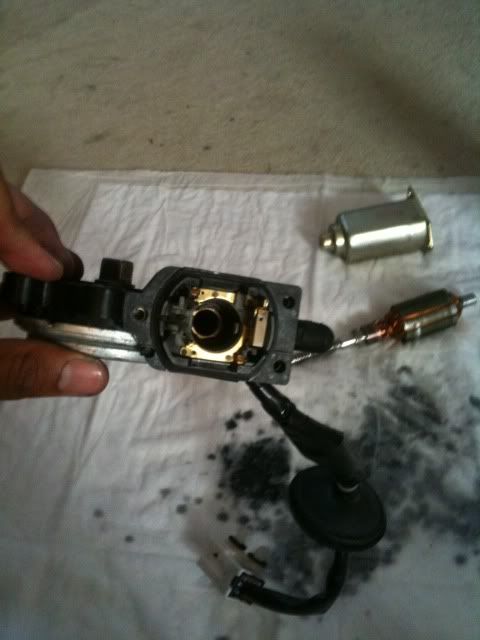
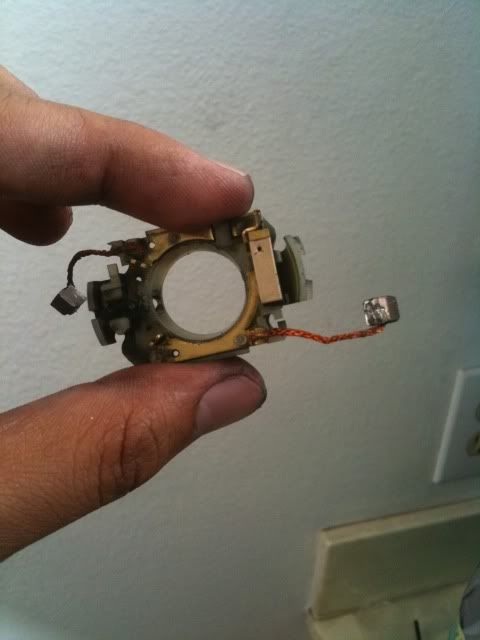
Here are the brushes attached to the housing, i pulled them out but still stuck to the part. Cut the string as close as you can to the housing to remove the old brushes.
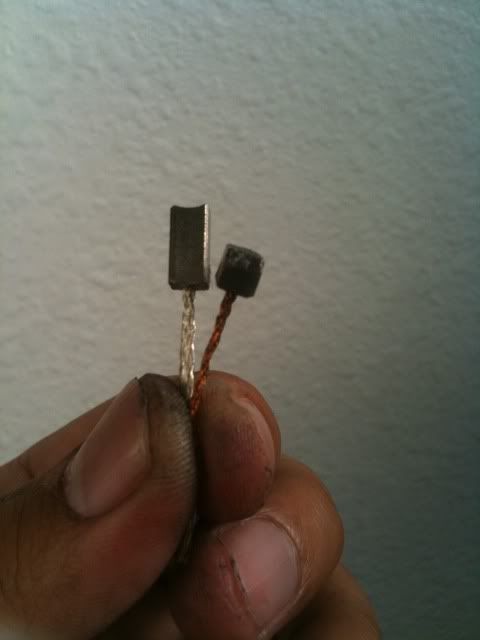
To the left is the NEW brush and the right is the old one, yup warn out!
you're gonna have to sand down the new brushes on the sides to make them fit back in the white housing, and then solder the ends where you cut the old strings from.
I placed the magnetic piece in, then put both of them back in the motor. it was easier for me to spread the brushes apart to fit the magnet back in.
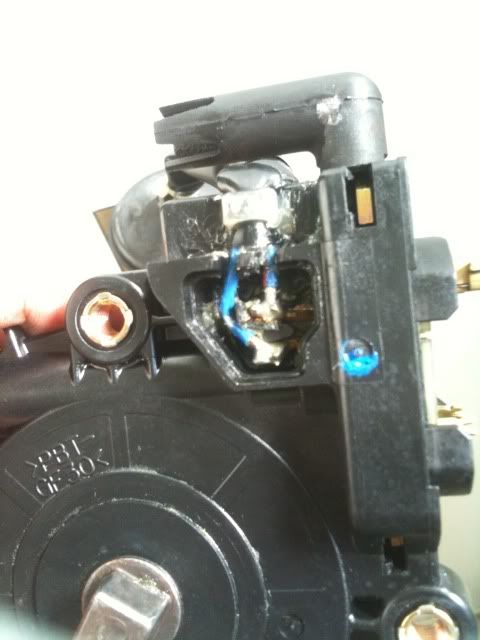
Solder back the 2 wires. my sucky soldering skills, and sucky photo skills

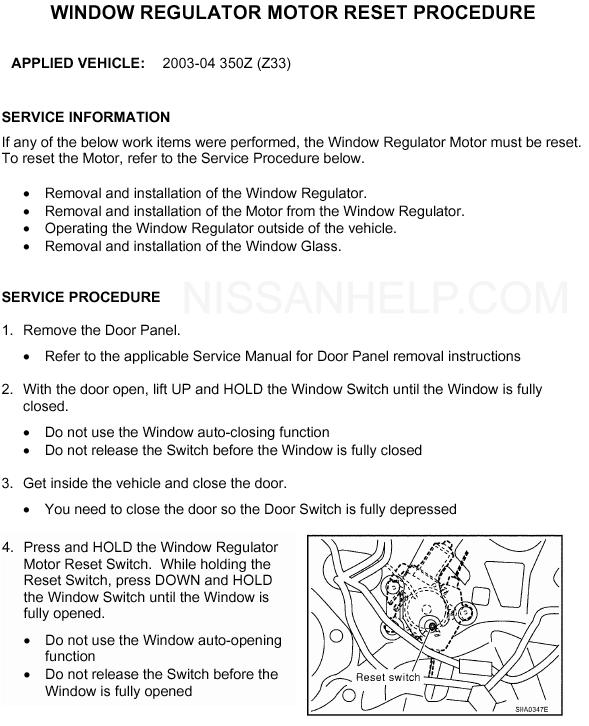
Put the cover back on with the 3 screws, cover the 2 wires you just soldered with electrical tape or some kind of silicone that doesn't affect electrical conductivity and replace everything. Don't forget to do the window reset then you're done.
 [/
[/
Type of brushes you'll need: 540 motor brushes, upright (stand up), uncut. You can find these brushes at Hobby Shops, they are the same brushes that go into RC motors.
My experience in soldering: 0 experience
Difficulty 0-10 (10 being the hardest): 3-4
Time start to finish: 3hrs (once you get familiar with everything)
I changed both my window motors this week and tools and supplies cost me a total of $41.87 for both windows. Hope this helps guys, and I couldn't have done this without Binders thread.
Here's what i got....Window motor, "Trinity" (new window brushes), Soldering iron, Solder, and electronics cleaner.
Open up your panel and get to the motor, you guys already have DIY for this part so i wont get to the details:
Grab the motor and remove those 3 screws that keeps the cover in place, this is whats inside...dirty
A little clean up.
near the motor cover there's this sticky silicone like substance, remove as much of it as you can to expose the 2 soldered wires.
Desolder the 2 wires. (Gotta make sure all the solder is completely removed or the housing wont slide out from the motor. If you have desoldering thread that will help absorb the old solder)
Here's what it looks like after sliding out. the 2 prongs sticking out is where you just unsoldered the 2 wires.
Here are the brushes attached to the housing, i pulled them out but still stuck to the part. Cut the string as close as you can to the housing to remove the old brushes.
To the left is the NEW brush and the right is the old one, yup warn out!
you're gonna have to sand down the new brushes on the sides to make them fit back in the white housing, and then solder the ends where you cut the old strings from.
I placed the magnetic piece in, then put both of them back in the motor. it was easier for me to spread the brushes apart to fit the magnet back in.
Solder back the 2 wires. my sucky soldering skills, and sucky photo skills
Put the cover back on with the 3 screws, cover the 2 wires you just soldered with electrical tape or some kind of silicone that doesn't affect electrical conductivity and replace everything. Don't forget to do the window reset then you're done.
[/Type of brushes you'll need: 540 motor brushes, upright (stand up), uncut. You can find these brushes at Hobby Shops, they are the same brushes that go into RC motors.
My experience in soldering: 0 experience
Difficulty 0-10 (10 being the hardest): 3-4
Time start to finish: 3hrs (once you get familiar with everything)
I changed both my window motors this week and tools and supplies cost me a total of $41.87 for both windows. Hope this helps guys, and I couldn't have done this without Binders thread.
Last edited by j3dz; Jul 16, 2010 at 02:14 PM. Reason: additional info
Thanks man.
The window reset lets the motor know how far up it goes and how far down, its for the auto up and auto down on the switch, or when you roll down from your remote.
The window reset lets the motor know how far up it goes and how far down, its for the auto up and auto down on the switch, or when you roll down from your remote.

I'm currently on my second motor which I've been using for a month now and it's going bad AGAIN on the passenger side. Do you think it could be the motor or the tracks for the window?
im not sure man....where did you get the 2nd motor from? if its new then you should have new brushes in there and should last longer than a month...if you got it from someone else (used), then odds are it was their old brushes in there, and you will still get the problem, worn out brushes stop the motor from turning.
oh ok, yeah im pretty sure they are the brushes and that your tracks are ok. Its not that too bad, just time consuming. when you open it up, you'll see how the motor works, and then you'll sadly realize as i did that this problem will be on going, due to the wearing of the brushes....but you'll be able to fix for $10 or less in a couple years. Fixed both my motors about a 3 weeks ago and they are going strong.
Trending Topics
 Hmm, will you be able to do it if I ship it to ya and pay ya ofcourse.


Thank you so much! I have 3 old motors at home and I haven't seen anything on finding and replacing the brushes.
I'm gonna fix mine real soon, test them rigorously, and sell them.
Thanks again!
I'm gonna fix mine real soon, test them rigorously, and sell them.
Thanks again!