
DIY: G35 Sedan HID and HID Fog Installation


DIY: G35 Sedan HID and HID Fog Installation
In these pictures, Ill show how to install an HID bulb and show how my HID DDM 35watt slim blasts are installed for the FOG Lights.
1. Gain Access to the HID's
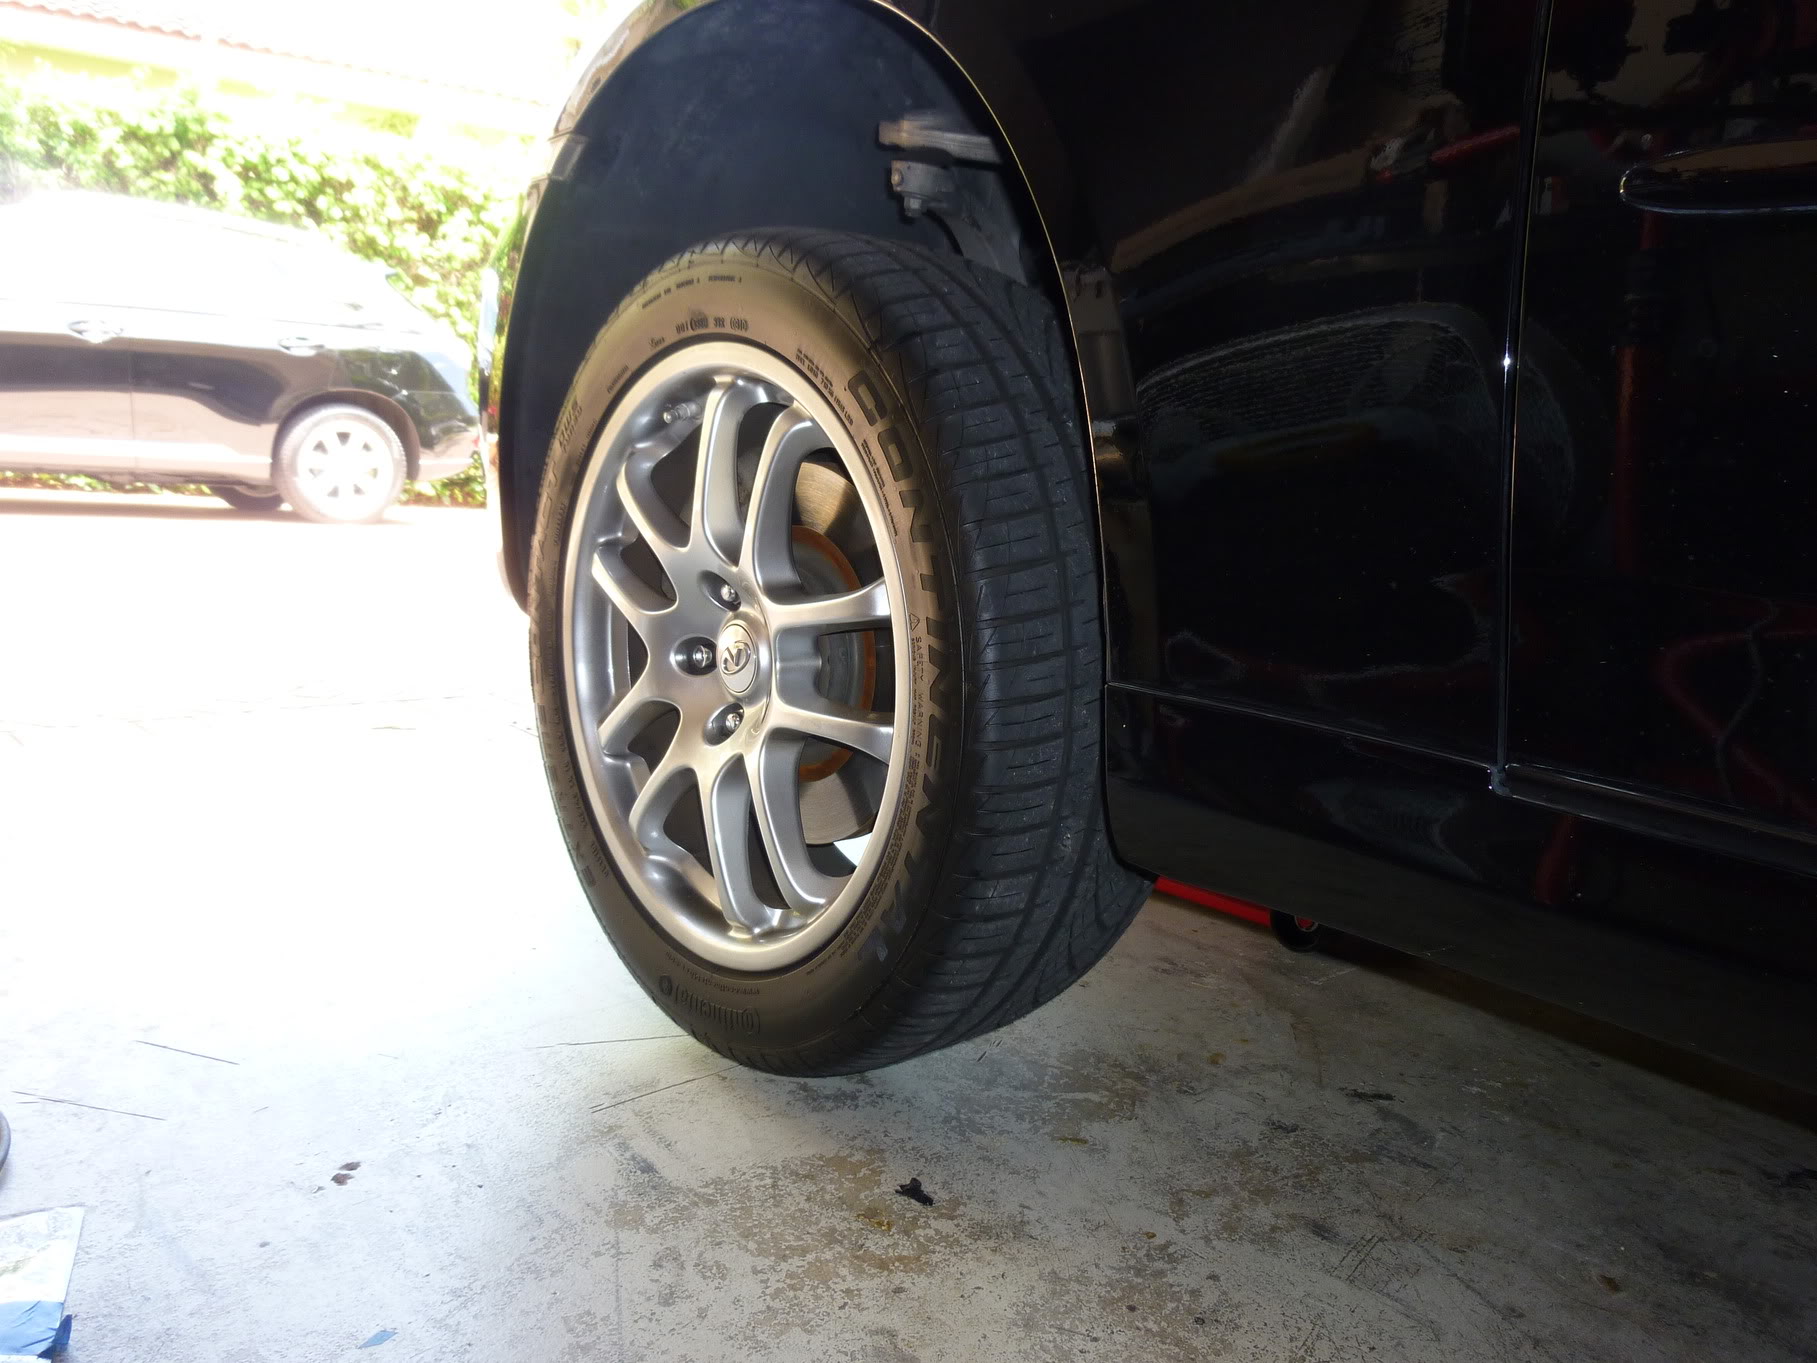
a. You can jack and remove the wheel (easier access)
b. You can turn the wheel all the way to the inside to gain access
Jacking the Car
Wheel Removed
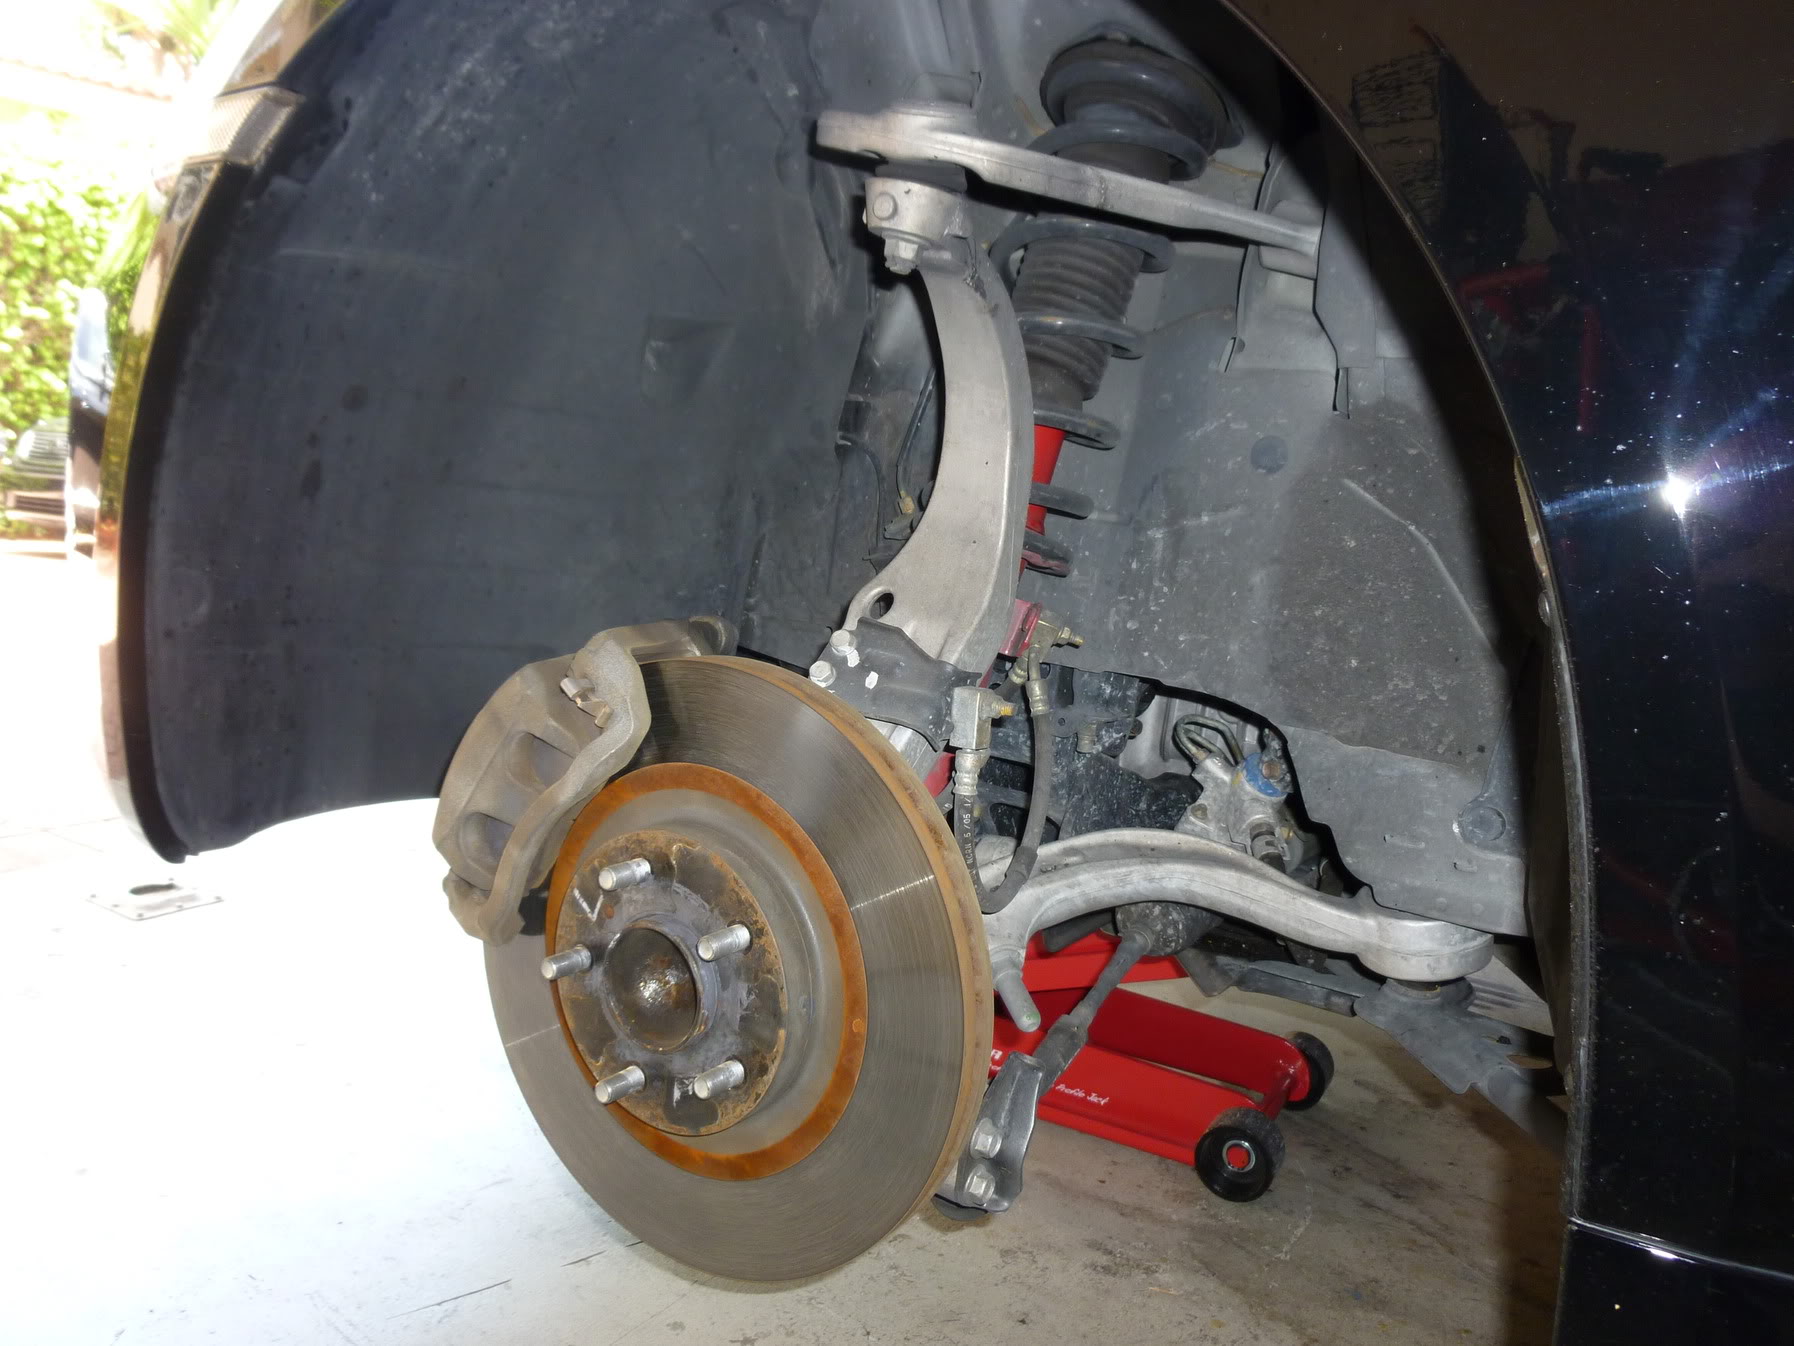
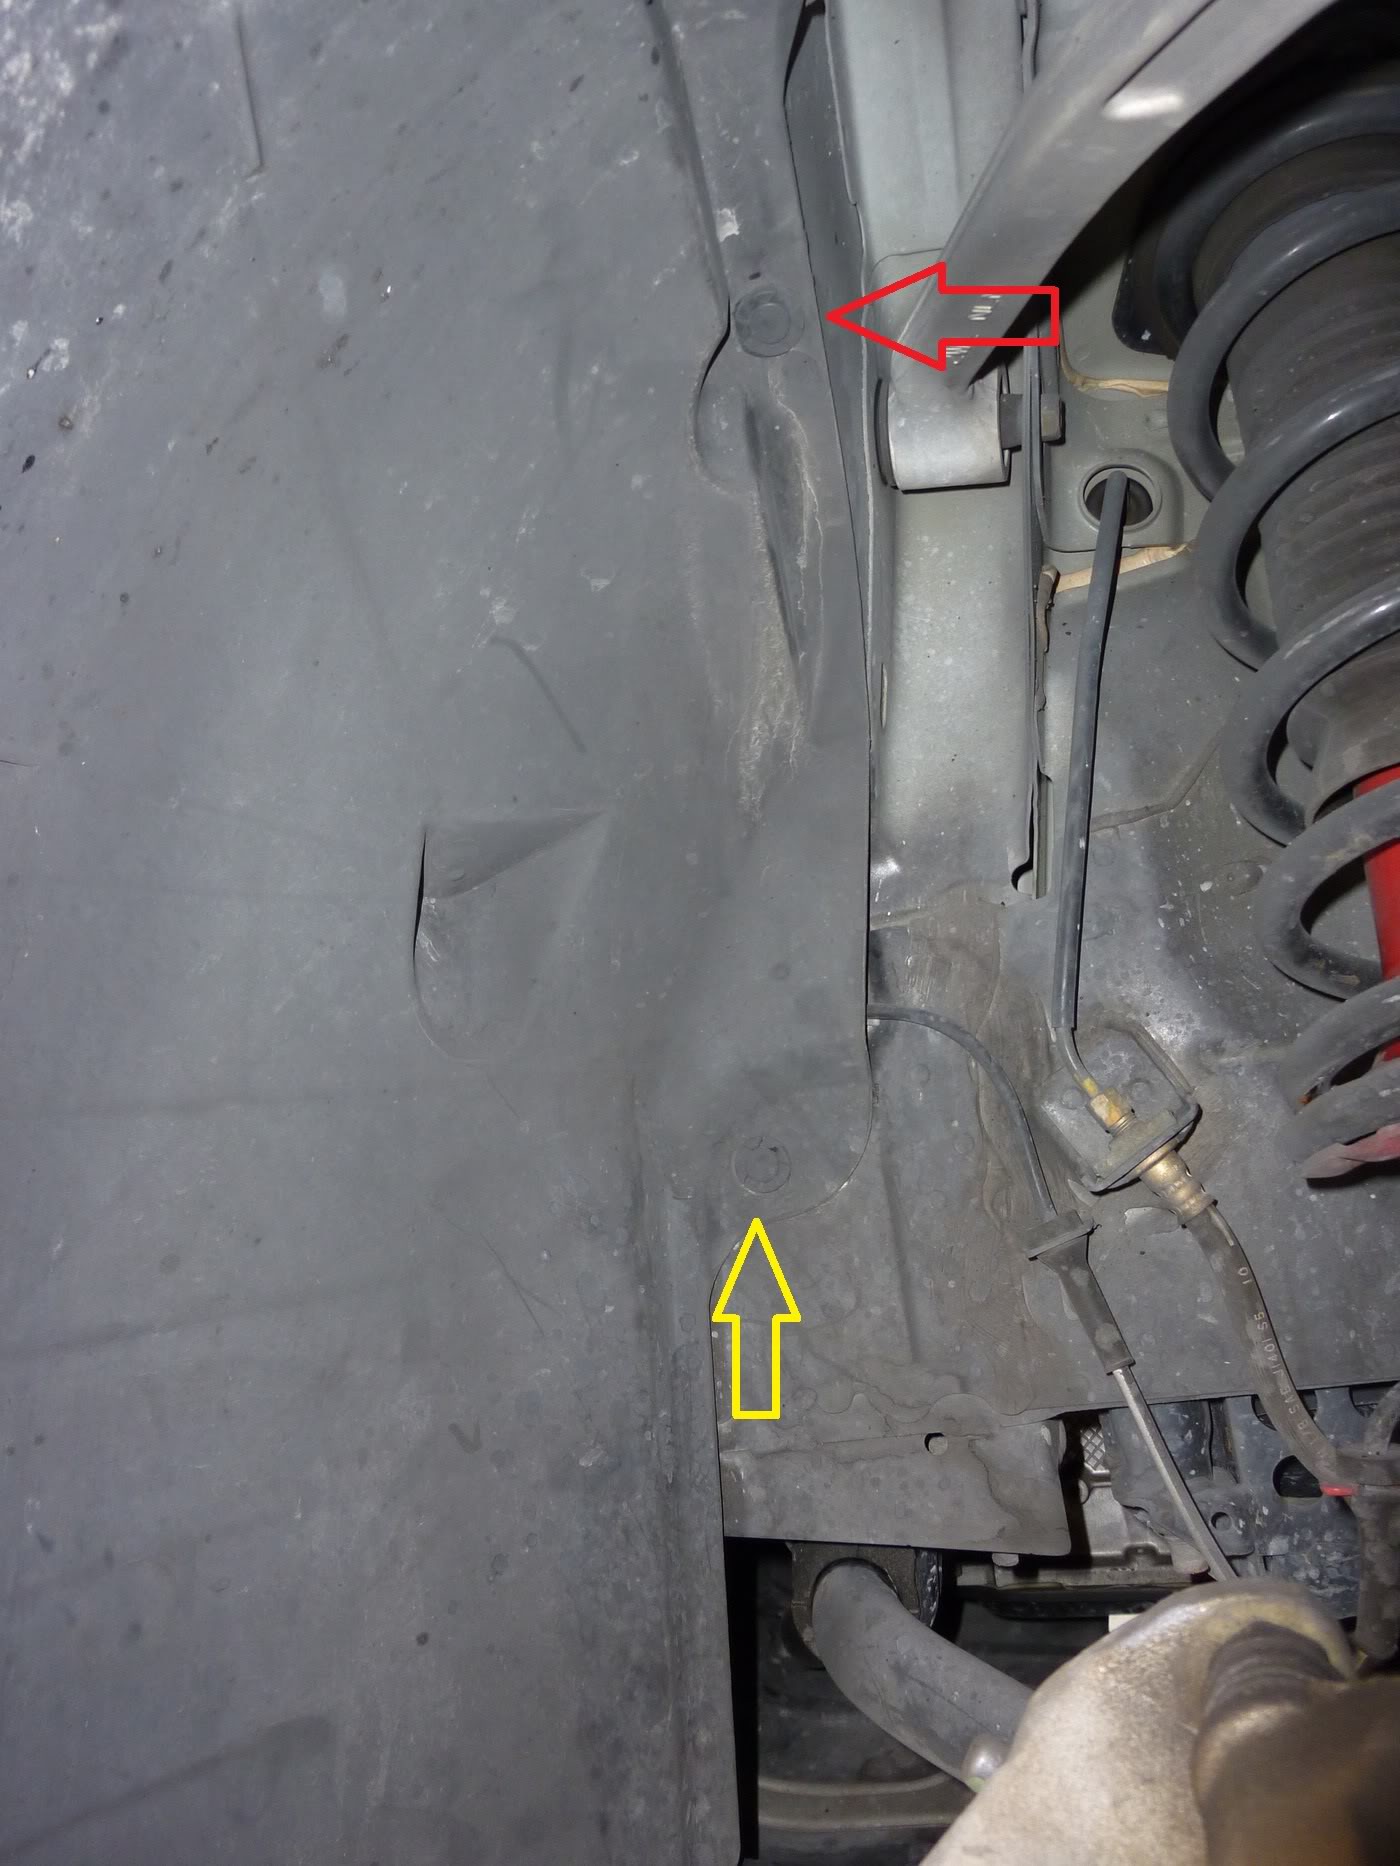
On the Top of the Wheel Well, remove the two Philips Screws
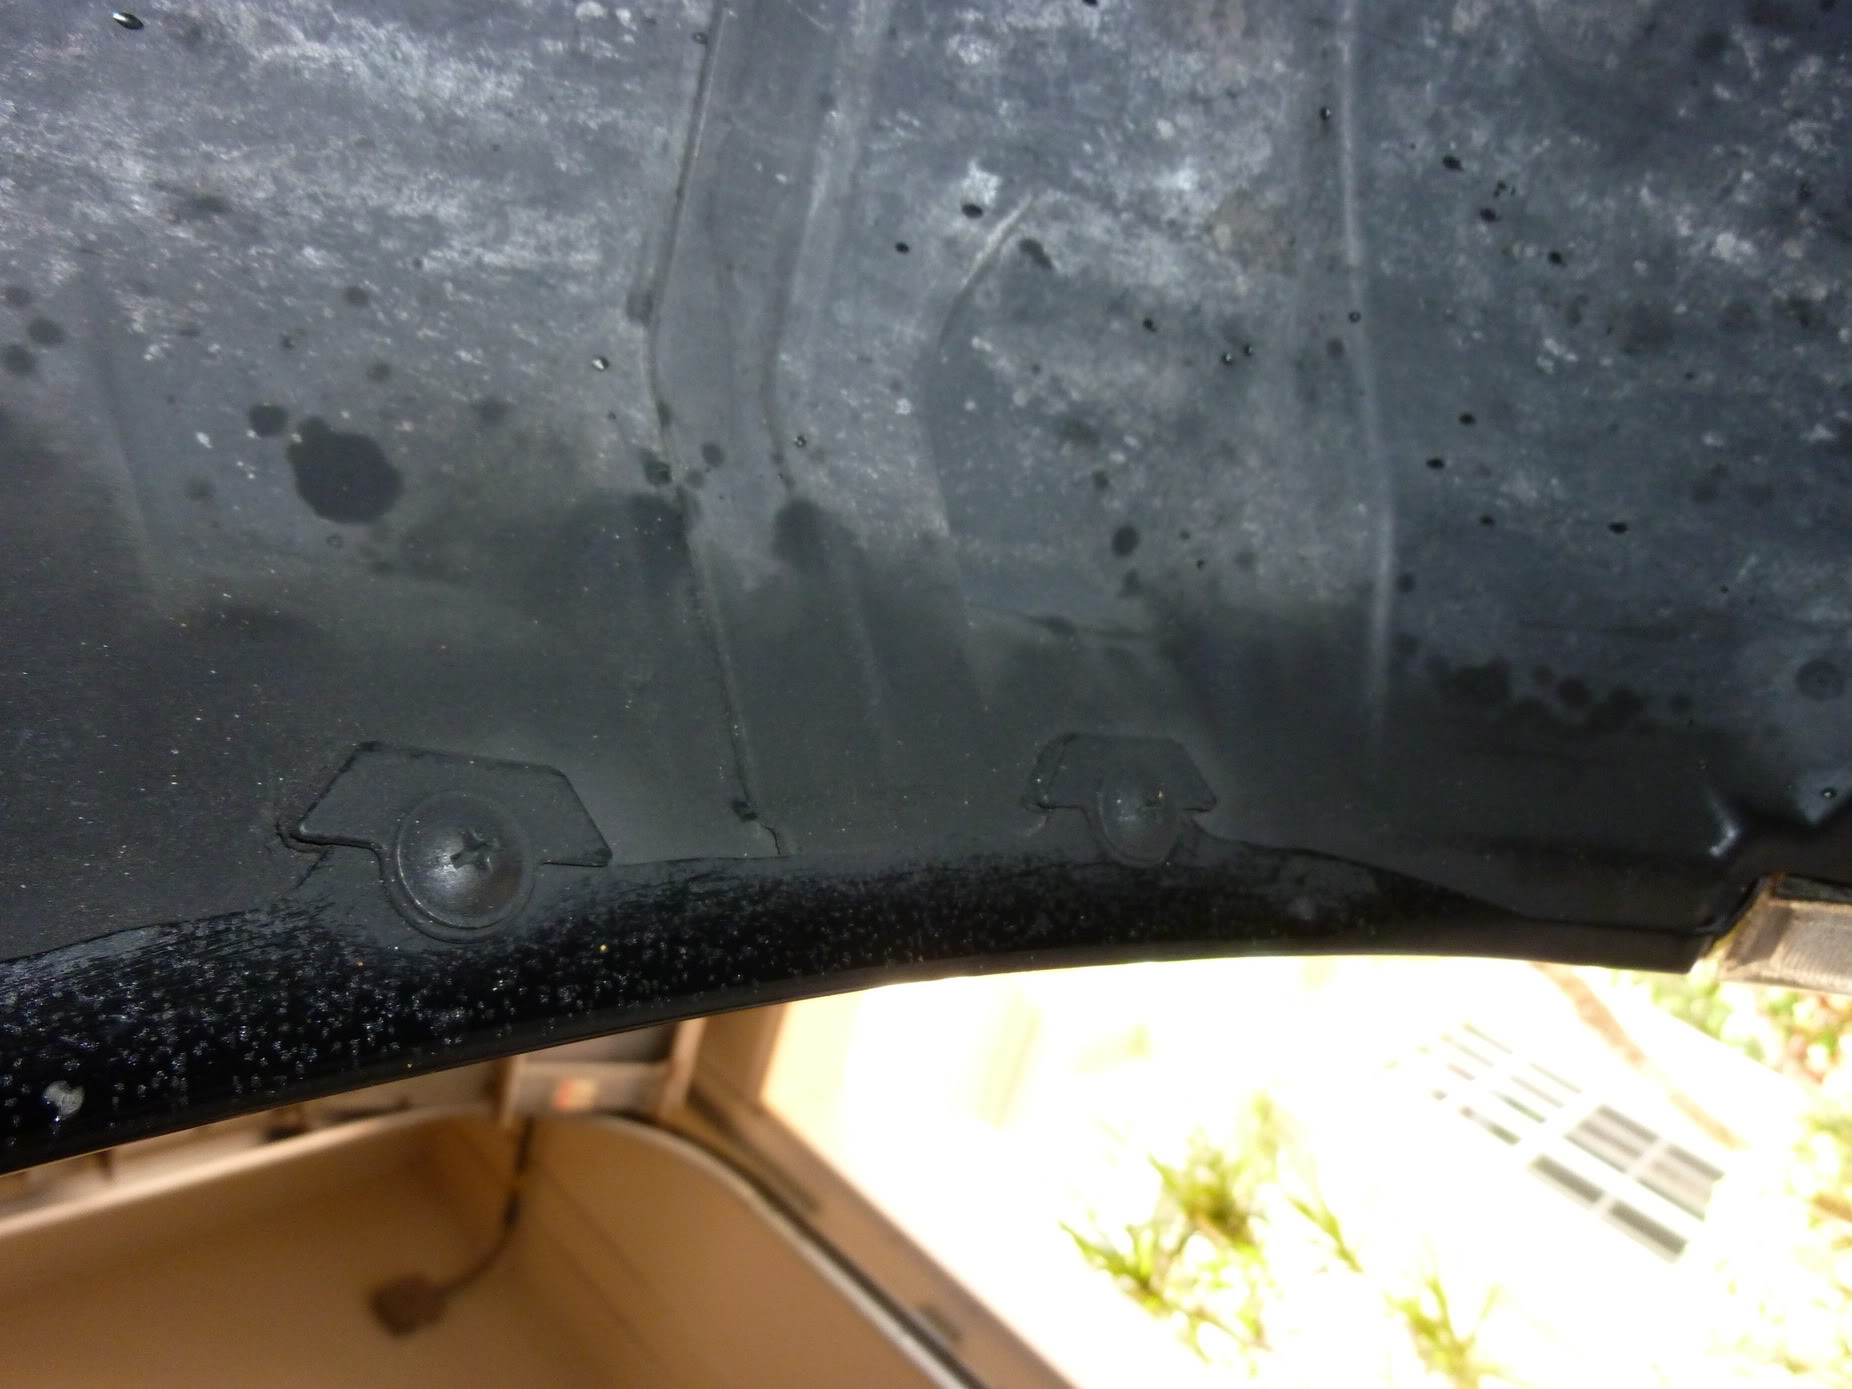
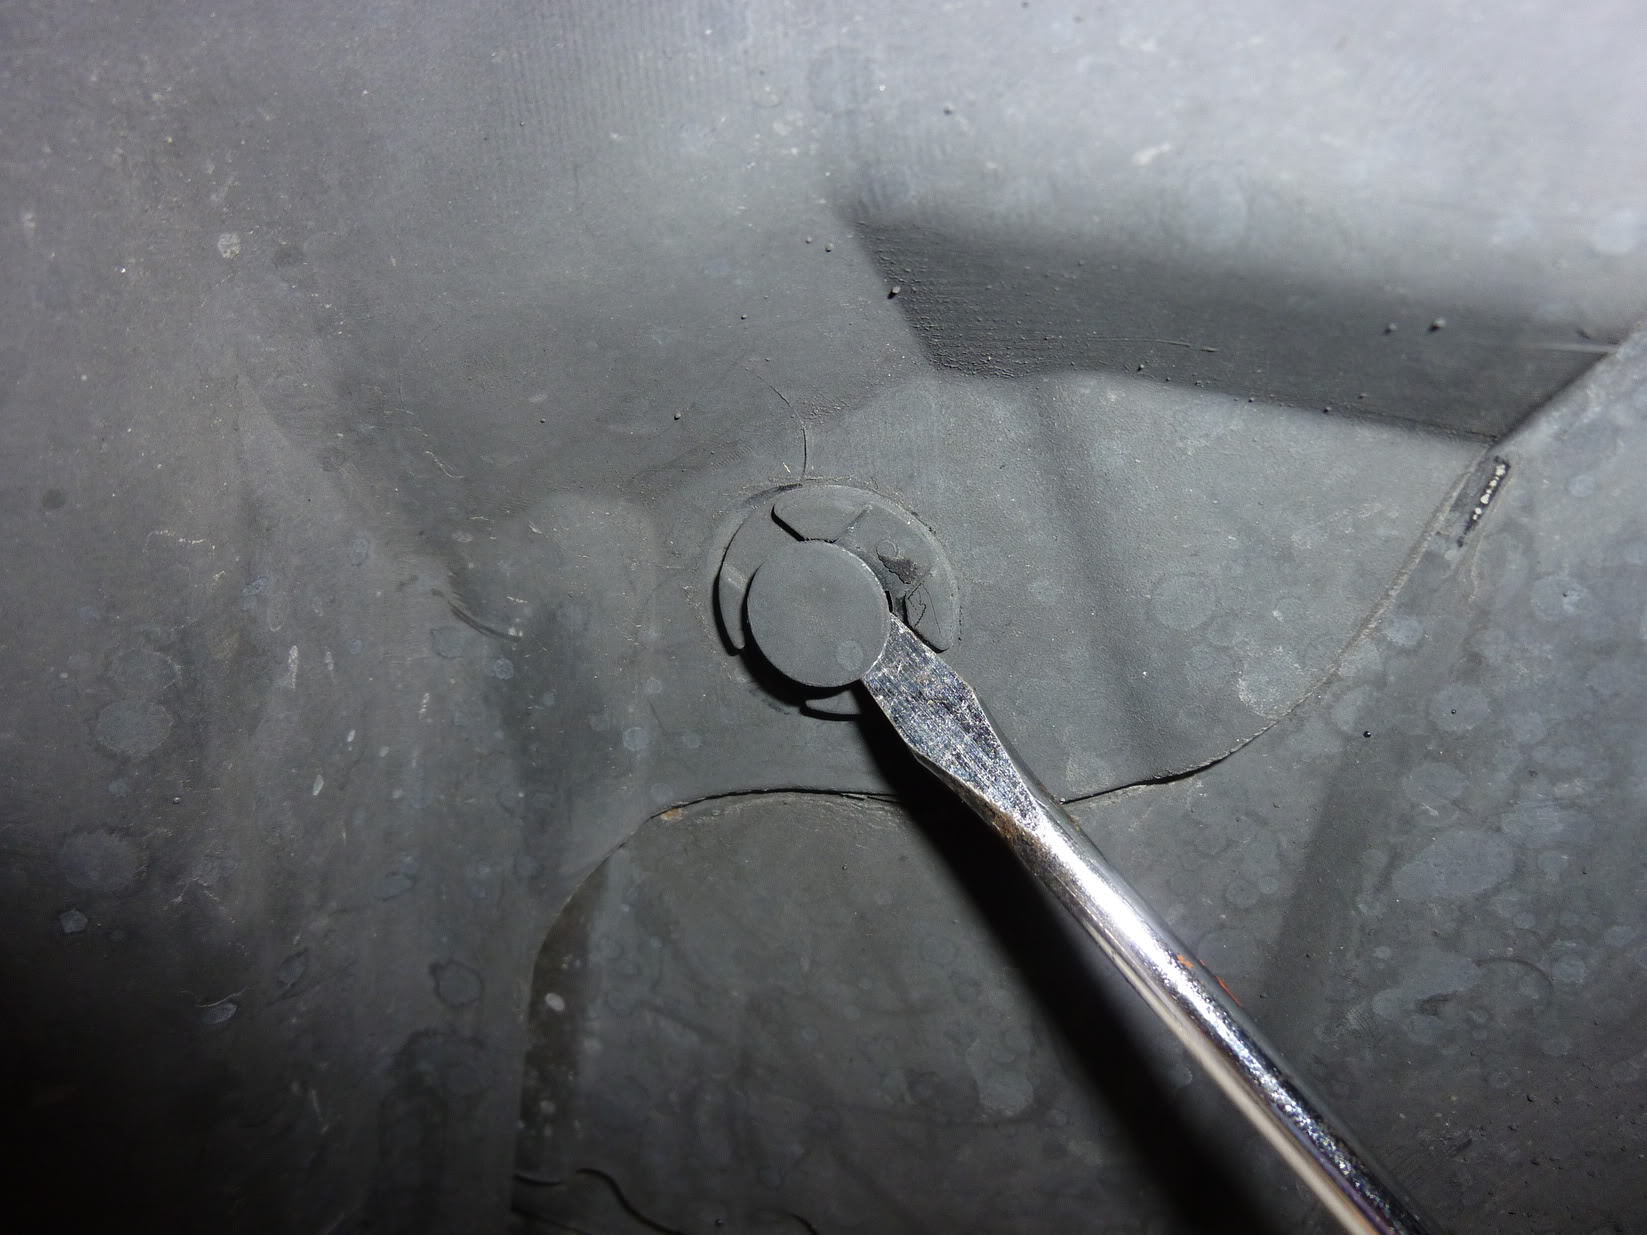
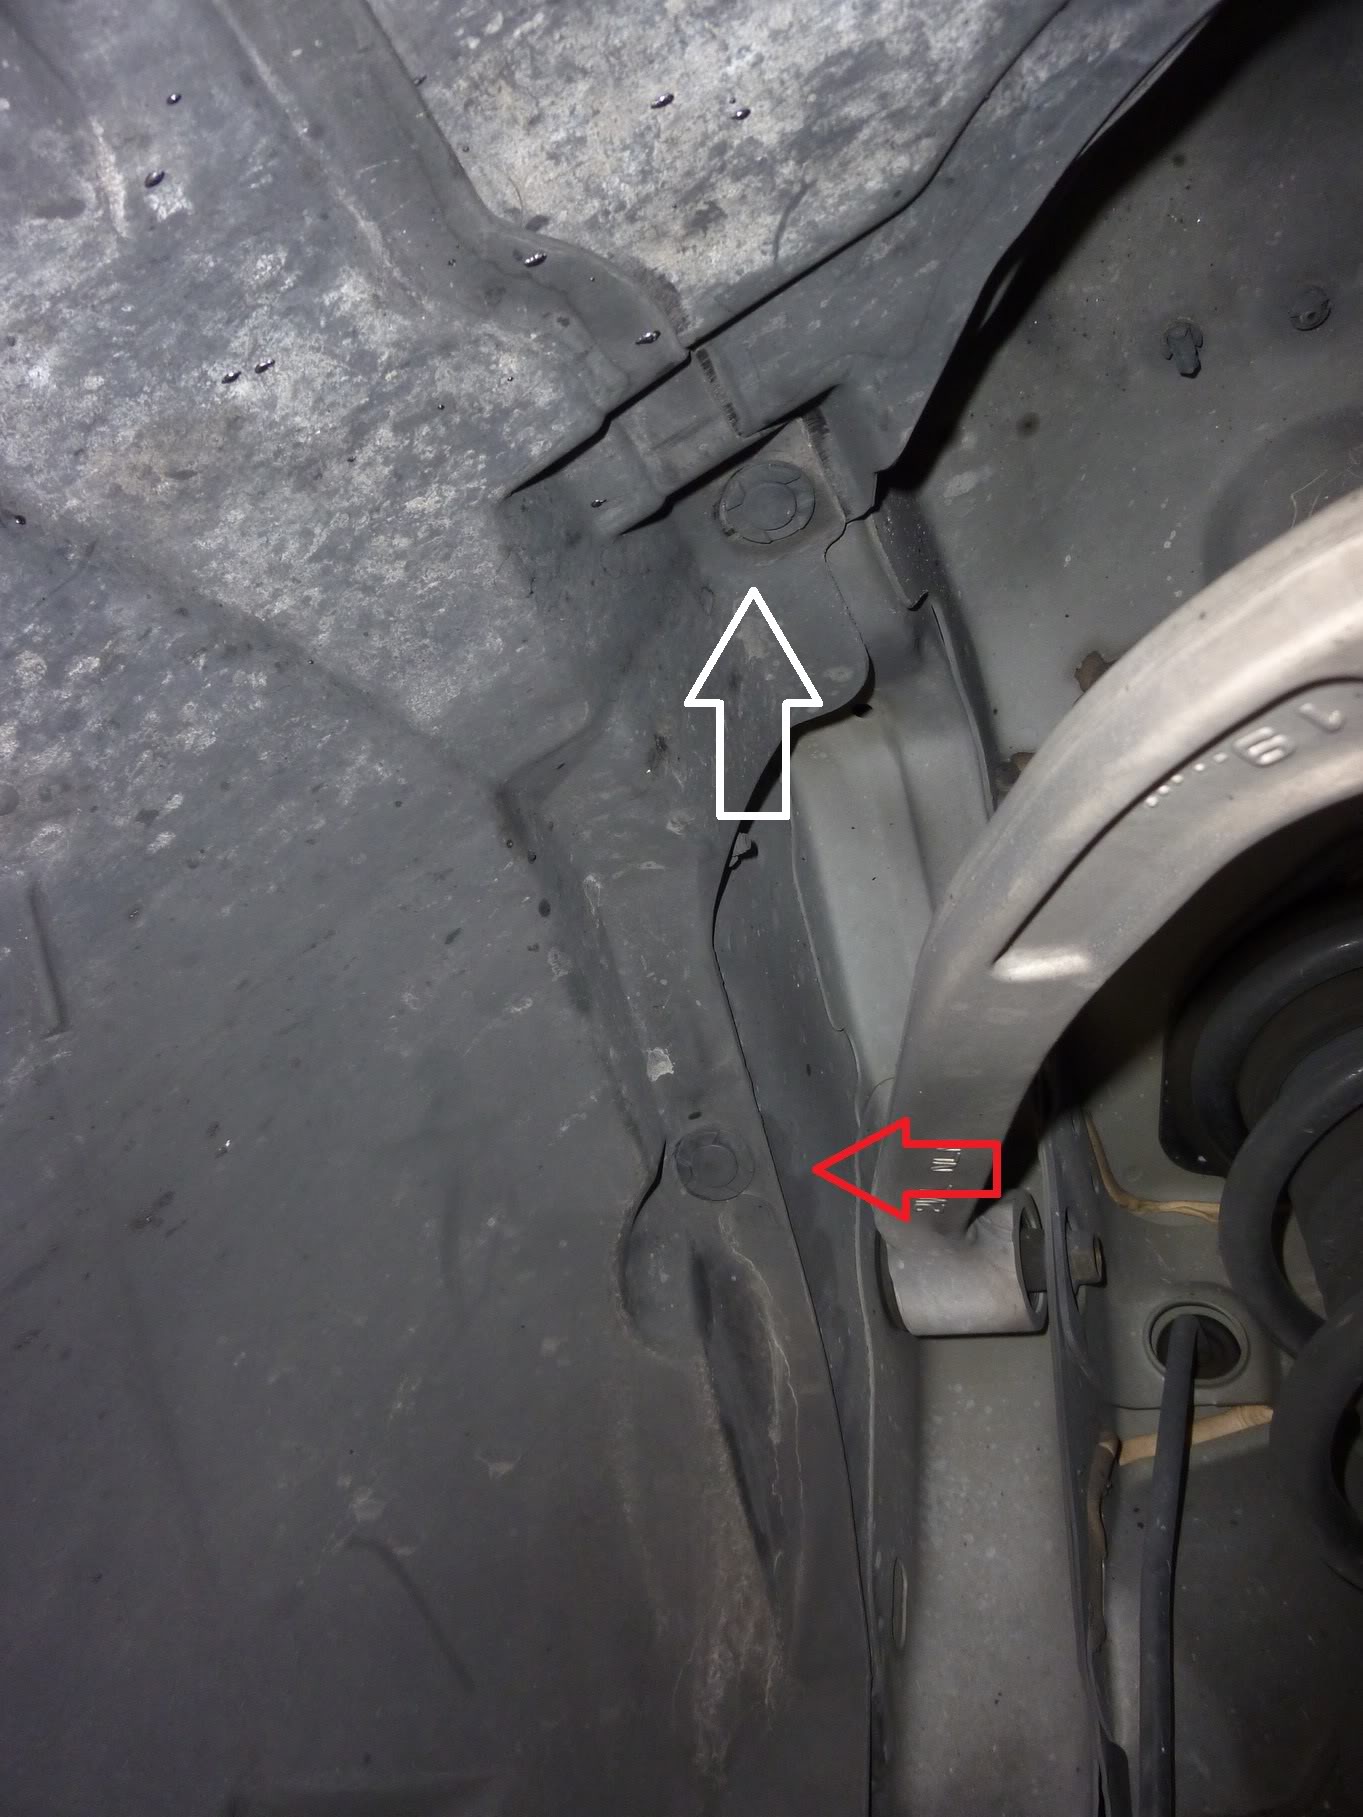
Remove Three Clips (Shown in Yellow, Red, and White)
To Remove Clips simply pry with a flat head (Shown in the picture below)
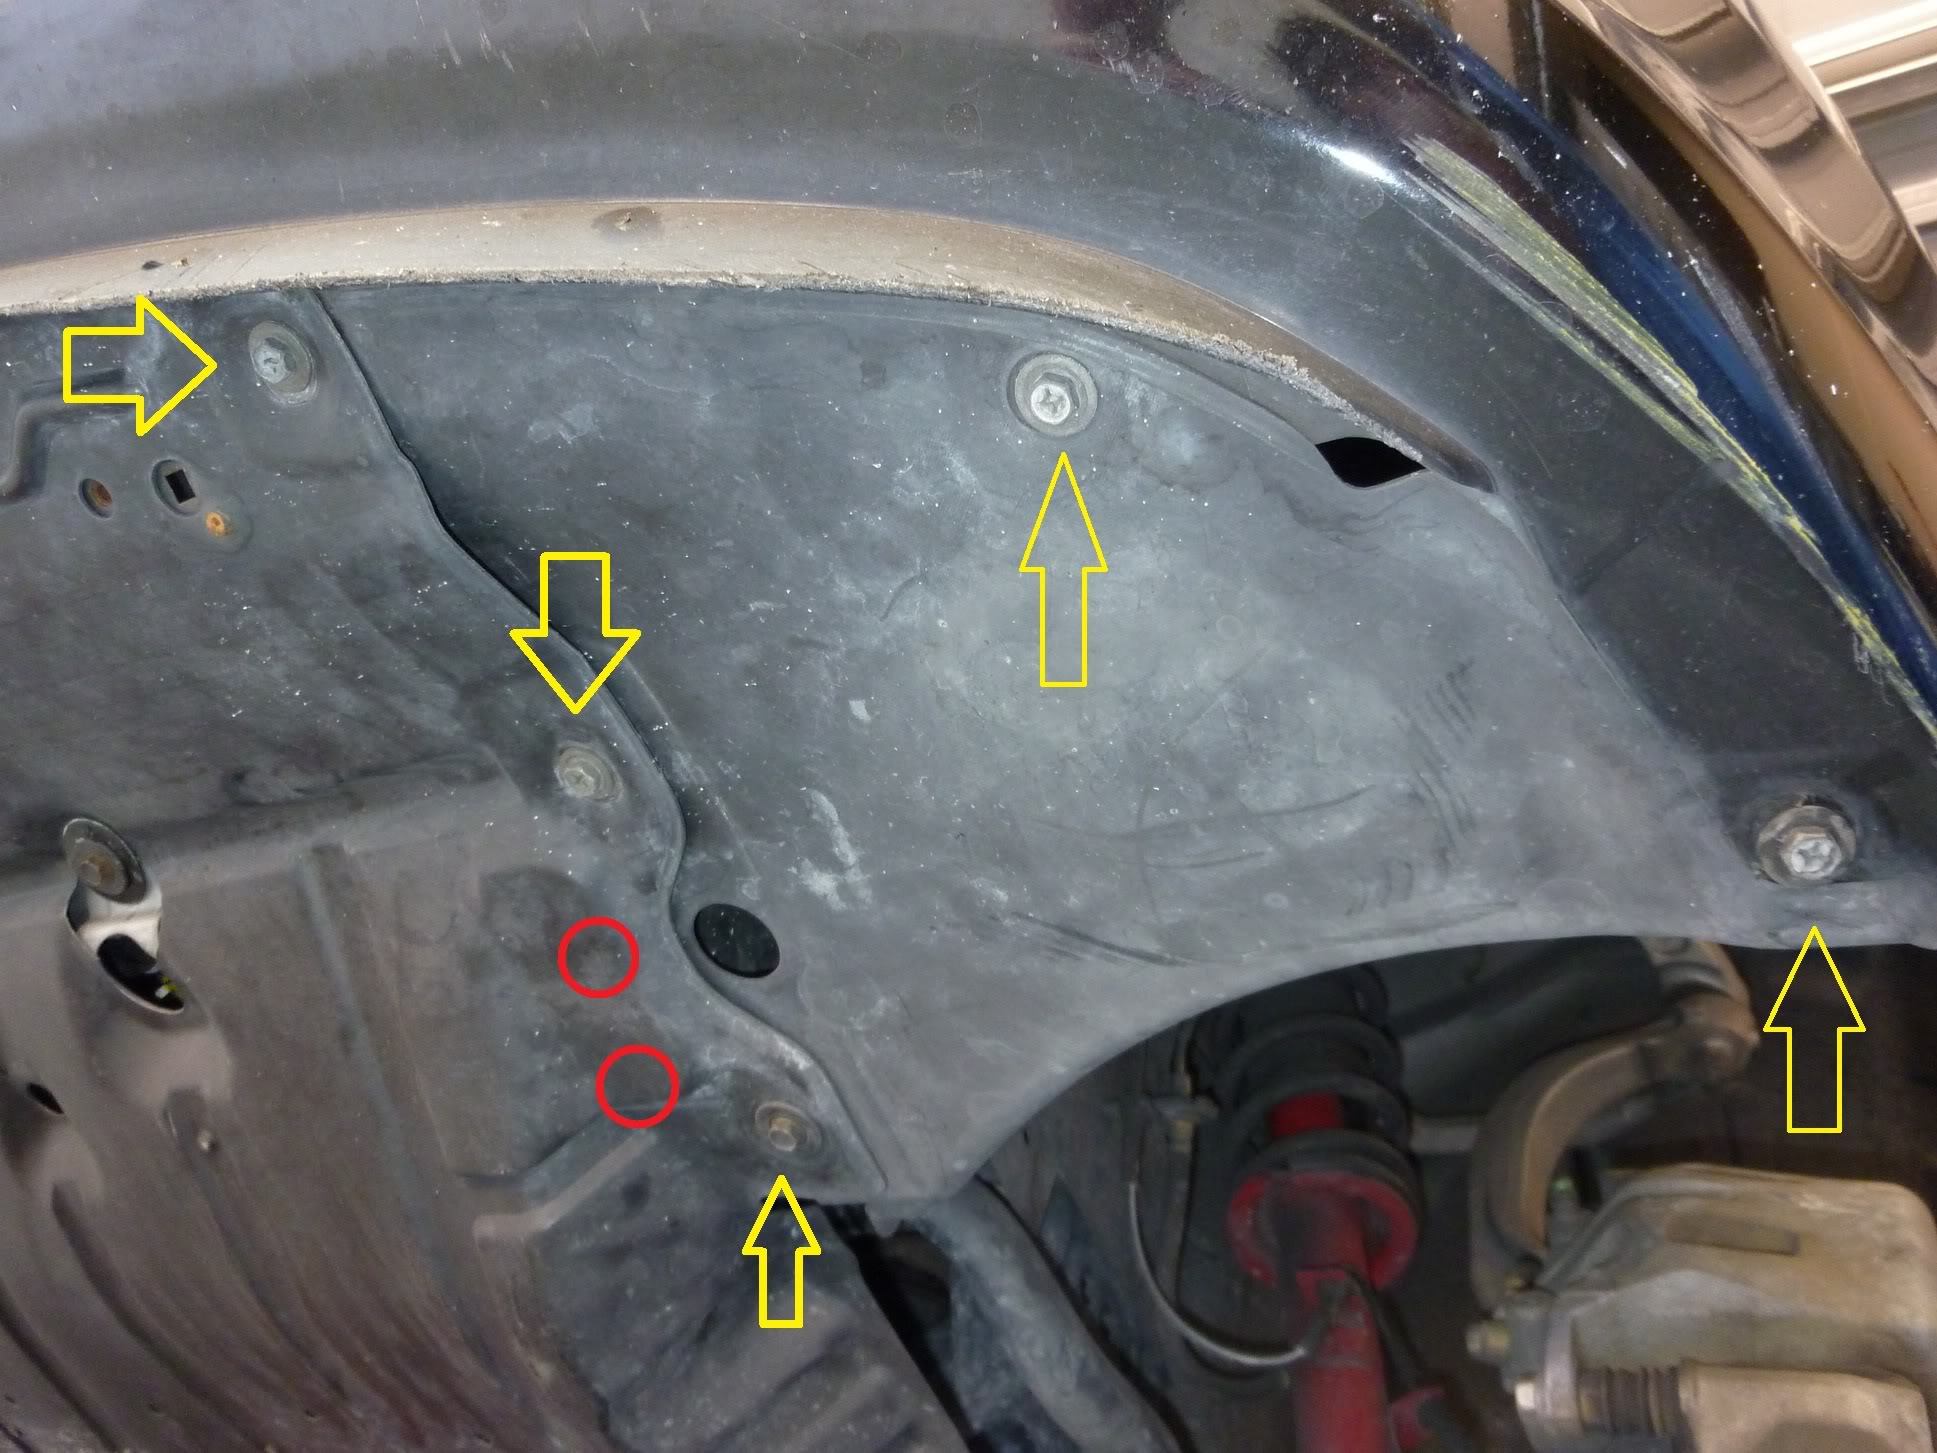
Remove (5) 10MM Bolts (Yellow) and two Clips (Red)
For the best way completely remove the undertray gain easy access to the two clips (Shown in RED). But I found it easier/faster(not best way) after the wheel well was unbolted the clips showed them selves.
After your Remove the Wheel Well Lining you will see this

The Top part is the Low Beams and the Bottom Ones are the Fogs, Simply rotate counterclockwise to unscrew (like a soda bottle)
HID Installation
The Low Beams will look like this once you have the cap off, Simply turn slightly counterclockwise wise and pull the connector off. To Reinstall, just push it back onto the bulb once it has been secured.
As you can see there is no bulb in the housing, but look. You see the metal shaped "A" on the bottom the tabs push them together(clamping)
When you first get to it, the BULB will be installed, simply clamp the "A" and it will make the bulb loose, so that you can remove it.
To Reinstall re clamp the "A" back into the guides that looks like Claws.
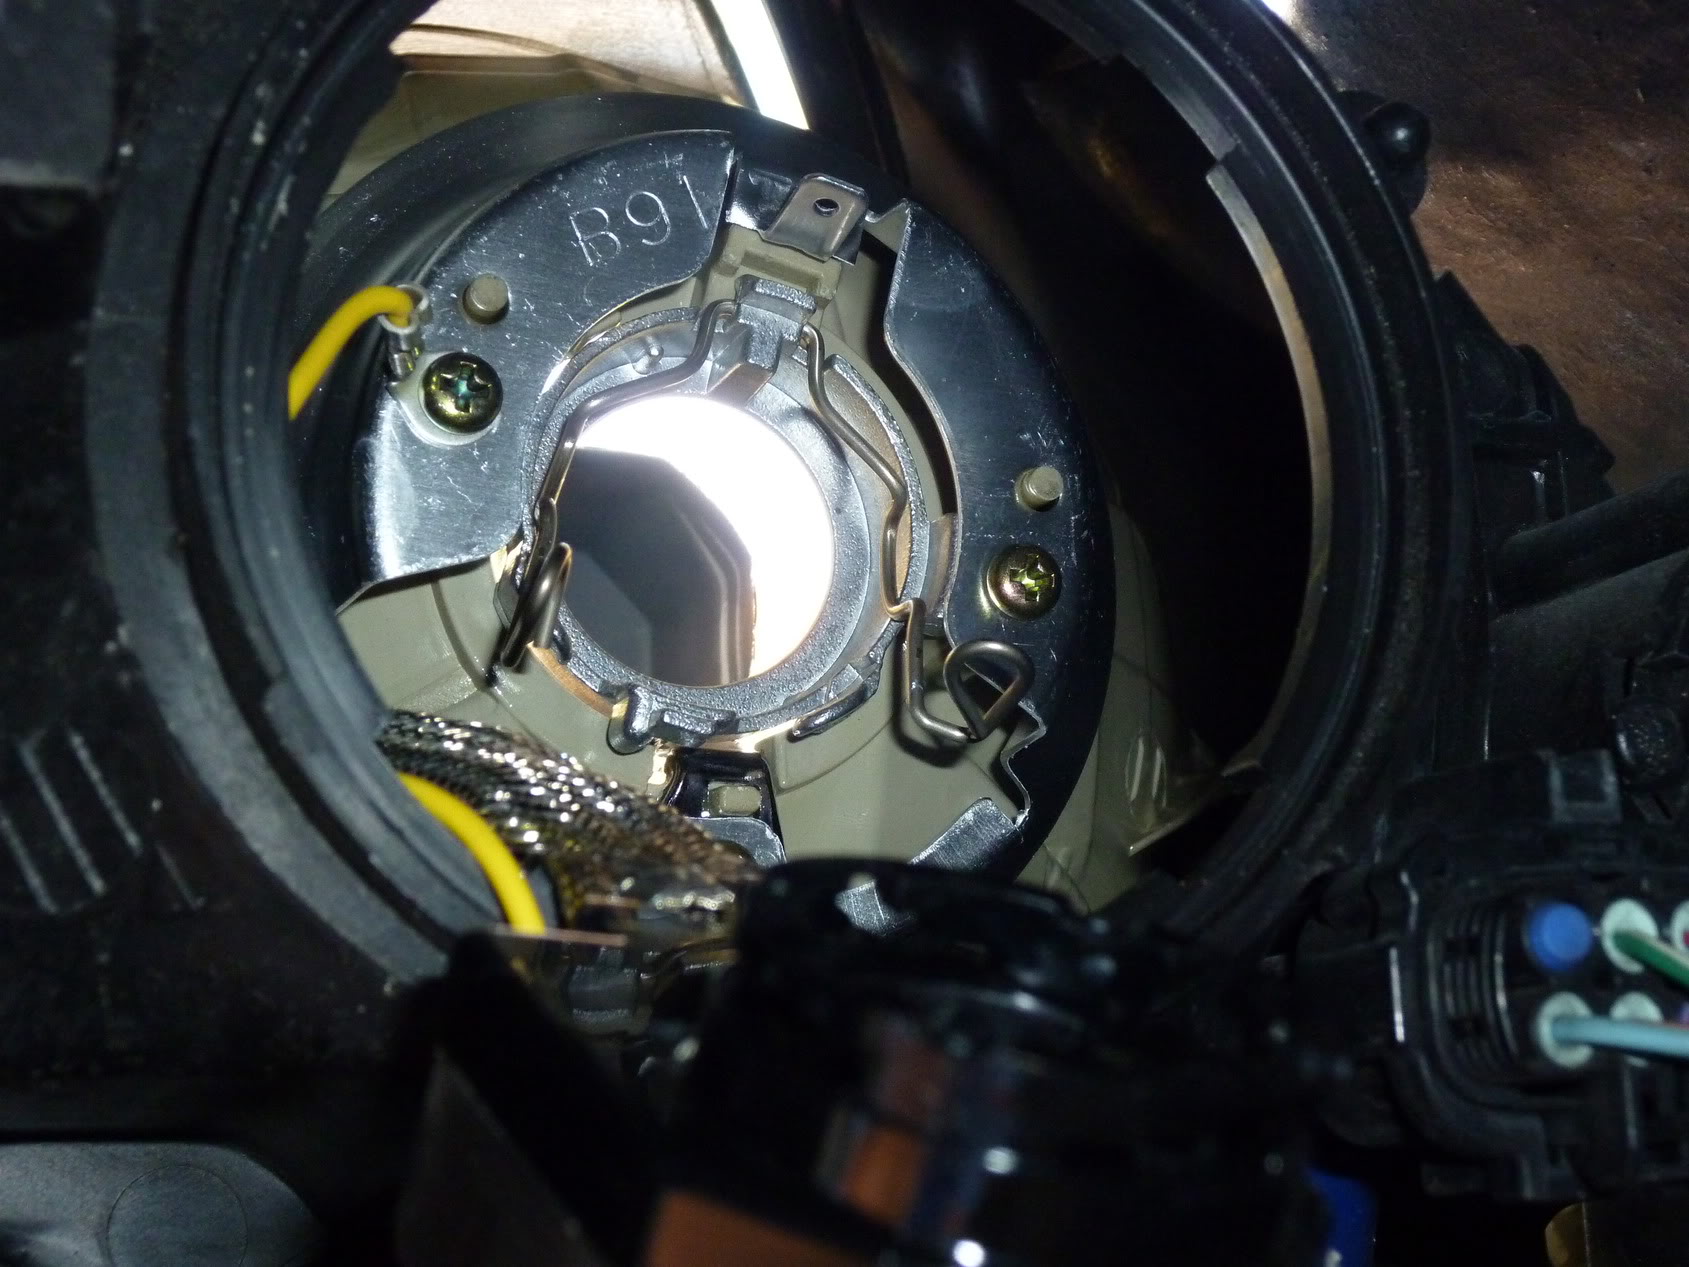
When you install the bulb, "DO NOT TOUCH THE GLASS", if you touch the glass for what ever reason by accident with your fingers or with dirt, you need to clean it with Isopropyl alcohol. To try to remove oils from the glass.
Reason being the bulb will die within hours, or days as the oil from your skin creates a hot spot.
The Bulb is notched so that it only goes in one way, like a Lego piece.

Here is my DDM 35 Watt Slim Ballast (Max temp 105C=221F)
I do not have pictures of how to remove or install the H4 bulb, but it uses the same mechanisms as the Low Beam.
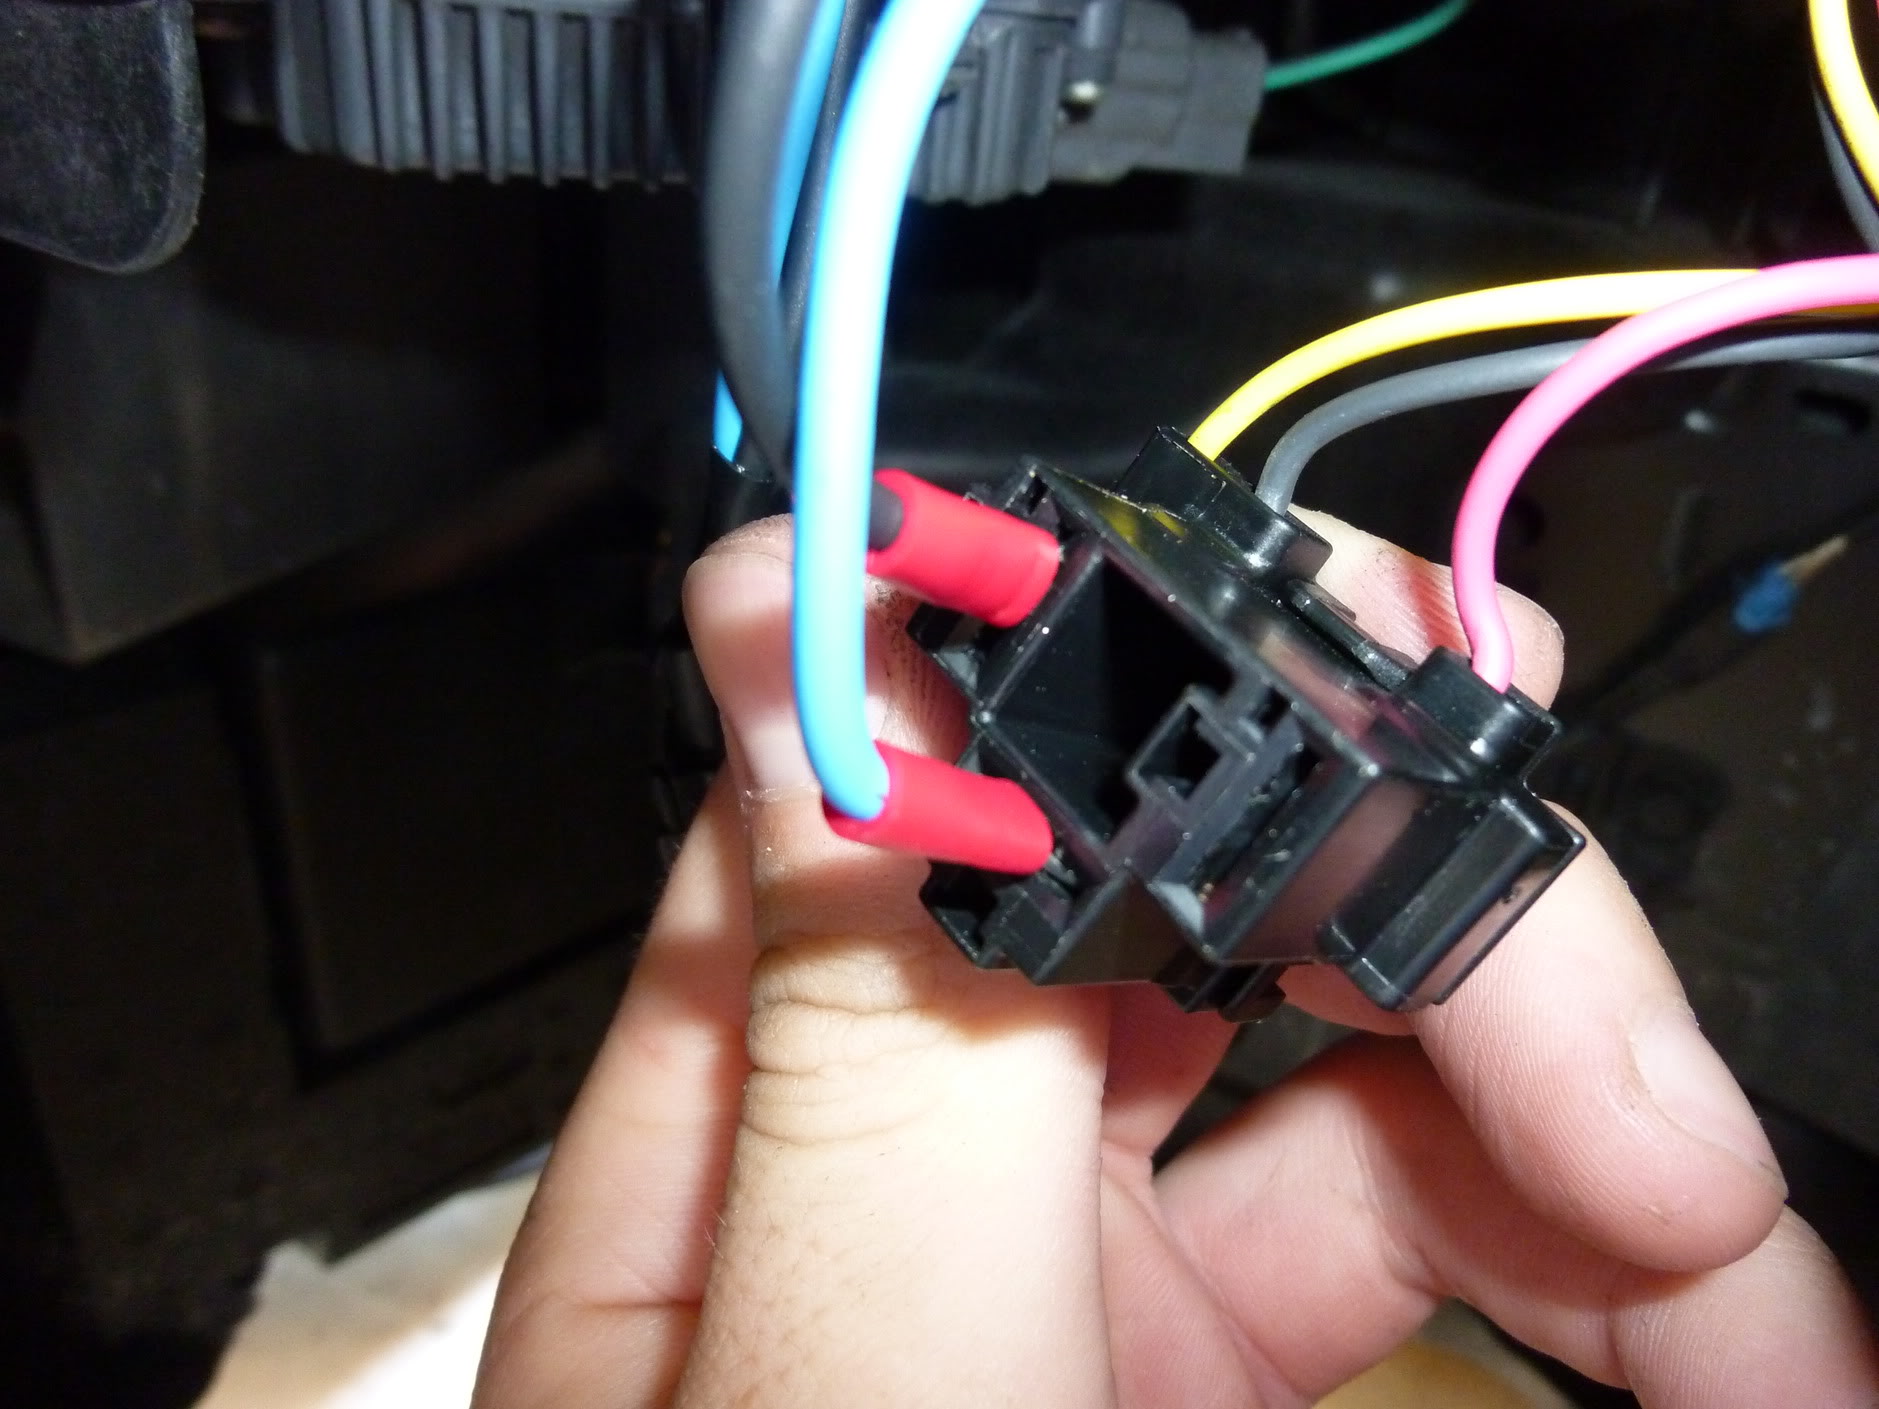
To remove the Power connector when you first take off the Fog cap, just pull the connector out, it should slide out.
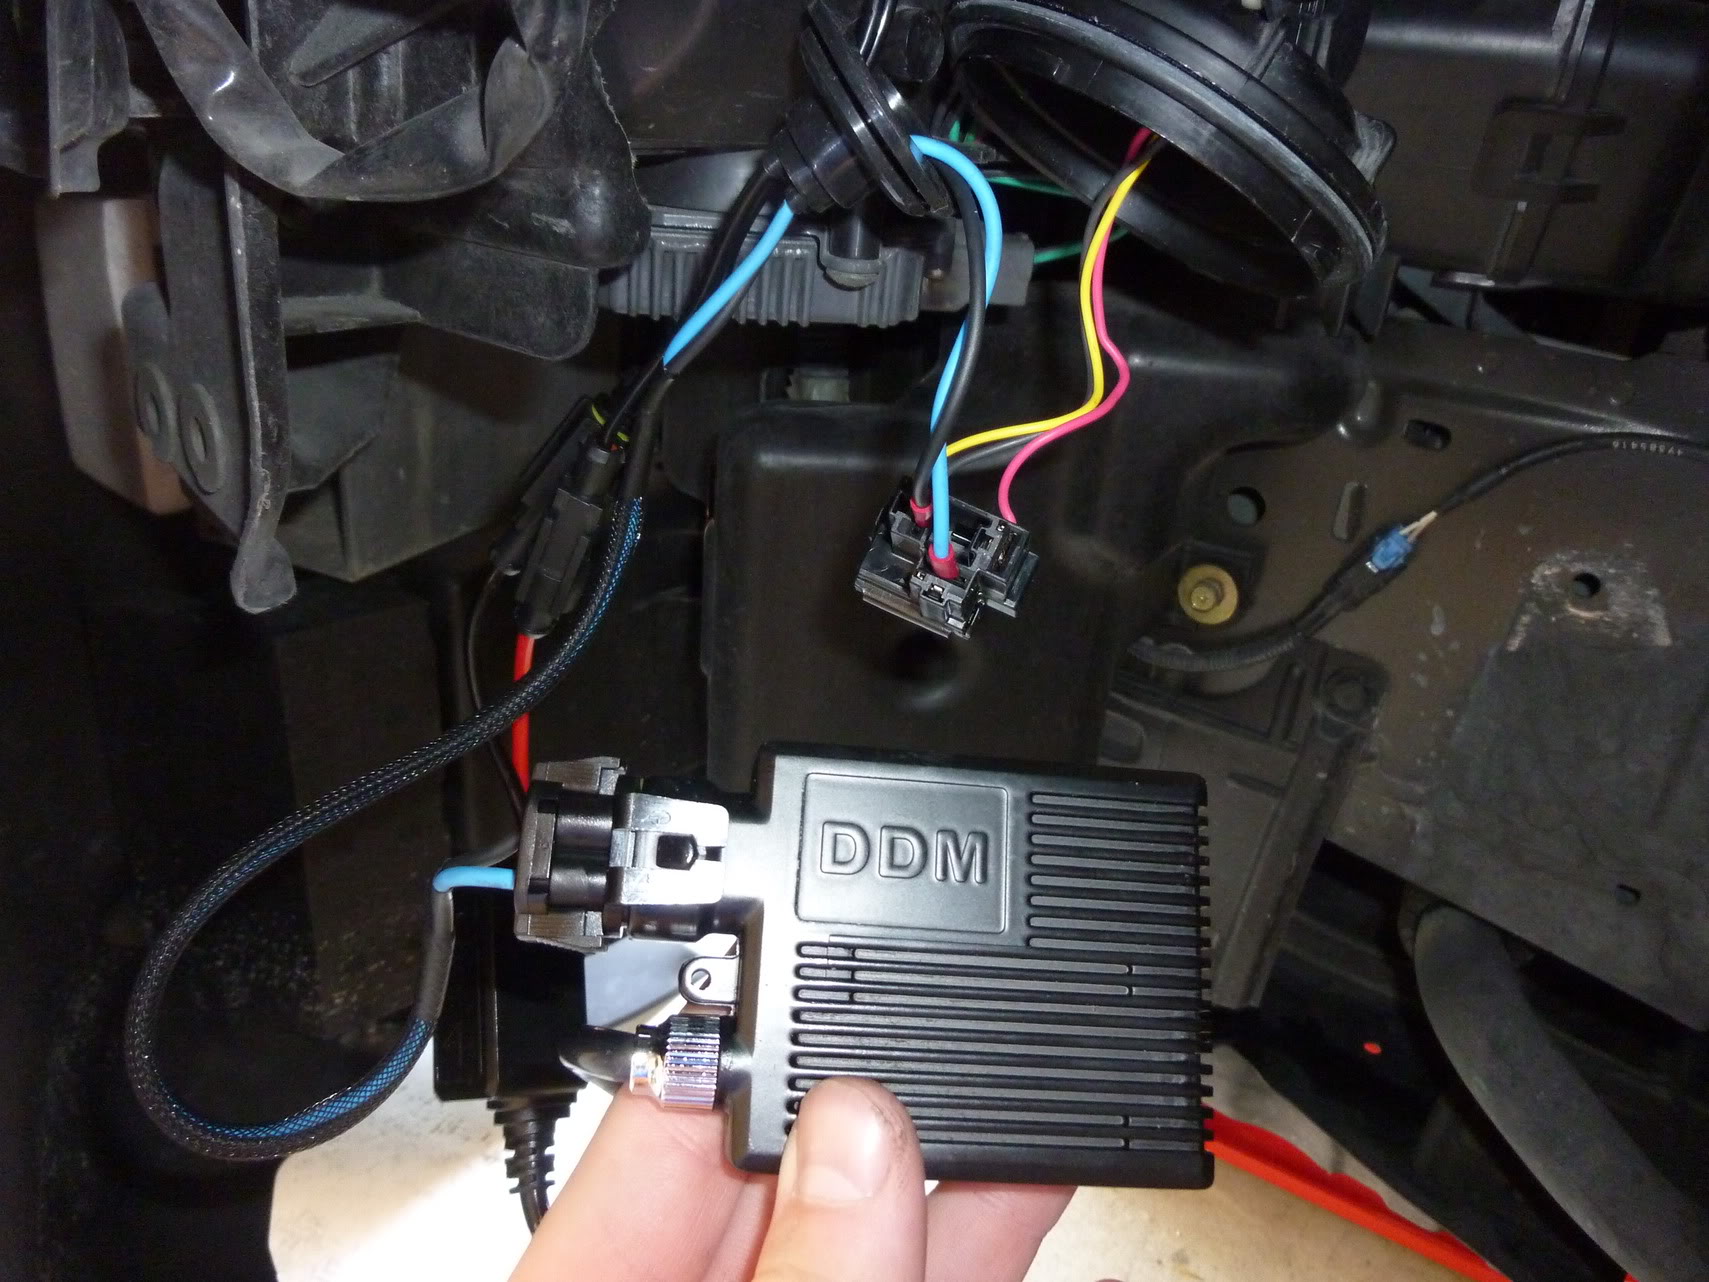
As I mentioned in the "6k/3k Installed Thread" I was able to fit the DDM Slim Ballast and wires inside the FOG light housing.
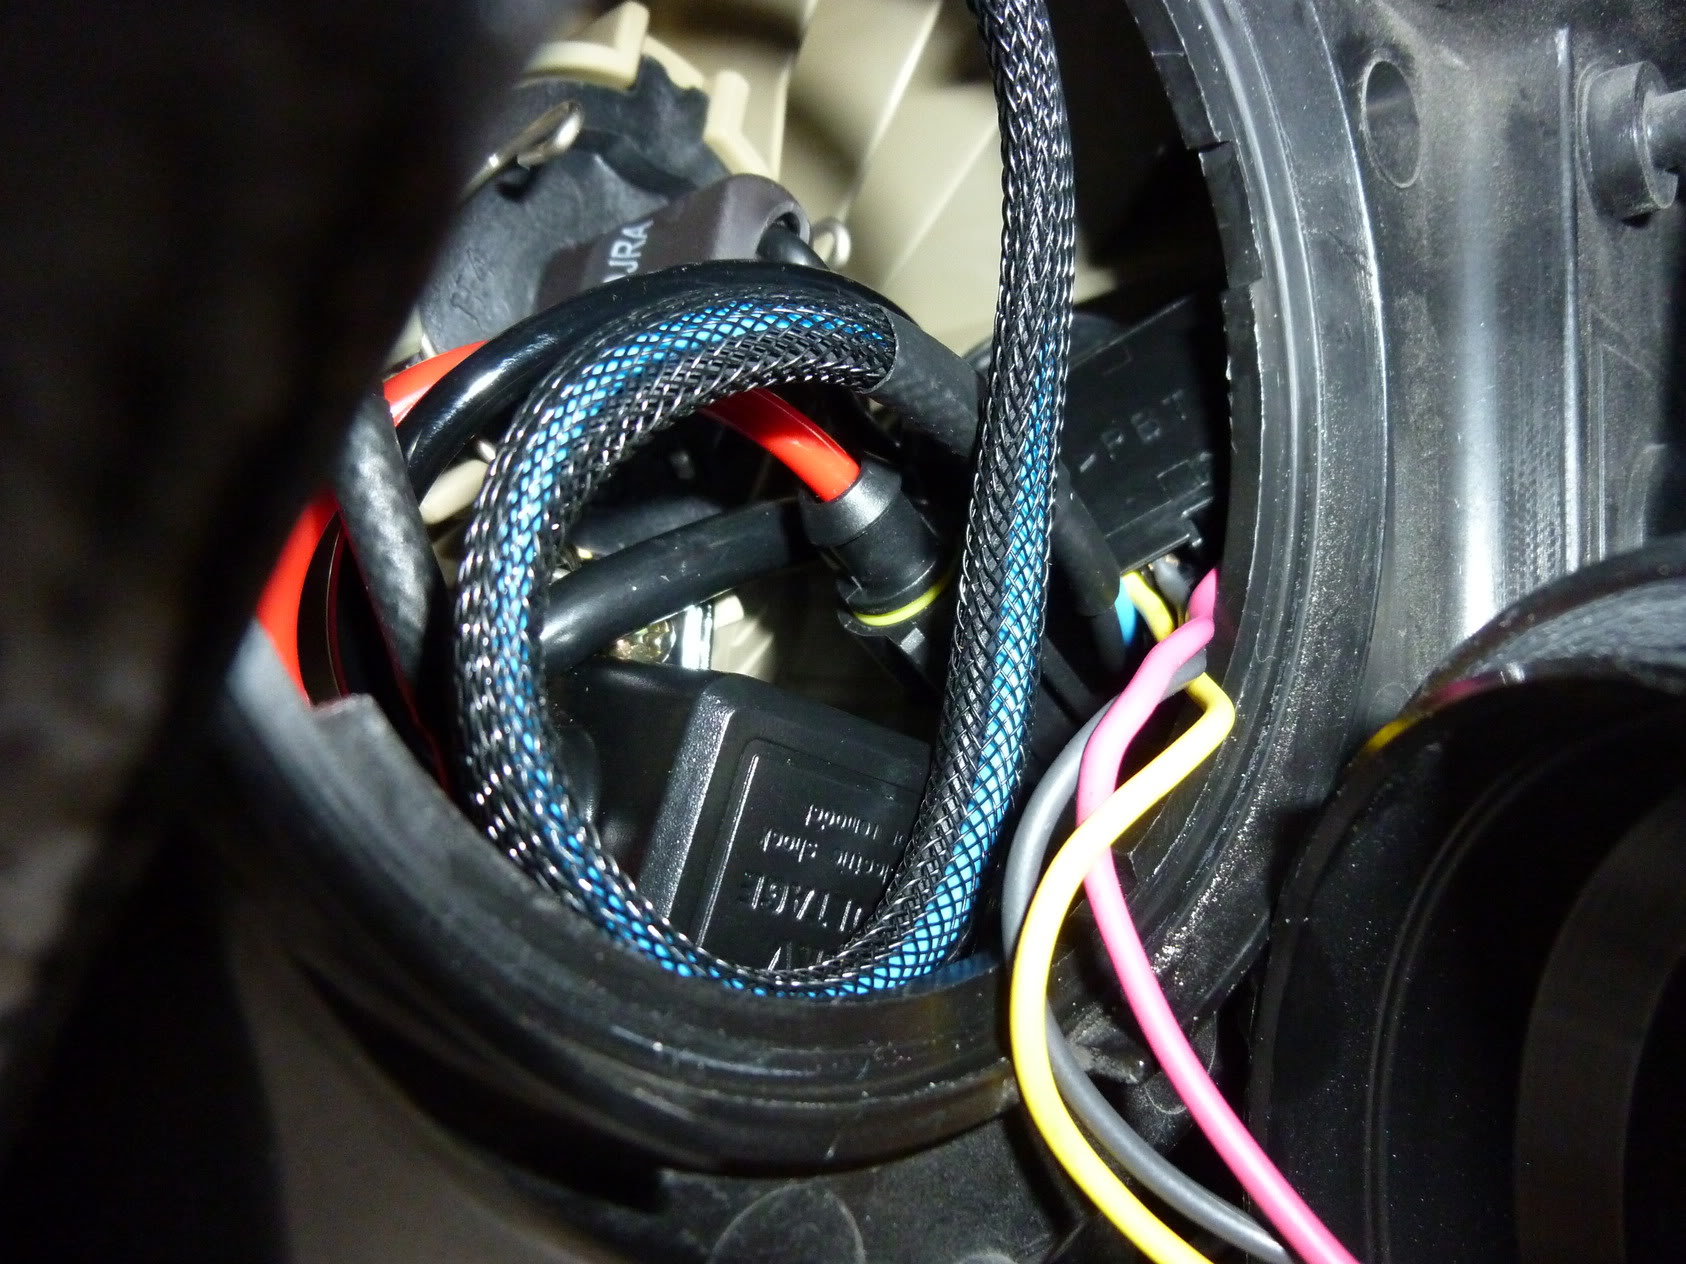
(Driver Side) (Opposite for Passenger)
1. Place Ballast on the left side(next to the bulb)
2. Carefully push and place wires to the other side, make sure the wires are not making contact to the rear of the Bulb) (Please make sure wires are not touching the back of the bulb)
Yes this picture above has the wires too close, I fixed it but did not take another picture.
Issues?
As some people mentioned in the "6k/3k Thread" that installing the ballast inside the housing could cause issues with heat
I took my IR Temp Gauge and in 90F ambient temp, here are the results.
Back of Bulb - 160F= 71C
DDM Slim Ballast(hanging outside) after ~15 min and a steady temp of 125F=52C
Now the passenger side caps were closed, I let the lights run and opened the Cap for the Fogs
The Space inside the housing after 15min were only wires are tucked 108f=42C
Ballast was 125F=52C
On the DDM Ballast itself it reads "Max temp 105c" so there are no issues at all during my test. I have driven 4 hours straight with them on and no problems.
1. Gain Access to the HID's
a. You can jack and remove the wheel (easier access)
b. You can turn the wheel all the way to the inside to gain access
Jacking the Car
Wheel Removed
On the Top of the Wheel Well, remove the two Philips Screws
Remove Three Clips (Shown in Yellow, Red, and White)
To Remove Clips simply pry with a flat head (Shown in the picture below)
Remove (5) 10MM Bolts (Yellow) and two Clips (Red)
For the best way completely remove the undertray gain easy access to the two clips (Shown in RED). But I found it easier/faster(not best way) after the wheel well was unbolted the clips showed them selves.
After your Remove the Wheel Well Lining you will see this
The Top part is the Low Beams and the Bottom Ones are the Fogs, Simply rotate counterclockwise to unscrew (like a soda bottle)
HID Installation
The Low Beams will look like this once you have the cap off, Simply turn slightly counterclockwise wise and pull the connector off. To Reinstall, just push it back onto the bulb once it has been secured.
As you can see there is no bulb in the housing, but look. You see the metal shaped "A" on the bottom the tabs push them together(clamping)
When you first get to it, the BULB will be installed, simply clamp the "A" and it will make the bulb loose, so that you can remove it.
To Reinstall re clamp the "A" back into the guides that looks like Claws.
When you install the bulb, "DO NOT TOUCH THE GLASS", if you touch the glass for what ever reason by accident with your fingers or with dirt, you need to clean it with Isopropyl alcohol. To try to remove oils from the glass.
Reason being the bulb will die within hours, or days as the oil from your skin creates a hot spot.
The Bulb is notched so that it only goes in one way, like a Lego piece.
Here is my DDM 35 Watt Slim Ballast (Max temp 105C=221F)
I do not have pictures of how to remove or install the H4 bulb, but it uses the same mechanisms as the Low Beam.
To remove the Power connector when you first take off the Fog cap, just pull the connector out, it should slide out.
As I mentioned in the "6k/3k Installed Thread" I was able to fit the DDM Slim Ballast and wires inside the FOG light housing.
(Driver Side) (Opposite for Passenger)
1. Place Ballast on the left side(next to the bulb)
2. Carefully push and place wires to the other side, make sure the wires are not making contact to the rear of the Bulb) (Please make sure wires are not touching the back of the bulb)
Yes this picture above has the wires too close, I fixed it but did not take another picture.
Issues?
As some people mentioned in the "6k/3k Thread" that installing the ballast inside the housing could cause issues with heat
I took my IR Temp Gauge and in 90F ambient temp, here are the results.
Back of Bulb - 160F= 71C
DDM Slim Ballast(hanging outside) after ~15 min and a steady temp of 125F=52C
Now the passenger side caps were closed, I let the lights run and opened the Cap for the Fogs
The Space inside the housing after 15min were only wires are tucked 108f=42C
Ballast was 125F=52C
On the DDM Ballast itself it reads "Max temp 105c" so there are no issues at all during my test. I have driven 4 hours straight with them on and no problems.


any other ideas for the ballast mount i dont think i have the testies to leave the ballast in there especially after that one kids hid kit went on fire a while back lol.
if i purchased 2 screws like the ones used on the oem hid kit could i make enough room to put both ballasts on the bottom of the head light?
also anyone have a pic of what fogs looks like 8000k hid and the regular low beams i already have in 6000k
if i purchased 2 screws like the ones used on the oem hid kit could i make enough room to put both ballasts on the bottom of the head light?
also anyone have a pic of what fogs looks like 8000k hid and the regular low beams i already have in 6000k
IIRC that kids G went on fire because of some hack job wiring.

Trending Topics
Great write up and pics are always helpful!
Personally I think it's easier to just drop the bumper. i've done it so many times that I could prob drop the bumper faster than I can jack up the car.
Personally I think it's easier to just drop the bumper. i've done it so many times that I could prob drop the bumper faster than I can jack up the car.
I think since most G's on driver are dropped it might not be as easy to remove the bumper. I personally put my 6000k hids in through the bumper and it was a pain in the ***. When I painted my headlights I dropped my bumper and realized its about a million times easier as well I didn't even touch the bottom I used a $h!t load of towels to rest it on and that was it


There are no High Beams, this kit is not bi-xenon if you look at the connector there are three plugs this kit only plugs into two of them. I haven't heard of anyone with DRLs using this kit so I am not sure how it will work. But if the DRL use your fogs then the fogs will light up(this kit runs off the fogs), all you are loosing are high beams.
If you want it to fit inside the housing this one has been tested to work, you can buy other kits they will work but will they fit? No idea.


