
~TunerMax's RF Controlled Colour Changing LED Project~ PIC HEAVY

~TunerMax's RF Controlled Colour Changing LED Project~ PIC HEAVY
UPDATE: ALL VIDEOS HAVE BEEN EMBEDED/FIXED
I toyed with this idea when I was doing LED conversions on the side for a short stint but got out of that work before I had a chance to do it. Now that I have decided my new 03 G will be my long time vehicle, I decided to try it.
This is NOT a system that randomly changes colour, strobes, or any other IMO silly functions.
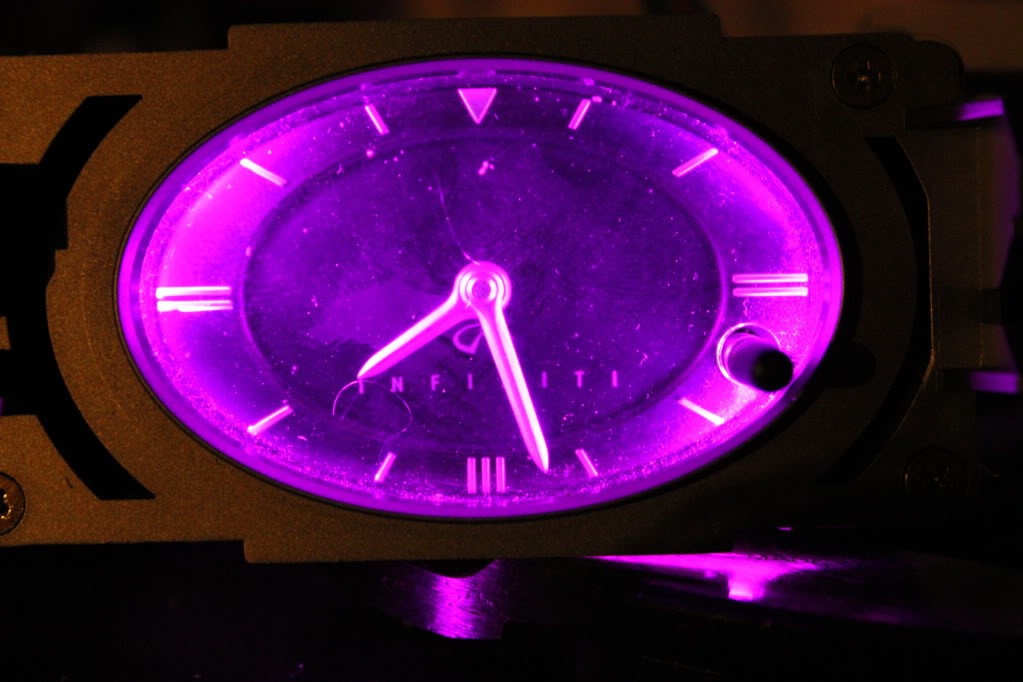
My intention was to be able to control the colour of the interior lighting to pretty much whatever colour I want whenever I want. This is especially handy because I don't know what colour I'm painting (or if I'm painting) the car yet. I also went RF (radio frequency) instead of the cheaper IR (infared), this way I can remote mount the control box out of sight, and also I don't ever have to worry about pointing the remote at anything, I could be 30 meters away and still control.
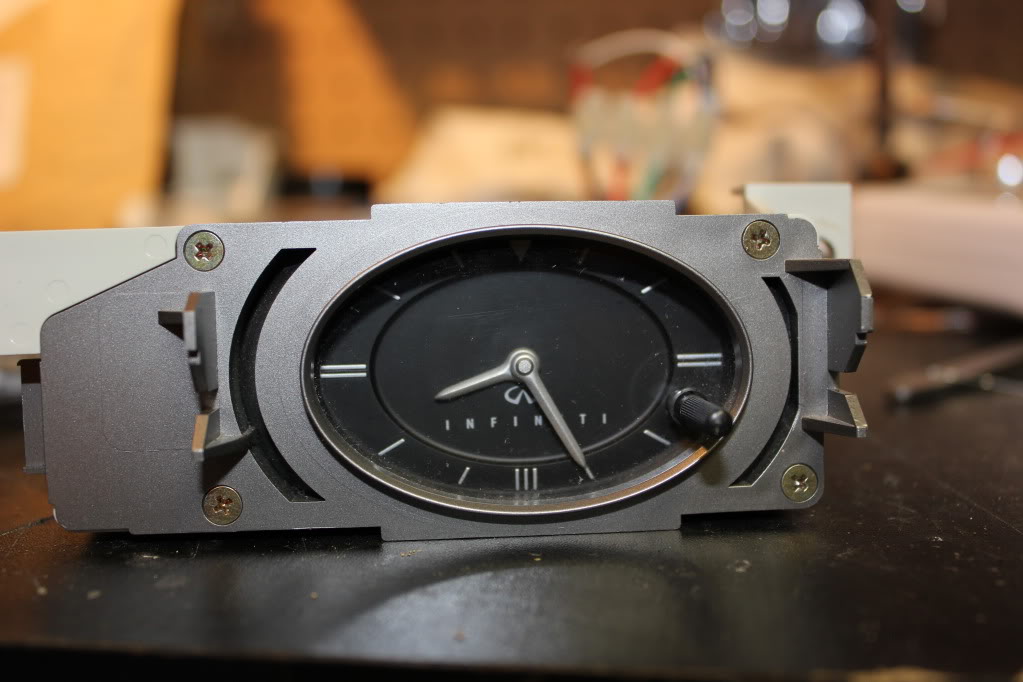
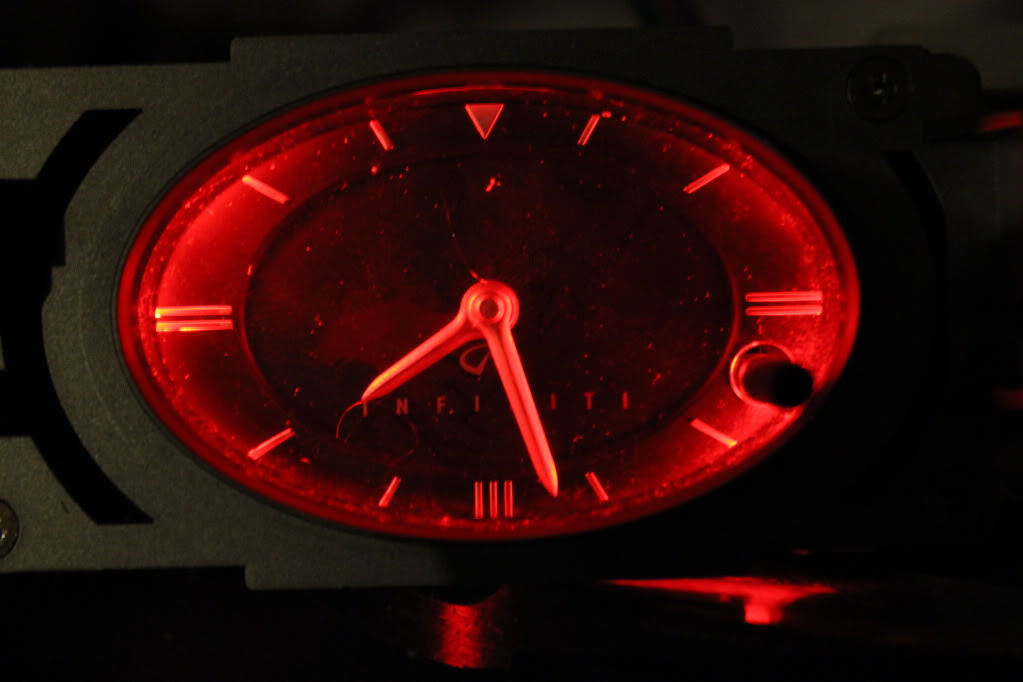
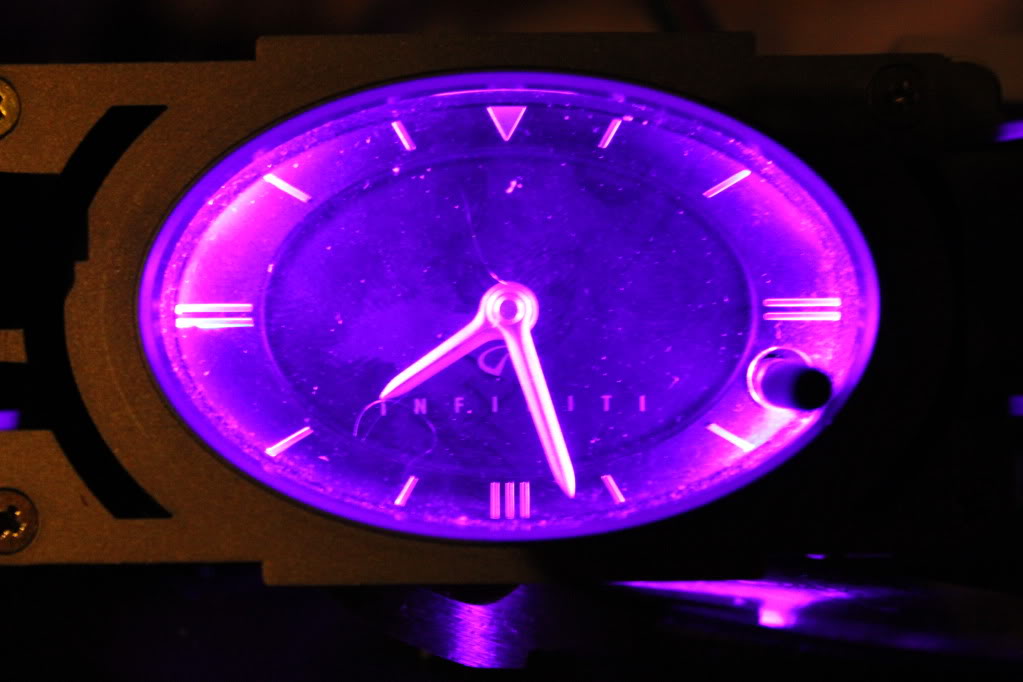
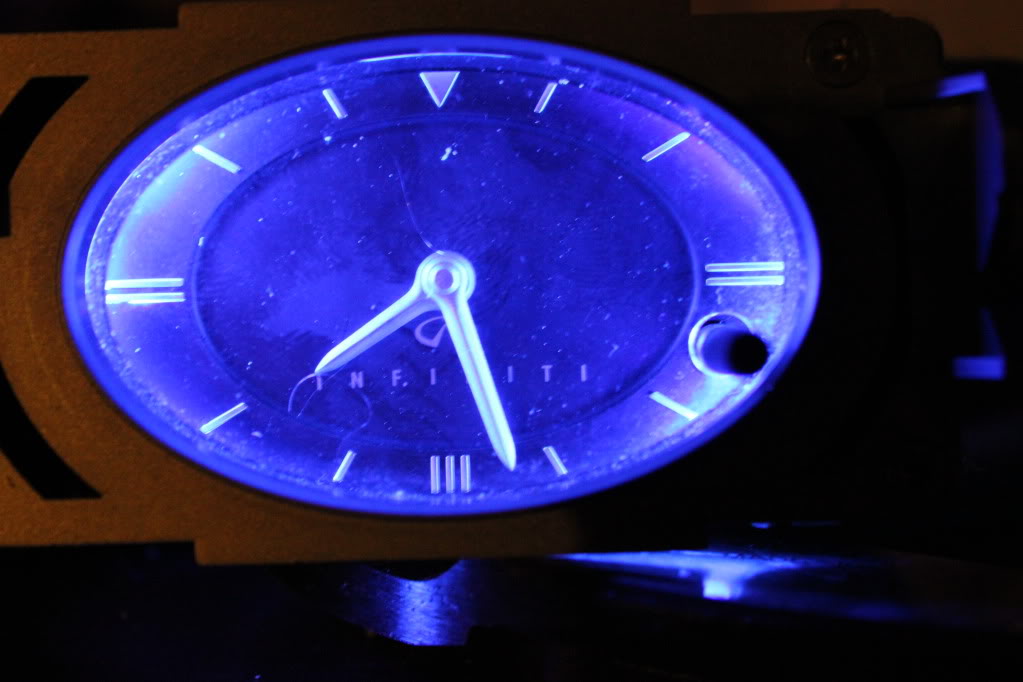
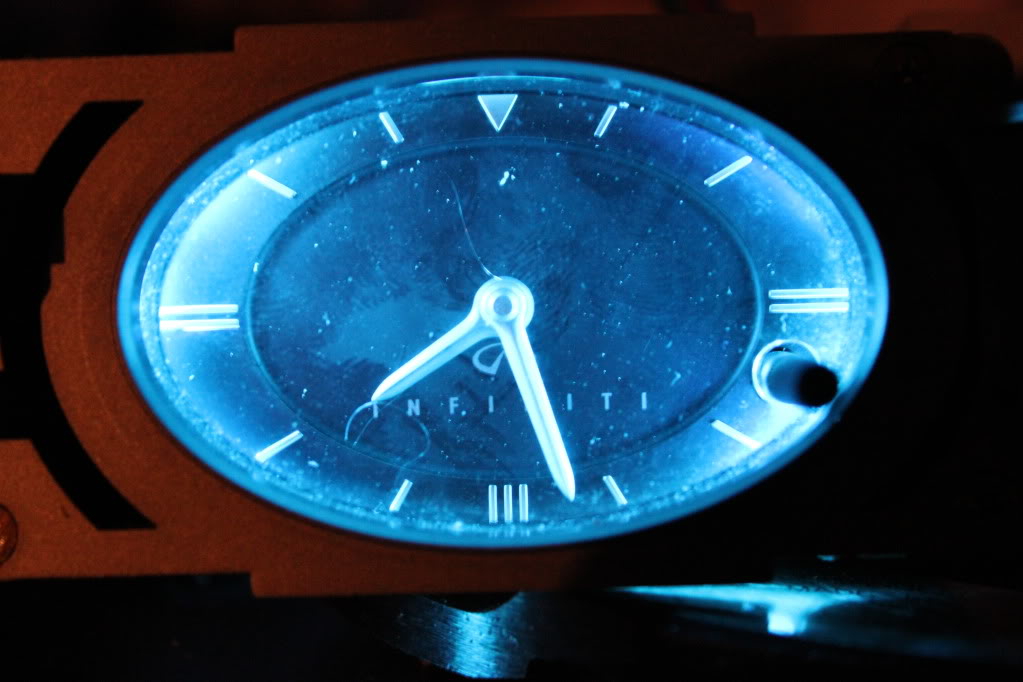
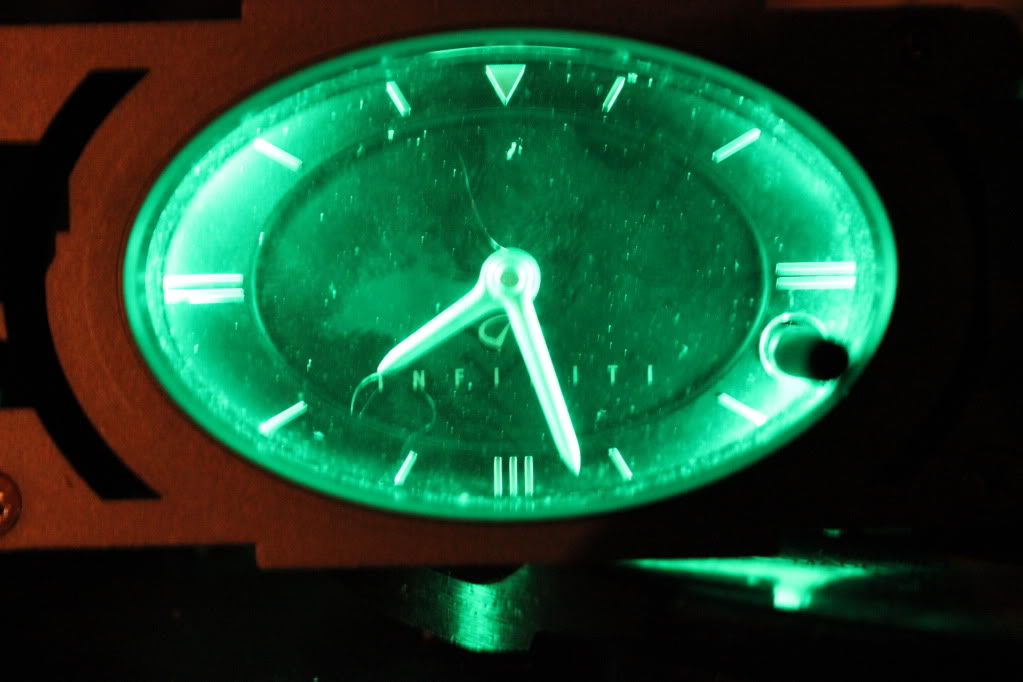
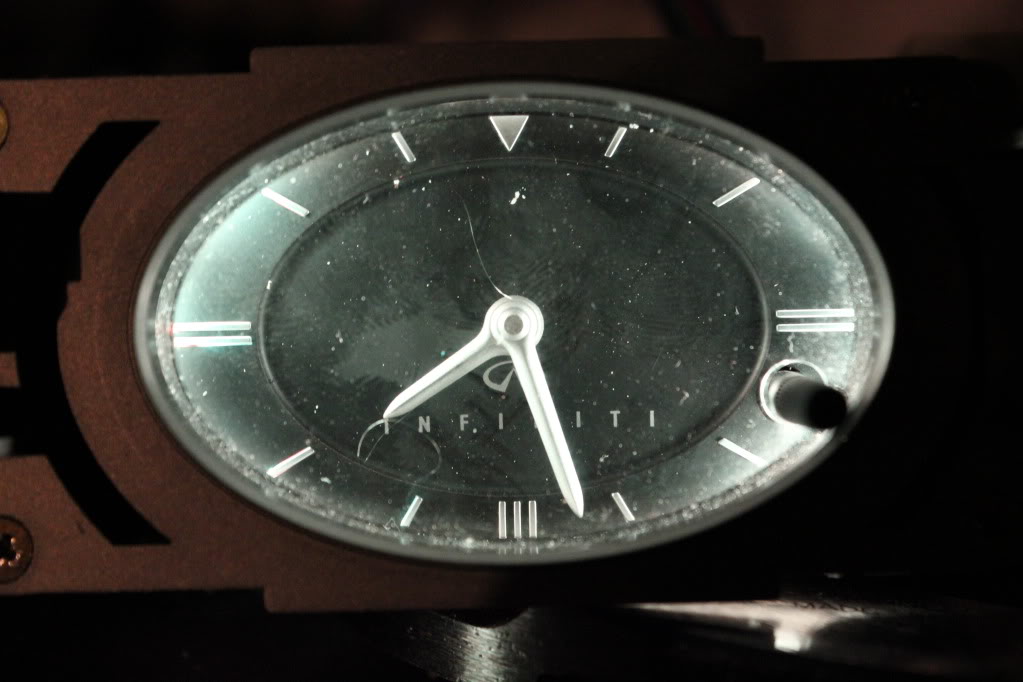
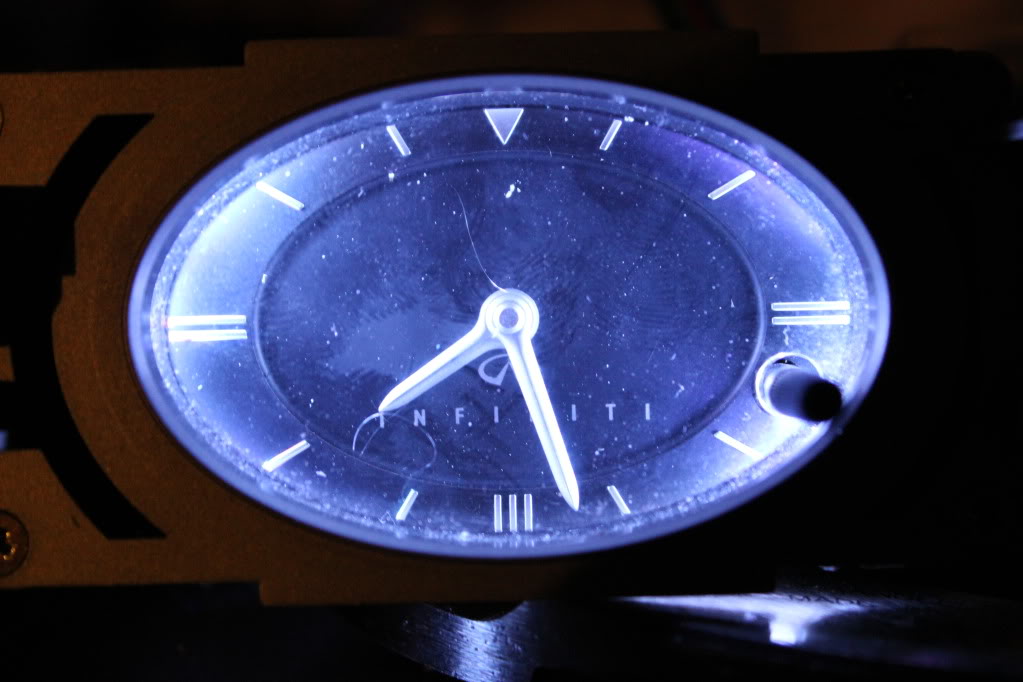
After tonights test work on the clock, I know for sure that I can do this to the gauges and the clock. I would like to do it to all illumination (window switches, audio, etc, etc), but I might not have enough ambition to go that far, the work involved to do it colour changing is insane on those components. I WILL be trying it and I'll post that up later, we'll see what happens!!
Enough chatter:
Making room:
Fitting:
Assembled, test shots:

Many more updates to come in this thread [/B]
[/B]
I toyed with this idea when I was doing LED conversions on the side for a short stint but got out of that work before I had a chance to do it. Now that I have decided my new 03 G will be my long time vehicle, I decided to try it.
This is NOT a system that randomly changes colour, strobes, or any other IMO silly functions.
My intention was to be able to control the colour of the interior lighting to pretty much whatever colour I want whenever I want. This is especially handy because I don't know what colour I'm painting (or if I'm painting) the car yet. I also went RF (radio frequency) instead of the cheaper IR (infared), this way I can remote mount the control box out of sight, and also I don't ever have to worry about pointing the remote at anything, I could be 30 meters away and still control.
After tonights test work on the clock, I know for sure that I can do this to the gauges and the clock. I would like to do it to all illumination (window switches, audio, etc, etc), but I might not have enough ambition to go that far, the work involved to do it colour changing is insane on those components. I WILL be trying it and I'll post that up later, we'll see what happens!!
Enough chatter:
Making room:
Fitting:
Assembled, test shots:
Many more updates to come in this thread
[/B]
Last edited by TunerMax; Jan 19, 2012 at 12:59 AM.


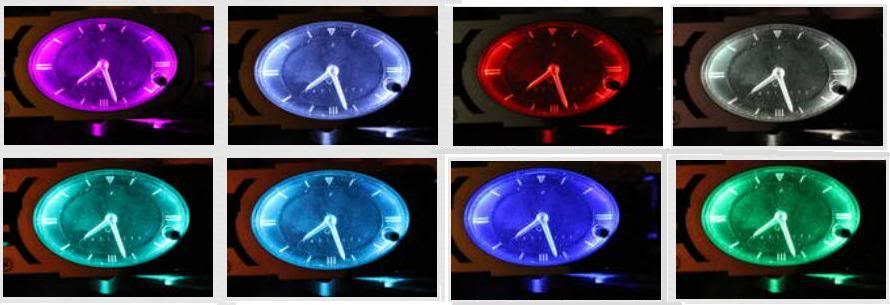
You can pick literally any colour in the spectrum with this setup, I just didn't get into it in the video. You can adjust contrast/hue and brightness/intensity as well as the colour ring. If you move over the colour ring slower you get more colours as well, I just wanted to make a quick video.
The other cool thing about the remote is it has "touch" technology, so you don't actually press anything it works just like a normal touch screen.
The other cool thing about the remote is it has "touch" technology, so you don't actually press anything it works just like a normal touch screen.
How much does something like this cost? It looks like you have a whole roll of something in the background. I'm sure the remote thing isn't cheap either. Great project though, for those that know how to do this stuff.
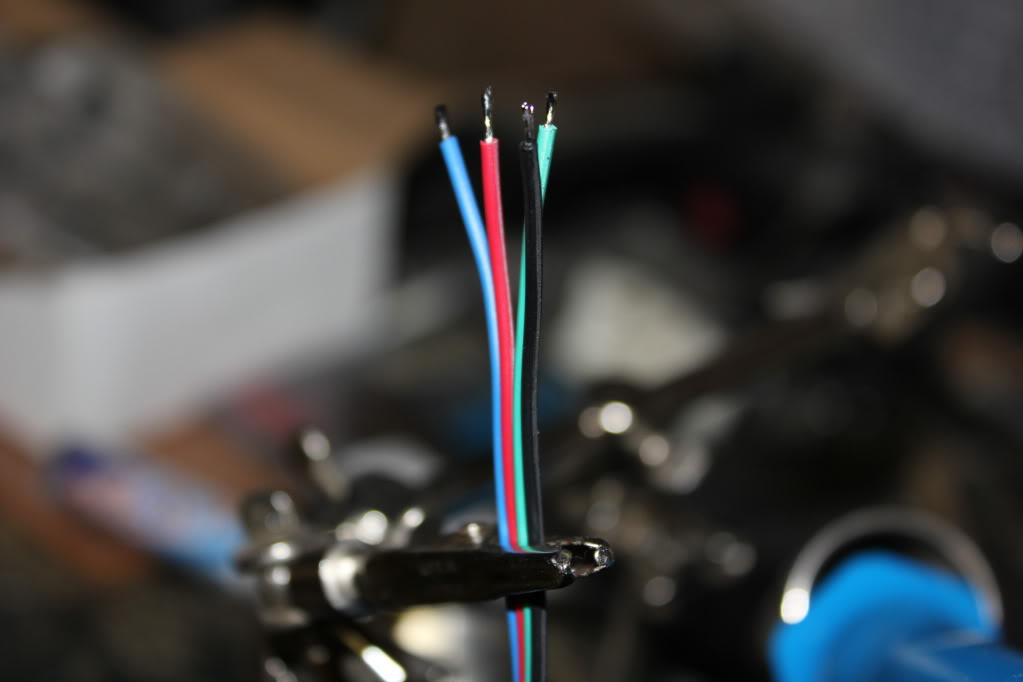
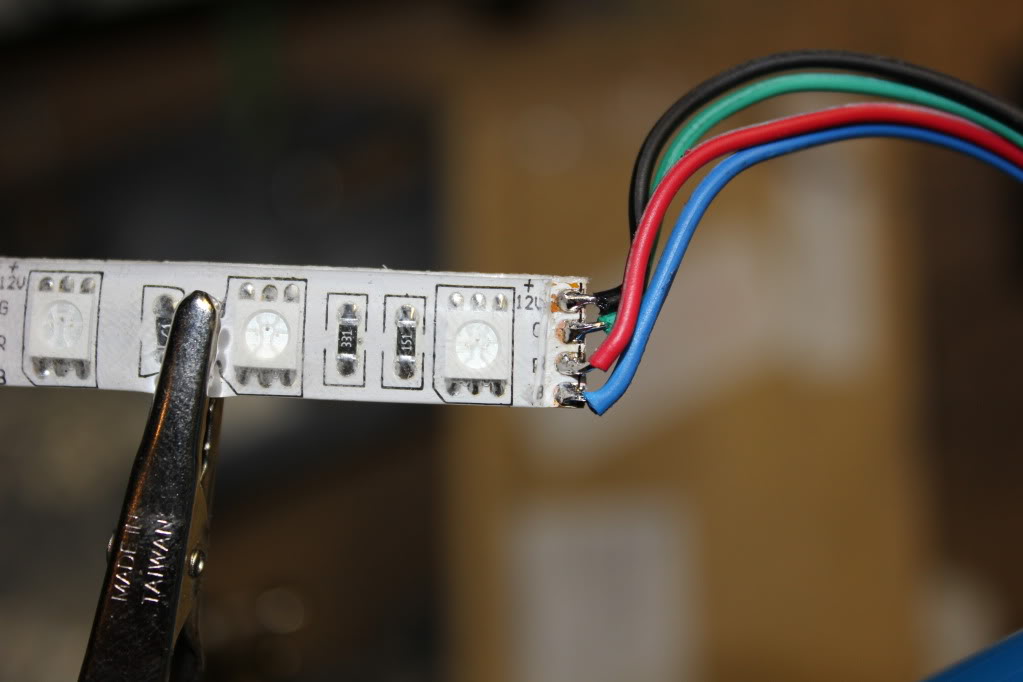
The roll is 5 meters of RGB 5050 Waterproof Ribbon strip, it's what I'm using for the gauges, footwells and clock. I have single 5050 RGB's for other locations if that works out.
The Gauge cluster is working out VERY well though. I managed to fully disassemble it, sand down the tach Gauge face, and also was very happy to find out the Needles are sandable too, so I cleared them.
It will look much better later on when I get all the LED's installed under the tach, and with my T2i camera. The post above is just a teaser.
Trending Topics


^I'm on the fence about an aftermarket deck, I really like the in dash CD changer, and the cost of a good double din screen + all the little extras you need on this car to run aftermarket is HUGE. A lot of coin for minimal gain. I'm more tempted to integrate a screen into the stock navi location


Thanks, only the beginning!
I finally got a half-decent video, had to take it quick so I didn't get time to play with the exposure. Not all the colours are showing up either, especially the greens. But it's much better than the teaser:. Still need to do the needles, and may add more lights:
I finally got a half-decent video, had to take it quick so I didn't get time to play with the exposure. Not all the colours are showing up either, especially the greens. But it's much better than the teaser:. Still need to do the needles, and may add more lights:
Last edited by TunerMax; Jan 19, 2012 at 12:59 AM.
A few .JPG's
A few quick snaps with the cheap Digi-cam. I hope to have some more progress this week, we'll see how time permits!
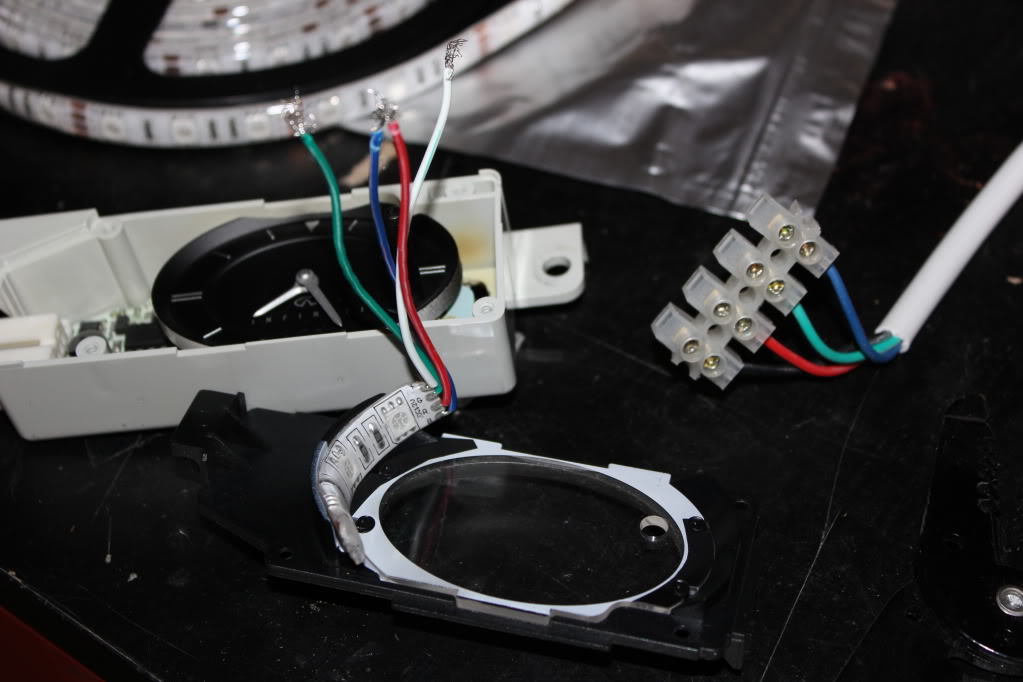
Disassebled, sanded Tach face and needle:
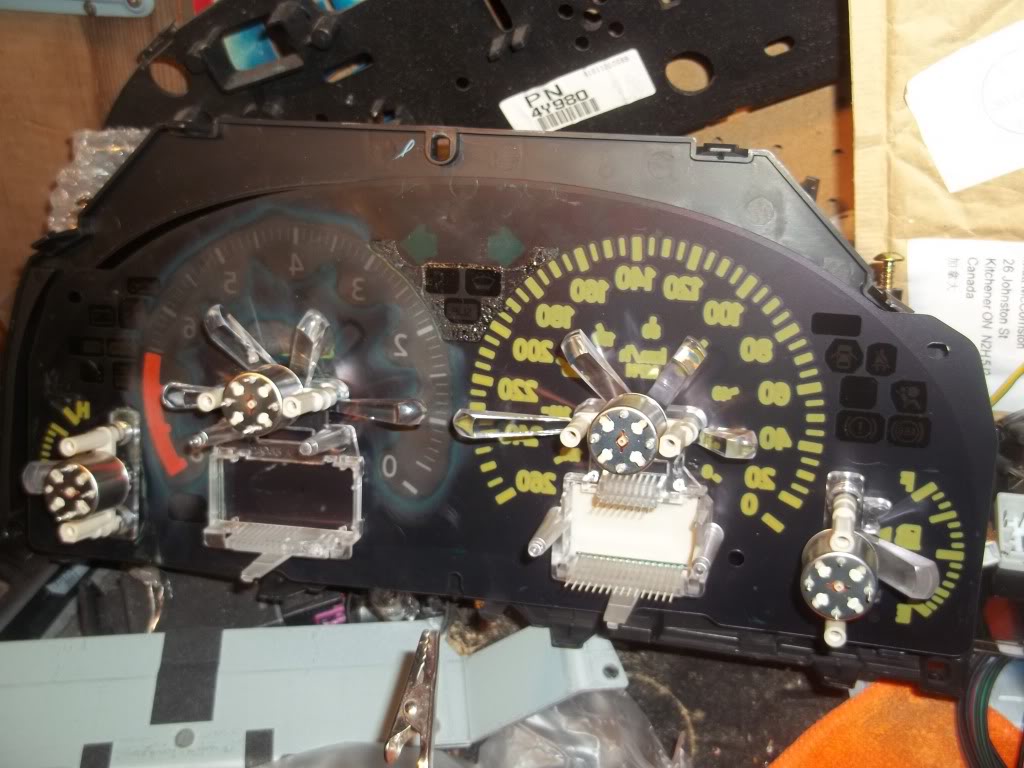
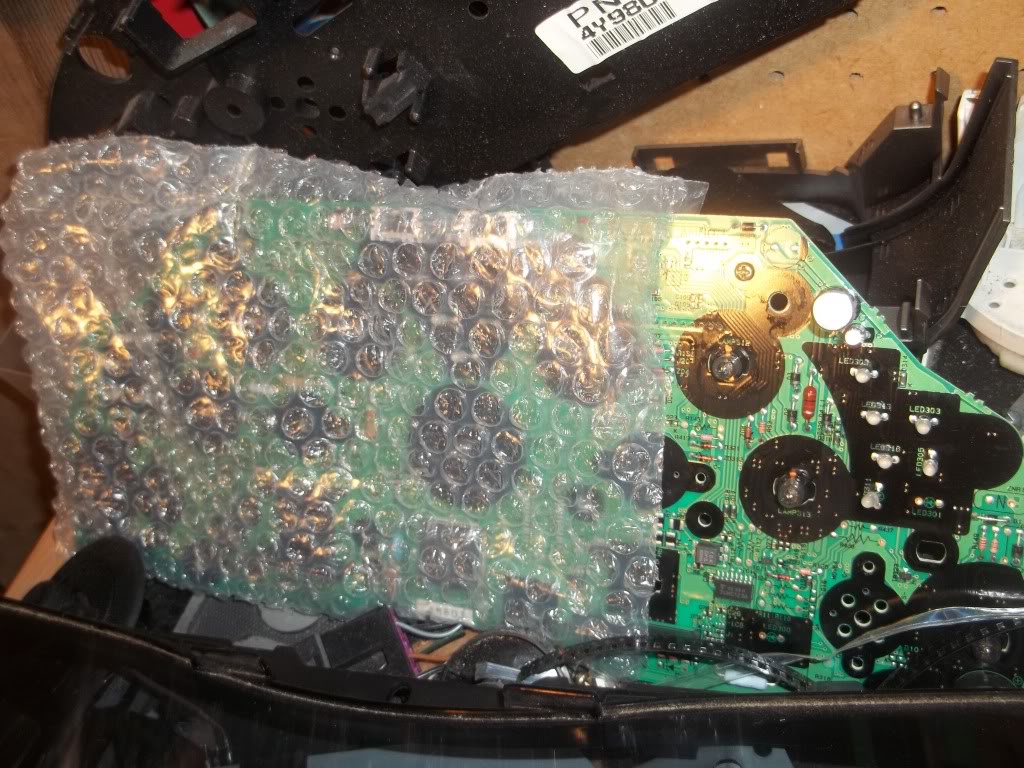
Circuit board tucked away during the job:
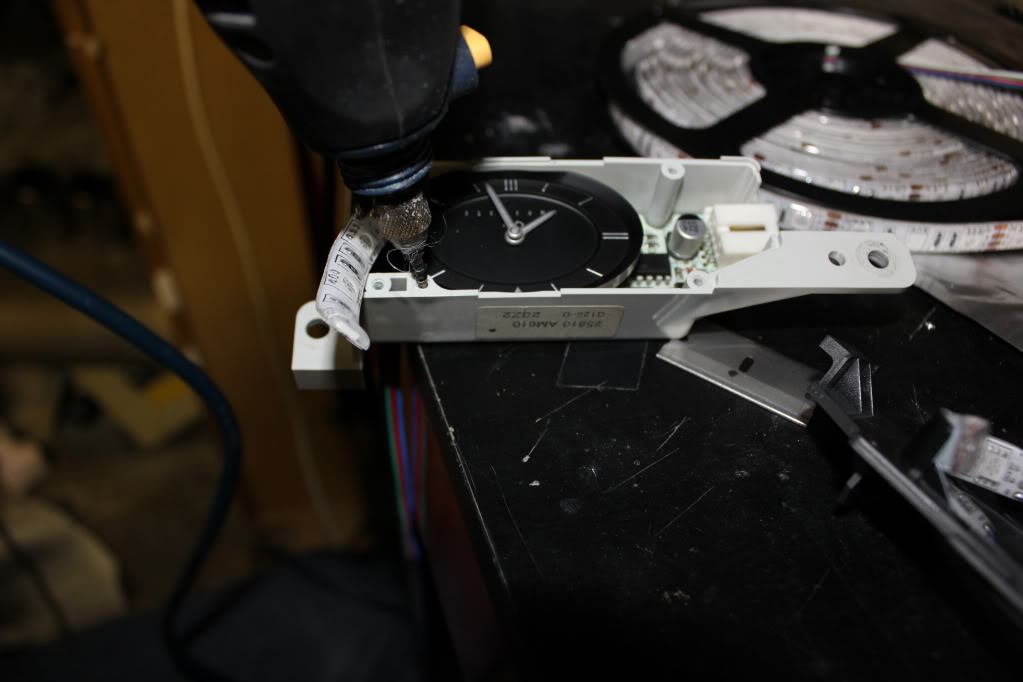
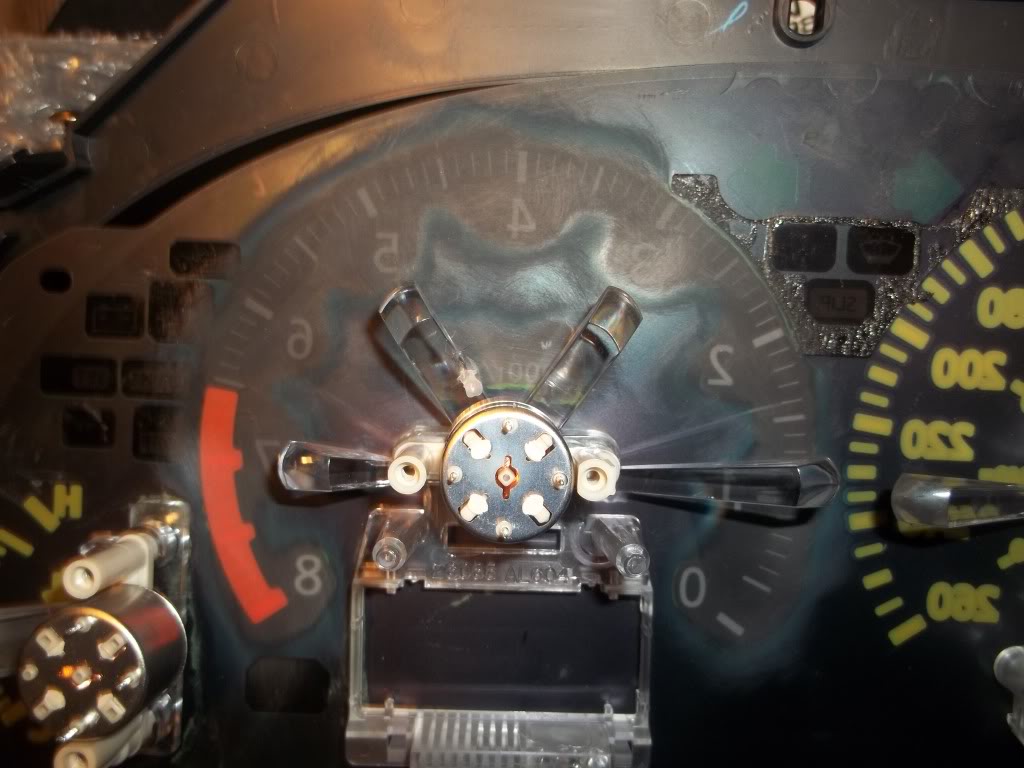
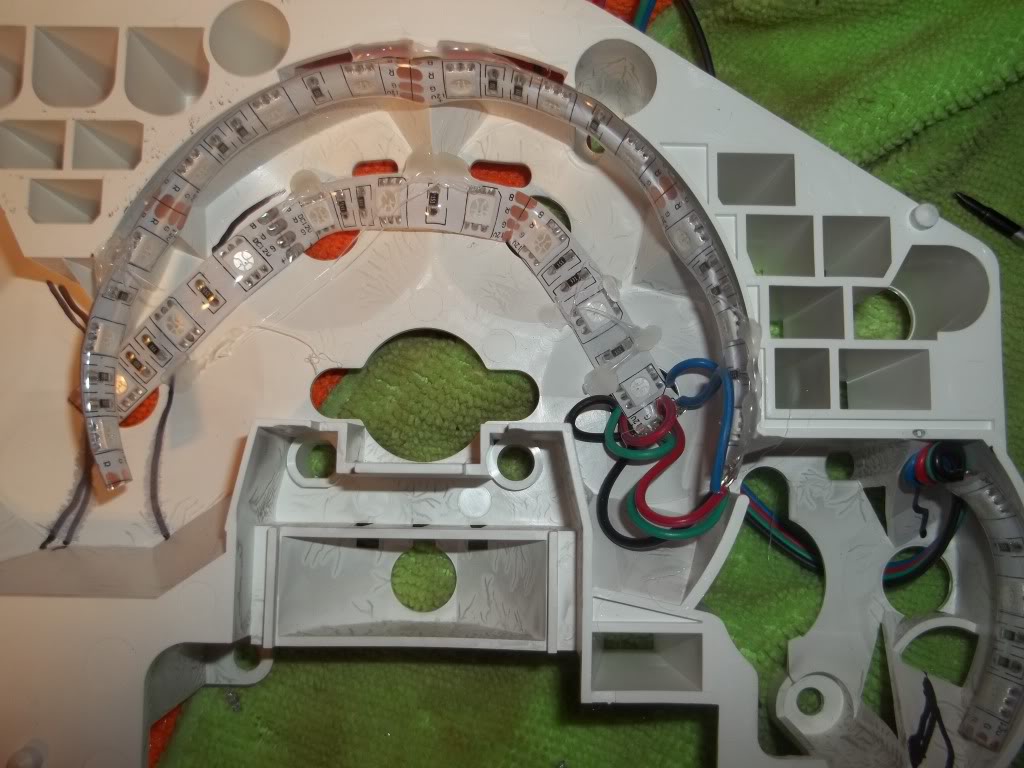
One option for SMD placement, newest test to date:

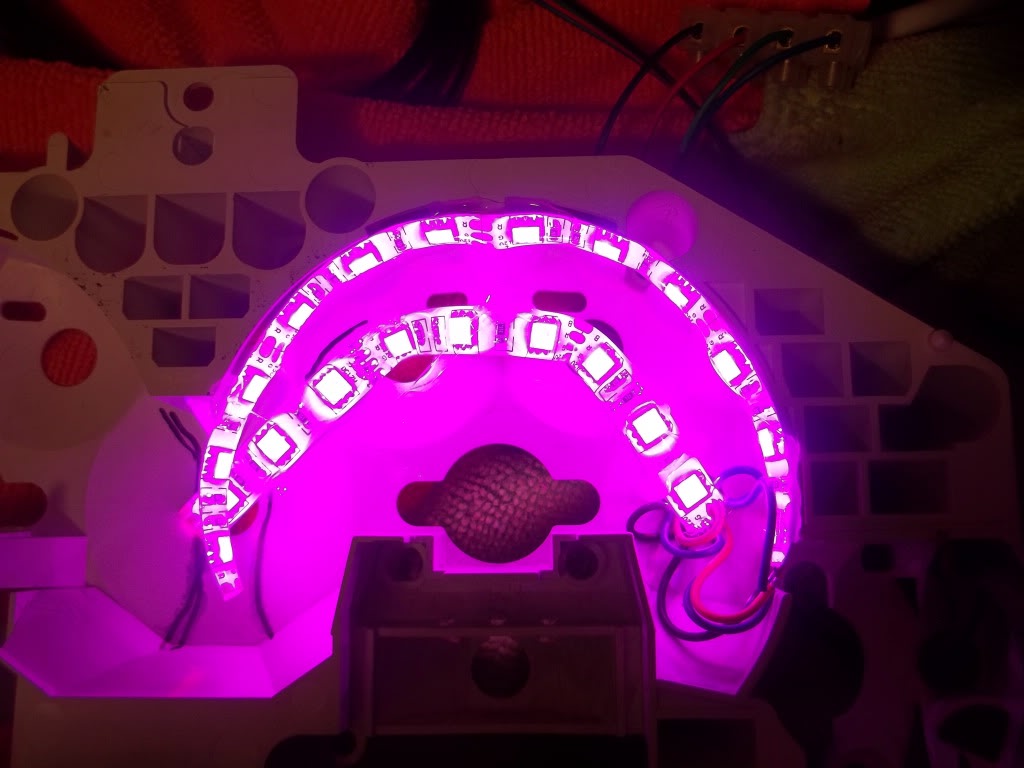

Video of above test setup will be up soon - Digi cam only (overexposed)
I'm trying to find a way to get the needle to glow more without getting into insanity with LED's everywhere. Normally I'd just stick some 3mm's under the needle but I can't do that with RGB's so I'm trying to incorporate the fiberoptic prisms, which is the reason for the inner SMD ring.
I might try drilling into the prisms and inserting a 5mm LED into each, or just putting a 5050 SMD on the end of each one. Having to solder 4 wires onto each individual LED sucks though
Oh well, it'll be worth it
I also found out that the remote I bought does allow a 'colour shift' option. This sets it to change colour on it's own either
A) smooth gradual shift in spectrum
B) More defined random shift in colour
C) Quick random colour shift
There may be more options I haven't messed with it much.
Disassebled, sanded Tach face and needle:
Circuit board tucked away during the job:
One option for SMD placement, newest test to date:
Video of above test setup will be up soon - Digi cam only (overexposed)
I'm trying to find a way to get the needle to glow more without getting into insanity with LED's everywhere. Normally I'd just stick some 3mm's under the needle but I can't do that with RGB's so I'm trying to incorporate the fiberoptic prisms, which is the reason for the inner SMD ring.
I might try drilling into the prisms and inserting a 5mm LED into each, or just putting a 5050 SMD on the end of each one. Having to solder 4 wires onto each individual LED sucks though
Oh well, it'll be worth it
I also found out that the remote I bought does allow a 'colour shift' option. This sets it to change colour on it's own either
A) smooth gradual shift in spectrum
B) More defined random shift in colour
C) Quick random colour shift
There may be more options I haven't messed with it much.