
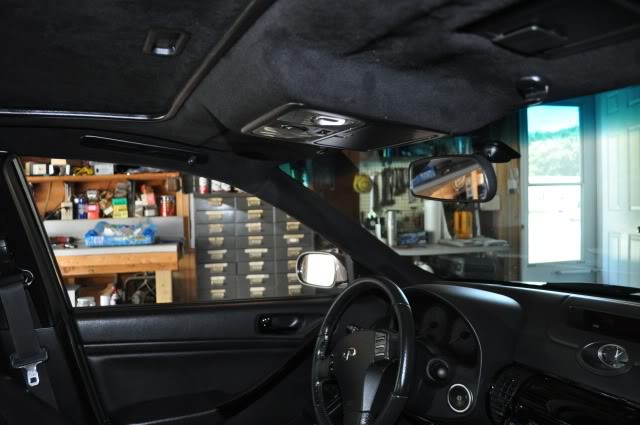
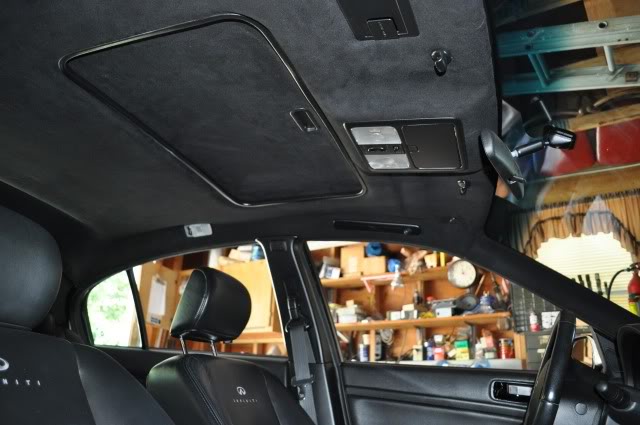
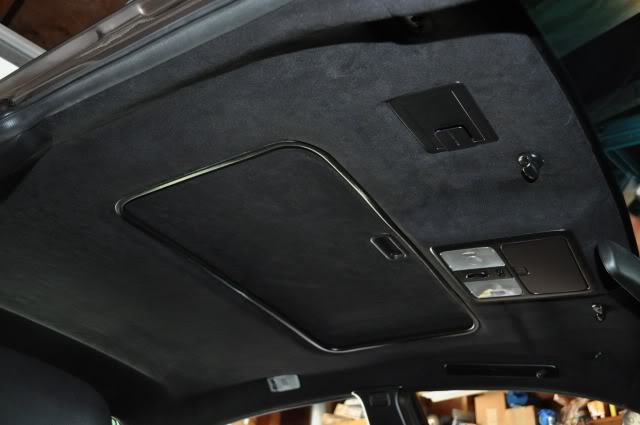
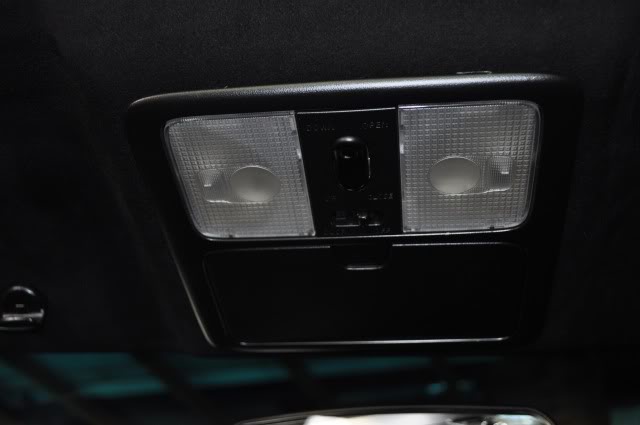
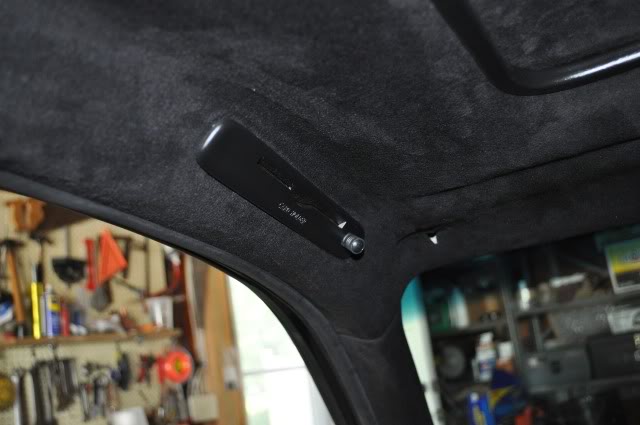
New black "suede" headliner and black plastics.


Joined: Sep 2007
Posts: 5,705
Likes: 53
From: Quahog RI
New black "suede" headliner and black plastics.
I have always wanted an all black interior so I ripped it all apart and did it. I never wrapped a headliner or pillars before so I learned a lot. I just need to address the visors and get the light up steering wheel controls and also address the dash trim that goes from left to right (gonna paint it brown).
I got rid of the OH ****! handles and installed my mic in the card holder. All tan plastics were done black. The seat belts are rubbing the black off on the guide but I can live with it. Also just threw a couple shots of the console and DD just to show the entire interior. Cost be about 70 bucks to do headliner and paint plastics.
Update DIY made https://g35driver.com/forums/g35-sed...r-removal.html
Special thanks to g35Mass who got my steering wheel controls to work.
 </p>
</p>

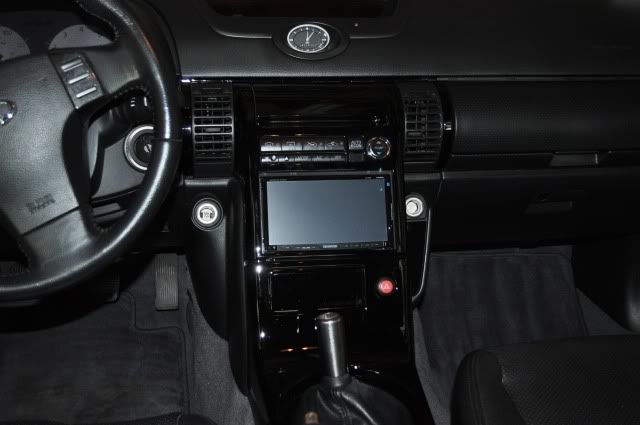
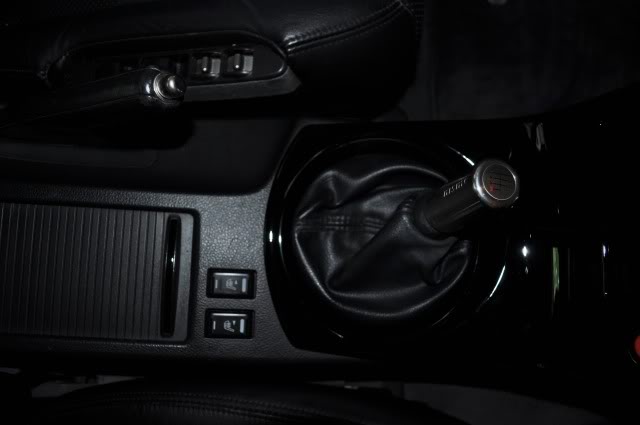
I got rid of the OH ****! handles and installed my mic in the card holder. All tan plastics were done black. The seat belts are rubbing the black off on the guide but I can live with it. Also just threw a couple shots of the console and DD just to show the entire interior. Cost be about 70 bucks to do headliner and paint plastics.
Update DIY made https://g35driver.com/forums/g35-sed...r-removal.html
Special thanks to g35Mass who got my steering wheel controls to work.
</p>
Last edited by naughty240; Aug 2, 2010 at 03:54 PM.


Looks excellent! Only thing I would have done differently is to get rid of the card holders, I've never used mine. But it looks like you made one of them functional by installing your mic (I assume for your bluetooth). I wish my interior was black, I would have done this already...haha. Nice work man, where did you get your suede from?

looks awesome, I'm in the middle of finishing mine up right now as well and I gotta question for you.
see that part that goes around the length of your sunroof, the trim ?
mine no matter how many times I paint it and let it dry, the paint doesn't seem to stick at all, it's all black yea but it ends up being really sticky and untouchable, I get black paint marks all over my hands.
I don't understand it as I'm using Krylon for plastics
also the passenger side roof handle is the same problem, really sticky... all the other plastic pieces are fine and the paint goes on normally.
i'm really stumped, how did you fix yours?
Joined: Sep 2007
Posts: 5,705
Likes: 53
From: Quahog RI
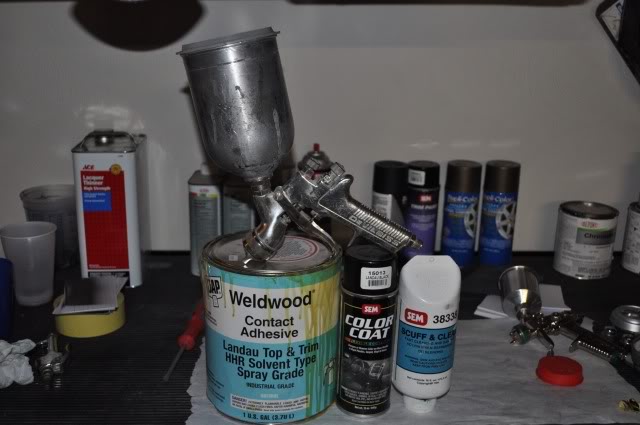
No krylon LOL. Use sem brand "scuff and clean" and sem interior plastic paint. I believe its the color coat line. Ill post a pic of products when I get home for you.
Sem is the best can stuff and cleaning prep materials that are affordable.
Sem is the best can stuff and cleaning prep materials that are affordable.
Last edited by naughty240; Jul 11, 2010 at 09:04 PM.

 microphone was a subtle nice addition.
Trending Topics

This is so sick. So did you use the same paint for all the parts? Looks like the headliner has a nice sublte charcoal color to it which matches great. How long did it take? Please do a write up when you have time!!!
Joined: Sep 2007
Posts: 5,705
Likes: 53
From: Quahog RI
Looks excellent! Only thing I would have done differently is to get rid of the card holders, I've never used mine. But it looks like you made one of them functional by installing your mic (I assume for your bluetooth). I wish my interior was black, I would have done this already...haha. Nice work man, where did you get your suede from?
I got the suede from here http://www.distinctivefabric.com/fab...product=SUEDE2. I cant compare quality to anything because no one I know in RI that I know has done this. Im sure there is better but its good.
Here are the products
Last edited by naughty240; Jul 11, 2010 at 09:02 PM.
Thanks, i was actually able to find a good write up/tips on the RSX site for whoever is interested, the way their pillars,etc connect can't be much different than ours id imagine
http://forums.clubrsx.com/showthread.php?t=639322
http://forums.clubrsx.com/showthread.php?t=639322
nice job man! I like how you mounted the microphone.....a lot of people opt for the flush mount option but doesn't realize their pickup suffer dramatically with the 360 degree receiver hidden. I did mine similarily between the A pillar and headliner, it picks up great.
Joined: Sep 2007
Posts: 5,705
Likes: 53
From: Quahog RI
Thanks, i was actually able to find a good write up/tips on the RSX site for whoever is interested, the way their pillars,etc connect can't be much different than ours id imagine
http://forums.clubrsx.com/showthread.php?t=639322
http://forums.clubrsx.com/showthread.php?t=639322
Gsedan yea I tried to angle toward where I talked. Got the idea from G35Mass thats how he did his.