FAQ & DIY Frequently Asked Questions & Do It Yourself- Sedan and Coupe. Updates Approved by Administrators and Moderators.

DIY Headliner removal

 
Thread Tools
 
Search this Thread
 
Rate Thread
 
  #1  
Old 08-02-2010, 12:57 PM
naughty240's Avatar
Registered User
Thread Starter
iTrader: (29)
Join Date: Sep 2007
Location: Quahog RI
Posts: 5,705
Received 53 Likes on 44 Posts
DIY Headliner removal

A few members asked for it so here it is. M@rco and midnytegsedan have been over and since we are doing interior makeovers we took plenty of pics.
Mods I put this is sedan media since it gets traffic and is just for 1st Gen sedan and it has pics (media?). Would like to see it here for a little bit so sedan guys see it.
Here we go!
Name:  DSC_0104.jpg
Views: 11077
Size:  28.6 KB
Name:  DSC_0106.jpg
Views: 8739
Size:  34.9 KB
Name:  DSC_0107.jpg
Views: 10114
Size:  35.6 KB
Name:  DSC_0124.jpg
Views: 8999
Size:  35.7 KB
Name:  DSC_0117.jpg
Views: 8761
Size:  31.0 KB
Name:  DSC_0116.jpg
Views: 8979
Size:  27.4 KB
Name:  DSC_0115.jpg
Views: 8826
Size:  32.3 KB
Name:  DSC_0113.jpg
Views: 8934
Size:  33.6 KB
Name:  DSC_0111.jpg
Views: 9057
Size:  28.6 KB
Name:  DSC_0108.jpg
Views: 8825
Size:  36.9 KB

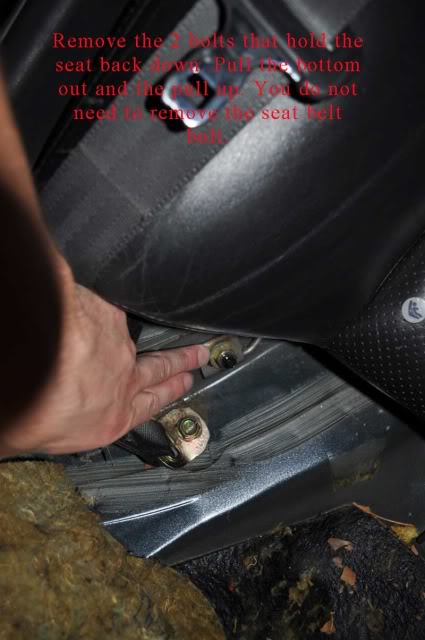
I didnt get a shot to remove the seat bottom but its easy. Just look at where the seat bottom meets the carpet and pull the little handle. Pull the handle and lift the seat up. Repeat on other side.
Name:  DSC_0118.jpg
Views: 8731
Size:  43.5 KB
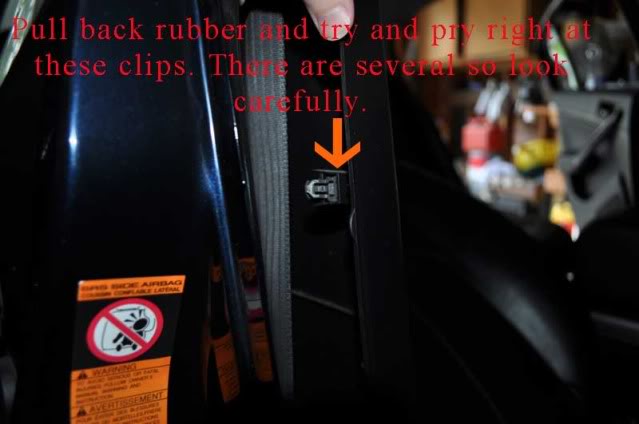
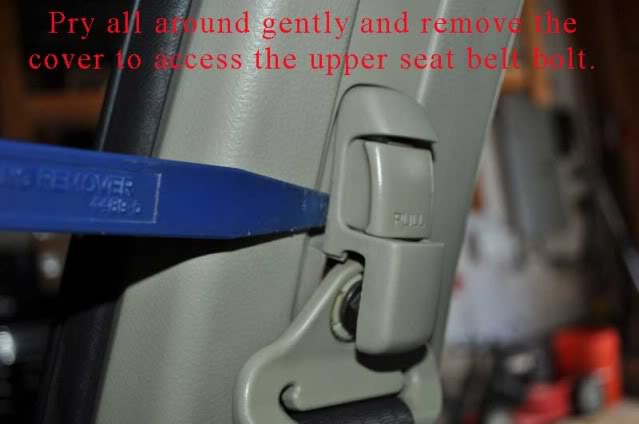
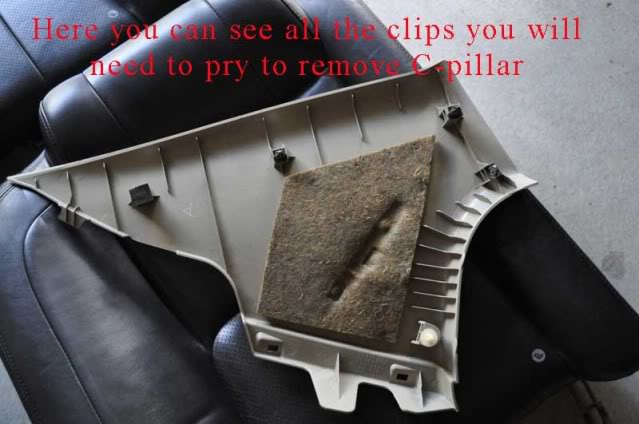
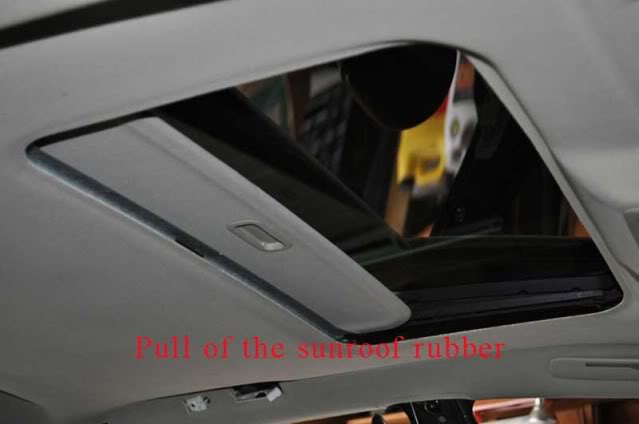
Missed a shot here too but its easy. Just pull back rubber and pry the clips on the small black trim piece. The top part of the trim part snaps into the C-pillar. Pic below shows the holes it snaps into.
Name:  DSC_0120.jpg
Views: 8701
Size:  43.6 KB
Name:  DSC_0123.jpg
Views: 9216
Size:  22.8 KB
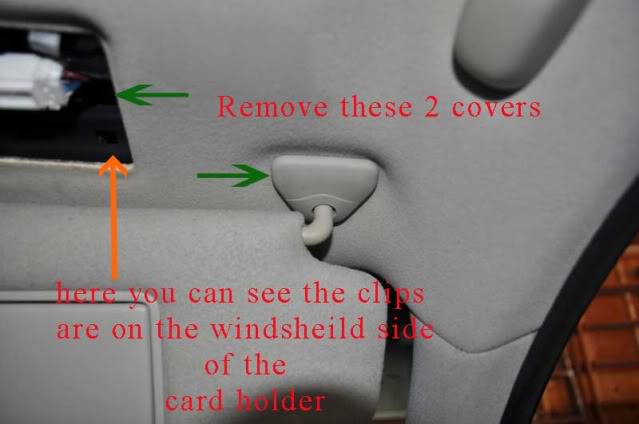
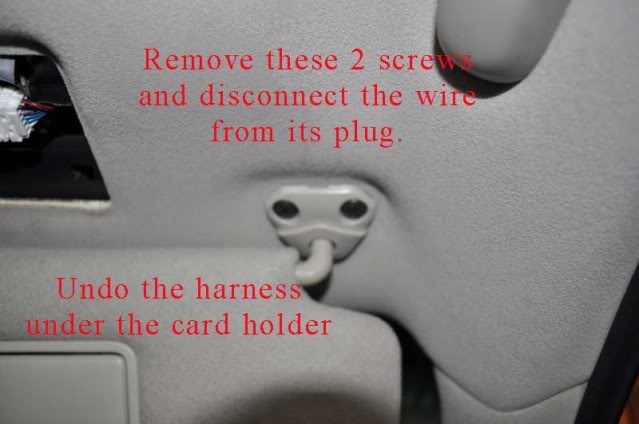
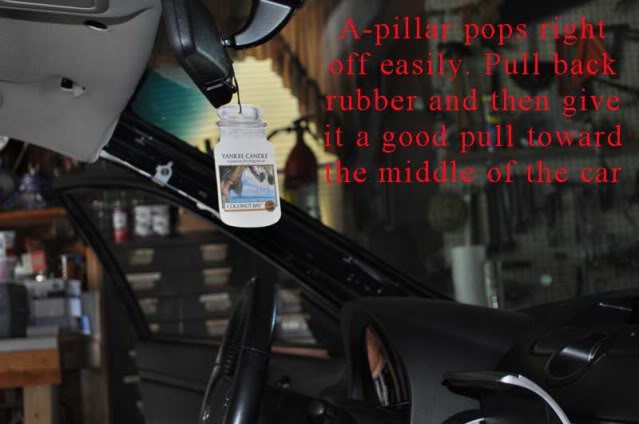
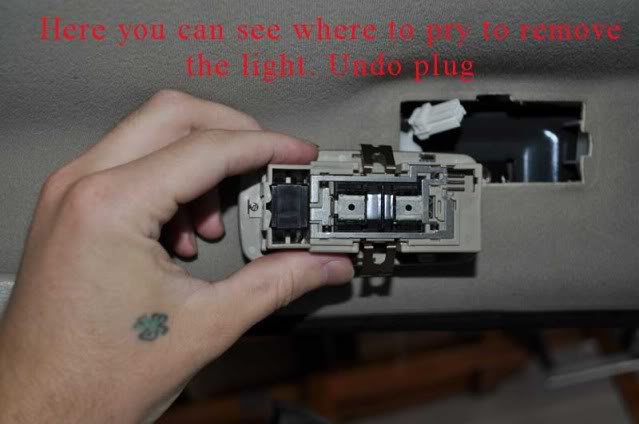
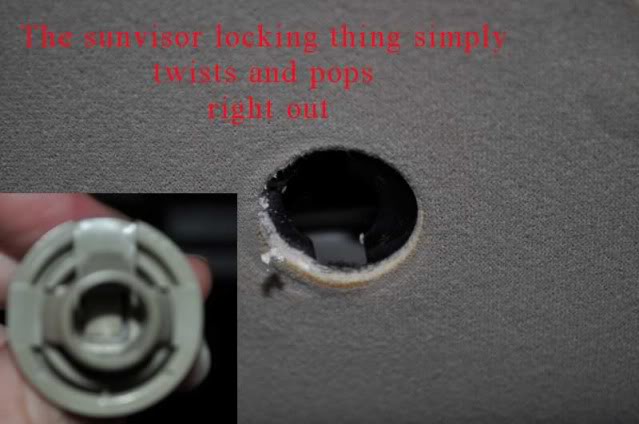
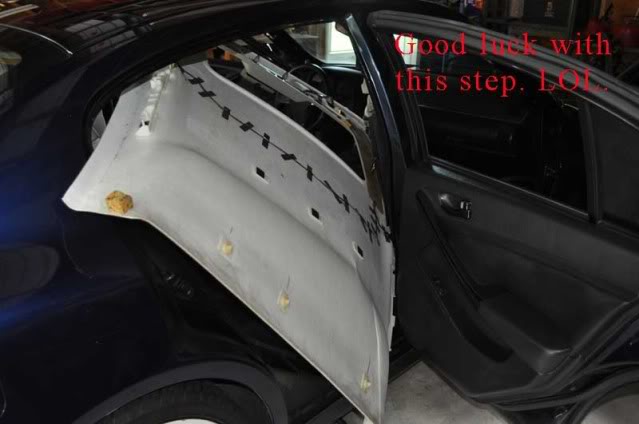
Pull down at the sunglass holder to get the front part of the liner to full. The Back of the liner has clips that pop out. You can see them in the last pic. A little pull on the sides releases the sides.

Well there you have it.
Name:  DSC_0125.jpg
Views: 9232
Size:  32.1 KB
 
The following 3 users liked this post by naughty240:
Henry Els (10-28-2019), Wrathernaut (06-06-2011), zhangweidai (08-11-2011)
  #2  
Old 08-02-2010, 01:16 PM
The Stimulation's Avatar
Registered User
iTrader: (69)
Join Date: Aug 2007
Location: Los Angeles
Posts: 10,850
Received 158 Likes on 108 Posts
Great thread. This will help me remember how to put back in all my interior pieces since I forgot which bolts went where and it's been a few months since I took it all out, haha.
 
  #3  
Old 08-02-2010, 01:31 PM
itgogitrev's Avatar
Registered User
iTrader: (1)
Join Date: Feb 2008
Location: Cincy
Posts: 976
Received 10 Likes on 9 Posts
Thread....

COMM + D.

 
  #4  
Old 08-02-2010, 01:33 PM
naughty240's Avatar
Registered User
Thread Starter
iTrader: (29)
Join Date: Sep 2007
Location: Quahog RI
Posts: 5,705
Received 53 Likes on 44 Posts
Originally Posted by itgogitrev
Thread....

COMM + D.

lol whats that mean?
 
  #5  
Old 08-02-2010, 01:34 PM
Wrathernaut's Avatar
Gentle Manne of Leisure

iTrader: (5)
Join Date: Nov 2008
Location: Pennsylvania
Posts: 7,966
Received 1,038 Likes on 611 Posts
I hope you posted this in the DIY forum too!
 
  #6  
Old 08-02-2010, 01:45 PM
naughty240's Avatar
Registered User
Thread Starter
iTrader: (29)
Join Date: Sep 2007
Location: Quahog RI
Posts: 5,705
Received 53 Likes on 44 Posts
Originally Posted by Wrathernaut
I hope you posted this in the DIY forum too!
Its locked or something. Cant start thread in that section.
 
  #7  
Old 08-02-2010, 02:14 PM
itgogitrev's Avatar
Registered User
iTrader: (1)
Join Date: Feb 2008
Location: Cincy
Posts: 976
Received 10 Likes on 9 Posts
Originally Posted by naughty240
lol whats that mean?
Bookmarked on my browser. This is a keeper.
 
  #8  
Old 08-02-2010, 02:28 PM
CandlestickPark's Avatar
ill Sedan

iTrader: (87)
Join Date: Jun 2007
Location: Long Beach, SoCal
Posts: 23,261
Received 2,687 Likes on 1,448 Posts
Excellent writeup and pics. Thanks for sharing this.
 
  #9  
Old 08-02-2010, 03:47 PM
thescreensavers's Avatar
Mr.202?

iTrader: (10)
Join Date: Apr 2009
Location: WPB
Posts: 9,751
Received 205 Likes on 163 Posts
Originally Posted by naughty240
Its locked or something. Cant start thread in that section.

https://g35driver.com/forums/body-in...b-span-19.html\

good DIY btw
 
  #10  
Old 08-02-2010, 04:12 PM
M@rCo's Avatar
Registered User
iTrader: (4)
Join Date: Apr 2007
Location: Rhode Island
Posts: 638
Received 1 Like on 1 Post
Name:  DSC_0125.jpg
Views: 8713
Size:  32.1 KB
Haha hardest part of the whole process. DIY came out good..cant wait to finish this project
 
  #11  
Old 08-02-2010, 05:32 PM
toymachine2009's Avatar
Registered User
iTrader: (7)
Join Date: Dec 2006
Location: Vegas
Posts: 1,855
Likes: 0
Received 6 Likes on 6 Posts
Sweet! Good DIY!
 
  #12  
Old 08-02-2010, 09:34 PM
CG4DR's Avatar
Registered User
iTrader: (12)
Join Date: Apr 2010
Location: FL
Posts: 3,139
Received 36 Likes on 31 Posts
the lights above the rear doors just pop off with a flat head? i have some LEDs on the way and wasn't sure how to change the bulb.
 
  #13  
Old 08-03-2010, 12:24 AM
naughty240's Avatar
Registered User
Thread Starter
iTrader: (29)
Join Date: Sep 2007
Location: Quahog RI
Posts: 5,705
Received 53 Likes on 44 Posts
Originally Posted by StormTroopa
the lights above the rear doors just pop off with a flat head? i have some LEDs on the way and wasn't sure how to change the bulb.
I would a plastic tool but yup just pry where those tabs are.
 
  #14  
Old 08-03-2010, 01:25 AM
CG4DR's Avatar
Registered User
iTrader: (12)
Join Date: Apr 2010
Location: FL
Posts: 3,139
Received 36 Likes on 31 Posts
thanks!!
 
  #15  
Old 08-03-2010, 04:00 AM
Wrathernaut's Avatar
Gentle Manne of Leisure

iTrader: (5)
Join Date: Nov 2008
Location: Pennsylvania
Posts: 7,966
Received 1,038 Likes on 611 Posts
Just PM a mod asking them to move it to the DIY as a sticky, this is a great write-up.


You have already rated this thread Rating: Thread Rating: 0 votes,  average.

Quick Reply: DIY Headliner removal


All times are GMT -4. The time now is 12:04 PM.