
Autokits-X CF Diffuser Pics & Review


Autokits-X CF Diffuser Pics & Review
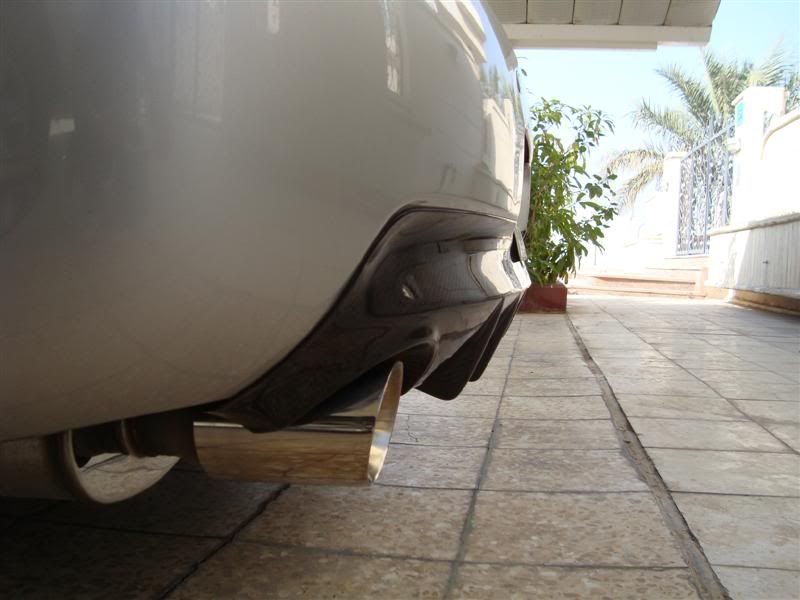
So today I received my CF diffuser from customs (they left it there for two weeks and in the end didn't charge anything  ). I installed it a couple hours ago and snapped a few quick photos. I'll be taking better pics maybe tomorrow when I get the chance. Onto the review...
Package
The diffuser was very nicely packed in the box with plenty of bubble wrap and protective material. The box even has a fragile sticker on it lol. They get a thumbs up from me for actually including the sticker since non of the previous body parts I ordered from other vendors had any.

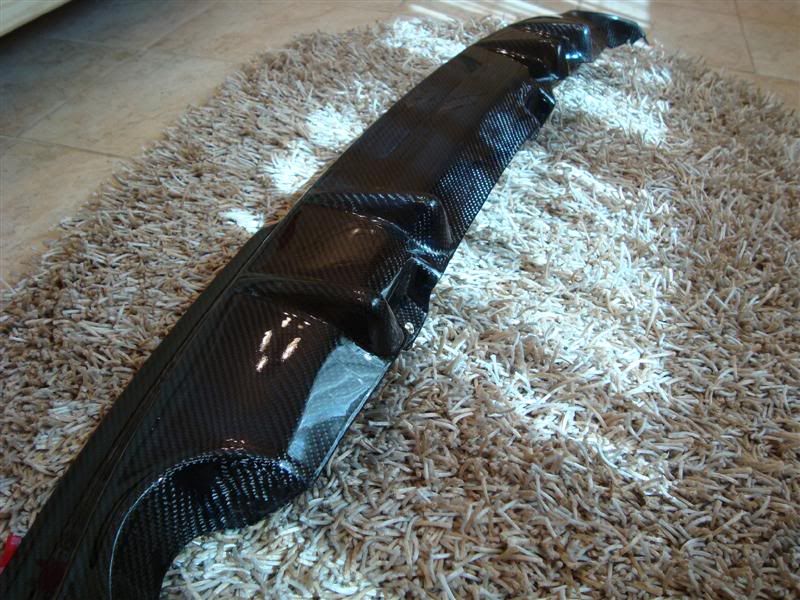
Quality
The quality and finish is top notch. Period. The weave was perfect, the mounting points are spot on and the edges are nice and smooth.

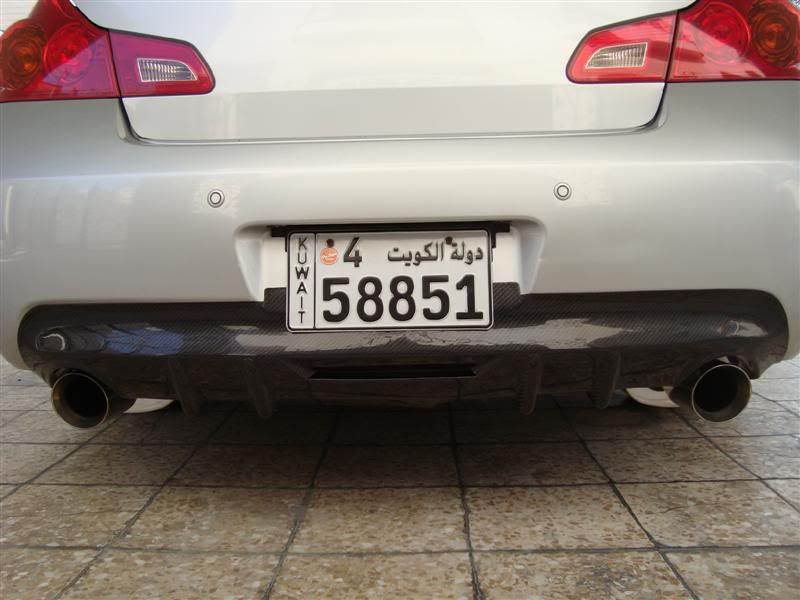

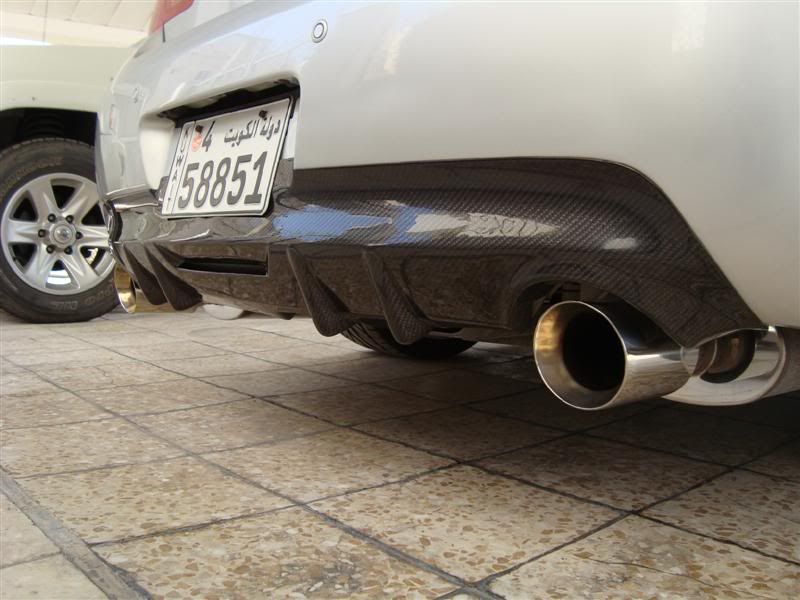
Installation
The diffuser is mounted using 3 clips and 3M heavy duty double sided tape. The 3M tape is already placed on the diffuser. All you need to do is peel off the plastic cover from the tape and mount the diffuser. As for the clips, 1 clip is supplied to hold the top part of the diffuser while the other two locations use the original bumper clips on the bottom. Installation was a breeze and like i previously said, all the holes lined up perfectly. The whole process took about 20 minutes. 15 minutes to clean the rear bumper area and 5 minutes to actually install it.

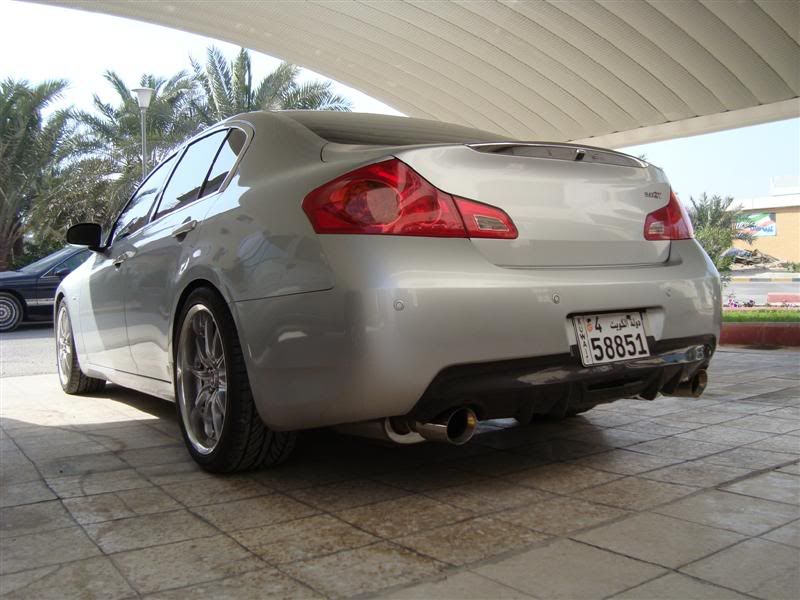
Final Verdict
I love it! The product is excellent and customer service is great as well. I couldn't be any happier
Thank you Autokits-X!!
). I installed it a couple hours ago and snapped a few quick photos. I'll be taking better pics maybe tomorrow when I get the chance. Onto the review...Package
The diffuser was very nicely packed in the box with plenty of bubble wrap and protective material. The box even has a fragile sticker on it lol. They get a thumbs up from me for actually including the sticker since non of the previous body parts I ordered from other vendors had any.
Quality
The quality and finish is top notch. Period. The weave was perfect, the mounting points are spot on and the edges are nice and smooth.
Installation
The diffuser is mounted using 3 clips and 3M heavy duty double sided tape. The 3M tape is already placed on the diffuser. All you need to do is peel off the plastic cover from the tape and mount the diffuser. As for the clips, 1 clip is supplied to hold the top part of the diffuser while the other two locations use the original bumper clips on the bottom. Installation was a breeze and like i previously said, all the holes lined up perfectly. The whole process took about 20 minutes. 15 minutes to clean the rear bumper area and 5 minutes to actually install it.
Final Verdict
I love it! The product is excellent and customer service is great as well. I couldn't be any happier
Thank you Autokits-X!!

Looks great! your car looked awful without it  I will be installing mine soon so i was wondering if you drilled holes for the extreme side two clips OR did you just snap on the alligator clips provided?
Thanks
I will be installing mine soon so i was wondering if you drilled holes for the extreme side two clips OR did you just snap on the alligator clips provided?Thanks


") you're making me
you're making me 


Trending Topics


AWESOME...I am convinced this diffuser in CF would look great on any color car.
I love mine as well--definitely one of the best things I have bought for my car so far. THANK YOU AUTOKITS-X!
I love mine as well--definitely one of the best things I have bought for my car so far. THANK YOU AUTOKITS-X!


