
OB 2007 G35x Paint Correction and 3 Piece Wheel Refinish


OB 2007 G35x Paint Correction and 3 Piece Wheel Refinish
Hey guys, just figured I'd share one of the projects I tackled about a month ago. The guy I bought the car took the car through the car-wash (non-touchless) pretty regularly, and it seems like he never waxed it. The result, faded, marred, and scratched black paint. This car easily had the most beat paint of anything I've owned to date, and it was really bothering me as I've always been **** about keeping my vehicles looking their best.
With that in mind, I purchased a Porter Cable 7424XP buffer and all the supporting accessories to have my hand at some paint correction on this bad boy. The one thing I failed to do through this process was take some good before photos or 50/50 shots to show the difference, so I guess you'll be left to evaluate the final results. It's a shame, because the difference was absolutely ridiculous. There are still some pretty serious RID's throughout (not to mention several door dings from the kind folks in my college parking lot), but hey for being 7 years old it's not too bad.
Process:
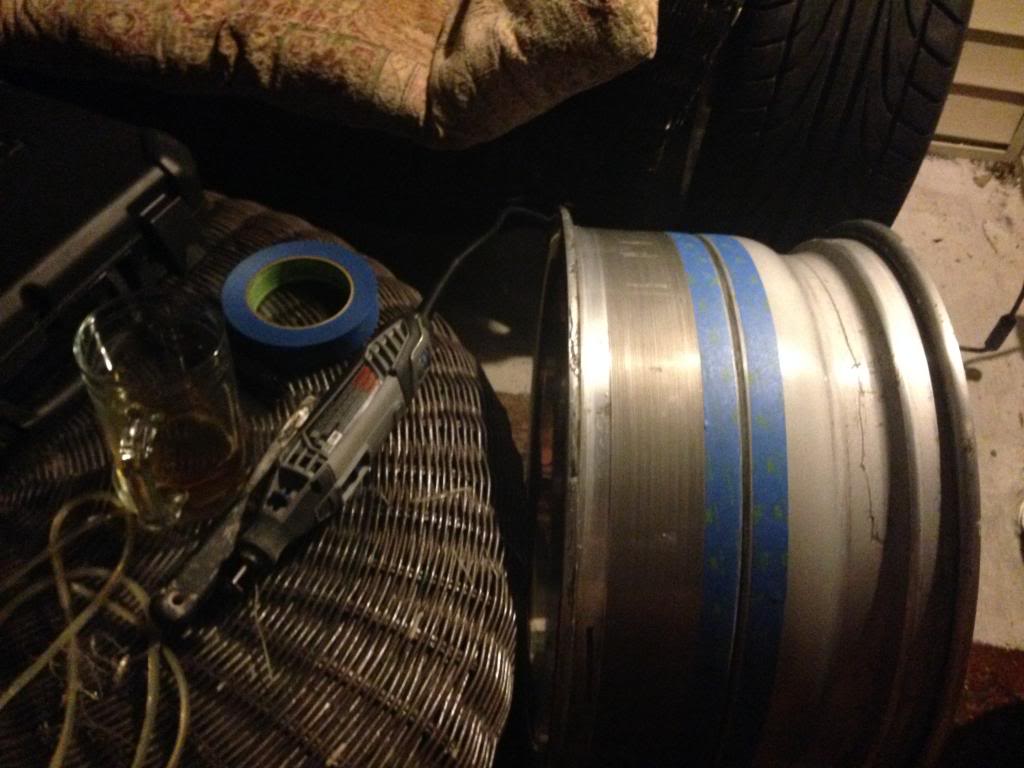
Only shot I have during the actual process is halfway through taping, which was probably overboard but I didn't want to spend hours removing dust from hard to get to areas.

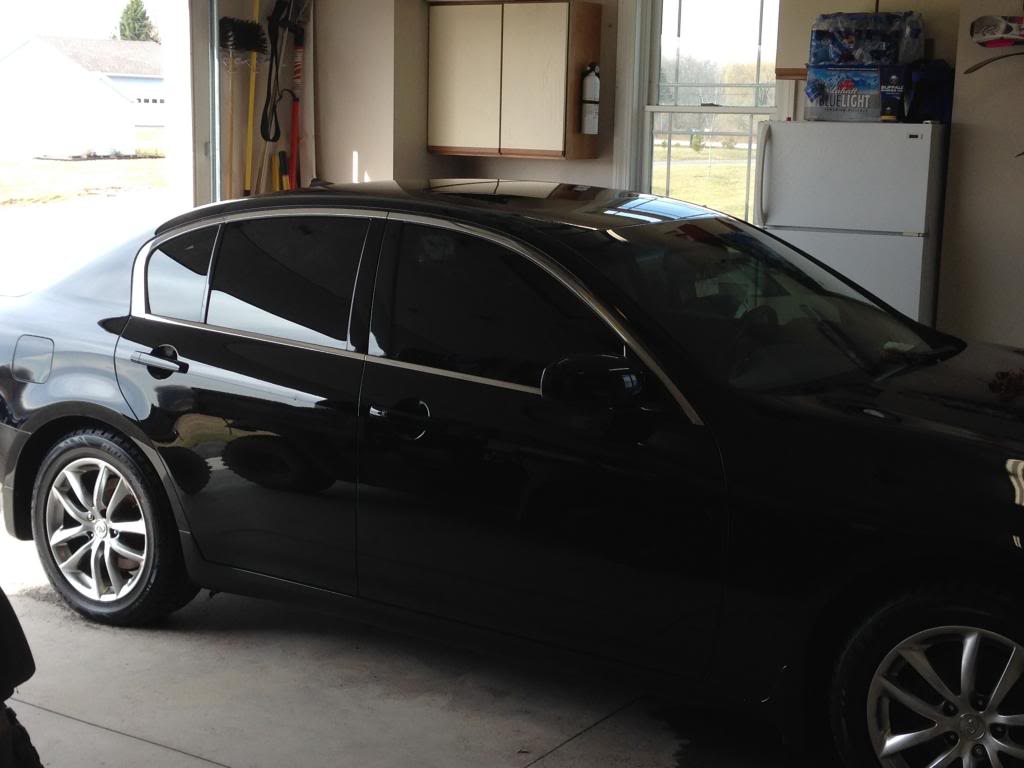
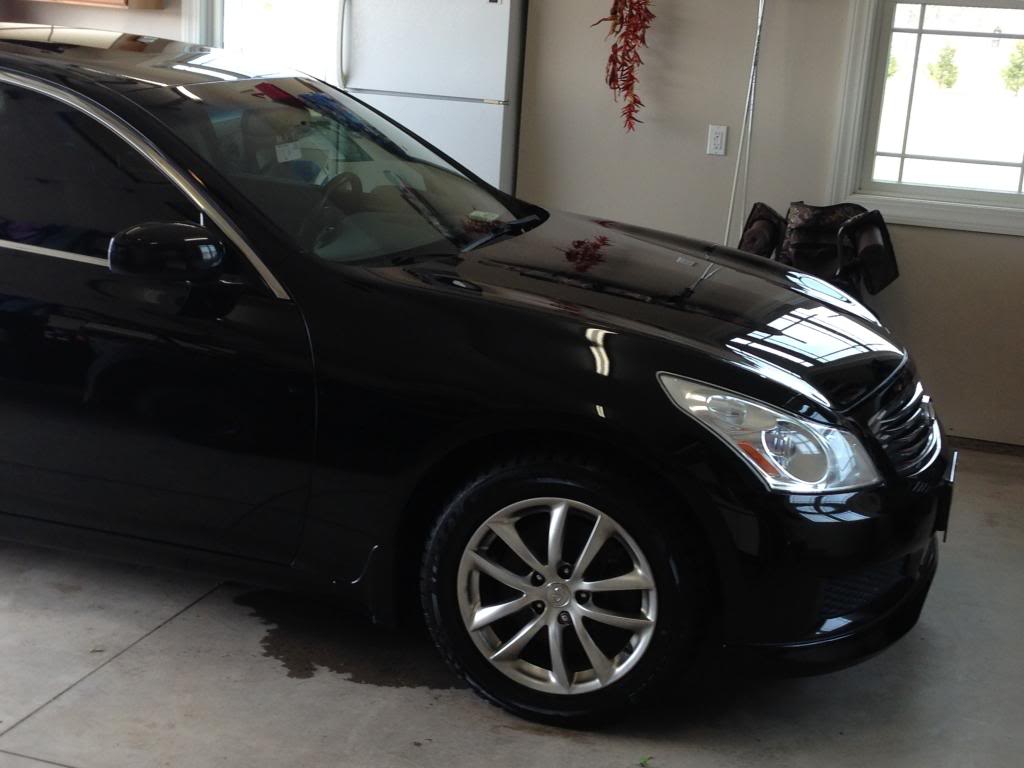
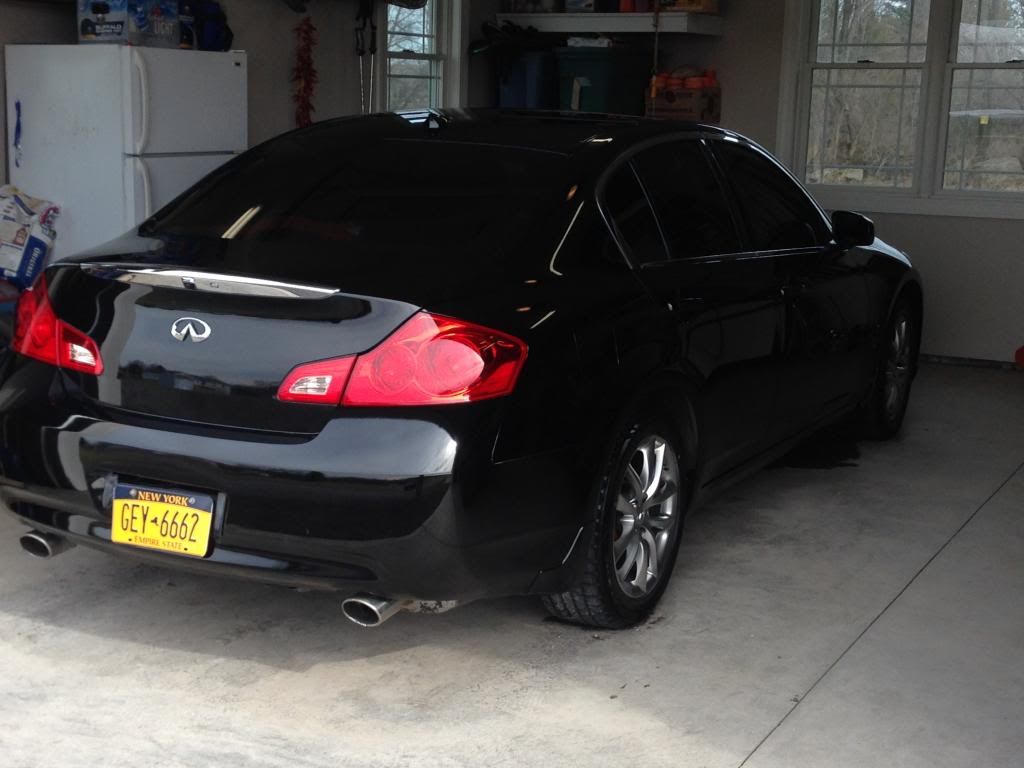
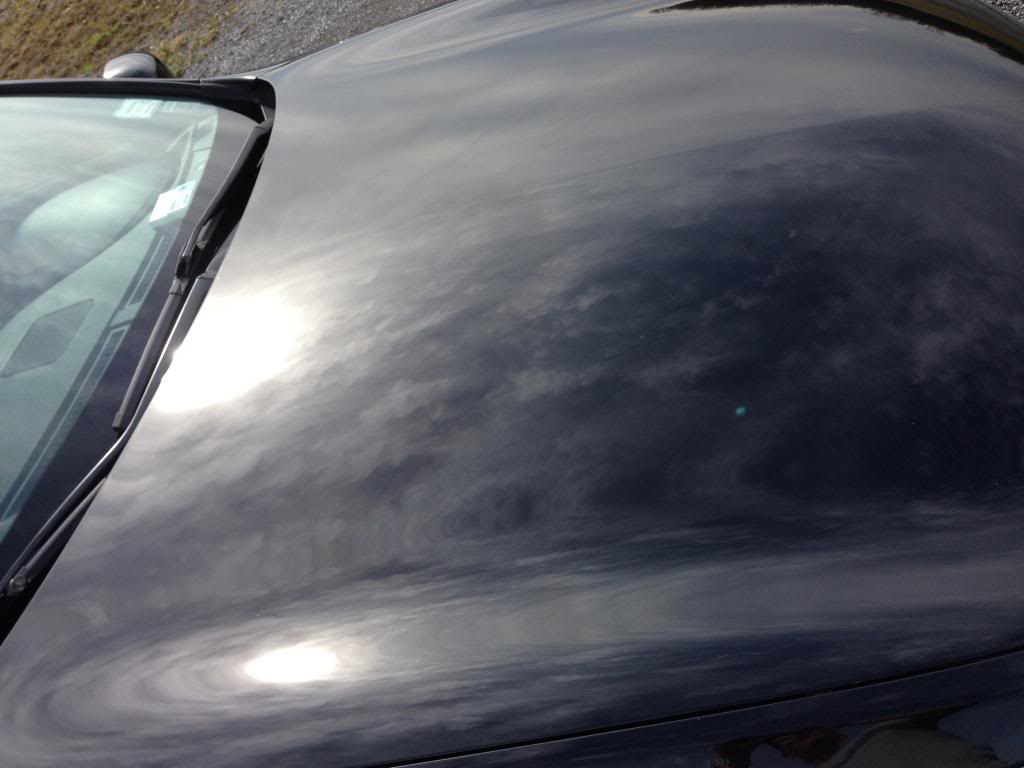
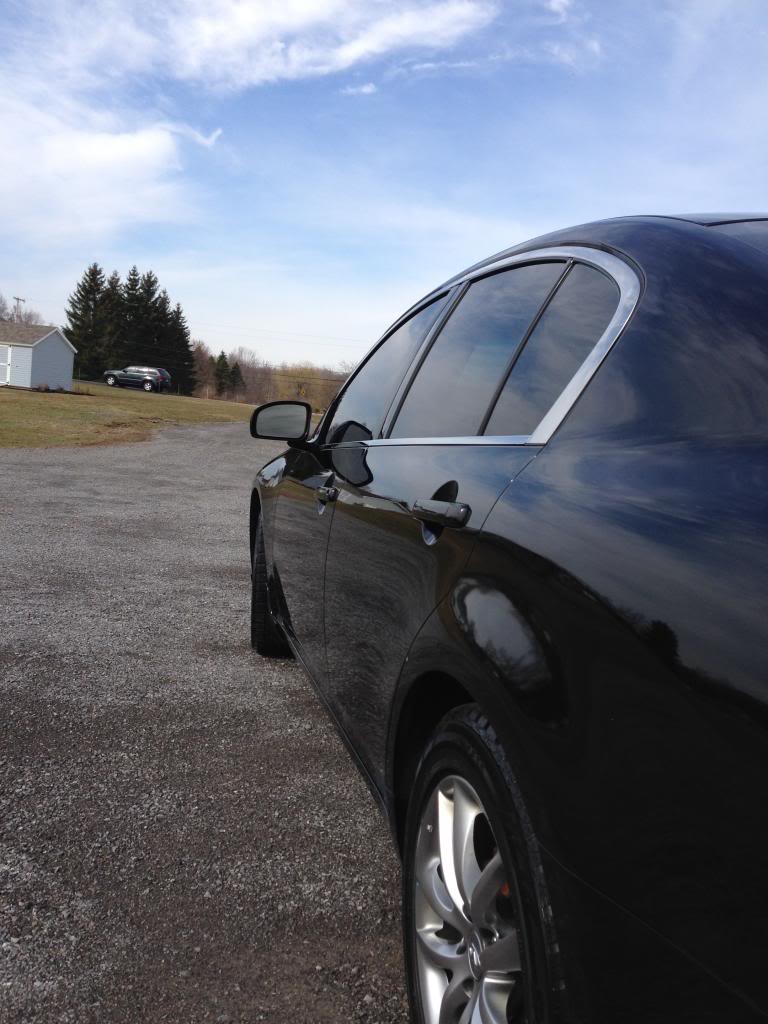
Anyhow, on to the after shots:
Garage shots:
Outside Shots:
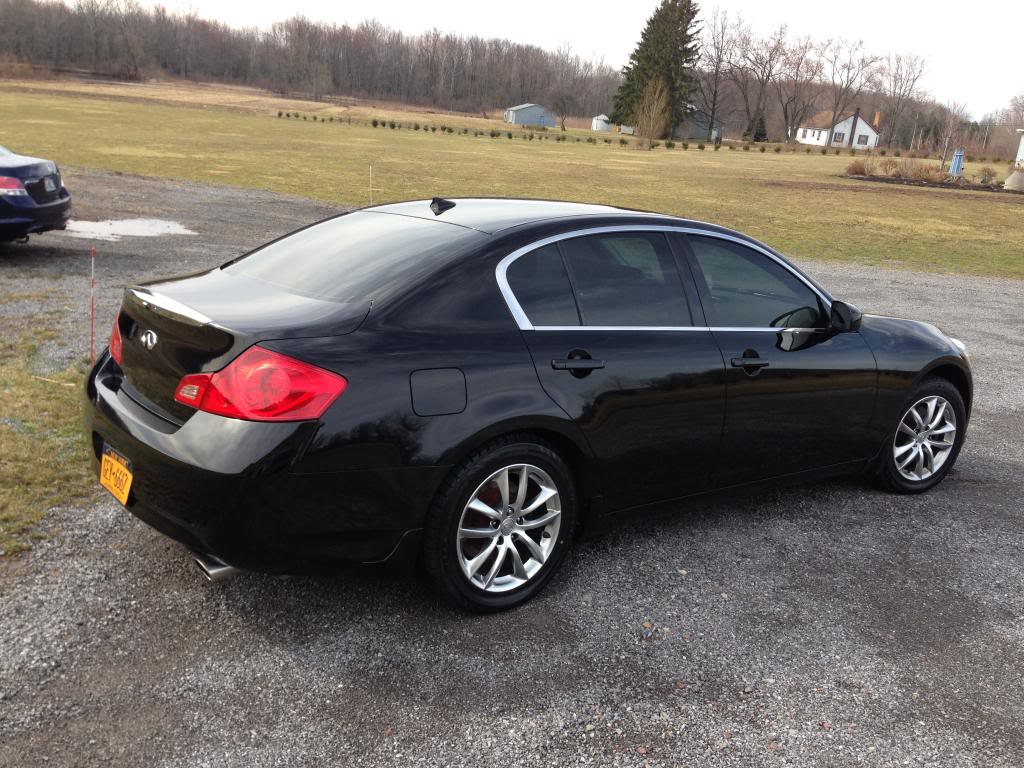
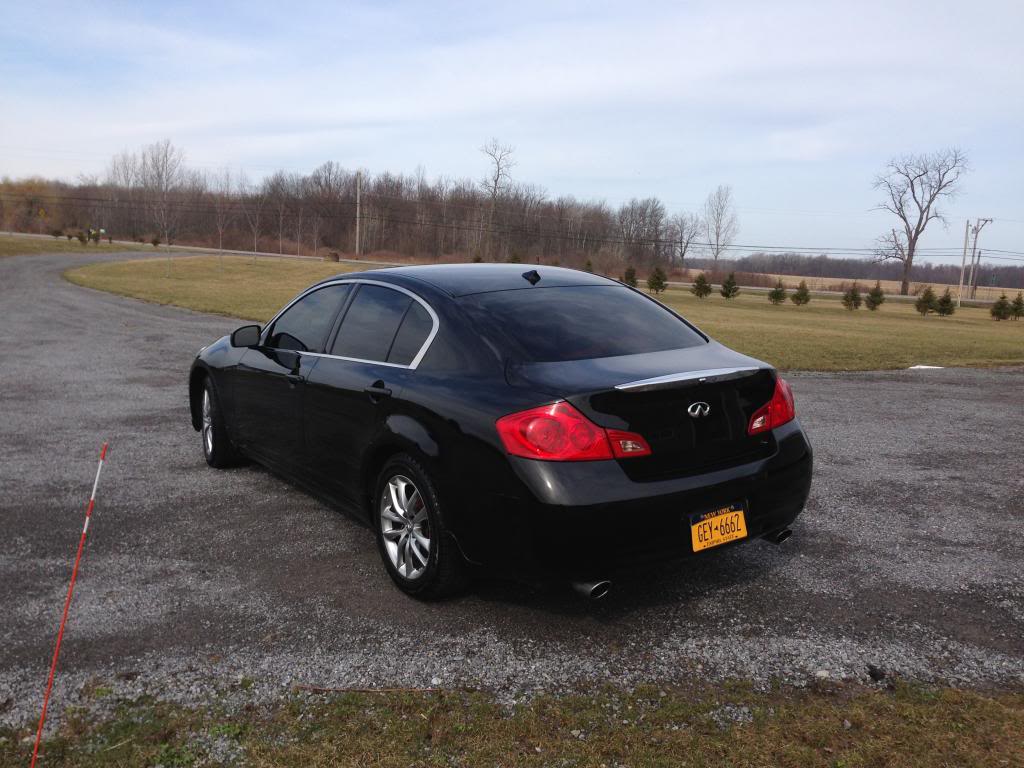
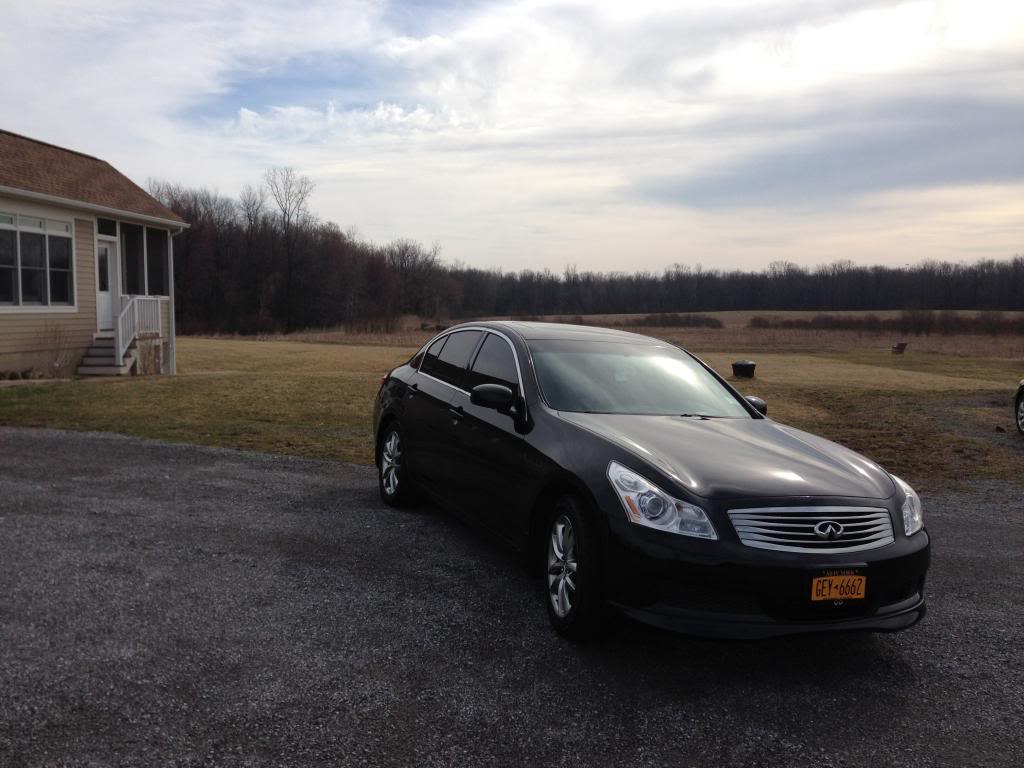
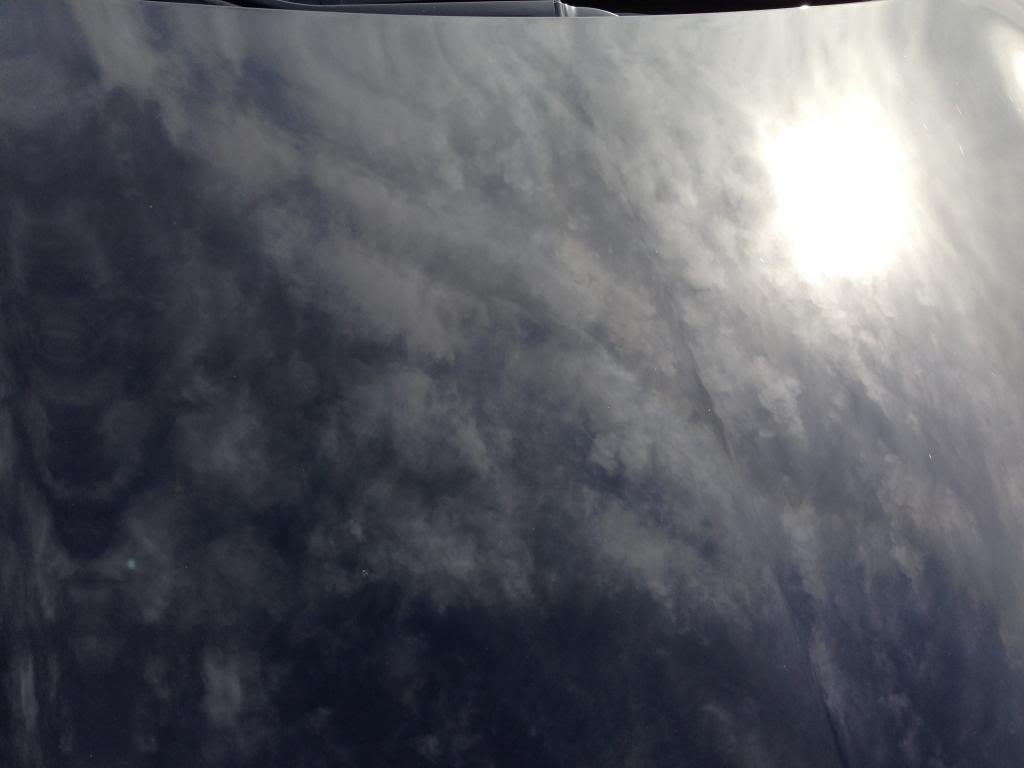
Mirror:
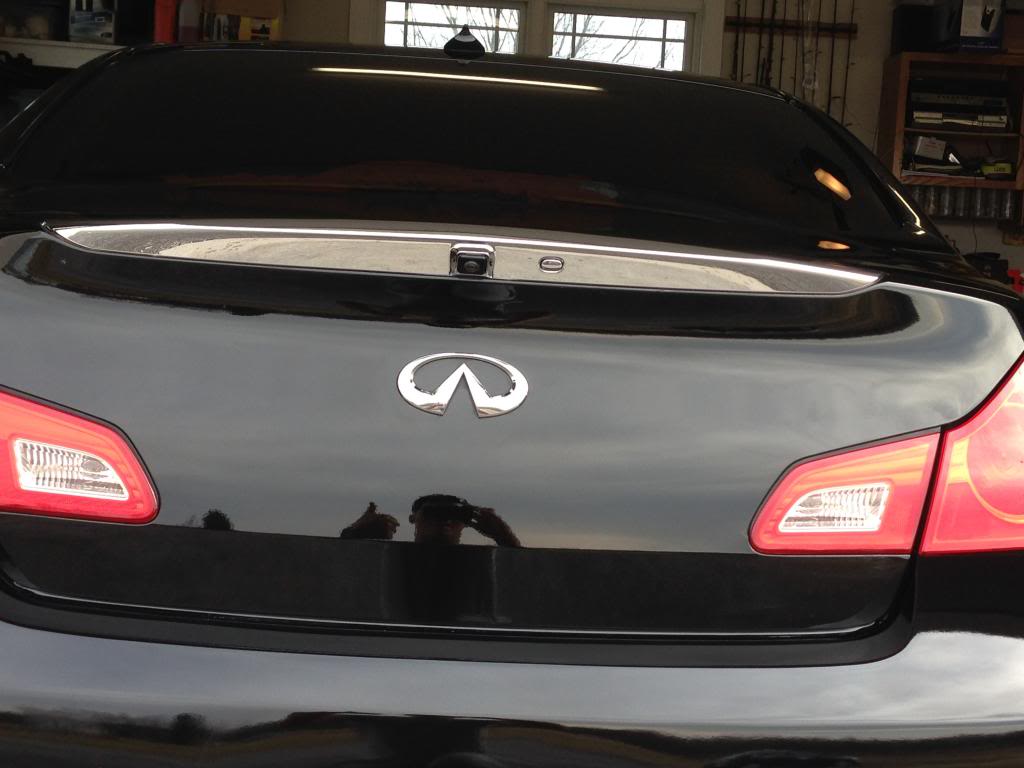
Love this shot:
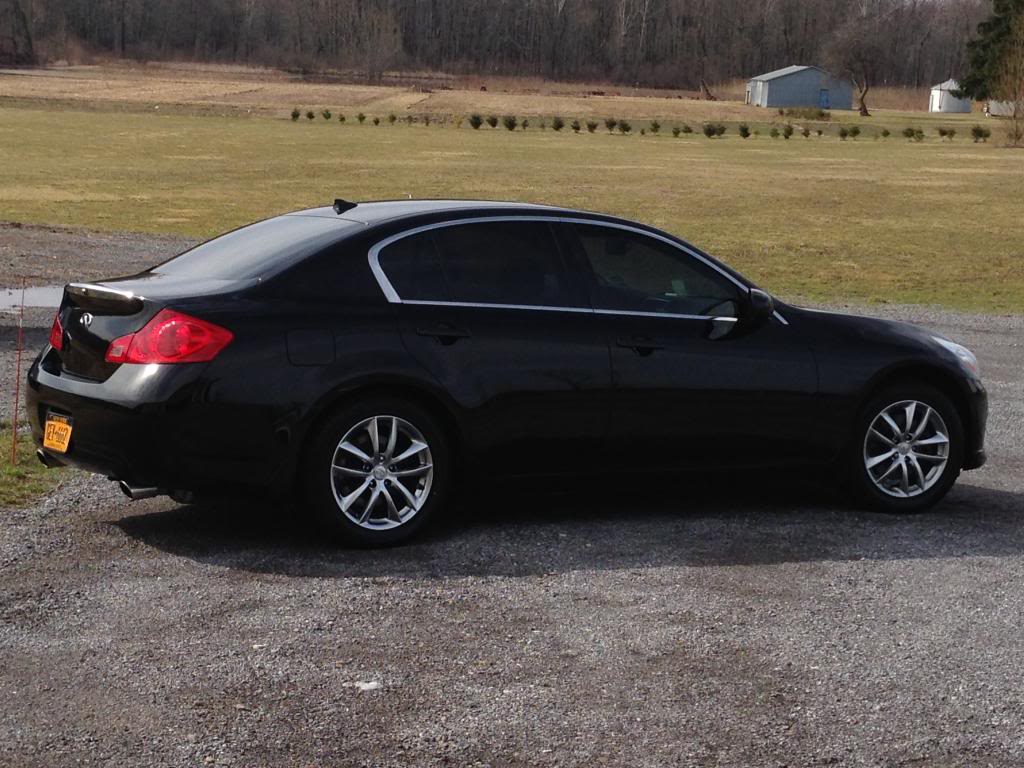
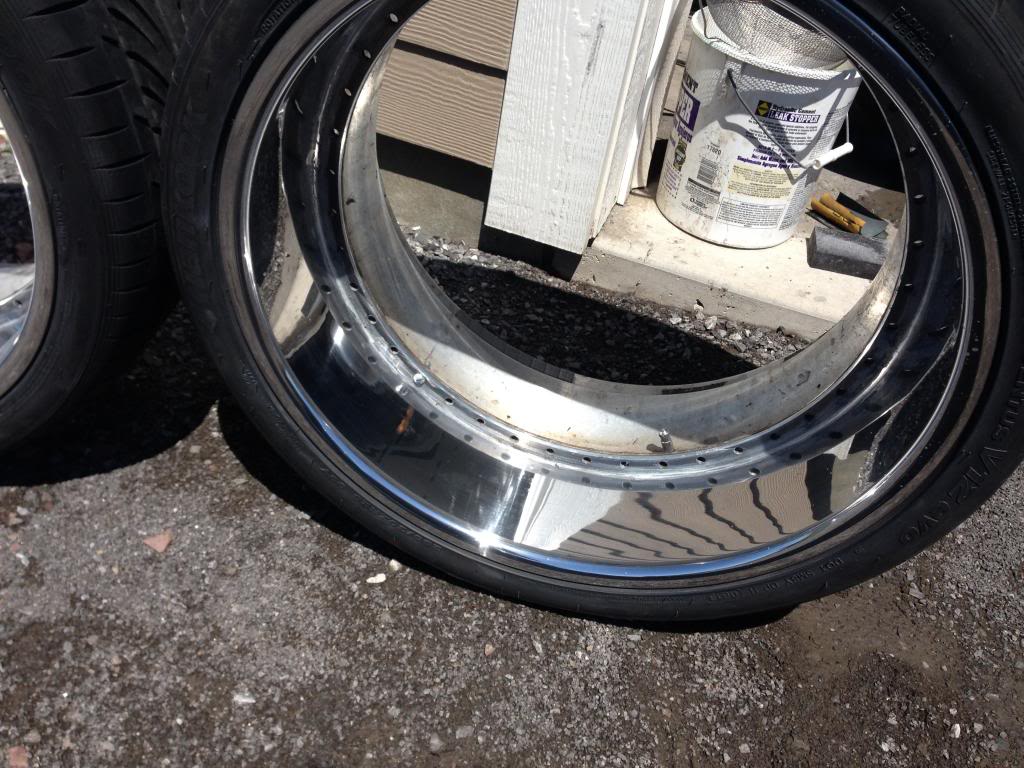
This was done a couple months back while the car was still in winter mode with the Blizzak's on, since then I finally got my other wheels on, which were a total pain to refinish. Instead of making two threads, I figured I'd combine. The wheels are MOZ GTM8's, they are a 3 piece forged aluminum wheel. I got an amazing deal on them, which is the only reason I bought them as I wasn't a huge fan of the color. They came stock with machined/clearcoated faces and lips and black windows.
With that in mind, I purchased a Porter Cable 7424XP buffer and all the supporting accessories to have my hand at some paint correction on this bad boy. The one thing I failed to do through this process was take some good before photos or 50/50 shots to show the difference, so I guess you'll be left to evaluate the final results. It's a shame, because the difference was absolutely ridiculous. There are still some pretty serious RID's throughout (not to mention several door dings from the kind folks in my college parking lot), but hey for being 7 years old it's not too bad.
Process:
- Wash with dawn to remove any old wax/sealants that may have been on there
- Zaino clay bar using plenty of diluted Optimum No Rinse (amazing stuff) as lubricant
- Taped off anywhere I didn't want polish to get into (handles, moldings, etc.)
- Wet-sanded RID's that were serious enough to require this. BE CAREFUL, this was my first shot and I actually ended up burning through in a small area that will need touchup in the future
 , but on the other ~10 I did, the 2000 Grit made quick work of them. BE SURE TO USE A SANDING BLOCK, when I burned through I'm 100% positive it was due to a pressure point from not using one. Live an learn I suppose..
- First Stage: Meguiars M105 on a 6" Lake Country Purple Foamed Wool Pad: one quick pass at speed 2-3 to spread compound, two slower passes at speed 6 with medium pressure, final pass at speed 5 with light pressure
- Wipe everything down using an IPA solution to remove all dust from spent compound
- Second Stage: Meguiars M205 on a white Lake Country White CCS pad. One quick pass at speed 2-3 to spread compound, 2 passes at speed 5 with medium pressure, final pass at speed 4 with light pressure.
- Another IPA wipedown
- Two coats of Zaino Z5 synthetic sealant applied by hand (no ZFX becuase I ran out so I waited a bit between coats)
- Two coats of Prima Banana Gloss to bring out that deep shine applied by hand
- Tires dressed with Zaino Tire Gloss, wheels coated with Zaino Z5 to make easy brake dust cleanup
Only shot I have during the actual process is halfway through taping, which was probably overboard but I didn't want to spend hours removing dust from hard to get to areas.
Anyhow, on to the after shots:
Garage shots:
Outside Shots:
Mirror:
Love this shot:
This was done a couple months back while the car was still in winter mode with the Blizzak's on, since then I finally got my other wheels on, which were a total pain to refinish. Instead of making two threads, I figured I'd combine. The wheels are MOZ GTM8's, they are a 3 piece forged aluminum wheel. I got an amazing deal on them, which is the only reason I bought them as I wasn't a huge fan of the color. They came stock with machined/clearcoated faces and lips and black windows.
Another project I wanted to tackle was to refinish the wheels I picked up last summer. They are 20" MOZ GTM8's that came with machined and clear coated lips and faces, with black windows. I decided to convert them over to polished lips with hyper silver centers.
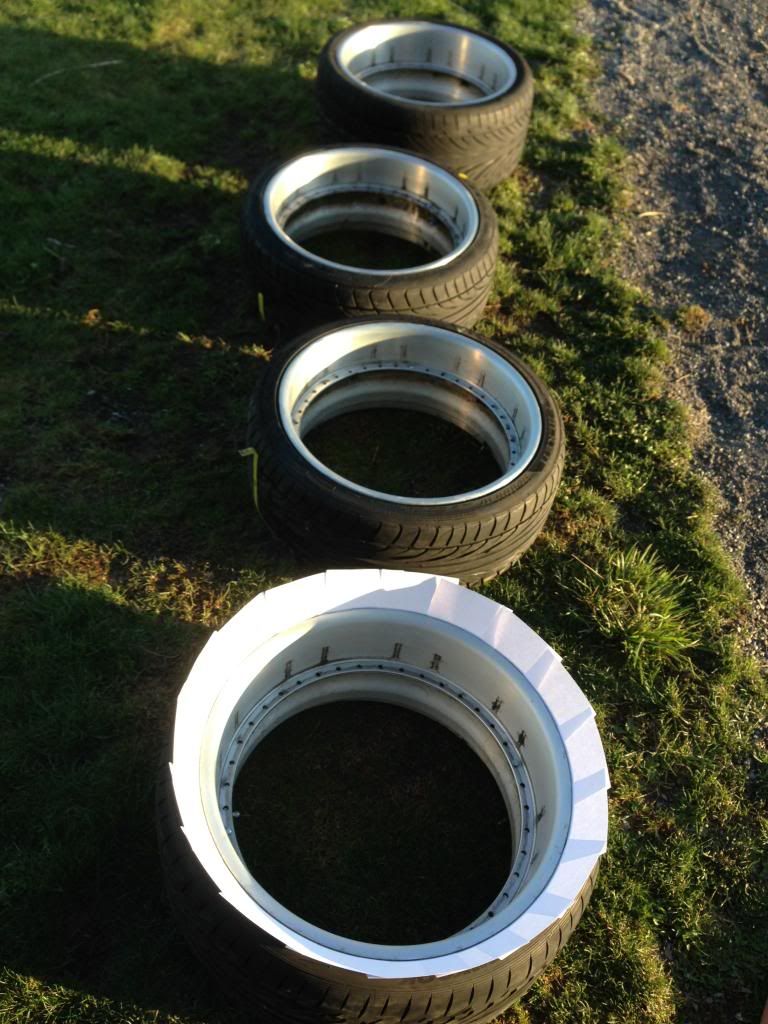
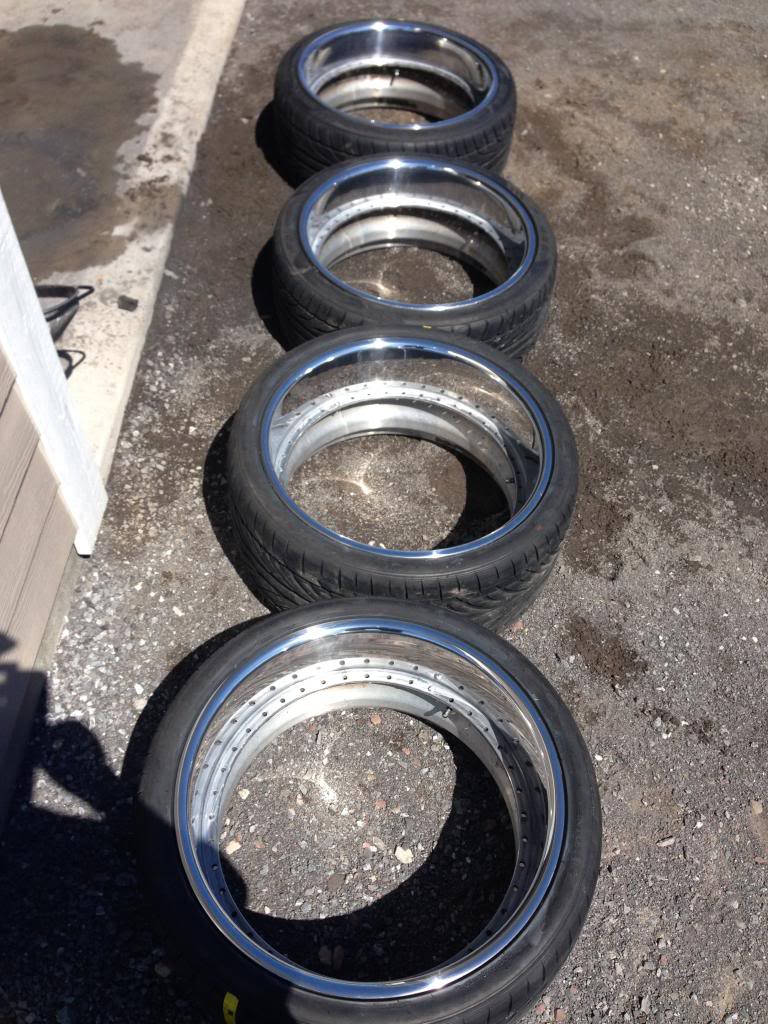
Original Look:
I really was not a fan of this, it made them look too 2D for my taste, with the black windows hiding the side of the spokes giving them a sort of skeleton-like feel. The ISF they came off of had an aggressive theme which fit these well, however I wasn't going for that kind of feel with my car. I decided to go ahead and polish the lips, and paint the centers hyper silver. I really wanted to do a powder coat on these, but I really just wanted to have my hand at DIY'ing them first before potentially going that route next year when funds allow.
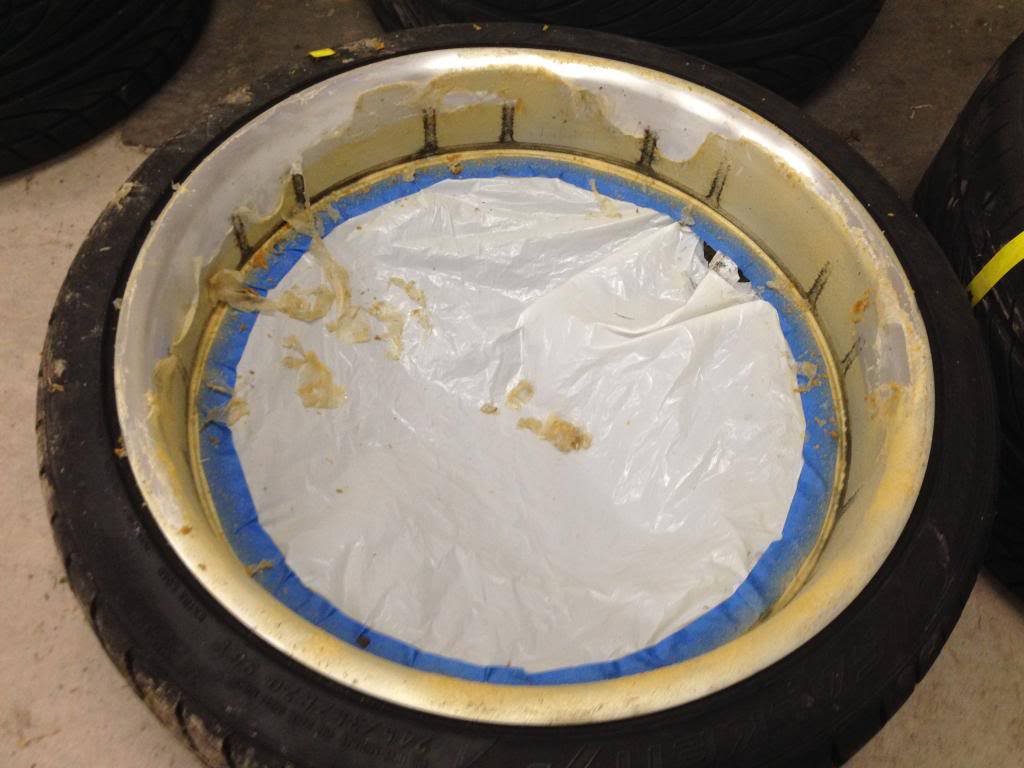
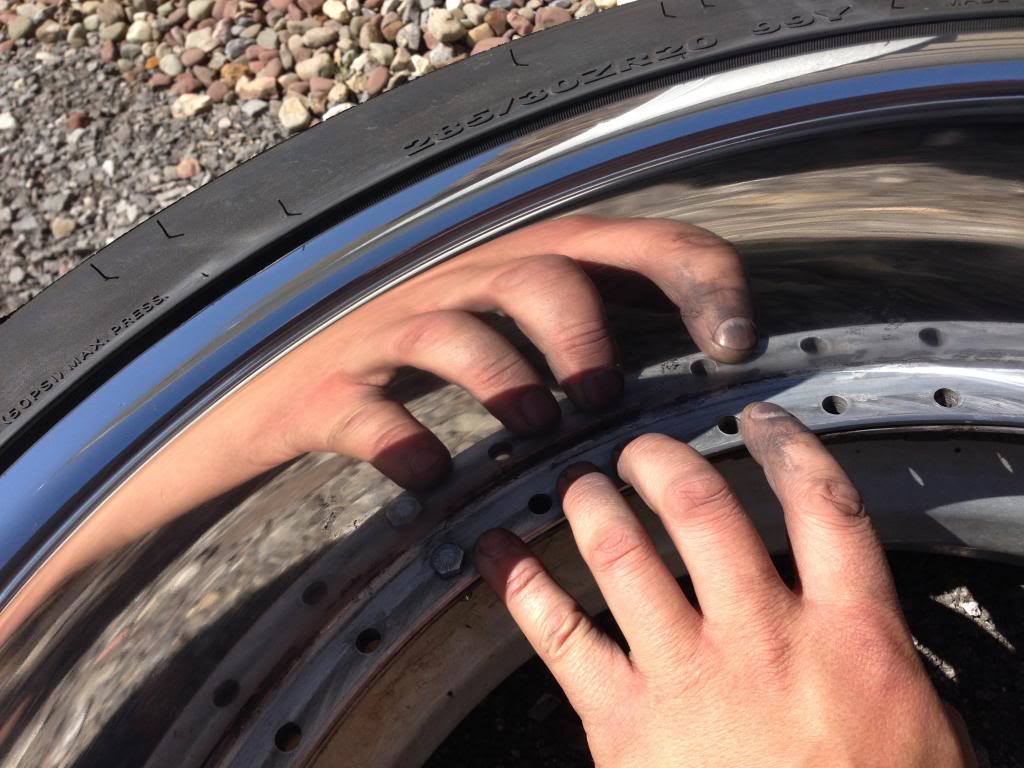
On with the procedure, after much researching I read that it would be possible to do this leaving the tires mounted. In retrospect, this would've been money well spent, but as I said above, live and learn. With that said, all air was removed from the tires, and faces were removed. This proved to be a PITA since there's about 40-50 bolts/wheel and they were corroded something fierce (galvanic because they used cheap nuts unlike the plated bolts). Once I got them off, it was time to go ahead and remove the clear from the wheels, I used Aircraft Remover as I've used it in the past with good results. Used the old index card trick to keep the solvent off the tires.
This clear was THICK and took several applications and a bunch of scraping with a putty knife to get it all off. Once it was off I proceeded with sanding. I made some serious errors here in hindsight, and if/when I take them apart next year I will redo the process to correct the faint scratches still present for the perfect mirror effect I was going for.
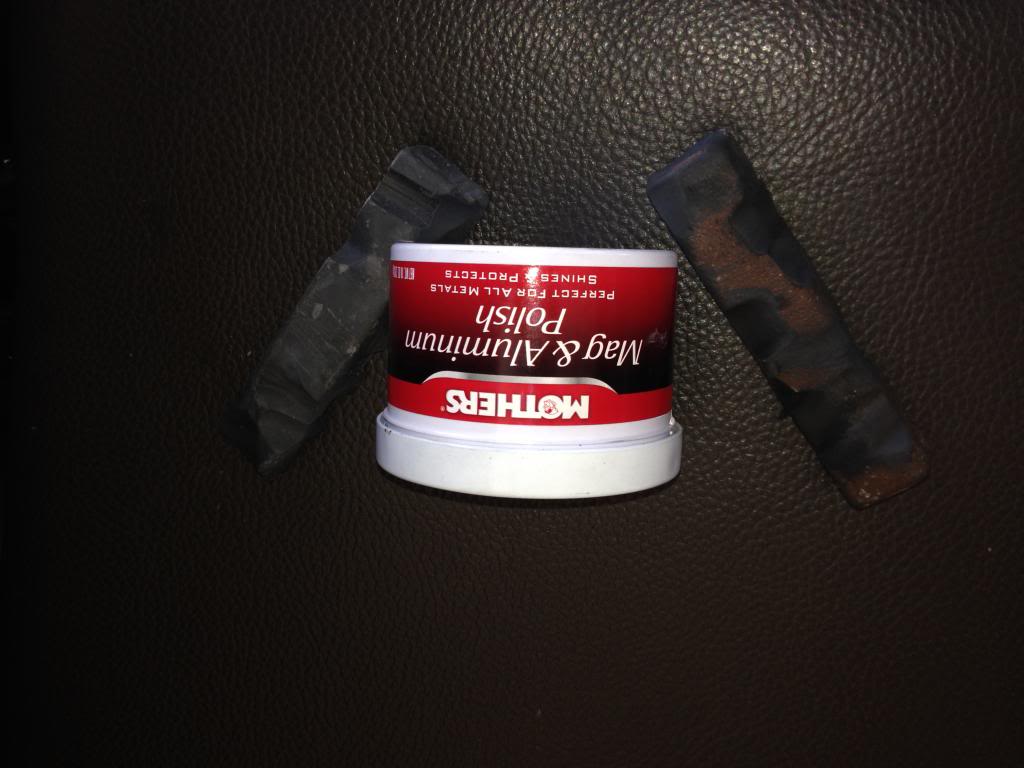
Anyhow, after smoothing down the minor rash with a small file, I gave them each a quick rub-down with 100 grit to remove the major scoring imparted by the putty knife. This is where I made my error, I didn't have anything between 100 grit and the 220 I followed it with (besides some emery which I tried with the same final result). This led to some of the deeper 100 grit scratches being left in there as I moved up through the grades. The scratches weren't really evident and I didn't realize it would be a problem until I was basically done, and didn't want to go back to square 1 on each wheel after spending hours sanding by hand, so I decided to live with it. Process was as follows: 100 grit (dry), 220 grit (dry), 400, 800, 1000, 1500, 2000 (wet). After sanding I used an aluminum polish kit I purchased in conduction with a die grinder (which was way too fast and actually melted the polish and destroyed the bobs in the kit if I wasn't careful), with two different polishes. Final step in polishing was to use some Mothers Mag and Aluminum to really make the lips pop, and a coat of Zaino Z5 Sealant to keep them easy to clean.
Next on the list was to paint the faces. For this I scuffed them all with 220 since the clear was in pretty good shape and didn't see the point in removing it all. I painted them in my schools paint booth, which I THOUGHT was a good idea. Unfortunately, one of our clubs happened to go in there and got carbon dust from carbon fiber construction EVERYWHERE, so these particles actually wound up settling on the flat surfaces facing upward. I didn't realize this during the application of the base coat which went on thick and hid most of it, but the color coat goes on thin and it became pretty obvious. Once I noticed I was already too far into the job to stop, so I just did my best. The outcome was not bad at all, the faces themselves didn't collect any of this dust, and that's what I really cared about. The paint system I used was DupliColors Hyper Silver Kit, which contains both a silver and a tinted clear to give the wheels added depth. I ended up using two different kits. It was recommended to spray the color coat over a black base, so before doing anything I gave all faces a couple thick coats of black VHT engine enamel. Some pictures of the process:
Prepped and Ready
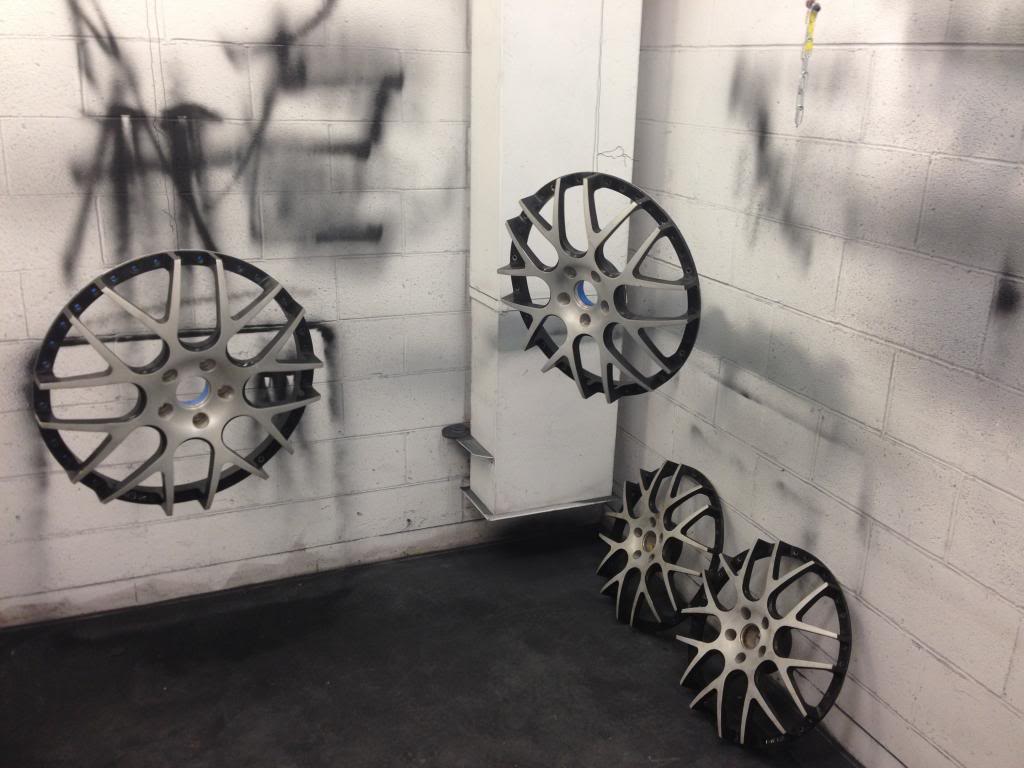
Black Base Coat Applied
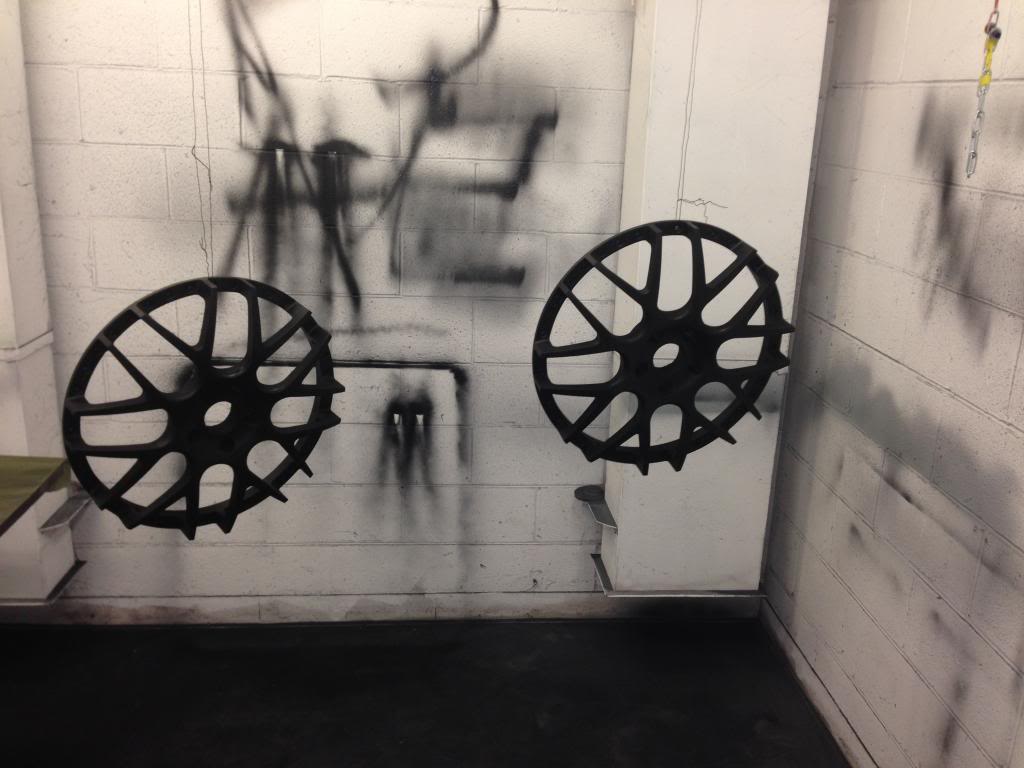
Faces close up complete, you can see I gave the center caps the same treatment, as those were originally black with the MOZ logo.

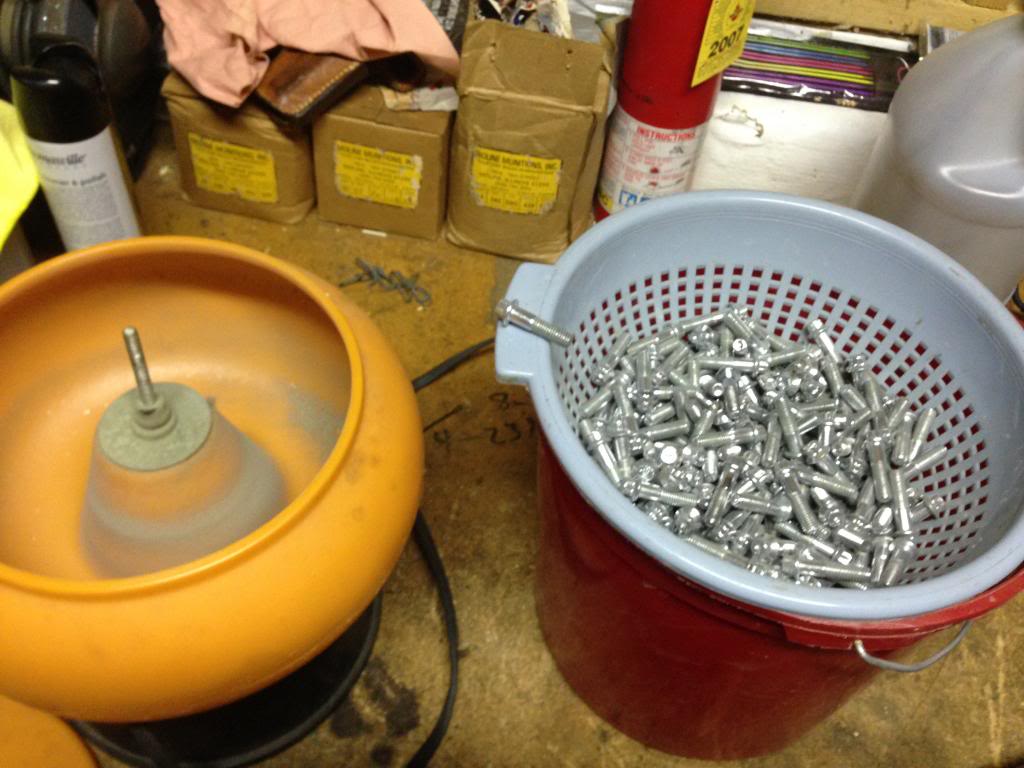
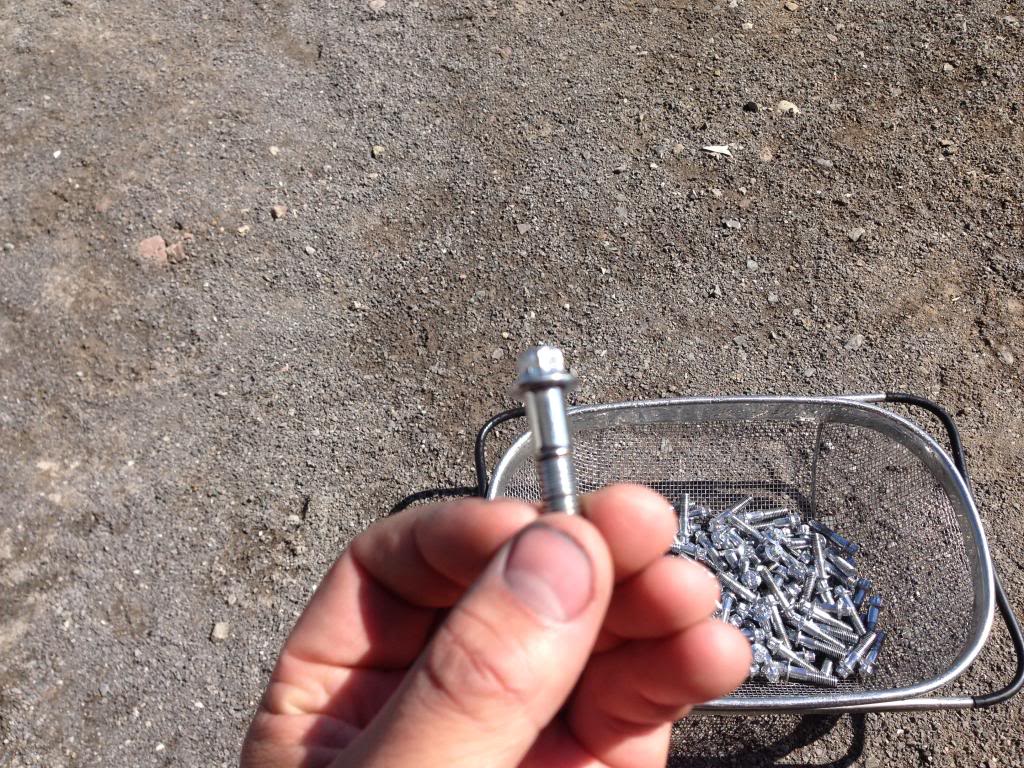
The last step in this process was to clean all the badly tarnished hardware. Lucky for me, my cousin has a tumbler set up to clean shell casings. He tumbled all the bolts for a day and the results were awesome. Don't have any before pictures of the bolts, but the wheels are 3 years old based on the date stamp on the center caps. Hardware now looks new:

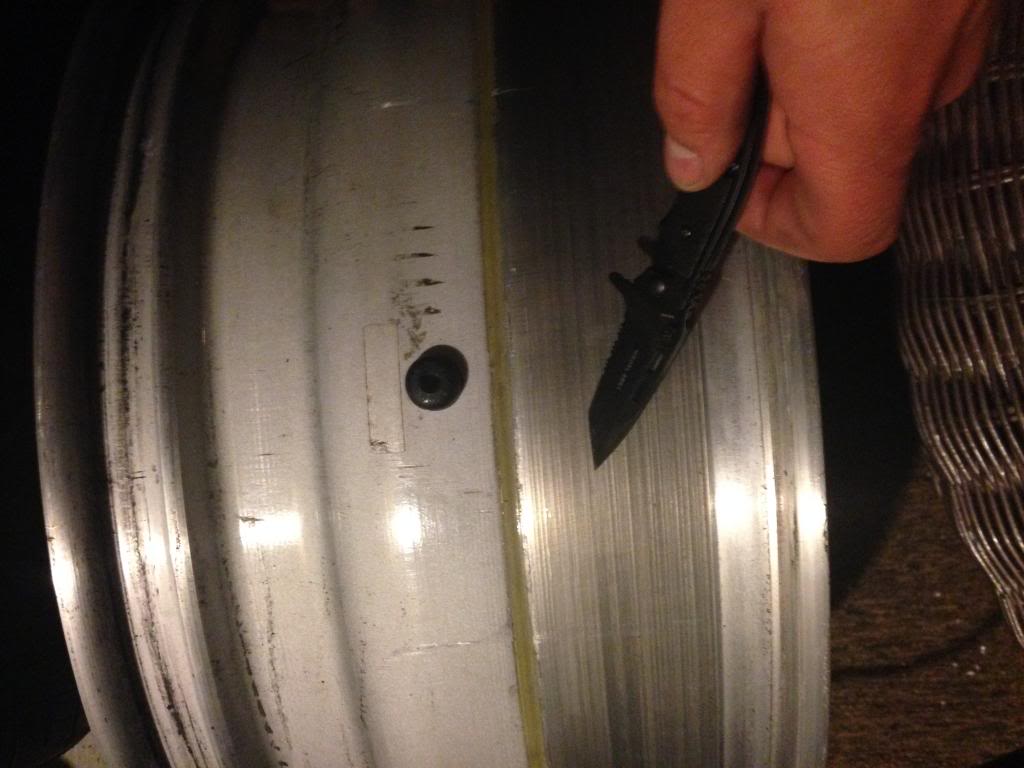
Wheels were all assembled, and unfortunately found out that two of the barrels split. This happened when I left them in the driveway on a hot day for about an hour to get the hardware back from my cousin. Apparently heating whatever air was in the tire actually caused it to expand enough to put enough pressure on the lips to pop the seal. I had 4 bolts in each flange holding them together while the faces were out in an attempt to relieve any stress that might be on the seal, but apparently this wasn't enough. In hindsight if I had just left them in the garage this wouldn't have been a problem, oh well. Took them to the local Dunn and had those two tires removed. Bought some GE Aluminum and Metal Fire/Freeze - Proof Caulk (temp range up to 400F), and went about redoing the two failed barrel seals. First step was to remove the old seal, this was done with a sharp knife to get the majority out, followed up by a wire wheel attachment on a Dremel to remove the residue. Once the old seal was off, tape was laid about 1/8" outside the "V" groove between the barrels for a professional look and to aid in balancing the wheel afterwards. I thought I took an after pic of the seal, but apparently not, either way these two pics show the process. I laid one continuous bead on each and pulled the tape before it set. After 24 hours I repeated this process a little further out on each side and took them to get tires mounted about 12 hours after that.
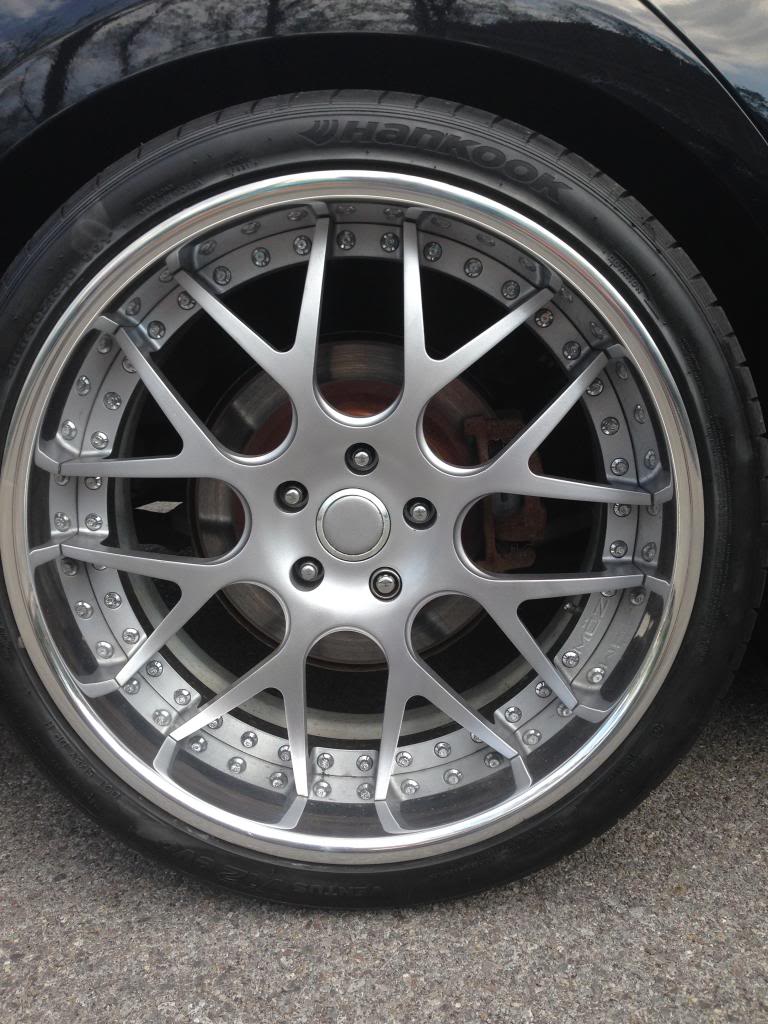
As you can see, just about EVERY part of this project fought me tooth and nail, from the hardware being corroded and stuck on (an entire can of PB blaster worth), removing the clear taking 3 applications of solvent, skipping one grade too many in sanding, the carbon dust everywhere in the paint booth, seals breaking. Perseverance paid off, and as I watched through the window at Dunn while they were mounted I was like a kid at a candy store. I went back and made sure they were extra careful on the lips with the machine and gun putting the lugs on, and proceeded to get tons of compliments on how good they looked, even more when I explained I just completely redid them on my own. Regardless, here's final pics:
Close up
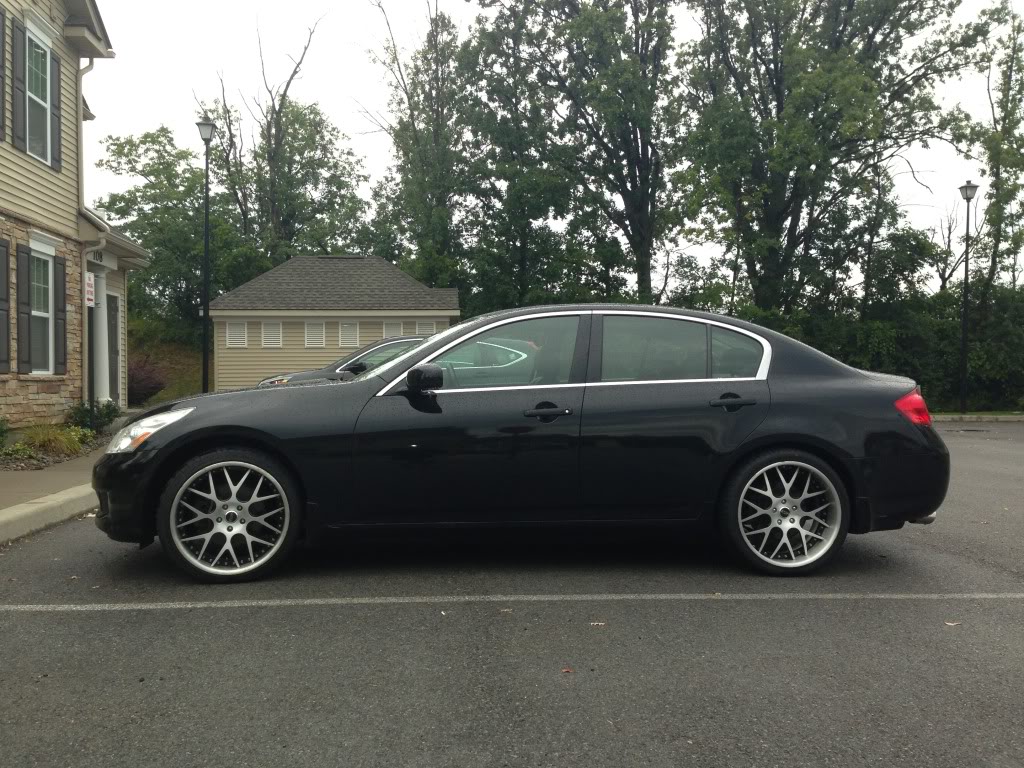
How she sits now:
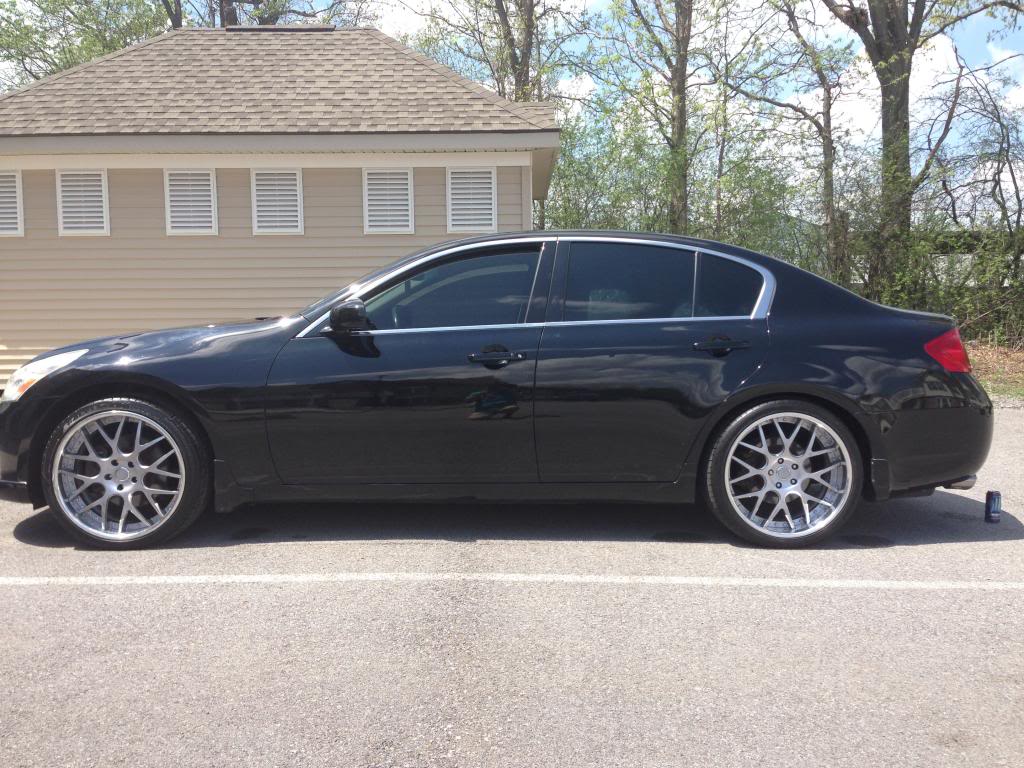
On stock suspension for now (as evidenced by the saggy rear from the 2 10w6v2's in the trunk with a big ol' heavy box), but I have BC Racing BR Coilovers, SPC Rear Arms + Bolts, and Stillen Rear Sway going on Tuesday. Was going to DIY that, but when I posted some pictures online I got an offer from one of my fraternity alum's that works in a local shop to install all, adjust to my specs, and align for practically nothing ($150). Upside is I will still be able to learn as I can be in the shop and watch/help which is what matters to me. Both of these projects were firsts for me, and I hope to continue to learn more as I progress with the build. So far DIY's I have tackled are OEM front chin spoiler install, and install of 2 JL 10w6v2's w/ JL 1000/1 amp in the trunk which was fun with the Bose. Only other "mod" was getting 20% tint all around, but there's no way I'd be dumb enough to try that my own. Let me know what you think, all comments and opinions are welcome. I've been browsing these forums for a couple years now and I just hope what I've posted helps someone else that might be thinking about tackling something like either of these projects!
Original Look:
I really was not a fan of this, it made them look too 2D for my taste, with the black windows hiding the side of the spokes giving them a sort of skeleton-like feel. The ISF they came off of had an aggressive theme which fit these well, however I wasn't going for that kind of feel with my car. I decided to go ahead and polish the lips, and paint the centers hyper silver. I really wanted to do a powder coat on these, but I really just wanted to have my hand at DIY'ing them first before potentially going that route next year when funds allow.
On with the procedure, after much researching I read that it would be possible to do this leaving the tires mounted. In retrospect, this would've been money well spent, but as I said above, live and learn. With that said, all air was removed from the tires, and faces were removed. This proved to be a PITA since there's about 40-50 bolts/wheel and they were corroded something fierce (galvanic because they used cheap nuts unlike the plated bolts). Once I got them off, it was time to go ahead and remove the clear from the wheels, I used Aircraft Remover as I've used it in the past with good results. Used the old index card trick to keep the solvent off the tires.
This clear was THICK and took several applications and a bunch of scraping with a putty knife to get it all off. Once it was off I proceeded with sanding. I made some serious errors here in hindsight, and if/when I take them apart next year I will redo the process to correct the faint scratches still present for the perfect mirror effect I was going for.
Anyhow, after smoothing down the minor rash with a small file, I gave them each a quick rub-down with 100 grit to remove the major scoring imparted by the putty knife. This is where I made my error, I didn't have anything between 100 grit and the 220 I followed it with (besides some emery which I tried with the same final result). This led to some of the deeper 100 grit scratches being left in there as I moved up through the grades. The scratches weren't really evident and I didn't realize it would be a problem until I was basically done, and didn't want to go back to square 1 on each wheel after spending hours sanding by hand, so I decided to live with it. Process was as follows: 100 grit (dry), 220 grit (dry), 400, 800, 1000, 1500, 2000 (wet). After sanding I used an aluminum polish kit I purchased in conduction with a die grinder (which was way too fast and actually melted the polish and destroyed the bobs in the kit if I wasn't careful), with two different polishes. Final step in polishing was to use some Mothers Mag and Aluminum to really make the lips pop, and a coat of Zaino Z5 Sealant to keep them easy to clean.
Next on the list was to paint the faces. For this I scuffed them all with 220 since the clear was in pretty good shape and didn't see the point in removing it all. I painted them in my schools paint booth, which I THOUGHT was a good idea. Unfortunately, one of our clubs happened to go in there and got carbon dust from carbon fiber construction EVERYWHERE, so these particles actually wound up settling on the flat surfaces facing upward. I didn't realize this during the application of the base coat which went on thick and hid most of it, but the color coat goes on thin and it became pretty obvious. Once I noticed I was already too far into the job to stop, so I just did my best. The outcome was not bad at all, the faces themselves didn't collect any of this dust, and that's what I really cared about. The paint system I used was DupliColors Hyper Silver Kit, which contains both a silver and a tinted clear to give the wheels added depth. I ended up using two different kits. It was recommended to spray the color coat over a black base, so before doing anything I gave all faces a couple thick coats of black VHT engine enamel. Some pictures of the process:
Prepped and Ready
Black Base Coat Applied
Faces close up complete, you can see I gave the center caps the same treatment, as those were originally black with the MOZ logo.
The last step in this process was to clean all the badly tarnished hardware. Lucky for me, my cousin has a tumbler set up to clean shell casings. He tumbled all the bolts for a day and the results were awesome. Don't have any before pictures of the bolts, but the wheels are 3 years old based on the date stamp on the center caps. Hardware now looks new:
Wheels were all assembled, and unfortunately found out that two of the barrels split. This happened when I left them in the driveway on a hot day for about an hour to get the hardware back from my cousin. Apparently heating whatever air was in the tire actually caused it to expand enough to put enough pressure on the lips to pop the seal. I had 4 bolts in each flange holding them together while the faces were out in an attempt to relieve any stress that might be on the seal, but apparently this wasn't enough. In hindsight if I had just left them in the garage this wouldn't have been a problem, oh well. Took them to the local Dunn and had those two tires removed. Bought some GE Aluminum and Metal Fire/Freeze - Proof Caulk (temp range up to 400F), and went about redoing the two failed barrel seals. First step was to remove the old seal, this was done with a sharp knife to get the majority out, followed up by a wire wheel attachment on a Dremel to remove the residue. Once the old seal was off, tape was laid about 1/8" outside the "V" groove between the barrels for a professional look and to aid in balancing the wheel afterwards. I thought I took an after pic of the seal, but apparently not, either way these two pics show the process. I laid one continuous bead on each and pulled the tape before it set. After 24 hours I repeated this process a little further out on each side and took them to get tires mounted about 12 hours after that.
As you can see, just about EVERY part of this project fought me tooth and nail, from the hardware being corroded and stuck on (an entire can of PB blaster worth), removing the clear taking 3 applications of solvent, skipping one grade too many in sanding, the carbon dust everywhere in the paint booth, seals breaking. Perseverance paid off, and as I watched through the window at Dunn while they were mounted I was like a kid at a candy store. I went back and made sure they were extra careful on the lips with the machine and gun putting the lugs on, and proceeded to get tons of compliments on how good they looked, even more when I explained I just completely redid them on my own. Regardless, here's final pics:
Close up
How she sits now:
On stock suspension for now (as evidenced by the saggy rear from the 2 10w6v2's in the trunk with a big ol' heavy box), but I have BC Racing BR Coilovers, SPC Rear Arms + Bolts, and Stillen Rear Sway going on Tuesday. Was going to DIY that, but when I posted some pictures online I got an offer from one of my fraternity alum's that works in a local shop to install all, adjust to my specs, and align for practically nothing ($150). Upside is I will still be able to learn as I can be in the shop and watch/help which is what matters to me. Both of these projects were firsts for me, and I hope to continue to learn more as I progress with the build. So far DIY's I have tackled are OEM front chin spoiler install, and install of 2 JL 10w6v2's w/ JL 1000/1 amp in the trunk which was fun with the Bose. Only other "mod" was getting 20% tint all around, but there's no way I'd be dumb enough to try that my own. Let me know what you think, all comments and opinions are welcome. I've been browsing these forums for a couple years now and I just hope what I've posted helps someone else that might be thinking about tackling something like either of these projects!
Last edited by zgn7003; May 16, 2014 at 12:13 AM.


Registered User
Joined: Nov 2011
Posts: 119
Likes: 8
From: Waukegan, IL
As a fellow owner of an improperly loved preowned 07 OBx you're my new hero. It kills me to see the haze in my paint but I haven't been able to take care of it properly yet. And the finish on those wheels is great! As usual with a DIY job you can see the flaws even if nobody else can but short of getting up close and personal with a magnifying glass I would say its an A+ job all around.
Any plans for more exterior mods?? Vinyl window trim? Painted housings/tails? Debadging?
EDIT- looks like you already got around to debadging
Any plans for more exterior mods?? Vinyl window trim? Painted housings/tails? Debadging?
EDIT- looks like you already got around to debadging
Last edited by Solo G; May 16, 2014 at 05:13 PM.


Thanks for all the feedback, glad that people here really seem to appreciate all the labor. These two projects probably took right around 30-40 hours total, so definitely make sure you have some time on your hands if you want to give this a shot.
As for exterior mods, I don't really want to go too wild on that, I prefer the classed up stock look. I think the new stance from the coils will really complete the exterior. I toyed with blacking out the chrome trim, tails, and housing, but TBH I kinda like the way the chrome accents tie the whole thin together without being over the top. YMMV. The big things I really want next are akebonos or similar with some slotted rotors to help set the wheels off. Other than that, I'm really happy with the way the body looks with just the oem lip, tint, debadge, and wheels. I suppose if I ever hit a deer or something I could see myself doing the 2010 sport conversion, but no way I'm footing the bill for that without insurance.
No more mods for a few months. I start my new engineering job after graduating in a week or so and have to pay down some of this student debt first
Trending Topics

Joined: Mar 2009
Posts: 18,299
Likes: 1,488
From: By the sea, Tx
G35 sedan w/ too much money in mods

I'm a little late to the party and I also have an inquiring mind that wants to know. Googled the **** out of it and came up with squat.....

Registered User
Joined: Apr 2018
Posts: 8
Likes: 0

OP shows up more than 4 years after the first post and delivers!!! Thank you!!

Thread
Thread Starter
Forum
Replies
Last Post
Cajuncowboy
G35 Sedan V35 2003-06
36
Jun 21, 2021 09:47 AM