
LS1 Drift Build 'Nuff Said'


Registered User
Joined: Dec 2009
Posts: 51
Likes: 0
I was wondering about the next update too
So what's your plans for exhaust? (sorry if I missed it, saw the headers but what about the pipes, cats, mufflers) I think its funny that the G has plenty of room under it for true duals with cats and any mufflers you want while most originally equipped LS cars have a terrible time fitting them!
So what's your plans for exhaust? (sorry if I missed it, saw the headers but what about the pipes, cats, mufflers) I think its funny that the G has plenty of room under it for true duals with cats and any mufflers you want while most originally equipped LS cars have a terrible time fitting them!
yes yes yes!! Stone is my favorite brewing Co. Sublimely Self Rightous Ale is epic as well. Black DIPA.
Just picked up som of that and Great Divide Yeti Imperial Stout.
Just picked up som of that and Great Divide Yeti Imperial Stout.

Thread Starter
|
Registered User
Joined: May 2005
Posts: 1,258
Likes: 127
From: San Antonio
Oh hell yeah, def had it... I was going to cover that one after the Octoberfest stuff.. good choice..
As for the exhaust setup. I plan to run QTPs (which are electric cut outs) at the track, And have them switched off for the street running back to my exhaust I have now.. Prb add a nice X-pipe in the middle to quite the sound some if I plan to drive on the street.
Yeah Stone is the ****... def a good pick up... Some might not like if you are new to beers..
I was wondering about the next update too
So what's your plans for exhaust? (sorry if I missed it, saw the headers but what about the pipes, cats, mufflers) I think its funny that the G has plenty of room under it for true duals with cats and any mufflers you want while most originally equipped LS cars have a terrible time fitting them!
So what's your plans for exhaust? (sorry if I missed it, saw the headers but what about the pipes, cats, mufflers) I think its funny that the G has plenty of room under it for true duals with cats and any mufflers you want while most originally equipped LS cars have a terrible time fitting them!
Yeah Stone is the ****... def a good pick up... Some might not like if you are new to beers..

Thread Starter
|
Registered User
Joined: May 2005
Posts: 1,258
Likes: 127
From: San Antonio
^^ sorry no, I was just saying I was going to update today... And here we are
STAGE 2: Phase 1 'Dropping Engine'
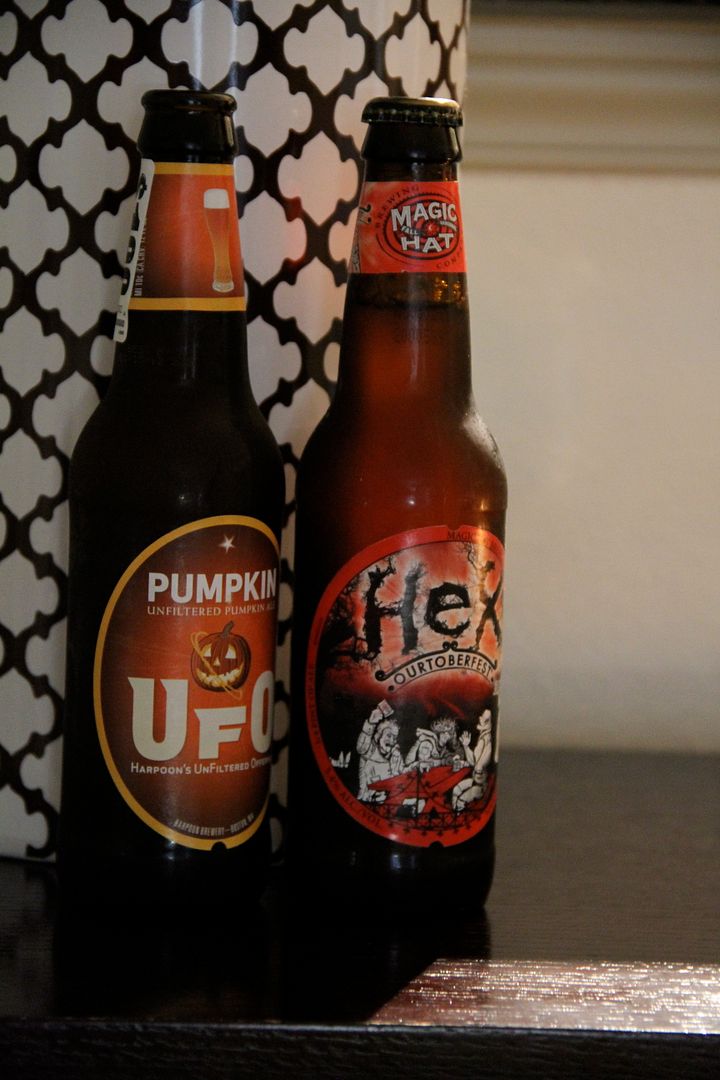
So like I said last week,here are two more Octoberfest beers. We have UFO Pumpkin, which is really good in my opinion. I like their Hefeweizen so this one did not disappoint at all.Easy drinking with a lingering pumpkin aftertaste on the back of the tongue so good..
Next we have Magic Hat "HEX", I just love Magic Hat's marketing.. Well I really like this beer, love that they used Toffee and Carmel gives a good taste but finishes with a smoky taste.. Really good...
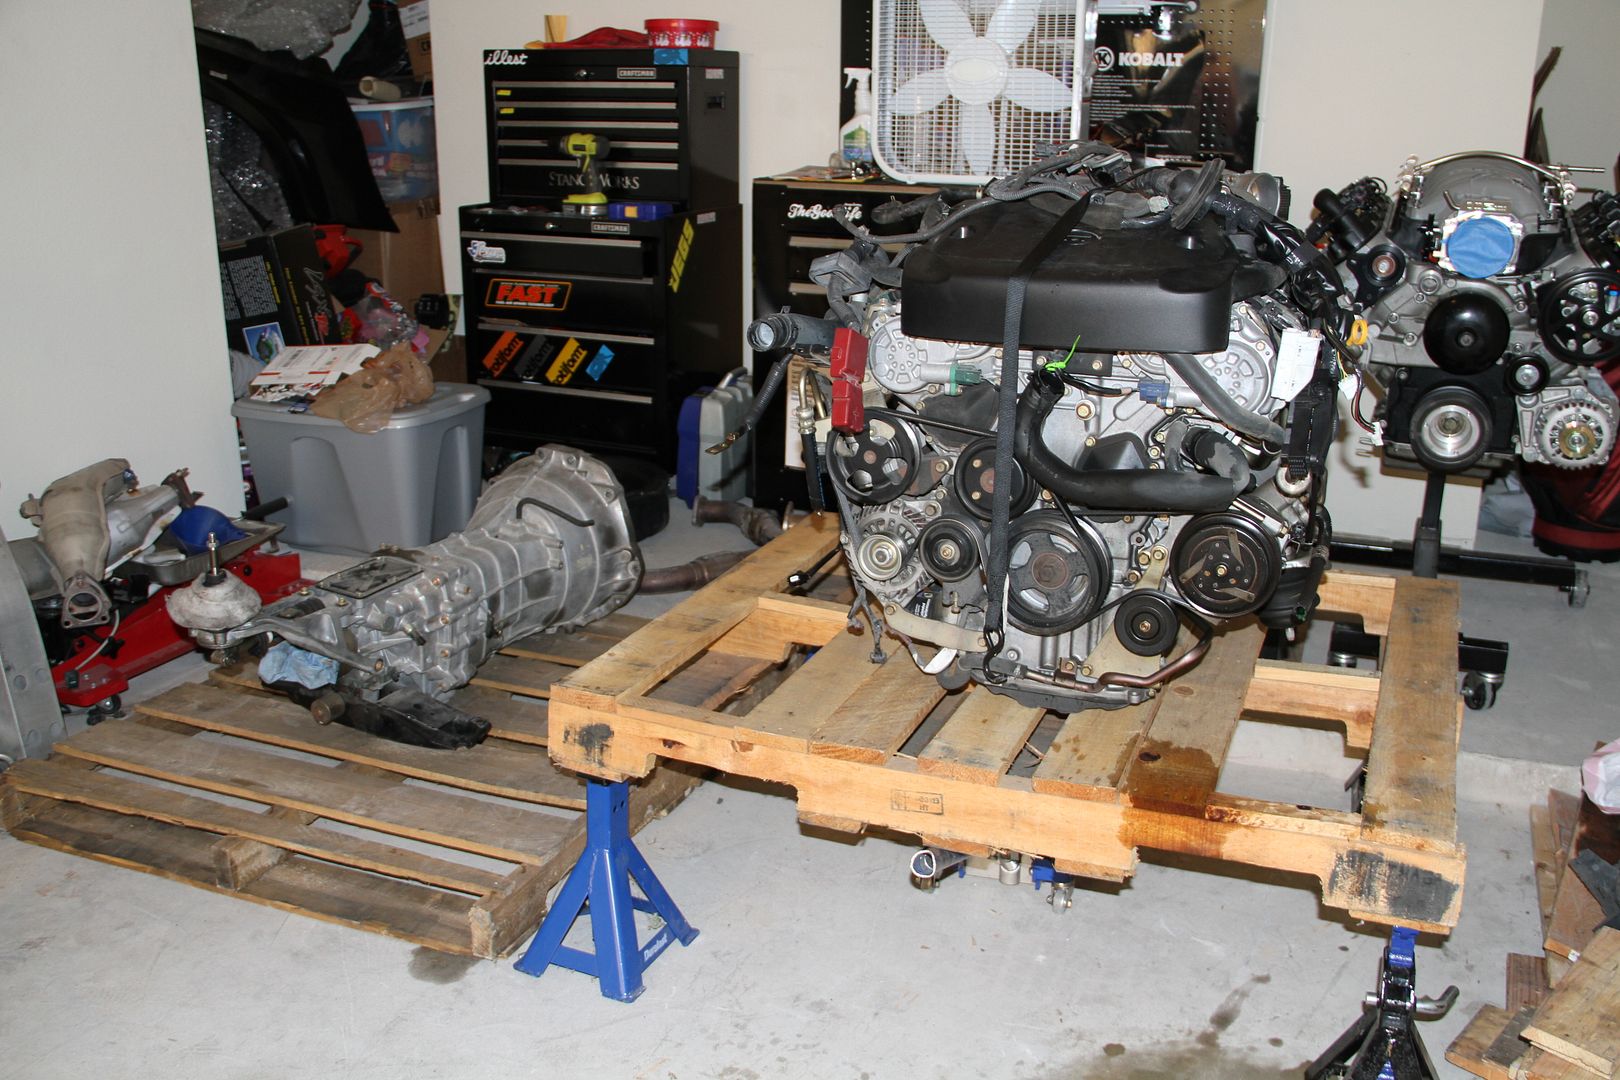
Okay before we jump into the build this is a short one due to it only referring to pulling the motor and shipping it off, but it is an important one.
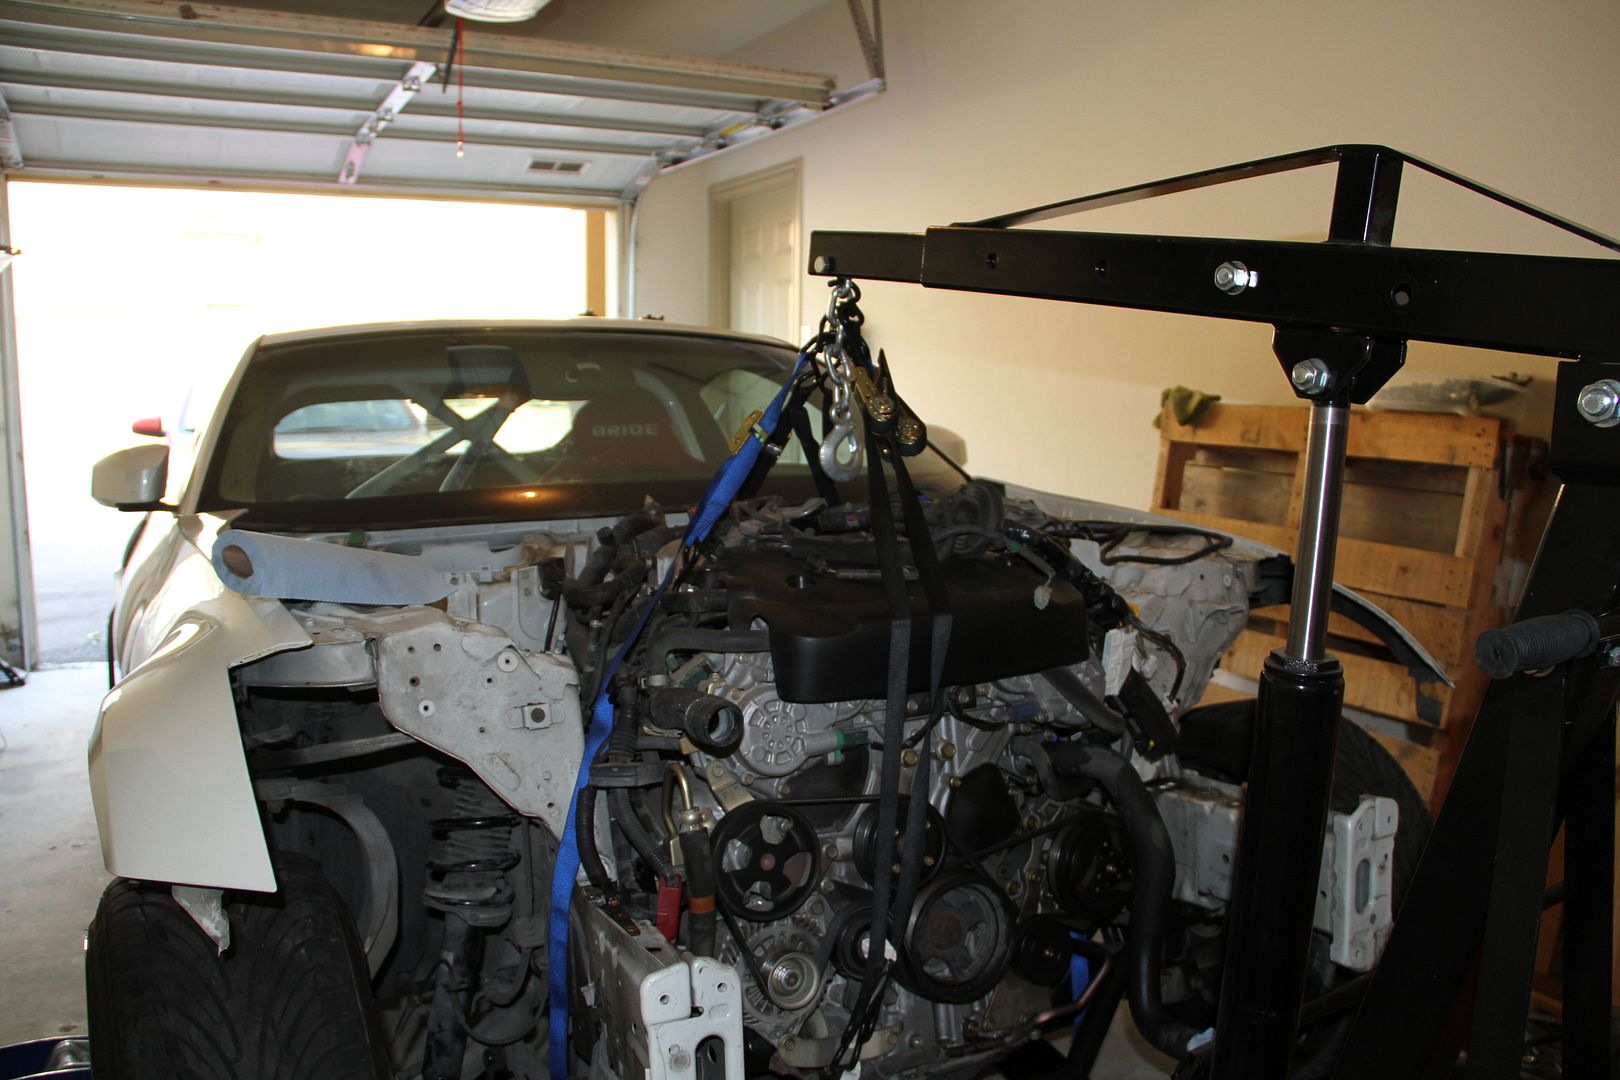
Make sure you have a good engine hoist. I started by removing the tranny first and all the exhaust from the car.
After I did that I started to remove all the radiator support stuff with the radiator. I then proceeded to remove or disconnect all the wires. I also just snapped/cut all hoses I was not going to use, including power steering hose, fuel and so on.. Reason for this is that I plan to replace all of these with AN hoses anyway...... And one last thing say goodbye to AC........lol
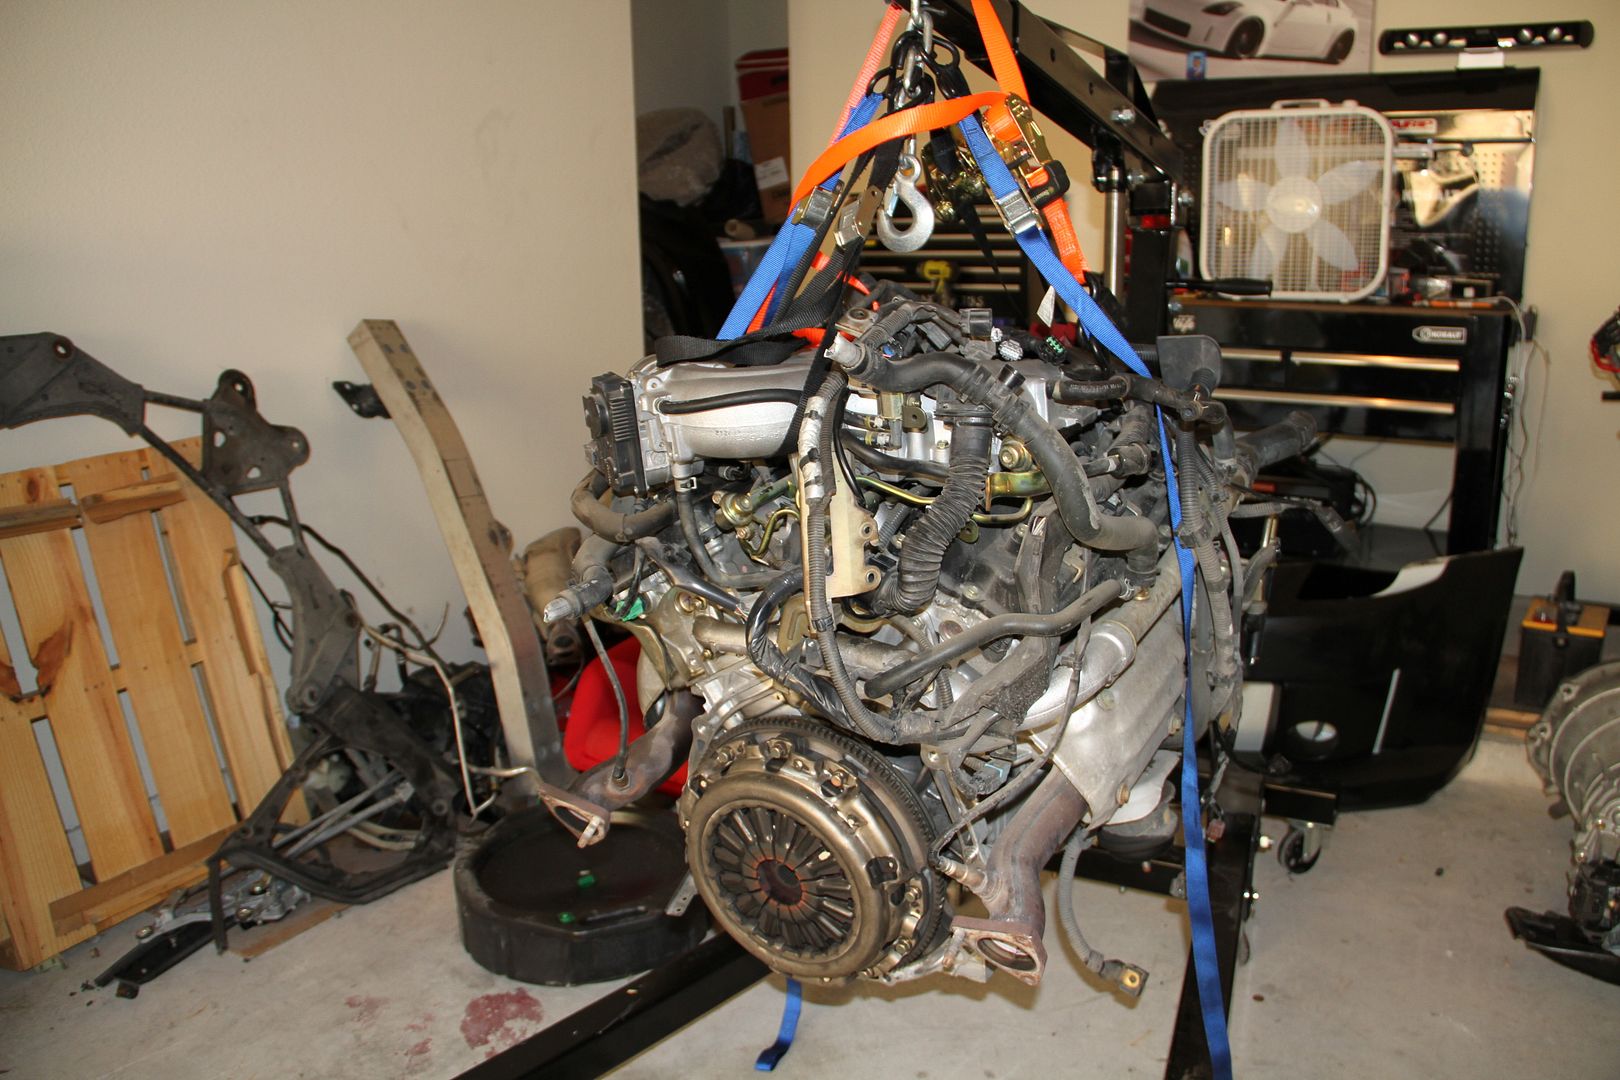
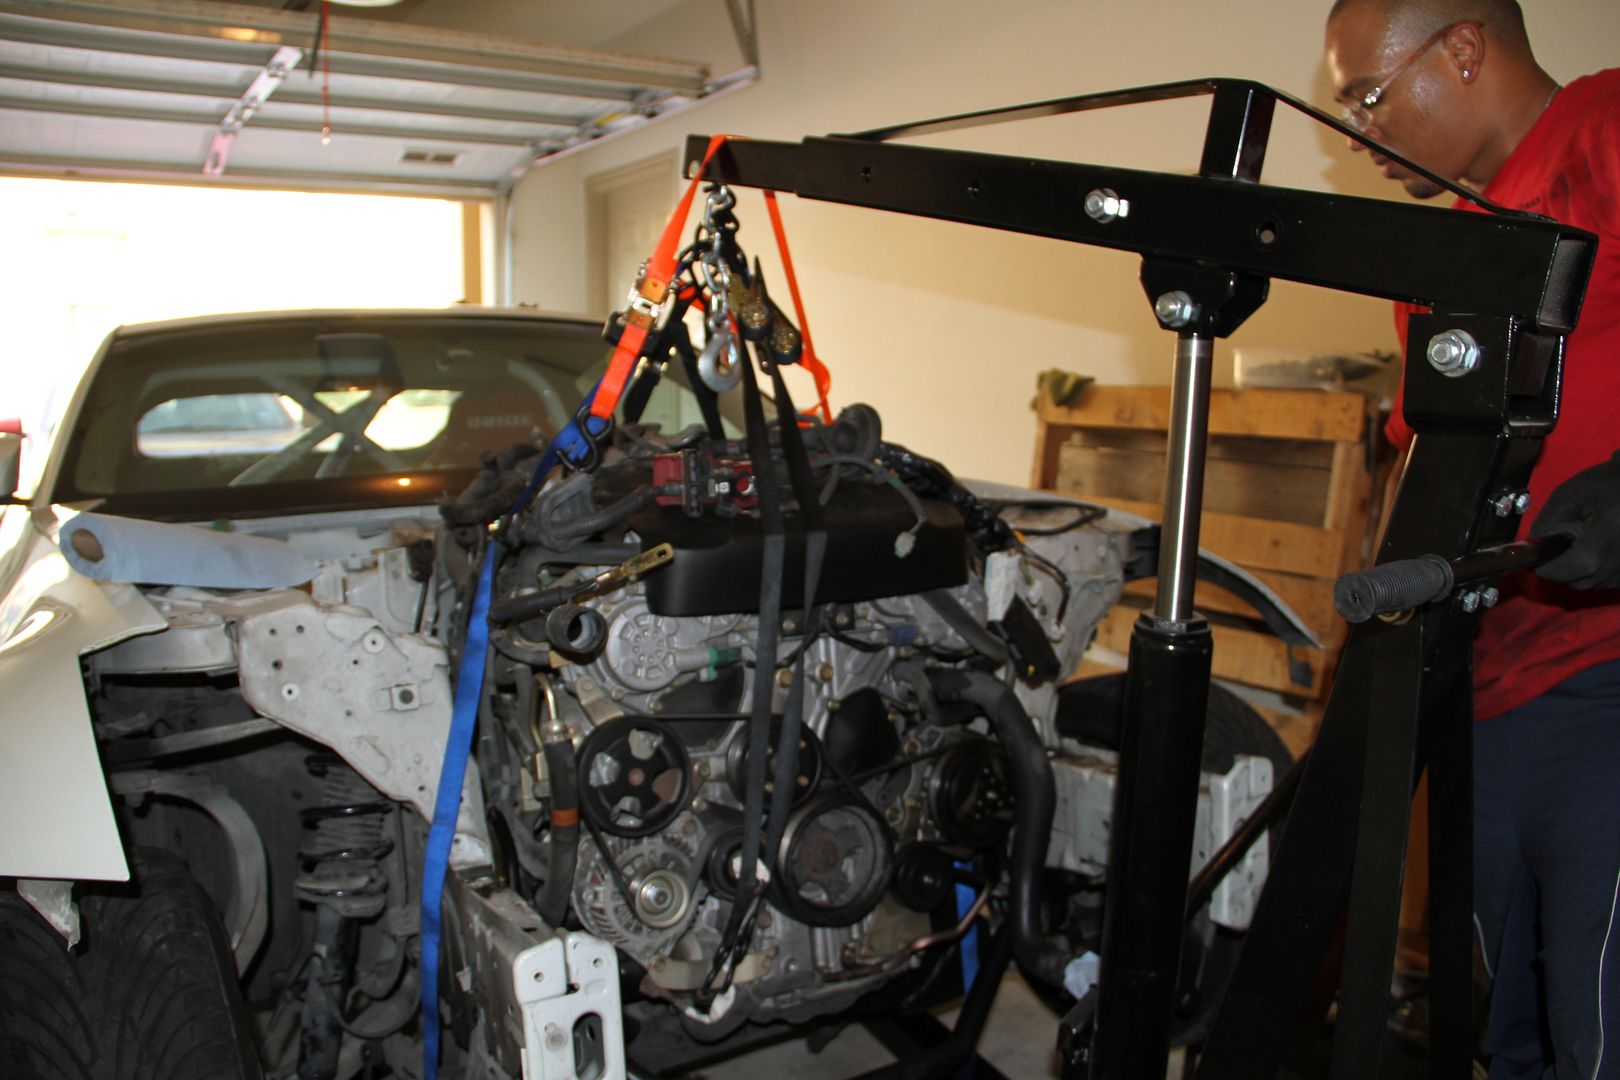
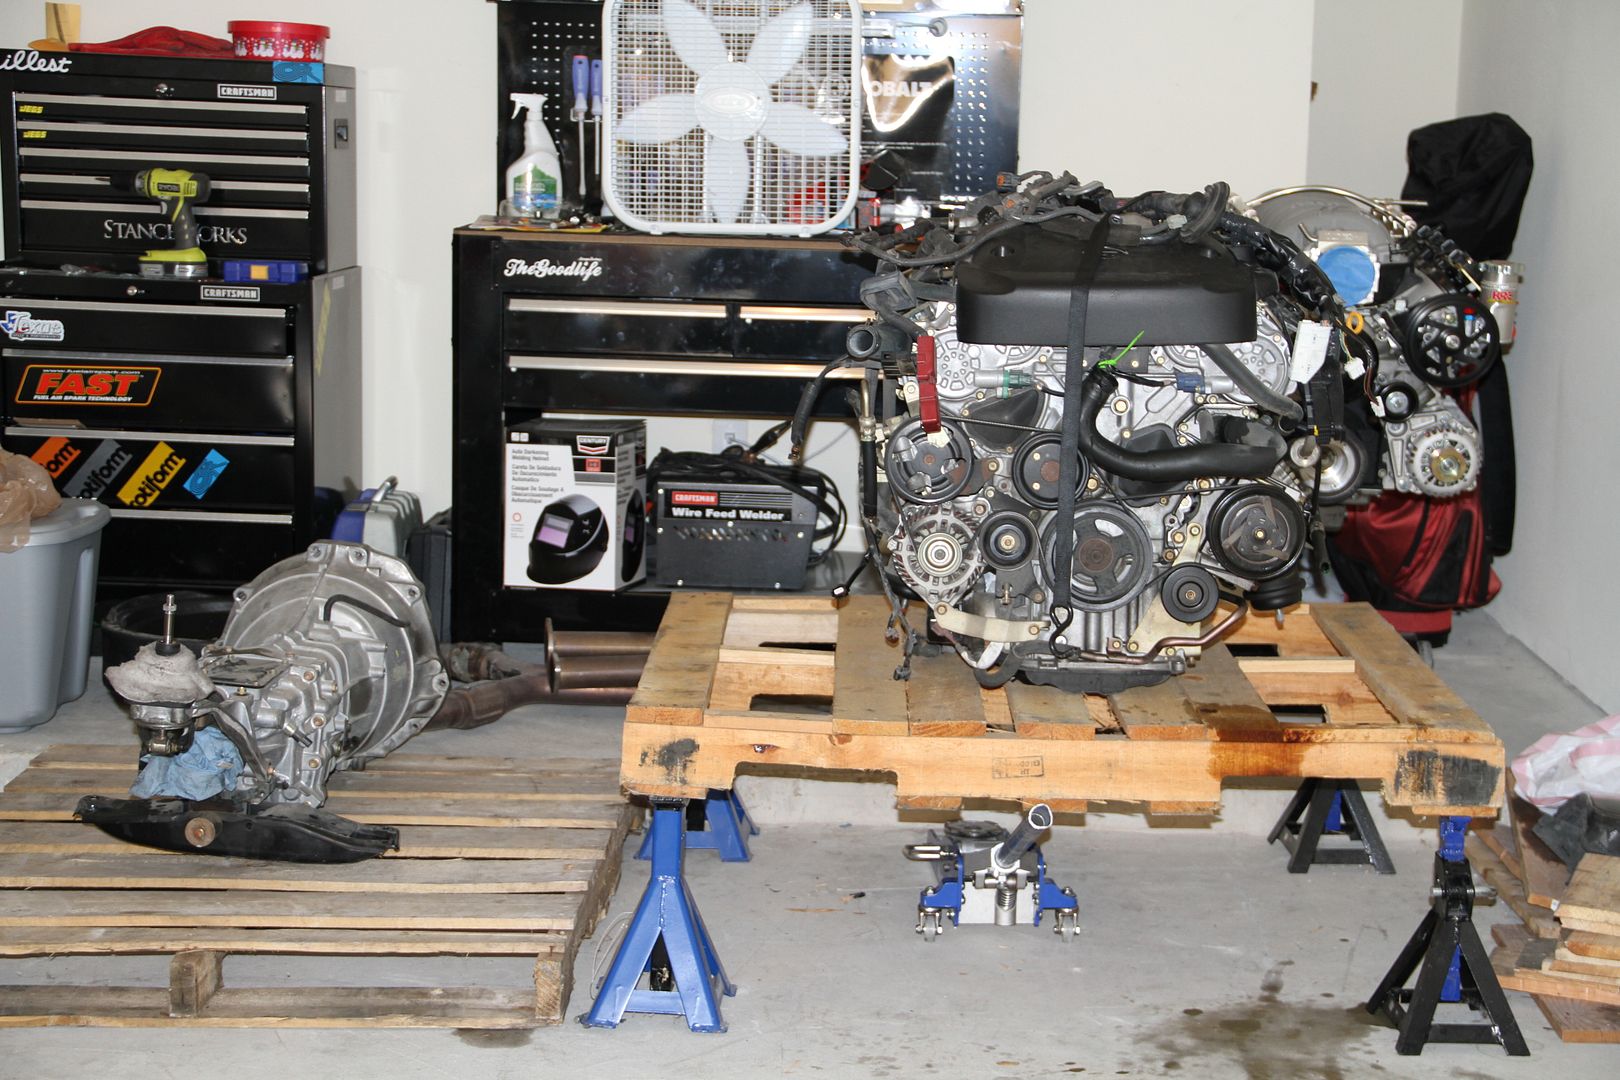
And she is out..... It is really easy to remove the VQ motor, it was only me doing it and it took me two days, due to work... So don't be scared to do it your self...
Already have a buyer for the engine/tranny so I have to crate them up for shipping...
Sat like this for a couple of days do to me not having my wood yet...
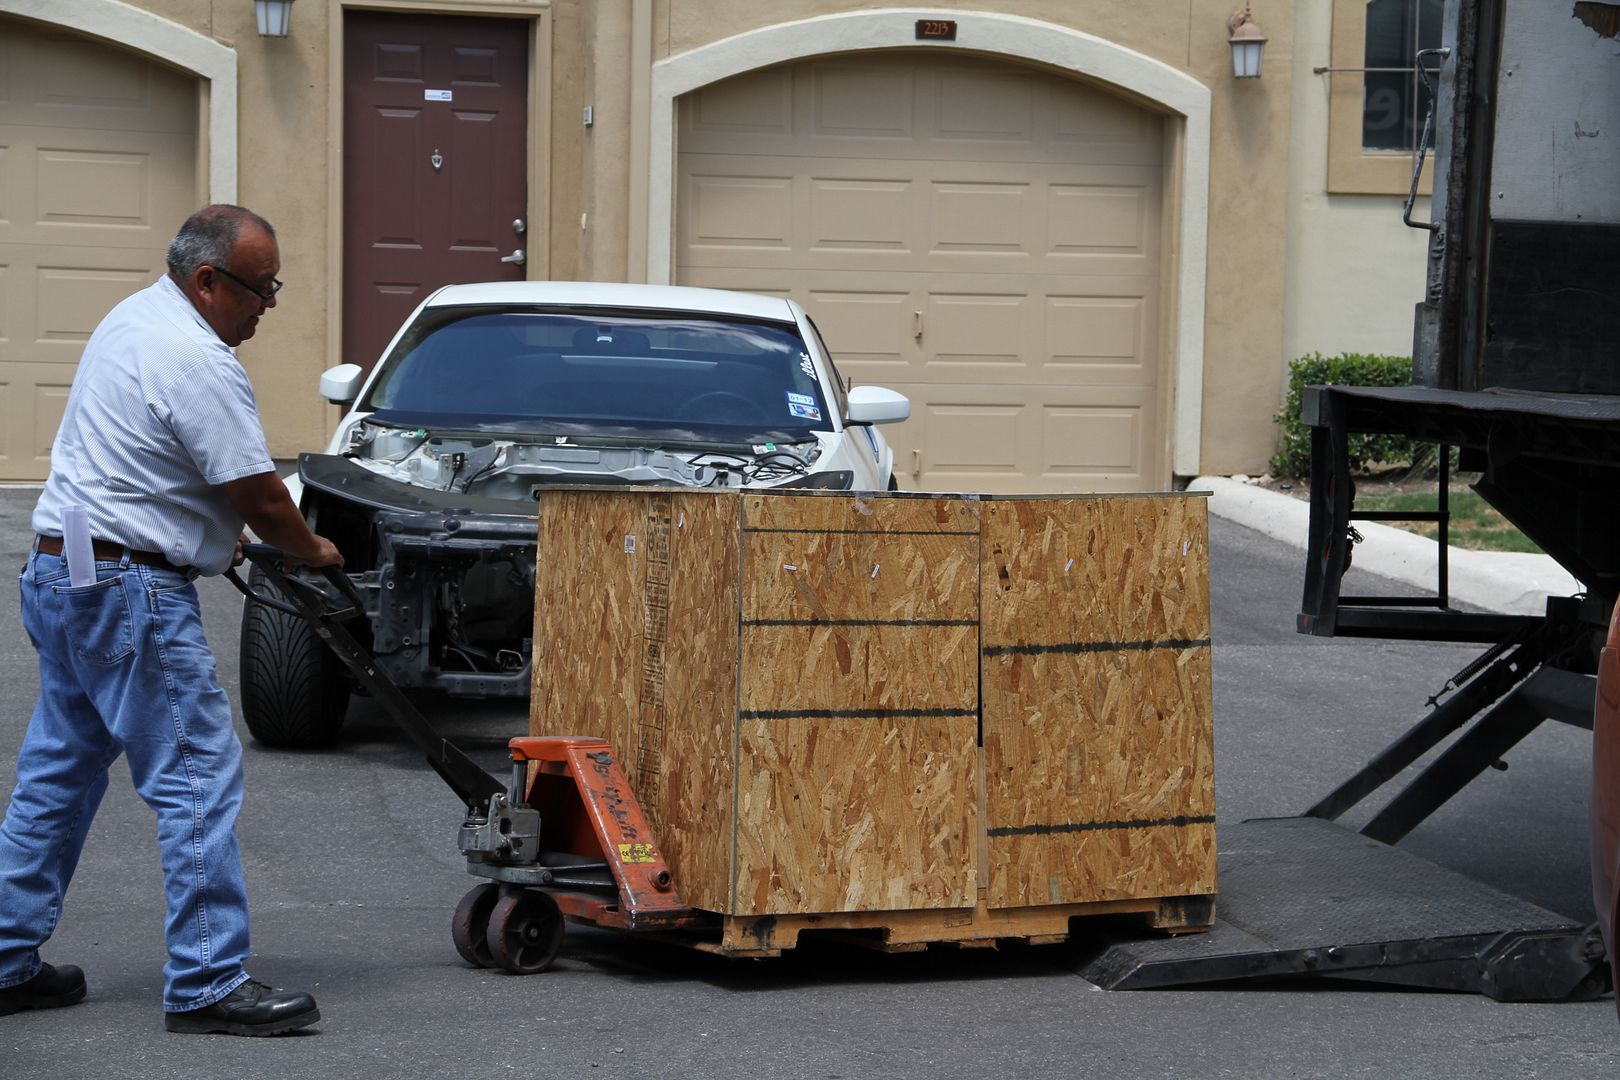
Finally got my wood and had every thing crated up and secured... Truck/shipping guy arrived and it was time to say goodbye to this VQ motor
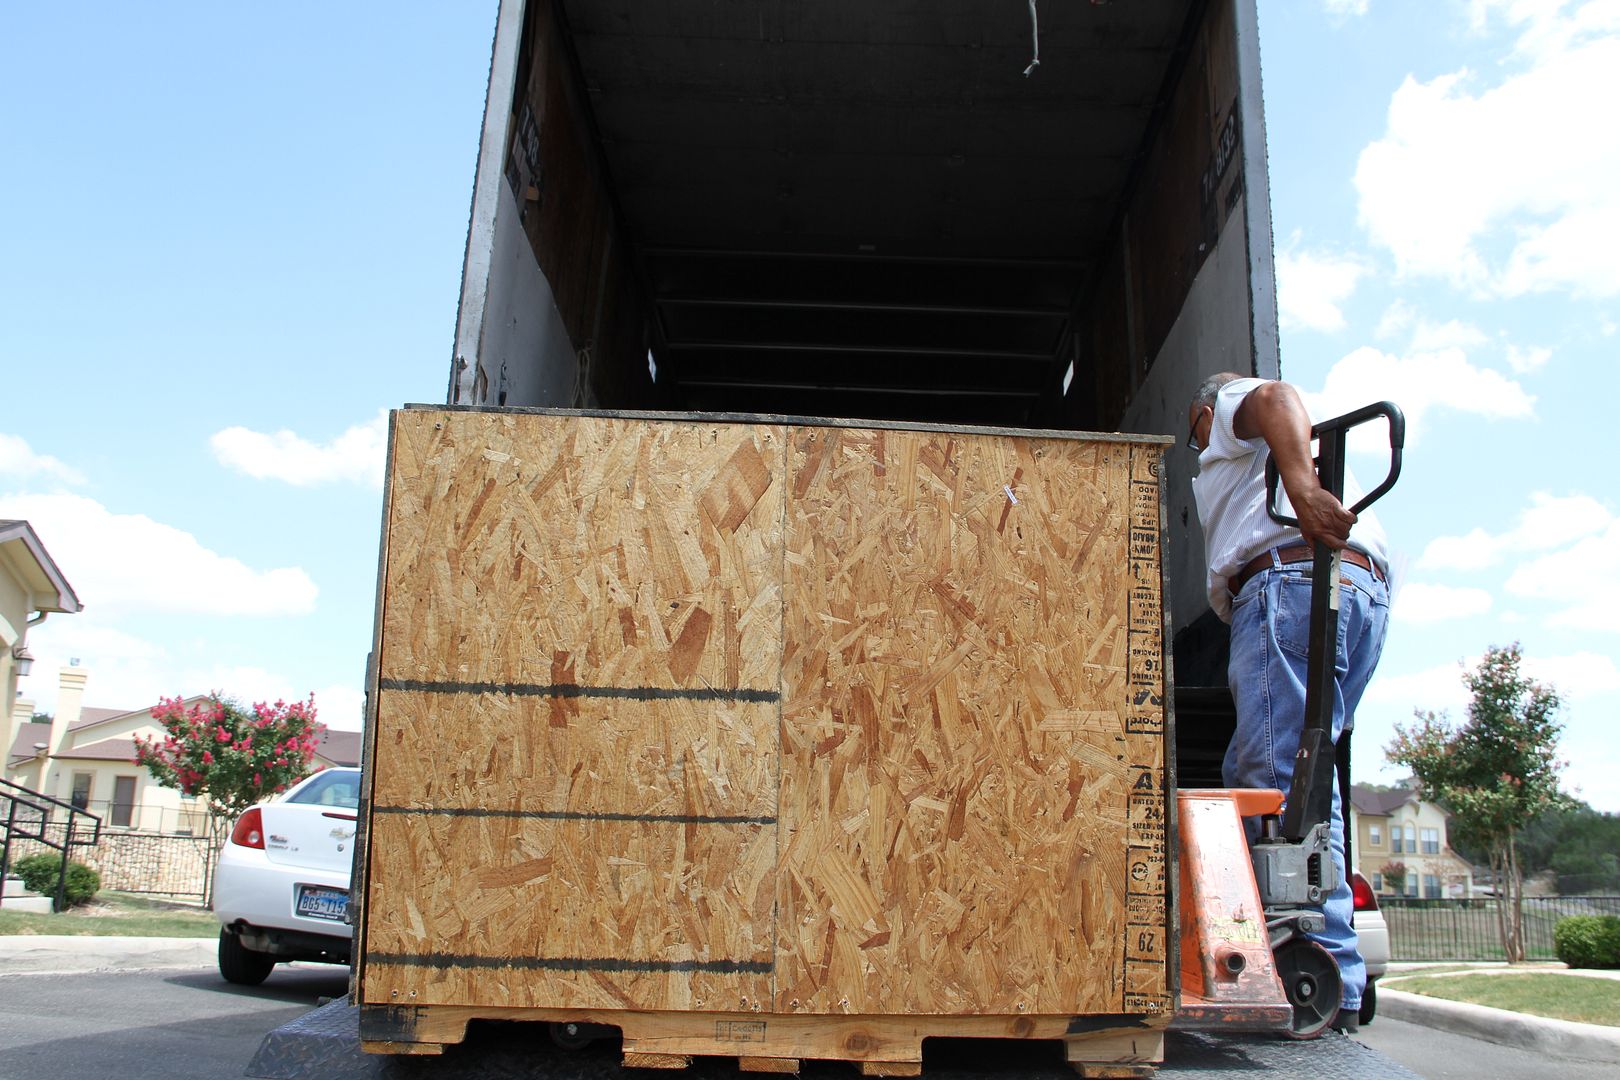
going up.....
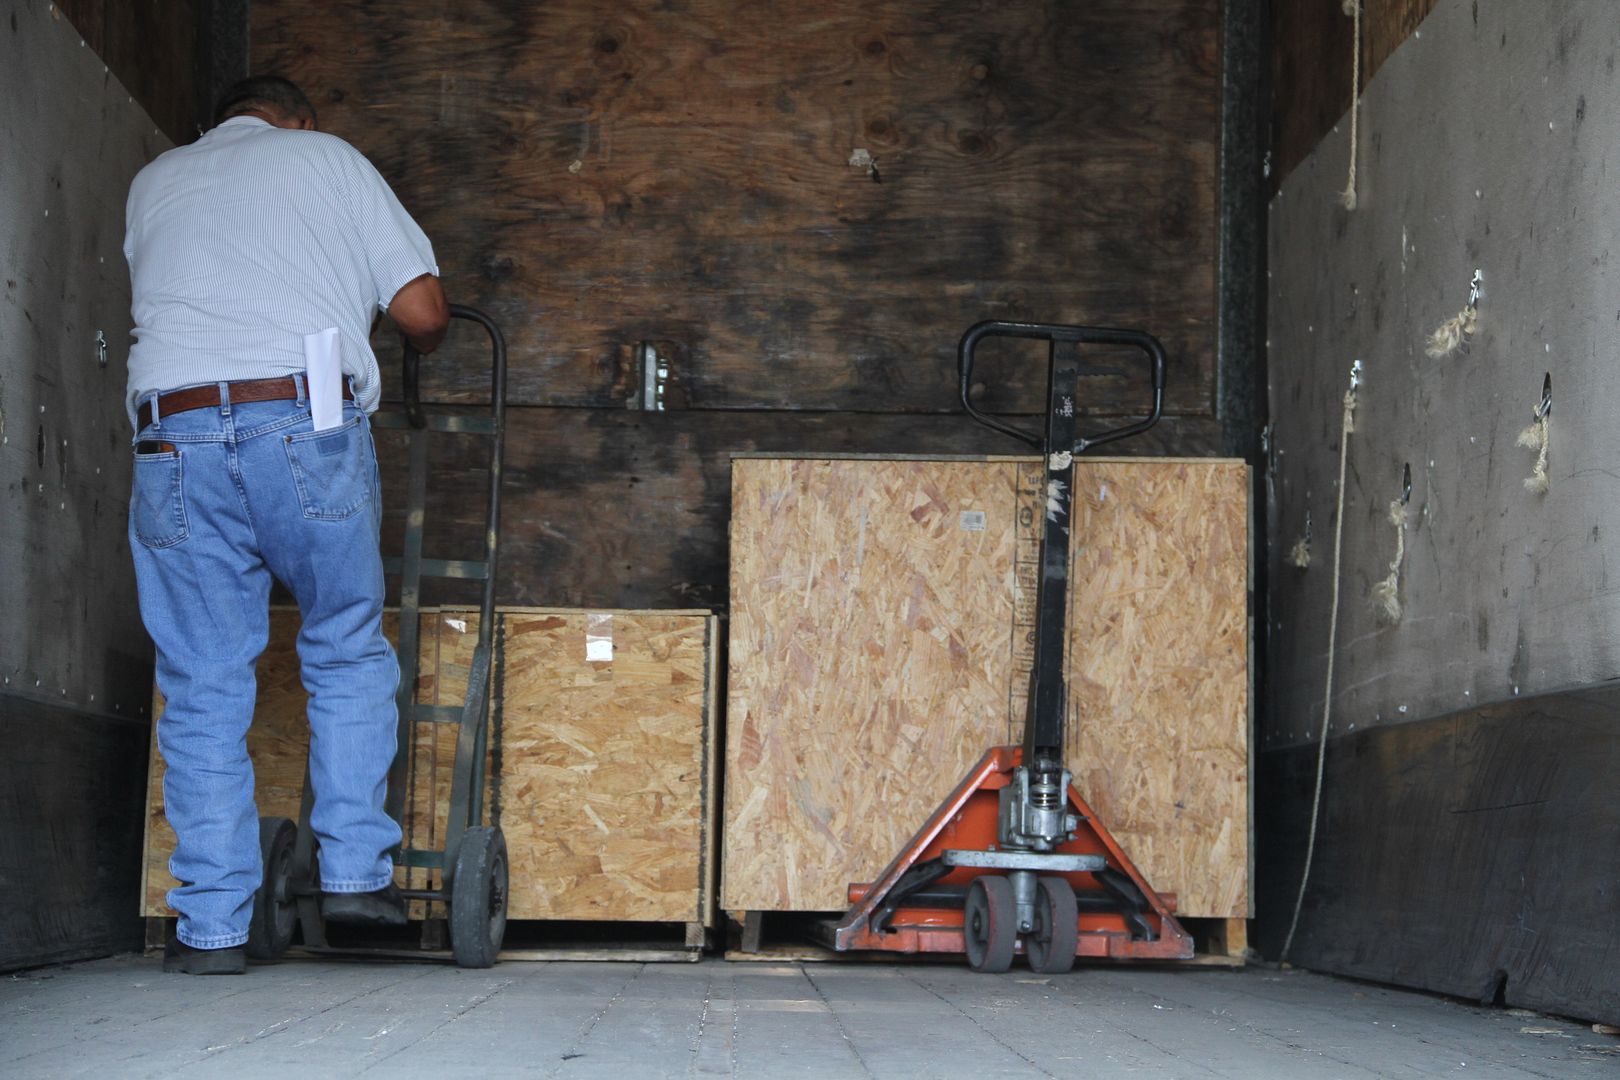
Goodbye,.,., we had fun but it was time to move on....
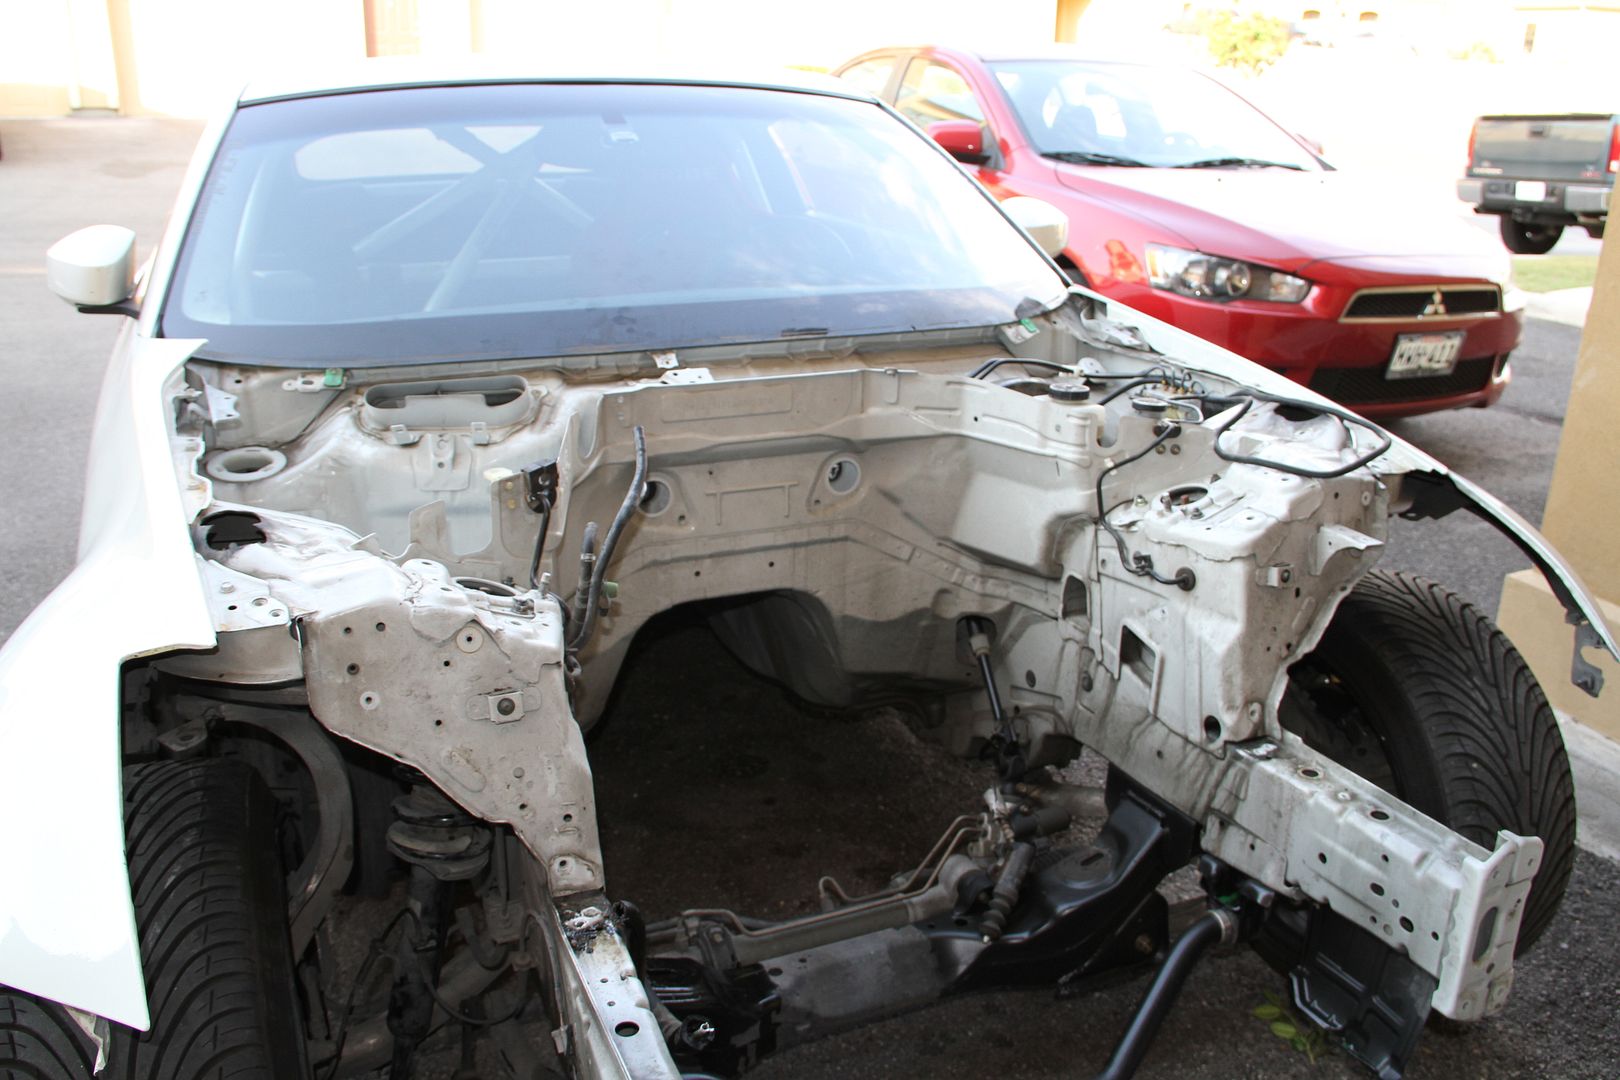
Here is what the bay looks like with out nothing in it... I also removed my windshield wipers and almost every clip..
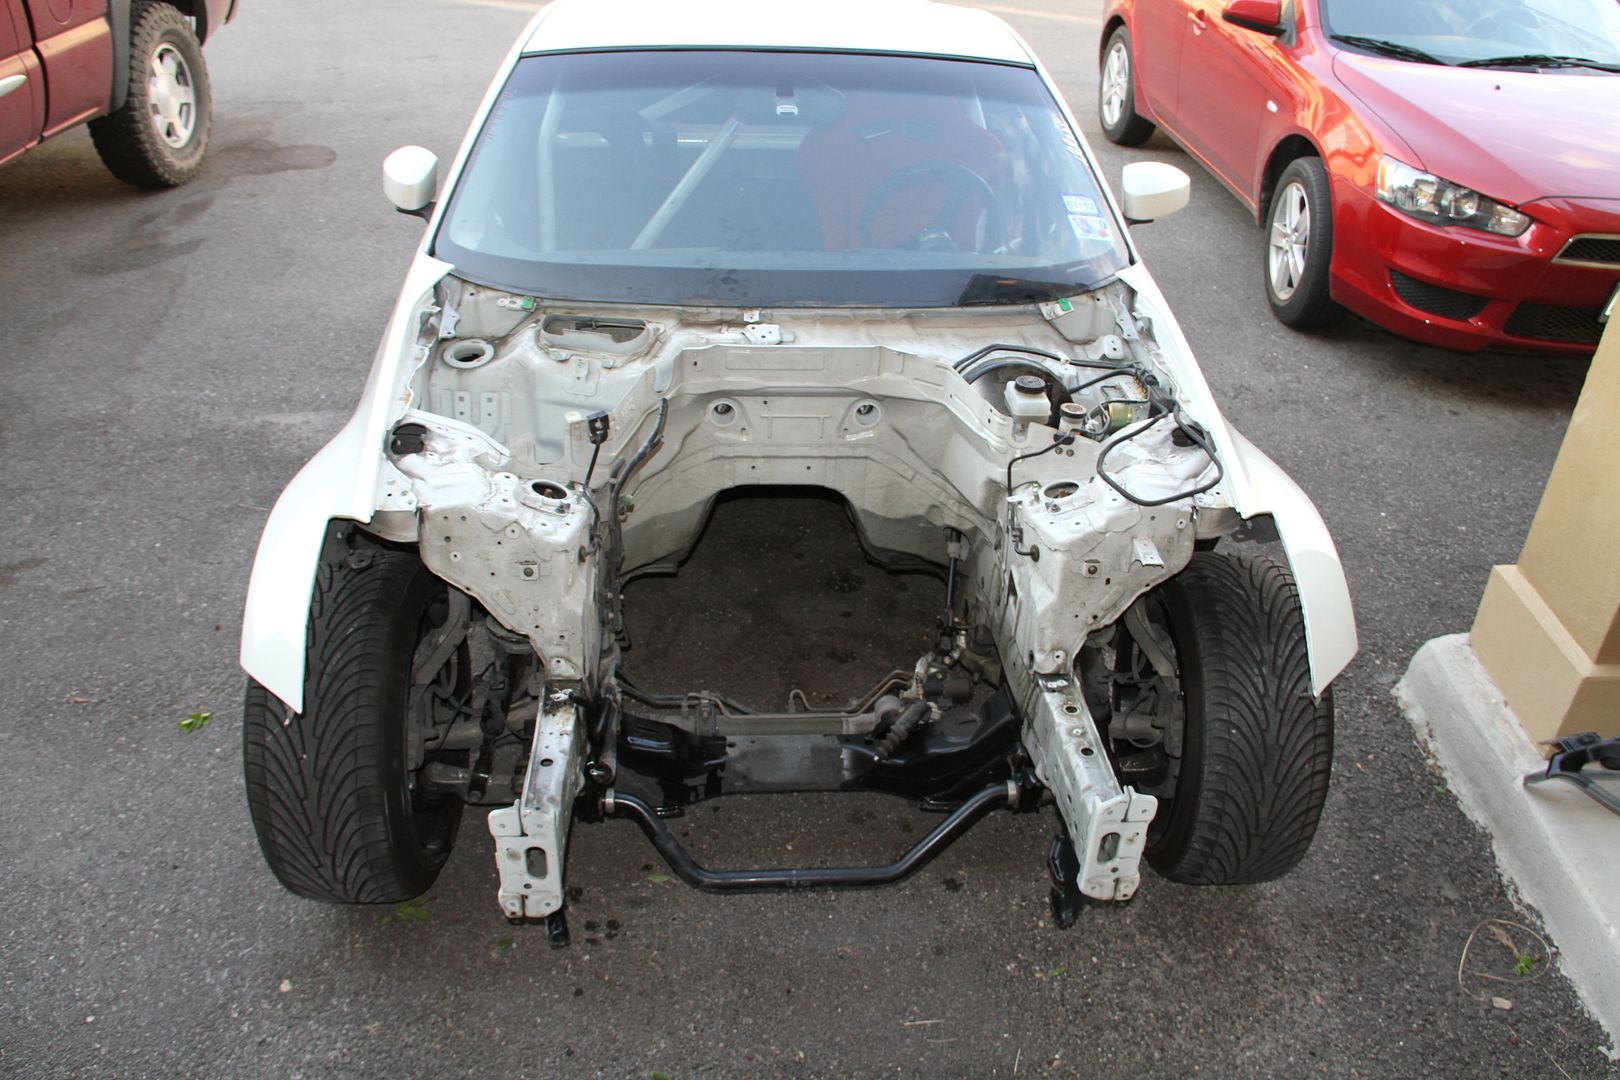
Before the LS1 can put up his "there is no place like home" frame. I will be doing a list of things to make his home pretty.. For one I will be removing the ABS system and redoing my brake lines... I might also cover up all holes I am not going to use... Oh and lets not forget about the main ingredient,, my tube chassis...
So since we did not spend no money this week,, I think we are doing good...lol
Total price so far: $9,089.16
Next week STAGE 3: Phase 1 'LS1 Mock Up'
STAGE 2: Phase 1 'Dropping Engine'
So like I said last week,here are two more Octoberfest beers. We have UFO Pumpkin, which is really good in my opinion. I like their Hefeweizen so this one did not disappoint at all.Easy drinking with a lingering pumpkin aftertaste on the back of the tongue so good..
Next we have Magic Hat "HEX", I just love Magic Hat's marketing.. Well I really like this beer, love that they used Toffee and Carmel gives a good taste but finishes with a smoky taste.. Really good...
Okay before we jump into the build this is a short one due to it only referring to pulling the motor and shipping it off, but it is an important one.
Make sure you have a good engine hoist. I started by removing the tranny first and all the exhaust from the car.
After I did that I started to remove all the radiator support stuff with the radiator. I then proceeded to remove or disconnect all the wires. I also just snapped/cut all hoses I was not going to use, including power steering hose, fuel and so on.. Reason for this is that I plan to replace all of these with AN hoses anyway...... And one last thing say goodbye to AC........lol
And she is out..... It is really easy to remove the VQ motor, it was only me doing it and it took me two days, due to work... So don't be scared to do it your self...
Already have a buyer for the engine/tranny so I have to crate them up for shipping...
Sat like this for a couple of days do to me not having my wood yet...
Finally got my wood and had every thing crated up and secured... Truck/shipping guy arrived and it was time to say goodbye to this VQ motor
going up.....
Goodbye,.,., we had fun but it was time to move on....
Here is what the bay looks like with out nothing in it... I also removed my windshield wipers and almost every clip..
Before the LS1 can put up his "there is no place like home" frame. I will be doing a list of things to make his home pretty.. For one I will be removing the ABS system and redoing my brake lines... I might also cover up all holes I am not going to use... Oh and lets not forget about the main ingredient,, my tube chassis...
So since we did not spend no money this week,, I think we are doing good...lol
Total price so far: $9,089.16
Next week STAGE 3: Phase 1 'LS1 Mock Up'


Thread Starter
|
Registered User
Joined: May 2005
Posts: 1,258
Likes: 127
From: San Antonio
^^ haha nope all factory, don't even have camber arms or toe arms... But that is all going to change with this build... revamping my whole suspension with camber,traction and toe arms, also sway bars and much more...

Registered User
Joined: Dec 2008
Posts: 1,985
Likes: 156
From: Rochester NY
I love this build Edafe. What I love most (that puts it above every other build I can remember) is that you put in price points. That saves SOOOOOO much time and research since that's normally such a large factor as to whether or not the build is even feasible for someone else. Keep up the good work man. And I hope to some day live in an area that has more than Labatt Blue. lol


still an inspring build. Question: the new oil pan *looks* significantly smaller than the stock one on the LS1, any concerns with the oil leaning out in left/right switch overs?
Last edited by IvoryGT; Sep 20, 2011 at 08:01 PM.
Thread Starter
|
Registered User
Joined: May 2005
Posts: 1,258
Likes: 127
From: San Antonio
I love this build Edafe. What I love most (that puts it above every other build I can remember) is that you put in price points. That saves SOOOOOO much time and research since that's normally such a large factor as to whether or not the build is even feasible for someone else. Keep up the good work man. And I hope to some day live in an area that has more than Labatt Blue. lol
I know my route is more expensive then most but it shines some light on some areas..

