
*Face Duct Review!*


Joined: May 2005
Posts: 1,770
Likes: 0
From: 909/626 California
*Face Duct Review!*
First, I would like to thank G35putih for the face ducts (although he should have given them to me as a gift since I'm doing this review  ). If anyone is interested, PM G35Putih for information.
This is what I said in the other thread:
Now after taking some test fit pictures, I'm even more impressed, and I cant wait to sand down the bottom of mine so it fits with my molded ings lip!!! When I held it on, it just seemed to fit right in place. There were a few little gaps, but thats to be expected when I'm holding it on with my fingers. If I installed it with the double sided tape, it would eliminate the gaps. Here are the pictures.
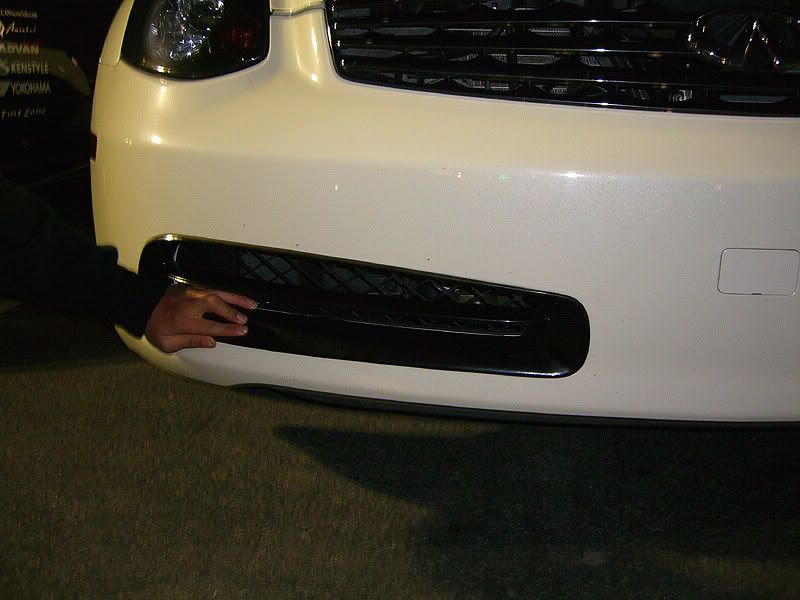
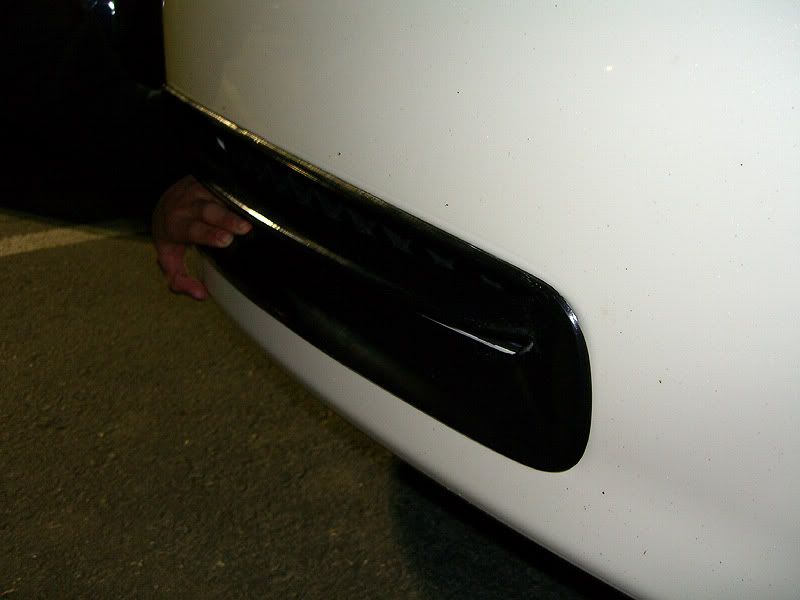
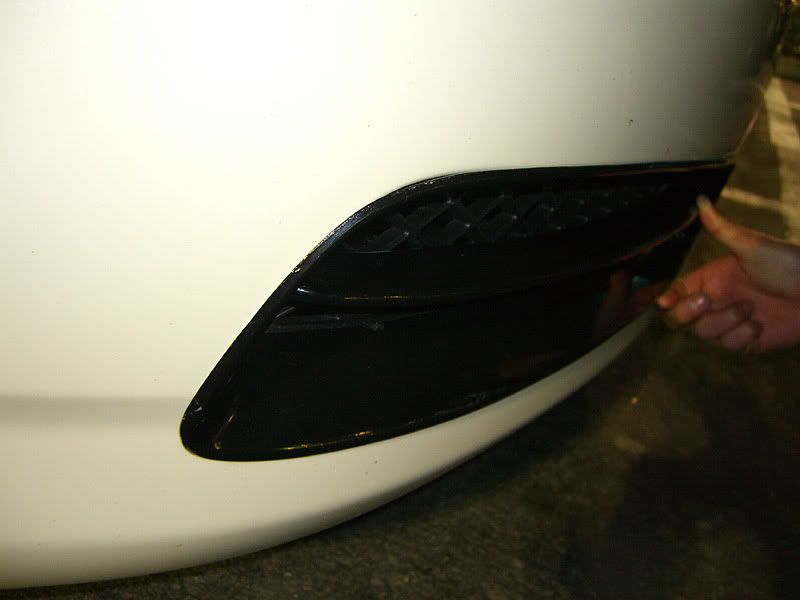
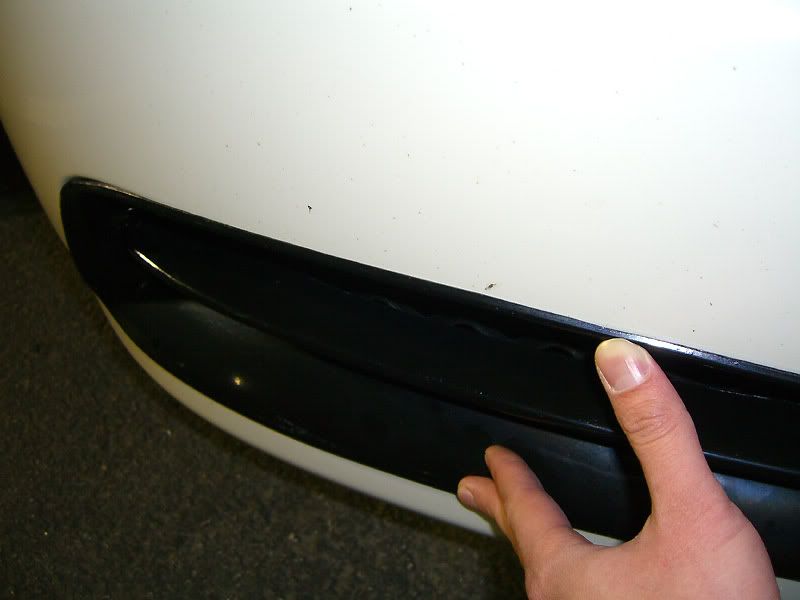
As you can see, the fitment is dead on!
). If anyone is interested, PM G35Putih for information.This is what I said in the other thread:
I JUST GOT MINE! Its real, and its finally happening!!!! I must say, I'm very impressed, and it looks great! The fitment might take a little work... wiggling it around to make it sit flush, but overall, its very snug! Another VERY big plus, is that its made of black fiberglass! That means, if it ever gets any rock chips, scratches or anything like that.. it'll stay black, and wont be polka-dotted with white dots everywhere! The ONLY downside to it is... for anyone that has a molded front lip, you might have to customize your lip a little to fit flush with the face ducts. The bodyshop that installed my lip molded it just a couple mm too high, so I'm going to have to shave the bottom of the face ducts a little. I'll take some pictures of them shortly, to show the quality and detail that was put into these! This thursday, at the local G35 meet, I'll bring them along to take some test fitment shots on a G. This weekend, I'll shave them down and install them, and if I finish, I'll take some final pictures of them on my car. I'm also installing sways on my car... with some other goodies, so I'm going to be busy this weekend, so I might not have enough time to custom fit them for my car for pictures.
As you can see, the fitment is dead on!
Last edited by Silverbolt; Jan 19, 2006 at 10:35 PM.
Joined: May 2005
Posts: 1,770
Likes: 0
From: 909/626 California
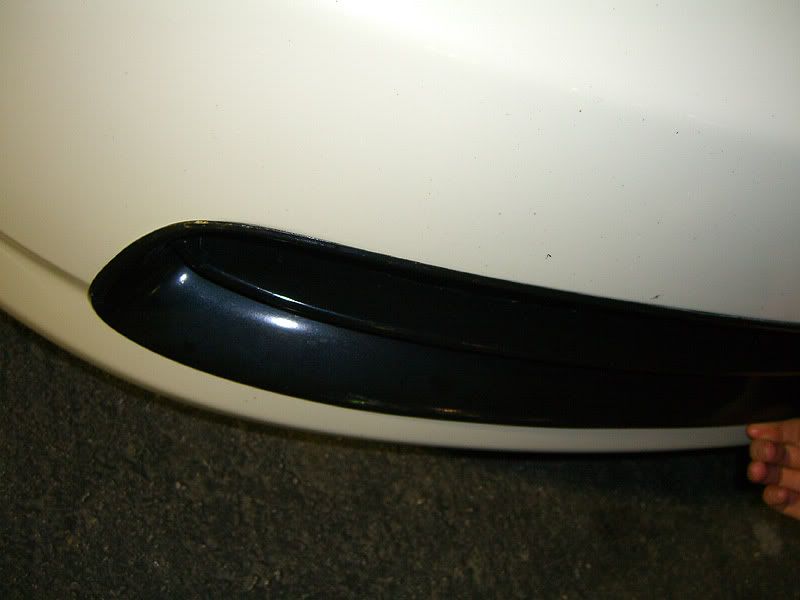
Here are some product shots of it!

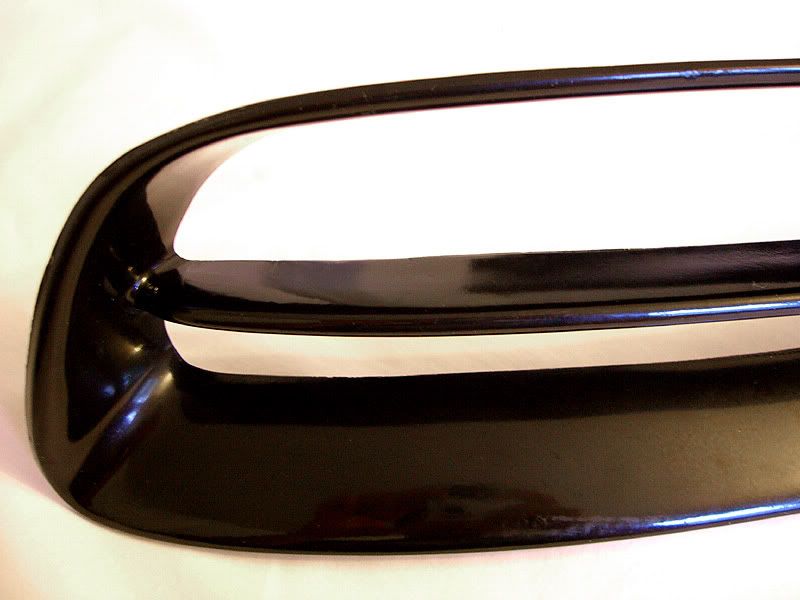

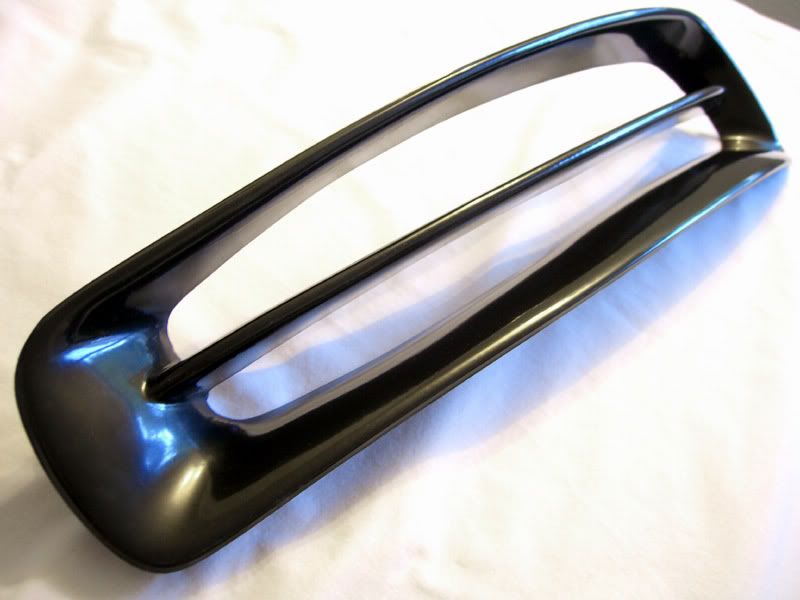
I was in a hurry, because I wanted to head down to the hardware store to pick up some sand paper to sand it down to fit with my molded lip. Thats why the picture quality isnt too great, but I did what I could ENJOY!!!
I was in a hurry, because I wanted to head down to the hardware store to pick up some sand paper to sand it down to fit with my molded lip. Thats why the picture quality isnt too great, but I did what I could
ENJOY!!!

Joined: May 2005
Posts: 1,770
Likes: 0
From: 909/626 California
Again, it comes semi-gloss black, and its great quality! In the pictures, they were a little diry, and I just got lazy and wiped it down with my t-shirt Right now, I'm debating if I should sand it down, polish it up and slap it on.. or paint it. Theres little tiny nicks in them, but you cant seem them from arms length. Right now, I'm thinking of leaving it the way it is, and use black crayon to fill in the nicks, and when/if I get rock chips, I'll bust out the black crayon again
Right now, I'm debating if I should sand it down, polish it up and slap it on.. or paint it. Theres little tiny nicks in them, but you cant seem them from arms length. Right now, I'm thinking of leaving it the way it is, and use black crayon to fill in the nicks, and when/if I get rock chips, I'll bust out the black crayon again
Joined: May 2005
Posts: 1,770
Likes: 0
From: 909/626 California
Originally Posted by afr0puff
Do they come pre-painted? Just wondering if they will turn "chalky" after a year or to, or oxidize in the sun.
Originally Posted by Silverbolt
but I kind of like it only semi glossy
Wet sand with 2000 grit for a nice finish. It won't be glossy, but a flat black. Don't bother with the crayon. Just sand everything smooth with something more coarse than 1000.
Trending Topics
Joined: May 2005
Posts: 1,770
Likes: 0
From: 909/626 California
Originally Posted by liu621
how do these fit with the OEM lip?

Also, another thing I noticed that although it sits clean and flush with the outside of the openings, the inside "walls" dont touch. They're curved up a little towards the center. At first, I thought of it as a problem, but now that I'm actually working on mine right now... sanding... test fitting... sanding.. fitting... I realized that that slight curve will actually help in the installation of the face ducts!!!! Ok, now the explanation; The face ducts are held on by high adhessive double sided tape. So this is what I'm thinking. The parts that curve up will be covered with double sided tap, so I'll be able to slide them straight in without any problems. Once I get them into the possition I want, I'll just press down on the curves so it sticks to the bumper to hold it in place!! I dont know if they were purposely designed like that, or if this was just serendipity. Either way, I'm heading back outside with a big smile on my face, and I sand it down some more!

Joined: May 2005
Posts: 1,770
Likes: 0
From: 909/626 California
Another thing I noticed was that the top opening of the face ducts opens up slightly more towards the outside of the face ducts. That opening is actually perfect for a foglight to shine through! This leaves the option open for me to have foglights behind my grill if I ever decide to. And since I have the face ducts, I might cut out the back grill all together. These are just some thoughts and ideas I have running through my head.

Joined: May 2005
Posts: 1,770
Likes: 0
From: 909/626 California
IS300TOG35, your grill is painted black? Yeah, that would match really nicely together! I was looking at the picture I just posted, with the stock front lip. If he had a back upper grill like yours, that would match alot better! After I'm done installing mine, my face duct "fin" should be chrome to match my stock upper grill

silverbolt good to know it finally happend after such a long time..............snap some pics after install...........matt good idea with painting the other grille