DIY: Lowering an 07 G35S pic and write up
#31
 04-17-2008, 10:05 AM


Registered User
Join Date: Mar 2008
Location: Houston, Texas
Posts: 201
Likes: 0
Received 0 Likes
on
0 Posts

 )
)

#33
04-21-2008, 03:32 PM

Join Date: Oct 2007
Location: Columbus, Oh
Posts: 99
Likes: 0
Received 0 Likes
on
0 Posts
#34
06-28-2008, 10:34 AM

Registered User


#36
06-28-2008, 07:50 PM
#37
06-29-2008, 06:34 AM
#38
07-12-2008, 06:56 PM
Registered User
ALL DISCLAIMERS APPLY HERE TOO, whatever you do on your own, you do so at YOU'RE OWN RISK. These are the Eibach springs used in the RWD installation. No problems with lining anything up, like they were made for the AwD as well.
I would like to thank Timmay77 for writing such a comprehensive DIY with photos.
For those of you who are planning to do this with the AWD models, there are some differences worth noting. Every other step is identical as is the rear spring setup as Timmay77's instructions.
I will do my best to point out the *differences* so please bear with me, as I may get some terminology incorrect as well.
REPLACING FRONT SPRINGS.......
This step is abit different for AWD cars due to there being a driveshaft in the way. This is the best photo I could take as I had put the car all back together.
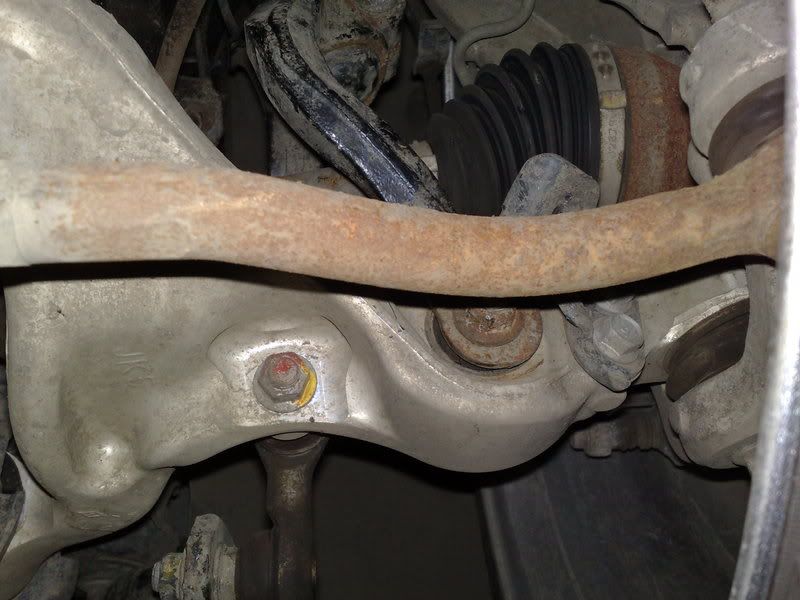
The black part is the strut that the driveshaft goes through. It forms a "Y" shape and bolts onto the lower control arm. This needs to be removed.
In order to remove the strut from the vehicle, the upper control arm must be separated.
Be very careful when removing the bolt from this part, as when I removed it, it was very *tight* and mushroomed the threads on the bolt. I had to re-tap the threads and it is fine now.
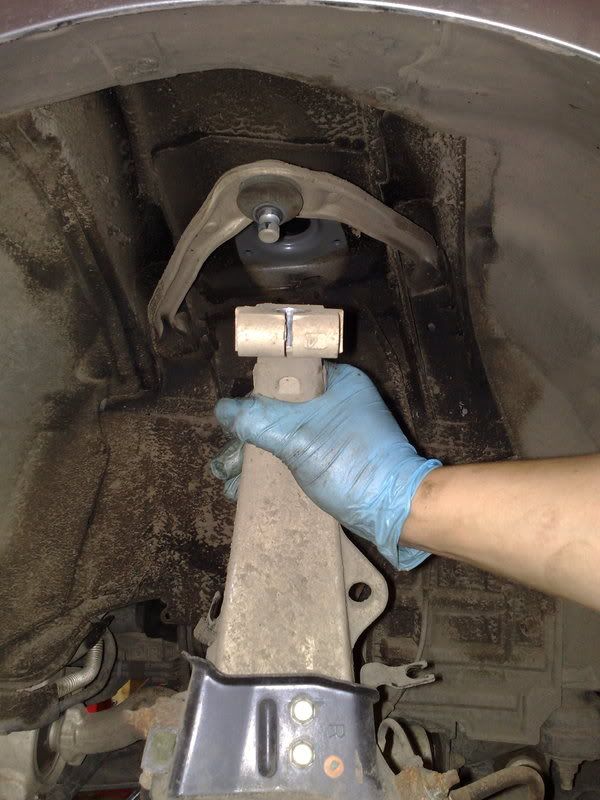
At this point, be careful not to let the assembly drop too low from the car,
there is a danger of the axle coming OUT of the transmission.
If this happens, (depending on your luck) you may be in for a painful moment as you try and line up the axle to put it back into the tranny.
To prevent this, keep the top part of the assemble where you took the bolt out, close to the car,
if you let it drop, best of luck to you, as the axle may come out.
Installing the new spring notes,

As you can see, both look identical, Those of you who do the "Foot technique" for removing springs. This technique will only take you so far, as the struts are PRELOADED. Meaning you will HAVE TO COMPRESS THE NEW SPRING to re-assemble it. There is no way around this. The shaft will not come out far enough and this is the first time I has encountered a pre-loaded suspension. Make sure you have a spring compressor, otherwise, you may have just borked yourself if you employed the "Foot technique" without a compressor.
It was looking pretty bleak with the new springs in, but rest assured, there is a drop involved.
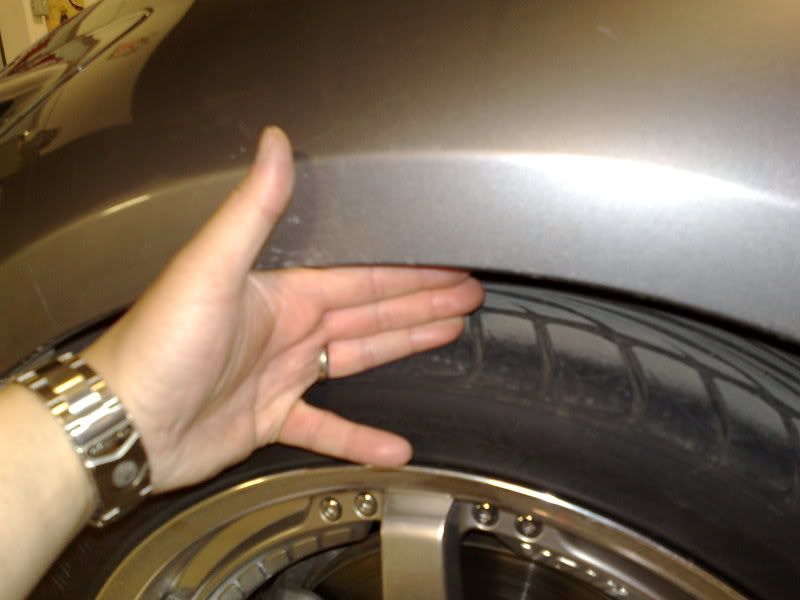
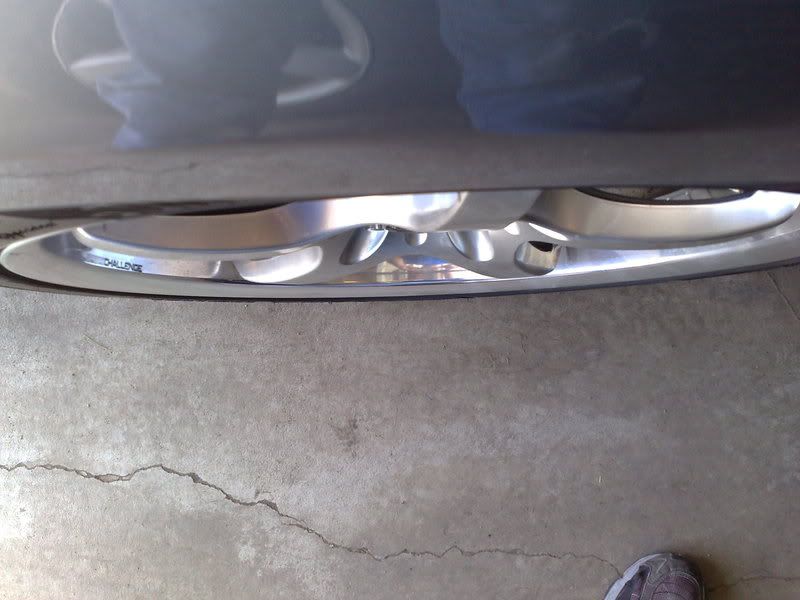
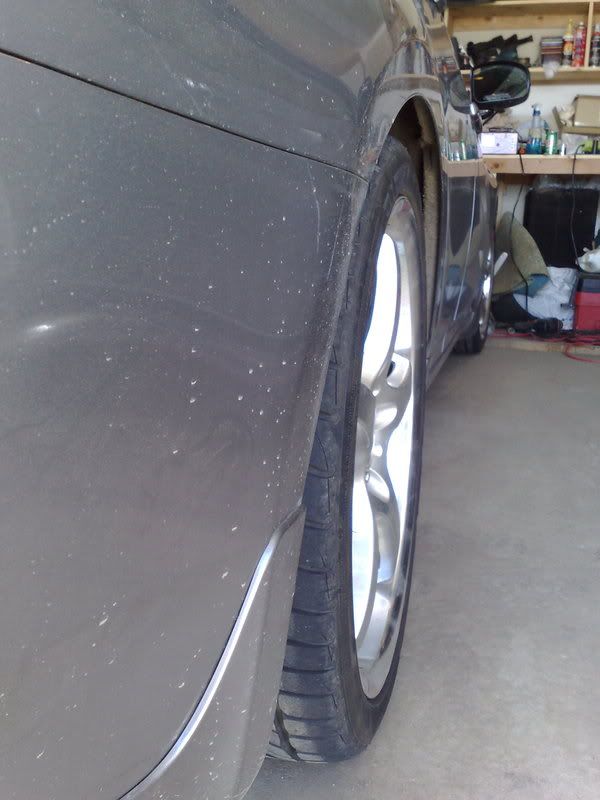
Before the install, I was able to get my entire fist into the fenders, front and back, now:
Back:
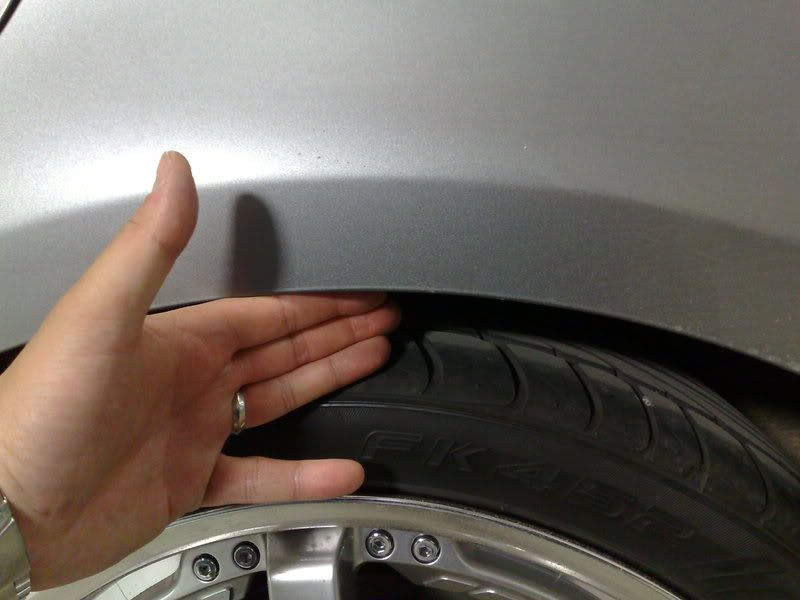
Front:
The rears look a little off camber, :
I will take it to an alignment shop in the following week and report my findings.
With all the different complications I have encountered added about 2 hours to the time, so about 3-4 (because I popped an axle out )
)
A few more pics are here:https://g35driver.com/forums/showthr...59#post3218859
Questions or comments will be cheeerfully replied to in time.
I would like to thank Timmay77 for writing such a comprehensive DIY with photos.
For those of you who are planning to do this with the AWD models, there are some differences worth noting. Every other step is identical as is the rear spring setup as Timmay77's instructions.
I will do my best to point out the *differences* so please bear with me, as I may get some terminology incorrect as well.
REPLACING FRONT SPRINGS.......
This step is abit different for AWD cars due to there being a driveshaft in the way. This is the best photo I could take as I had put the car all back together.
The black part is the strut that the driveshaft goes through. It forms a "Y" shape and bolts onto the lower control arm. This needs to be removed.
In order to remove the strut from the vehicle, the upper control arm must be separated.
Be very careful when removing the bolt from this part, as when I removed it, it was very *tight* and mushroomed the threads on the bolt. I had to re-tap the threads and it is fine now.
At this point, be careful not to let the assembly drop too low from the car,
there is a danger of the axle coming OUT of the transmission.
If this happens, (depending on your luck) you may be in for a painful moment as you try and line up the axle to put it back into the tranny.
To prevent this, keep the top part of the assemble where you took the bolt out, close to the car,
if you let it drop, best of luck to you, as the axle may come out.
Installing the new spring notes,
As you can see, both look identical, Those of you who do the "Foot technique" for removing springs. This technique will only take you so far, as the struts are PRELOADED. Meaning you will HAVE TO COMPRESS THE NEW SPRING to re-assemble it. There is no way around this. The shaft will not come out far enough and this is the first time I has encountered a pre-loaded suspension. Make sure you have a spring compressor, otherwise, you may have just borked yourself if you employed the "Foot technique" without a compressor.
It was looking pretty bleak with the new springs in, but rest assured, there is a drop involved.
Before the install, I was able to get my entire fist into the fenders, front and back, now:
Back:
Front:
The rears look a little off camber, :
I will take it to an alignment shop in the following week and report my findings.
With all the different complications I have encountered added about 2 hours to the time, so about 3-4 (because I popped an axle out
)A few more pics are here:https://g35driver.com/forums/showthr...59#post3218859
Questions or comments will be cheeerfully replied to in time.
Last edited by InTgr8r; 02-13-2009 at 09:00 AM.
#39
08-07-2008, 04:43 PM

#40
08-11-2008, 06:00 PM

Originally Posted by disgookonfiya
...how would you mount coil overs in the rear??? If it's just a spring on a control arm where would the new spring/strut mount?
So, technically, the rears are not "coilovers" in the sense that the spring coils are not sitting "over" the shocks, but they're height adjustable just like other regular coilover set ups.
#41
10-26-2008, 05:29 PM

Registered User
Join Date: Mar 2007
Location: San Clemente
Posts: 145
Likes: 0
Received 0 Likes
on
0 Posts
#42
01-31-2009, 08:02 PM

Just wanted to say thanks for the excellent write up and pictures. Put on my Eibach Prokit and camber/toe kit today. It took me about 5 hours--I was surprised because I don't consider myself a newb! Putting back the bolt that secures the bottom of the front strut was a bear--if you line up the springs to the rubber spring mounts-the strut will not be oriented correctly. Also dremeling the toe bolt hole took a little time but wasn't too bad.
I also put on GTspec subframe tie brace--great product, although pricey. Very easy to install using existing holes with the hardware provided. Literally took 5 minutes!
Preliminary opinion: you can feel the bumps in the road a LOT more. I also heard some dash noise I didn't have before. I think it is unavoidable that NVH factor is a notch higher. But the car is much more planted in corners and of course looks awesome so it is all worth it!


#45
08-27-2009, 11:37 AM

Registered User
Join Date: Jun 2009
Location: San Jose, CA
Posts: 164
Likes: 0
Received 0 Likes
on
0 Posts
Damn. That is such a aggressive drop. Looks nice though!