
Journey lip on a 07-08 journey installation pics with templates


Thread Starter
|
Registered User
Joined: Aug 2011
Posts: 24
Likes: 3
Journey lip on a 07-08 journey installation pics with templates
Hey guys, just installed my lip on my journey and thought I'd share a few pics for those who are a bit confused on the Infiniti templates. It was not as easy as I thought but after 2 hours it was not bad. Hope these pics help as reference for any who is confused.
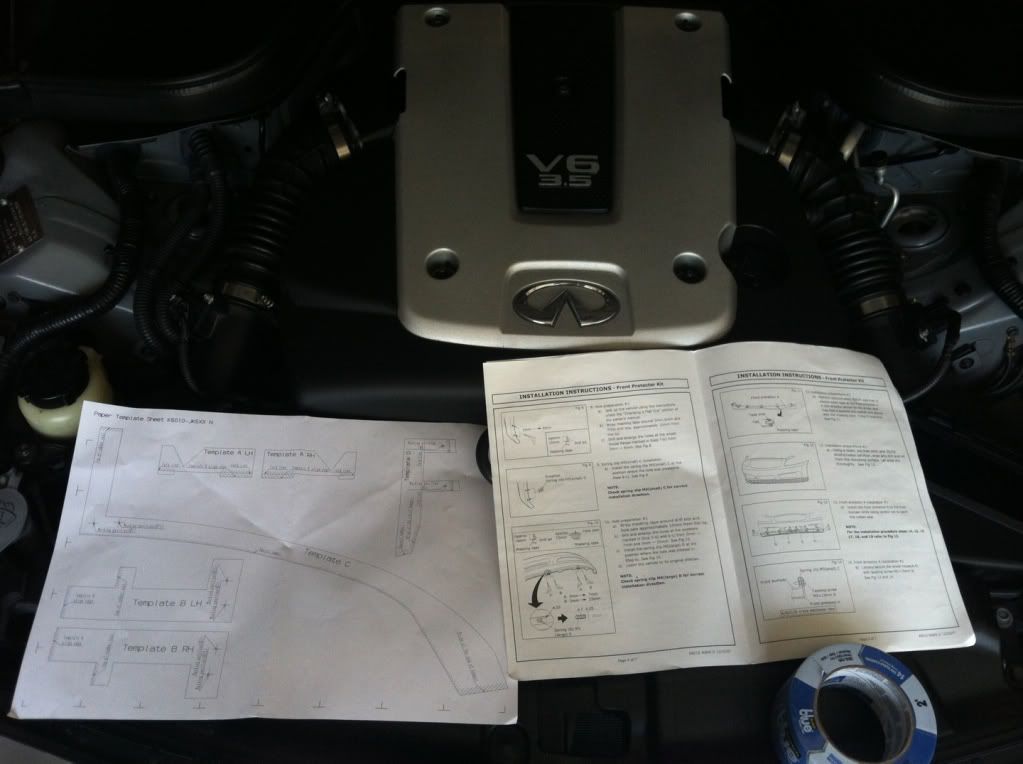
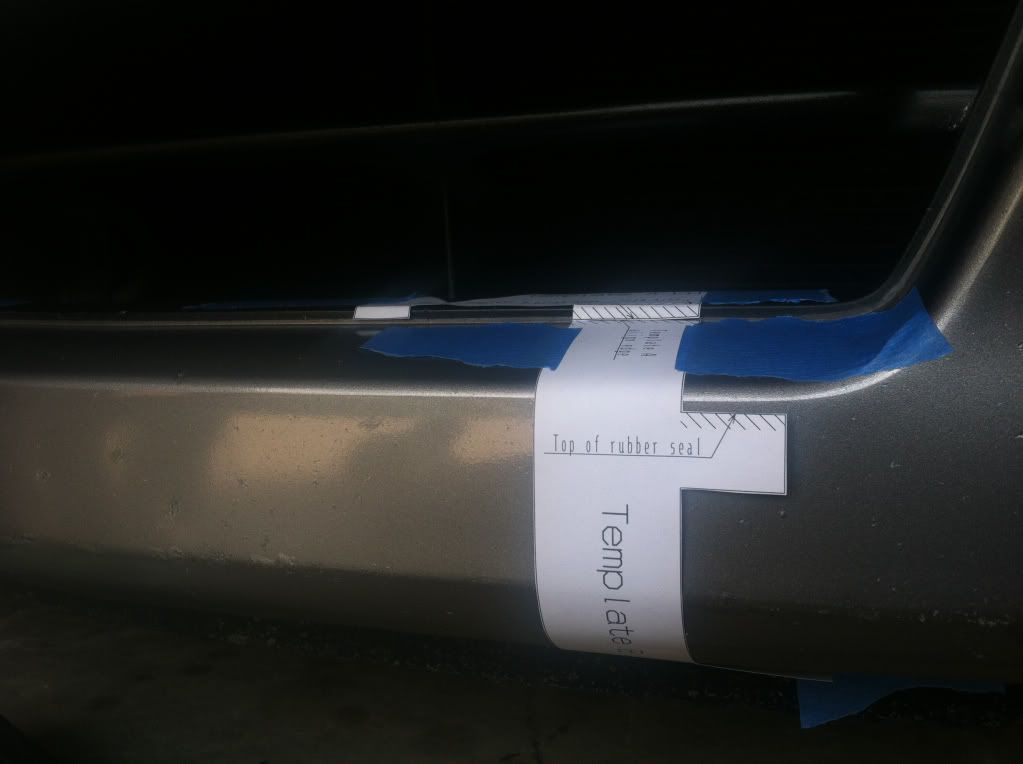
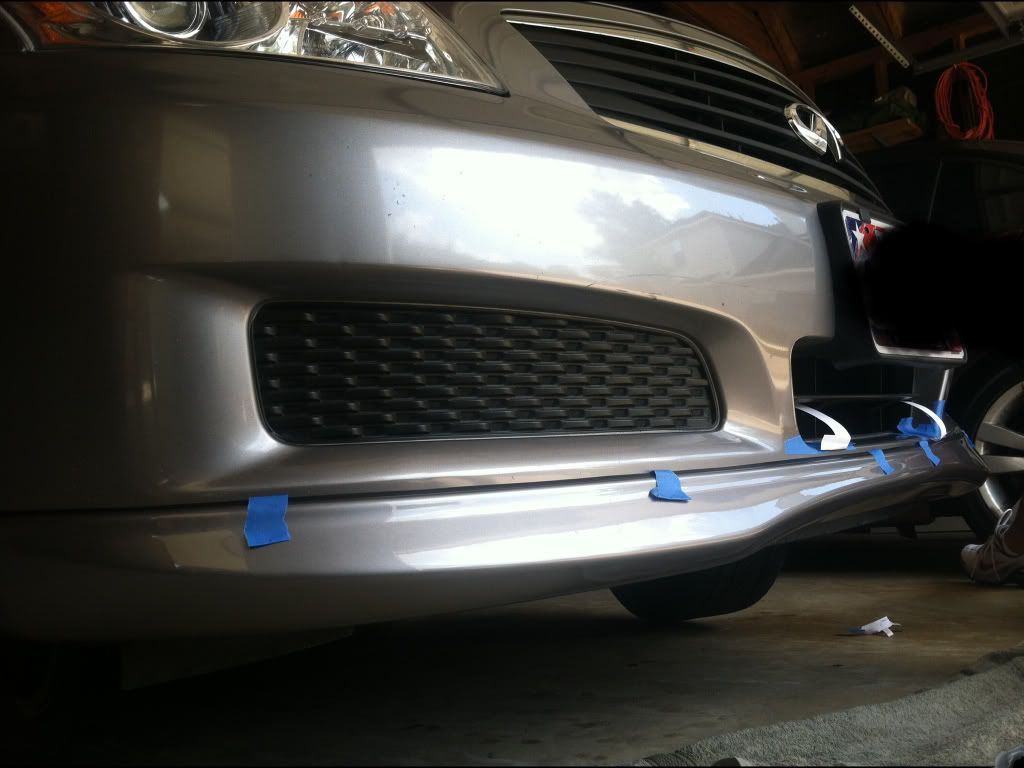
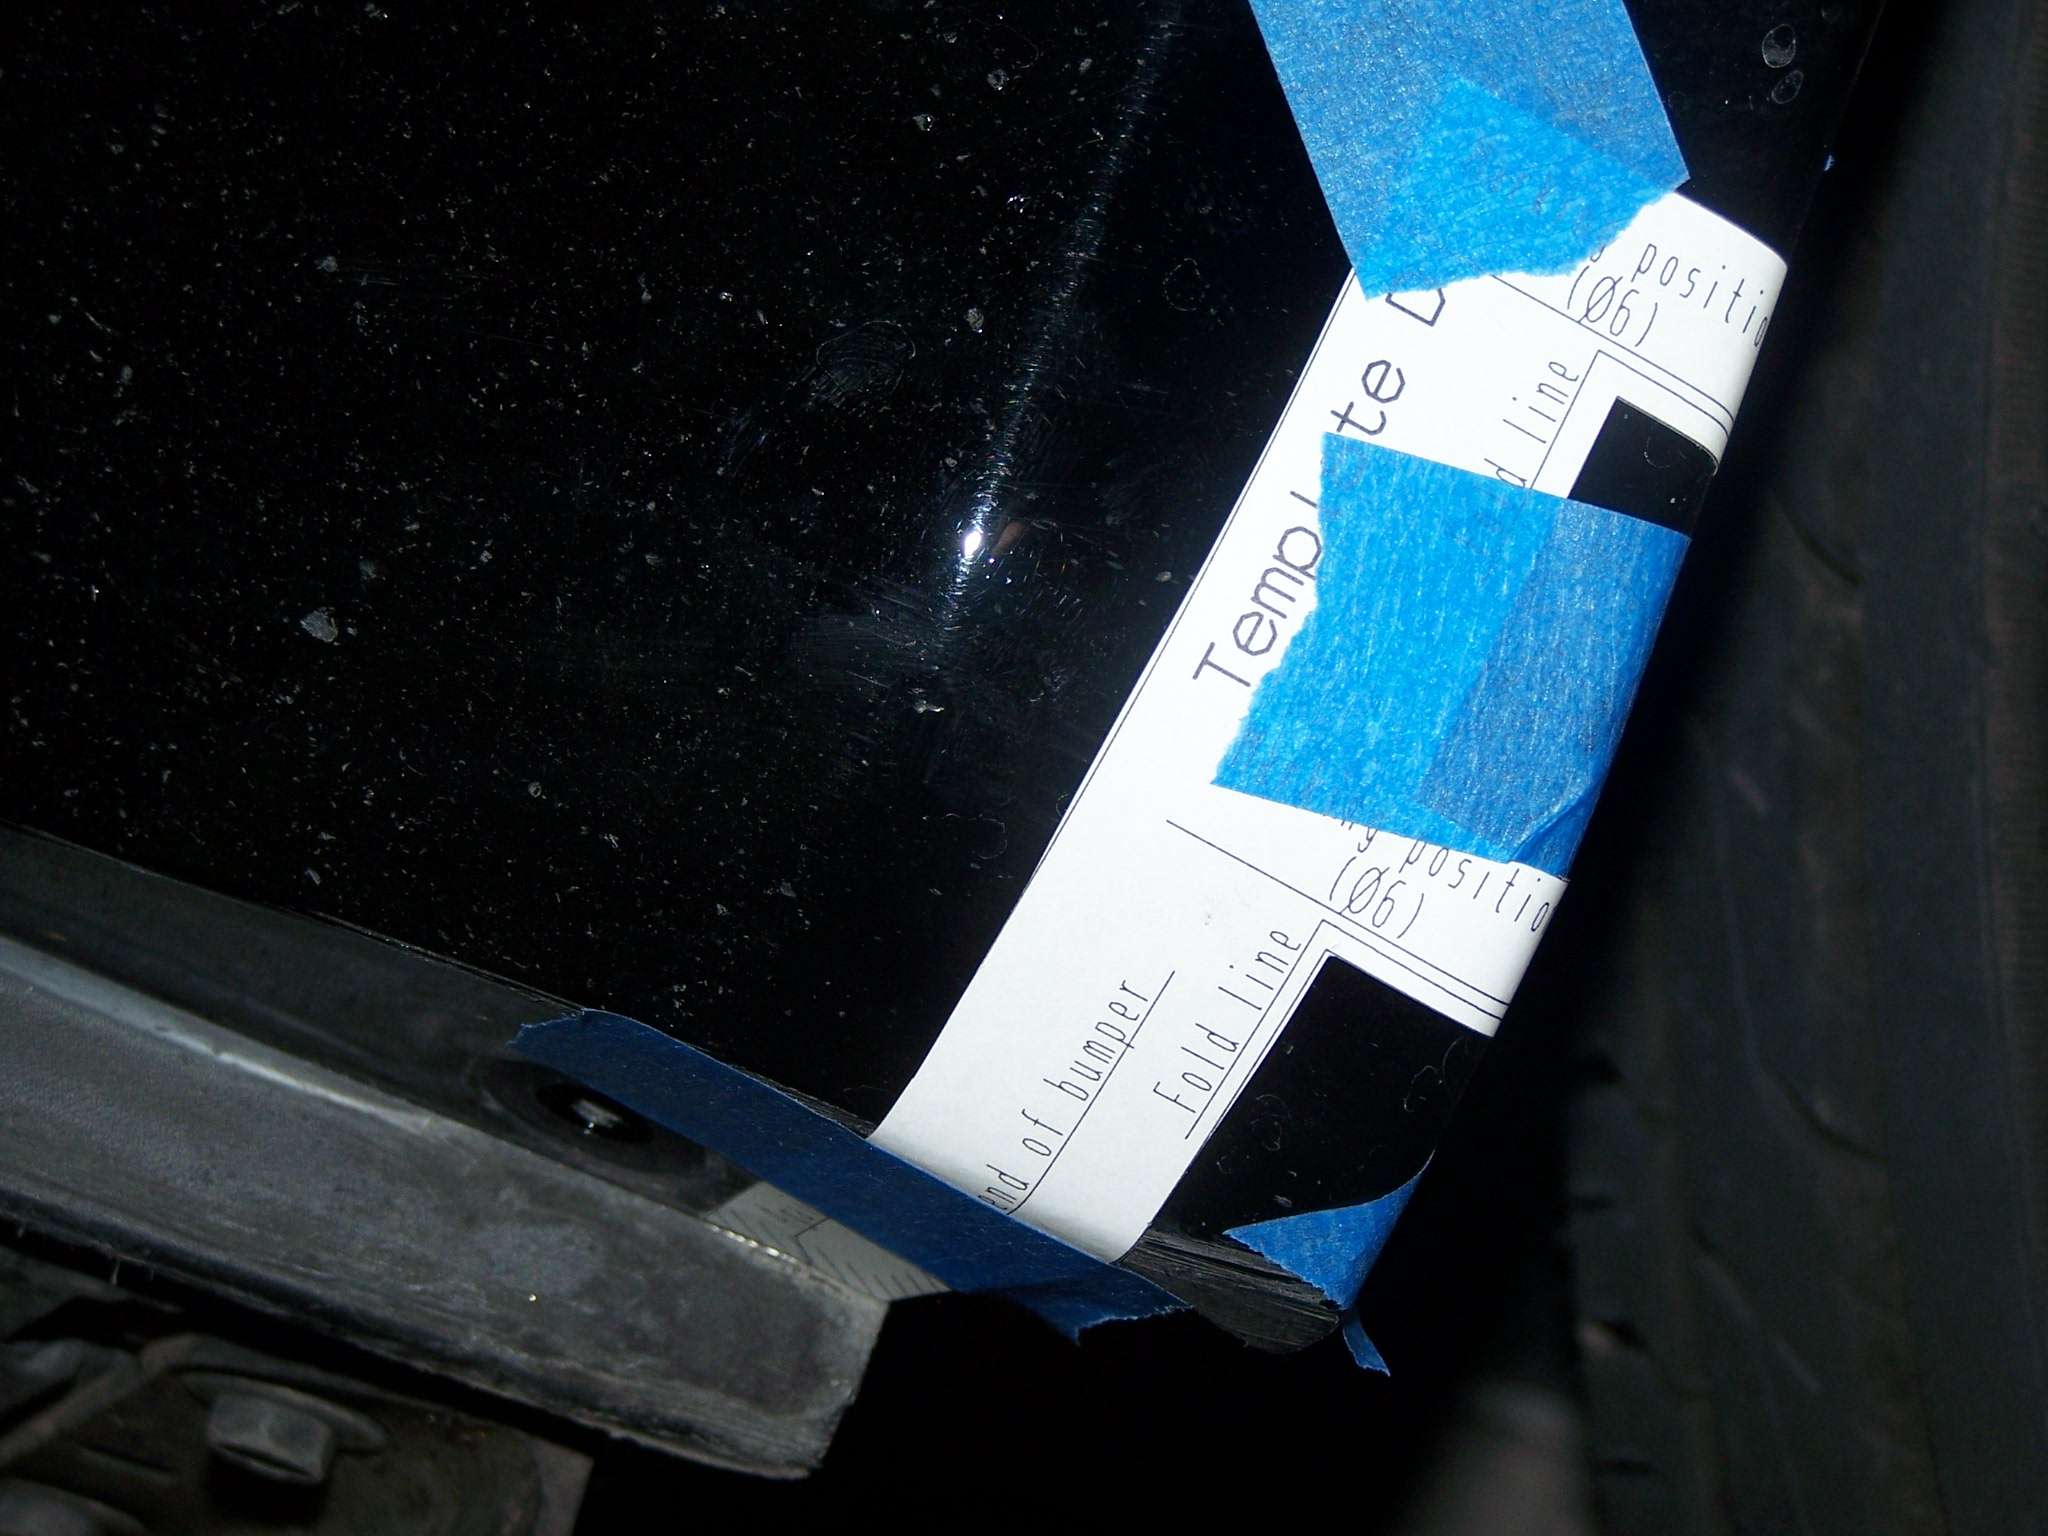
Template A and B installed

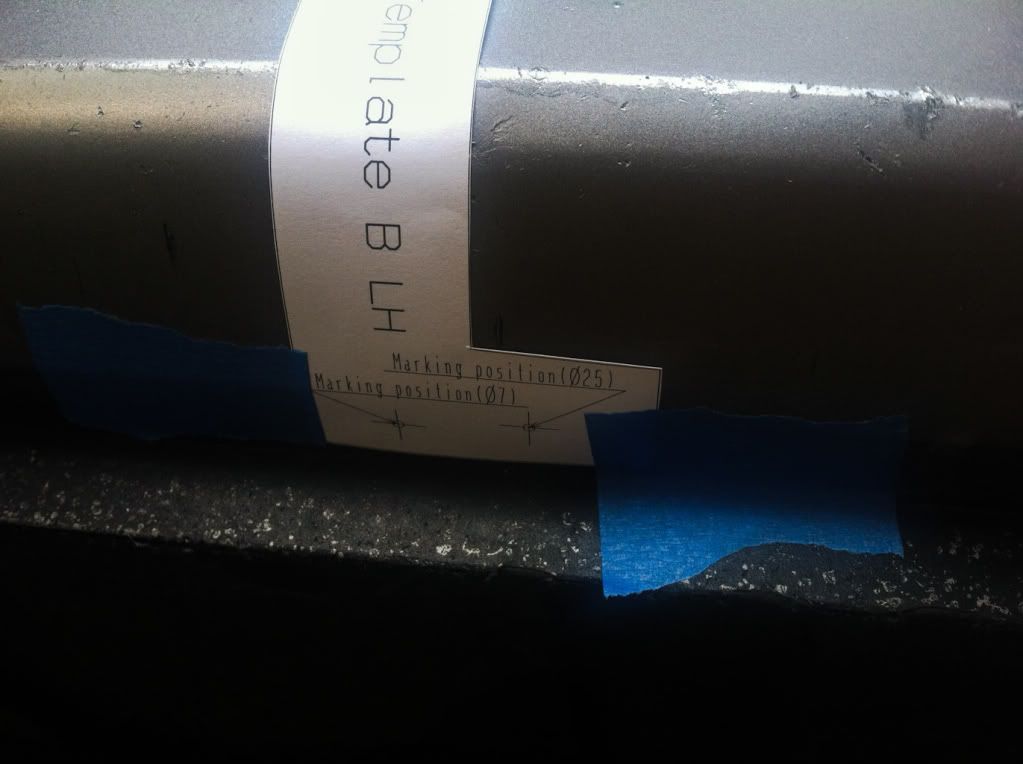
Bottom go template B where you are shown where to drill the holes

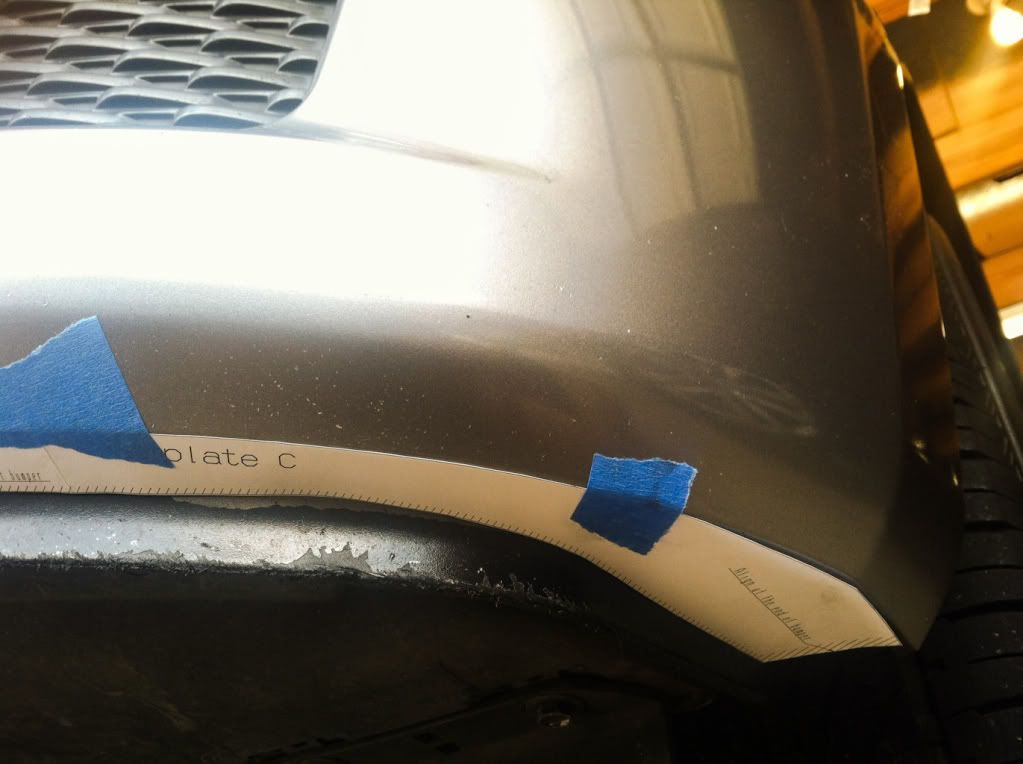
Template C
And now for a test fit
Finally done

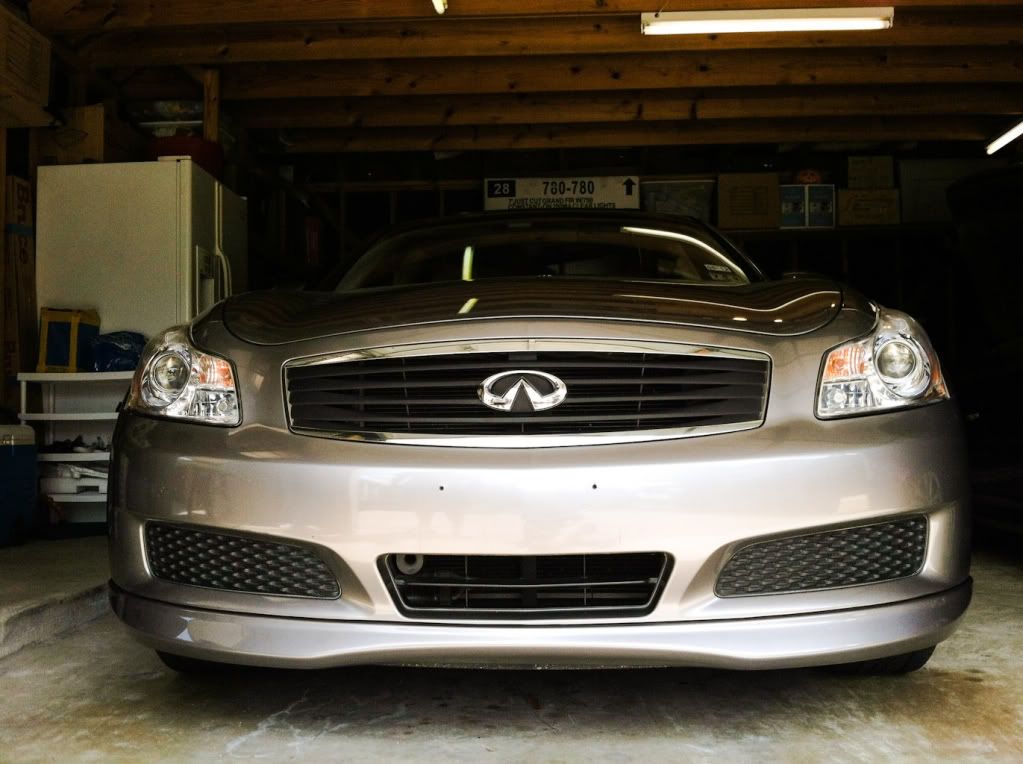
Hope this helps anyone and good luck
Template A and B installed
Bottom go template B where you are shown where to drill the holes
Template C
And now for a test fit
Finally done
Hope this helps anyone and good luck


Thread Starter
|
Registered User
Joined: Aug 2011
Posts: 24
Likes: 3
Sorry guys that i havent replied but work has been busy...
Thanks to all for the good feedback, i appriciate it!
CRV_33 : I plasti dipped my grill in which i have a post about the grill in the forum. I twas not hard to do , just take your time and the out come is awesome.
Thanks to all for the good feedback, i appriciate it!
CRV_33 : I plasti dipped my grill in which i have a post about the grill in the forum. I twas not hard to do , just take your time and the out come is awesome.

Did you have to use any of those (4) washers to make up for any gaps? (figure 19 in the instructions) or did yours fit perfect? Just got mine today and the only thing your pics didn't include was template D but that seems pretty straightforward, After reading the instructions along w/ your actual install pics it looks pretty simple. Did you have a roller or "burnish" (whatever the hell that is, lol) to apply pressure to the lip after taping it down or just pressed it w/ pressure moving along the tape? After installing my rear oem spoiler w/out instructions or templates this should be a walk in the park 
Thanks again
Thanks again
Thread Starter
|
Registered User
Joined: Aug 2011
Posts: 24
Likes: 3
Did you have to use any of those (4) washers to make up for any gaps? (figure 19 in the instructions) or did yours fit perfect? Just got mine today and the only thing your pics didn't include was template D but that seems pretty straightforward, After reading the instructions along w/ your actual install pics it looks pretty simple. Did you have a roller or "burnish" (whatever the hell that is, lol) to apply pressure to the lip after taping it down or just pressed it w/ pressure moving along the tape? After installing my rear oem spoiler w/out instructions or templates this should be a walk in the park
Thanks again
Thanks again
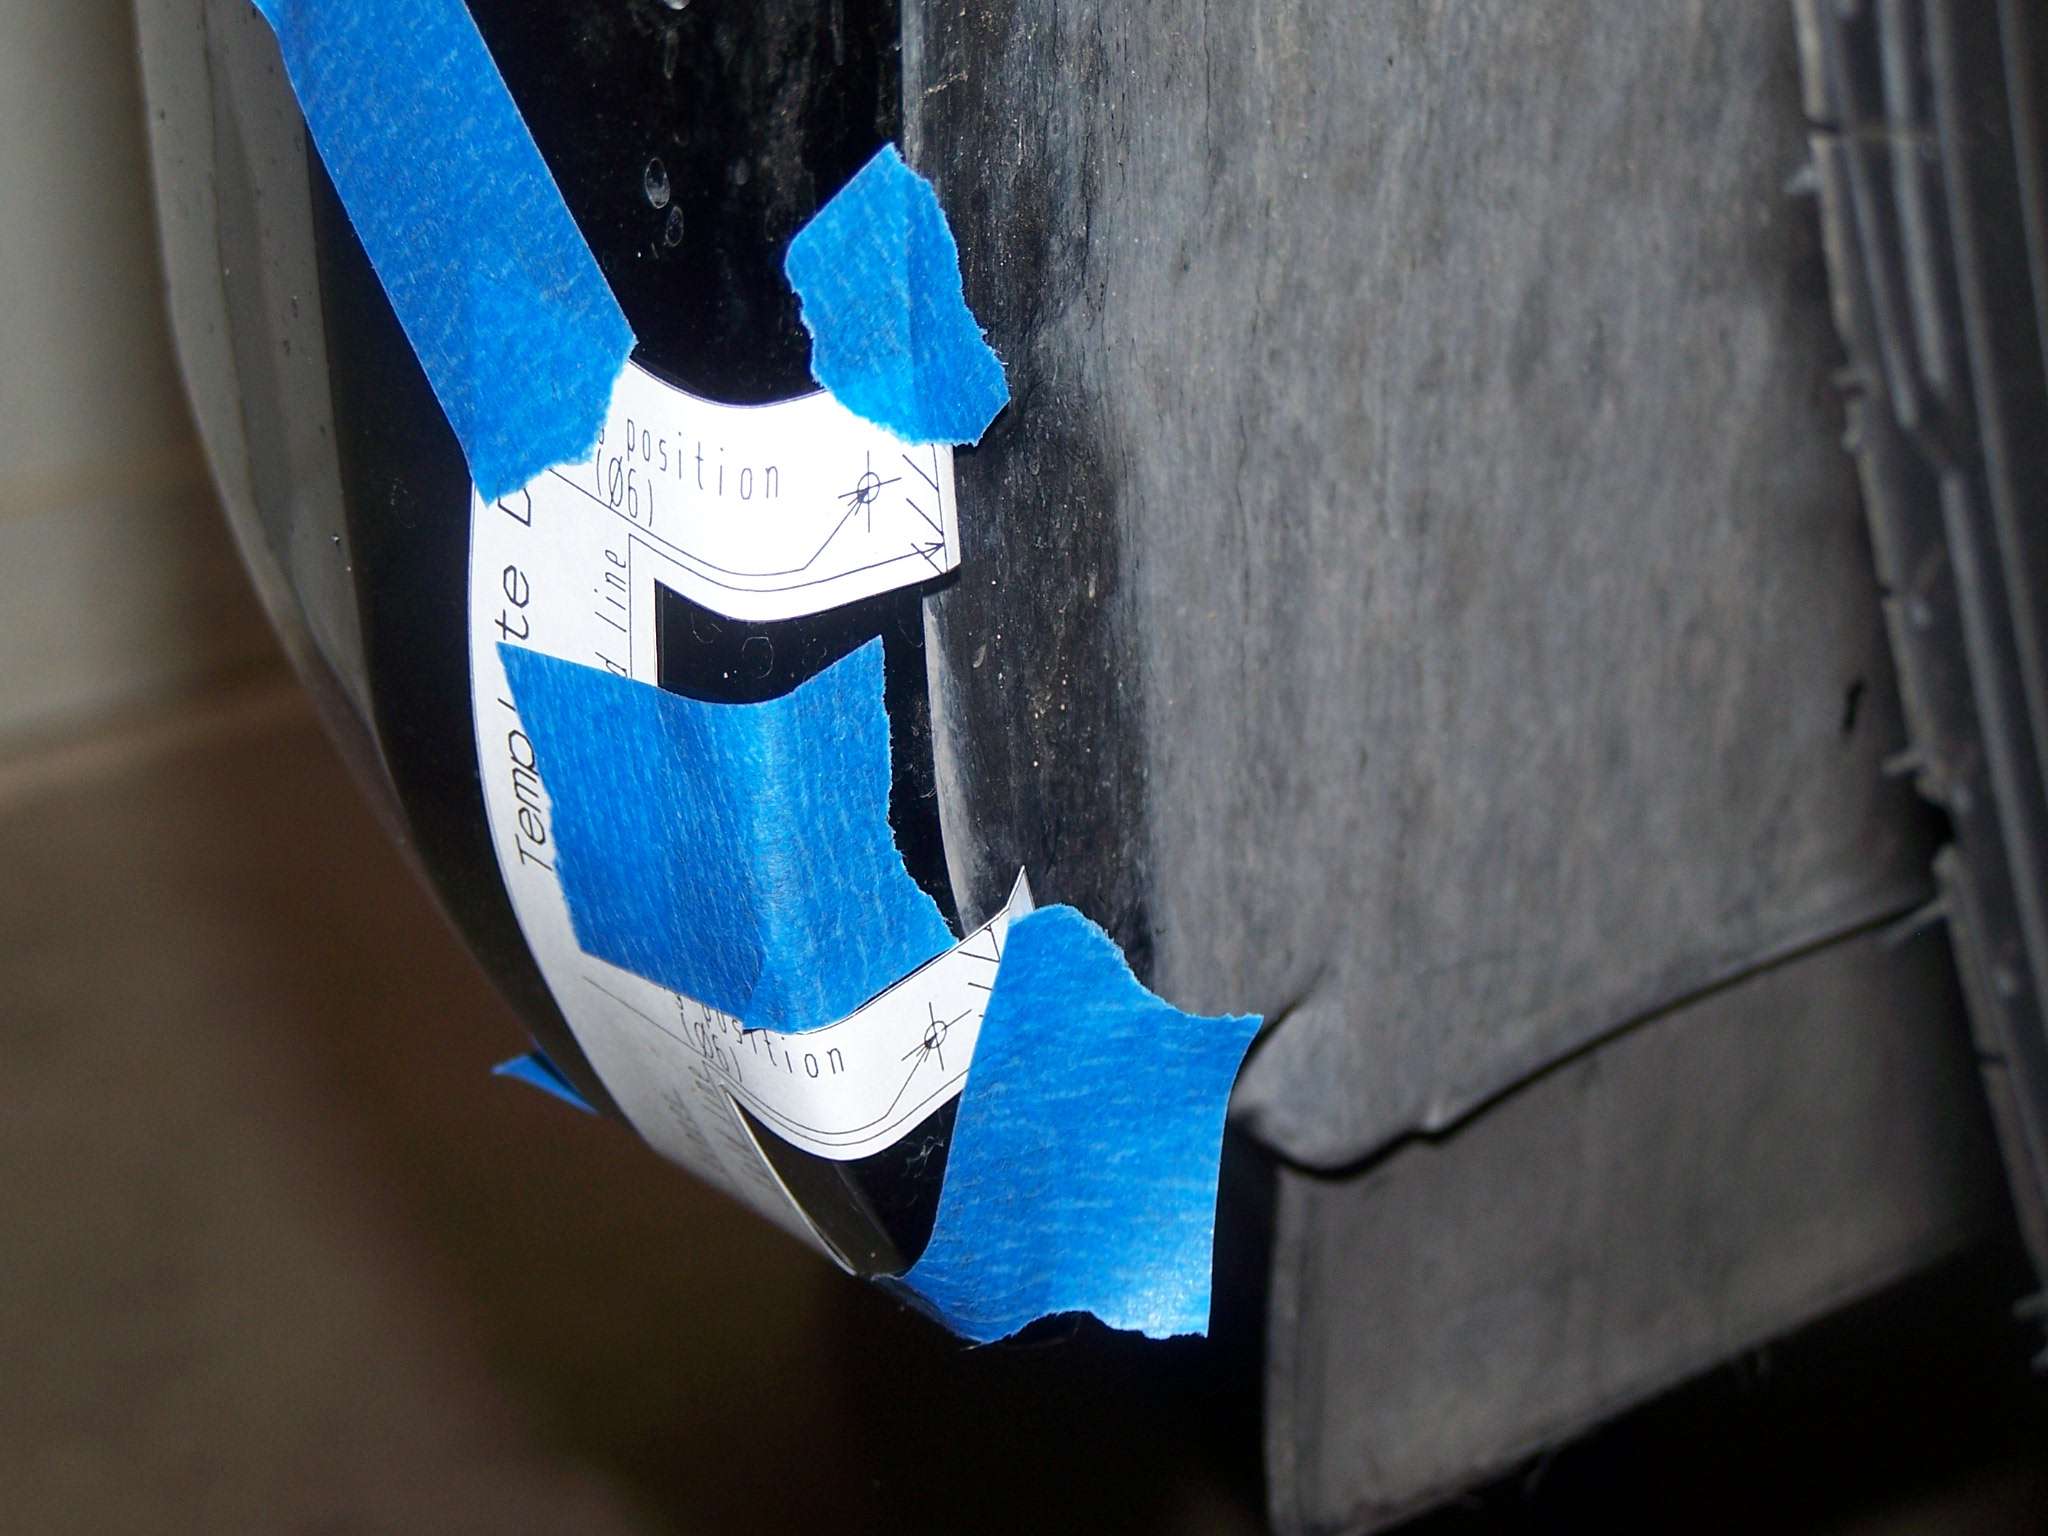
 sorry. As for Template D, this was a PITA(Pain in the A**). I tried fitting that template like how the instructions said, and after about half an hour of messing with it , i decided to not use it. What i did was line up the lip and screw in the first two screw in the from (dont screw them all the way in) and line up the lip on the edge of the bumper (Where template D would go) and mark the hole where the screw will go. If you got all the other holes lined up correctly, then you wont need to use Template D since the lip will show you where the screw would go. Good luck! Trust me, you will love the final product! i love my lip every time i see it
Trending Topics


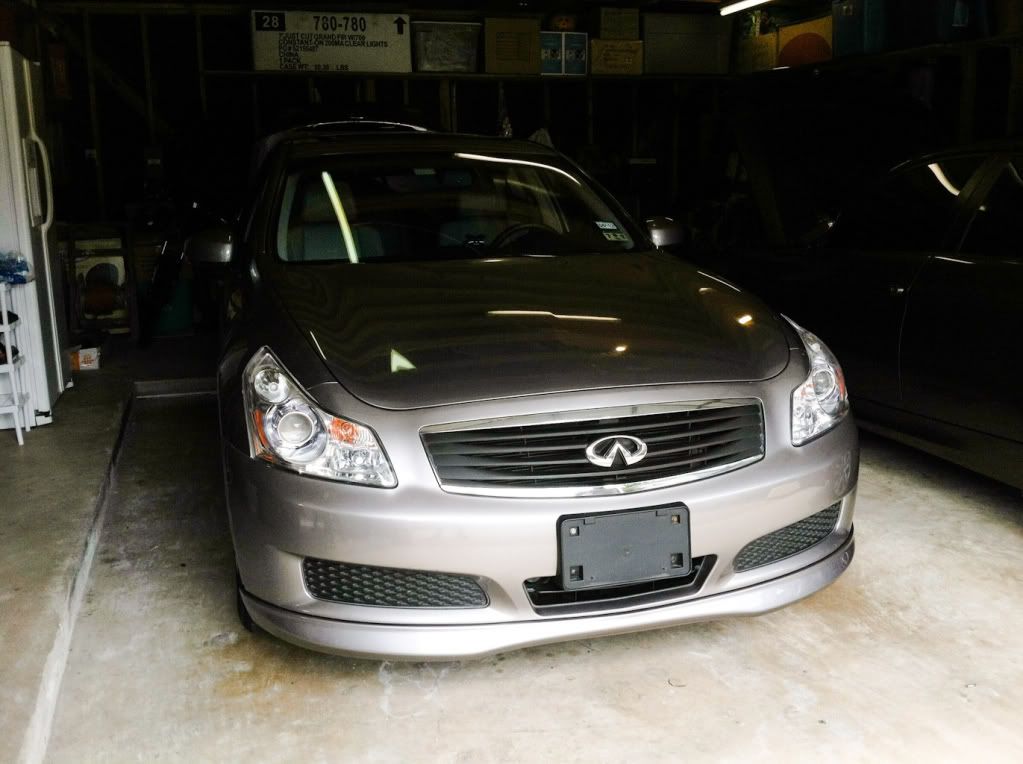
Gnmtl'91, thanks again for your pics. Here's a pic of template D for those interested and a pic of my installed lip.
At least one part of my bumper is no longer pitted (or filthy, lol)
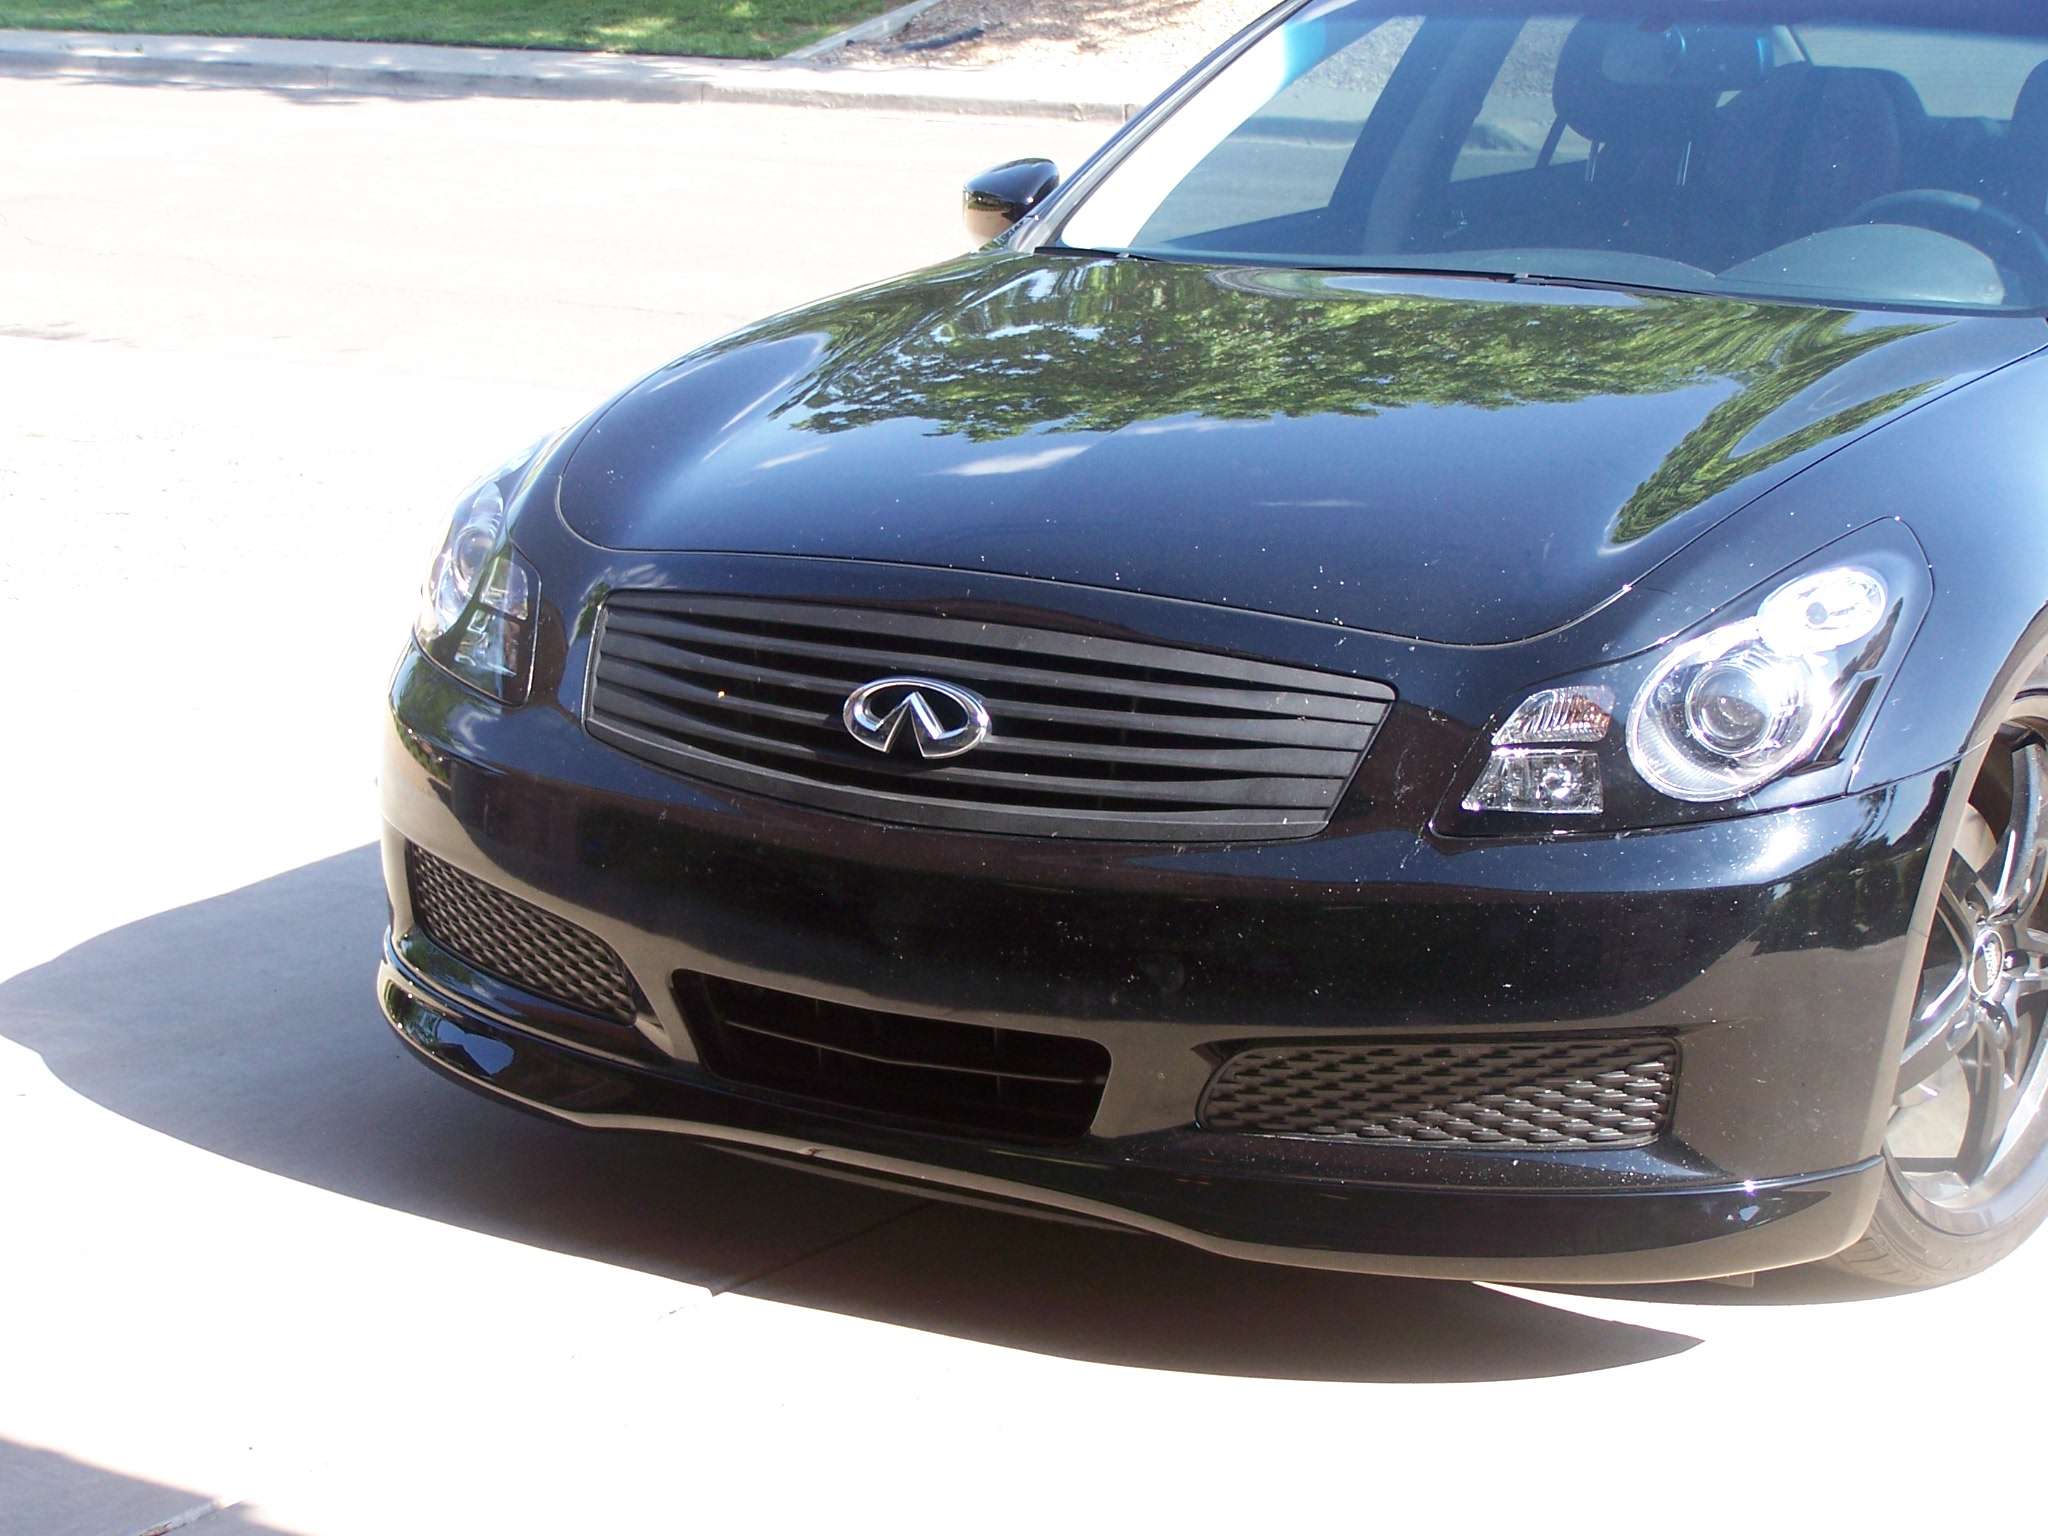

At least one part of my bumper is no longer pitted (or filthy, lol)


Thread
Thread Starter
Forum
Replies
Last Post
911Turbo
19 Inch
10
Aug 24, 2016 08:31 AM