
Installed HD Radio Adapter


Thread Starter
|
Registered User
Joined: Mar 2007
Posts: 26
Likes: 0
Installed HD Radio Adapter
I recently installed an HD radio adapter into my 07 G35 and it is working nicely. I don't have photos at the moment. I'll get some up soon. Hopefully I explained everything clearly. Don't hesitate to ask any questions. Make sure you feel confident in taking items apart in your car and that there is always some risk in these types of projects.
What you'll need:
Service Manual - Get from this g35driver thread. You will need this for getting behind the Media console and for removing the middle arm-rest console.
An HD Radio!

Antenna adapters! You need two. I bought both from Crutchfield.
Adapter one:
Adapter two:

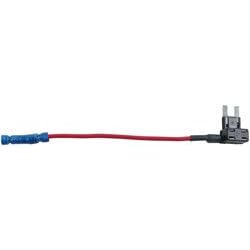
Two "Add a Circuits"
You can get these at any auto shop. They run from $5-$10. Make sure to get the small fuse version.
Extra small fuses. Make sure that they fit the Add a Circuit fuse slots. The ones you remove from the G35 fuse box will not fit in the "Add a Circuit" slots.
A way to check power in lines. A 12V power line tester. The tool with the clip for ground and the probe with an LED light to show that there is power.

Wire cutters and wire strippers, phillips screwdriver, crimper, U or O-ring wire end attachment, RCA cables, and small zip ties.
Installation:
Note: Refer to page IP-11 for number diagram parts on the exploded view on the Instrument Panel assembly. IE #14 would be the media box/radio.
Note: You'll will not be cutting, stripping, damaging, tapping into any stock wires into you car. You can remove the radio [#14] easily and not void any warranties.
Think about where you want to stash the receiver. I placed mine under the passenger seat. It fit nicely with the wires and connectors going out behind the seat, up the side of the middle console and through up to behind the media box/radio.
First begin removing items to get behind the media box/console [#14] to get to the car's antenna. Refer to page IP-12 of the 2007 G35 Service Manual on how to get things removed. You are good when you complete step 16. There is no need to do step #11. The hardest part will be removing shift **** if you haven't done it before. It is a PITA! It took three of us to get the shift **** removed.
Caution:
When removing the arm rest/middle console, please note that there are some Air Bag sensors. Take care in not to damage or mess with it at all.
Once you have the media box accessible, locate the antenna plug on the bottom right. It is a thin rectangular plug in a vertical orientation. Look at the antenna adapter picture above. You'll get an idea on what to look for. You don't need to unplug the entire media box, just the top few plugs so you can reach behind to access the car's antenna.
Take the female antenna adapter and connect it to the antenna plug that you just removed. Take the male antenna adapter and plug it into the media box/console [#14].
You should now have two loose blue wires. Take both ends, one from the male adapter and one from the female adapter and securely connect the two together. On the standard antenna plugs that you now have, take note on which one is from the car and which one is going into the media box [#14].
Here is where you can get creative and start dragging power lines and antenna cables. When you have access under the arm rest/middle console in between the driver/passenger seats, you can neatly place the antenna and power lines there. Use zip ties to secure the new lines to the existing cabling. Take the power lines and thread them up behind the steering column and drop them down to where the Fuse Box is. You can find this by your clutch.
Plug in the antenna cables that came with your HD Radio assembly into your HD radio. Take note of what cable is in and out. Now, on the other end of the HD radio antenna cables, take the in cable and plug it into the car antenna plug. Take the out antenna plug and plug it into the socket going into the media box [#14]. When laying the antenna cables and connecting them to the adapters, make sure you have plenty of clearance to place the media box back into its slot so it fits snug once again.
At this point you can now reassemble your middle console/arm rest, media box and what ever else was removed. Pretty much, go backward through the IP section of the service manual where you left off.
Once everything is buttoned up (don't forget any connectors!!), you can test the antenna pass through to if the adapters still work and that your original radio works and is getting a clear signal. If you can work your car's radio, get RDS text, and nothing else seems odd, then you're good to go. If you're not getting anything, then you need to check your antenna cabling. Make sure you have the loop going from car antenna, HD radio in, HD radio out, media box antenna in.
Now time to connect the power lines. The HD radio model linked above has three power lines. Ground, +12v ignition, and +12v constant. These power lines are properly labeled. So, pay attention on what line does what.
Trim and strip the lines. Make sure to not short your self and that you have plenty of slack to work with. Take your U or O-ring attachment and clamp it on to the end of the ground wire. Locate the ground plug for the car. It is straight down from the fuse box, under some carpet. Not to hard to miss. It is a bolt with lots of wires going to the bolt. Loosen/remove the bolt and then attach the ground line.
Now to hook up the power lines. Trim the two remaining power lines to a length that is necessary. Take the ends of the "add a circuits" and crimp them to the freshly cut and stripped power lines for the HD radio. Locate two places inside the fuse box where you can tap into an ignition switched power source and a constant power source. Slots like car lights and the cig lighter are good places to tap into. You will get a better idea when you look on the inside cover of the fuse box cover. It will specifically tell you which power is constant or ignitioned. I also chose items with 10A fuses.
With the "add a circuit" in hand, find the fuses you should have gotten with the "add a circuit" and insert the same amp fuse that was removed from the fuse box. Make sure to read the manual on where to insert the fuse on the "add a circuit." For the accessory slot on the "add a circuit," open up your spare fuses that you purchased and find the 10A fuses. Insert them into the accessory slot on the "Add a circuit." Make sure the power connector is unplugged from the HD radio. Insert the "add a circuits" in the the slots you reserved. Make sure that you pay attention where you're plugging the "Add a circuits." After you plugged in the fuses, take your 12V power line tester so that you can double check your work. Locate the constant power line that is going to the connector and test the plug. If you see a light on the tester or any other positive result that shows you have power, then you have the constant power line installed.
Almost there...
Take your RCA cables and connect them to the HD radio and then to the RCA jacks for the AUX on the car. Do the same with the remove LCD display. Tuck the wires how you see fit for the RCA and remote display wires.
Turn the car to the on position or start the car up. Take your remote LCD display and push the power button. If everything is installed correctly, then the LCD display should light up. Flip over to AUX on the console and enjoy your CD quality radio! If you need to listen to the car's stock radio, make sure you turn off the HD unit or you'll not get a good signal.
Enjoy!
What you'll need:
Service Manual - Get from this g35driver thread. You will need this for getting behind the Media console and for removing the middle arm-rest console.
An HD Radio!
Antenna adapters! You need two. I bought both from Crutchfield.
Adapter one:
Adapter two:
Two "Add a Circuits"
You can get these at any auto shop. They run from $5-$10. Make sure to get the small fuse version.
Extra small fuses. Make sure that they fit the Add a Circuit fuse slots. The ones you remove from the G35 fuse box will not fit in the "Add a Circuit" slots.
A way to check power in lines. A 12V power line tester. The tool with the clip for ground and the probe with an LED light to show that there is power.
Wire cutters and wire strippers, phillips screwdriver, crimper, U or O-ring wire end attachment, RCA cables, and small zip ties.
Installation:
Note: Refer to page IP-11 for number diagram parts on the exploded view on the Instrument Panel assembly. IE #14 would be the media box/radio.
Note: You'll will not be cutting, stripping, damaging, tapping into any stock wires into you car. You can remove the radio [#14] easily and not void any warranties.
Think about where you want to stash the receiver. I placed mine under the passenger seat. It fit nicely with the wires and connectors going out behind the seat, up the side of the middle console and through up to behind the media box/radio.
First begin removing items to get behind the media box/console [#14] to get to the car's antenna. Refer to page IP-12 of the 2007 G35 Service Manual on how to get things removed. You are good when you complete step 16. There is no need to do step #11. The hardest part will be removing shift **** if you haven't done it before. It is a PITA! It took three of us to get the shift **** removed.
Caution:
When removing the arm rest/middle console, please note that there are some Air Bag sensors. Take care in not to damage or mess with it at all.
Once you have the media box accessible, locate the antenna plug on the bottom right. It is a thin rectangular plug in a vertical orientation. Look at the antenna adapter picture above. You'll get an idea on what to look for. You don't need to unplug the entire media box, just the top few plugs so you can reach behind to access the car's antenna.
Take the female antenna adapter and connect it to the antenna plug that you just removed. Take the male antenna adapter and plug it into the media box/console [#14].
You should now have two loose blue wires. Take both ends, one from the male adapter and one from the female adapter and securely connect the two together. On the standard antenna plugs that you now have, take note on which one is from the car and which one is going into the media box [#14].
Here is where you can get creative and start dragging power lines and antenna cables. When you have access under the arm rest/middle console in between the driver/passenger seats, you can neatly place the antenna and power lines there. Use zip ties to secure the new lines to the existing cabling. Take the power lines and thread them up behind the steering column and drop them down to where the Fuse Box is. You can find this by your clutch.
Plug in the antenna cables that came with your HD Radio assembly into your HD radio. Take note of what cable is in and out. Now, on the other end of the HD radio antenna cables, take the in cable and plug it into the car antenna plug. Take the out antenna plug and plug it into the socket going into the media box [#14]. When laying the antenna cables and connecting them to the adapters, make sure you have plenty of clearance to place the media box back into its slot so it fits snug once again.
At this point you can now reassemble your middle console/arm rest, media box and what ever else was removed. Pretty much, go backward through the IP section of the service manual where you left off.
Once everything is buttoned up (don't forget any connectors!!), you can test the antenna pass through to if the adapters still work and that your original radio works and is getting a clear signal. If you can work your car's radio, get RDS text, and nothing else seems odd, then you're good to go. If you're not getting anything, then you need to check your antenna cabling. Make sure you have the loop going from car antenna, HD radio in, HD radio out, media box antenna in.
Now time to connect the power lines. The HD radio model linked above has three power lines. Ground, +12v ignition, and +12v constant. These power lines are properly labeled. So, pay attention on what line does what.
Trim and strip the lines. Make sure to not short your self and that you have plenty of slack to work with. Take your U or O-ring attachment and clamp it on to the end of the ground wire. Locate the ground plug for the car. It is straight down from the fuse box, under some carpet. Not to hard to miss. It is a bolt with lots of wires going to the bolt. Loosen/remove the bolt and then attach the ground line.
Now to hook up the power lines. Trim the two remaining power lines to a length that is necessary. Take the ends of the "add a circuits" and crimp them to the freshly cut and stripped power lines for the HD radio. Locate two places inside the fuse box where you can tap into an ignition switched power source and a constant power source. Slots like car lights and the cig lighter are good places to tap into. You will get a better idea when you look on the inside cover of the fuse box cover. It will specifically tell you which power is constant or ignitioned. I also chose items with 10A fuses.
With the "add a circuit" in hand, find the fuses you should have gotten with the "add a circuit" and insert the same amp fuse that was removed from the fuse box. Make sure to read the manual on where to insert the fuse on the "add a circuit." For the accessory slot on the "add a circuit," open up your spare fuses that you purchased and find the 10A fuses. Insert them into the accessory slot on the "Add a circuit." Make sure the power connector is unplugged from the HD radio. Insert the "add a circuits" in the the slots you reserved. Make sure that you pay attention where you're plugging the "Add a circuits." After you plugged in the fuses, take your 12V power line tester so that you can double check your work. Locate the constant power line that is going to the connector and test the plug. If you see a light on the tester or any other positive result that shows you have power, then you have the constant power line installed.
Almost there...
Take your RCA cables and connect them to the HD radio and then to the RCA jacks for the AUX on the car. Do the same with the remove LCD display. Tuck the wires how you see fit for the RCA and remote display wires.
Turn the car to the on position or start the car up. Take your remote LCD display and push the power button. If everything is installed correctly, then the LCD display should light up. Flip over to AUX on the console and enjoy your CD quality radio! If you need to listen to the car's stock radio, make sure you turn off the HD unit or you'll not get a good signal.
Enjoy!
Thread Starter
|
Registered User
Joined: Mar 2007
Posts: 26
Likes: 0
Originally Posted by bfranks
Nice write up.  I'm a big fan of Sat radio, but I've never tried HD radio. Aside from the "free" part, are there any advantages?
I'm a big fan of Sat radio, but I've never tried HD radio. Aside from the "free" part, are there any advantages?But, besides the fact that you can pay for the Sat service for listening to whatever you want anywhere (I think this is what an MP3 player can replace), here's what HD radio can do.
There's no hiss, pops, or cracks in a weak analog FM signal. If you can receive an HD signal, then the station sounds really nice - CD quality. Also, the signal seems to reach out a bit further than some analog signals. Most HD stations have a 2nd or 3rd sub channel that you can change to. Usually it is more of the same type of music that the station plays. There are some stations where the music is totally different. The kicker for those sub channels, is that they are commercial free...for now, I think.
You can read more from here.
Also, HD is good if you live in an area that broadcasts a lot of stations in HD. You can go here to find what cities are heavy in broadcasting in HD.
http://www.hdradio.com/
Edit - added HD Radio Wiki link
http://en.wikipedia.org/wiki/HD_Radio
Last edited by bfspider; Mar 7, 2008 at 04:43 PM.

Registered User
Joined: Jan 2008
Posts: 321
Likes: 1
From: Houston TX
Thanks for the info. Living in Houston, I'm sure most of the major stations are broadcasting in HD. The sub channels are what I was most interested in. I didn't realize that most were commercial free. I might have to look into this more


Thread
Thread Starter
Forum
Replies
Last Post