
DIY Wheel Repair


DIY Wheel Repair
Hey guys!
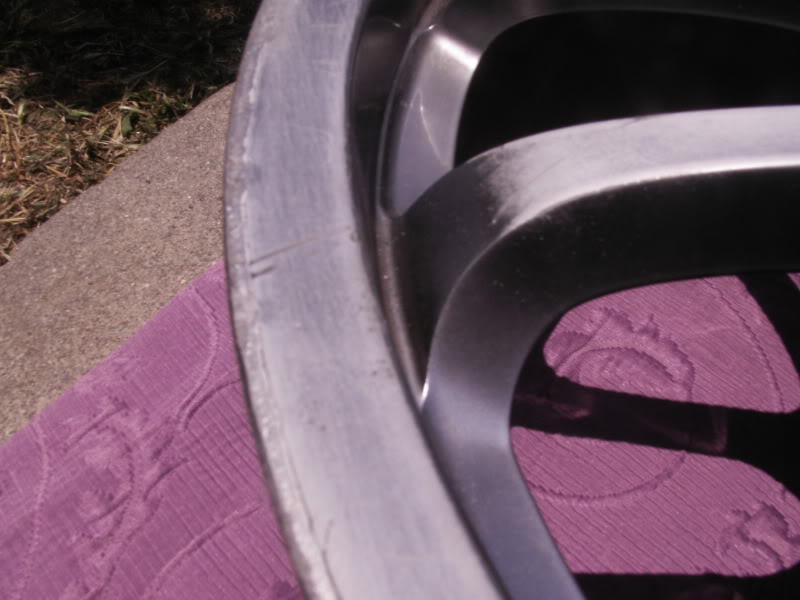
So I recently got a set of OEM 19in Rays and I decided to fix them up myself instead of taking them to a shop. The wheels had curb rash all around so I had to get that fixed. I looked up 2 DIY and worked my own method into it.
List of Materials:
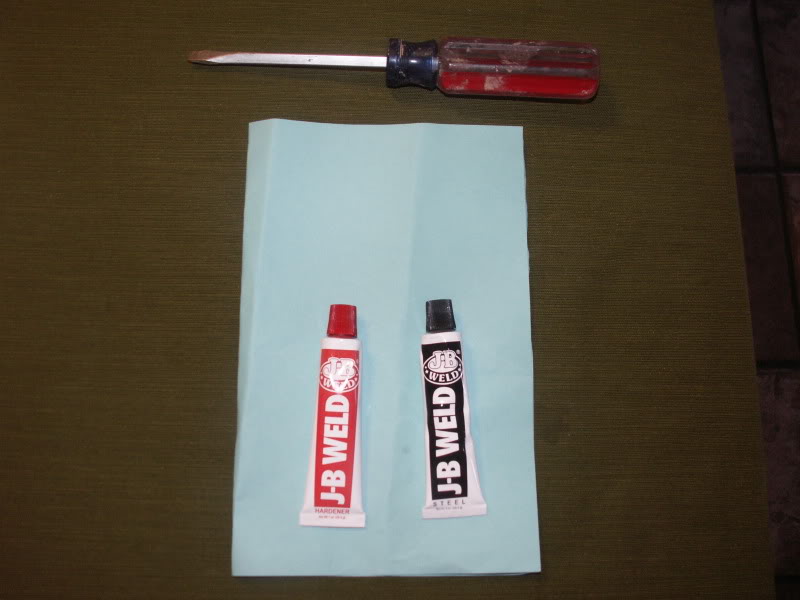
JB Weld
Metal File
Gloves
Sand Paper - 60, 100, 400
Flat Black Primer
Flat Black Paint
I saw one guy on here who repaired his wheels with Bondo, but I decided to do mine with JB Weld.
Step 1:
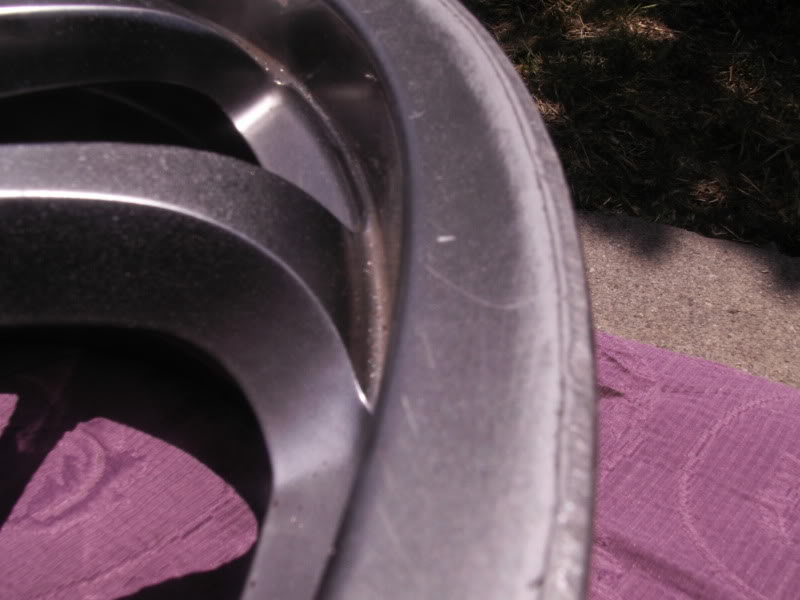
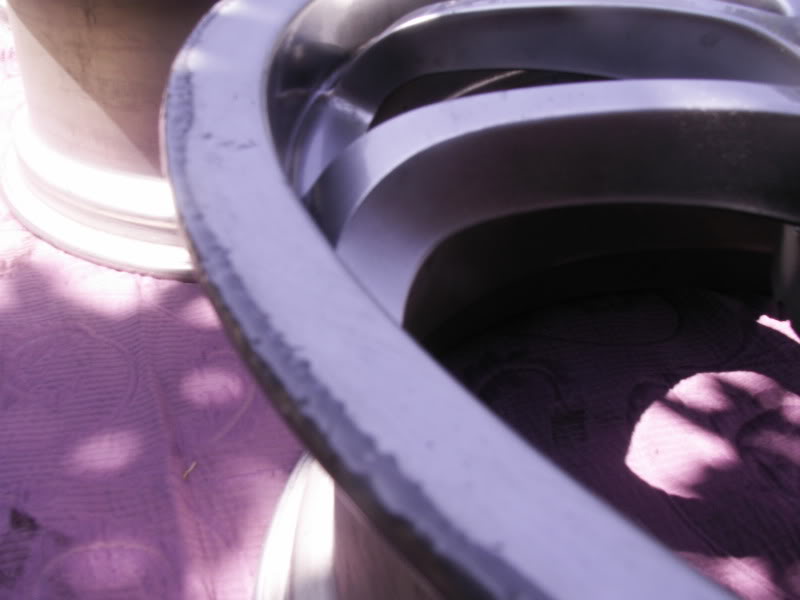
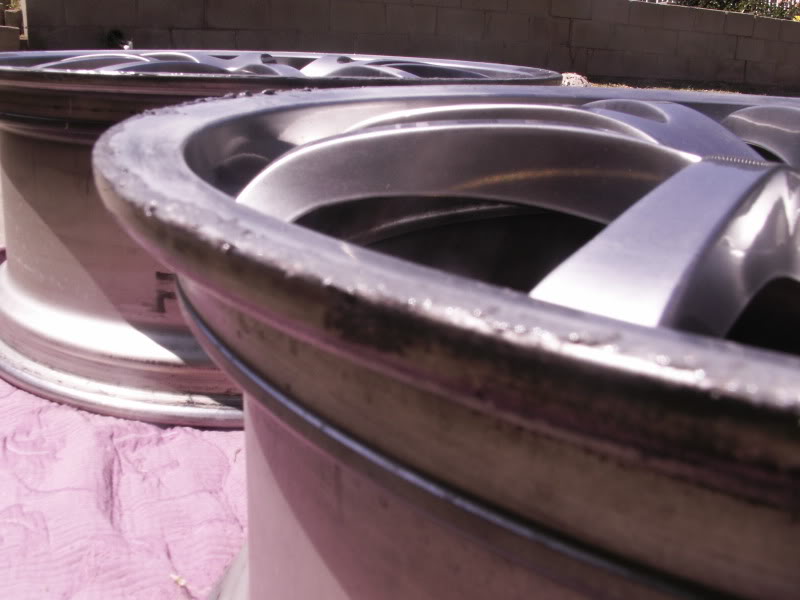
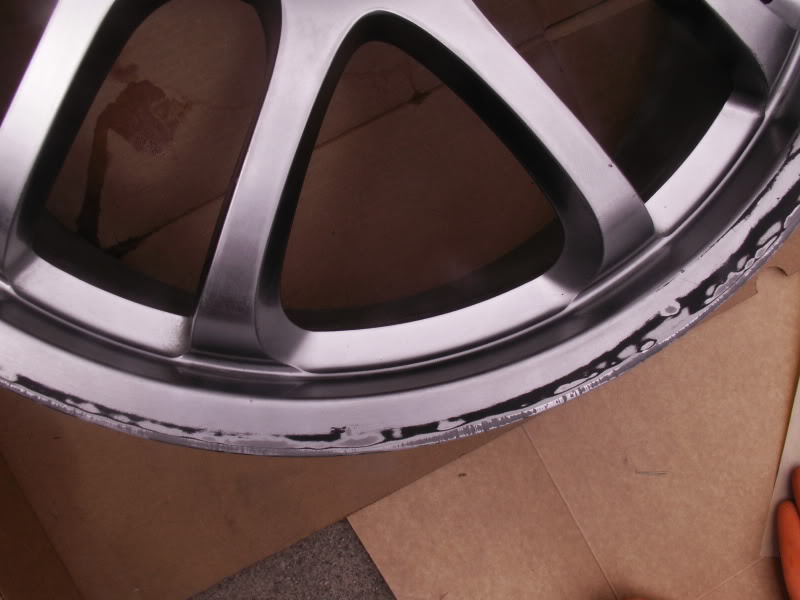
I washed the wheels clean with soap and water and dried them off.
Then I filed down the edges of the wheels to rid of any excess metal.
After that I used the 100 grit sand paper to sand them down even more.

Step 2:
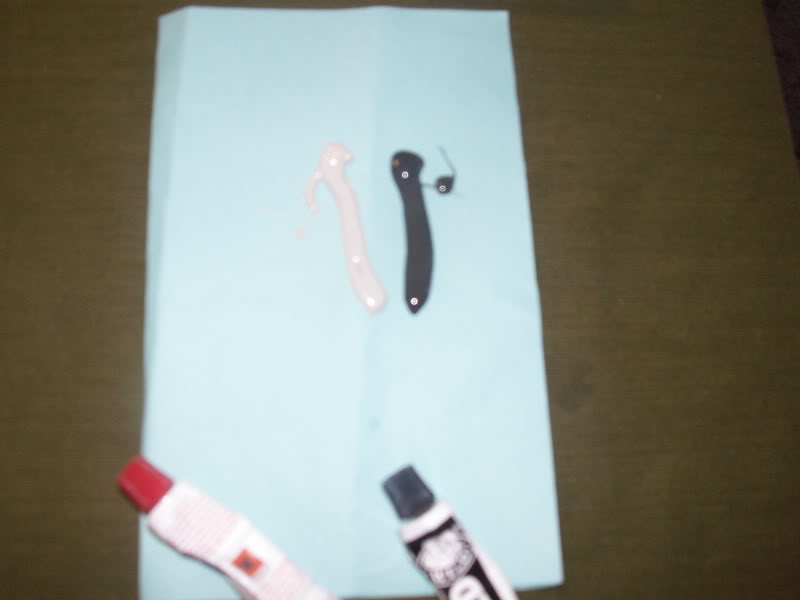
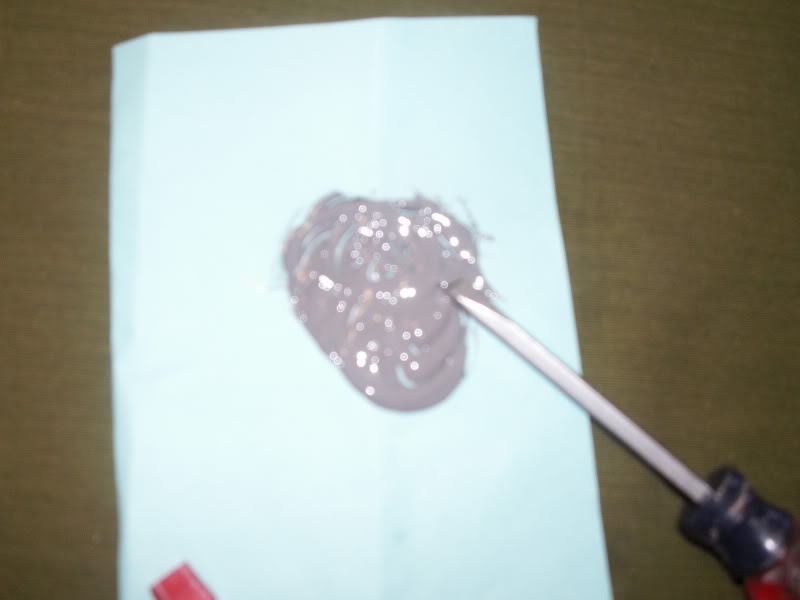
Then came the JB Weld. I had to mix the JB Weld composites from both tubes. I squeezed to lines of the liquid from each tube on a piece of paper and mixed them to a grey color.
I then put on the gloves, and applied the JB weld mix onto edges of the wheels with the curb rash. I used a flat screwdriver to apply the JB Weld onto the wheels. I made sure I applied enough because I was going to sand it down anyway.
Once I finished applying the JB Weld, I let it dry for an entire 24 hours.
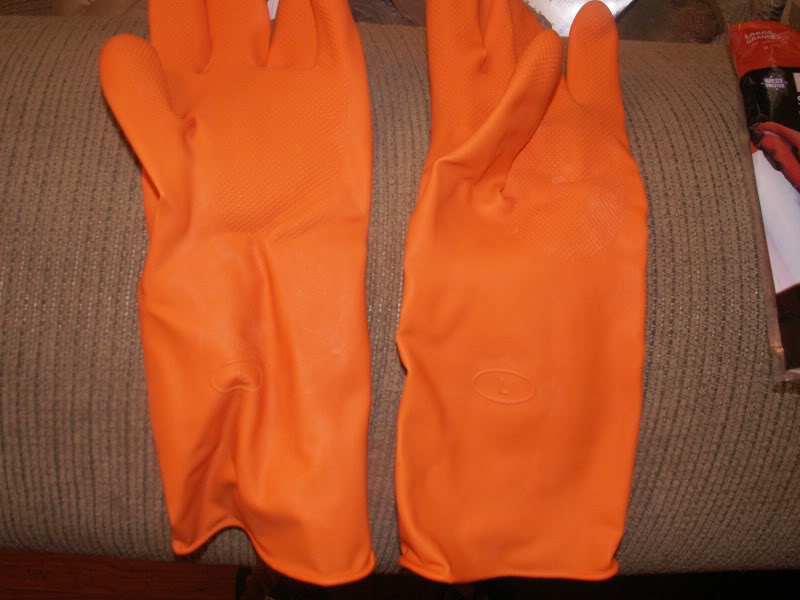
These gloves I bought came with two left-handed gloves Lol

Step 3:
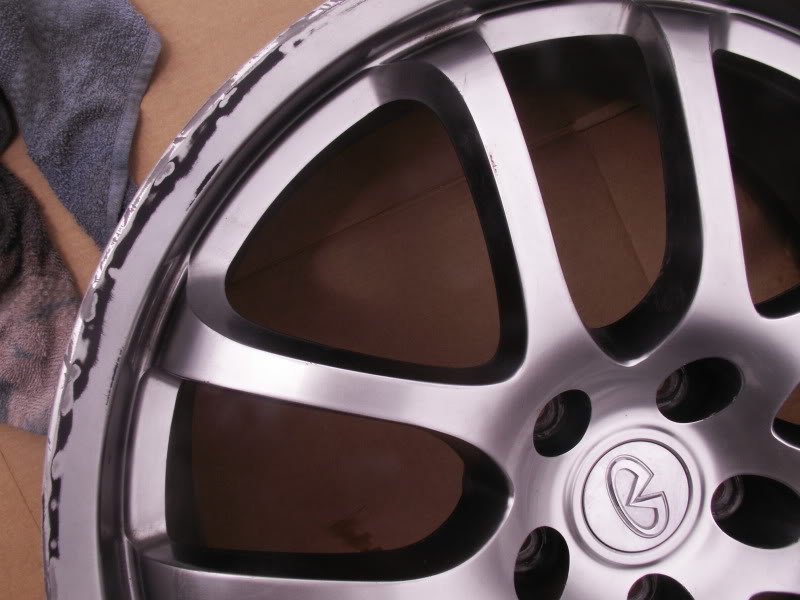
The next day, the JB Weld was dry and it was time to sand down the JB Weld. I used my 100 grit sand paper first, but then that was inefficient so I used the 60 grit which was a lot better and sanded it down faster.
I made sure the edges were very smooth and there were no bumps left from the JB Weld.

Step 4:
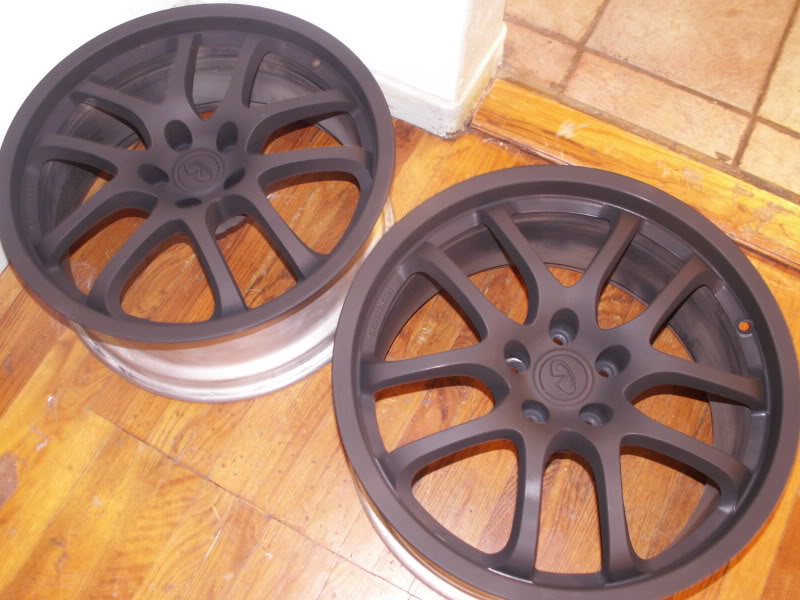
Then I sprayed the wheels with 2 coats of Flat Black Primer that I purchased from Auto Zone.
Step 5:
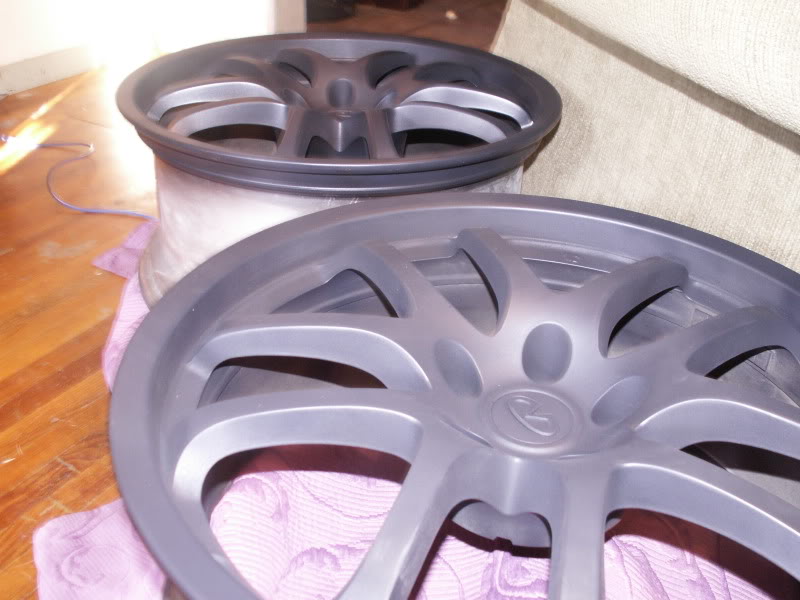
I let the wheels dry off with the primer for a day and didn't paint them with the actual paint 'til the next day. I used a matte paint first, but then I didn't like it, so I used a flat-black color instead. I sprayed 4 coats of that. And this is how they turned out.
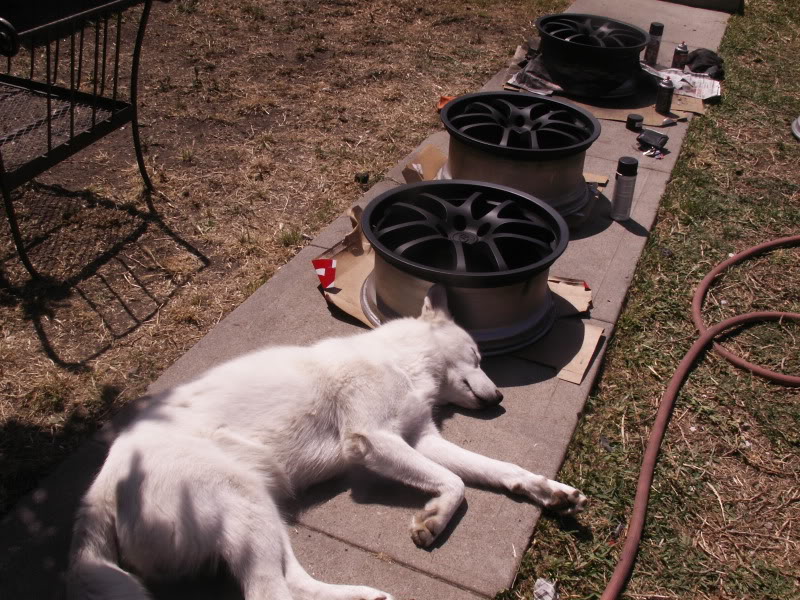
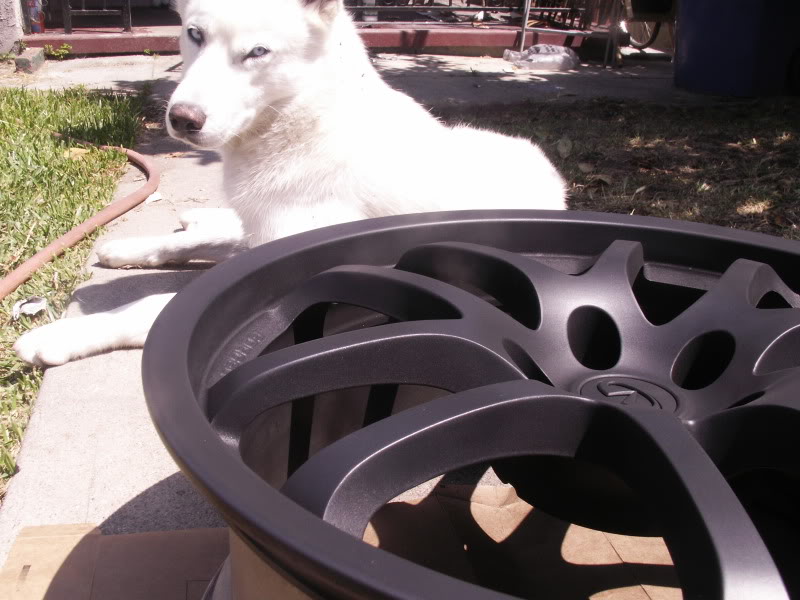

My dog was pleased with the outcome so he decided to take a nap while I let them dry haha.
Summary:
In total, it took me about 3 days to complete everything. I took my time with so it would come out nice. I didn't want to rush it and have my wheels look like ****. The hardest and most-time consuming part of the job was sanding down the JB Weld. The JB Weld was pretty hard after it dried and it held up really well.
The wheels are not mounted yet, they're in my house, covered, just waiting for the paint to settle in right. I heard that you shouldn't wash your newly painted wheels 'til about after 30 days so I'm just waiting 'til that long to mount them. I don't want them to get ruined.
I'll show you guys how they look on my car once I mount them.
So I recently got a set of OEM 19in Rays and I decided to fix them up myself instead of taking them to a shop. The wheels had curb rash all around so I had to get that fixed. I looked up 2 DIY and worked my own method into it.
List of Materials:
JB Weld
Metal File
Gloves
Sand Paper - 60, 100, 400
Flat Black Primer
Flat Black Paint
I saw one guy on here who repaired his wheels with Bondo, but I decided to do mine with JB Weld.
Step 1:
I washed the wheels clean with soap and water and dried them off.
Then I filed down the edges of the wheels to rid of any excess metal.
After that I used the 100 grit sand paper to sand them down even more.
Step 2:
Then came the JB Weld. I had to mix the JB Weld composites from both tubes. I squeezed to lines of the liquid from each tube on a piece of paper and mixed them to a grey color.
I then put on the gloves, and applied the JB weld mix onto edges of the wheels with the curb rash. I used a flat screwdriver to apply the JB Weld onto the wheels. I made sure I applied enough because I was going to sand it down anyway.
Once I finished applying the JB Weld, I let it dry for an entire 24 hours.
These gloves I bought came with two left-handed gloves Lol
Step 3:
The next day, the JB Weld was dry and it was time to sand down the JB Weld. I used my 100 grit sand paper first, but then that was inefficient so I used the 60 grit which was a lot better and sanded it down faster.
I made sure the edges were very smooth and there were no bumps left from the JB Weld.
Step 4:
Then I sprayed the wheels with 2 coats of Flat Black Primer that I purchased from Auto Zone.
Step 5:
I let the wheels dry off with the primer for a day and didn't paint them with the actual paint 'til the next day. I used a matte paint first, but then I didn't like it, so I used a flat-black color instead. I sprayed 4 coats of that. And this is how they turned out.
My dog was pleased with the outcome so he decided to take a nap while I let them dry haha.
Summary:
In total, it took me about 3 days to complete everything. I took my time with so it would come out nice. I didn't want to rush it and have my wheels look like ****. The hardest and most-time consuming part of the job was sanding down the JB Weld. The JB Weld was pretty hard after it dried and it held up really well.
The wheels are not mounted yet, they're in my house, covered, just waiting for the paint to settle in right. I heard that you shouldn't wash your newly painted wheels 'til about after 30 days so I'm just waiting 'til that long to mount them. I don't want them to get ruined.
I'll show you guys how they look on my car once I mount them.
Nice work. way to save the dough and DIY it! I also just picked up the same wheels and the previous owner drove like Ray Charles and fu#ked up all 4 rims. Got a great deal though figuring I would do the repairs. B/c the weather has been so terrible her in MN haven't had the weather to let it dry. However yesterday was nicer so I did some of the prep work and did the initial sanding with some 60 grit. Gonna pick up some JB weld today and hopefully paint them this week. Wanted to powdercoat them but jsut do much money compared to painting. going with gunmetal on my OB.

Nice work. way to save the dough and DIY it! I also just picked up the same wheels and the previous owner drove like Ray Charles and fu#ked up all 4 rims. Got a great deal though figuring I would do the repairs. B/c the weather has been so terrible her in MN haven't had the weather to let it dry. However yesterday was nicer so I did some of the prep work and did the initial sanding with some 60 grit. Gonna pick up some JB weld today and hopefully paint them this week. Wanted to powdercoat them but jsut do much money compared to painting. going with gunmetal on my OB.


Trending Topics
Nope, coming off this week then going to the shop to take the tires off the rims then finishing with primer then paint.
Yes, I will definitely post pics of them mounted. Stay tuned
Instead of JB weld I used Quick Steel. Alot easier to work with than JB weld, highly recommend. After I used that I used some spot putty to get the small hairline cracks.
http://www.dual-star.com/index2/Serv...poxy_putty.htm
http://www.dual-star.com/index2/Serv...poxy_putty.htm


