
DIY: Akebono BBK Installation on 03-07 G/Z


Registered User
Joined: Feb 2010
Posts: 16
Likes: 0
I have found 2 ways of installing Plate/Bracket.
So...What is the proper way of installing it?
Figure A.
From Dealer. The Plate/Bracket hooks are facing upwards. Highlighted in the red box.
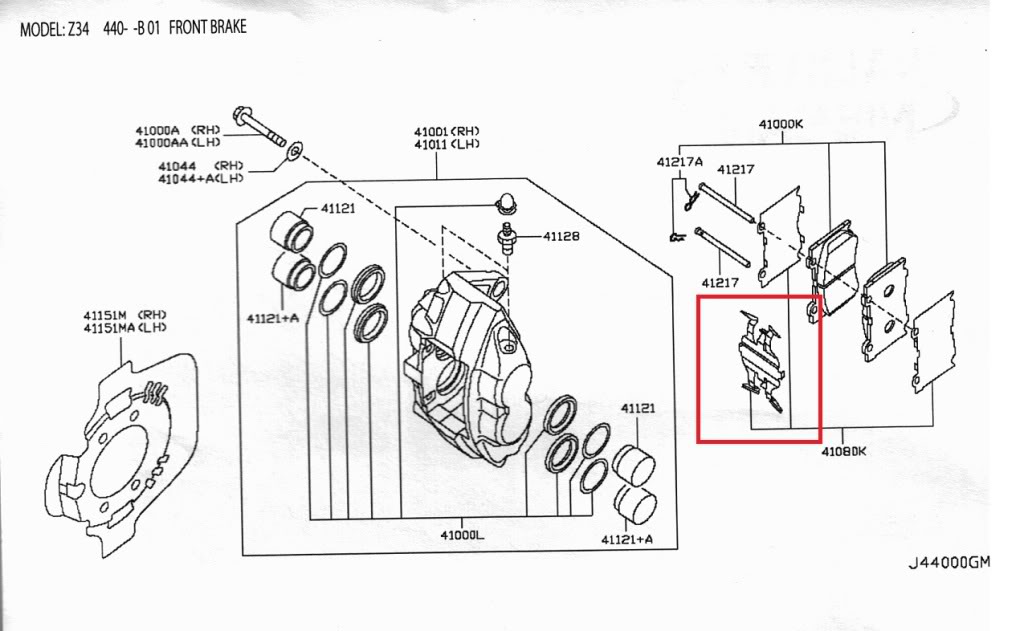
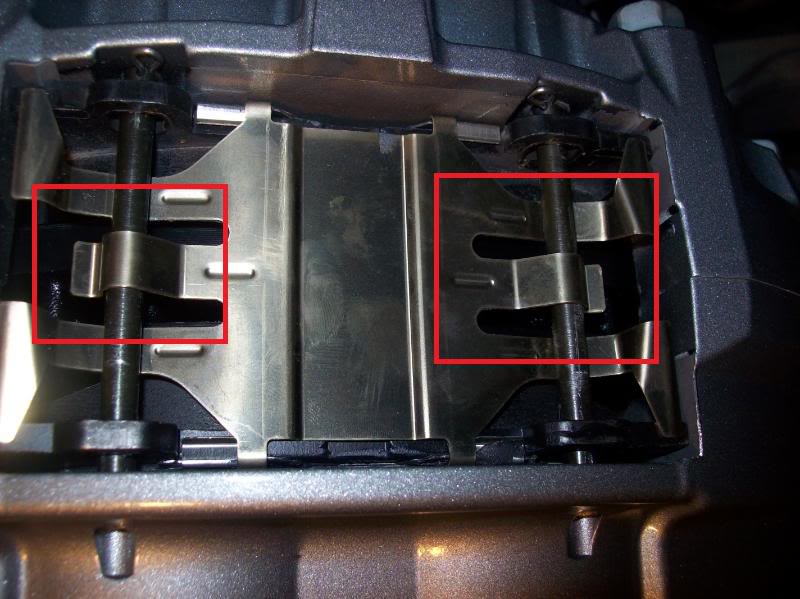
Figure B.
From Forums. As you can see it looks the like Plate/Bracket is inverse from figure A. And the hooks are facing downwards
So What is the proper installation?
So...What is the proper way of installing it?
Figure A.
From Dealer. The Plate/Bracket hooks are facing upwards. Highlighted in the red box.
Figure B.
From Forums. As you can see it looks the like Plate/Bracket is inverse from figure A. And the hooks are facing downwards
So What is the proper installation?

I have mine where the hooks are facing downward, like in the picture (not the diagram). I'm not even sure if it would fit right if you tried to invert it. IMO, the picture is the correct way.

I did it the way in the photo.. but originally had it the other way. Let me say, it was a lot easier to do it the inverted way..


Registered User
Joined: Jan 2010
Posts: 70
Likes: 0
Just received my set yesterday, hoping to install this weekend. Awesome write-up- glad I found it!
One question- I've got the SS lines I'm putting on- at the end where the lines connect to the hard lines (not the caliper side, the other side), is it a screw-on connection, or is there any crimping involved?
One question- I've got the SS lines I'm putting on- at the end where the lines connect to the hard lines (not the caliper side, the other side), is it a screw-on connection, or is there any crimping involved?

Registered User
Joined: Jan 2010
Posts: 70
Likes: 0
Yup, the aligning the plate according to the picture sets it in place a LOT better. The one thing is, doing it the FSM way, the two "fingers" on either side of the hook circled in red in the picture give some outward push to the pads, sort of like a spring clip would.
But, it's decision time, so I'm going with the picture, not the FSM!
But, it's decision time, so I'm going with the picture, not the FSM!
Registered User
Joined: Jan 2010
Posts: 70
Likes: 0
Literally hammering in the pins. I'm thinking the HPS pads are too tall, they're pushing up against the center of the bracket, because once I hammer in the pins, there's still a decent gap between the middle finger and the pin- the pin's only contact with the bracket is with the two outer fingers on either side of the middle finger. This can't be right...
I went with HPS pads also. Didn't use the OEM shims. The HPS already have them on the pads I believe? I don't recall about the bracket and pins.. I do know it was really had to get the second pin on doing it the way it was in that photo.
Registered User
Joined: Feb 2010
Posts: 16
Likes: 0
Literally hammering in the pins. I'm thinking the HPS pads are too tall, they're pushing up against the center of the bracket, because once I hammer in the pins, there's still a decent gap between the middle finger and the pin- the pin's only contact with the bracket is with the two outer fingers on either side of the middle finger. This can't be right...