
Trunk SOund Proofing


Trunk SOund Proofing
So today I took the trunk apart and injected the creeks with foam. Waiting for it to dry now. Thanks to ian's tips I picked some 5/16inch foam at home depot. going to start cutting that up.
Now my question is for the coupe owners. How do you remove the rear seat. I search the DIY section but all the pics are bad or no pics at all. Anyone have some good step by step with pictures?
Now my question is for the coupe owners. How do you remove the rear seat. I search the DIY section but all the pics are bad or no pics at all. Anyone have some good step by step with pictures?

I didn't have a DYI but it's easy. I'm doing this from memory.
The seat back is held in by two bolts in the rear at the bottom and outermost ends. Fold it down and lift up the finishing upholstery at the bottom of the seat back which is held down with velcro. It may also be attached to some trunk upholstery with two black push down plastic clips which will need to be removed. (Can't remember if that was just the trunk piece or attached to seat as well.) You should see a bolt on each side of the seat back which is easily removable. Also disconnect the driver side cable for the seat back release and note how it is connected and routed. Then just carefully lift the seat back out of the car.
The seat bottom is removed by pulling straight up at the seat front. It is attached by two vertical brackets which are located about 12-18 inches in from each side. You'll have to use some force. After it lifts up just pull it forward and remove it from the car.
Post back or pm me if you need any more help at all.
Thanks RBull Here is some picture updates


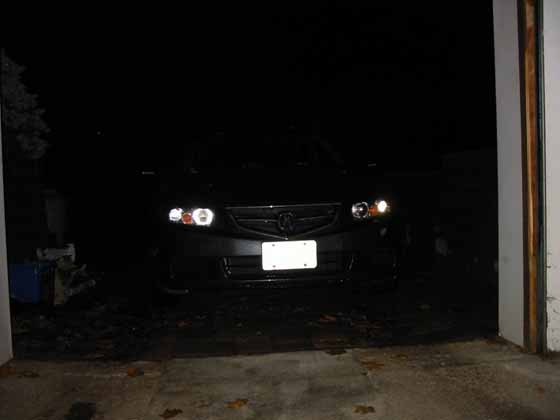
Now here is the funny thing I turn around and I saw my winter car and I was thinking heck I might as well too so here is my next project till i get all my equipments for the G. SOund proofing my winter beater.


Now here is the funny thing I turn around and I saw my winter car and I was thinking heck I might as well too so here is my next project till i get all my equipments for the G. SOund proofing my winter beater.
Originally Posted by God|ZIlla168
Thanks RBull Here is some picture updates
Attachment 26664 Attachment 26665
Now here is the funny thing I turn around and I saw my winter car and I was thinking heck I might as well too so here is my next project till i get all my equipments for the G. SOund proofing my winter beater.
Attachment 26667
Attachment 26664 Attachment 26665
Now here is the funny thing I turn around and I saw my winter car and I was thinking heck I might as well too so here is my next project till i get all my equipments for the G. SOund proofing my winter beater.
Attachment 26667
Hey good for you GZ. Looks like you're doing an extensive job.
How is the rear seat interior area coming along?
It was getting dark out and I need the car out on the driveway in order for me to take the seat out of the car. I will let you know tomorrow how it goes. How are you doing with your coupe? I still need to dynamt a few more aera of the trunk and then I need to cut up the foam that Ian suggested to use much better then that cheap stuff that the factory used.
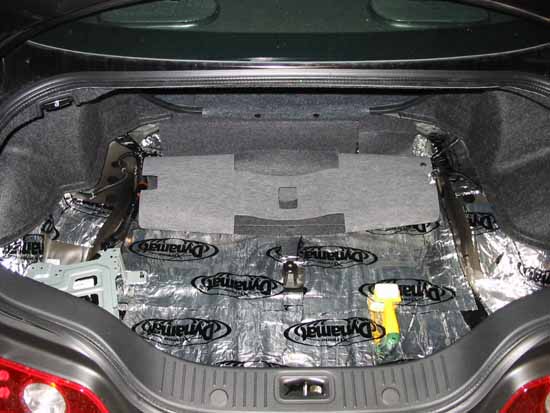
Here are few more pics of my job that was completed last weekend. Many thanks Ian. I'll be doing more of the interior this coming spring.
Please note my pics do not show the cutout in the floorpan HD foam I had to make to allow clearance for the spare tire. It needed to rest directly on the factory floor liner material in order for the spare hold down bolt to thread properly. Also had to remove the OE felt pad for the tire. I decided to do it this way instead of just putting the hd foam under the trunk mat which would have been easier to begin with.
I'll be doing more of the interior this coming spring. Please note my pics do not show the cutout in the floorpan HD foam I had to make to allow clearance for the spare tire. It needed to rest directly on the factory floor liner material in order for the spare hold down bolt to thread properly. Also had to remove the OE felt pad for the tire. I decided to do it this way instead of just putting the hd foam under the trunk mat which would have been easier to begin with.
Last edited by RBull; Nov 6, 2005 at 10:27 AM.
Trending Topics
Great Job Dean, I actually did things a little different, I cut up the evofoam and spray adhesive it to the back of the trunk Linings. But the effect will be the same.
See your pic is now like a competition to see who will finish it first puahahaha ut i am still waiting for the custom boxes before I can go any further.
See your pic is now like a competition to see who will finish it first puahahaha ut i am still waiting for the custom boxes before I can go any further.

Originally Posted by God|ZIlla168
No is the TSX auto with no nav. Carbon Grey is the only car I let my GF drive


Joined: Jan 2004
Posts: 21,095
Likes: 47
From: Toronto, GTA north
Originally Posted by RBull
Here are few more pics of my job that was completed last weekend. .........................
Had a chance to road test yet??
Originally Posted by inTgr8r
Looks great Deane.
Had a chance to road test yet??
Had a chance to road test yet??
Hi Ian,
Yes I've driven it a couple of hundred km since then. It's definitely an improvement.
 It's still not where I want it yet though.
 I find I am now noticing road noise from the cabin floor pan and from the front wheel area since the rear is better.
") I probably won't get to the front until next spring.
I probably won't get to the front until next spring. Deane
Got some Quiet pink insulation and stuffed it inside plastic bags and filled the rear quarter panels with it as well as floor under seat. I also pulled out front floor kick panels and used it in there. I'm very happy with the results. Noticeable improvement over just the original job I did with foam behind the rear side panels andunder the seat.

