

Installed Aramid gasket, new plugs, and ported lower collector *PICS*


Installed Aramid gasket, new plugs, and ported lower collector *PICS*
Hey guys,
I recently did some work on the car. After doing some research, I decided that a slightly ported/smoothed plenum, new plugs, and an aramid gasket would be a few nice upgrades.
Here is the parts list:
-Motordyne Aramid gasket --> $50
-NGK Iridium IX (6 of them, part number: LFR5AIX-11) --> $55-60
-Ported and smoothed non-revup lower collector --> $70-110
I would like to sell my stock non-revup lower collector if anyone wants it. I'll clean it up. PM me if interested. I'll have a thread in the FS section sometime soon.
Here is a tool list (I am probably forgetting something):
-Torque wrench (ft-lbs for the spark plugs, and in-lbs for the plenum)
-10mm nut driver and leather glove (if you do not have an in-lbs tq wrench)
-Flat head screw driver
-16mm spark plug socket
-Grabber tool (if you do not have a spark plug socket)
-10in extension (to fit the socket into the spark plug port)
-10mm socket + driver (for misc bolts under the hood, or use the nut driver)
-A little spare oil to coat the gasket, etc. for a good seal
I would have done a DIY about changing the plugs, but I don't have enough pics.
I was a bit skeptical of using the nut driver + leather glove method, but it worked without a hitch (using a leather glove to tighten the plenum bolts is supposed to max out the force to 95in-lbs, 100in-lbs is the max recommended torque value if using an in-lbs tq wrench, so close enough). I loved it, and this method works great. Thank you to Tony from Motordyne for giving one an alternative to an expensive, and potentially unreliable, tq wrench.
The install was very smooth, but I did notice that I had a small bit of oil around the cylinder 6 spark plug (in the plug hole). I also had evidence of a little bit of oil around the plug in cylinder 5, but the oil was dry, and there was nothing in there besides a tiny bit of residue on the coil and the white part of the plug. I thought it was strange that it was completely dry.
My car has 122,000 miles, so I halfway expected to see the valve cover gasket(s) starting to leak. I am happy that there was only a small amount of oil around cylinder 6 because I cleaned it all out, and I'm not going to worry about it for a little bit. I have no intention of spending $800-1000 to fix this at the moment. The last time I did plugs was at 75,000 miles, in 2008, and I know everything was clear then, so to have the equivalent of a few drops of oil in the spark plug port (over about 50k miles) is something I can deal with for the time being. Also, on the intake manifold piece that attaches to the bottom of the lower collector (what the Aramid gasket sits on) the ports for cylinder 5 and 6 looked like they were coated with dried oil (it was dry to the touch). Does anyone have any ideas? Is this the result of the valve cover gasket failing? Take a look at the pictures, I've put a note referencing my question above the respective photos.
In terms of the ported lower plenum, the tops of the front runners were ground down, like on the MREV2, and the rest was slightly ported and smoothed. I went over every part of the collector with some 40 grit sandpaper to ensure that the surface wasn't too smooth because I read that it was not conducive to airflow. My work with the sandpaper was nothing extreme, but it put some scratches in the finish, and that was about as far as I was willing to take it. Driving it around after the install, I do not really feel a difference, but when one is dealing with 5whp, I doubt any butt dyno will read that. I do feel that the car is a bit smoother from the new plugs. The tips of the old plugs looked good, so, thankfully, the engine seems to be healthy aside from the possibility of a tiny valve cover gasket leak.
I've also purchased a revup airbox, so I will see how that feels when it arrives later this week, and hopefully Hypertech will sort out their early ECU tune sometime soon. I hope that the combination of the ported lower plenum, the revup box, and the Hypertech programmer will result in a gain of 10-15whp. I would be happy with that along with the removal of the 0-60 tq management. I hope that the Aramid gasket will help with the heatsoak if I take this oldy to the track again.
Here are some pics, they are from my phone, please excuse the quality:
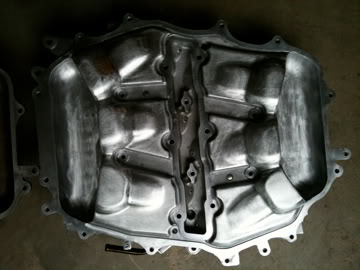
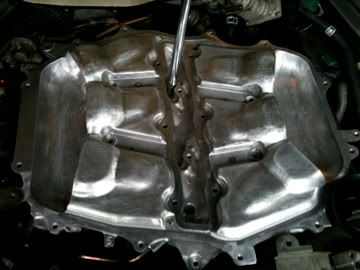
Stock lower collector vs. ported and smoothed lower collector
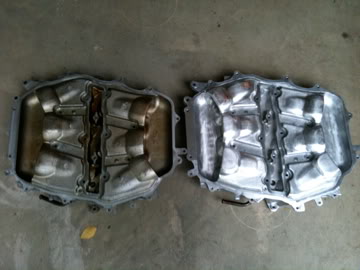

Old
New
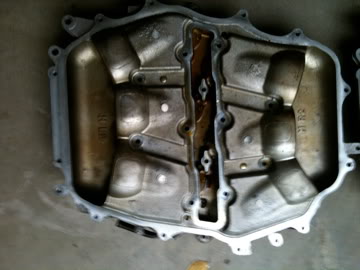
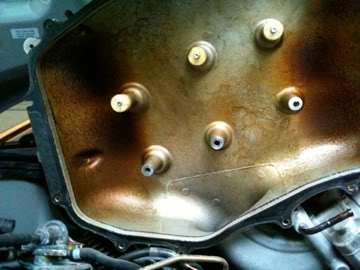
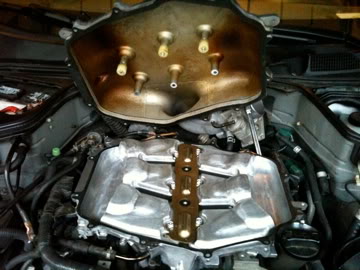
The dried oil in the ports for cylinder 5 and 6 I was wondering about
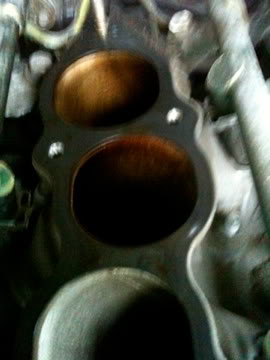
Dried oil in the upper collector
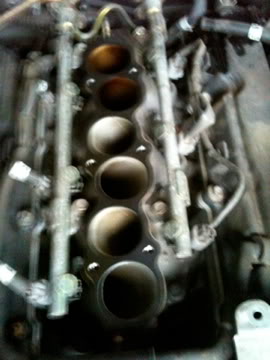
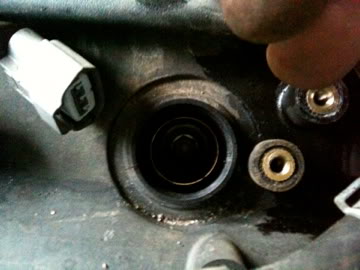
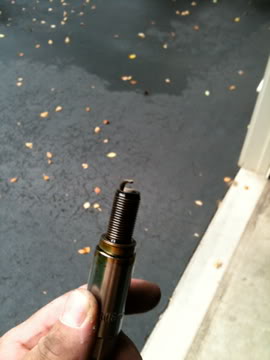
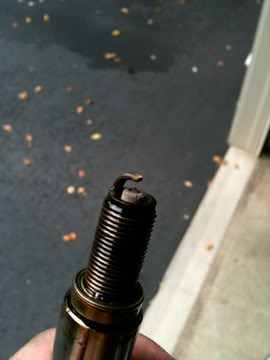
Spark plug port for cylinder 6
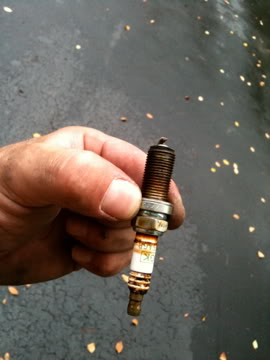
Spark plug from cylinder 6, notice some oil on the threads and by the seal. It did not actually touch the tip, but it was close. You can also notice a touch of oil at the end of the socket.
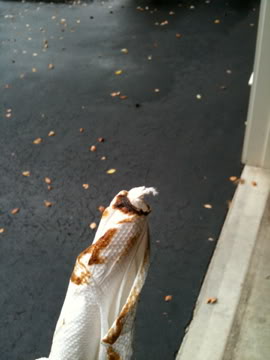
Here is the oil I got out of the port for cylinder 6, again, not very much. Some was probably smeared up the port when I took the plug out.
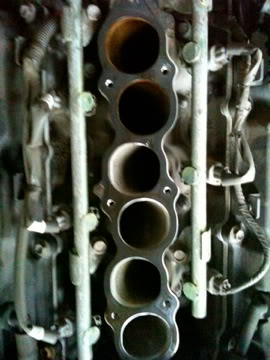
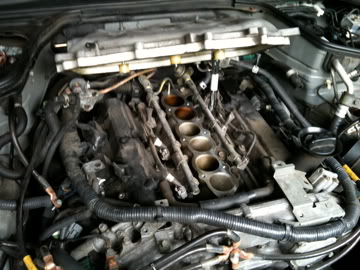
Another view of the engine with the intake plenum out
The plug with the dried oil on it from cylinder 5. Notice it's only a little bit on the white part of the plug body, and maybe a little on the threads.
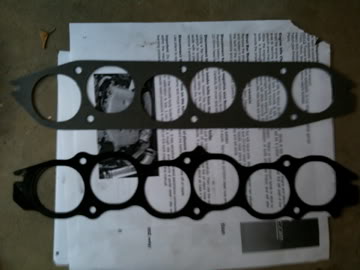
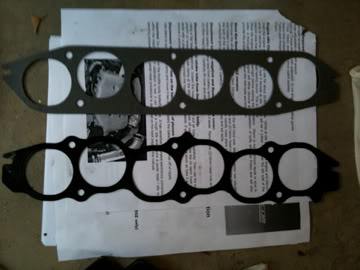
Aramid gasket vs. stock gasket (the Aramid gasket is obviously the wider looking gasket)
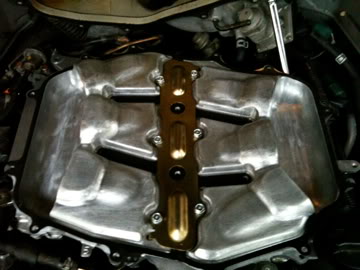
The new lower collector going in
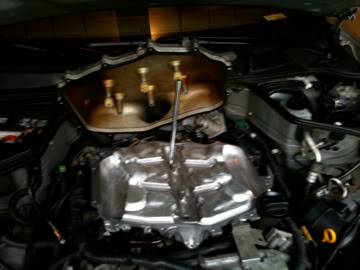
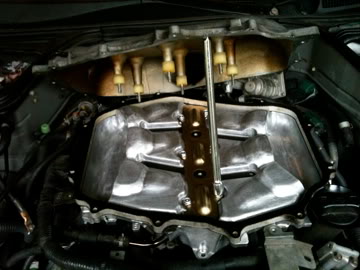
The last shot before I buttoned down the upper collector.
Thanks for looking guys.
I will do a write-up for the revup box later in the week. I'll also do an update to my Hypertech thread at some point.
I recently did some work on the car. After doing some research, I decided that a slightly ported/smoothed plenum, new plugs, and an aramid gasket would be a few nice upgrades.
Here is the parts list:
-Motordyne Aramid gasket --> $50
-NGK Iridium IX (6 of them, part number: LFR5AIX-11) --> $55-60
-Ported and smoothed non-revup lower collector --> $70-110
I would like to sell my stock non-revup lower collector if anyone wants it. I'll clean it up. PM me if interested. I'll have a thread in the FS section sometime soon.
Here is a tool list (I am probably forgetting something):
-Torque wrench (ft-lbs for the spark plugs, and in-lbs for the plenum)
-10mm nut driver and leather glove (if you do not have an in-lbs tq wrench)
-Flat head screw driver
-16mm spark plug socket
-Grabber tool (if you do not have a spark plug socket)
-10in extension (to fit the socket into the spark plug port)
-10mm socket + driver (for misc bolts under the hood, or use the nut driver)
-A little spare oil to coat the gasket, etc. for a good seal
I would have done a DIY about changing the plugs, but I don't have enough pics.
I was a bit skeptical of using the nut driver + leather glove method, but it worked without a hitch (using a leather glove to tighten the plenum bolts is supposed to max out the force to 95in-lbs, 100in-lbs is the max recommended torque value if using an in-lbs tq wrench, so close enough). I loved it, and this method works great. Thank you to Tony from Motordyne for giving one an alternative to an expensive, and potentially unreliable, tq wrench.
The install was very smooth, but I did notice that I had a small bit of oil around the cylinder 6 spark plug (in the plug hole). I also had evidence of a little bit of oil around the plug in cylinder 5, but the oil was dry, and there was nothing in there besides a tiny bit of residue on the coil and the white part of the plug. I thought it was strange that it was completely dry.
My car has 122,000 miles, so I halfway expected to see the valve cover gasket(s) starting to leak. I am happy that there was only a small amount of oil around cylinder 6 because I cleaned it all out, and I'm not going to worry about it for a little bit. I have no intention of spending $800-1000 to fix this at the moment. The last time I did plugs was at 75,000 miles, in 2008, and I know everything was clear then, so to have the equivalent of a few drops of oil in the spark plug port (over about 50k miles) is something I can deal with for the time being. Also, on the intake manifold piece that attaches to the bottom of the lower collector (what the Aramid gasket sits on) the ports for cylinder 5 and 6 looked like they were coated with dried oil (it was dry to the touch). Does anyone have any ideas? Is this the result of the valve cover gasket failing? Take a look at the pictures, I've put a note referencing my question above the respective photos.
In terms of the ported lower plenum, the tops of the front runners were ground down, like on the MREV2, and the rest was slightly ported and smoothed. I went over every part of the collector with some 40 grit sandpaper to ensure that the surface wasn't too smooth because I read that it was not conducive to airflow. My work with the sandpaper was nothing extreme, but it put some scratches in the finish, and that was about as far as I was willing to take it. Driving it around after the install, I do not really feel a difference, but when one is dealing with 5whp, I doubt any butt dyno will read that. I do feel that the car is a bit smoother from the new plugs. The tips of the old plugs looked good, so, thankfully, the engine seems to be healthy aside from the possibility of a tiny valve cover gasket leak.
I've also purchased a revup airbox, so I will see how that feels when it arrives later this week, and hopefully Hypertech will sort out their early ECU tune sometime soon. I hope that the combination of the ported lower plenum, the revup box, and the Hypertech programmer will result in a gain of 10-15whp. I would be happy with that along with the removal of the 0-60 tq management. I hope that the Aramid gasket will help with the heatsoak if I take this oldy to the track again.
Here are some pics, they are from my phone, please excuse the quality:
Stock lower collector vs. ported and smoothed lower collector
Old
New
The dried oil in the ports for cylinder 5 and 6 I was wondering about
Dried oil in the upper collector
Spark plug port for cylinder 6
Spark plug from cylinder 6, notice some oil on the threads and by the seal. It did not actually touch the tip, but it was close. You can also notice a touch of oil at the end of the socket.
Here is the oil I got out of the port for cylinder 6, again, not very much. Some was probably smeared up the port when I took the plug out.
Another view of the engine with the intake plenum out
The plug with the dried oil on it from cylinder 5. Notice it's only a little bit on the white part of the plug body, and maybe a little on the threads.
Aramid gasket vs. stock gasket (the Aramid gasket is obviously the wider looking gasket)
The new lower collector going in
The last shot before I buttoned down the upper collector.
Thanks for looking guys.
I will do a write-up for the revup box later in the week. I'll also do an update to my Hypertech thread at some point.
Last edited by MM_G3520; Sep 6, 2010 at 05:01 AM.

Registered User

Joined: Dec 2005
Posts: 335
Likes: 3
From: South Florida
Its interesting. You can really see the airflow pattern. I never realized how much of the air flowed from the throttle body to the front of the intake manifold and then back to the back. It looks like most of the oil vapors get carried into 5 and 6.
I also never realized that the front two runners were the ones flattened - clearly motordyne knows that the air flows to the front over the first two runners and around to the back. It almost seems like it would create a lot of turbulence over the 1 and 2 runners. Looking at it like that it seems like the HR version with dual intakes really could offer some gains.
I also never realized that the front two runners were the ones flattened - clearly motordyne knows that the air flows to the front over the first two runners and around to the back. It almost seems like it would create a lot of turbulence over the 1 and 2 runners. Looking at it like that it seems like the HR version with dual intakes really could offer some gains.
Last edited by MM_G3520; Sep 6, 2010 at 05:02 AM.

I'm surprised I missed this thread. 03Base, how do you like the ported manifold? I recently bought a used non-rev lower plenum for $70 and have basically done the same thing. I didn't polish everything up as much as you did though. I shaved the front two air horns down with a 40 grit flapper disc and then used a random orbital to knock down the casting grain a bit on the interior surfaces. I also polished out some of the rough casting edges around a few of the airhorns and cleaned up some casting flash on the inside of the runners. If it doesn't work well, I'm only out $70. I'll post back with my plenum pics and findings.

That aramid gasket is definately a good add on to keep temps down in the plenum. I noticed that after installing the MRev2+5/16 spacer(came with aramid gasket) that the plenum feels a bit cooler to touch then it used to.
I'm surprised I missed this thread. 03Base, how do you like the ported manifold? I recently bought a used non-rev lower plenum for $70 and have basically done the same thing. I didn't polish everything up as much as you did though. I shaved the front two air horns down with a 40 grit flapper disc and then used a random orbital to knock down the casting grain a bit on the interior surfaces. I also polished out some of the rough casting edges around a few of the airhorns and cleaned up some casting flash on the inside of the runners. If it doesn't work well, I'm only out $70. I'll post back with my plenum pics and findings.
 I think he fleeced me out of $100 or 110
I agree. I noticed that my plenum was slightly cooler to the touch as well. It's a great upgrade! I hate the heat soak on these cars.
Trending Topics

The MREV lower plenums are OEM cores modified by Motordyne. The main modification is milling of the two front runner horns and some grinding/polishing of portions horns, valleys, and maybe some other things. Tony at Motordyne is pretty secretive about what exactly is done and rightly so. However, I've studied many used MREVs in the for sale sections of this site and MY350z and have a fairly good idea of what he's doing. He charges $460 for the modified plenum. I bought my used plenum for $70 on MY350.com and modified it myself with an angle grinder, random orbital, and elbow grease. I've spent about 3 hours working on mine. $460 is expensive for a modified OEM plenum, but there is quite a bit of labor involved and also the R/D that went into it. Some people like to do the work themselves and others prefer to simply buy the made part.
It's not a Motordyne MREV lower collector. It's a stock non-rev lower collector that was modified.

modified - exactly what motordyne does - but maybe not the same modifications.
If you see them side by side and know what you're looking for you would know what has been done though.
I can tell you from looking at the pics though, that there are a few things extra that Motordyne does. Also, it looks like the front 2 cylinders were milled down a little too far.
Potato -Patodo
modified - exactly what motordyne does - but maybe not the same modifications.
If you see them side by side and know what you're looking for you would know what has been done though.
I can tell you from looking at the pics though, that there are a few things extra that Motordyne does. Also, it looks like the front 2 cylinders were milled down a little too far.