
Help! Headlight restoration gone wrong!


Help! Headlight restoration gone wrong!
Wow do I feel like an idiot! I completely f'd up my headlight when trying to get it a little less hazy. You may think you are seeing the pictures in reverse. But no, it went from good to terrible real quick. This was my process:
I wet the headlight and 1000 grit sand paper sponge and then rubbed in a circular motion on my headlight. Then repeat with 2000 grit sandpaper. After that, I used this
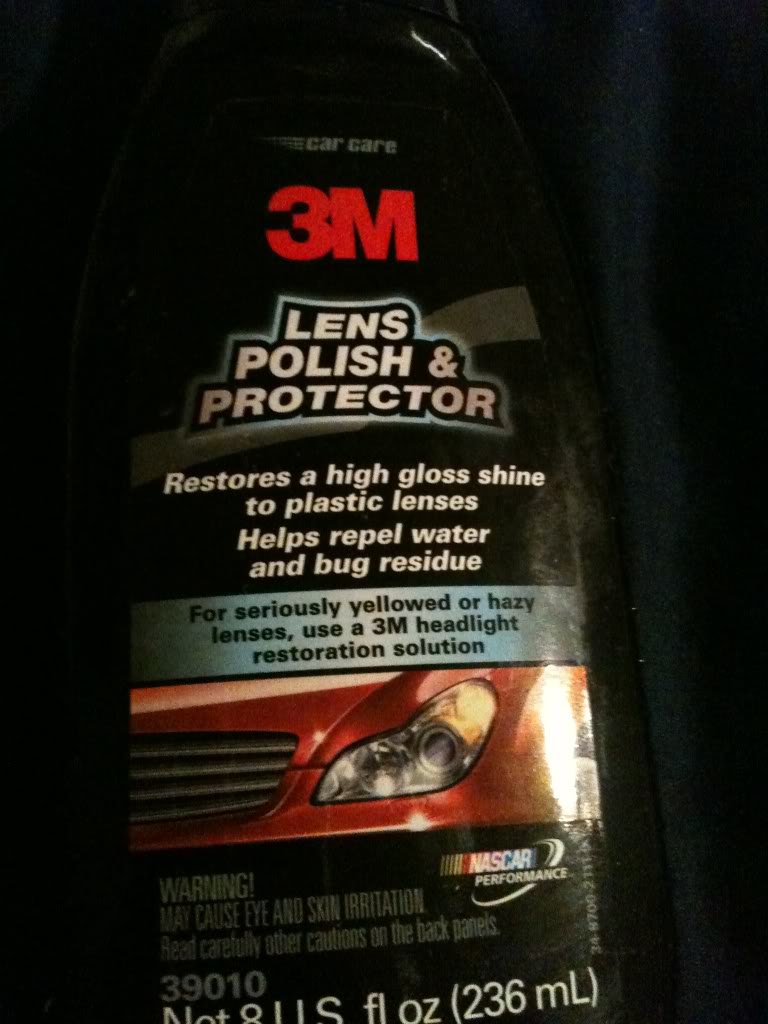
Which is what the guy at pep boys recommended.
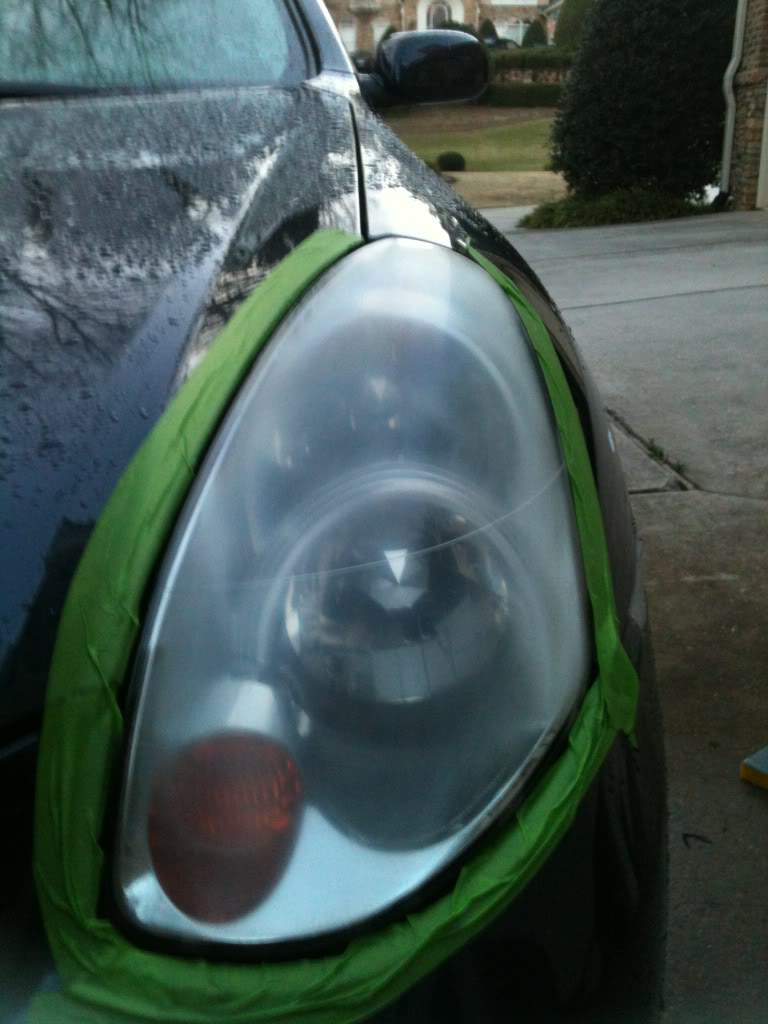
These are the results. Be careful, it's ugly.
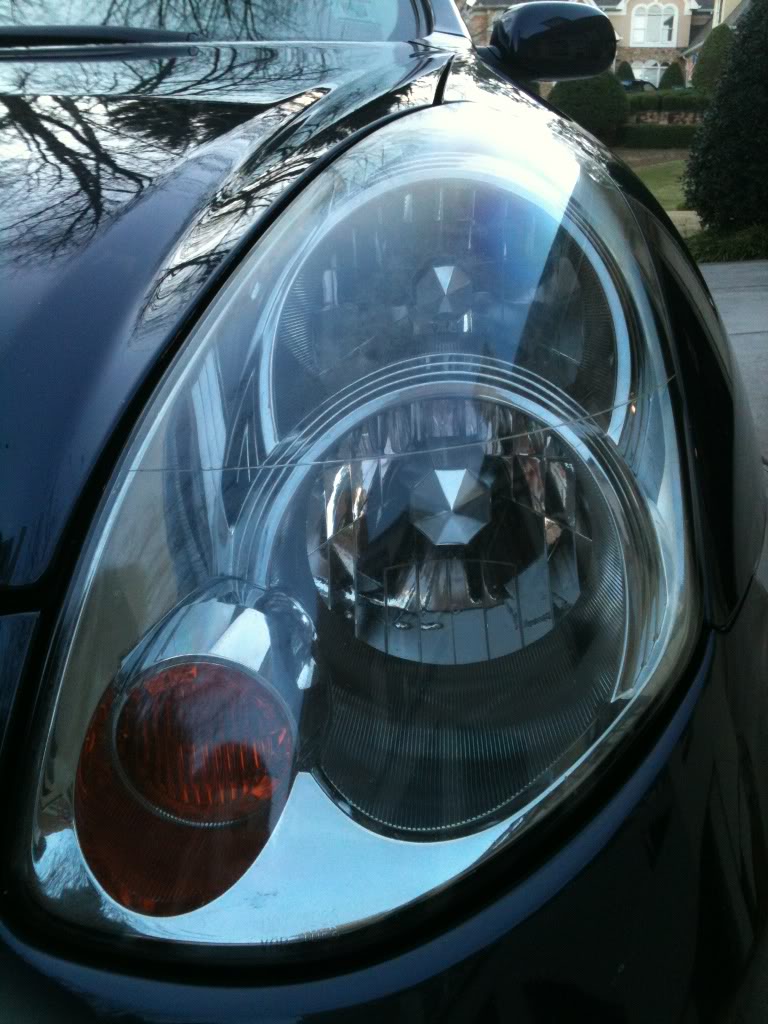
Before:
After:
No I did not mix those up. What did I do wrong?
I wet the headlight and 1000 grit sand paper sponge and then rubbed in a circular motion on my headlight. Then repeat with 2000 grit sandpaper. After that, I used this
Which is what the guy at pep boys recommended.
These are the results. Be careful, it's ugly.
Before:
After:
No I did not mix those up. What did I do wrong?


Registered User
Joined: Dec 2010
Posts: 507
Likes: 18
yeah man with your hand i'm sure it wont work. Dont freak out this is fixable I've done this a few times and i freaked out because my headlight looked like yours. if i were you id get a pad for the drill, once you get that wet sand it once more just a bit, after that spray it clean with water and dry it off with a towel. Throw some compound on the headlight and start buffing it, you gotta work it but don't press to hard or stay in once spot to lomg, once the compound is buffed in pretty good wipe it clean with a towel, may need to repeat buffing a few times.
Trending Topics
yeah man with your hand i'm sure it wont work. Dont freak out this is fixable I've done this a few times and i freaked out because my headlight looked like yours. if i were you id get a pad for the drill, once you get that wet sand it once more just a bit, after that spray it clean with water and dry it off with a towel. Throw some compound on the headlight and start buffing it, you gotta work it but don't press to hard or stay in once spot to lomg, once the compound is buffed in pretty good wipe it clean with a towel, may need to repeat buffing a few times.
 What compound do you recommend?
I hate the sanding headlight restorers, it looks great when lights are off but shitty when the lights are on, after my fenderbender I got new headlights & I just keep them clean by waxing them each time I wash my car & they stay clear.

That’s how it should look after sanding. You didn't really screw anything up or do anything wrong. You started right but do not have the tools to finish. The process needs to be completed in steps just like sanding clear coat on paint. The process is most aggressive to least aggressive. Like I said you started right by using 1000 grit then 2000 grit. Now you have to use a product that can remove the 2000 grit marks then you need a product that can remove the marks you create with that product and so on. Each step should give the headlight more clarity than the step before.
What you are trying to tackle by hand will be very difficult, if not impossible; to get the results you are looking for. If you know someone who does auto detailing or someone who has a polisher (orbital or rotary) they could possibly help you.
If not you can, as mentioned by others, find a kit that you use with a drill. An example is this one:
http://www.autogeek.net/3m-headlight-kit.html
I believe they sell this at Wal-Mart. I have not used this kit but it has what you need provided you have the drill. Check out the video on Autogeek’s page and this will give you a good understanding of what you need to do.
Good luck. Let us know how it works out.
-edit- and FYI. If you wouldn't have sanded the lights the product Mr.auto part store guy gave you would have probably worked fine. Your headlights don't look bad. The bold statement on the front of the bottle "for seriously yellowed or hazy lenses use a 3m headlight restoration solution" should have been a hint to him that it's not strong enough to remove sanding marks.
Last edited by twitch; Mar 13, 2012 at 11:22 PM.


Yeah haha they did look good before but had a little hazing when the lights were on. I hate being such a perfectionist. Thanks for the help guys. I'm going to pick up a kit after work and I'll post up results later
Last edited by SkylinesTheLimit; Mar 14, 2012 at 12:31 PM.
