
Painting your window switch panels.


Thread Starter
|
Registered User
Joined: Jul 2011
Posts: 158
Likes: 11
Painting your window switch panels.
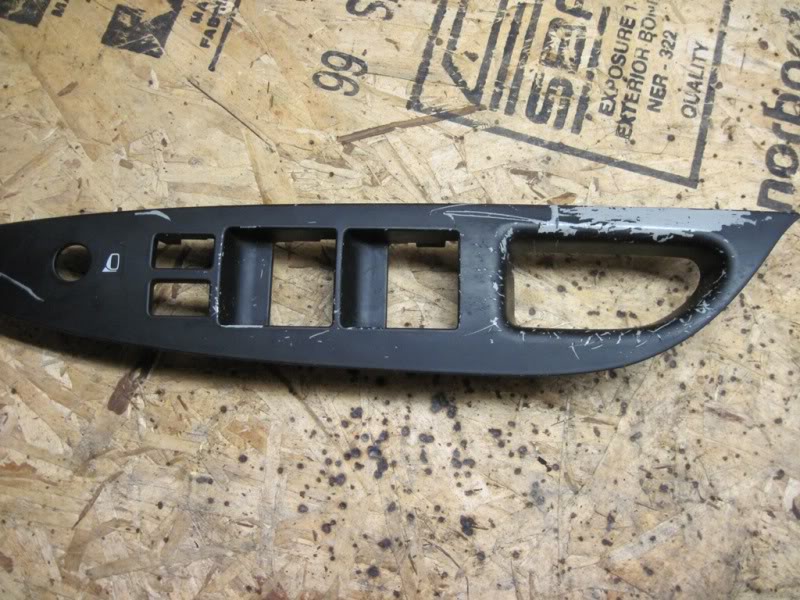
OK, you have a few options to repair, replace your scratched up window switch bezels(panels).
1.) if you under MFG warranty still you should be able to have them replaced under warranty(time is ticking)
2.) Replace them yourself at this link(thanks go to KOOL YAAR). Not sure if they are the same rubberized or not.
https://www.infinitipartsonline.com/...layCatalogid=0
3.) Repaint yours as described below
4.) Plasti-dip it (it is being attempted at this time, look for pics soon on page 4 or so)
5.) Live with it
I used the paint that I had left over from my grill painting project. You can try anything you like and please post your results. It would be fairly easy to sand and repaint it, so I am eager to know. Even though it only looks bad in the picture do the reflectivity of the Clearcoat and the flash of my camera. You can try flat clearcoat or no clear coat at all.
This is very similar to painting your grill. It was very straightforward and very easy, but the removal of the old “paint” was PITA. There are no screws or clips to remove.
Difficulty level 2 on scale of 1 to 10 (1=putting air in your tires, 10= engine swap).
What you need:
1.) Small screw driver
2.) Scraper(letter opener, or fingernail)
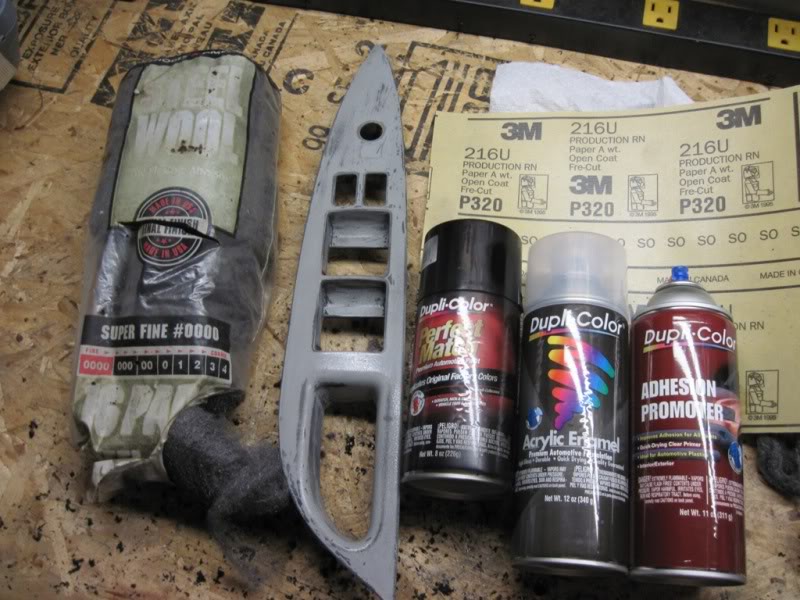
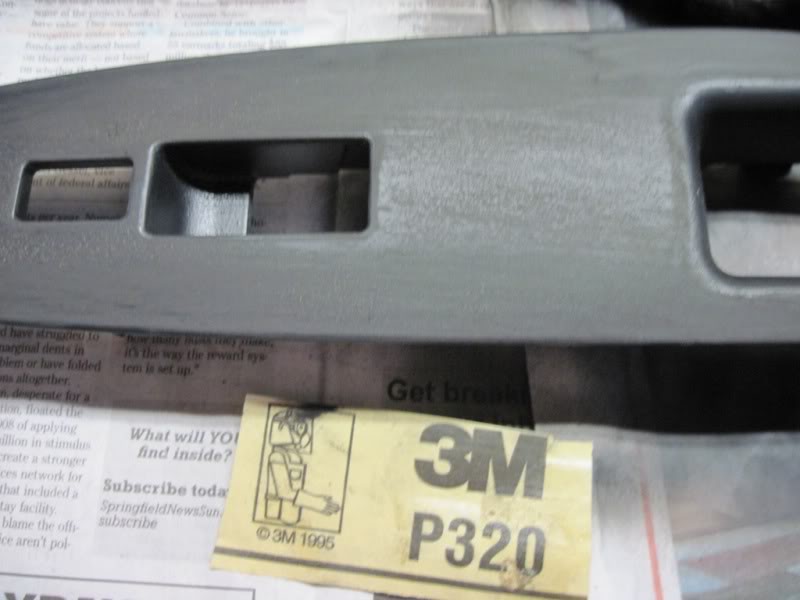
3.) Sand paper 320 grit worked fine
4.) Duplicolor Clear adhesive / primer
5.) Duplicolor Flat black paint
6.) Duplicolor enamel Clear Clearcoat Might want to try FLAT CC if you are going to use clear coat
Procedure:
Use a small skinny flathead screwdriver to gently pry up the panel in the middle, while messaging the soft edge of the door. It should pop up, then work the screwdriver towards the rear and then to the front. The unit should come out. Use the small flathead to “gently” work the 4 clips to remove the switches (works the same on the mirror control). Remove the whole switch housings and not the wires.
Now the fun part, stripping the old black off. Actually I used my fingernail the most, but the letter opener and scissors worked well in tight spots. Try not to scratch the unit as it will show through, but you will end up sanding most out.
Sanding; I used a 320 grit sand paper and it worked well. I removed all shiny parts so the new paint would stick.
Painting; Make sure to turn the unit between coats. If you get too much paint, just lightly sand it before doing the next coat.
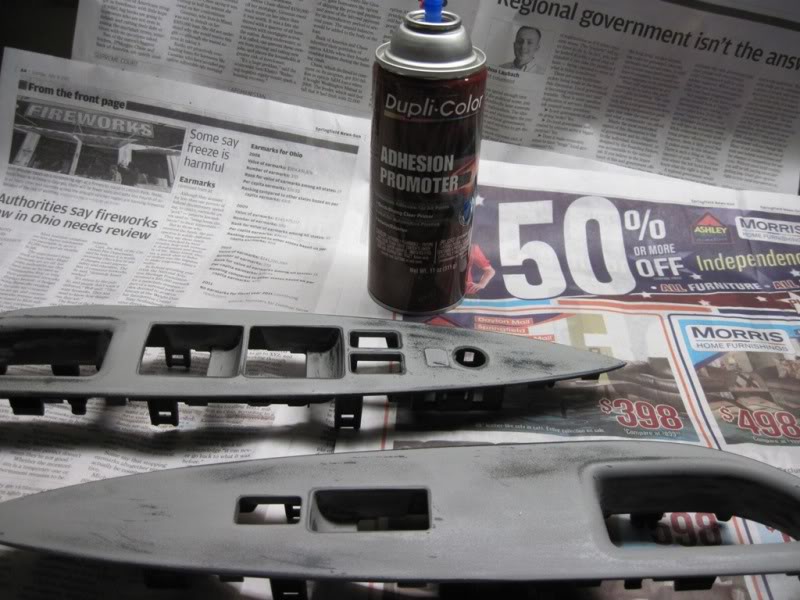
3-4 coats of adhesive primer
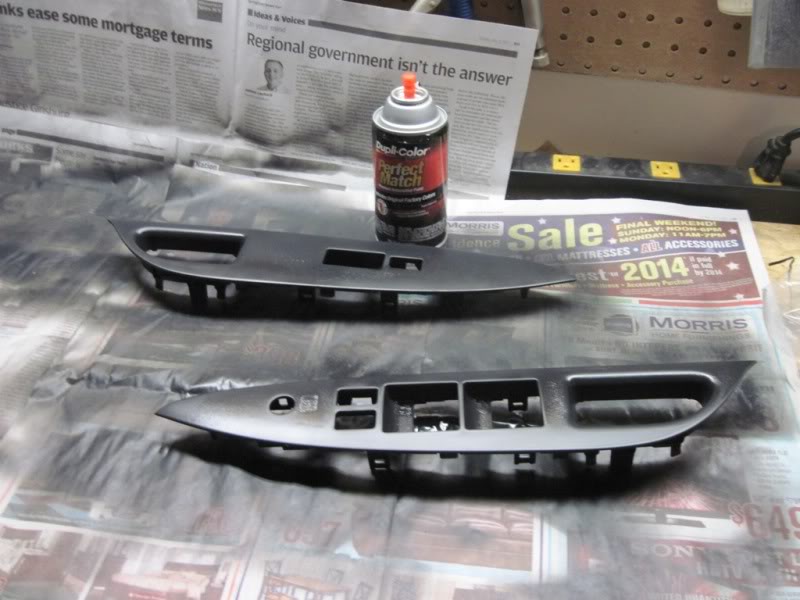
3-5 coats of Flat black paint (if it bubbles you can sand it between coats (didn’t hurt mine at all), but do it very lightly. I used a piece of copy paper to smooth out some imperfections.
3-4 coats of enamel clear coat. I waited an hour to let the paint dry before using the clear coat (It was a very humid and hot day). The CC will go on hazy, but dries to a clear coat
Reassemble it and your good to go.(test your controls before you actually snap it back into place
Tips: The paint dried in about 5 minutes, but I gave it 10 min between coats. I gave the final coat of CC 2 hours to harden before putting them back in(It was bullet proof).
I am tempted to use a paint brush on my steering wheel parts if they get any worse. I will experiment with Plastic cleaner/protectors(armorall "like" stuff).
Do not take the mirror adjustment box apart or you will regret it.
Sanding between coats to make smooth.

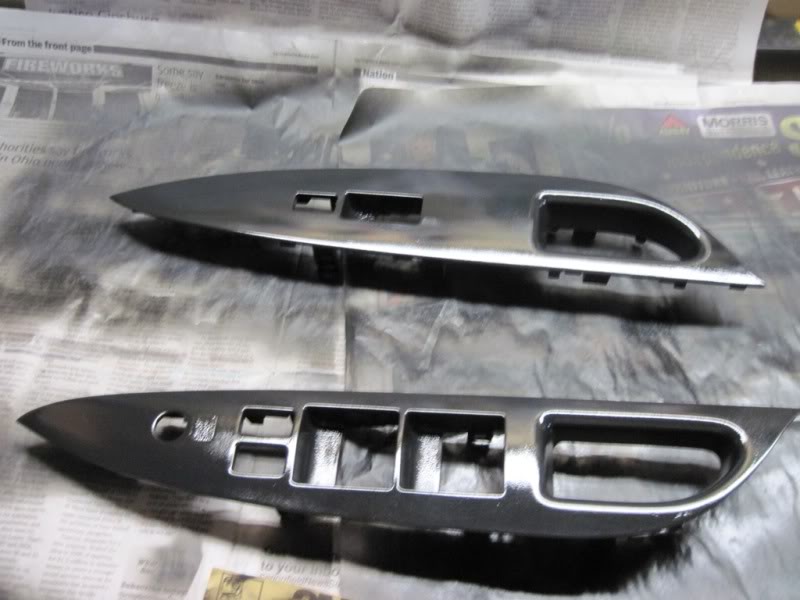
I know the picture above(pre-Clearcoat) looks better, but the paint was pretty "scratchable" without it. It looks alot better on the car as the camera flash really played heck off the shiny CC.


Any questons, please let me know.
1.) if you under MFG warranty still you should be able to have them replaced under warranty(time is ticking)
2.) Replace them yourself at this link(thanks go to KOOL YAAR). Not sure if they are the same rubberized or not.
https://www.infinitipartsonline.com/...layCatalogid=0
3.) Repaint yours as described below
4.) Plasti-dip it (it is being attempted at this time, look for pics soon on page 4 or so)
5.) Live with it
I used the paint that I had left over from my grill painting project. You can try anything you like and please post your results. It would be fairly easy to sand and repaint it, so I am eager to know. Even though it only looks bad in the picture do the reflectivity of the Clearcoat and the flash of my camera.
You can try flat clearcoat or no clear coat at all.This is very similar to painting your grill. It was very straightforward and very easy, but the removal of the old “paint” was PITA. There are no screws or clips to remove.
Difficulty level 2 on scale of 1 to 10 (1=putting air in your tires, 10= engine swap).
What you need:
1.) Small screw driver
2.) Scraper(letter opener, or fingernail)
3.) Sand paper 320 grit worked fine
4.) Duplicolor Clear adhesive / primer
5.) Duplicolor Flat black paint
6.) Duplicolor enamel Clear Clearcoat Might want to try FLAT CC if you are going to use clear coat
Procedure:
Use a small skinny flathead screwdriver to gently pry up the panel in the middle, while messaging the soft edge of the door. It should pop up, then work the screwdriver towards the rear and then to the front. The unit should come out. Use the small flathead to “gently” work the 4 clips to remove the switches (works the same on the mirror control). Remove the whole switch housings and not the wires.
Now the fun part, stripping the old black off. Actually I used my fingernail the most, but the letter opener and scissors worked well in tight spots. Try not to scratch the unit as it will show through, but you will end up sanding most out.
Sanding; I used a 320 grit sand paper and it worked well. I removed all shiny parts so the new paint would stick.
Painting; Make sure to turn the unit between coats. If you get too much paint, just lightly sand it before doing the next coat.
3-4 coats of adhesive primer
3-5 coats of Flat black paint (if it bubbles you can sand it between coats (didn’t hurt mine at all), but do it very lightly. I used a piece of copy paper to smooth out some imperfections.
3-4 coats of enamel clear coat. I waited an hour to let the paint dry before using the clear coat (It was a very humid and hot day). The CC will go on hazy, but dries to a clear coat
Reassemble it and your good to go.(test your controls before you actually snap it back into place
Tips: The paint dried in about 5 minutes, but I gave it 10 min between coats. I gave the final coat of CC 2 hours to harden before putting them back in(It was bullet proof).
I am tempted to use a paint brush on my steering wheel parts if they get any worse. I will experiment with Plastic cleaner/protectors(armorall "like" stuff).
Do not take the mirror adjustment box apart or you will regret it.
Sanding between coats to make smooth.
I know the picture above(pre-Clearcoat) looks better, but the paint was pretty "scratchable" without it. It looks alot better on the car as the camera flash really played heck off the shiny CC.
Any questons, please let me know.
Last edited by MPohio; Aug 8, 2011 at 03:35 PM.

Thread Starter
|
Registered User
Joined: Jul 2011
Posts: 158
Likes: 11
be careful using the screwdriver as I did leave a couple small indentations in my door panel from prying. It pops straight up by the way. Do both while your at it. I didn't even check my rear as I nobody ever rides back there.

Thread Starter
|
Registered User
Joined: Jul 2011
Posts: 158
Likes: 11
It really doesn't look bad at all. It's the flash off the clearcoat that makes it looks bad. You can always try it with the regular paint. It isn't nearly as scratchable as the original crap that came on the car(idiots). All you would have to do is pop it off light sanding, 1 more coat of paint and then clear coat it.

Thread Starter
|
Registered User
Joined: Jul 2011
Posts: 158
Likes: 11
I imagine as long as the paint is hard enough you wouldn't need the acrylic Clearcoat.
I am going to ad a sort of disclaimer to my op. I only used those as I had them left over from the grill paint I just completed.
I am going to ad a sort of disclaimer to my op. I only used those as I had them left over from the grill paint I just completed.
Trending Topics

Registered User
Joined: May 2010
Posts: 187
Likes: 6
From: the Valley
I did this same thing with plastidip, except I didn't really sand ALL the old finish off, just scuffed it up enough to hold the paint. Then I cleaned the whole thing with alcohol and just painted away. Then I used a heat gun at its lowest setting to bake the paint on and let it sit for a day or two. It has been about 4ish months of daily use and no scratches to speak of, even without any clear coat. I think the key is in the prep and allowing the paint to fully cure before handling the pieces.


Thread Starter
|
Registered User
Joined: Jul 2011
Posts: 158
Likes: 11
320 actually worked fine as you can see by the pictures. It left no marks and the paint filled in the "micor scratches perfectly. I probably should have used a flat Clearcoat but this is what I had had. I will try to take another picture without the flash to show you how it looks. It really looks fine. If it didn't I would have just sanded off the clear coat and put another coat of flat black on it


