
2003 G35 Sedan Dual Exhaust


Joined: Apr 2009
Posts: 305
Likes: 1
From: Saint Louis
Note: This thread is to monitor the progress of installing a dual exhaust setup on my 2003 G35 Sedan.
2003 and 2004 G35 Sedans do not come with dual exhaust. There are also no aftermarket dual exhaust kits for this vehicle. Why? The 2003 and 2004 G35 Sedan has a "fuel evap" system that is in the way of where your passenger side dual exhaust would run.
I have found only 2 other people who have put dual exhaust on Gen 1 (2003/2004) G35 Sedans. Their methods are located at the following:
https://g35driver.com/forums/g35-sed...-my-sedan.html
https://g35driver.com/forums/intake-...-complete.html
Below is the method I used to install dual exhaust on my 2003 G35 Sedan.
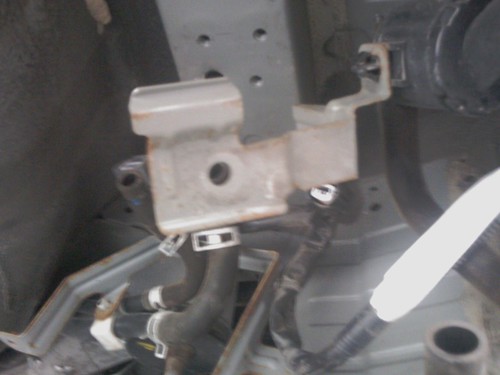
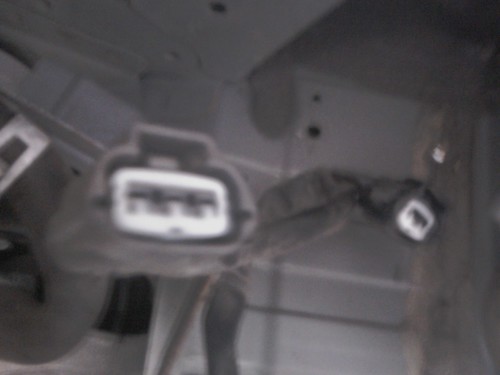
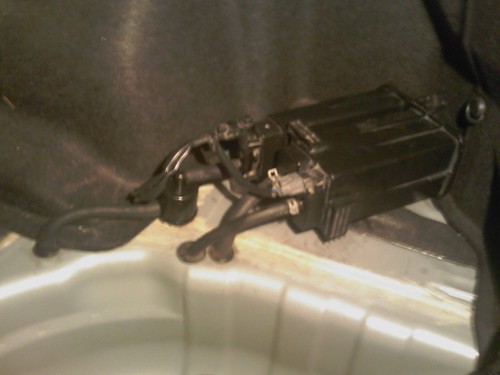
The main fuel evap canister for this system is located under the rear passenger side of the car.
The fuel evap canister is shown below.


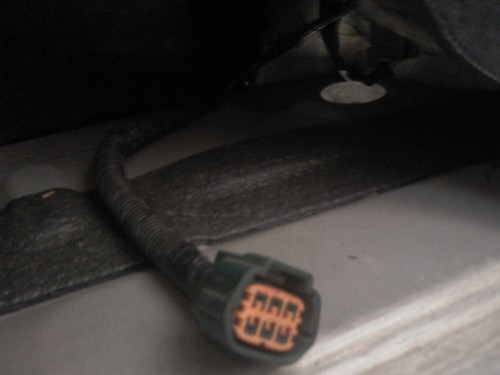
Taking the fuel evap canister out is easy work. The only tools I needed was a 10mm and 12mm socket wrench. My socket extension helped as well. First I took off the under panel that covers where my passenger tailpipe will run. Once removed, the fuel evap canister is revealed. There are a few 10mm bolts and a few 12mm bolts holding the canister in place. Once all the bolts were removed, I removed all hoses and the wiring harness that was attached to the canister. I made sure to mark which hose went where so I didn't put the wrong hose in the wrong place when I was done relocating the canister.
The photos below show the hoses once taken off the canister.

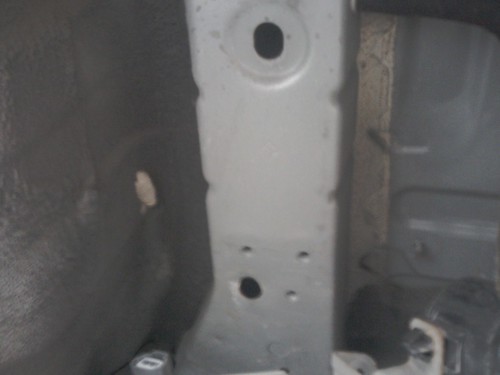
The following photo shows the space I had to work with once the canister was removed.
I chose to reroute my evap canister in the trunk, directly above where it used to be.
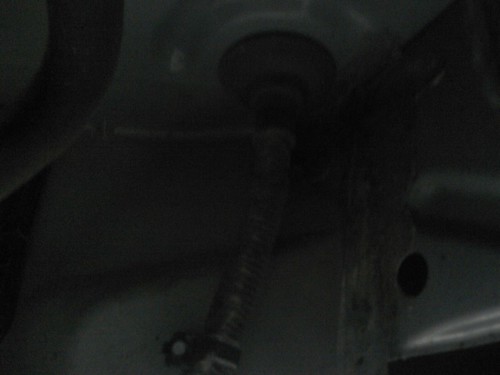
The wiring harness that the evap canister uses runs from the trunk through a grommet to its factory position. The following photo shows this grommet from the bottom up (this is a view from under the vehicle).
I disconnected all the wires from the harness, and I pulled the wiring harness through this grommet into the trunk. I reattached all the wires to their wiring harness into the trunk. This is shown below.
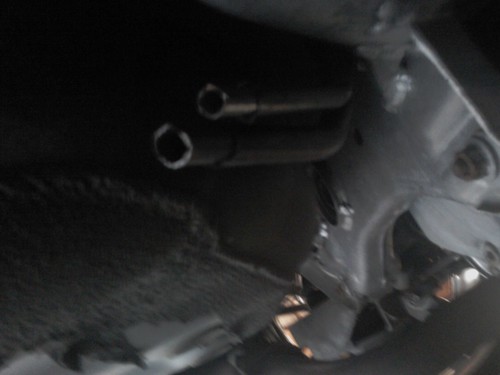
Next came the task of rerouting all hoses into the trunk to reconnect them to the evap canister. This took the most time, and I believe was the most critical step in the process. I do not fully understand the concept of the fuel evap system, and I did not want to risk putting potential fuel lines next to my hot exhaust I would be installing later. I noticed that their were two lines running from the vehicle to the evap canister. I chose a place to drill two holes up into the trunk where I felt that their integrity would not be compromised by a hot exhaust. I cut these two lines directly where they began to bend down toward the original position of the fuel evap canister, and I drilled two large holes directly between the spare tire holder and the frame of the car. This gives somewhat of a naturally enclosed heat shield to the hoses I will be installing.
The lines I cut and their respective holes I drilled are shown below.
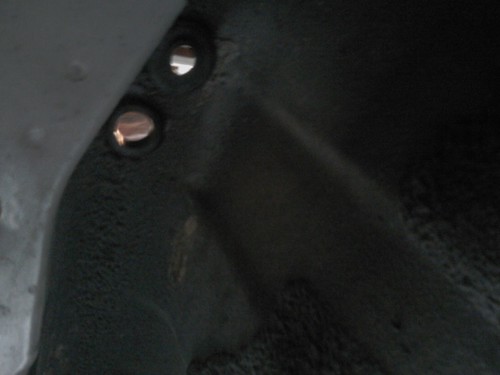
The other two hoses that are connected to the fuel evap system simply breathe into the cars frame. I chose to drill two strategic holes from the trunk town into the cars hollow frame. Doing this will also provide a natural shield to any heat coming off of the new exhaust.
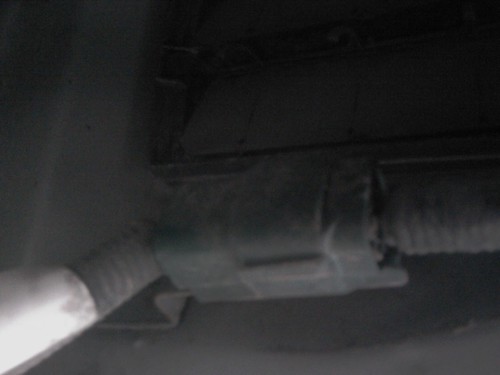
The following photo shows my relocated fuel evap canister with all hoses and wires connected.
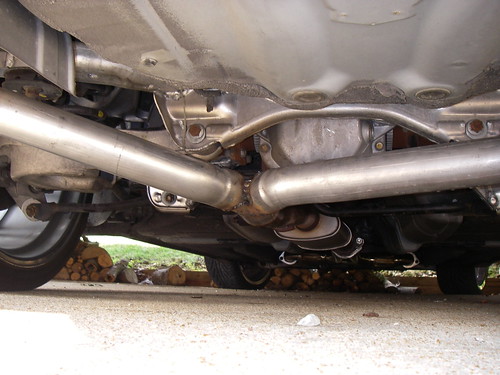
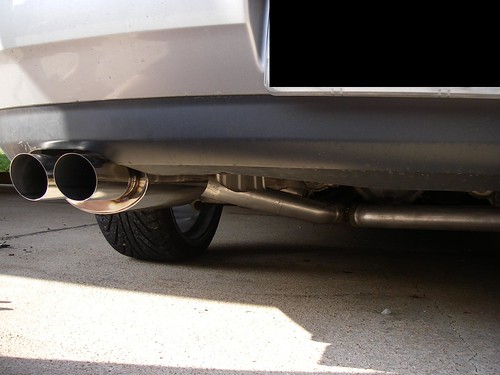
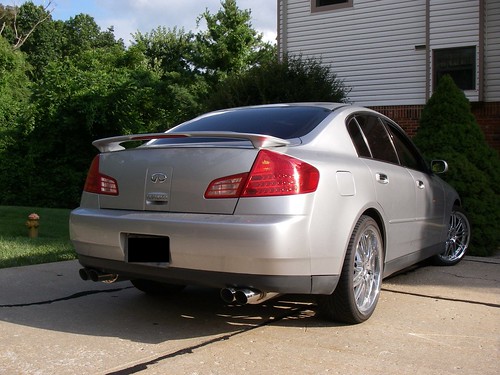
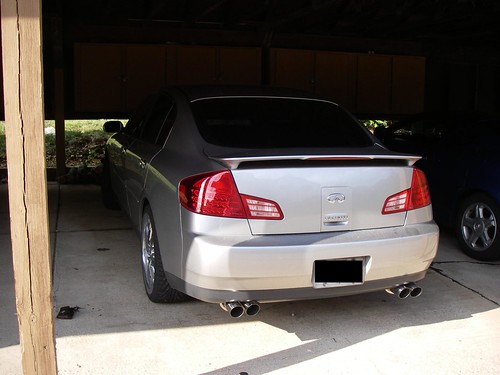
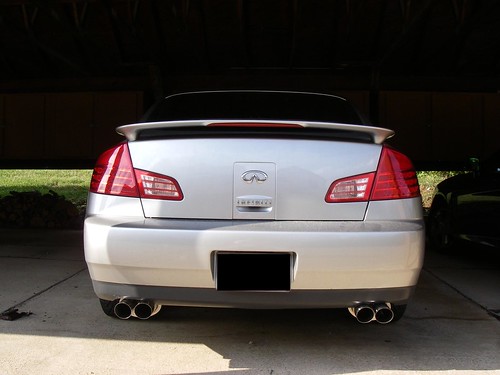
Next I make a cut in the rear bumper to accommodate the passenger side muffler. I bolted on a Megan Racing Y Pipe, 350z midpipe, and had a local shop y the midpipe in the back to two mufflers which I got off ebay. Photos and a vid are below.

<object type="application/x-shockwave-flash" width="400" height="300" data="http://www.flickr.com/apps/video/stewart.swf?v=71377"> <param name="flashvars" value="intl_lang=en-us&photo_secret=6a9d34da7f&photo_id=3779477478"></param> <param name="movie" value="http://www.flickr.com/apps/video/stewart.swf?v=71377"></param> <param name="bgcolor" value="#000000"></param> <param name="allowFullScreen" value="true"></param><embed type="application/x-shockwave-flash" src="http://www.flickr.com/apps/video/stewart.swf?v=71377" bgcolor="#000000" allowfullscreen="true" flashvars="intl_lang=en-us&photo_secret=6a9d34da7f&photo_id=3779477478" height="300" width="400"></embed></object>
Thanks for looking


2003 and 2004 G35 Sedans do not come with dual exhaust. There are also no aftermarket dual exhaust kits for this vehicle. Why? The 2003 and 2004 G35 Sedan has a "fuel evap" system that is in the way of where your passenger side dual exhaust would run.
I have found only 2 other people who have put dual exhaust on Gen 1 (2003/2004) G35 Sedans. Their methods are located at the following:
https://g35driver.com/forums/g35-sed...-my-sedan.html
https://g35driver.com/forums/intake-...-complete.html
Below is the method I used to install dual exhaust on my 2003 G35 Sedan.
The main fuel evap canister for this system is located under the rear passenger side of the car.
The fuel evap canister is shown below.
Taking the fuel evap canister out is easy work. The only tools I needed was a 10mm and 12mm socket wrench. My socket extension helped as well. First I took off the under panel that covers where my passenger tailpipe will run. Once removed, the fuel evap canister is revealed. There are a few 10mm bolts and a few 12mm bolts holding the canister in place. Once all the bolts were removed, I removed all hoses and the wiring harness that was attached to the canister. I made sure to mark which hose went where so I didn't put the wrong hose in the wrong place when I was done relocating the canister.
The photos below show the hoses once taken off the canister.
The following photo shows the space I had to work with once the canister was removed.
I chose to reroute my evap canister in the trunk, directly above where it used to be.
The wiring harness that the evap canister uses runs from the trunk through a grommet to its factory position. The following photo shows this grommet from the bottom up (this is a view from under the vehicle).
I disconnected all the wires from the harness, and I pulled the wiring harness through this grommet into the trunk. I reattached all the wires to their wiring harness into the trunk. This is shown below.
Next came the task of rerouting all hoses into the trunk to reconnect them to the evap canister. This took the most time, and I believe was the most critical step in the process. I do not fully understand the concept of the fuel evap system, and I did not want to risk putting potential fuel lines next to my hot exhaust I would be installing later. I noticed that their were two lines running from the vehicle to the evap canister. I chose a place to drill two holes up into the trunk where I felt that their integrity would not be compromised by a hot exhaust. I cut these two lines directly where they began to bend down toward the original position of the fuel evap canister, and I drilled two large holes directly between the spare tire holder and the frame of the car. This gives somewhat of a naturally enclosed heat shield to the hoses I will be installing.
The lines I cut and their respective holes I drilled are shown below.
The other two hoses that are connected to the fuel evap system simply breathe into the cars frame. I chose to drill two strategic holes from the trunk town into the cars hollow frame. Doing this will also provide a natural shield to any heat coming off of the new exhaust.
The following photo shows my relocated fuel evap canister with all hoses and wires connected.
Next I make a cut in the rear bumper to accommodate the passenger side muffler. I bolted on a Megan Racing Y Pipe, 350z midpipe, and had a local shop y the midpipe in the back to two mufflers which I got off ebay. Photos and a vid are below.
<object type="application/x-shockwave-flash" width="400" height="300" data="http://www.flickr.com/apps/video/stewart.swf?v=71377"> <param name="flashvars" value="intl_lang=en-us&photo_secret=6a9d34da7f&photo_id=3779477478"></param> <param name="movie" value="http://www.flickr.com/apps/video/stewart.swf?v=71377"></param> <param name="bgcolor" value="#000000"></param> <param name="allowFullScreen" value="true"></param><embed type="application/x-shockwave-flash" src="http://www.flickr.com/apps/video/stewart.swf?v=71377" bgcolor="#000000" allowfullscreen="true" flashvars="intl_lang=en-us&photo_secret=6a9d34da7f&photo_id=3779477478" height="300" width="400"></embed></object>
Thanks for looking
Last edited by bigdano; Aug 1, 2009 at 07:50 PM.


Joined: Apr 2009
Posts: 305
Likes: 1
From: Saint Louis
I am not sure. Any 05 owners wanna take a look?
05 does not have dual exhaust like the 03-04 so I assume its the same.
Trending Topics


Why would it run rich? I've done this in every car I've ever owned and have never had an issue but I have heard G35's have issues but don't know why.

Cause it returns the vapors back to the manifold and it adds in the the air/fuel ratio. On a scale of one to ten how hard was this? From my understanding it was very complicated but you made it seem like simple job.
I have read the issue has to do more with filling up the tank but can't remember right now.