
G35 Coupe Halos DIY Guide


G35 Coupe Halos DIY Guide
Ok so after 3 shipments of Halo/ Angel eyes rings i finally found the right ones!
2003 G35 Coupe non projector headlights
CCFL Angel Eyes, 106mm / 4.175-inch x2
CCFL Angel Eyes, 94mm / 3.70-inch x2
I got mine from http://myworld.ebay.com/ebaymotors/operatic98/
They are the enclosed style ones, not the flimsy 'naked' style ones.
Step 1: Remove headlights.
Guide can be found here:
Step 2: Bake in oven
I found a post about oven temps, i followed his guide: http://my350z.com/forum/8257901-post179.html
250F for 10-15mins, turn it down to 225F (107C) and bake the lights for 13mins
Step 3: Mounting the halos
As you take the headlights apart mount the halos in place with some electrical tape, make sure the chrome part of the halo is at the very bottom of the housing so the wires can be hidden later on.
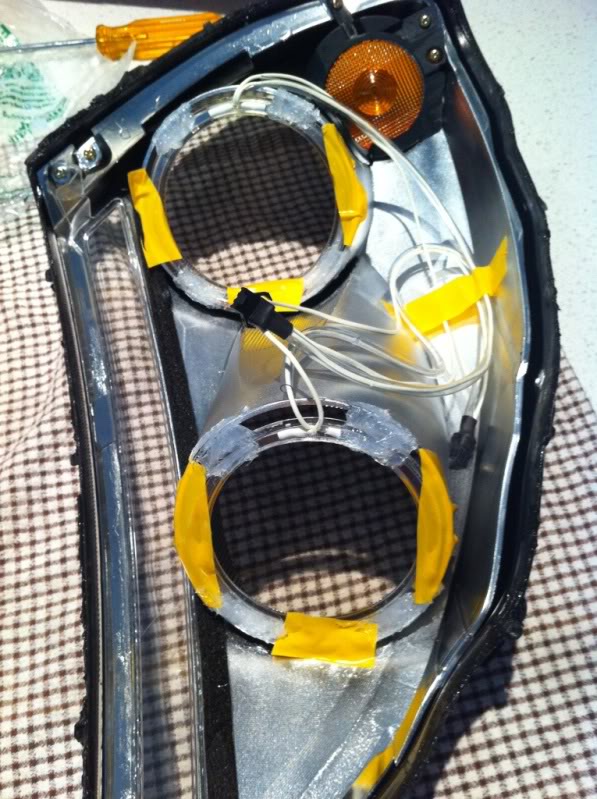
Step 4: Gluing the halos in place
What i did was just glue each corner of the halos in and put the lens (not housing) back in the oven so the glue sets faster. The oven was off, just remnant heat.
I used Acetic cure silicone {high temp rating clear} as it is what i have at home, but if you have to go buy it, a high temp clear gasket silicone would prob be better.
Once you have done each corner and its been in the oven you can take the tape off and fill in the rest of the halo with silicone.

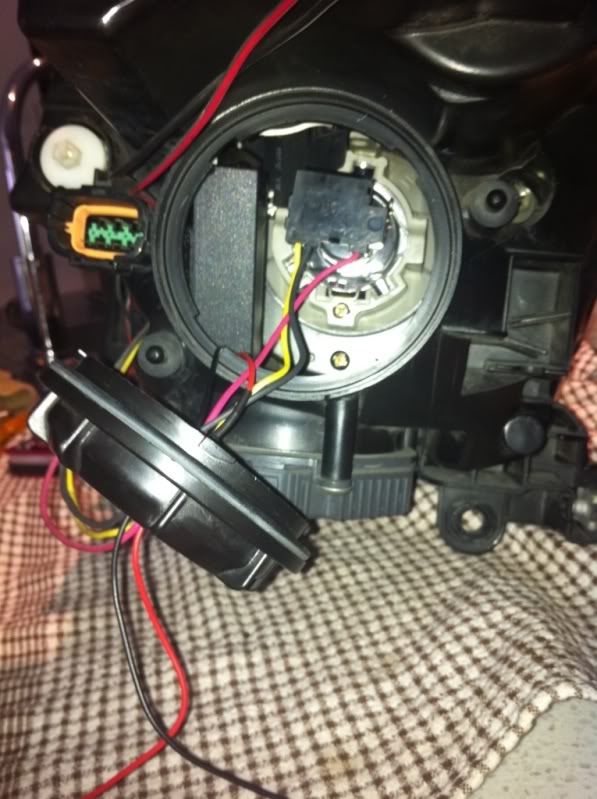
Step 5: Running the halo wires
One side (cant remember if L or R) both wires will run through near the top adjustment screws so they poke out the back of the housing (when u take the lid off) and the others will run in two separate directions. One in the top left corner and one in the bottom right. This way they cant be seen when you put the lens cover back on the housing.
Step 6: Putting the lens and house back together
Once you have run the halo wires to the back of the fog light cover, zip lock the ends of the two cables together. For now sit them back inside the housing. Put the fog light covers back on. Sit the lens back on the housing and reheat the oven same as before, put it back in and then once times up, take it out, use hand towels and push the lens back into the housing and hold until it dries.
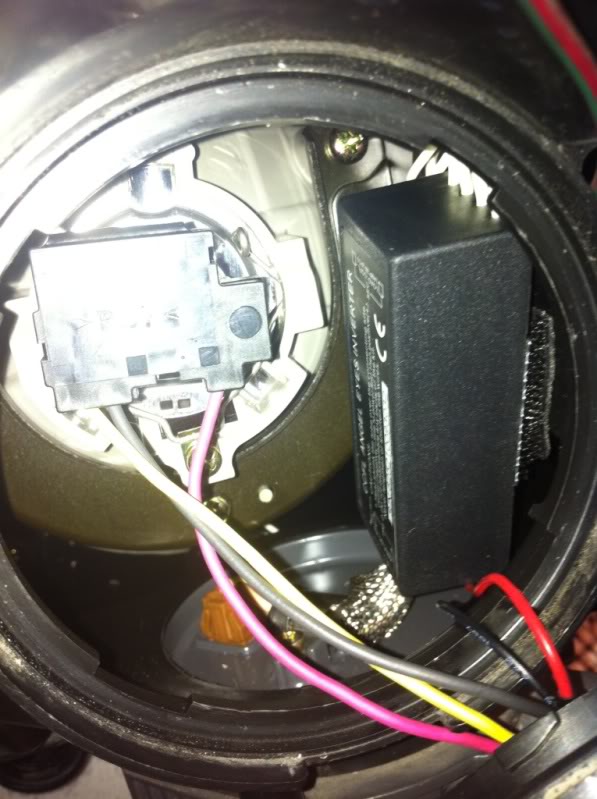
Step 7: Mounting the inverter
Once headlights have cooled get some 3M dual lock velcro tape.
Place the dual lock tape in the middle of the inverter and leave the opposite side of the tape on so you will be able to feel where you need to stick the other side on the headlight housing, just inside the fog lamps cover. It will look somewhere like this.
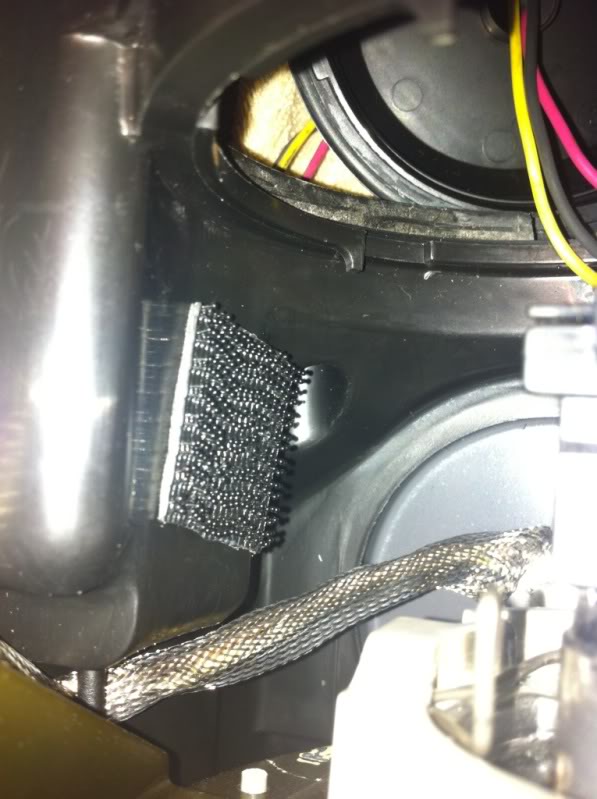
From the outside it will look like this, now u can see why i ran the halo wires i did. So they connect to the top of the inverter and be push inside the housing and hidden.
Step 8: Running the inverter wires
The positive and negative wires you can run through the rubber grommet of the fog light cover like so.
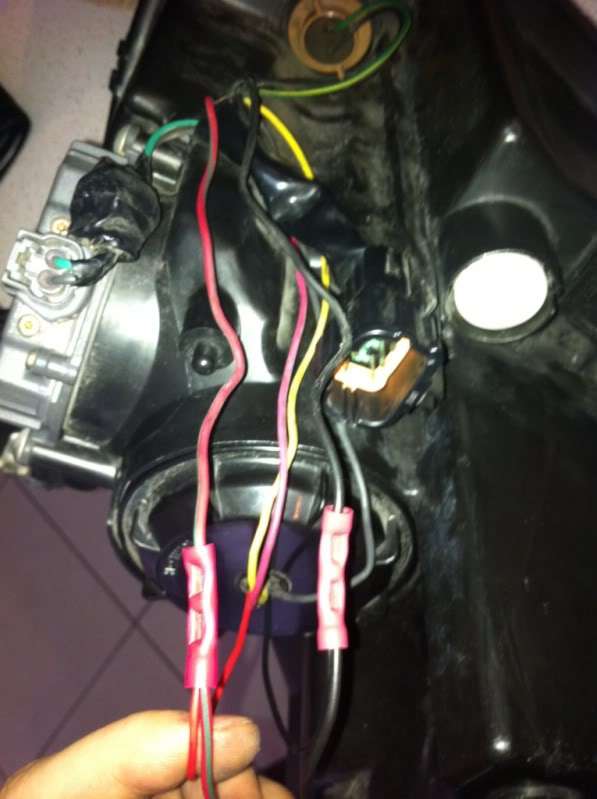
Step 9: Wiring to the parkers
Get some crimps, 4 in total. You will need to cut the negative and positive wires of the parkers, strip them back and then reconnect the 2 ends but add in the halos in the process, neg with neg, pos with pos.
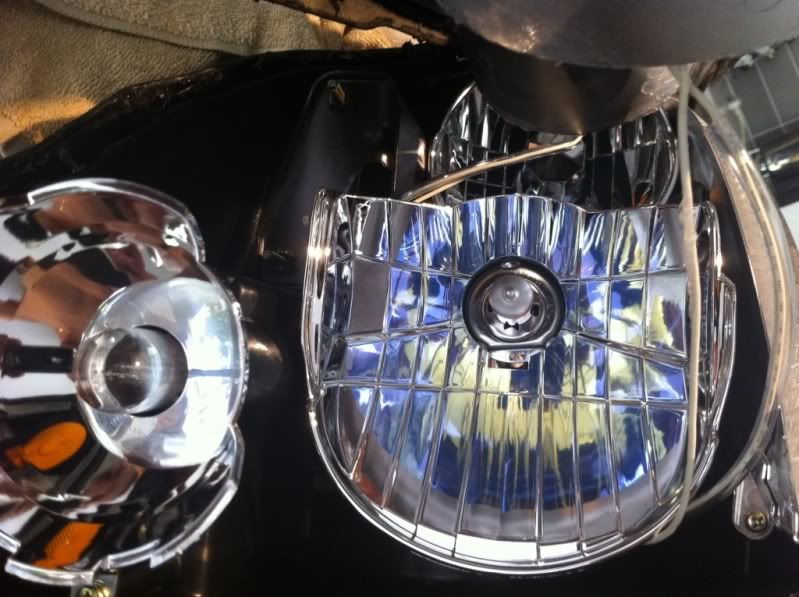
Step 10: Put them back on the car !
Test them first!!
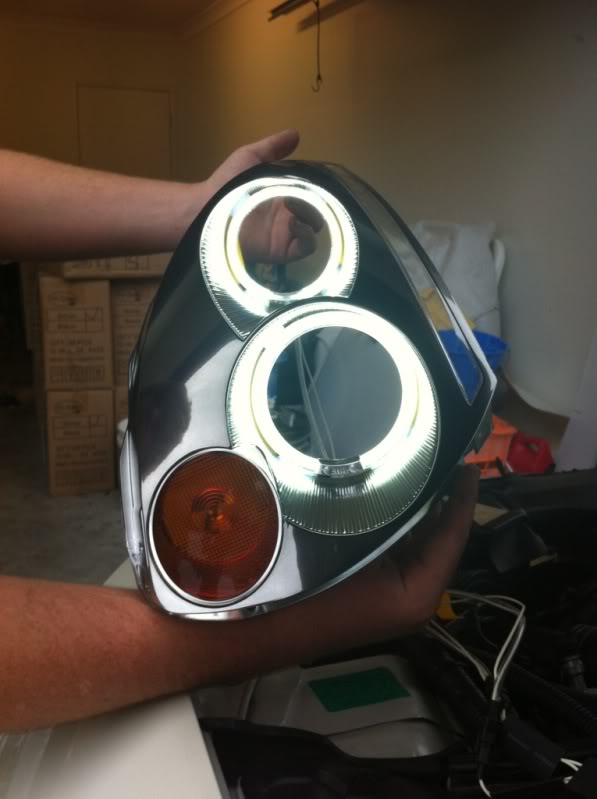
Then install
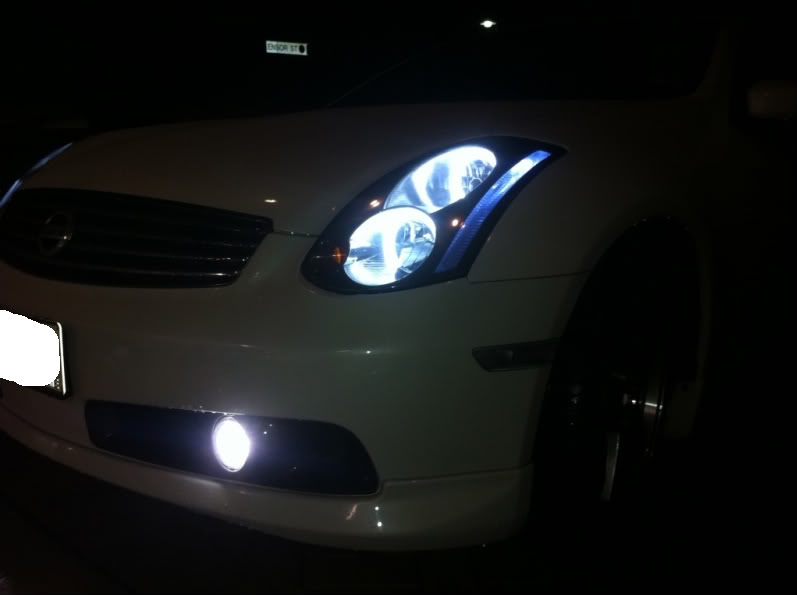
Left
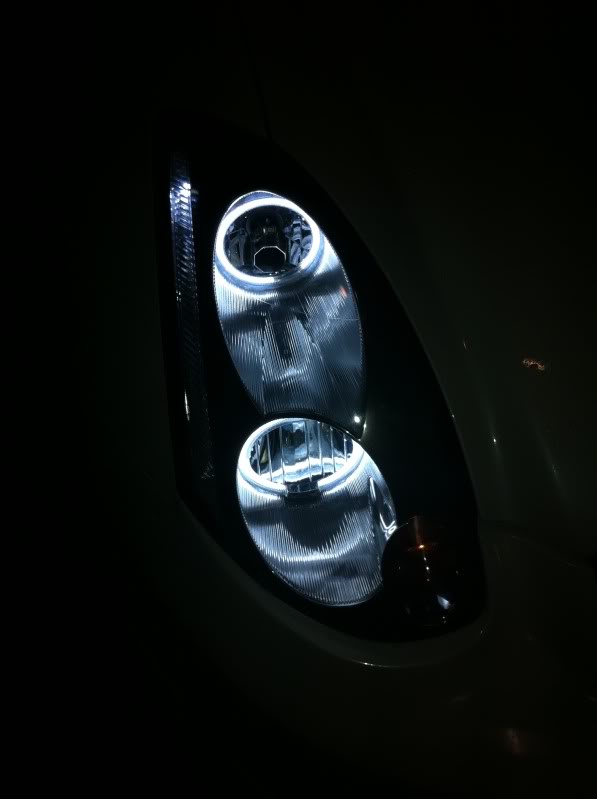
Right
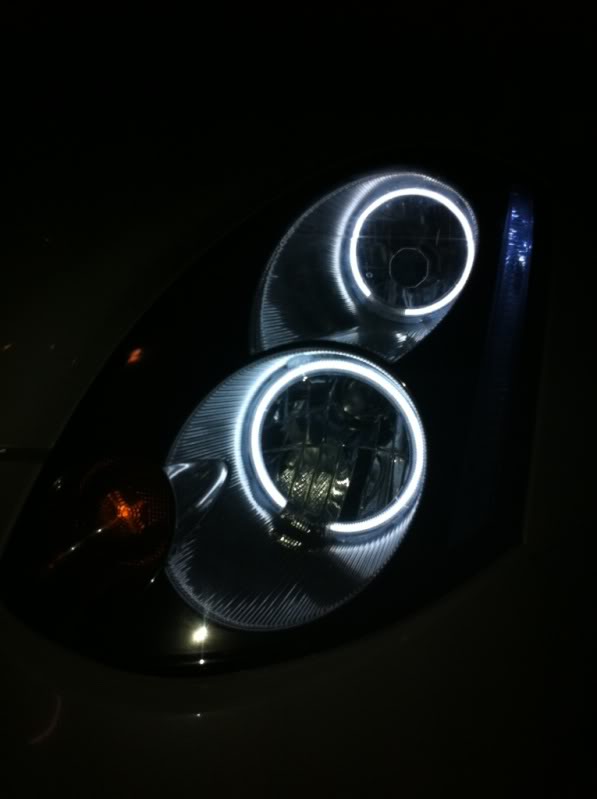
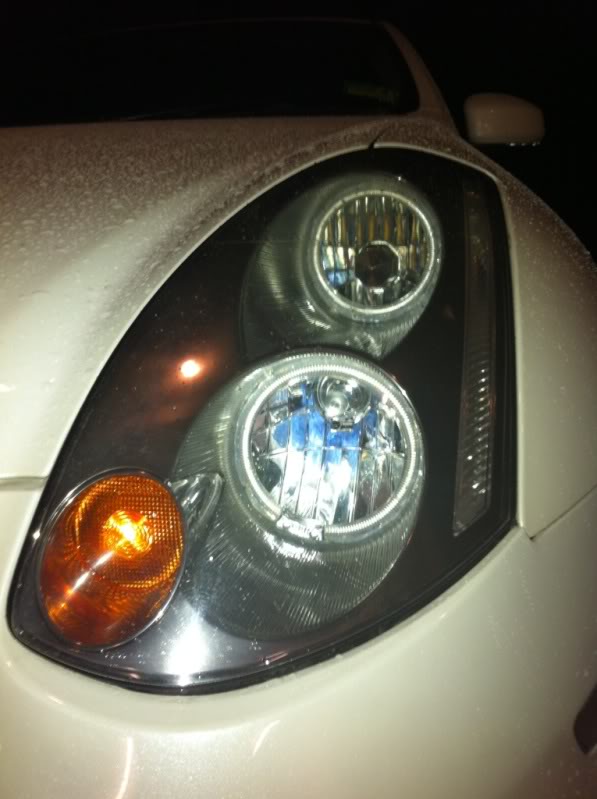
When lights are off
2003 G35 Coupe non projector headlights
CCFL Angel Eyes, 106mm / 4.175-inch x2
CCFL Angel Eyes, 94mm / 3.70-inch x2
I got mine from http://myworld.ebay.com/ebaymotors/operatic98/
They are the enclosed style ones, not the flimsy 'naked' style ones.
Step 1: Remove headlights.
Guide can be found here:
Step 2: Bake in oven
I found a post about oven temps, i followed his guide: http://my350z.com/forum/8257901-post179.html
250F for 10-15mins, turn it down to 225F (107C) and bake the lights for 13mins
Step 3: Mounting the halos
As you take the headlights apart mount the halos in place with some electrical tape, make sure the chrome part of the halo is at the very bottom of the housing so the wires can be hidden later on.
Step 4: Gluing the halos in place
What i did was just glue each corner of the halos in and put the lens (not housing) back in the oven so the glue sets faster. The oven was off, just remnant heat.
I used Acetic cure silicone {high temp rating clear} as it is what i have at home, but if you have to go buy it, a high temp clear gasket silicone would prob be better.
Once you have done each corner and its been in the oven you can take the tape off and fill in the rest of the halo with silicone.
Step 5: Running the halo wires
One side (cant remember if L or R) both wires will run through near the top adjustment screws so they poke out the back of the housing (when u take the lid off) and the others will run in two separate directions. One in the top left corner and one in the bottom right. This way they cant be seen when you put the lens cover back on the housing.
Step 6: Putting the lens and house back together
Once you have run the halo wires to the back of the fog light cover, zip lock the ends of the two cables together. For now sit them back inside the housing. Put the fog light covers back on. Sit the lens back on the housing and reheat the oven same as before, put it back in and then once times up, take it out, use hand towels and push the lens back into the housing and hold until it dries.
Step 7: Mounting the inverter
Once headlights have cooled get some 3M dual lock velcro tape.
Place the dual lock tape in the middle of the inverter and leave the opposite side of the tape on so you will be able to feel where you need to stick the other side on the headlight housing, just inside the fog lamps cover. It will look somewhere like this.
From the outside it will look like this, now u can see why i ran the halo wires i did. So they connect to the top of the inverter and be push inside the housing and hidden.
Step 8: Running the inverter wires
The positive and negative wires you can run through the rubber grommet of the fog light cover like so.
Step 9: Wiring to the parkers
Get some crimps, 4 in total. You will need to cut the negative and positive wires of the parkers, strip them back and then reconnect the 2 ends but add in the halos in the process, neg with neg, pos with pos.
Step 10: Put them back on the car !
Test them first!!
Then install
Left
Right
When lights are off
Last edited by R6n350GT; Jan 9, 2011 at 10:24 PM.


^ Would be very similar, just different halos...
How about a thank you for giving 2 awesome DIY guides so far!!!
https://g35driver.com/forums/audio-v...ml#post5592819
How about a thank you for giving 2 awesome DIY guides so far!!!
https://g35driver.com/forums/audio-v...ml#post5592819

Trending Topics
I had a look but couldnt see what type they are, i would have to remove them to find out but they came with the car when i got it from japan. Must be an factory option over there.
Only the low beam does, the fogs just dont have one, thats why they are not HID, only H4.

Is step 9 hard? Trying to think if I want to tinker with splicing into my parking lights - everything is so neatly wrapped up in the harness right now, not sure what i'm even looking for.
Not at all, the wires are just sitting on the outside, you dont even have to unwrap anything..just do what i did and cut the negative and positive in half and reconnect them but add in you extra lights..
ahh I gotcha, thanks for the speedy response- sorry for the newb questions.
- I was picturing unwrapped the harness and splicing them into the connectors but I see what you mean. Just snip it before the harness and add in the red/black wires from my halos, right?
- I was picturing unwrapped the harness and splicing them into the connectors but I see what you mean. Just snip it before the harness and add in the red/black wires from my halos, right?