

TunerMax
Registered User
close
Oct 2, 2024
- Join DateDec 2011
- Posts:2,075
-
iTrader Positive Feedback100
-
iTrader Feedback Score(3)
- My RideG35
-
Likes:1,021
-
Liked:359 Times in 258 Posts
There's copious amounts of guys who sell LED boards and bulbs, guarantee there's one close to you, or at least in your state. There's pretty much one guy in ever forum that sells them it seems.
Alternatively, you can get them from VLEDS.com or superbrightleds.com, or roll the dice on some ebay stuff.
The benefit to my old friends connection was pretty reliable quality and output, he was meticulous and changed suppliers numerous times until he got the best product, he researched more than a reasonable amount about LEDs and how to know good from bad, etc.
Either way, you should very easily be able to get your car setup with some nice lighting from any of the sources listed, I'm sure there's even kits available in the classifieds on this site if you wander in there?
TunerMax
Registered User
close
Oct 2, 2024
- Join DateDec 2011
- Posts:2,075
-
iTrader Positive Feedback100
-
iTrader Feedback Score(3)
- My RideG35
-
Likes:1,021
-
Liked:359 Times in 258 Posts
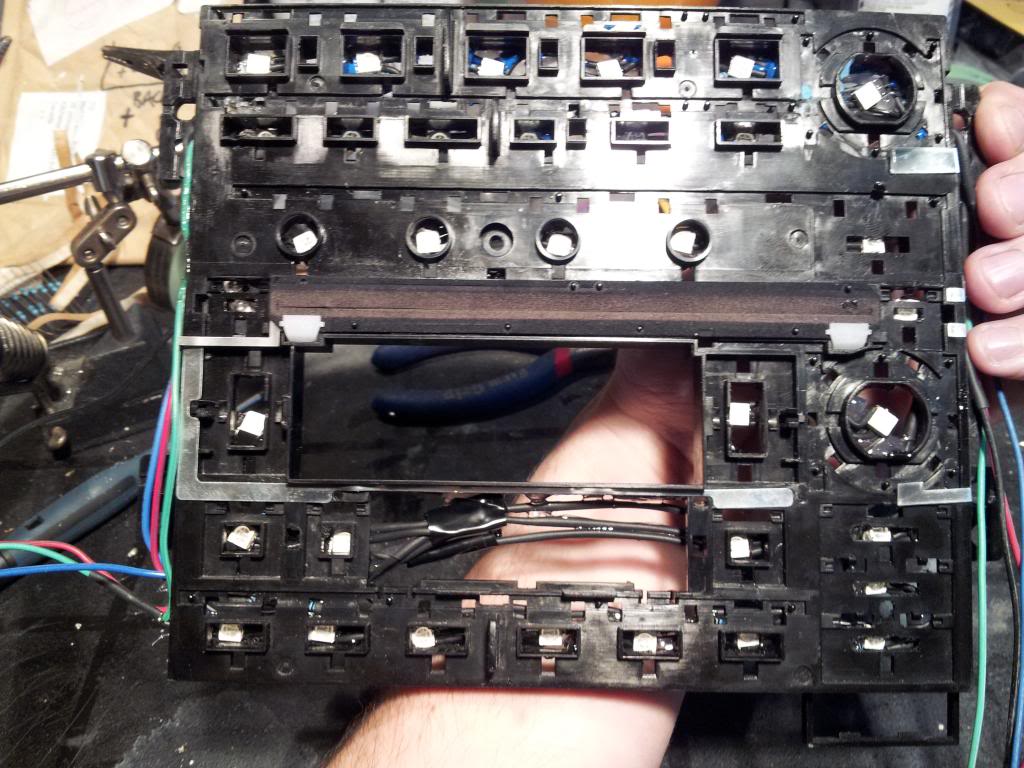
The buttons DO come off.
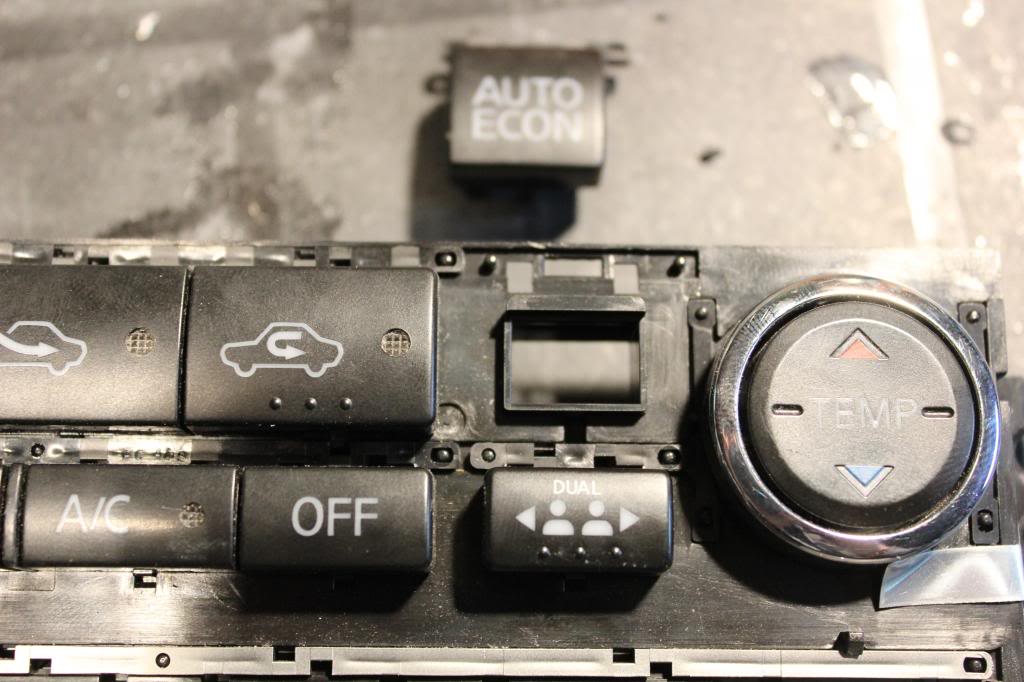
I had to shave the plastic down considerably more for clearance, and removing the buttons made a ton of sense to try and save from damaging stuff!
Going around the little Indicator light spots is going to be a royal PITA, but a little bit more got done last night either way, and eventually, I'll get there:

Registered User
1 word...WOWWWW!!!! You still working on it Max? Keep it up, this is insane! =) the end product is gonna be meticulous! I wish i had the know how to do half this stuff =( wish i had someone to teach me
TunerMax
Registered User
close
Oct 2, 2024
- Join DateDec 2011
- Posts:2,075
-
iTrader Positive Feedback100
-
iTrader Feedback Score(3)
- My RideG35
-
Likes:1,021
-
Liked:359 Times in 258 Posts
Yup! Thanks dude, I just have this crazy audio unit to do, then a touch up on the cluster, and hook wires up to the rear switches

Registered User
Do you have your gauge LED strips connected to the headlight switch? Meaning when you turn on your headlights do your LEDs turn on, and then you can use your remote to change the colors? If so which wires are you connecting to on the harness to draw your power and ground from? I wouldn't call myself a novice in terms of wiring and circuit board electronics, but I'm far from a professional. I plan on trying something like this but before I take on anything like this I want to be sure I have a quality understanding of what I have in store.
This really is the coolest mod I've seen, and I commend you for taking on such a vast amount of meticulous work! My friend attempted an LED switch this weekend and pulled out the needles on his gauge face (not just the caps, but the rods and all) and now his gas needle isn't responding (though the other three seems to be working OK). Any advice for how he can recalibrate them? I told him that possibly a manuel ECM reset may work, but to google everything he could first.
This really is the coolest mod I've seen, and I commend you for taking on such a vast amount of meticulous work! My friend attempted an LED switch this weekend and pulled out the needles on his gauge face (not just the caps, but the rods and all) and now his gas needle isn't responding (though the other three seems to be working OK). Any advice for how he can recalibrate them? I told him that possibly a manuel ECM reset may work, but to google everything he could first.
TunerMax
Registered User
close
Oct 2, 2024
- Join DateDec 2011
- Posts:2,075
-
iTrader Positive Feedback100
-
iTrader Feedback Score(3)
- My RideG35
-
Likes:1,021
-
Liked:359 Times in 258 Posts
I hooked everything up as an auxiliary feed, with ign power I get power to the remote and have to manually control it from there.
Tapping into power at every location would be a night mare. If I want to in the future I can trigger them automatically with any illumination feed, but I doubt I'll bother.
Tapping into power at every location would be a night mare. If I want to in the future I can trigger them automatically with any illumination feed, but I doubt I'll bother.
TunerMax
Registered User
close
Oct 2, 2024
- Join DateDec 2011
- Posts:2,075
-
iTrader Positive Feedback100
-
iTrader Feedback Score(3)
- My RideG35
-
Likes:1,021
-
Liked:359 Times in 258 Posts
As for the needles, use an OBDII scanner to find speed tach, and temp (run car on highway for 15 mins and verify operating temp then install needle in the center of the gauge.
Fuel gauge is trial and error unfortunately.
Needless need to be marked before removal, but the tricks above should get him close.
Fuel gauge is trial and error unfortunately.
Needless need to be marked before removal, but the tricks above should get him close.
TunerMax
Registered User
close
Oct 2, 2024
- Join DateDec 2011
- Posts:2,075
-
iTrader Positive Feedback100
-
iTrader Feedback Score(3)
- My RideG35
-
Likes:1,021
-
Liked:359 Times in 258 Posts
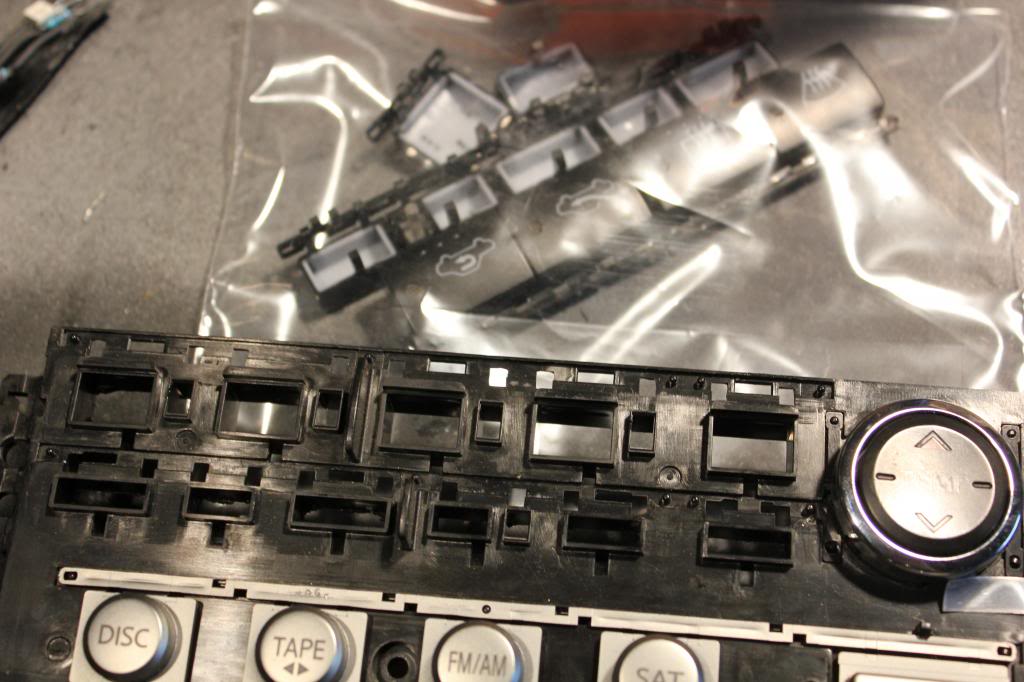
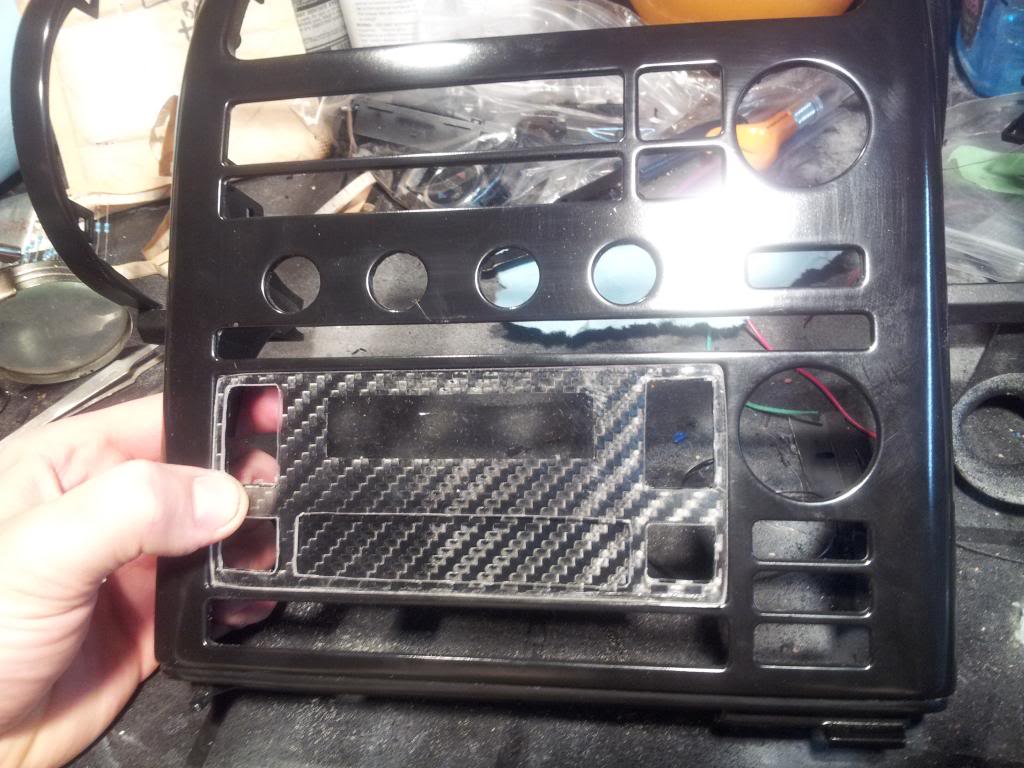
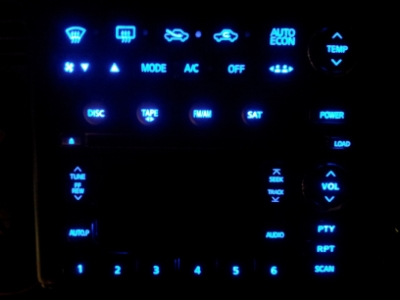
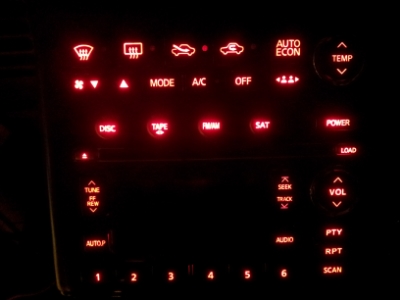
One row done and epoxied in place.
Just used some high qual. vinyl to try and lower the chances of a short
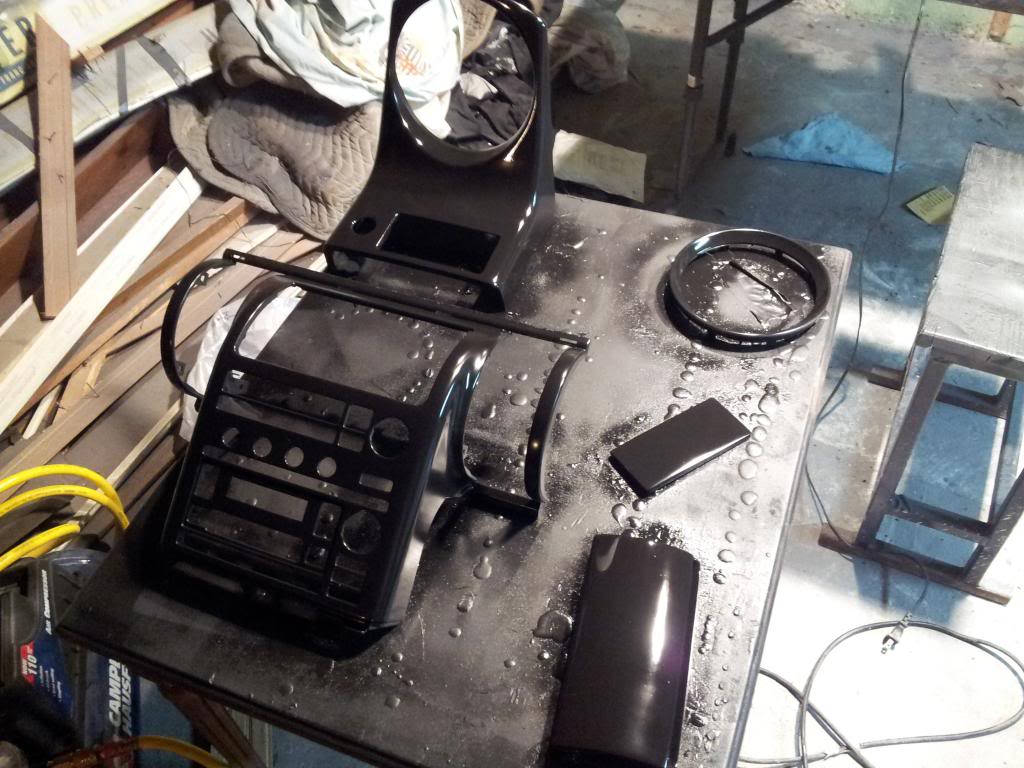
Buttons on and test:


2nd row started.
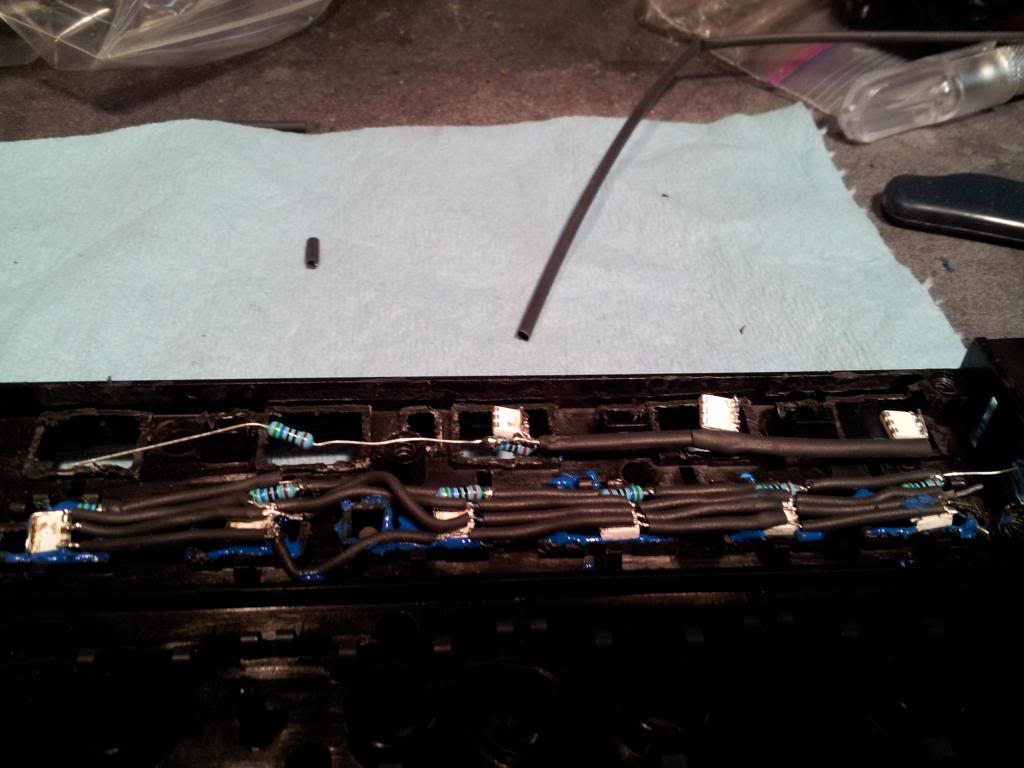
And almost done painting some of the interior pieces
Just used some high qual. vinyl to try and lower the chances of a short
Buttons on and test:
2nd row started.
And almost done painting some of the interior pieces

Registered User
Lookin good Matt! I finally got me a roll of SMD 5050. Need to hunt down that L-Tech now.
TunerMax
Registered User
close
Oct 2, 2024
- Join DateDec 2011
- Posts:2,075
-
iTrader Positive Feedback100
-
iTrader Feedback Score(3)
- My RideG35
-
Likes:1,021
-
Liked:359 Times in 258 Posts
Crappy celly pictures, apologies, the camera is out for repair.
An idea. No idea where I"ll take that.
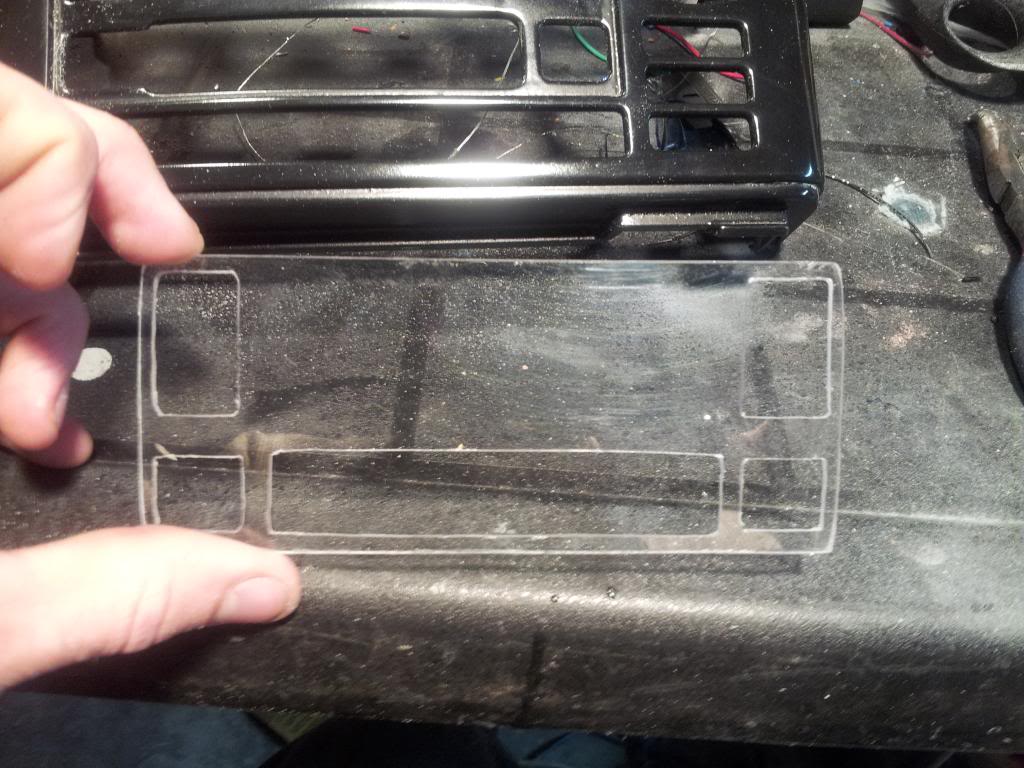
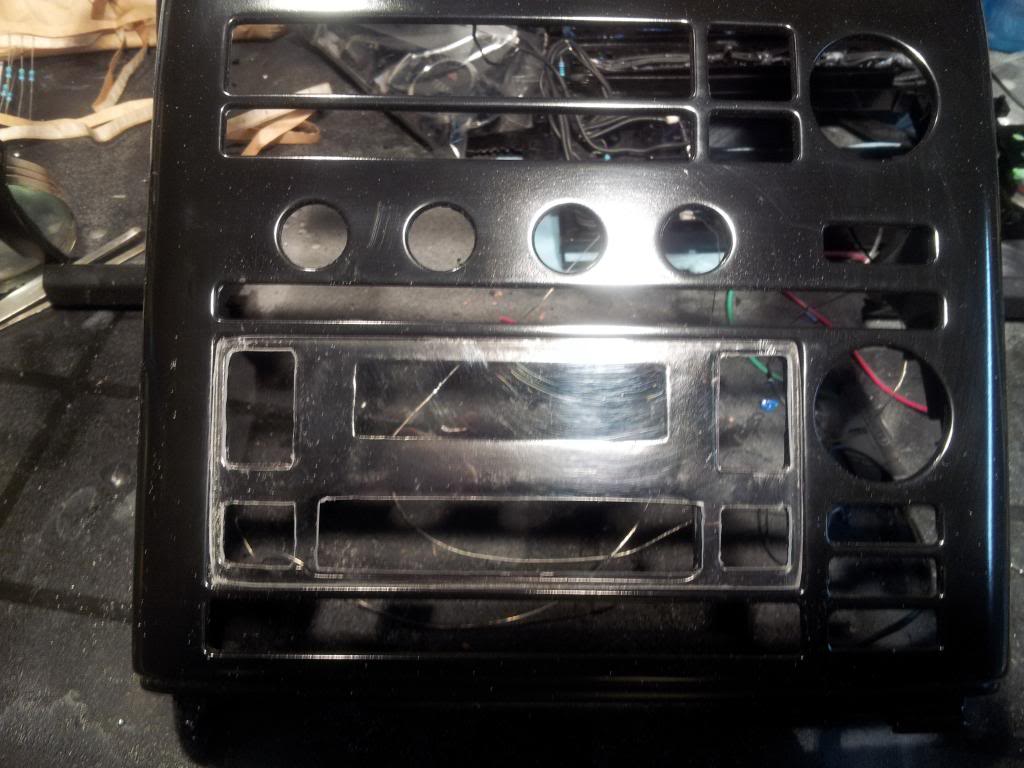
Also the clear piece I made is getting re-done because I've decided to delete the Tape track completely. I'm going to decide on some sort of emblem to go there. V35 is on the list of potentials.
An idea. No idea where I"ll take that.
Also the clear piece I made is getting re-done because I've decided to delete the Tape track completely. I'm going to decide on some sort of emblem to go there. V35 is on the list of potentials.

TunerMax
Registered User
close
Oct 2, 2024
- Join DateDec 2011
- Posts:2,075
-
iTrader Positive Feedback100
-
iTrader Feedback Score(3)
- My RideG35
-
Likes:1,021
-
Liked:359 Times in 258 Posts
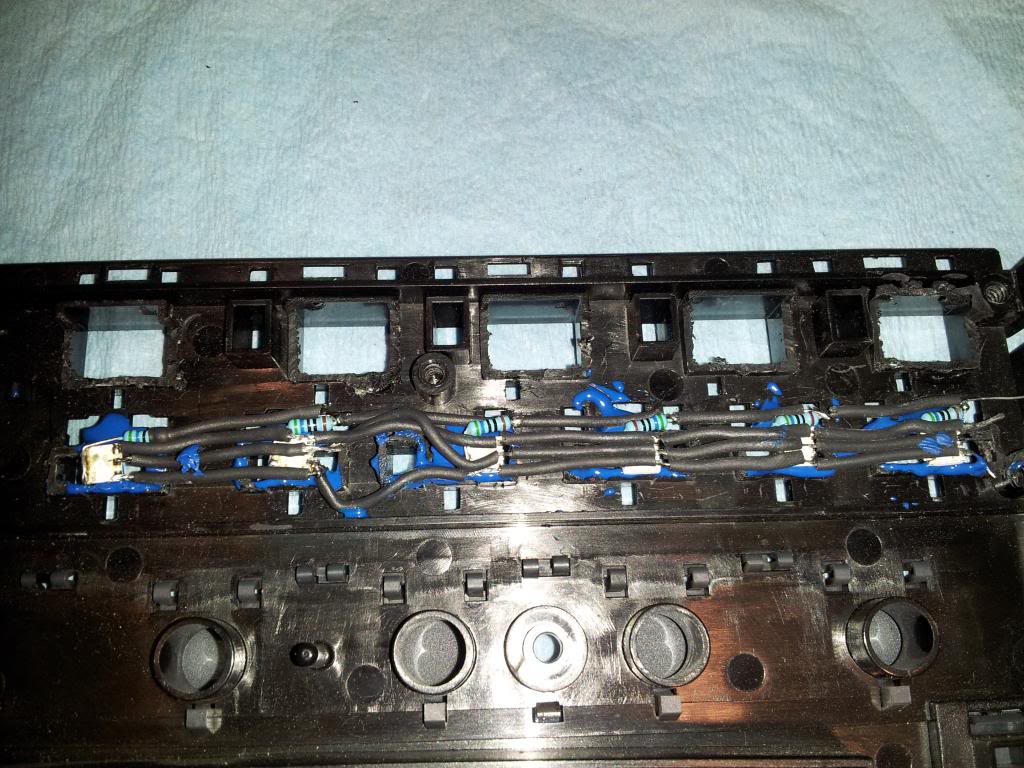
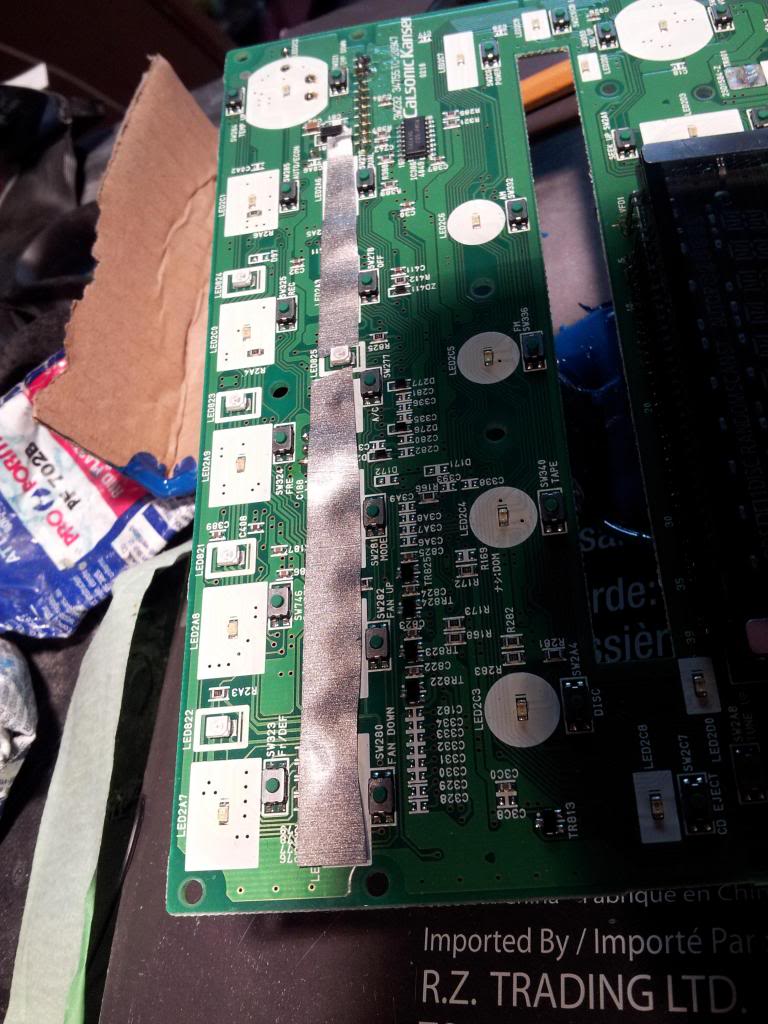
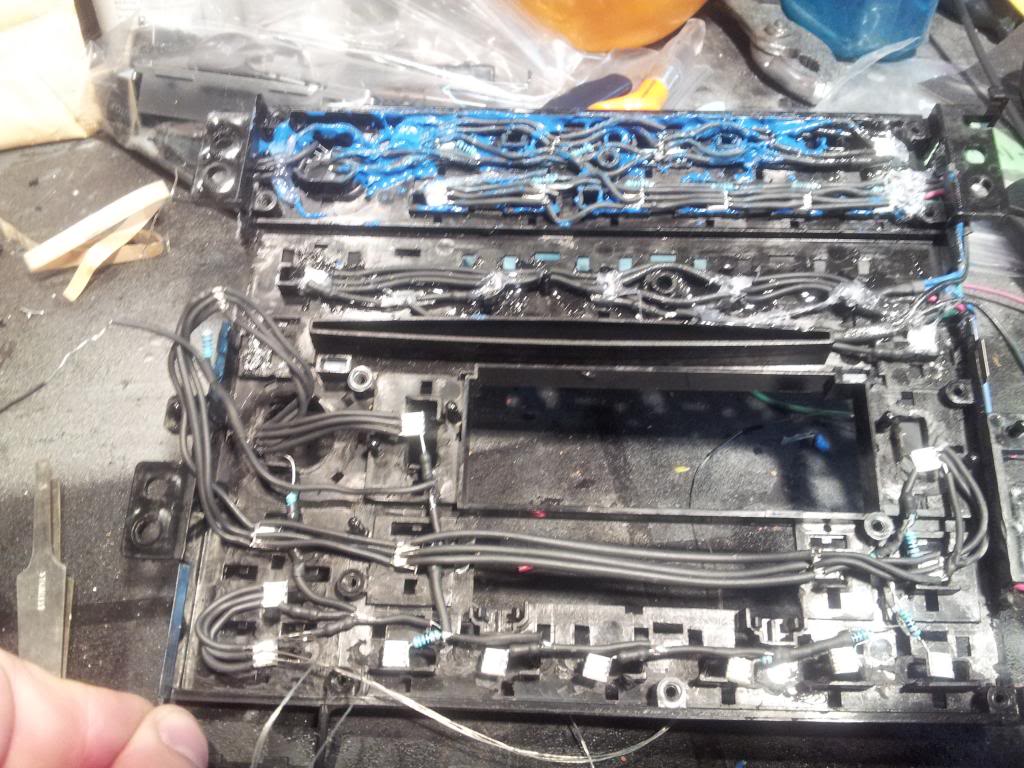
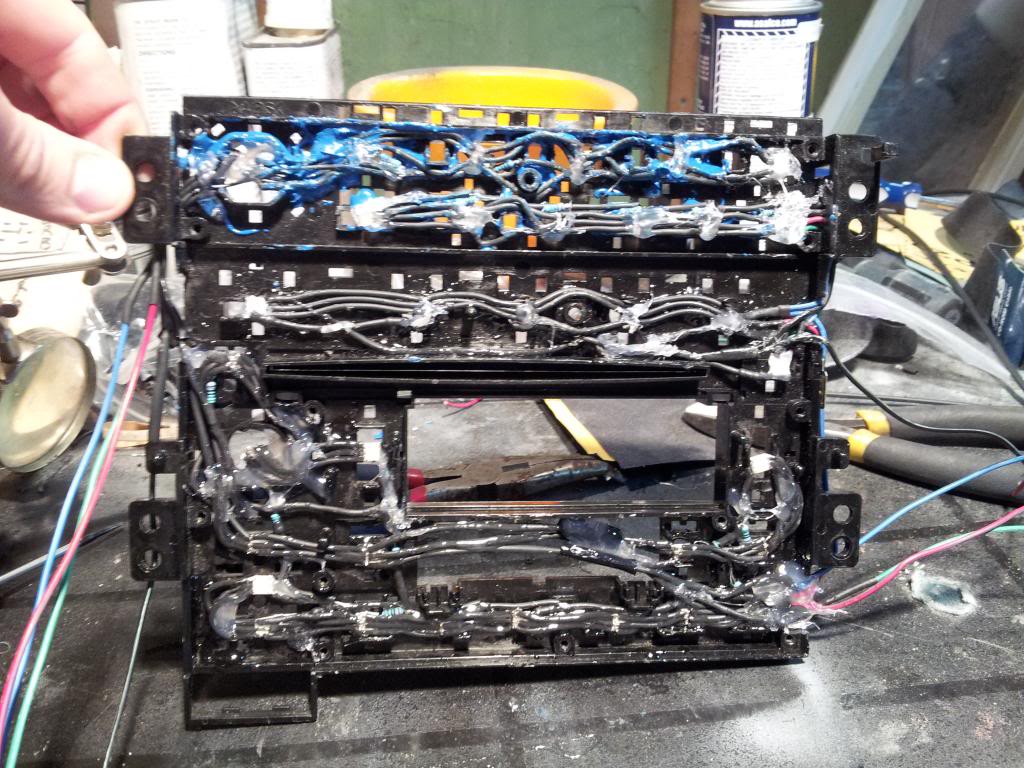
Very surprised that this actually came together and all works, considering the ridiculous wiring and customization involved in it (imagine 4 wires to every little LED on a tight-*** circuit board, all connected to each other, with resistors on every one, and all the buttons have to work, etc.
Very happy it's finally done. If it ever fails I'm giving up
Very happy it's finally done. If it ever fails I'm giving up