
Headlight Mod with DIY Pics/Steps

Joined: Jul 2007
Posts: 2,461
Likes: 467
From: Pasadena, CA
Headlight Mod with DIY Pics/Steps
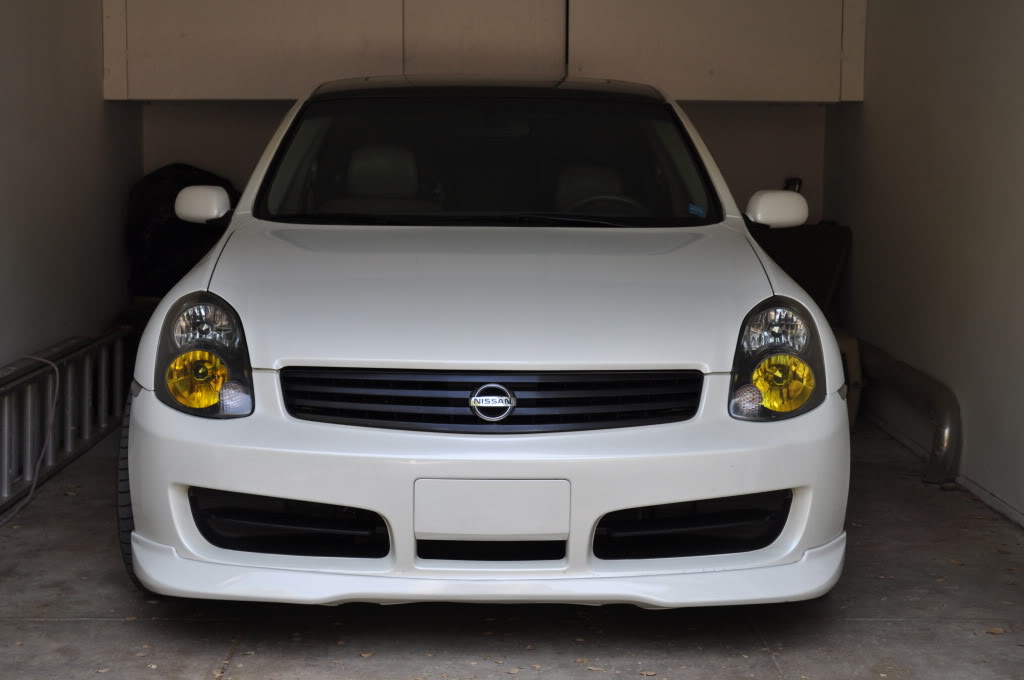
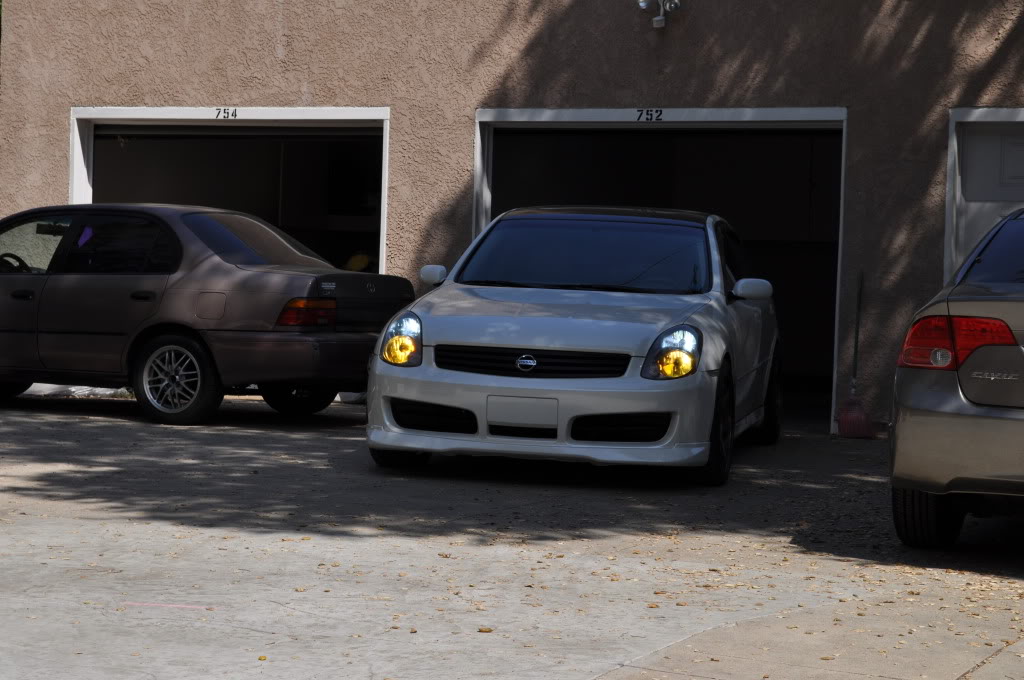
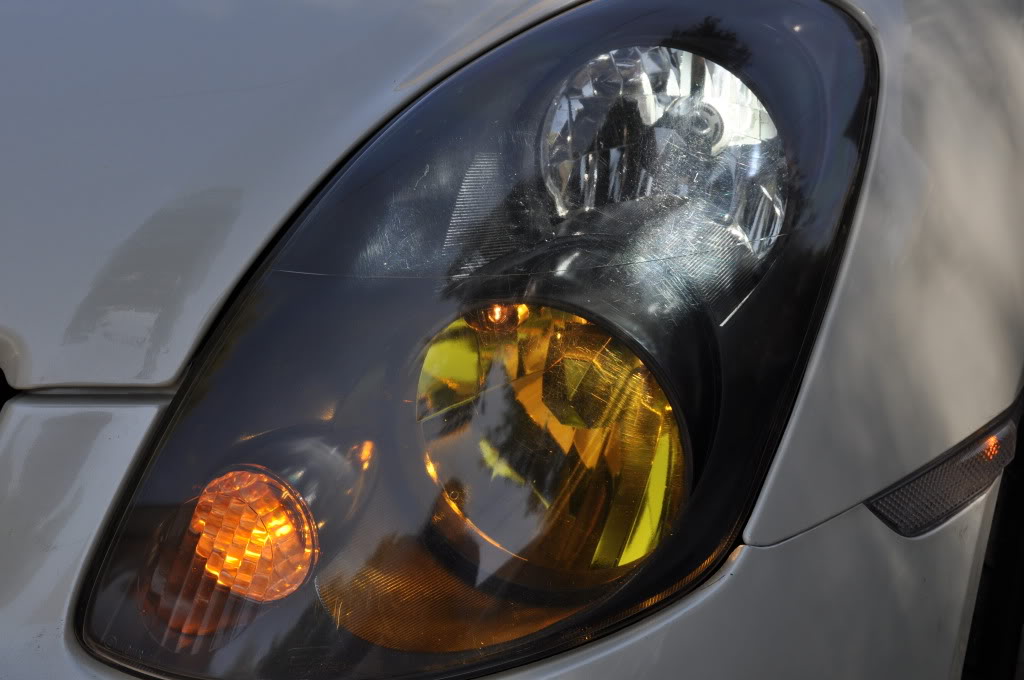
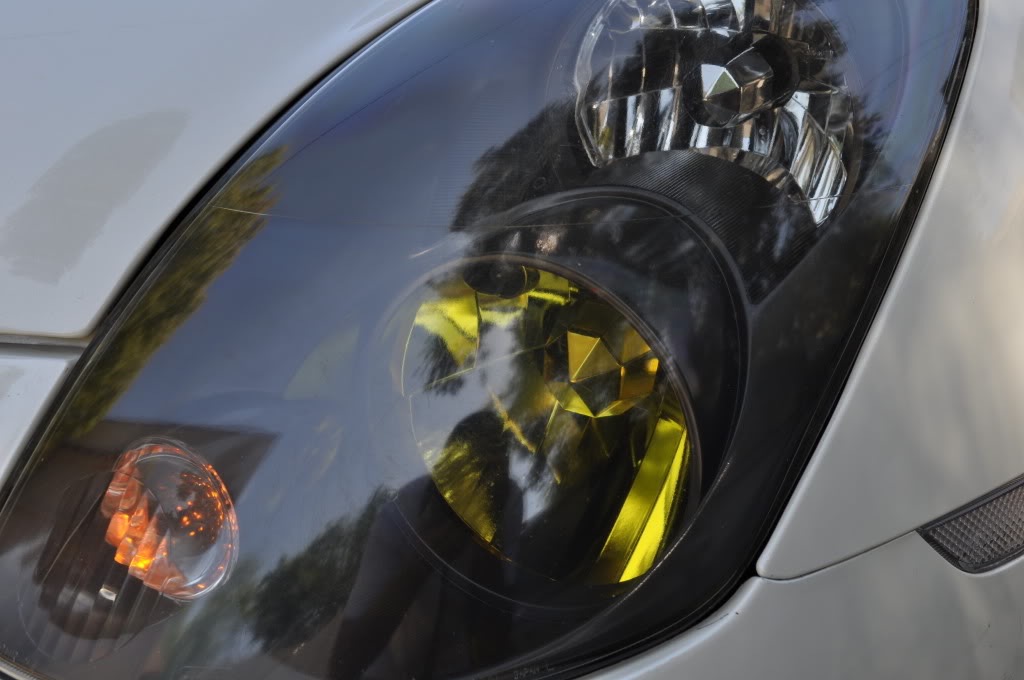
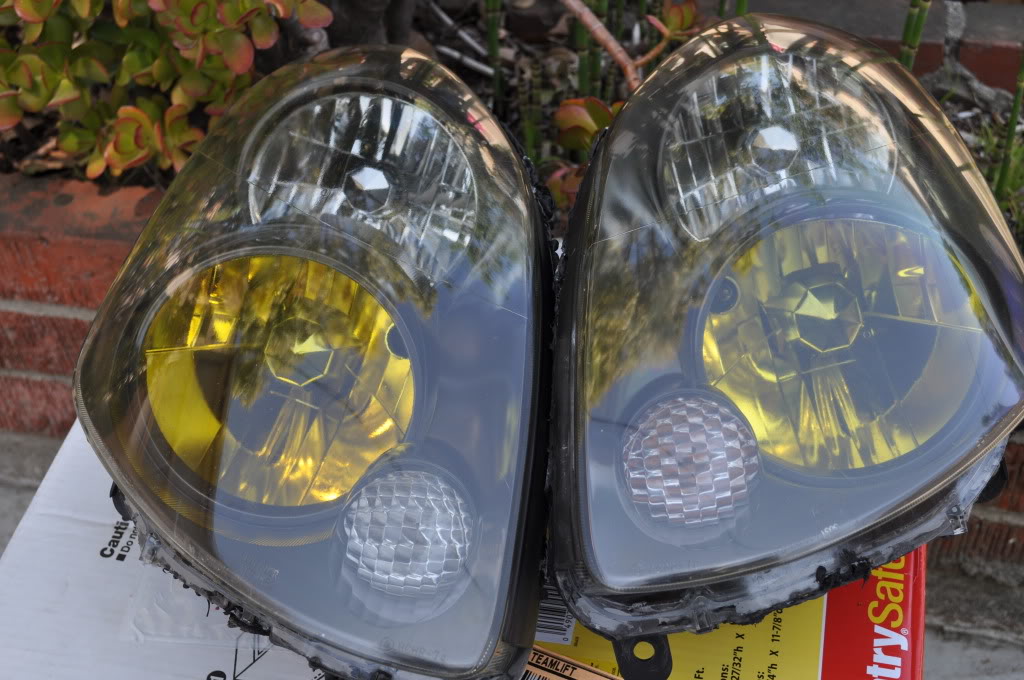
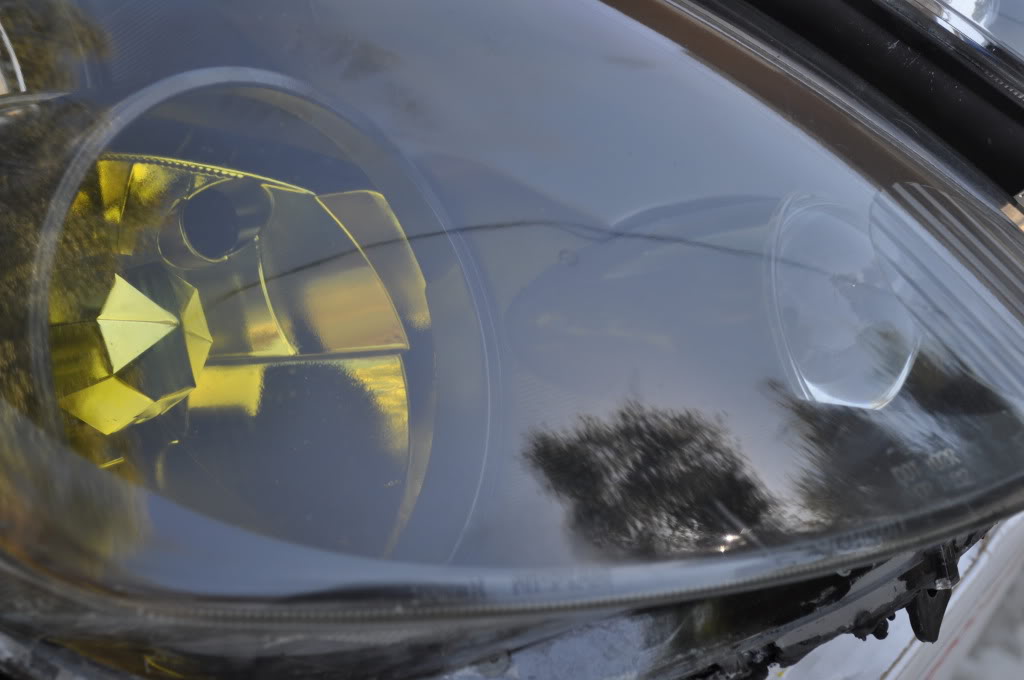
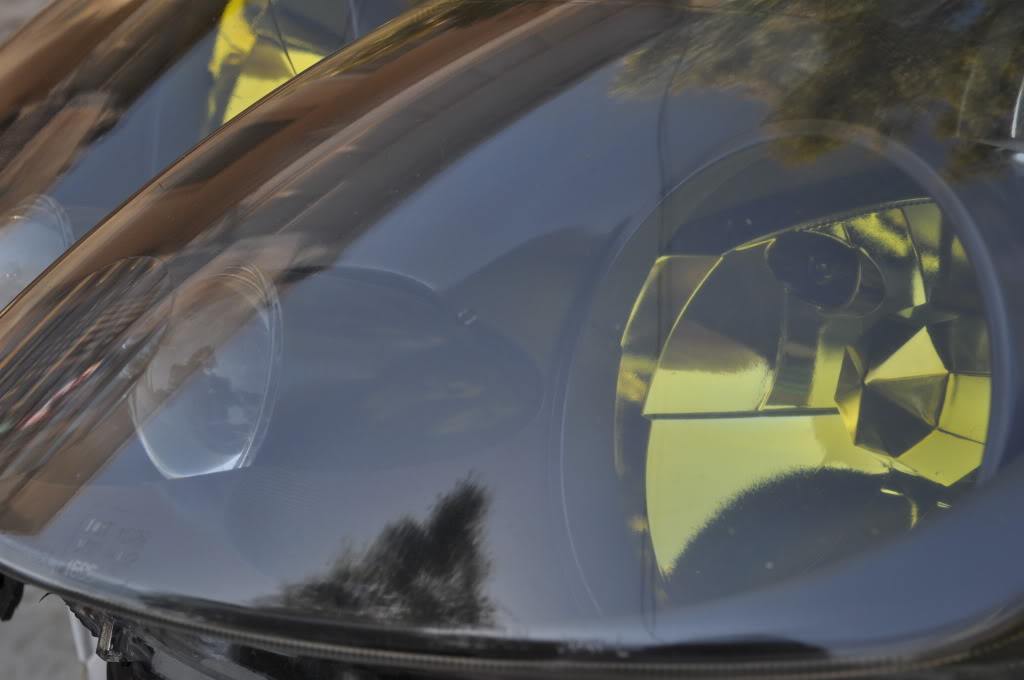
This is a project i've been wanting to tackle for some time but never could get too, especially with a New Born  I finally made time this weekend to paint the foglight housing with Krylon Yellow stained glass paint (purchased through Amazon) and install a Projector Lens to my turn signal.
Here are some pics..

DIY pictures and steps...Proceed At Own Risk!!
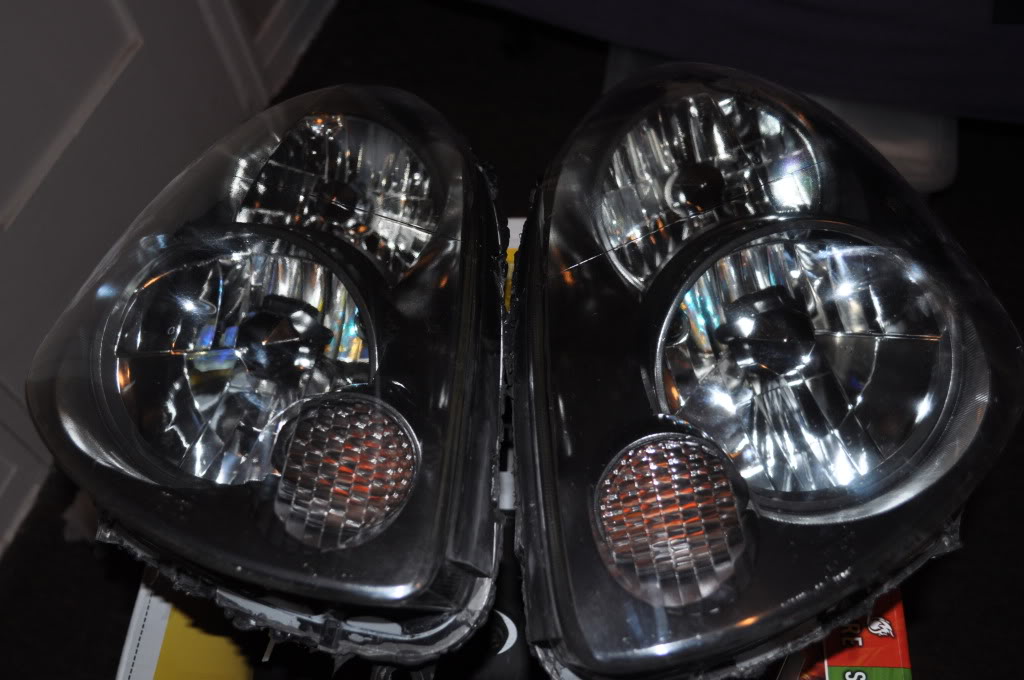
Follow these steps for opening headlights (thanks Chris)
https://g35driver.com/forums/lightin...eadlights.html
Projector install steps...
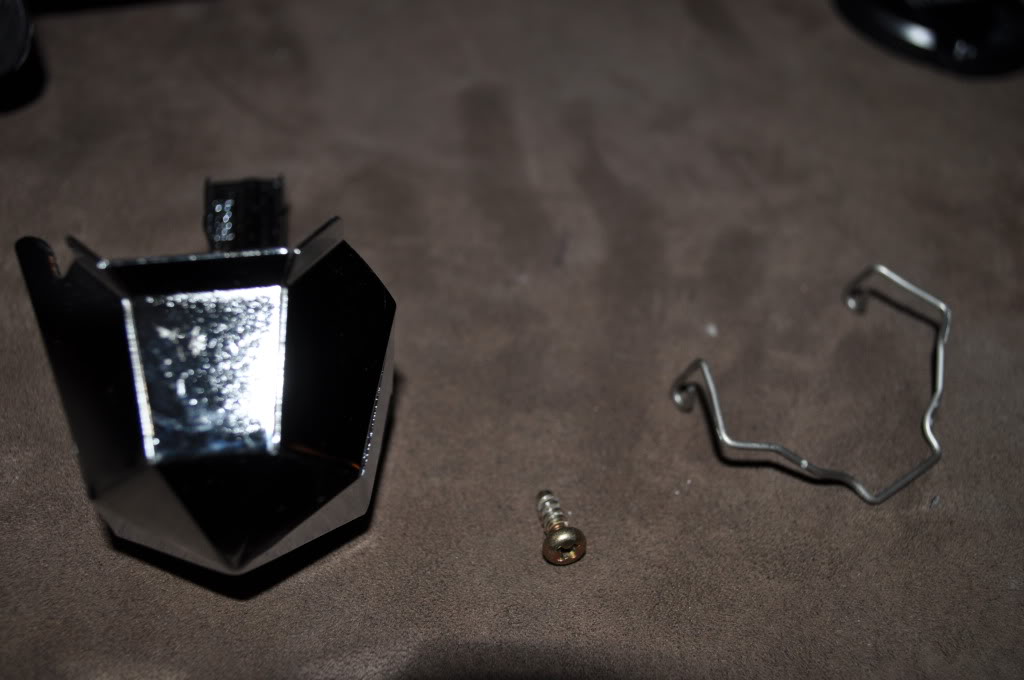
Items you will need for project
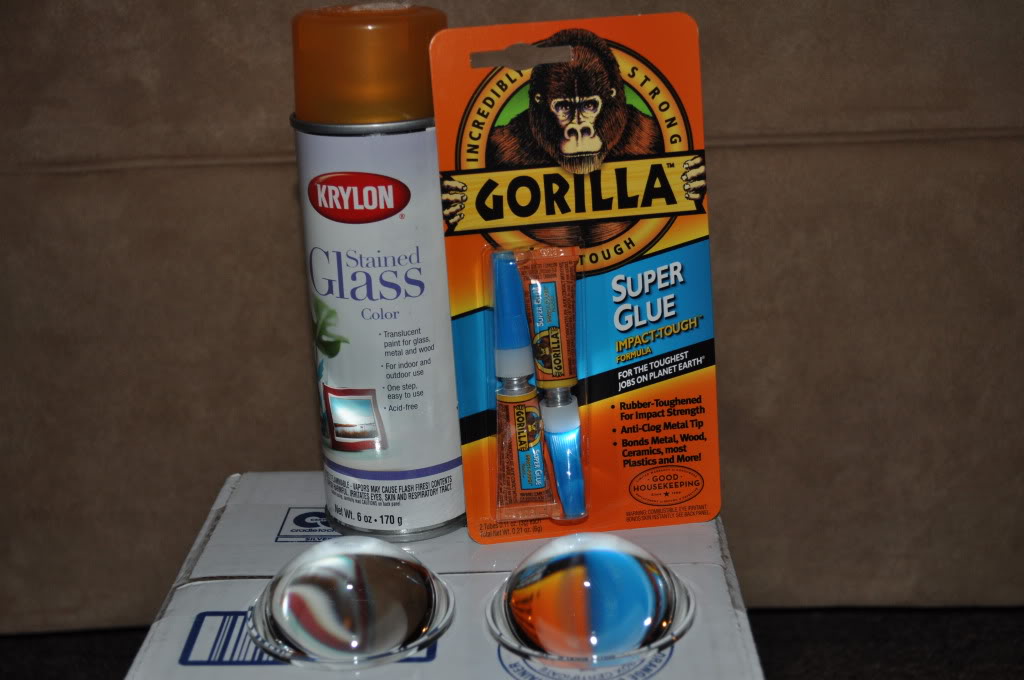
Lens fits over turn signal housing, apply 3-4 drops of Gorilla Glue, press and hold firmly for 30 seconds
Same process for both turn signals

Painting the housing steps...
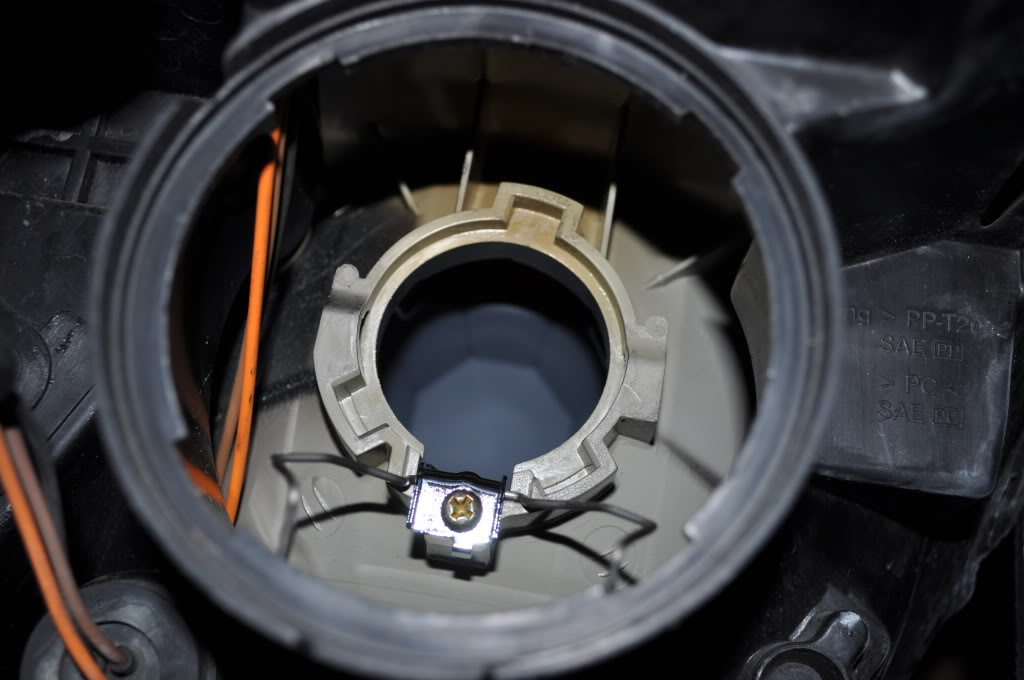
Unscrew to remove foglight bulb housing
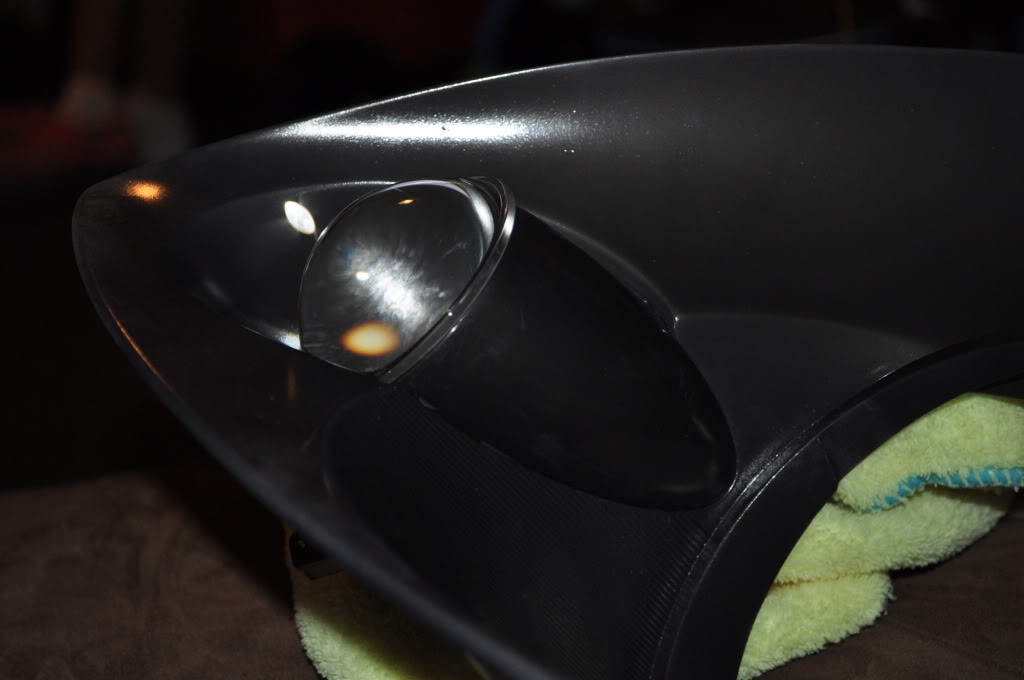
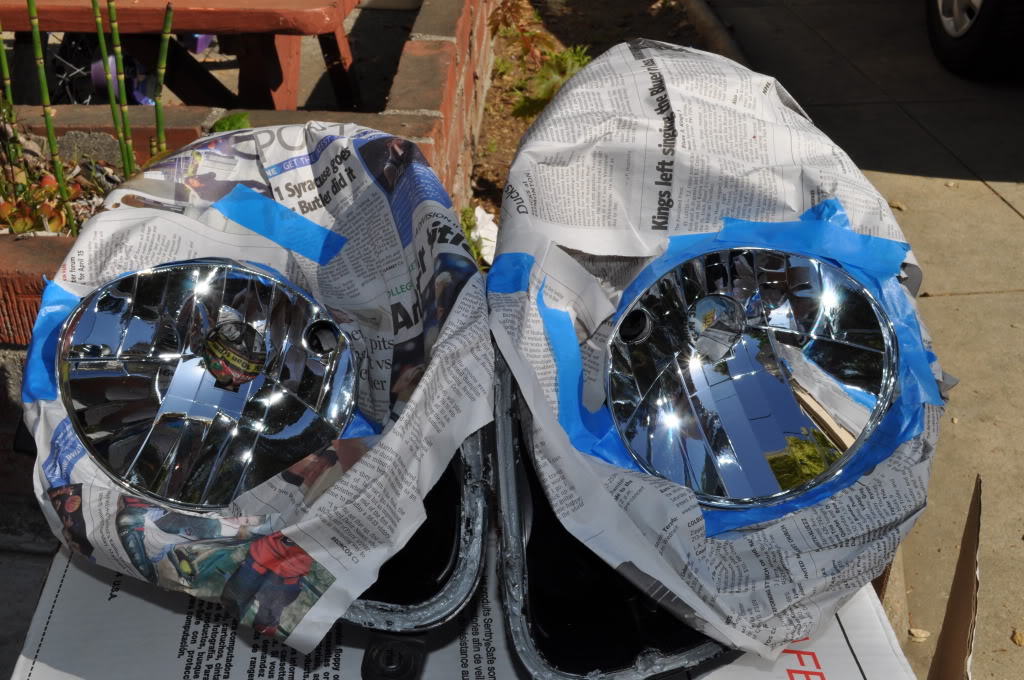
Using Newspaper, cover up Headlight housing to avoid painting and/or overspray....
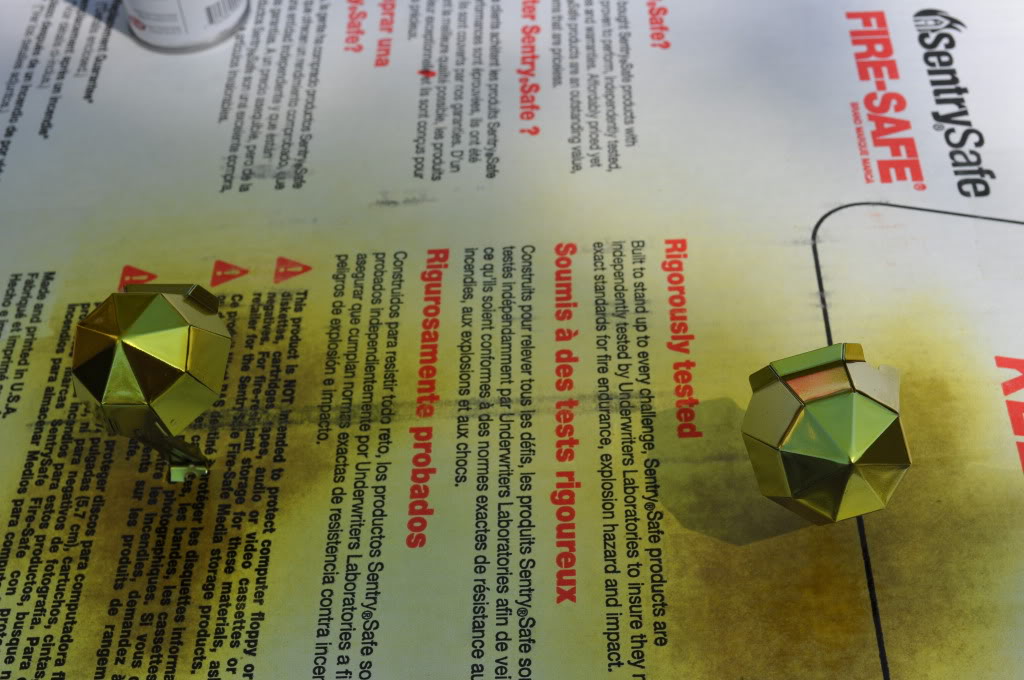
I used 2 coats of paint. The more coats you apply, the Yellowier it gets.

The next step is optional. I opted to painting the outside of the bulb housing but you can leave it chrome. I also applied 2 coats.
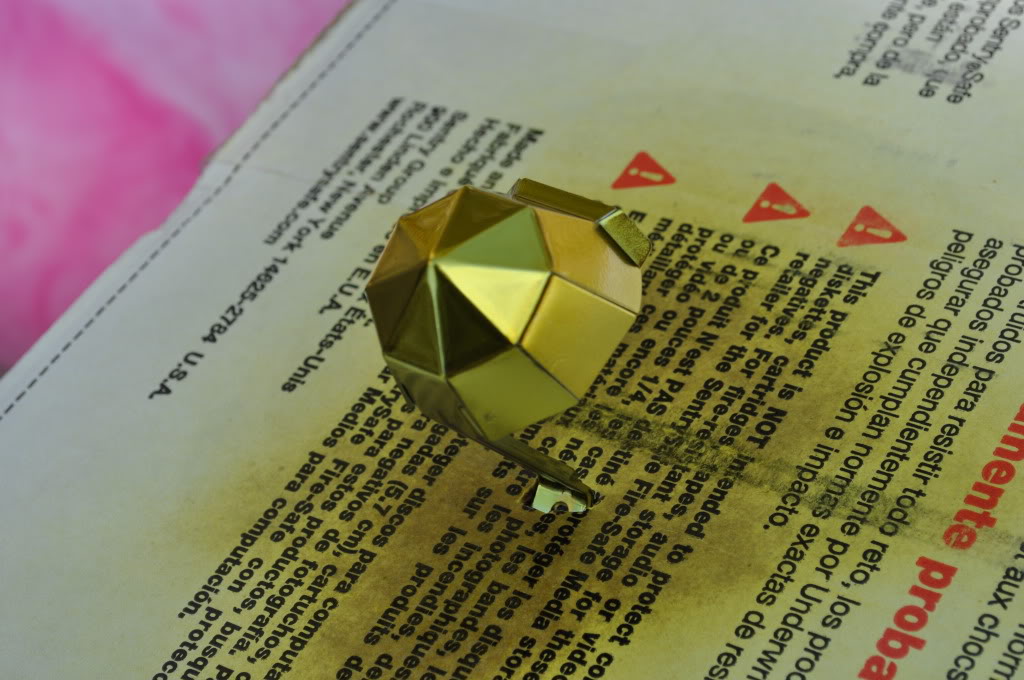
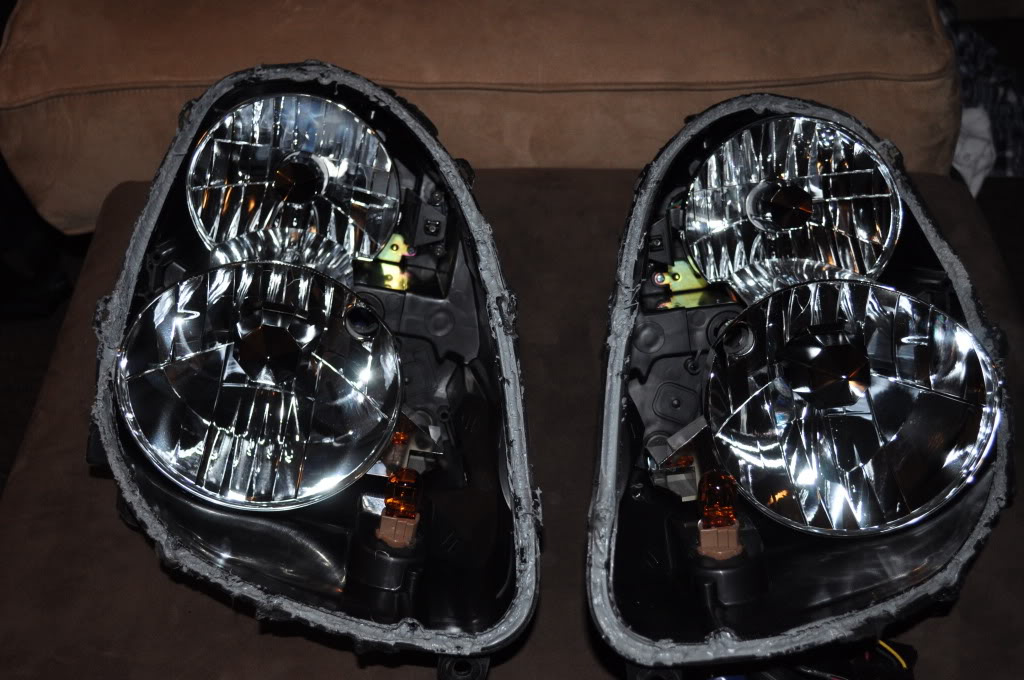
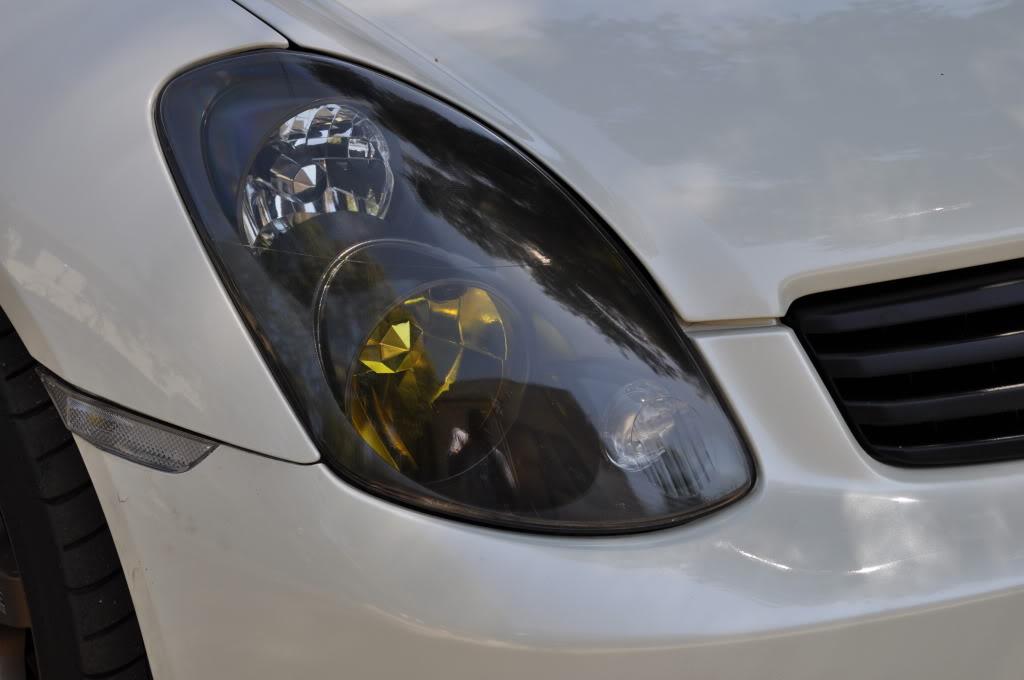
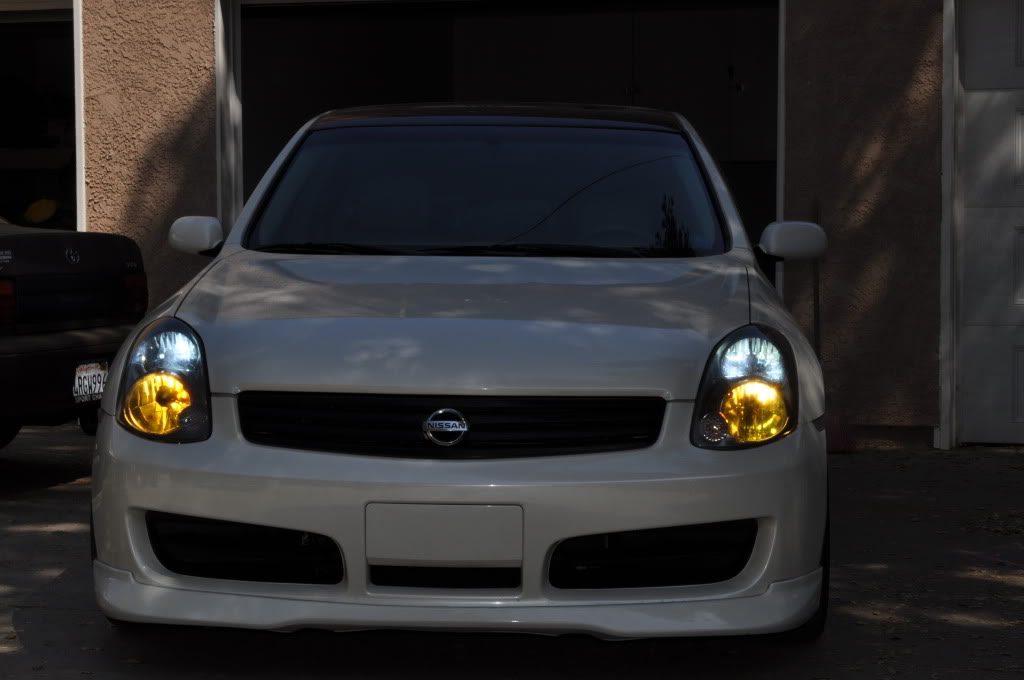
I let the paint dry up for an hour under the sun before I began putting them back together. Below are pictures of the final outcome.

I finally made time this weekend to paint the foglight housing with Krylon Yellow stained glass paint (purchased through Amazon) and install a Projector Lens to my turn signal. Here are some pics..
DIY pictures and steps...Proceed At Own Risk!!
Follow these steps for opening headlights (thanks Chris)
https://g35driver.com/forums/lightin...eadlights.html
Projector install steps...
Items you will need for project
Lens fits over turn signal housing, apply 3-4 drops of Gorilla Glue, press and hold firmly for 30 seconds
Same process for both turn signals
Painting the housing steps...
Unscrew to remove foglight bulb housing
Using Newspaper, cover up Headlight housing to avoid painting and/or overspray....
I used 2 coats of paint. The more coats you apply, the Yellowier it gets.
The next step is optional. I opted to painting the outside of the bulb housing but you can leave it chrome. I also applied 2 coats.
I let the paint dry up for an hour under the sun before I began putting them back together. Below are pictures of the final outcome.

Hmmm great job! I kinda get that look with my JDM yellow bulbs already reflecting back, just not quite that striking. The projector lens was a pretty neat idea but not sure what the purpose is!? Nice car though.
Looks really good. Sorry for of topic but how hard was it to install that 05/06 sedan lip on the nismo bumper? I always wanted to get one but everyone told me it's alot of work.


Trending Topics
Joined: Jul 2007
Posts: 2,461
Likes: 467
From: Pasadena, CA


Joined: Jul 2007
Posts: 2,461
Likes: 467
From: Pasadena, CA

Joined: Jul 2007
Posts: 2,461
Likes: 467
From: Pasadena, CA

Where in the 626 are you? I'm mainly in Arcadia but never see any modded G's. Great idea on the yellow. I've been wanting to do the projector lens for the turn signal myself.