2003 Interior Refresh. A Winter Project. Pic Heavy.


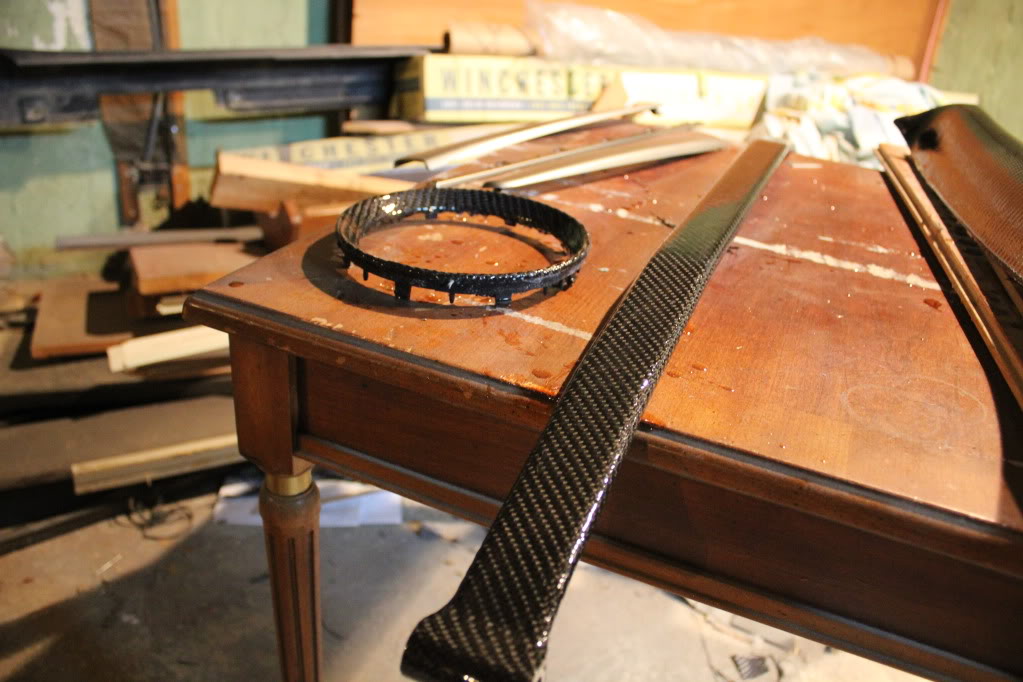
^ its real carbon fiber resin with clear coat on top
It's Real CF.
Gauges are dual-display.. Oil Pressure, Oil Temp, Air/Fuel, Boost
Actually was freezing my canadian butt off today installing the Supercharger

The Mt.Fuji emblems only come on at night with the lights on.
Just a picture of the overall interior, to get an idea of how the whole thing blends together.
And thanks for the offer on the fabric! I'll keep that in mind in case I want to wrap anything else in that pattern!
Last edited by TunerMax; Jan 2, 2013 at 02:56 PM.
Ill post one tomorrow. My interior is undee construction. The steering wheel is black and red but I havent fone the seats 2 tone black and red yet and the door inserts in red notbdone yet either. I did the armrest already black with red stitchint though so the only thing left is the seats and doors
Should be fun

Also, a few minor updates, still need to re-strip and paint the trim pieces, I'm going to a paint store to ask what is best to use, because this Krylon is terrible.
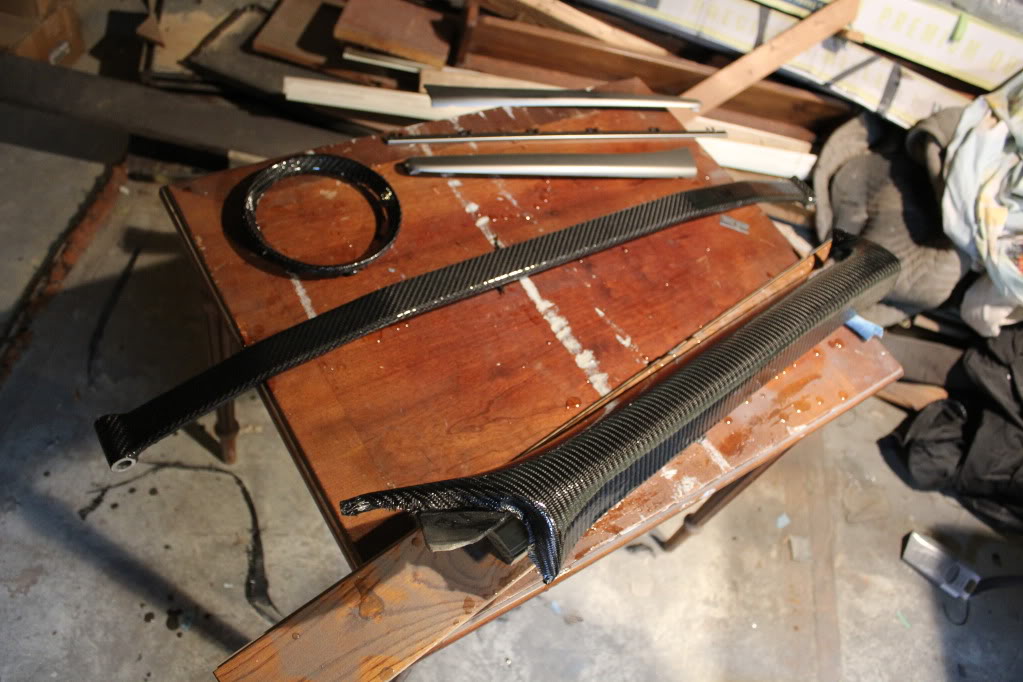
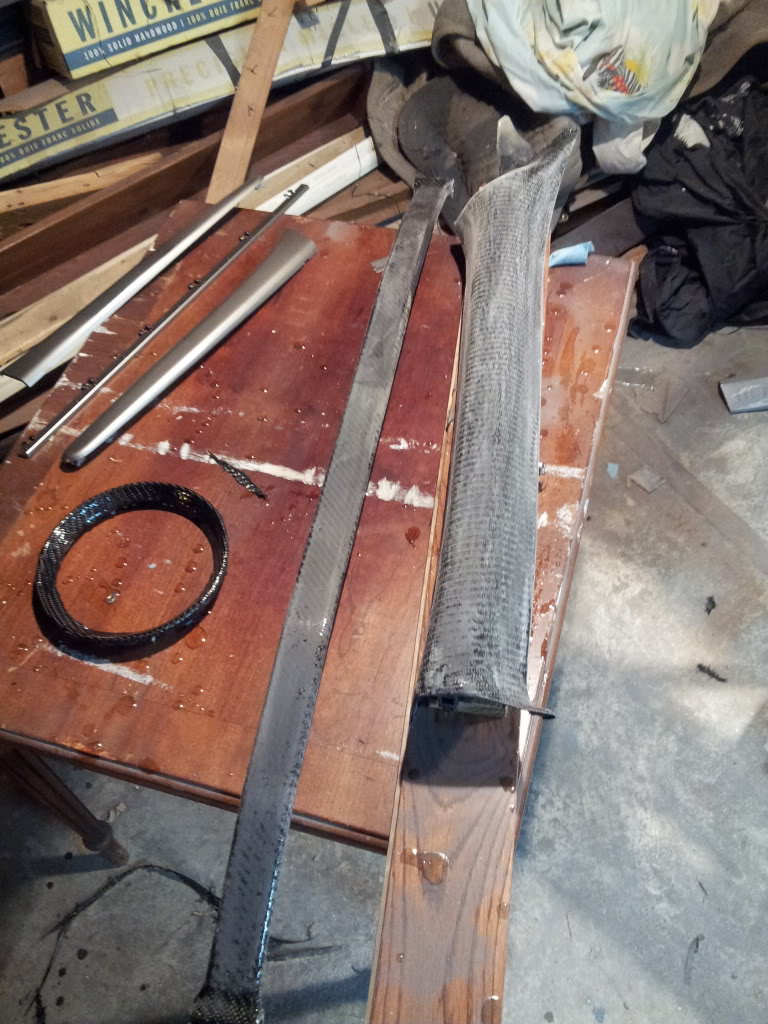
A Pillar, Strut bar, and Shifter trim CF work is almost sanded flat, will get a few more Epoxy coats once flat, then wetsand, clearcoat, polish, wax

So. Much. Work.
Also painting the trim edge on the actual Gauges. They were silver. Going to see what Gloss black looks like (like body colour, OB)

Krylon is as good as any rattle can paint. It's not the brand that's the issue, it's that there are limitations to the delivery method. I've seen some decent results from a rattle can. You just have to be patient.
^I've done some nice rattle can jobs. This stuff won't layer up though. As soon as you try and layer it it creases over the 'skinned' over layer, if that makes sense.
I need spray paint that is just a base coat, not a 'all in one' like most spray balms, I think.
Either way, I've never used spray paint that is as troublesome as this Krylon is for what I'm doing.
Wetsanding seems to be the key to getting a nice Spray Balm finish. And this stuff wont sand, at all. It just clumps up, too soft maybe, dunno.
I think I found the problem, something like a flashpoint. Working time with the Krylon to re-apply a layer is under 30 minutes it seems.
And you can't really layer more than two layers in that period. Otherwise you have to wait 24-36 hours before re-applying.
I grabbed some stuff that has a 3 hour layer-up time without wrinkling. And then 36 hour wait after that. At which point I should be able to wetsand and clear it. Hopefully! I'll update when I get there.
poop. The new paint I got worked great at first and now after letting it cure for 48 hours, wetsanding, using acetone to clean it, then putting a second coat on and it immediately wrinkled up again.
I wonder if it's the acetone? maybe I need to let it dry for a while after cleaning with acetone, or something else. I have never had this issue until I started using acetone to clean stuff per a bunch of guys advice.
Seems like maybe I'm just doing it wrong lol.
And hopefully last Epoxy coat for the CF stuff I have.

Basement ftw!
CF/Clear epoxy actually smells nice, it's not at ALL strong! Not like fiberglass or anything. It's something you could do in your apartment if you wanted, granted, you'd need an undisturbed work area during the process.
CF/Clear epoxy actually smells nice, it's not at ALL strong! Not like fiberglass or anything. It's something you could do in your apartment if you wanted, granted, you'd need an undisturbed work area during the process.
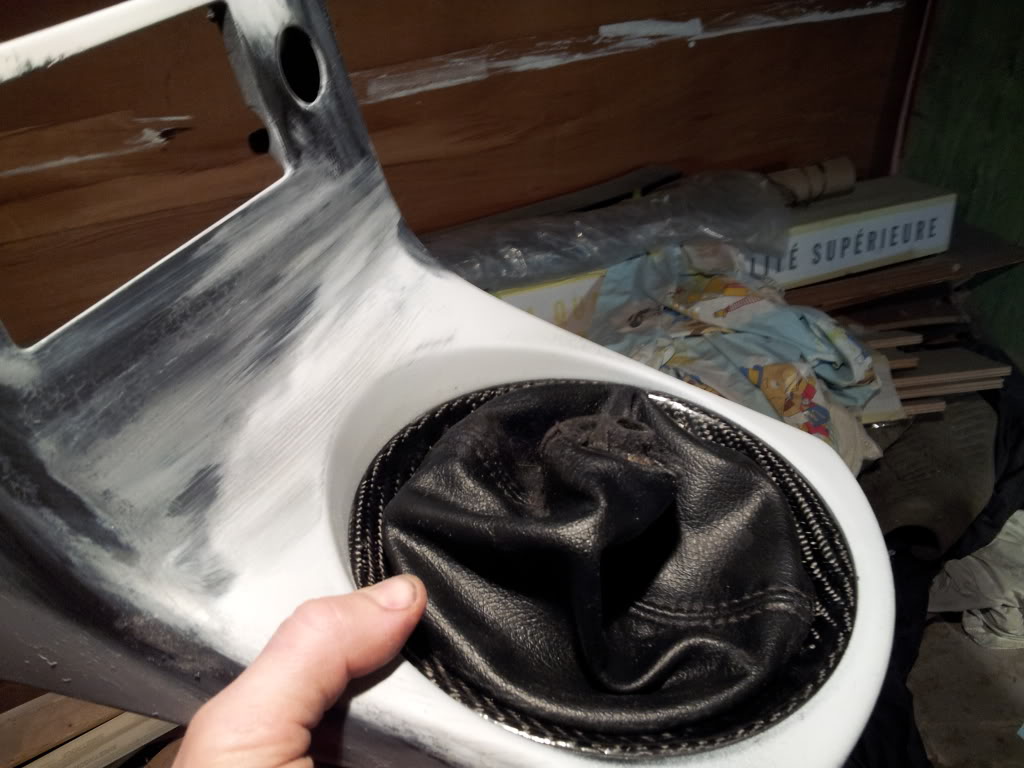
A little cell phone teaser of the Shifter piece, still needs wetsanding and clearcoat, polish, wax.
And the main trim piece will probably end up in Satin Black with a 'flat/satin' clearcoat on it.
And the main trim piece will probably end up in Satin Black with a 'flat/satin' clearcoat on it.
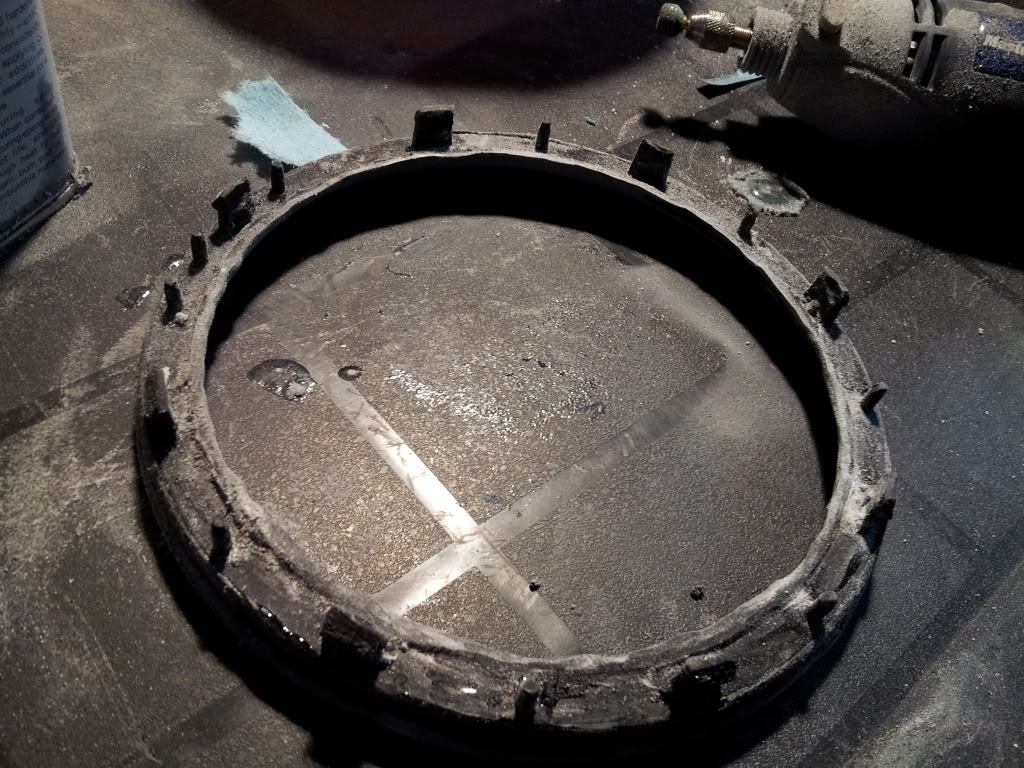
It was tedious to get that piece to fit, had to return every little bit to normal dimensions on the outside, dremel it back down to original, even re-shape some of the lock tabs back to normal lol.