
The Transformation of and Road to My VIP G35 Sedan


Joined: Aug 2007
Posts: 10,850
Likes: 158
From: Los Angeles
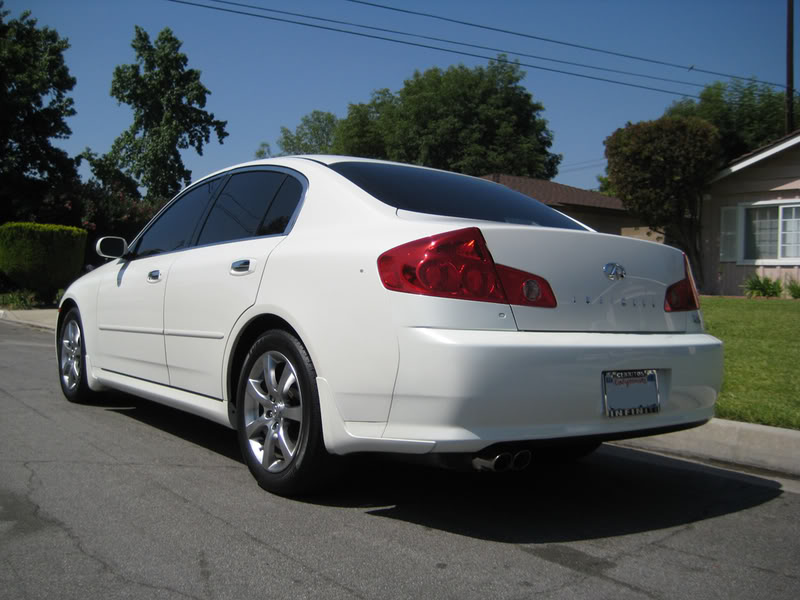
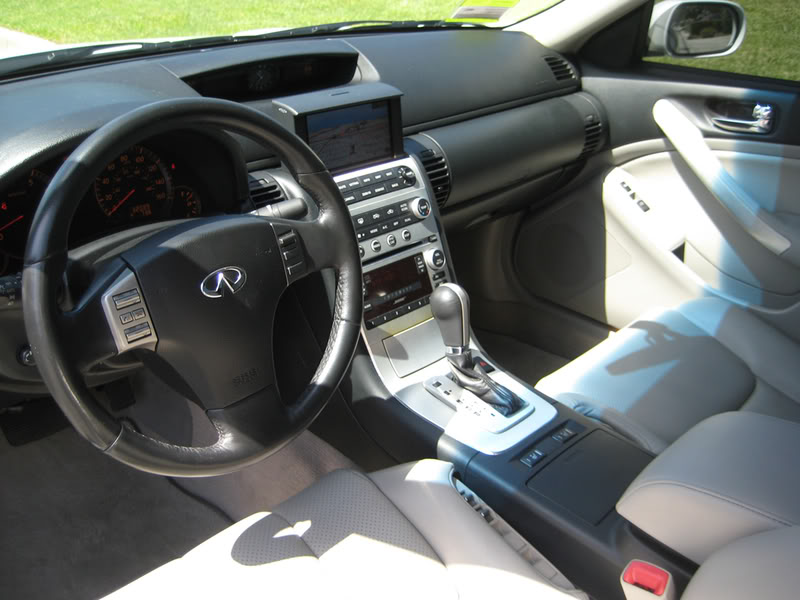
The Transformation of and Road to My VIP G35 Sedan
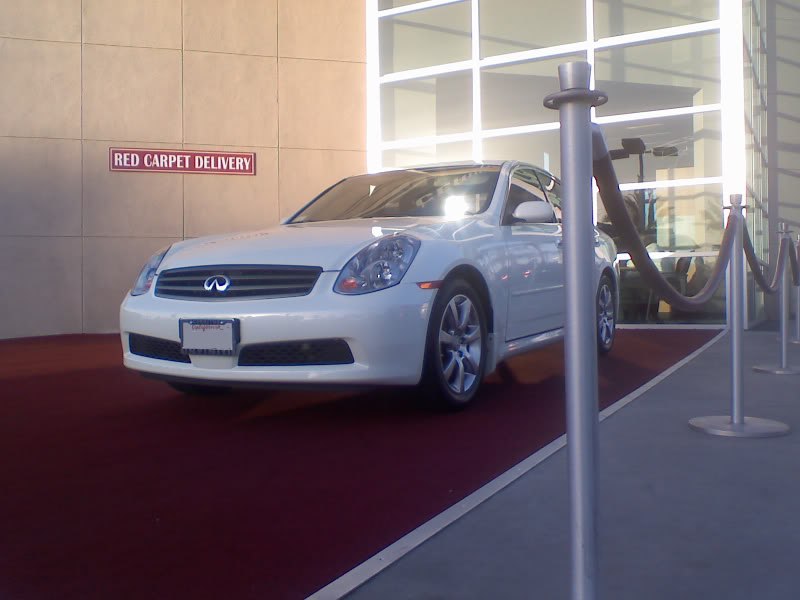
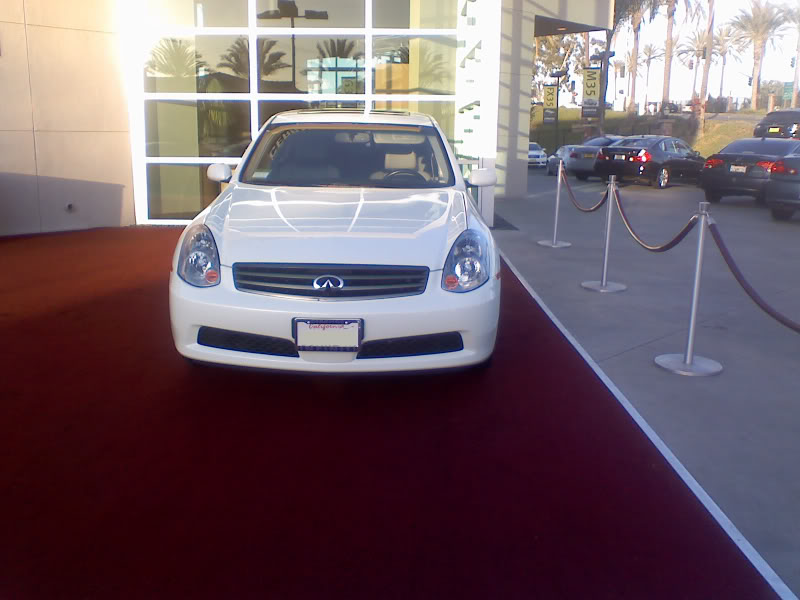
I figured since a few others have shared their progress with their vehicles and having seen the transformation it would be pretty cool if I documented my road and vision for my VIP styled G.
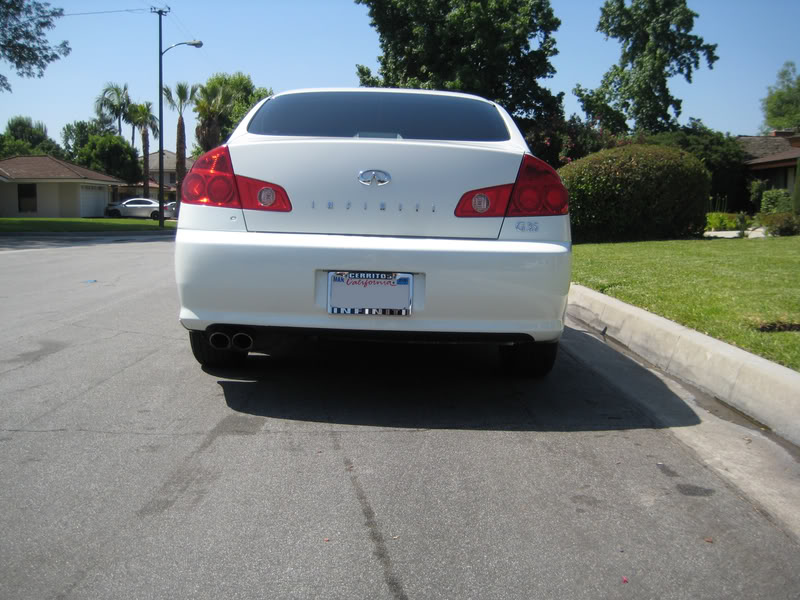
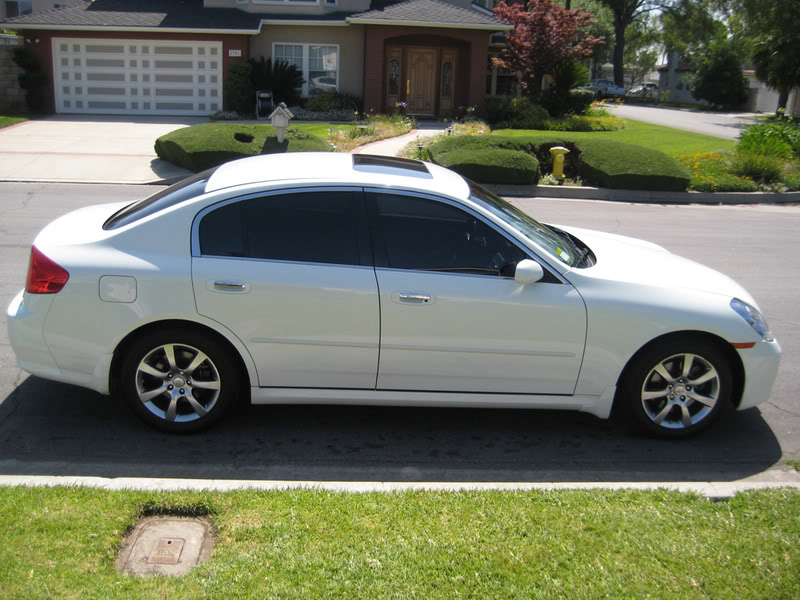
I didn't always have this idea. In fact, some of what I have done to my car to this day I disliked in the past, but it grew on me and it inspired me to do more. I'll be posting quite a bit of pics, because eventually, almost every aspect of the vehicle will be changed. Let's start with the first chapter....OEM!
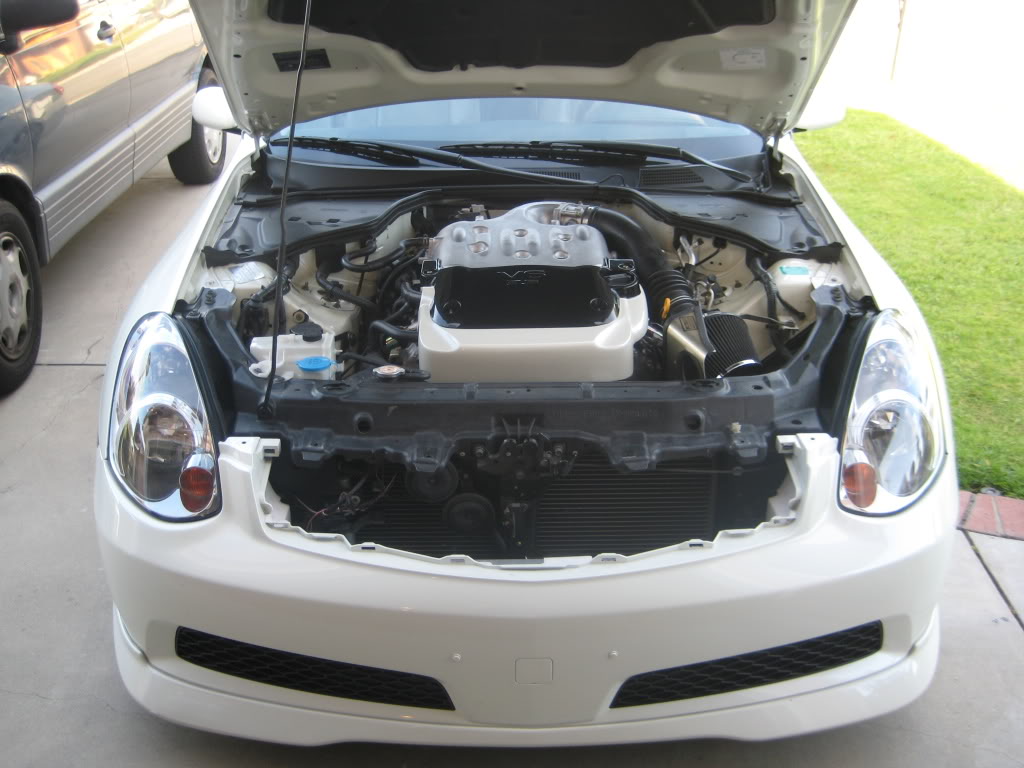
First Mod: JWT Pop Charger w/Z tube
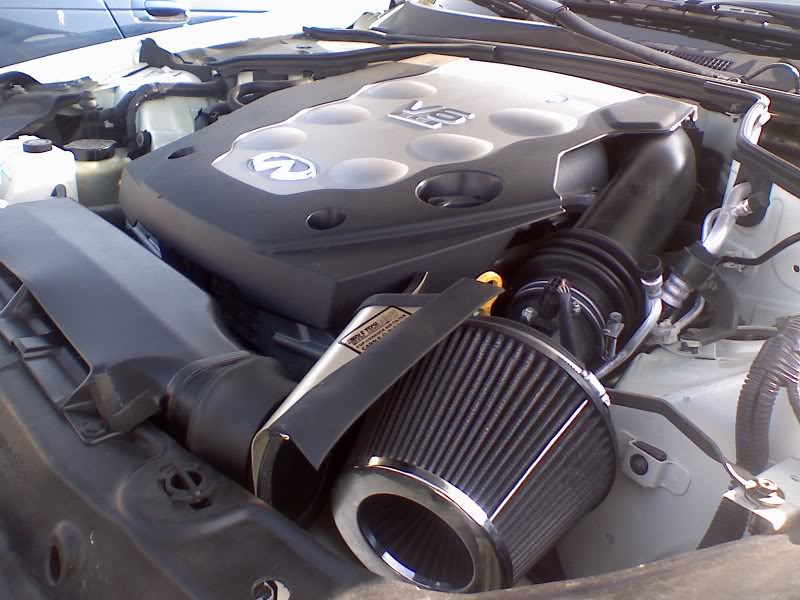
Soon after I got the Motordyne 5/16" plenum spacer.
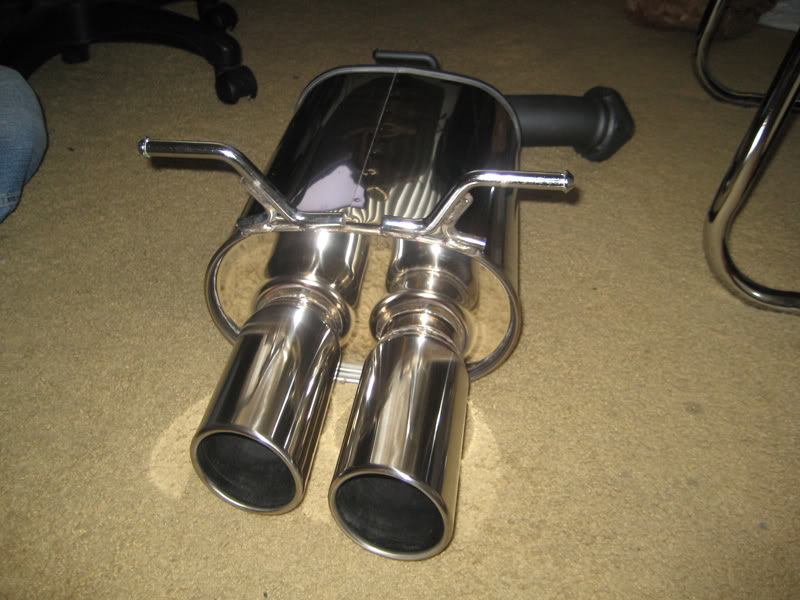
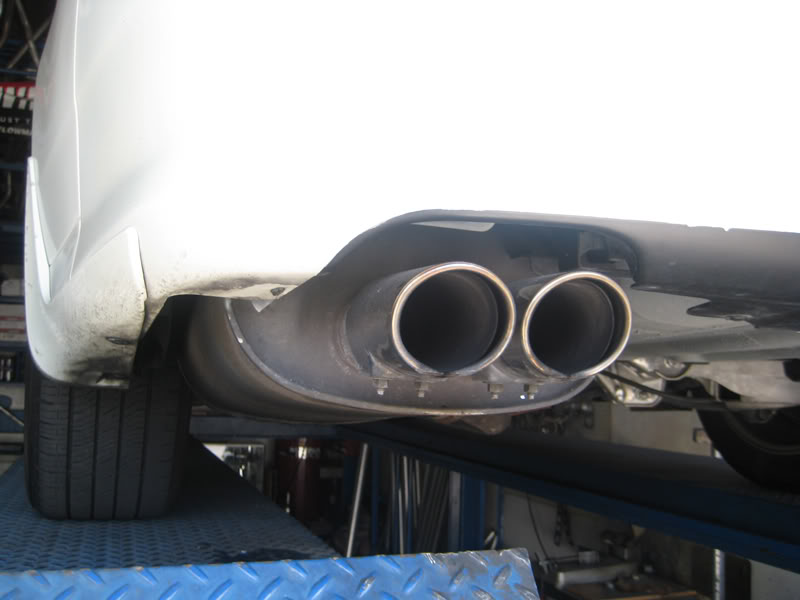
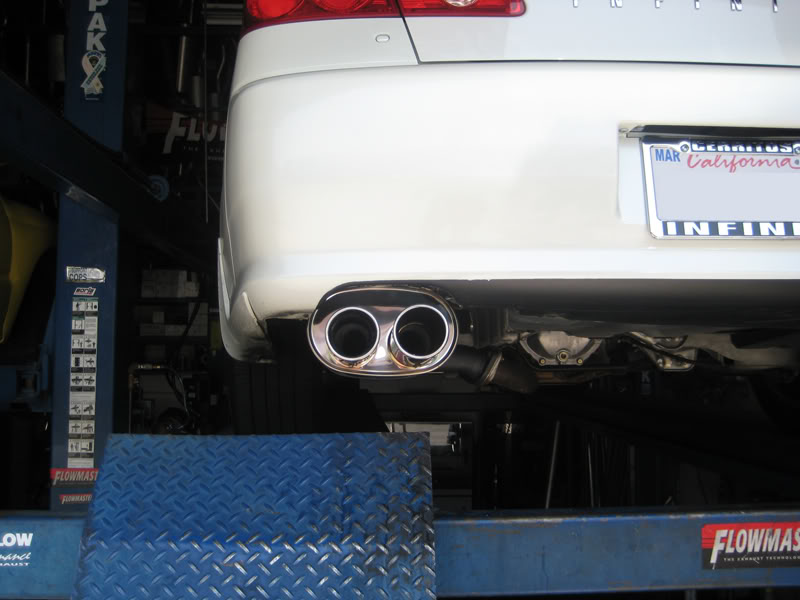
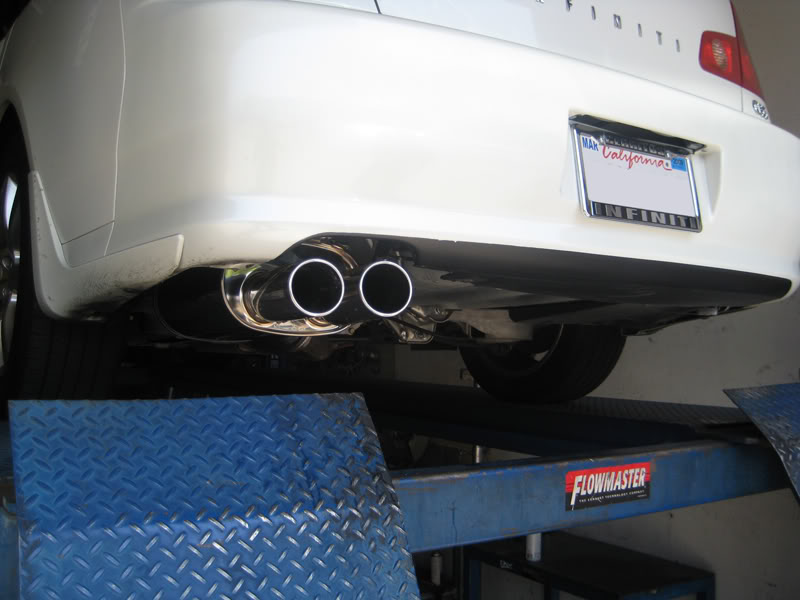
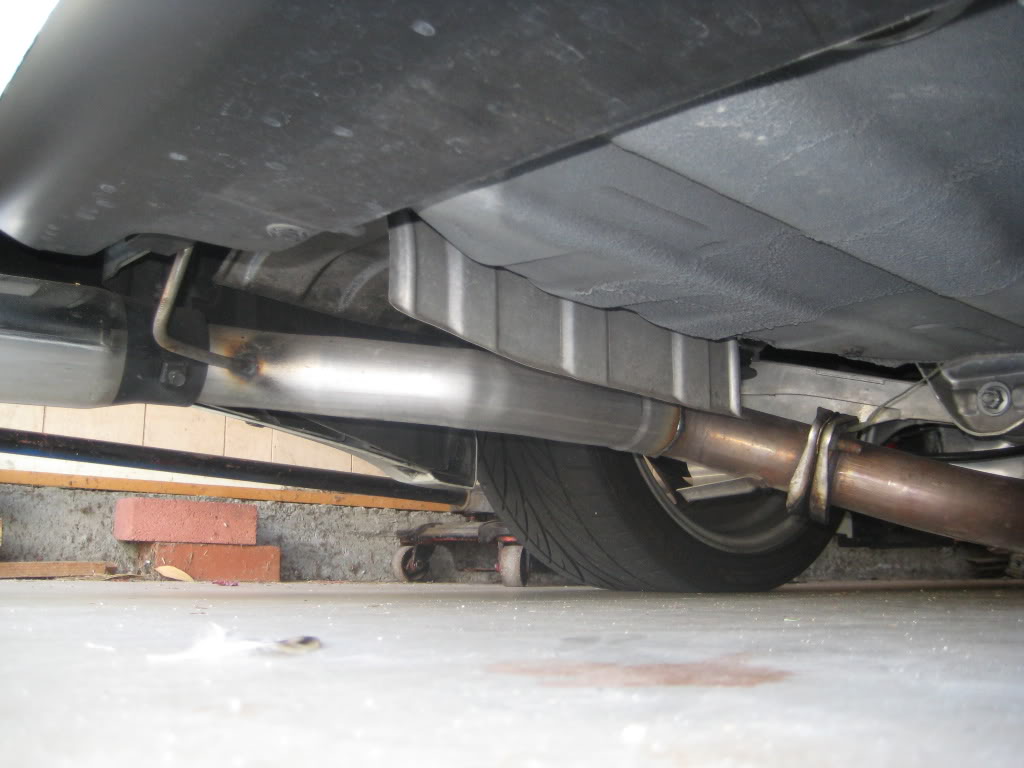
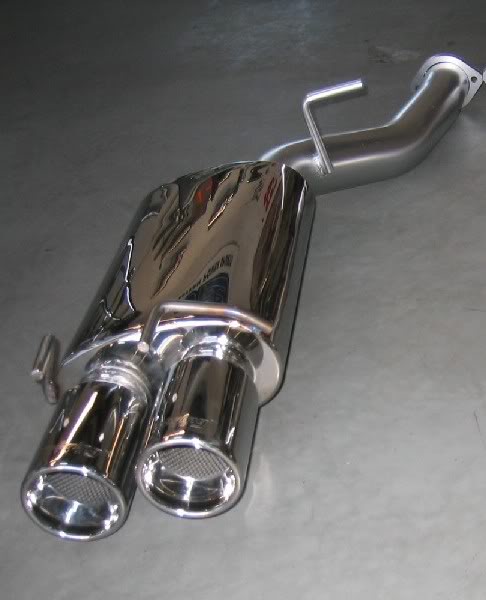
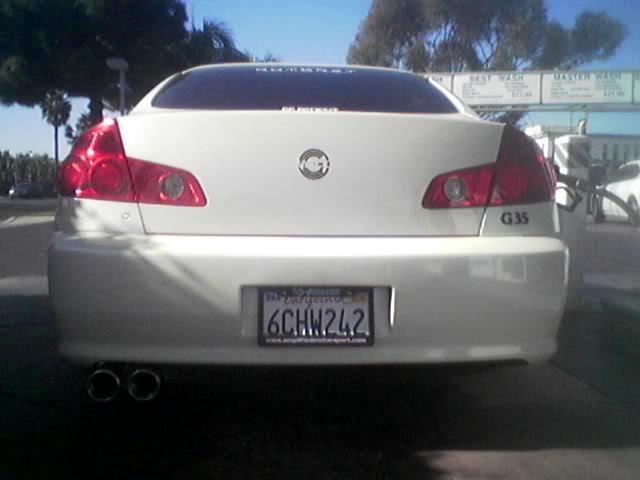
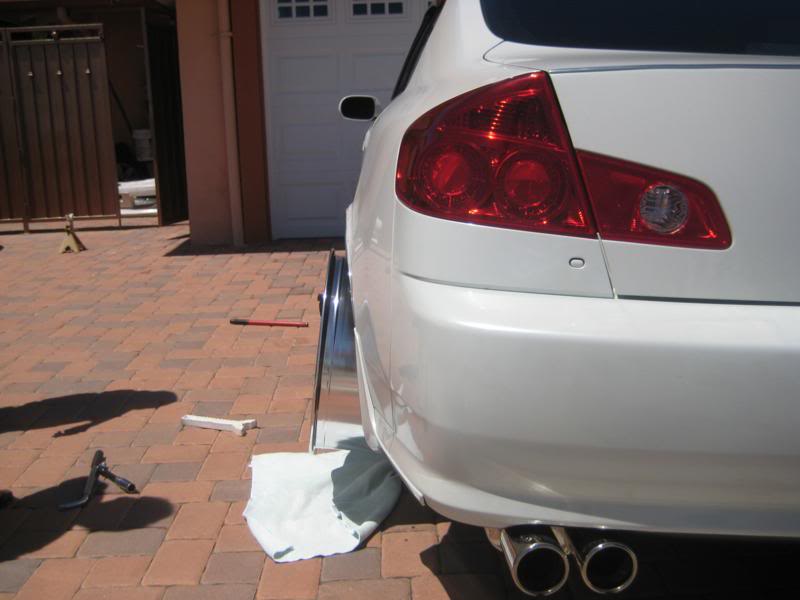
HKS Axleback
Before
After
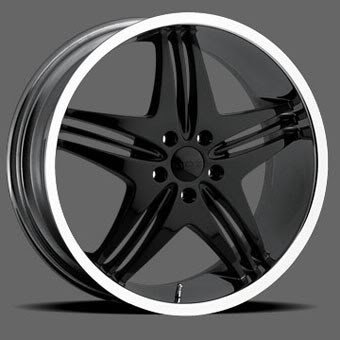
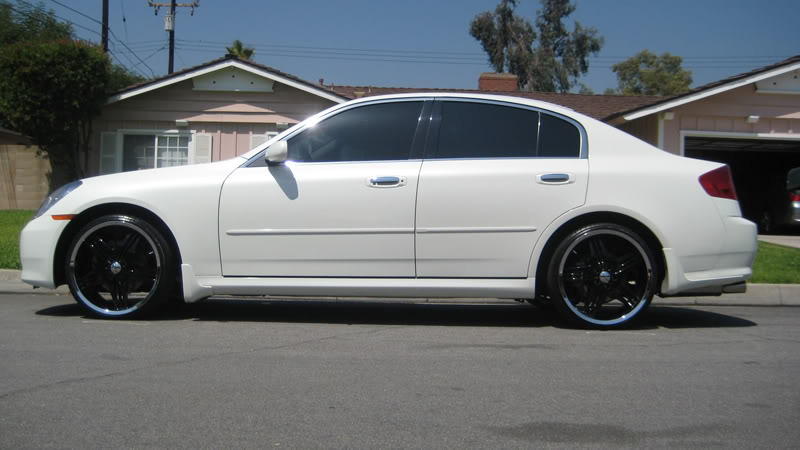
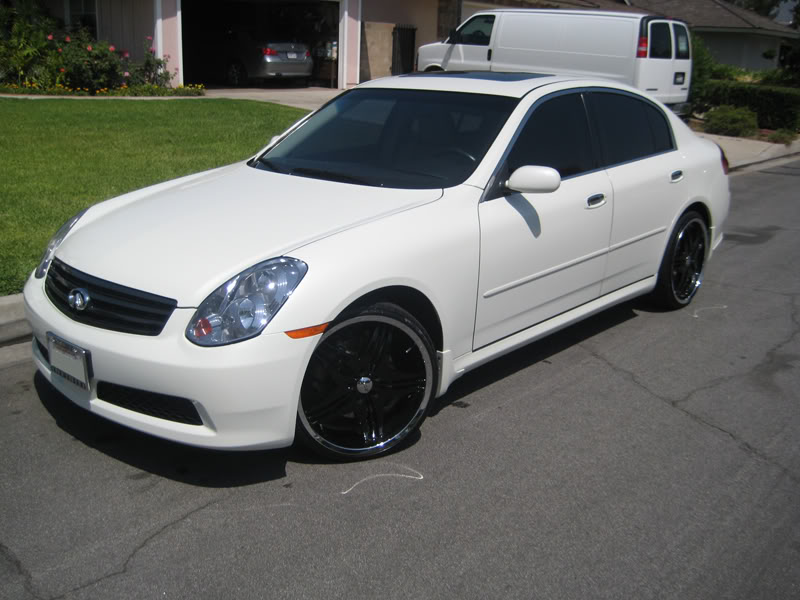
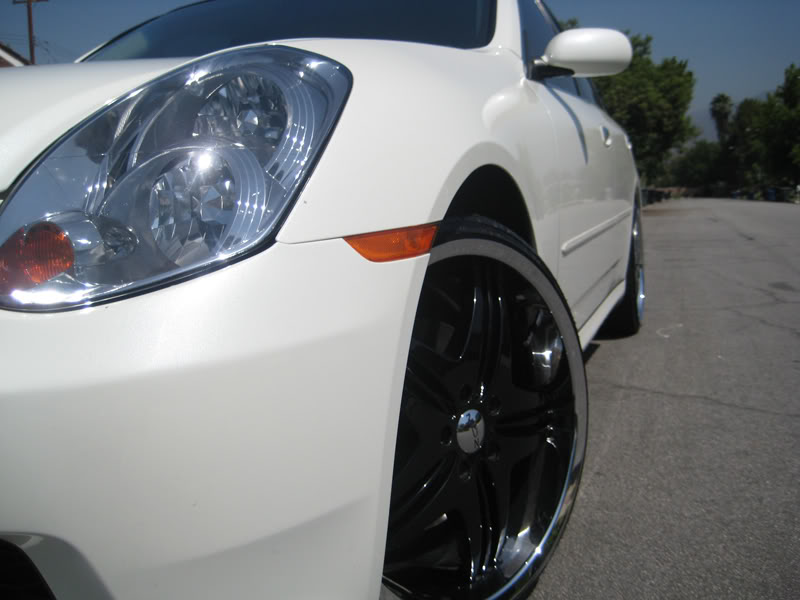
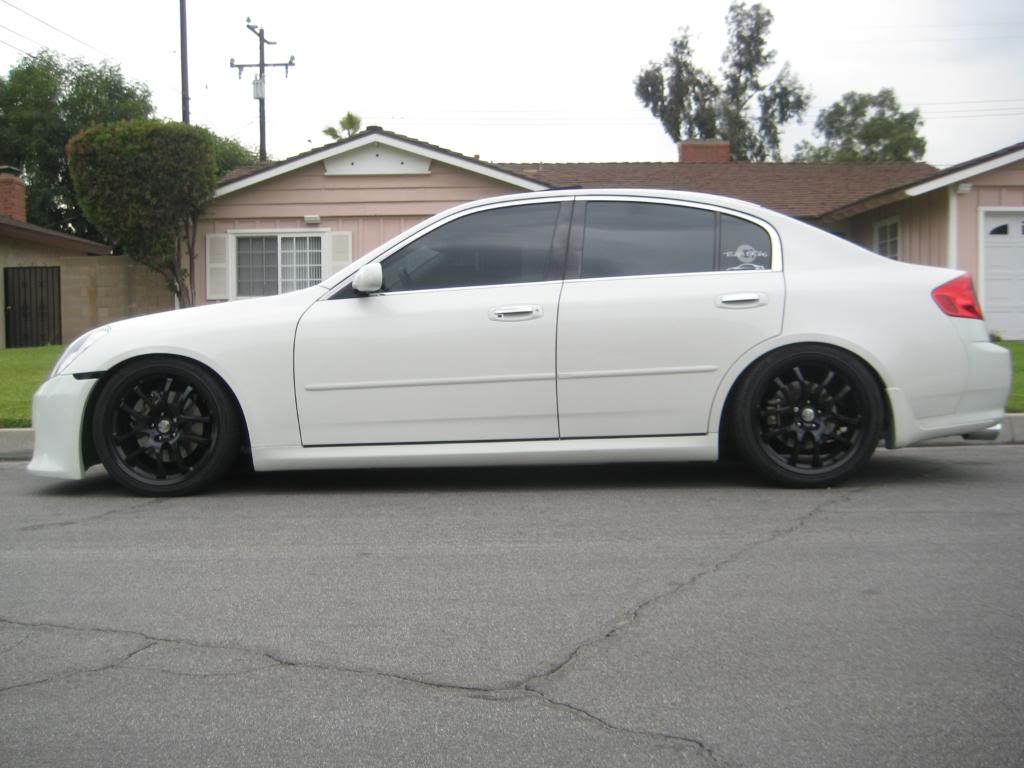
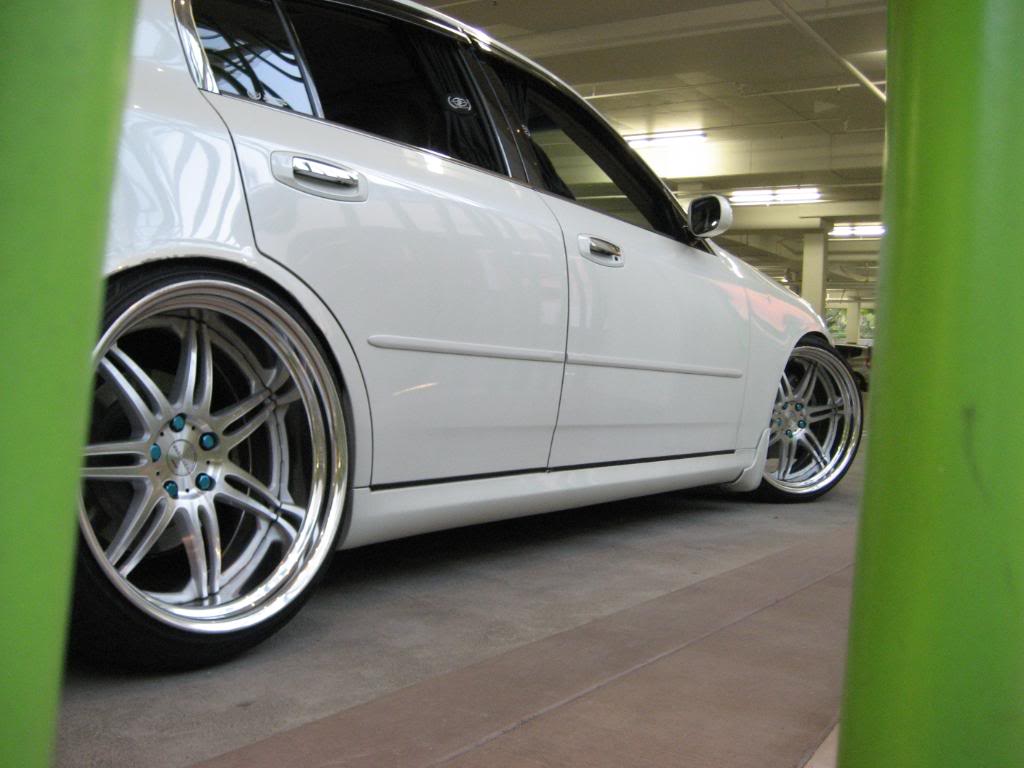
20" Moz Tower 5 wheels
20x8.5 +34 all around. Tires were 225/30.

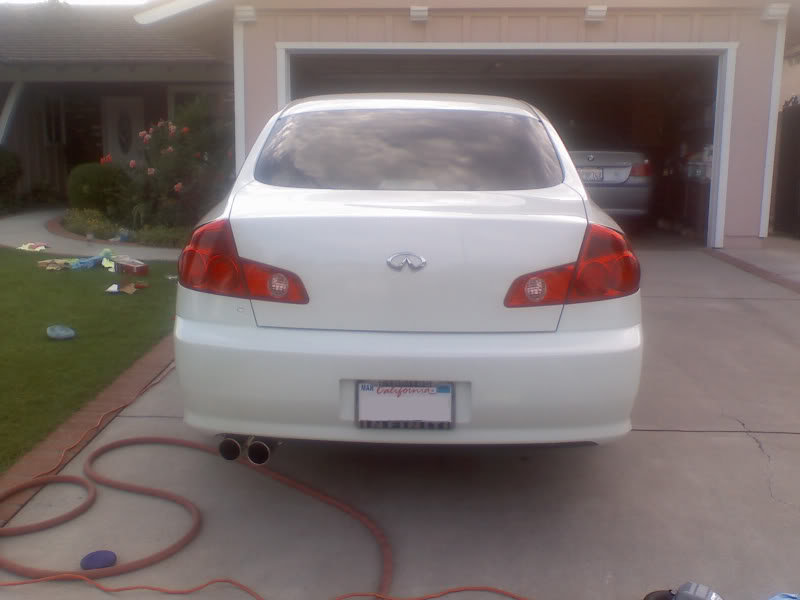
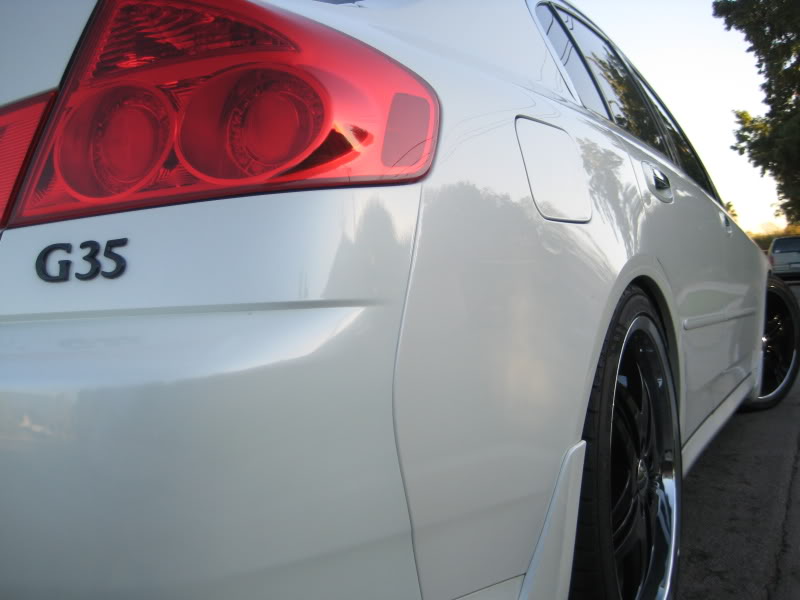
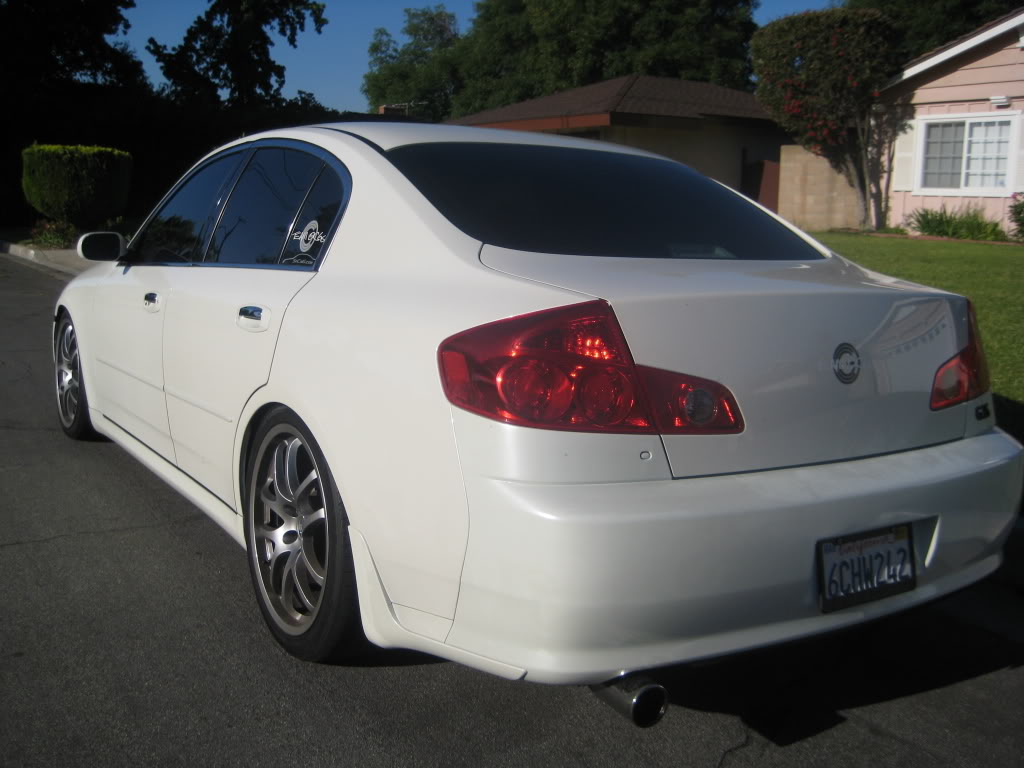
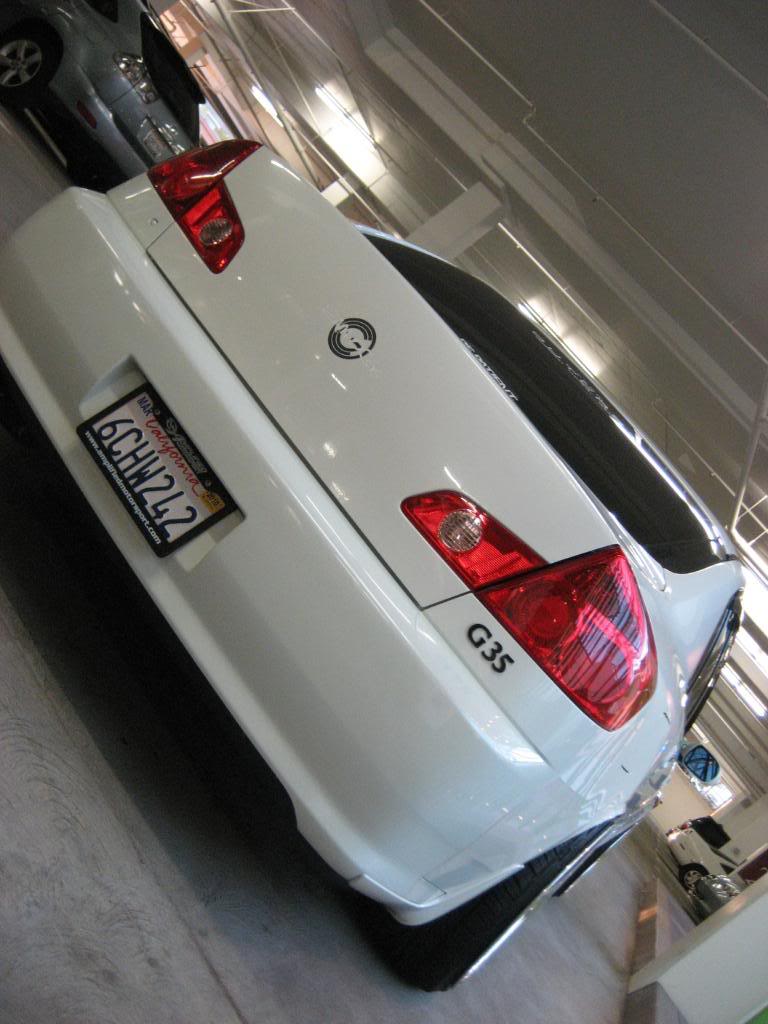
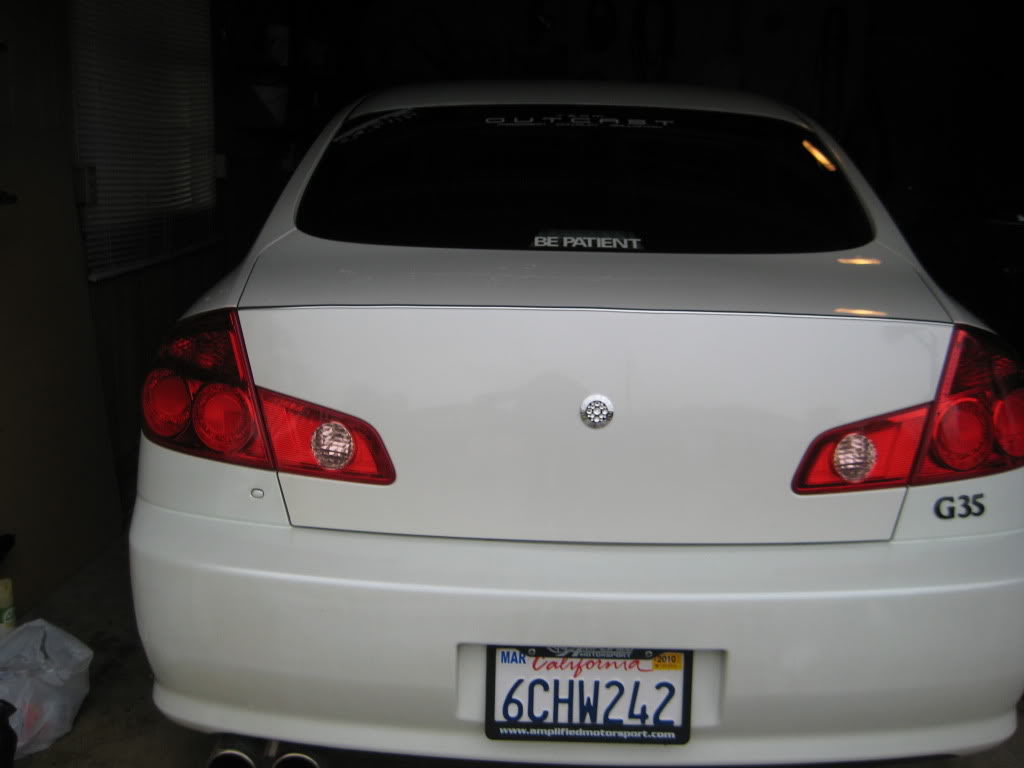
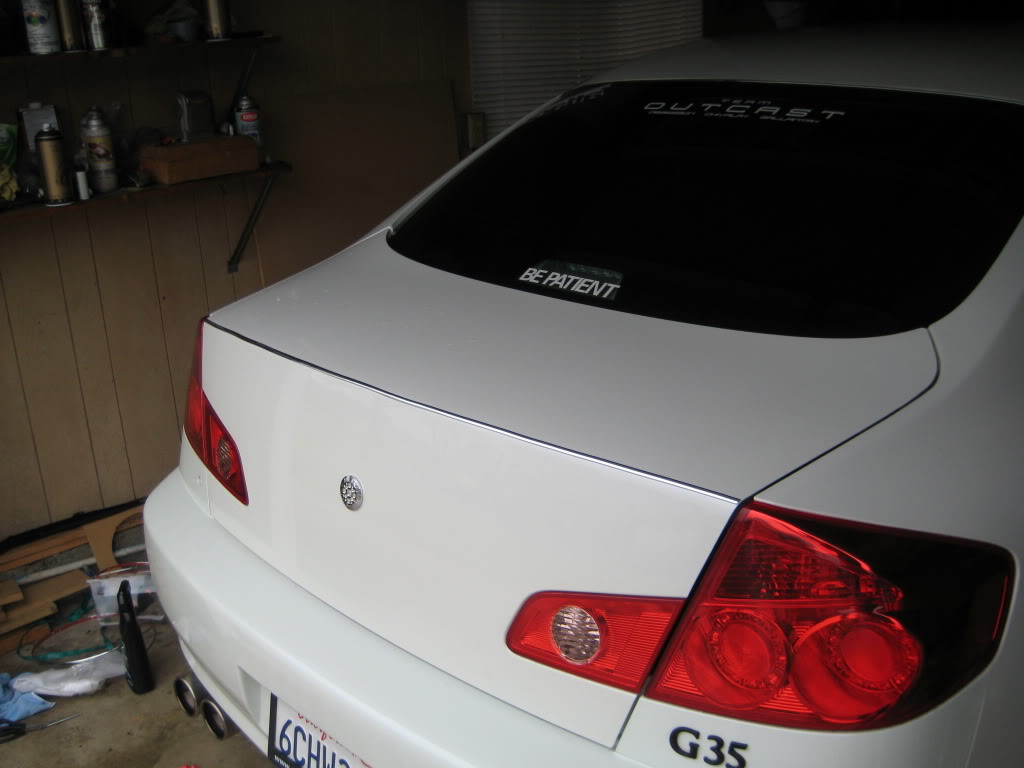
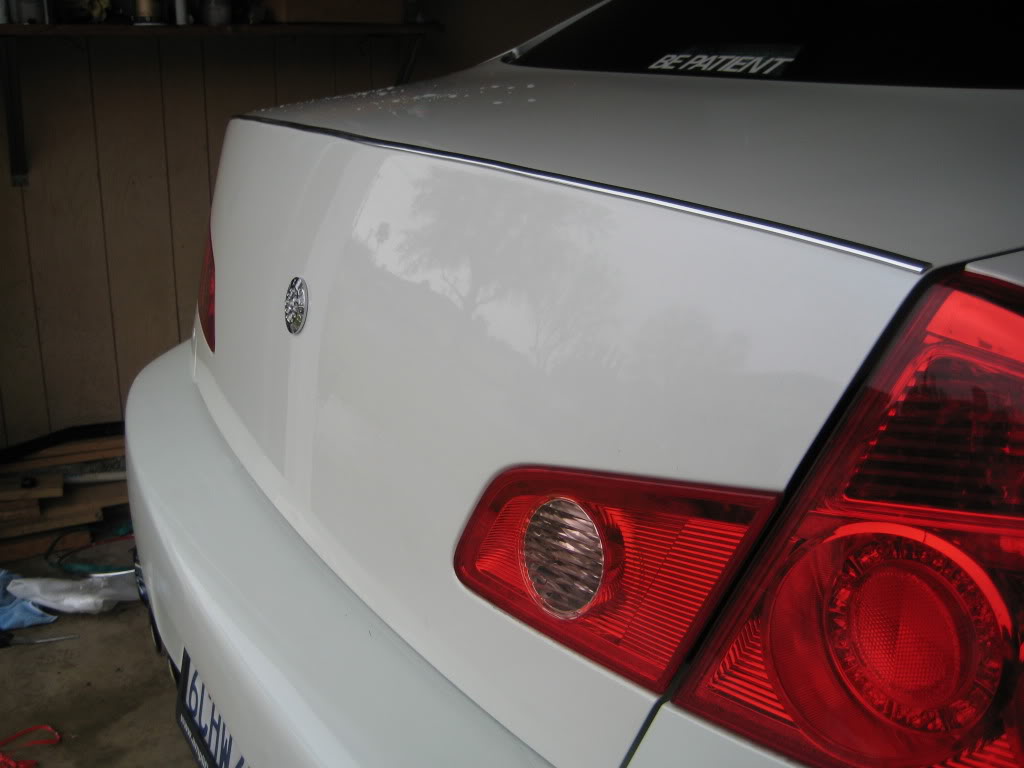
Debadge
Infiniti emblem came off a couple days later.
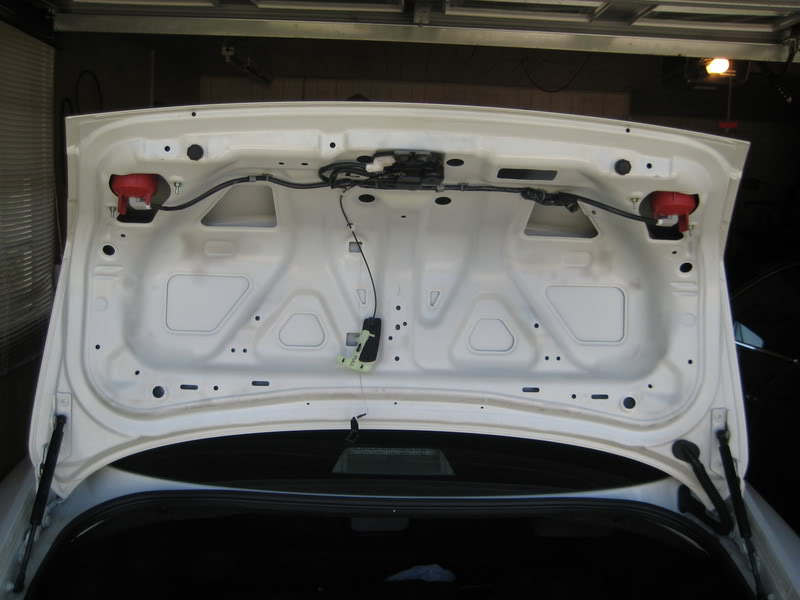
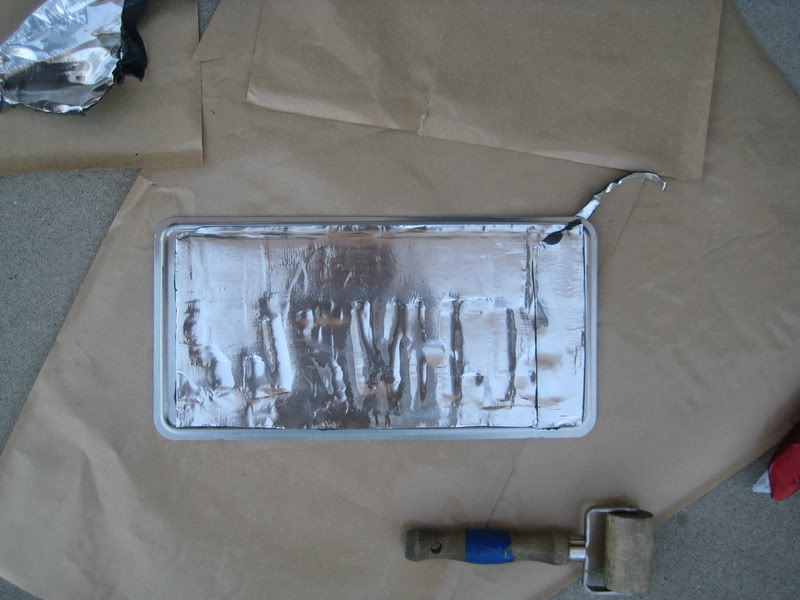
Sound deadening
I was a lucky winner in a raffle and got some free Second Skin Damplifier Pro. 13 sq. ft. Enough for the entire trunk lid, include a little on the inside.
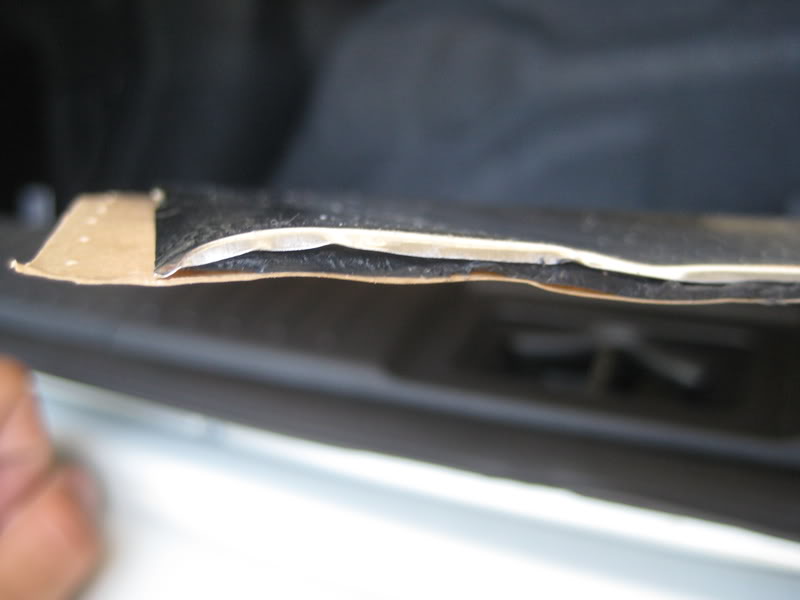
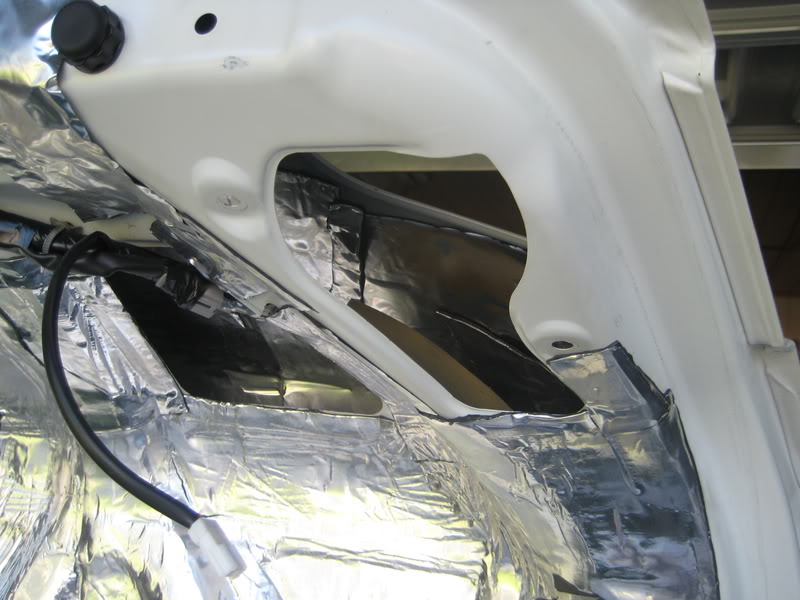
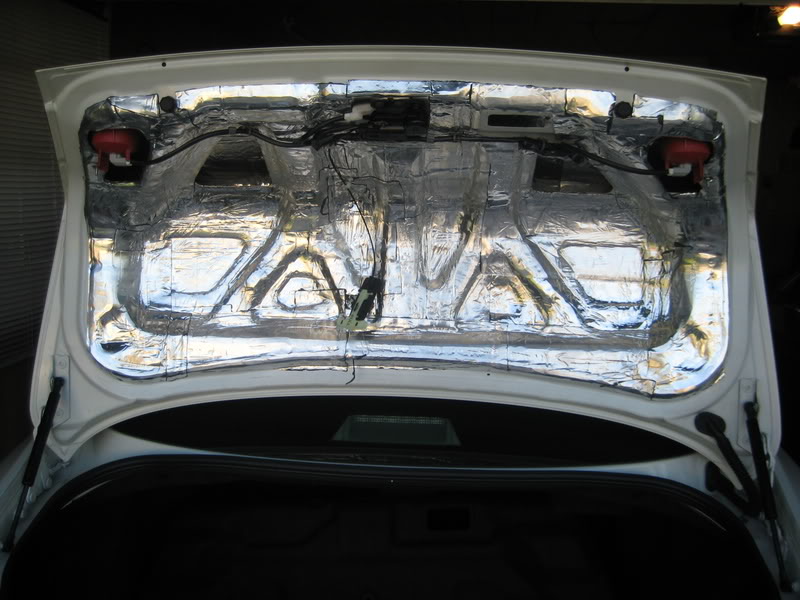
And some on the license plate
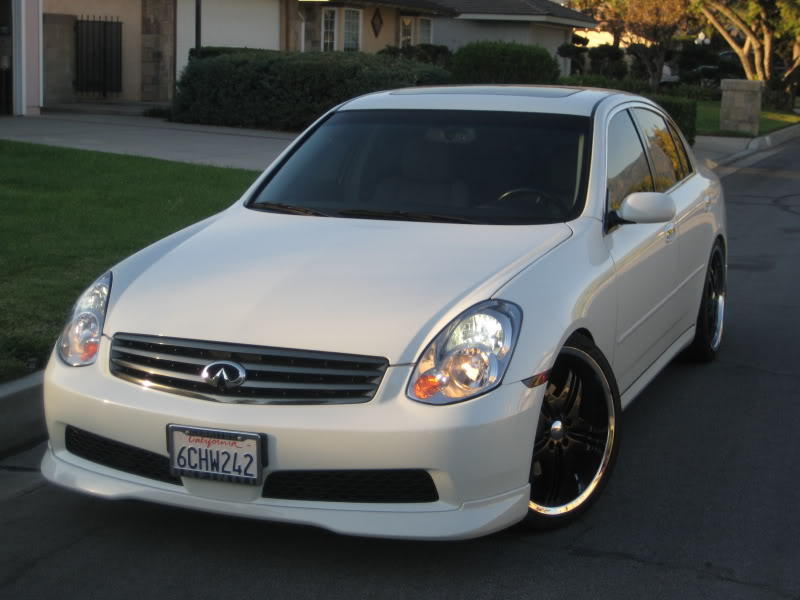
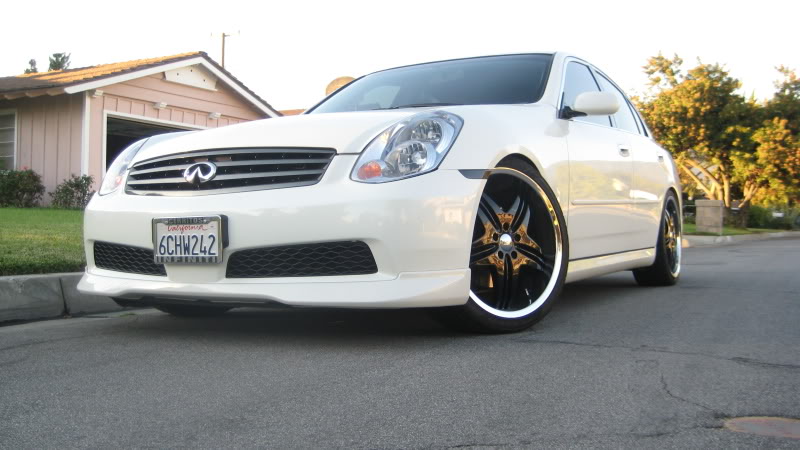
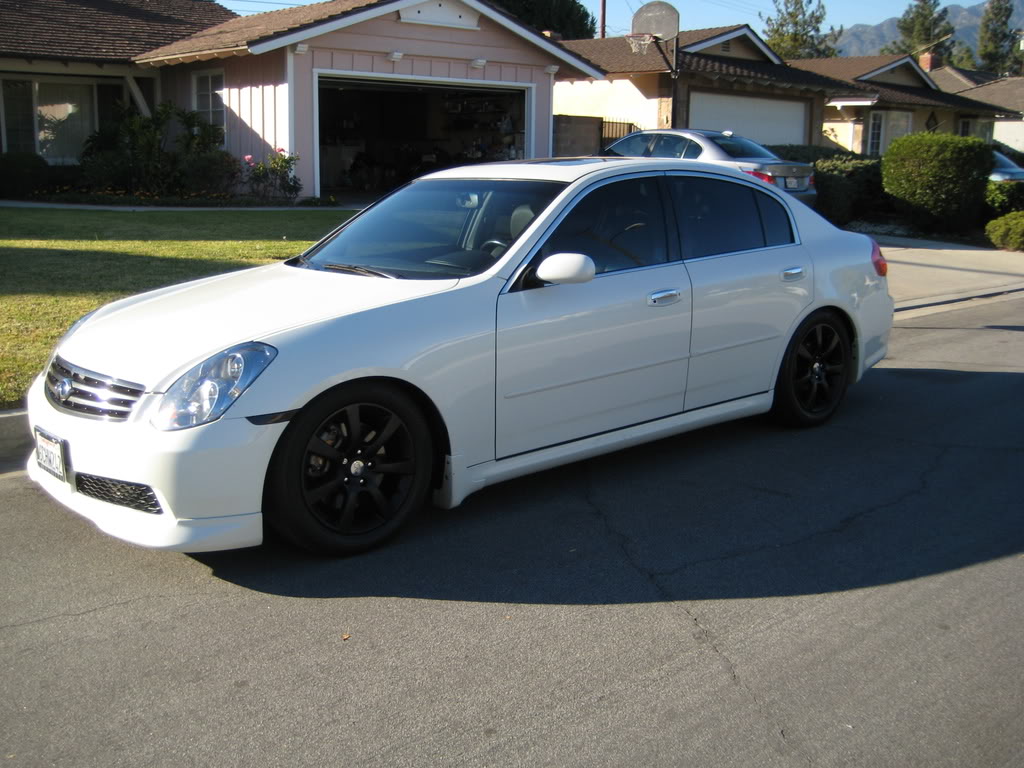
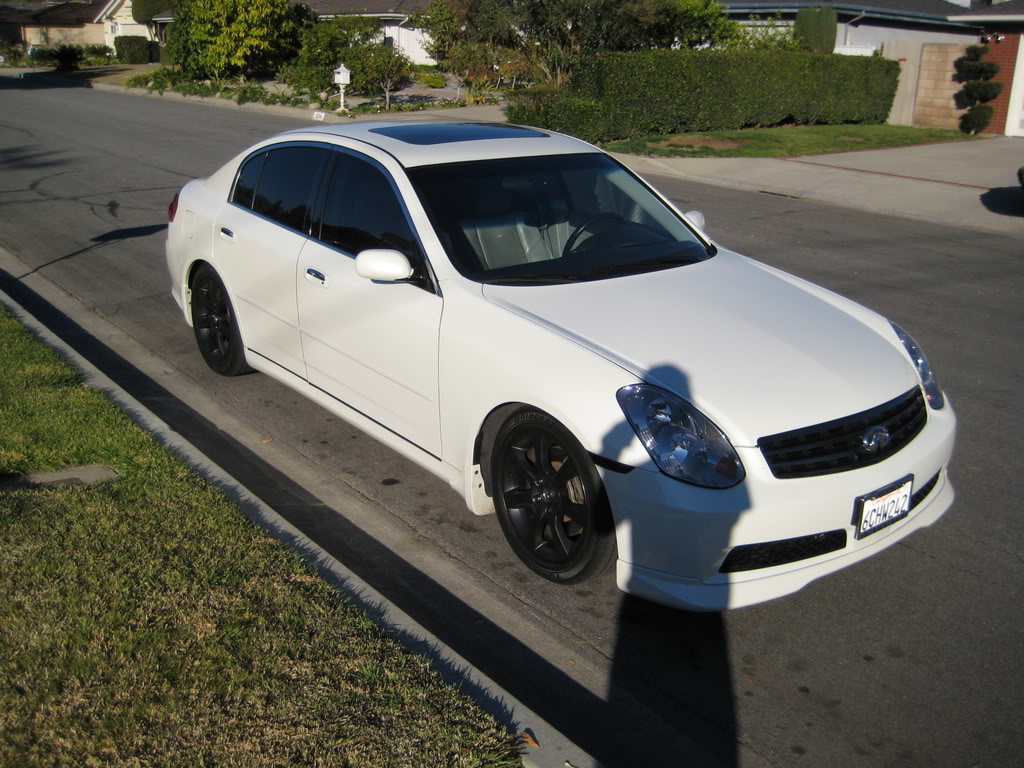
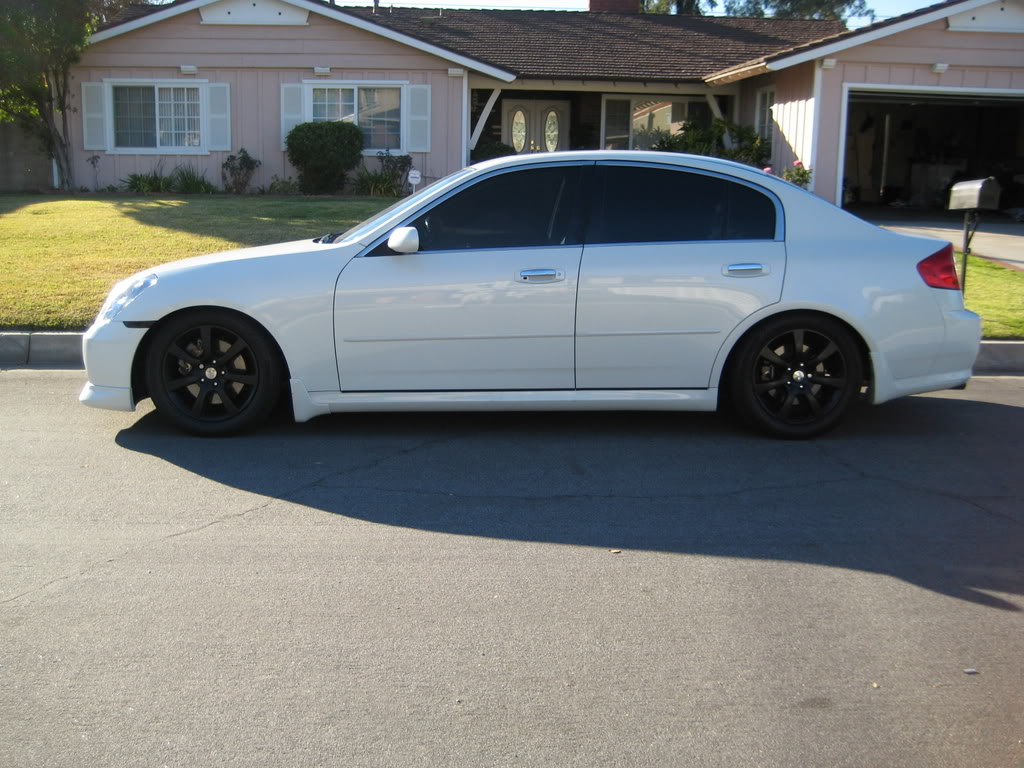
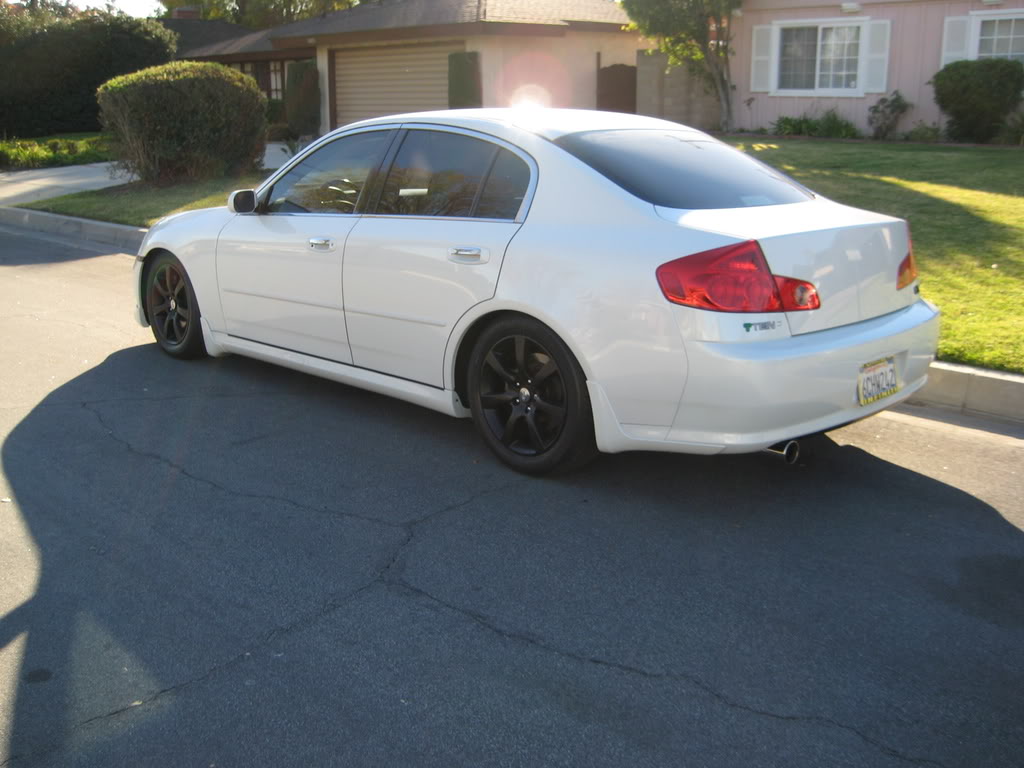
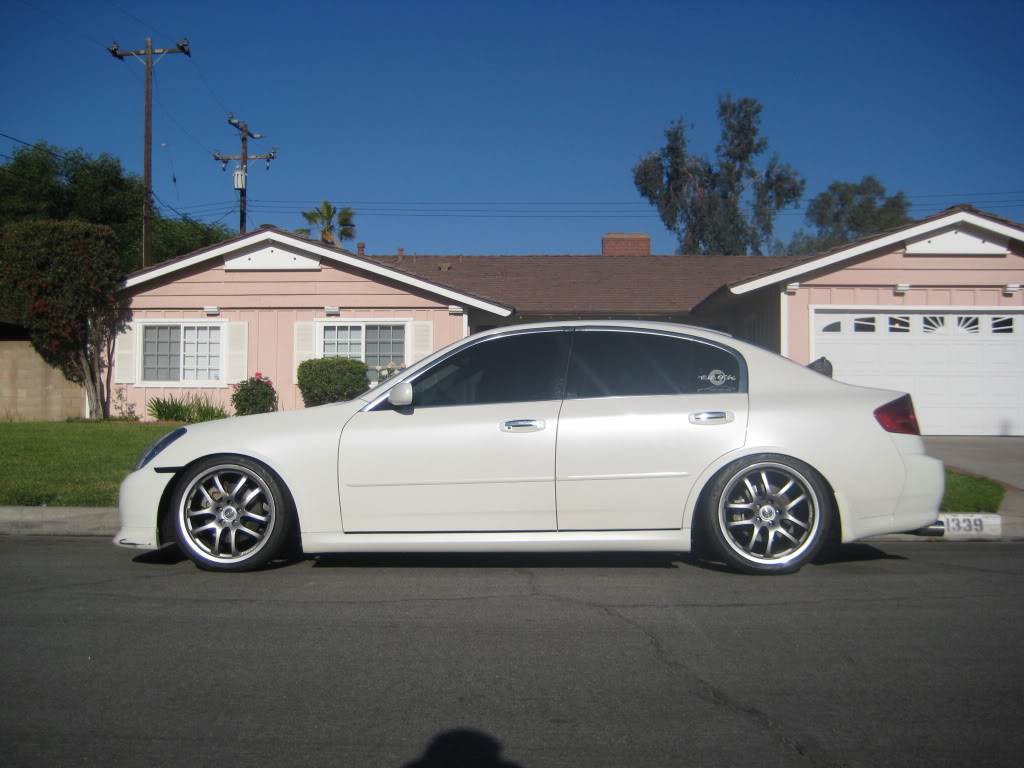
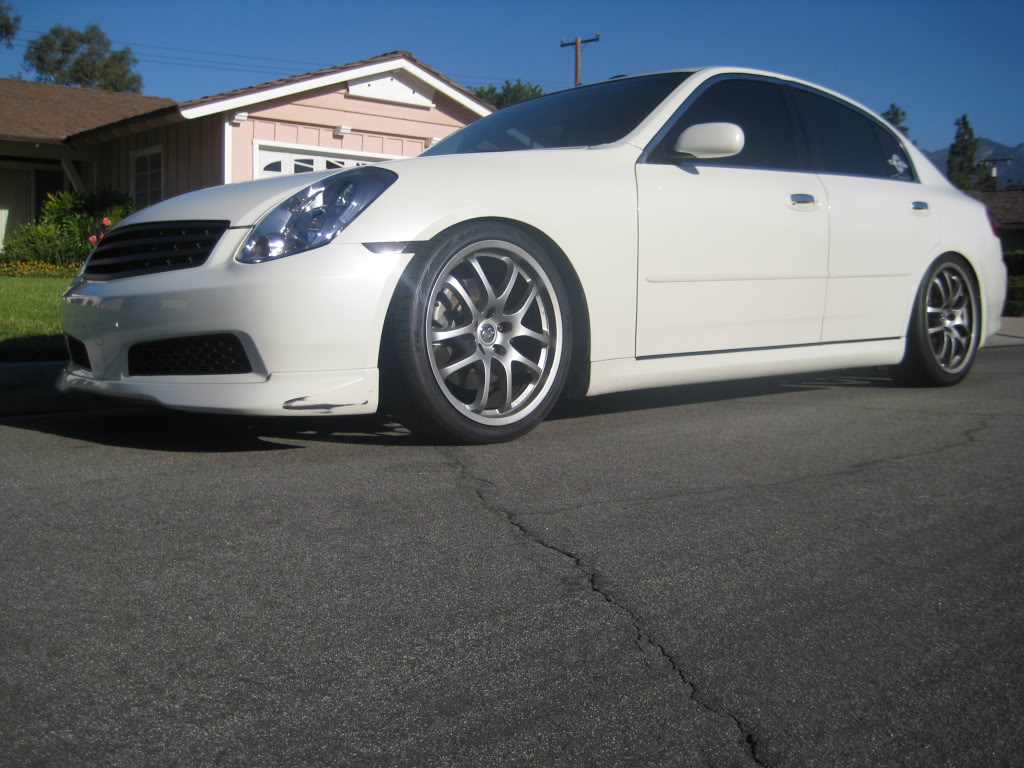
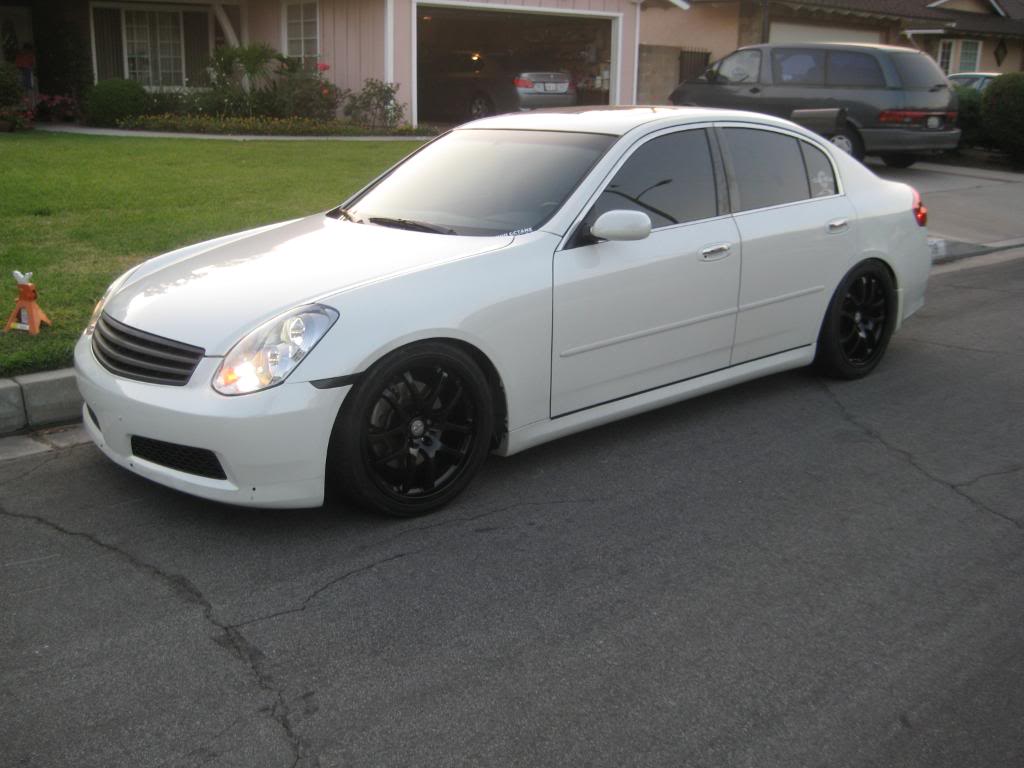
Tein Basics, Larger Tires, OEM Front Lip, Emblem Paint & Muffler Delete (Walmart Tip FTW)
Got the first suspension setup on and matched the new tires up with some 245/35's all around. Also added the OEM front lip and painted the G35 black since the paint had chipped when debading it.

Fully painted (black) sidemarkers, 17" OEM's painted matte black, & ghey Tein Emblem
Painted Engine Cover
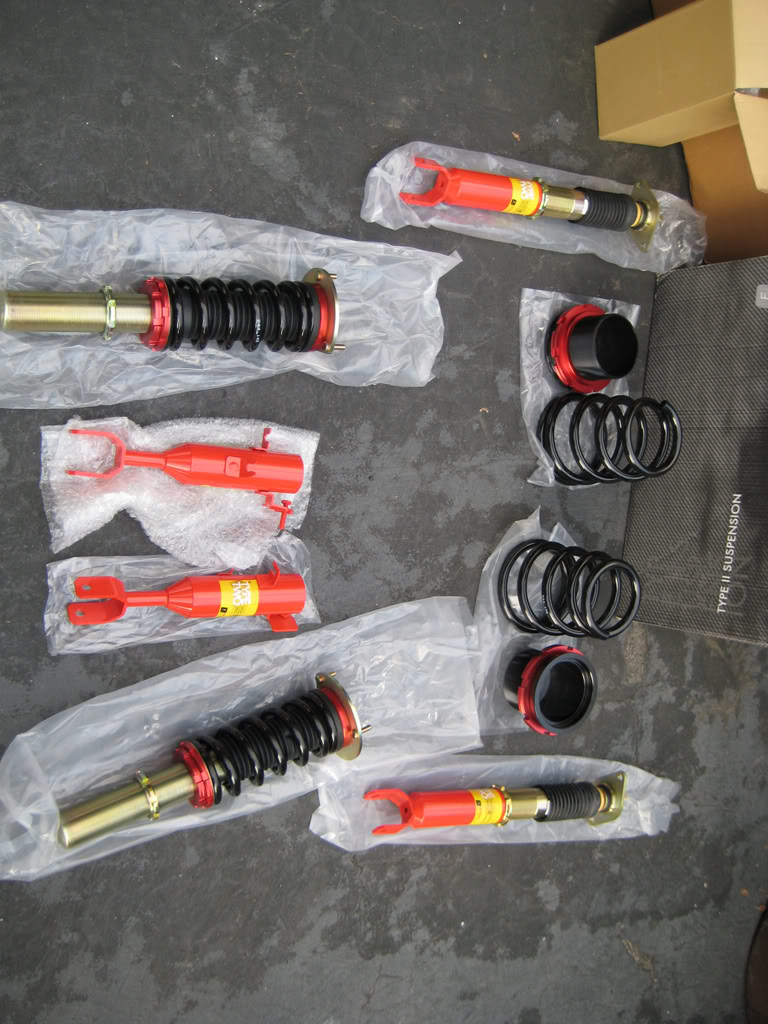
2nd Suspension Setup: Function & Form Type II & OEM 19's
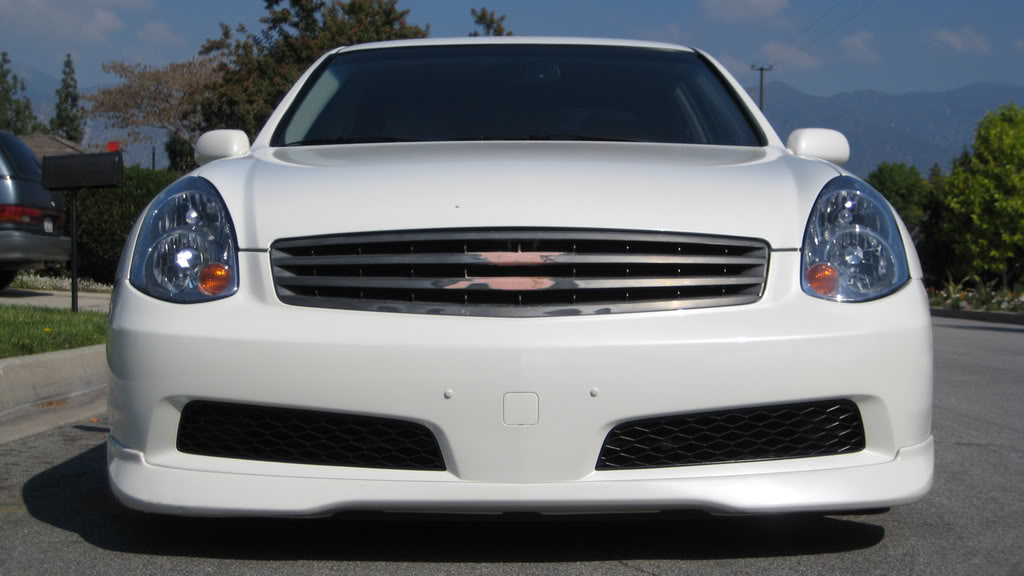
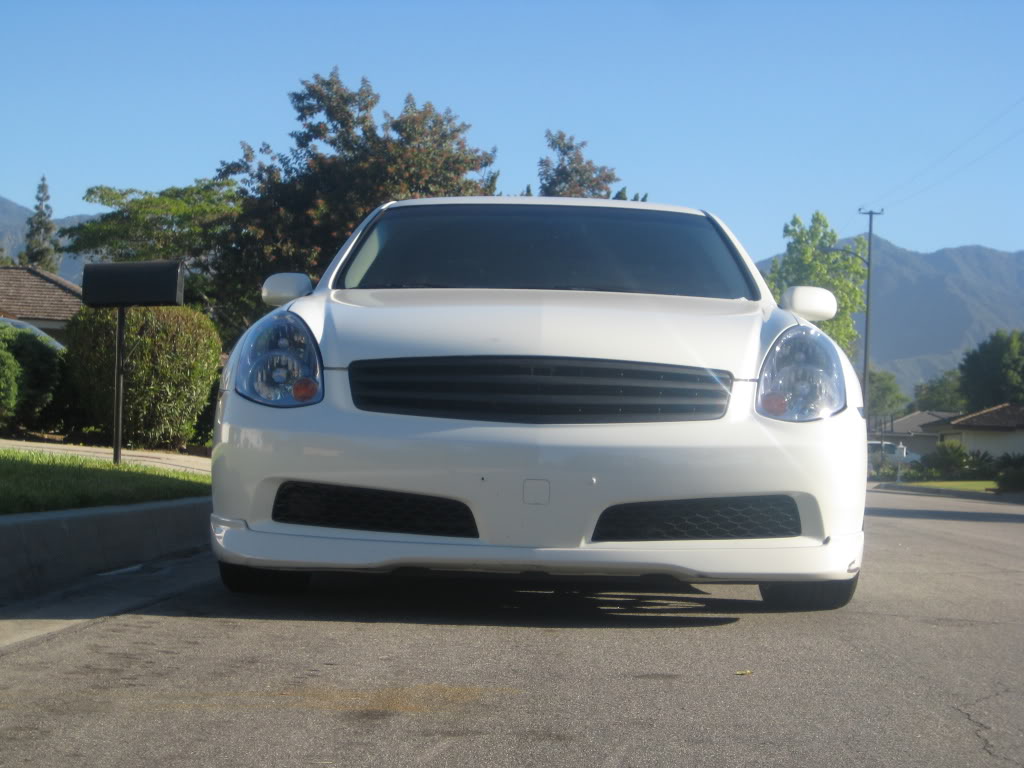
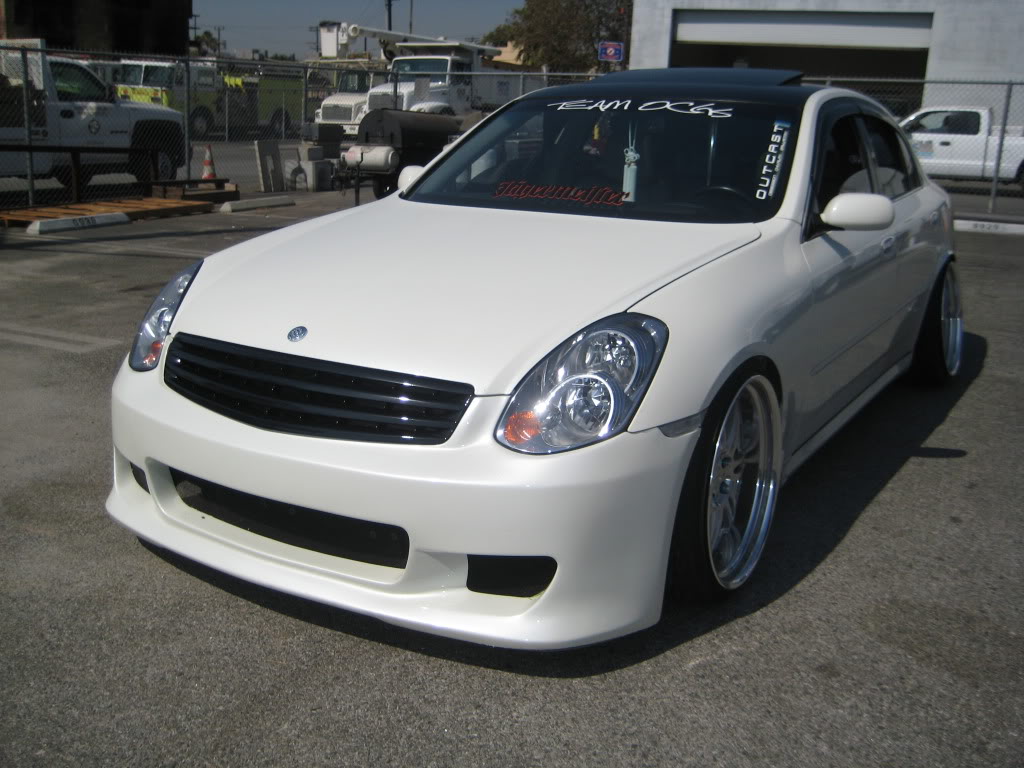
Emblemless Grill

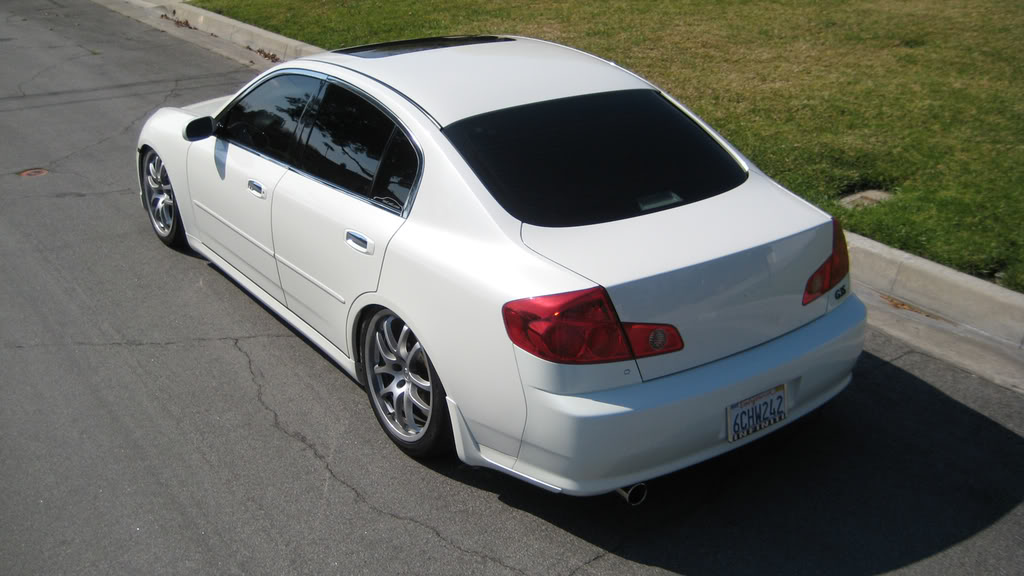
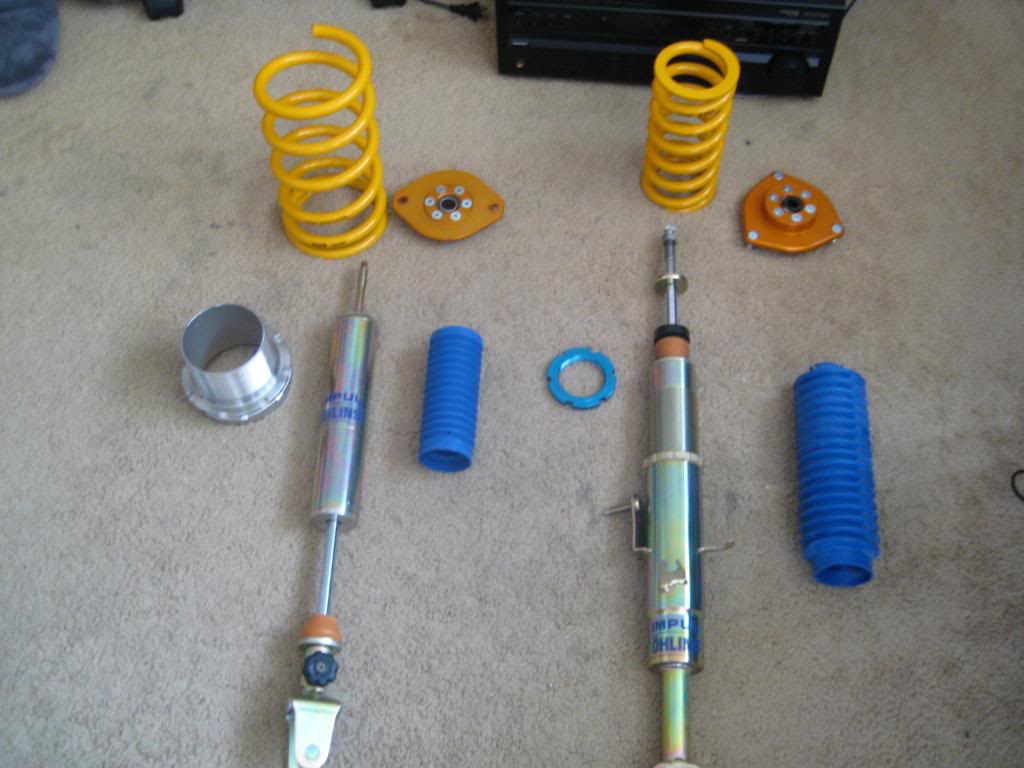
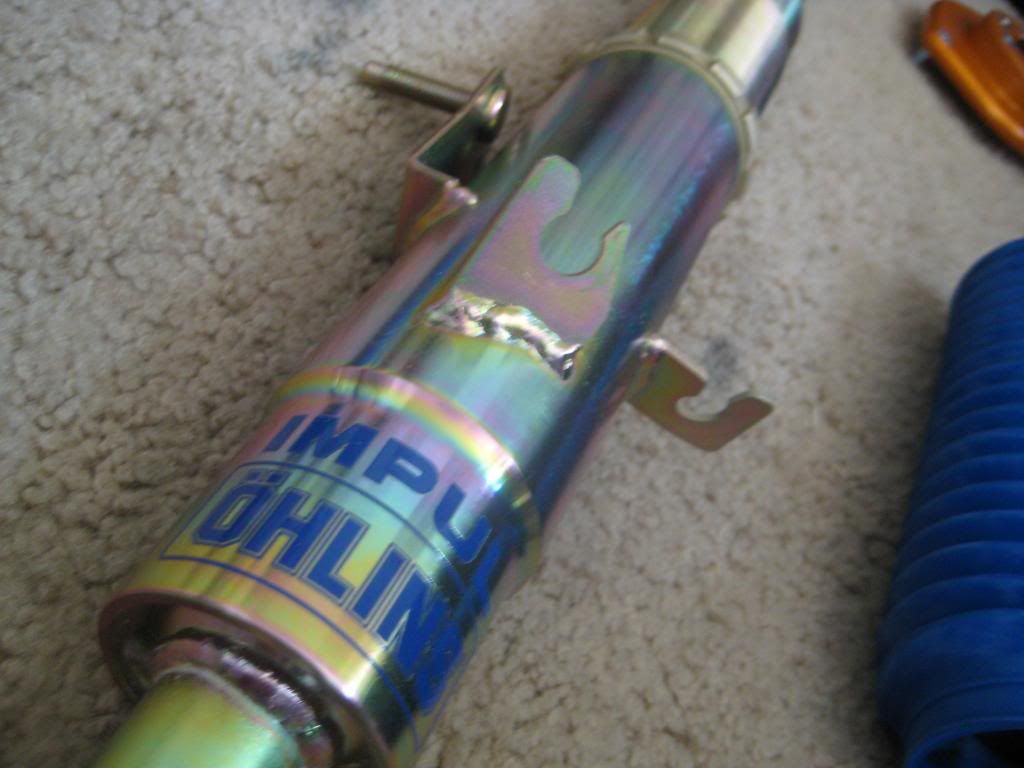
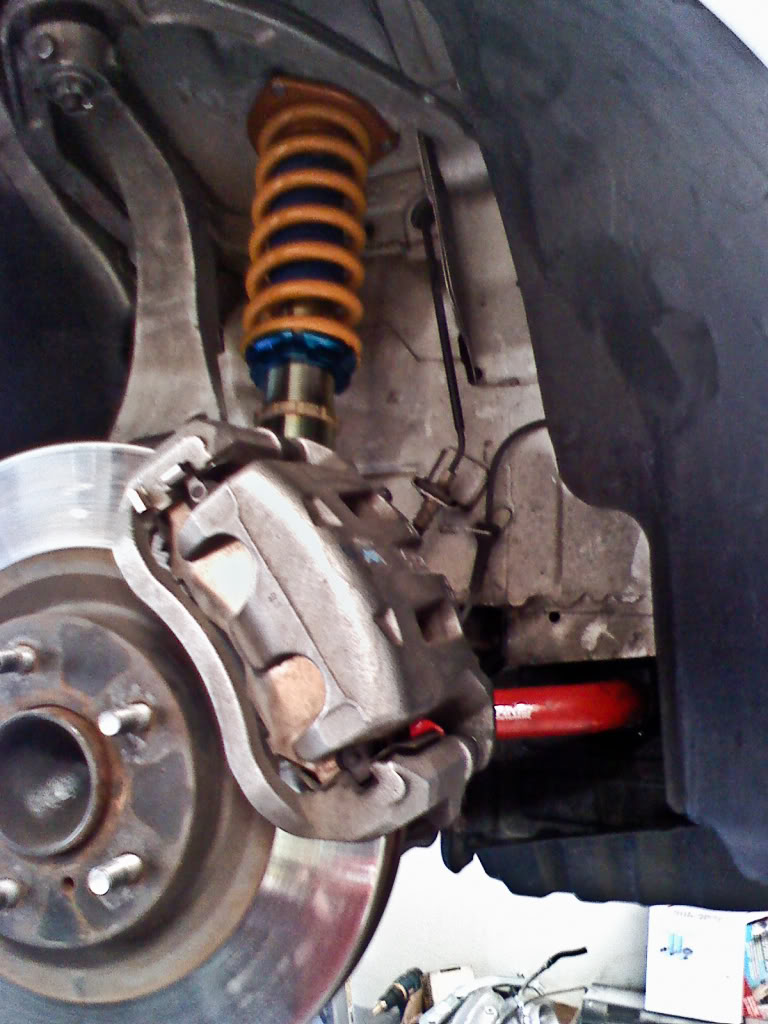
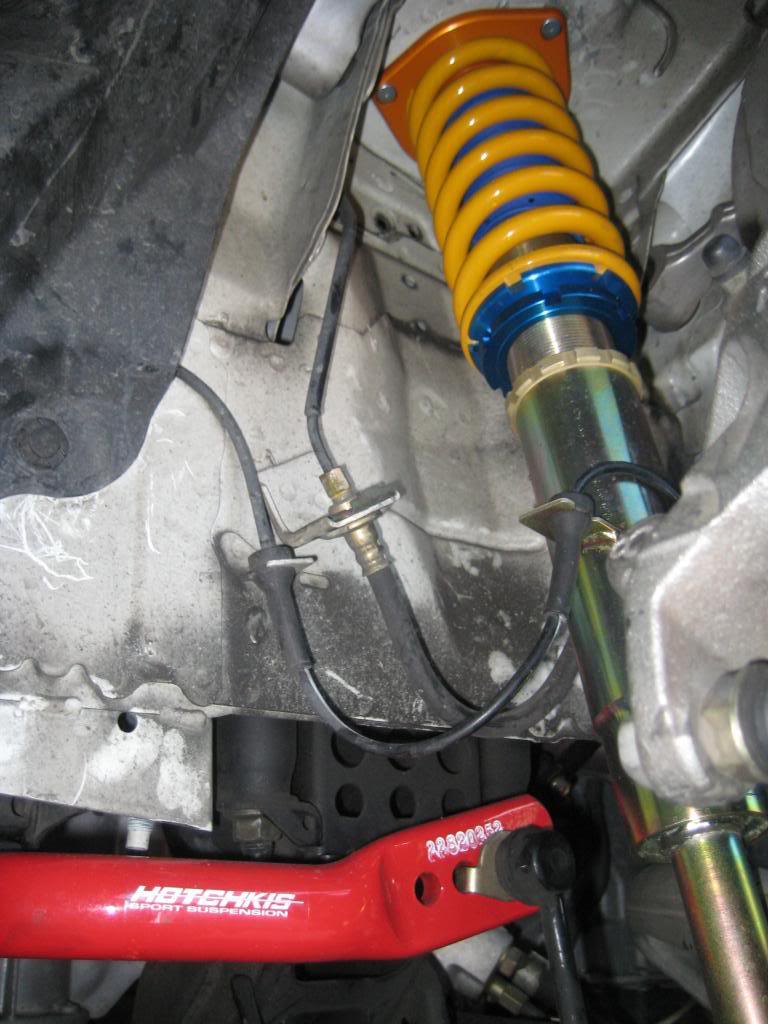
3rd Suspension Setup: Impul Ohlins & Hotchkis Sway Bars
What a huge upgrade. I wish I could keep these to put on bags, but I don't think the bags would go over the streets. Performance was immaculate and noticeable during daily driving. Don't really have pics of sways, but you can see the front ones in these pics.

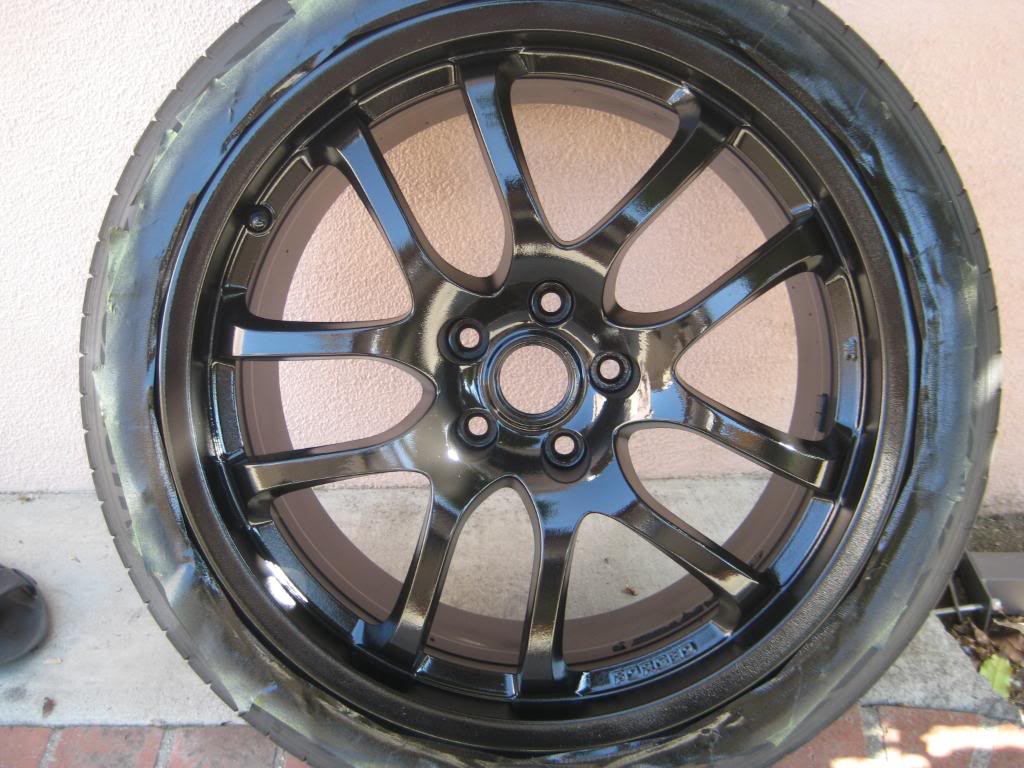
Painted Gloss Black OEM 19's


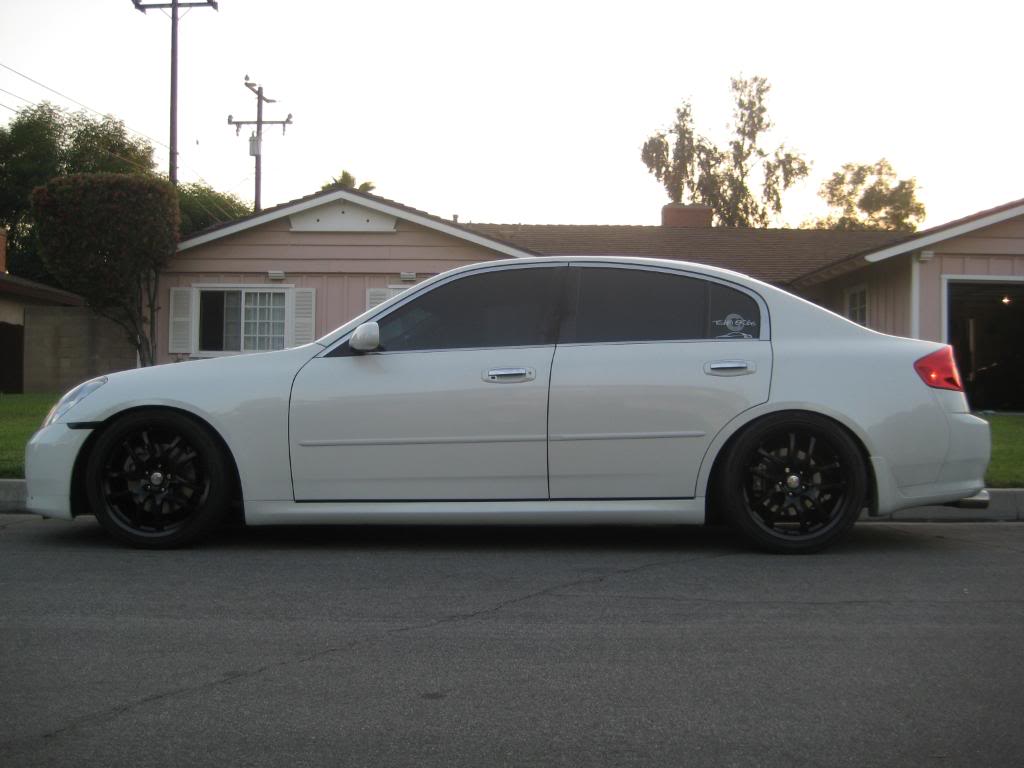
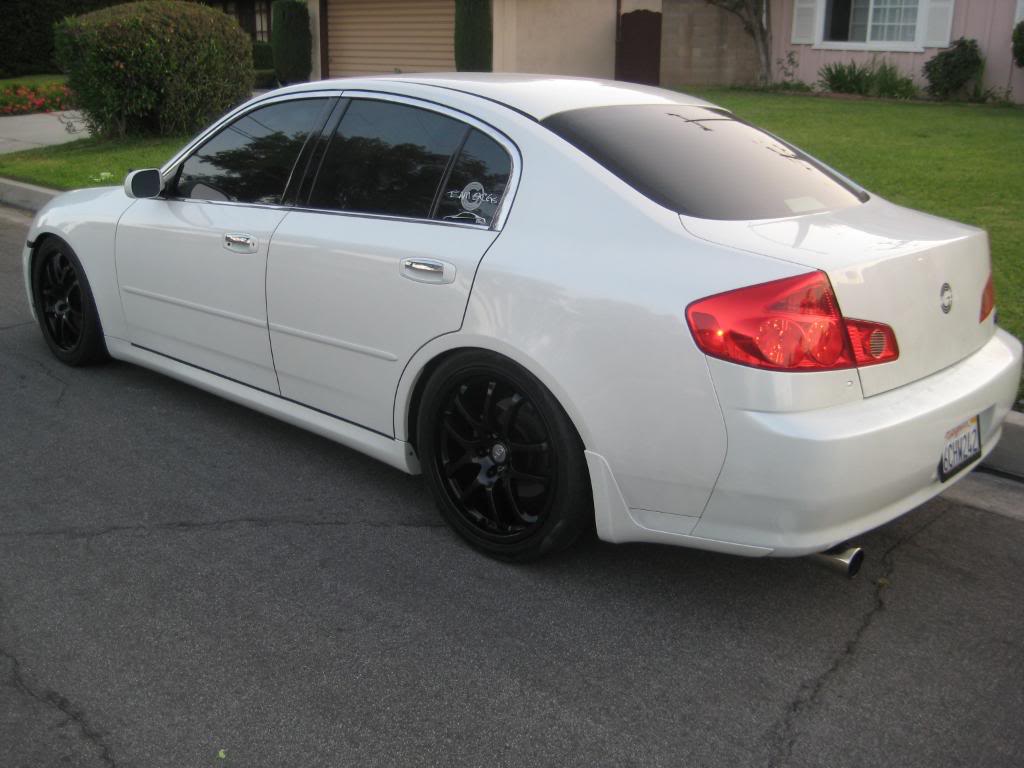
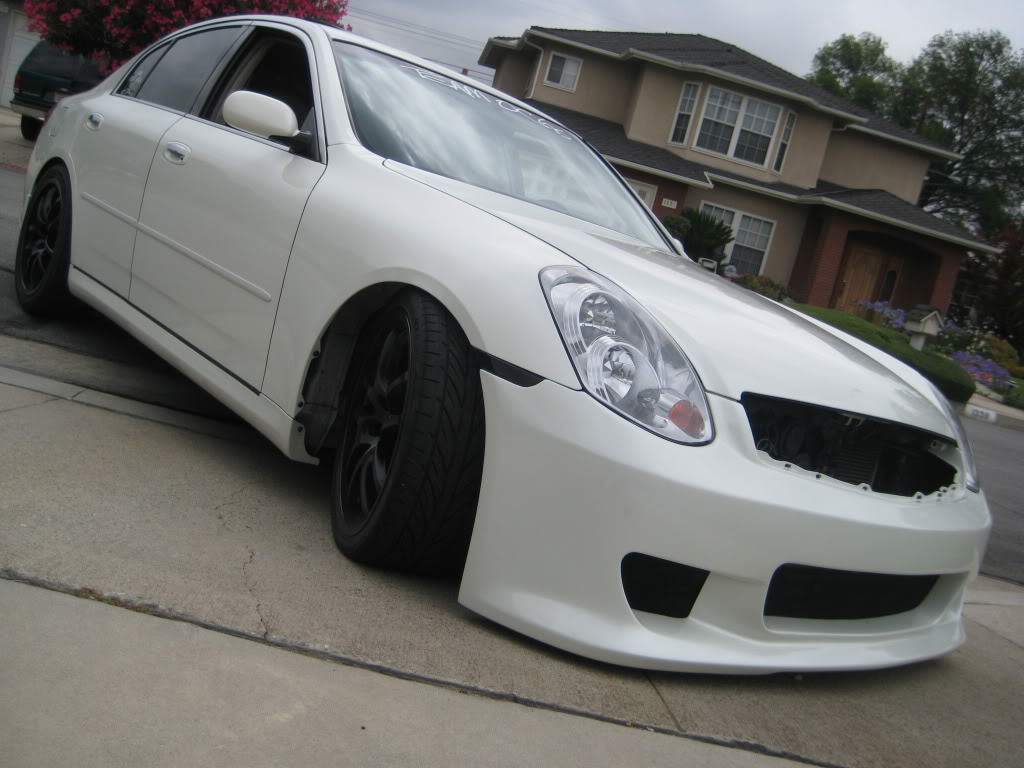
Karookie Bumper & 4th Suspension Setup: HKS Hypermax III (Non-sport)
In some pics I had the Ohlins still on, in others the HKS are on.
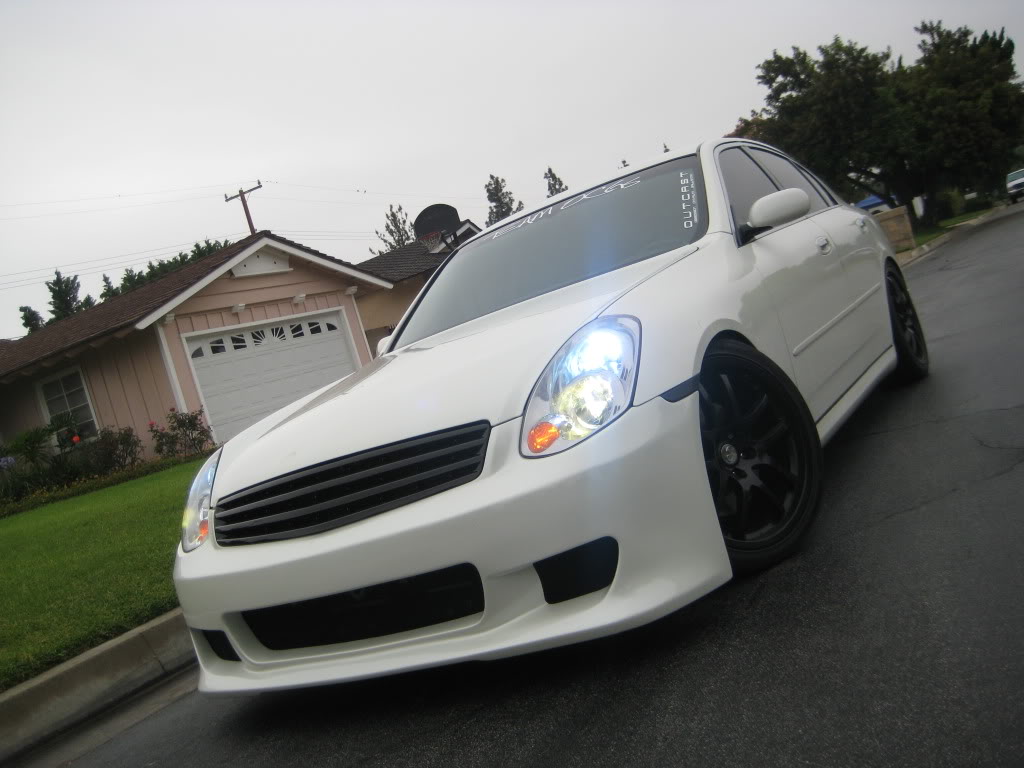
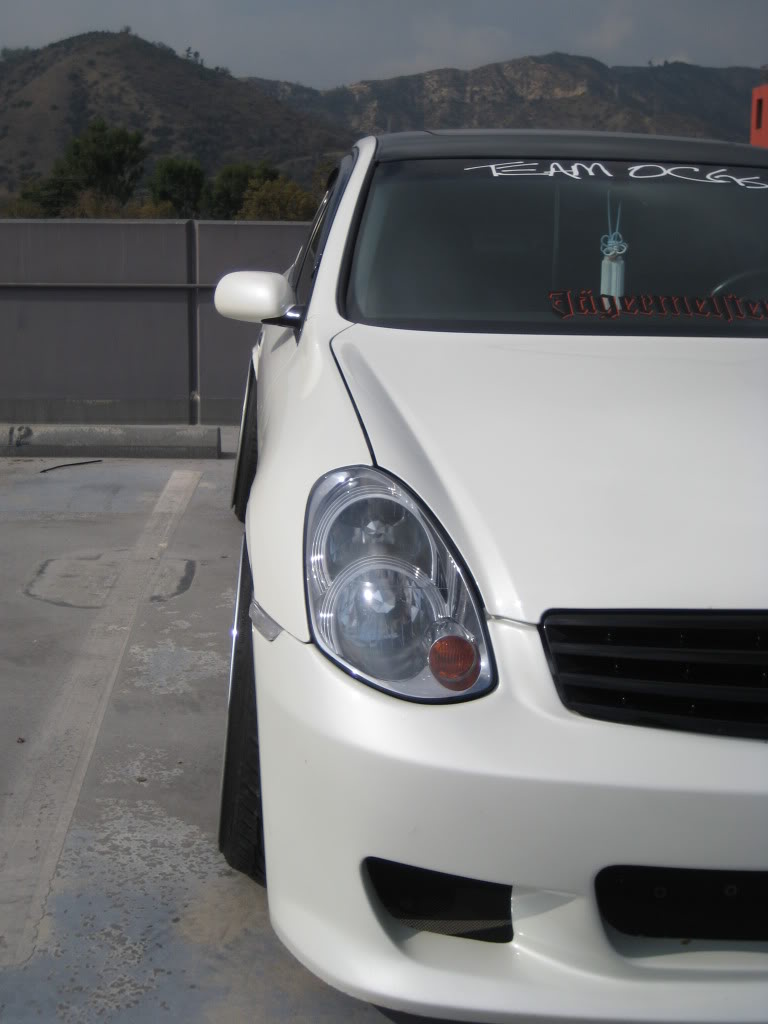
8K HID's and 3K HID Fogs
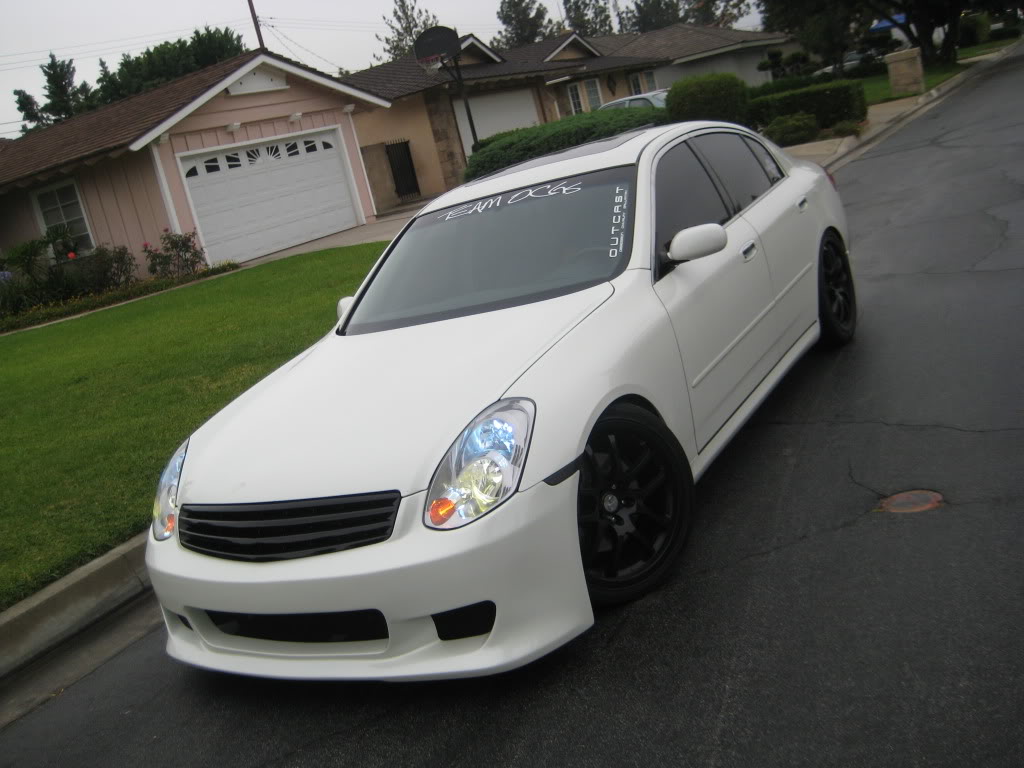
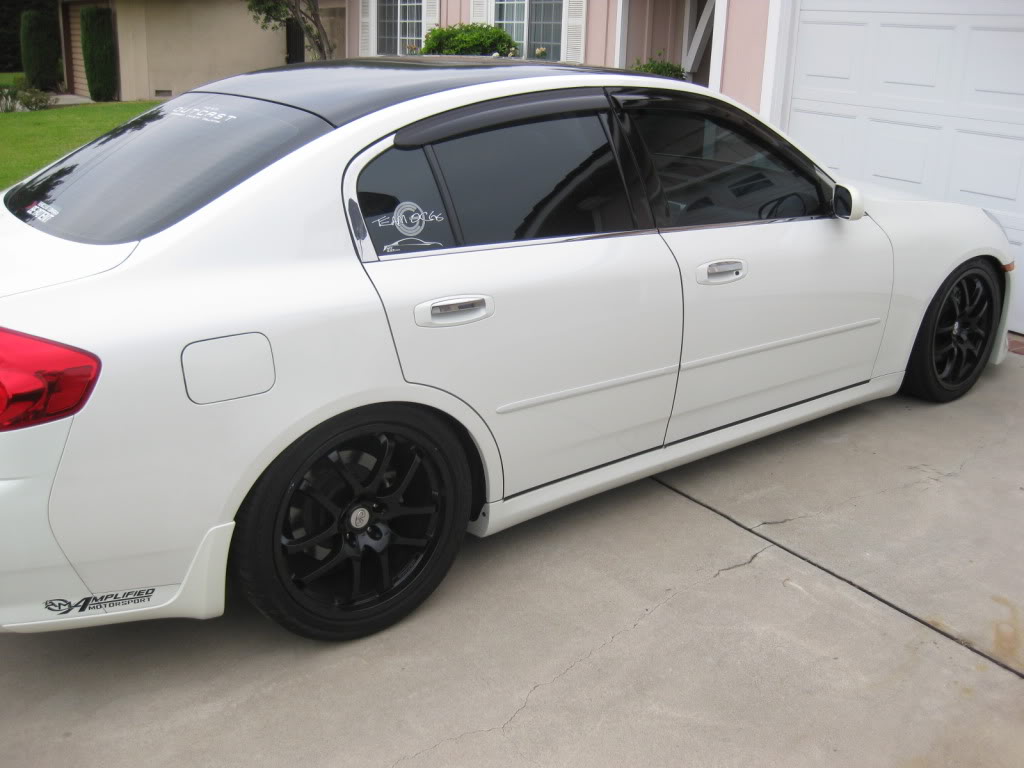
Roof Overlay & JDM Visors
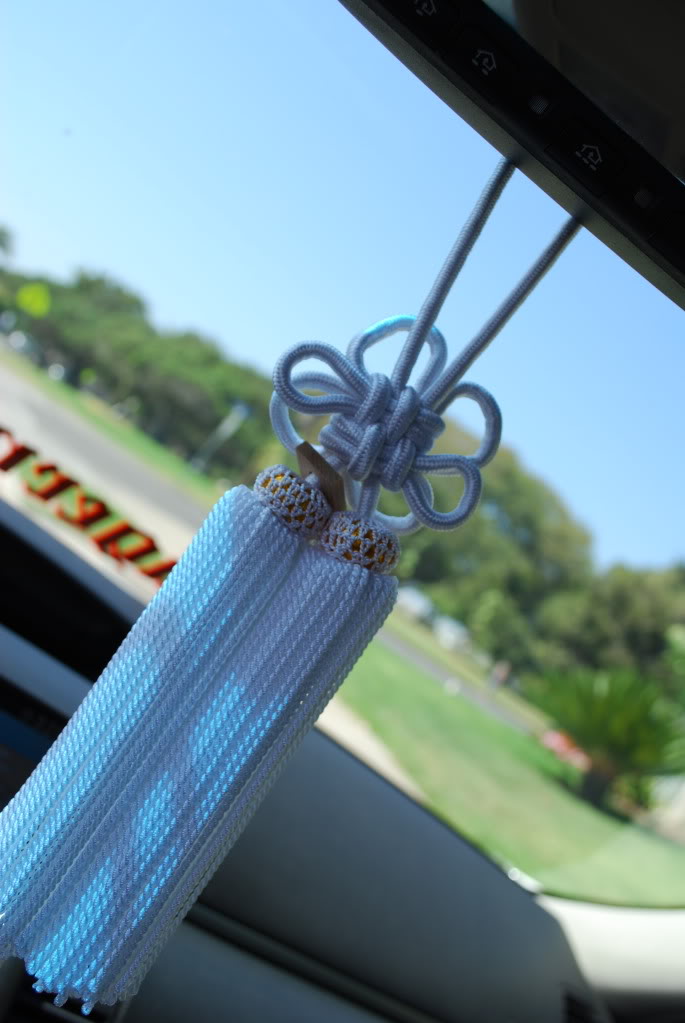
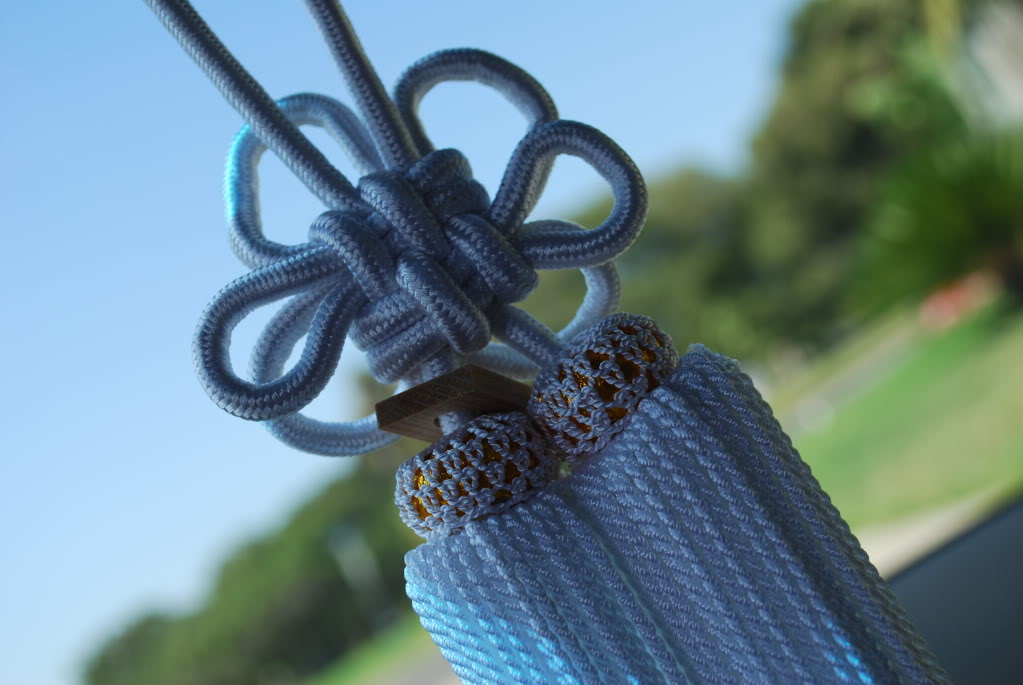
Junction Produce Fusa
I didn't always have this idea. In fact, some of what I have done to my car to this day I disliked in the past, but it grew on me and it inspired me to do more. I'll be posting quite a bit of pics, because eventually, almost every aspect of the vehicle will be changed. Let's start with the first chapter....OEM!
First Mod: JWT Pop Charger w/Z tube
Soon after I got the Motordyne 5/16" plenum spacer.
HKS Axleback
Before
After
20" Moz Tower 5 wheels
20x8.5 +34 all around. Tires were 225/30.
Debadge
Infiniti emblem came off a couple days later.
Sound deadening
I was a lucky winner in a raffle and got some free Second Skin Damplifier Pro. 13 sq. ft. Enough for the entire trunk lid, include a little on the inside.
And some on the license plate
Tein Basics, Larger Tires, OEM Front Lip, Emblem Paint & Muffler Delete (Walmart Tip FTW)
Got the first suspension setup on and matched the new tires up with some 245/35's all around. Also added the OEM front lip and painted the G35 black since the paint had chipped when debading it.
Fully painted (black) sidemarkers, 17" OEM's painted matte black, & ghey Tein Emblem
Painted Engine Cover
2nd Suspension Setup: Function & Form Type II & OEM 19's
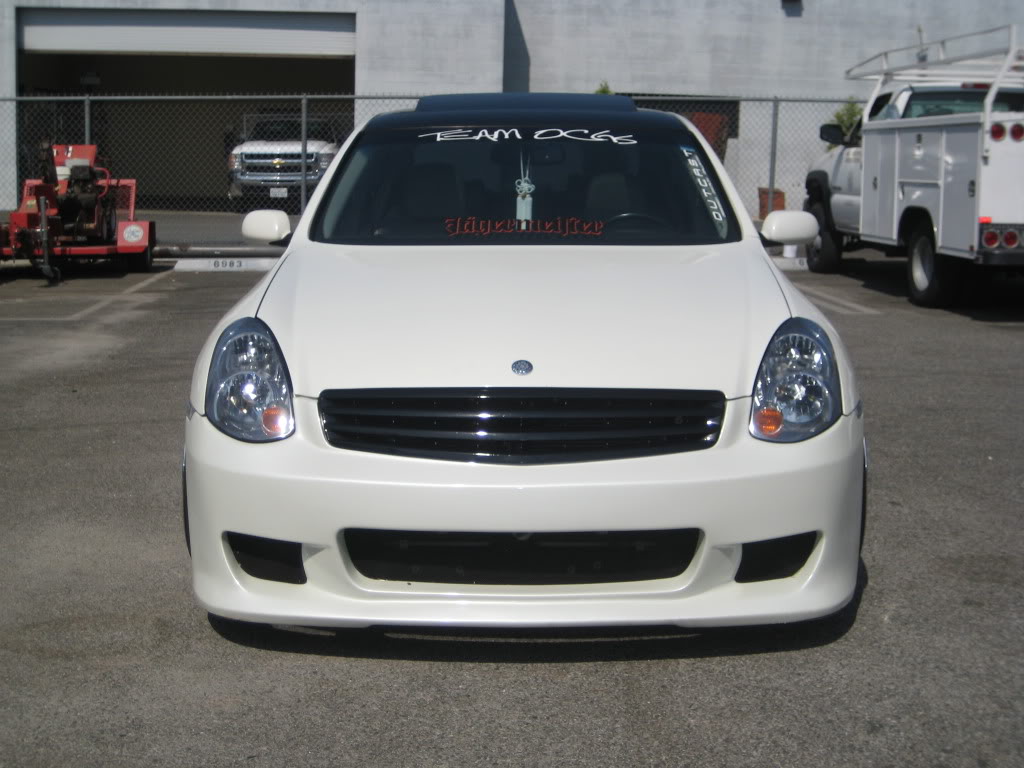
Emblemless Grill
3rd Suspension Setup: Impul Ohlins & Hotchkis Sway Bars
What a huge upgrade. I wish I could keep these to put on bags, but I don't think the bags would go over the streets. Performance was immaculate and noticeable during daily driving. Don't really have pics of sways, but you can see the front ones in these pics.
Painted Gloss Black OEM 19's
Karookie Bumper & 4th Suspension Setup: HKS Hypermax III (Non-sport)
In some pics I had the Ohlins still on, in others the HKS are on.
8K HID's and 3K HID Fogs
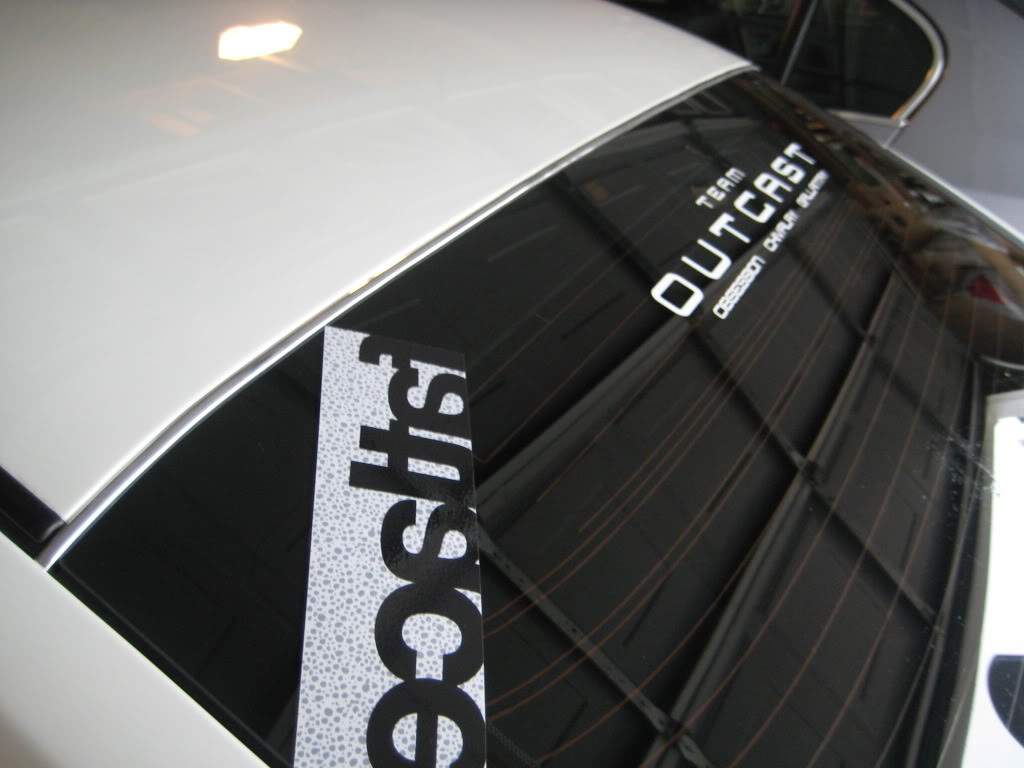
Roof Overlay & JDM Visors
Junction Produce Fusa
Last edited by The Stimulation; Oct 12, 2009 at 11:57 PM.
Joined: Aug 2007
Posts: 10,850
Likes: 158
From: Los Angeles
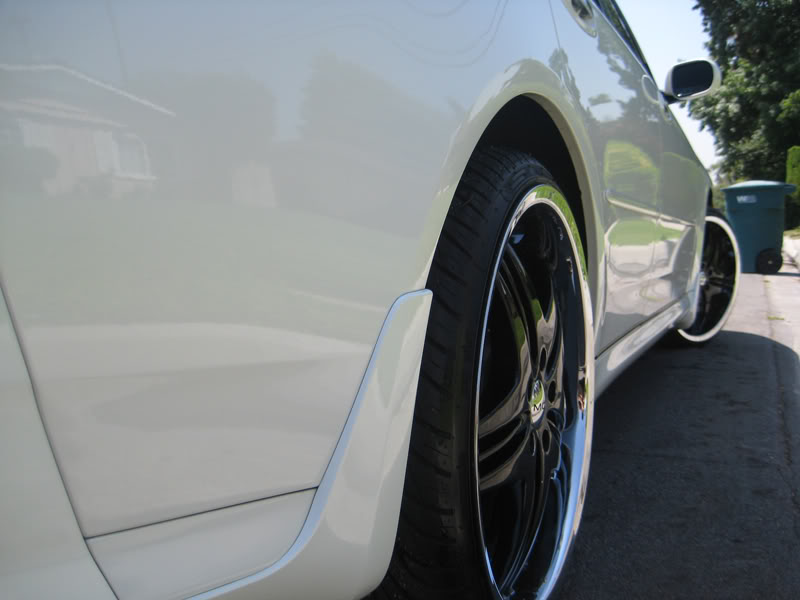
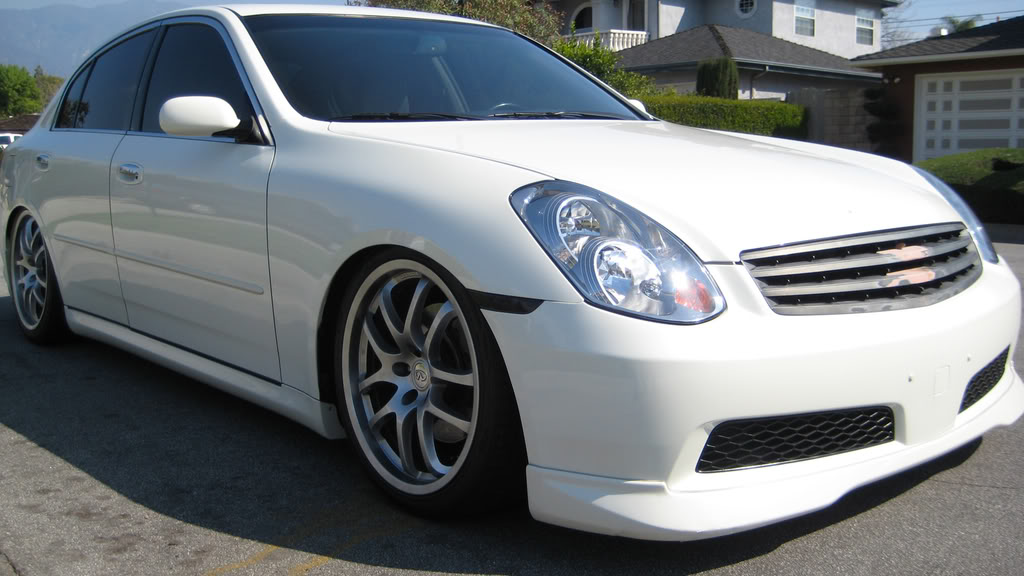
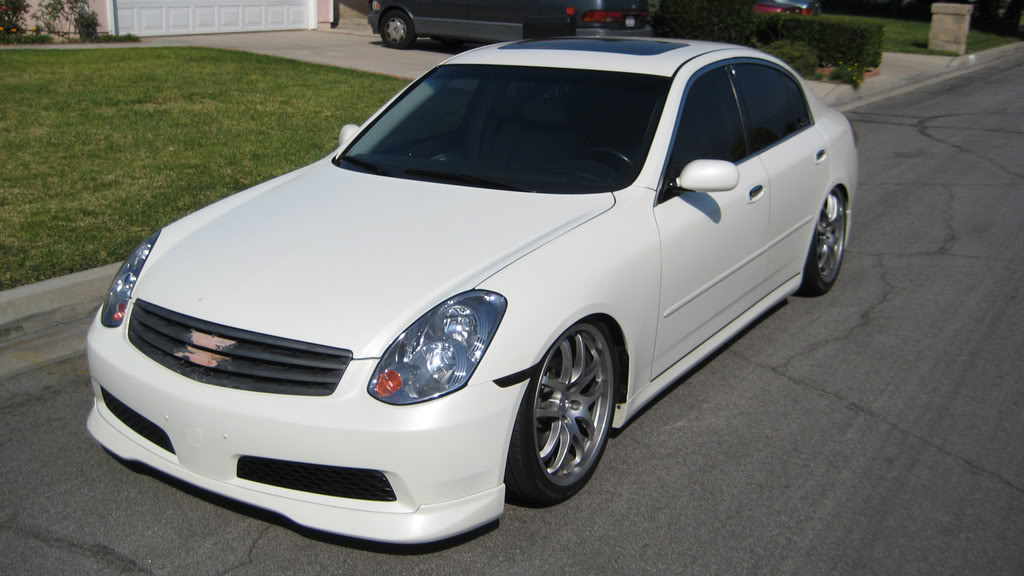
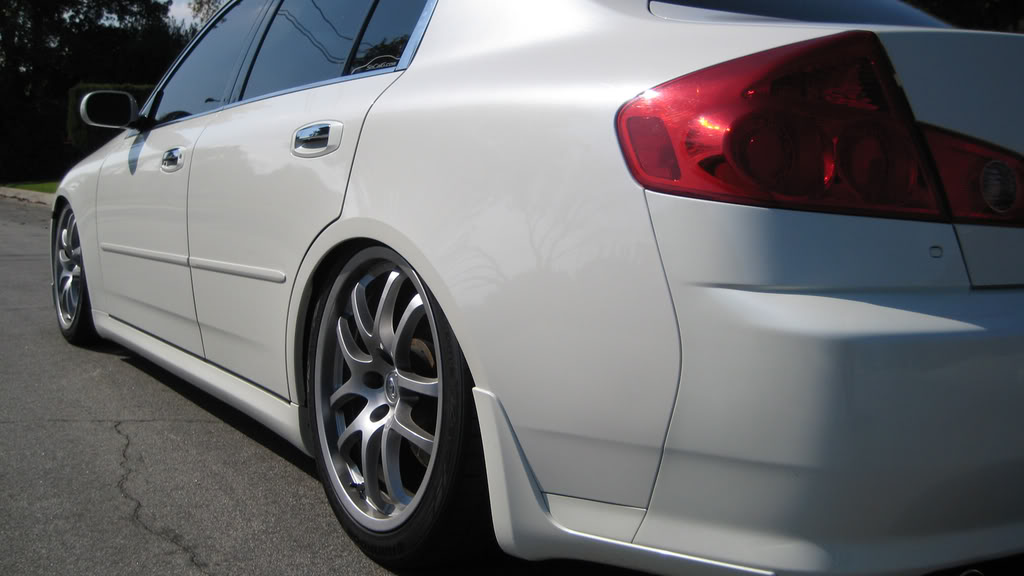
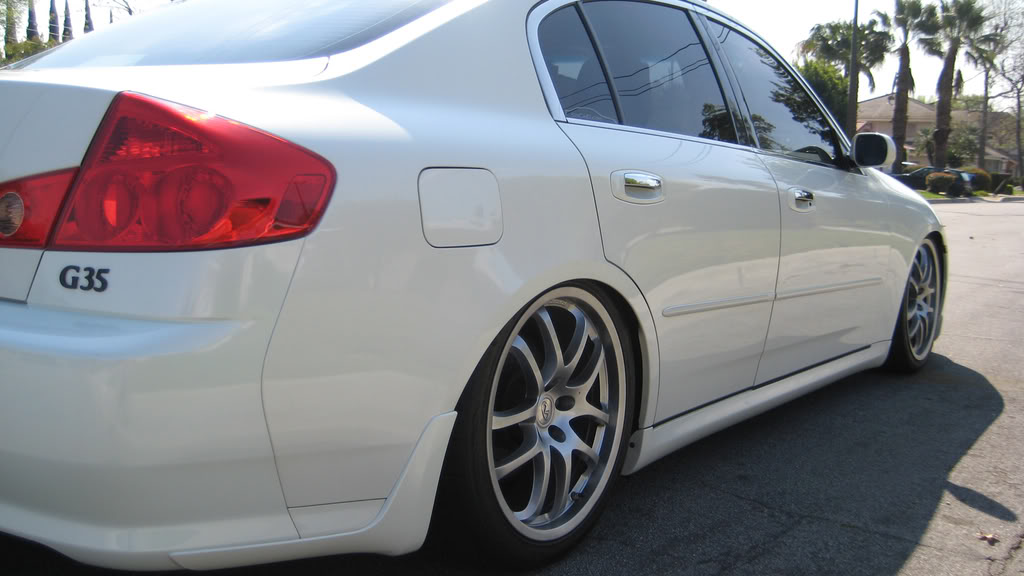
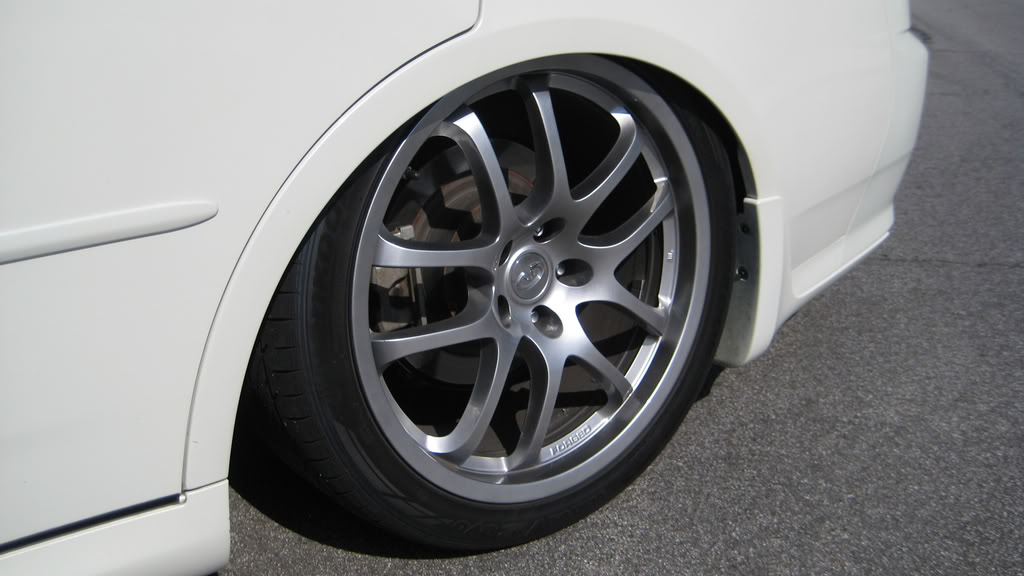
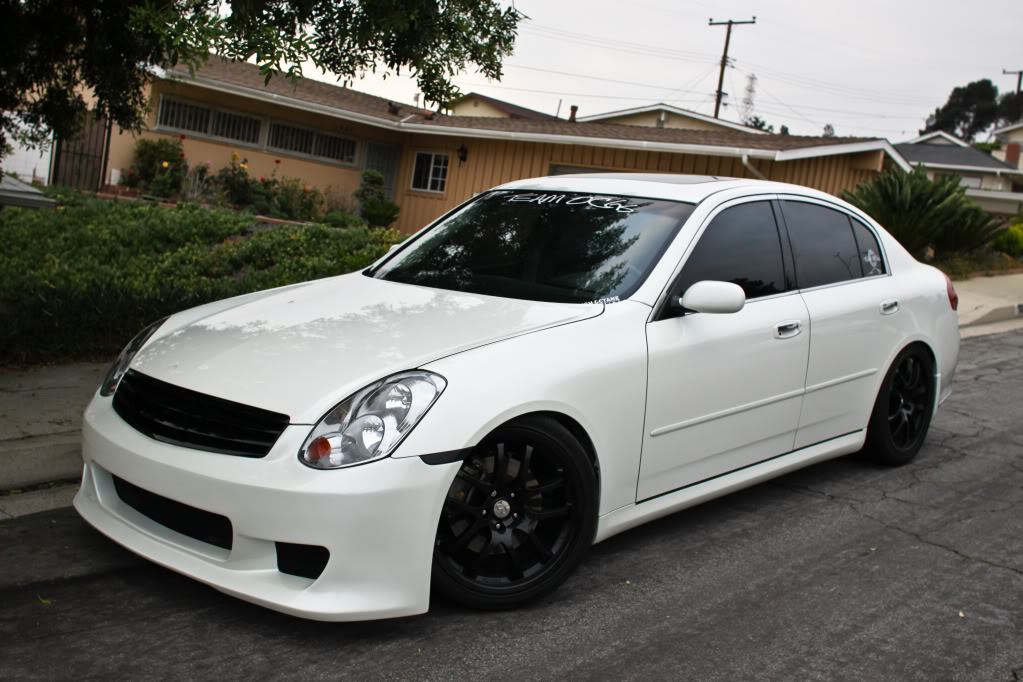
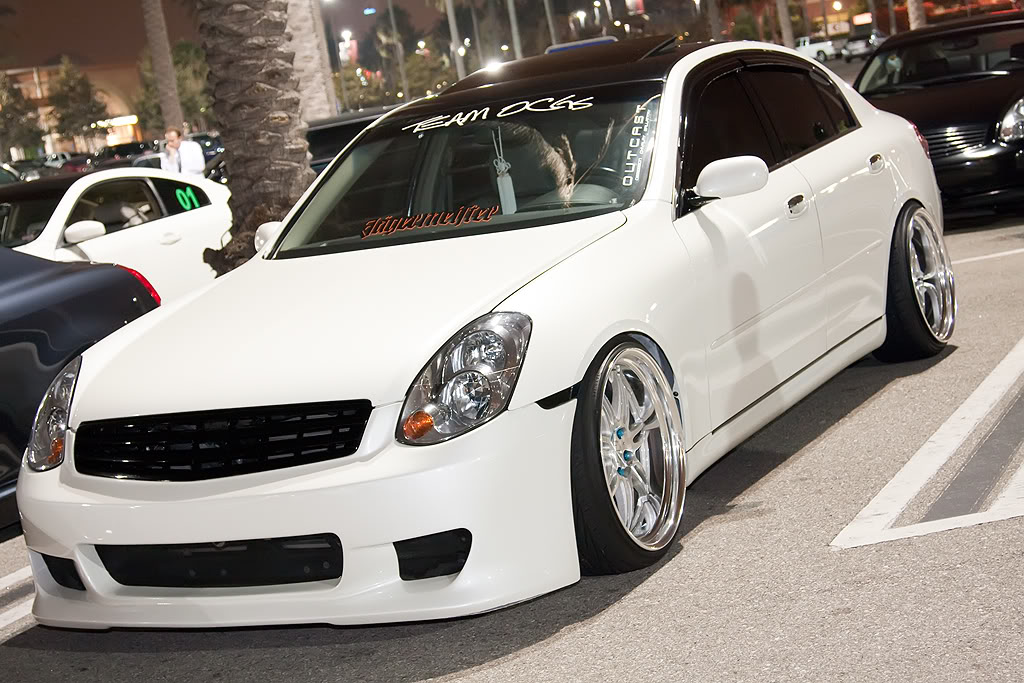
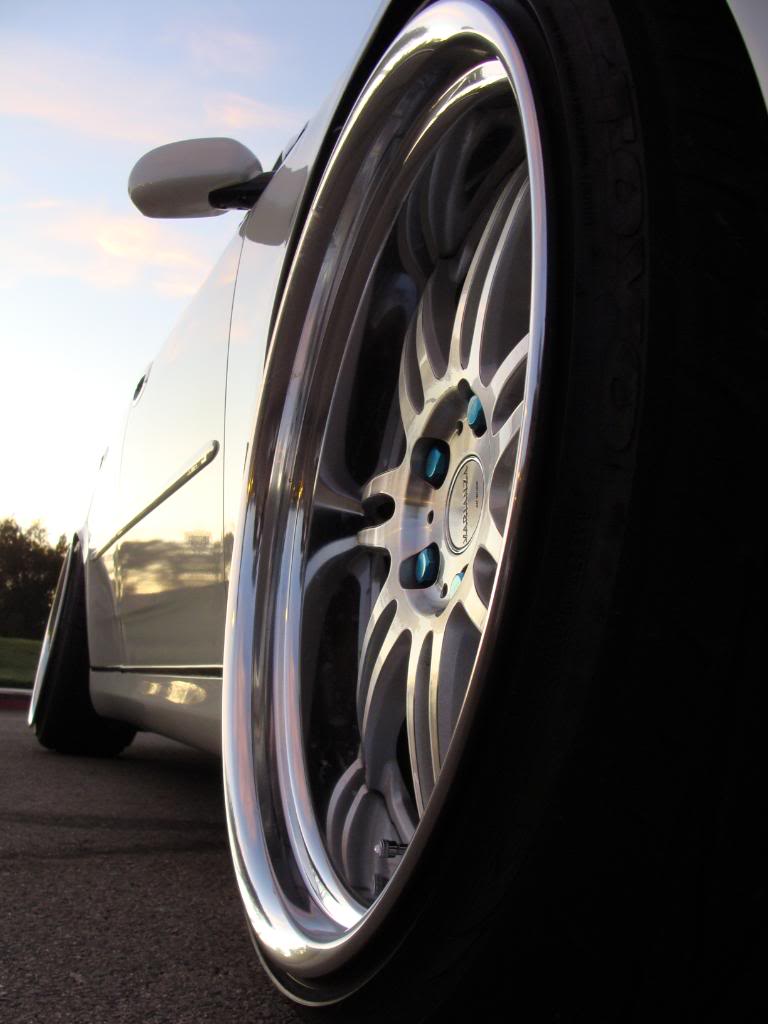
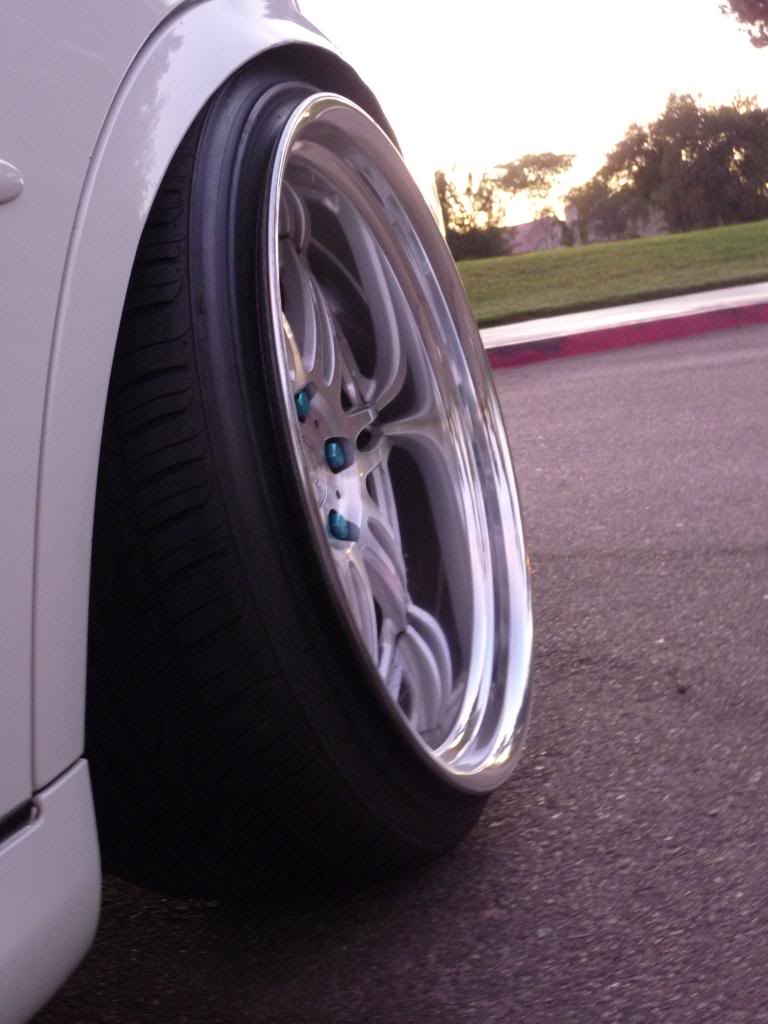
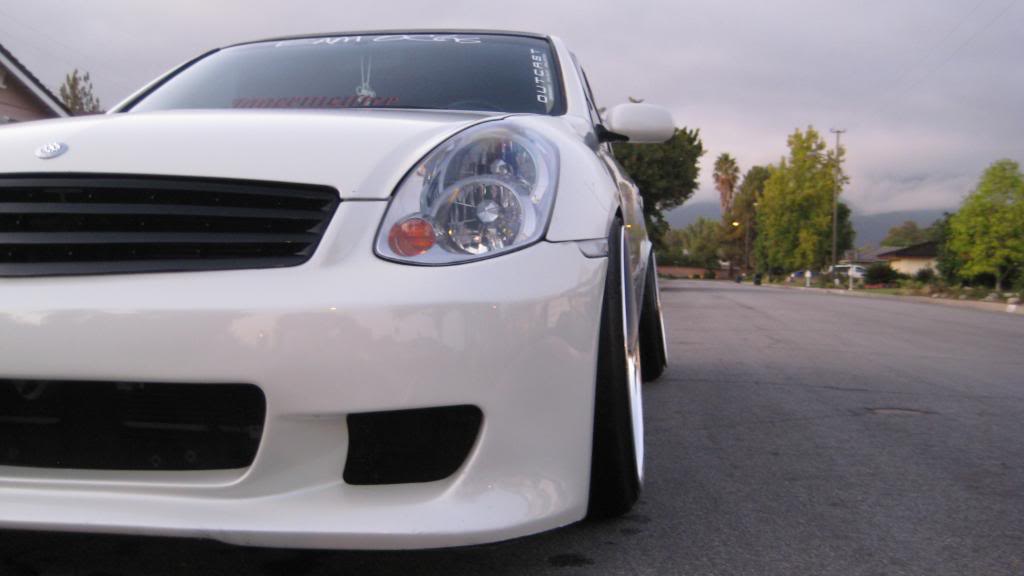
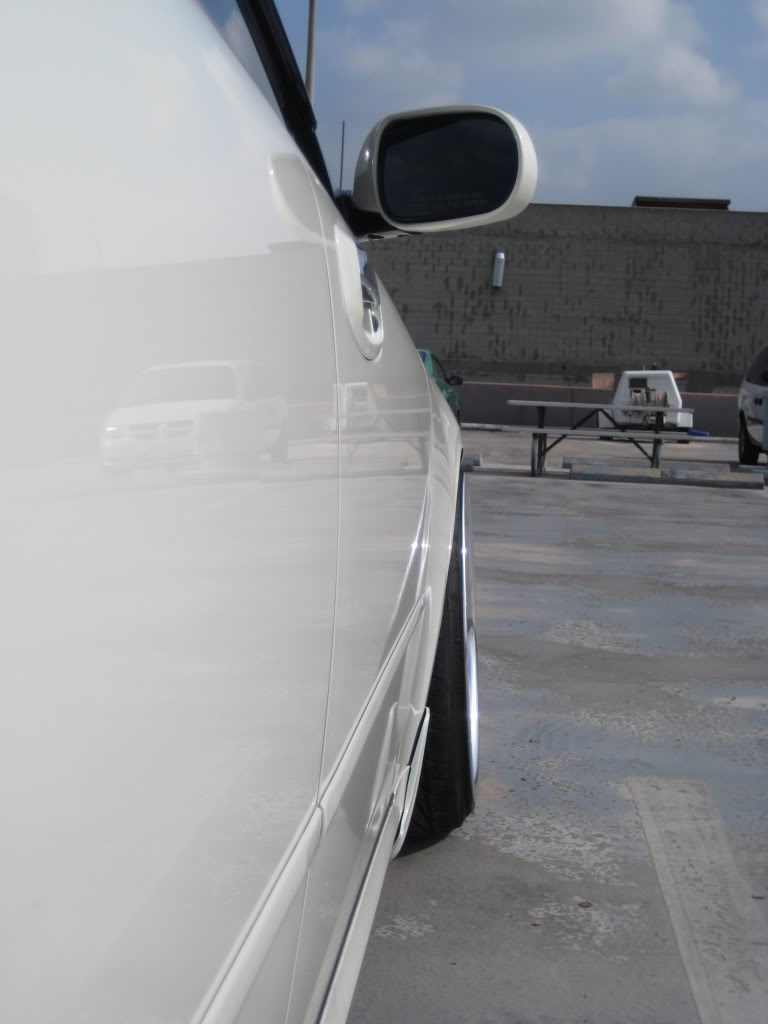
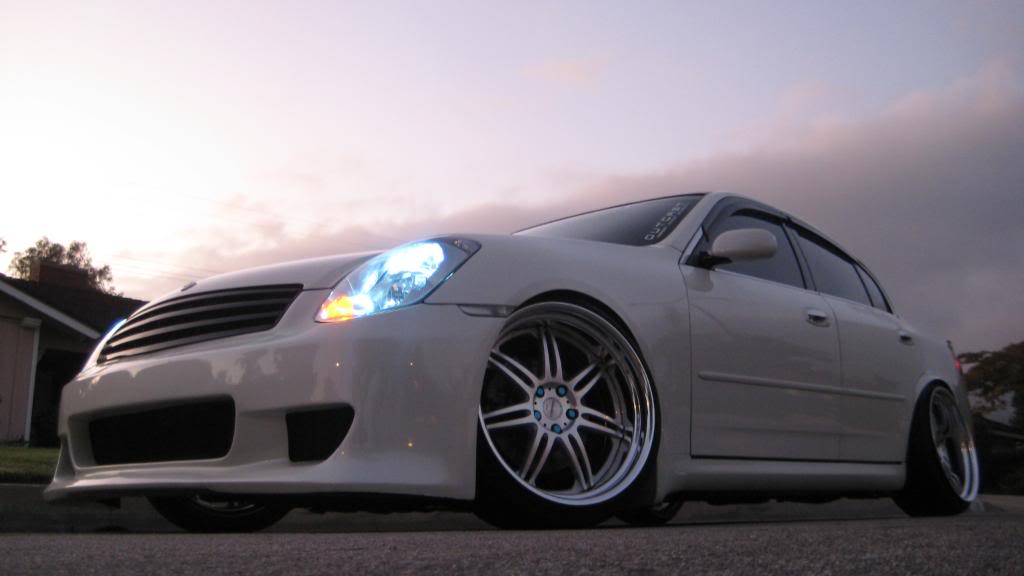
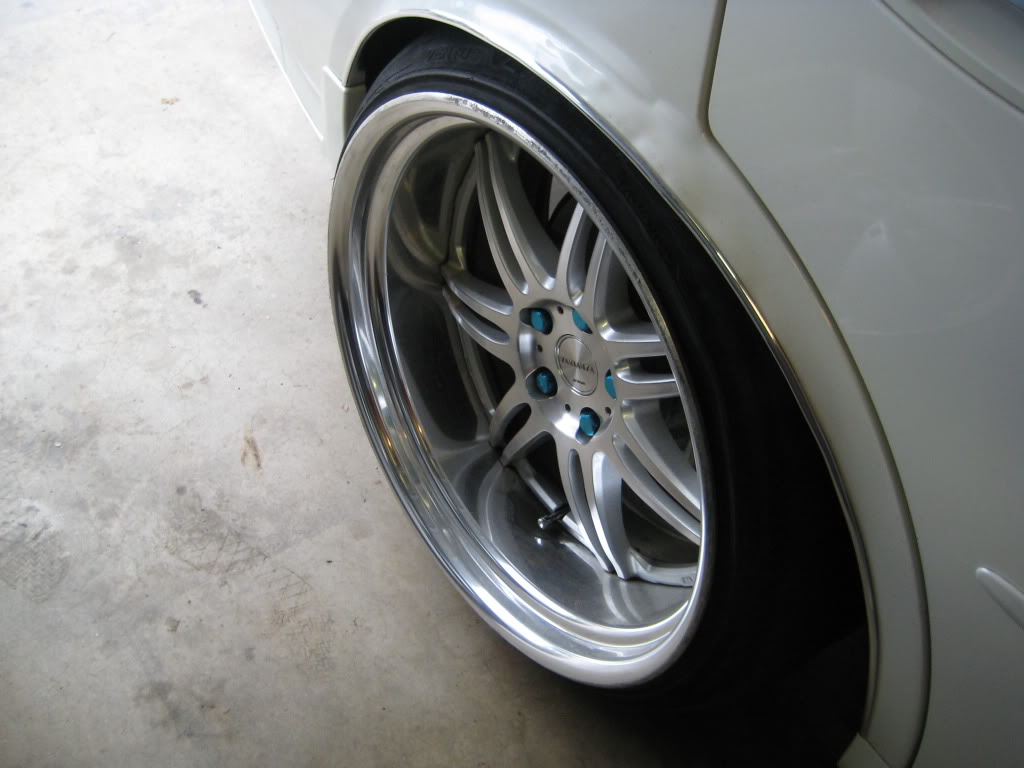
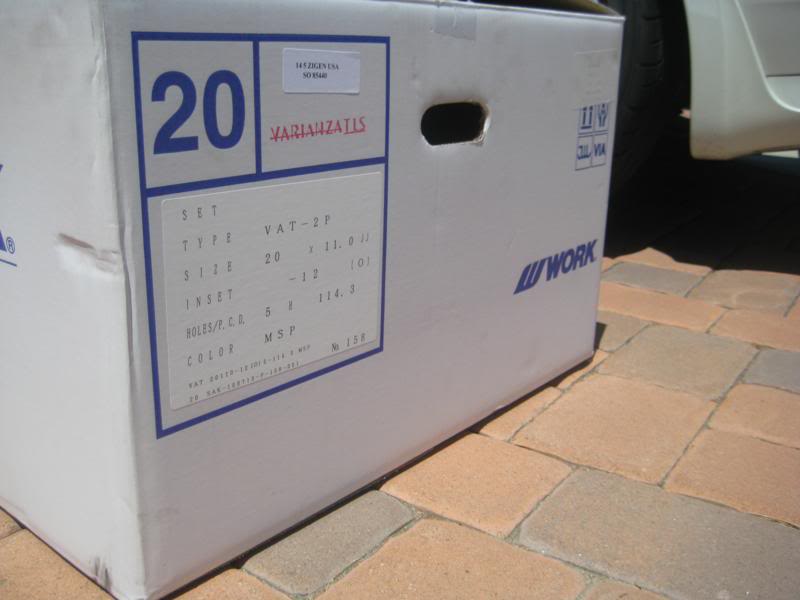
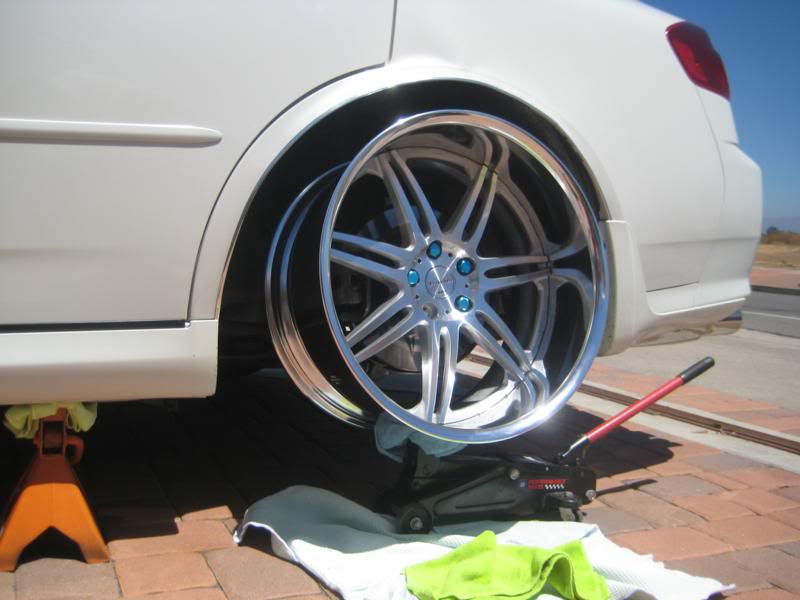
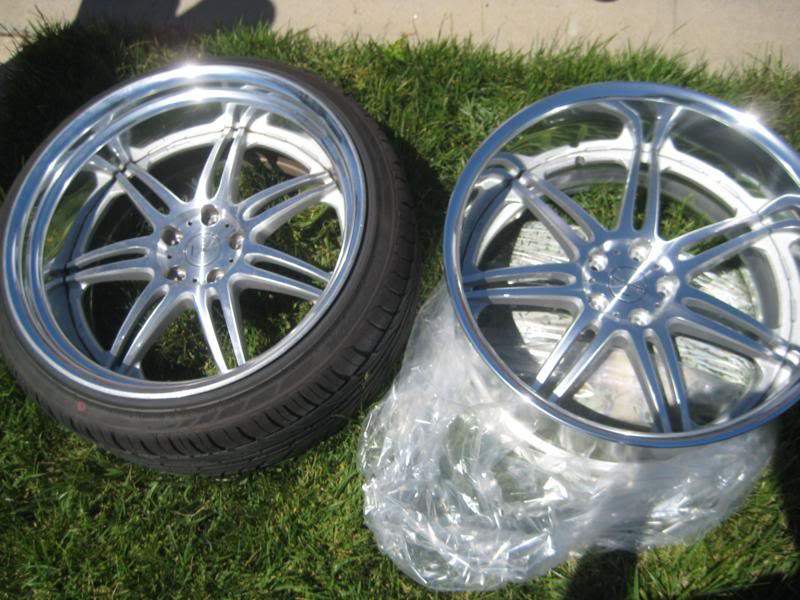
20" Work Varianza T1S (step lip), 5th Suspension Setup: Stance GR+ True Coilovers, Garson Valve Stem Caps, & Battle Version Camber Arms
Wheel specs: (F)9.5 +3 w/225/35 tires, (R)10.5 +0 w/225/35 tires. Fronts are HKS still since I have an issue with the damper clicker, should be fixed soon. This is when I started wanting to go with the VIP look.


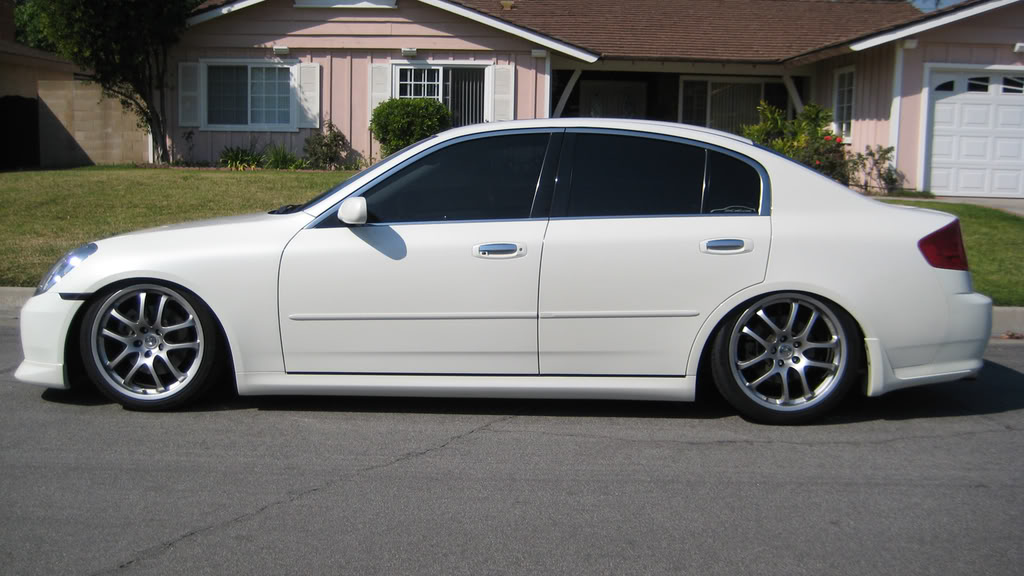
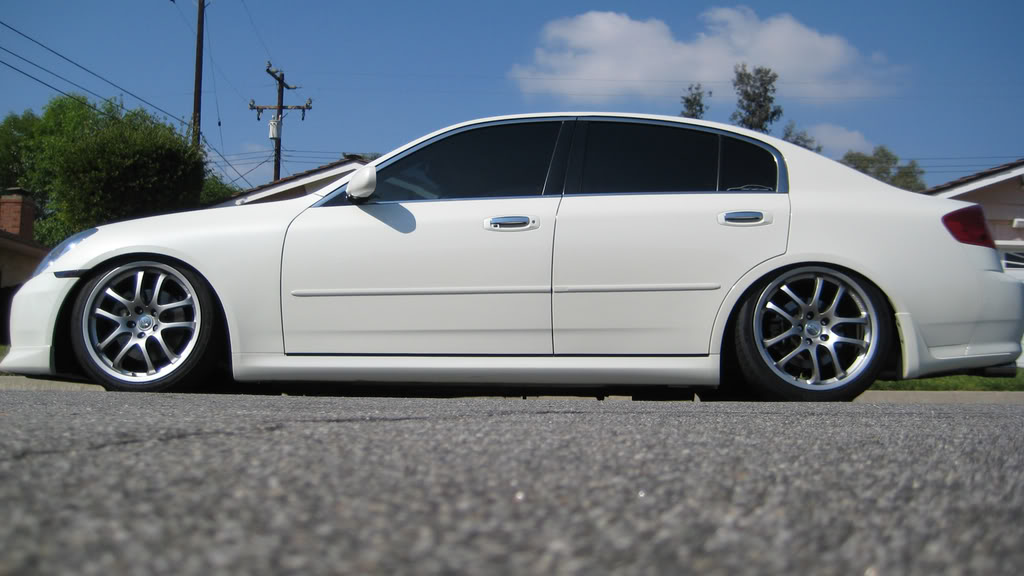
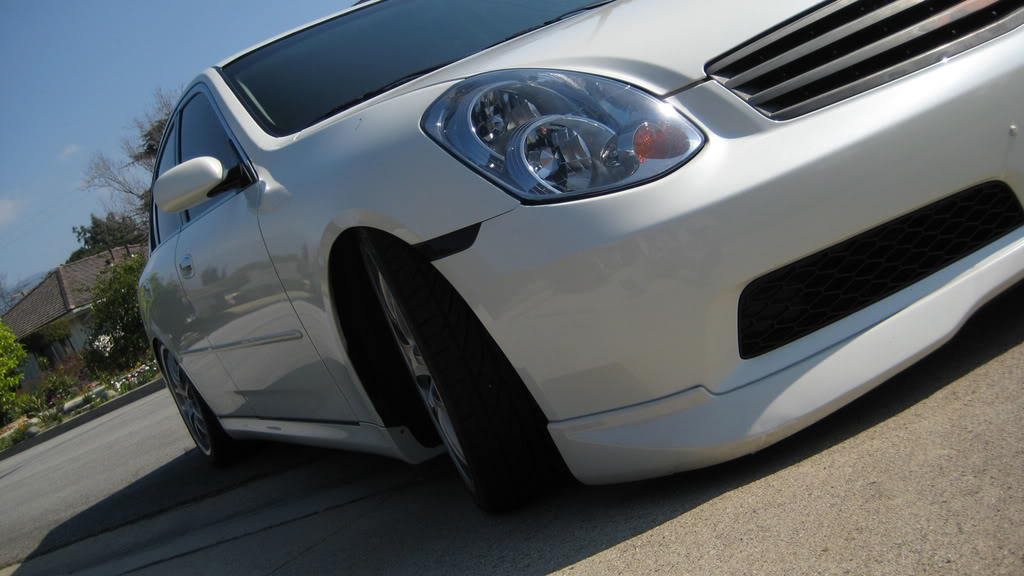
Camber & Fender Work and Battle Version Toe Arms Installed
Tires rubbed on the fender so I added some negative camber. Currently at -7.5 degrees. Had some more fender work done, lots of pull and a little flare. This is the point where I was truly inspired to go with the VIP theme, basically go all out. Before I was just testing the waters.

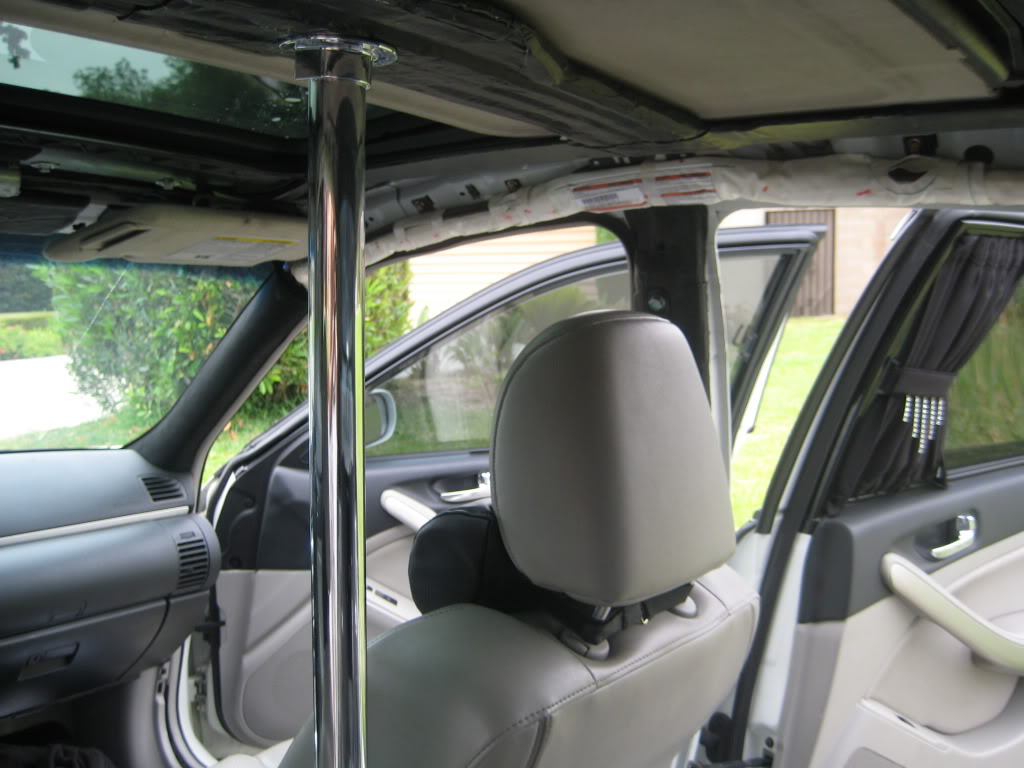
Stripper Pole


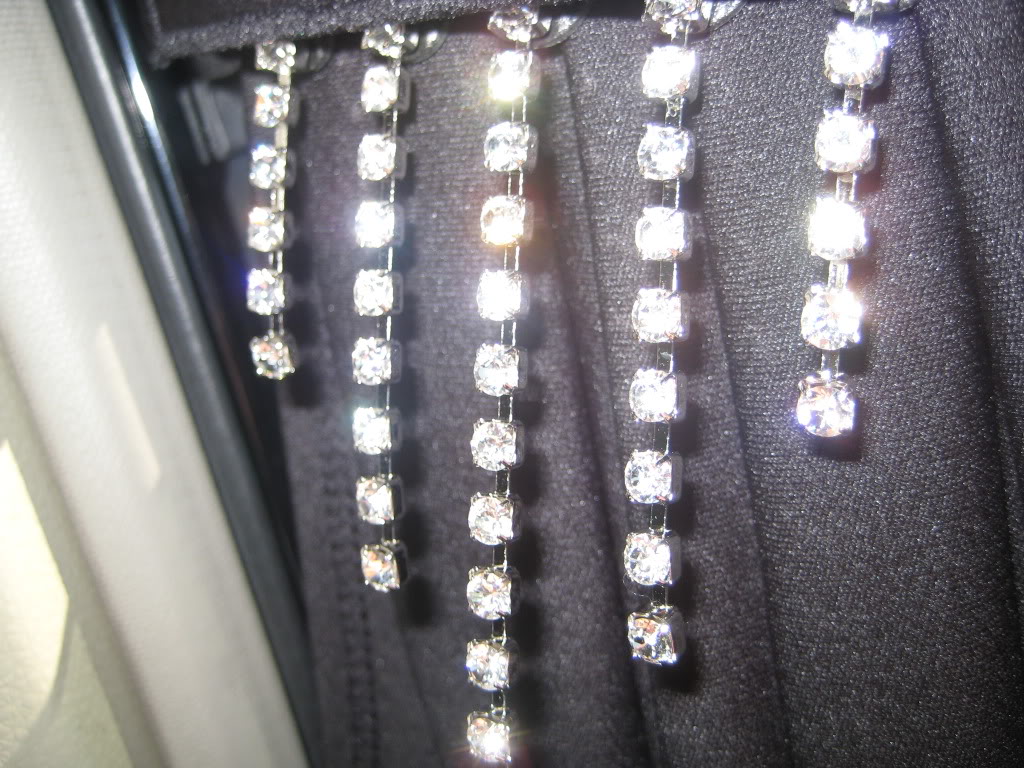
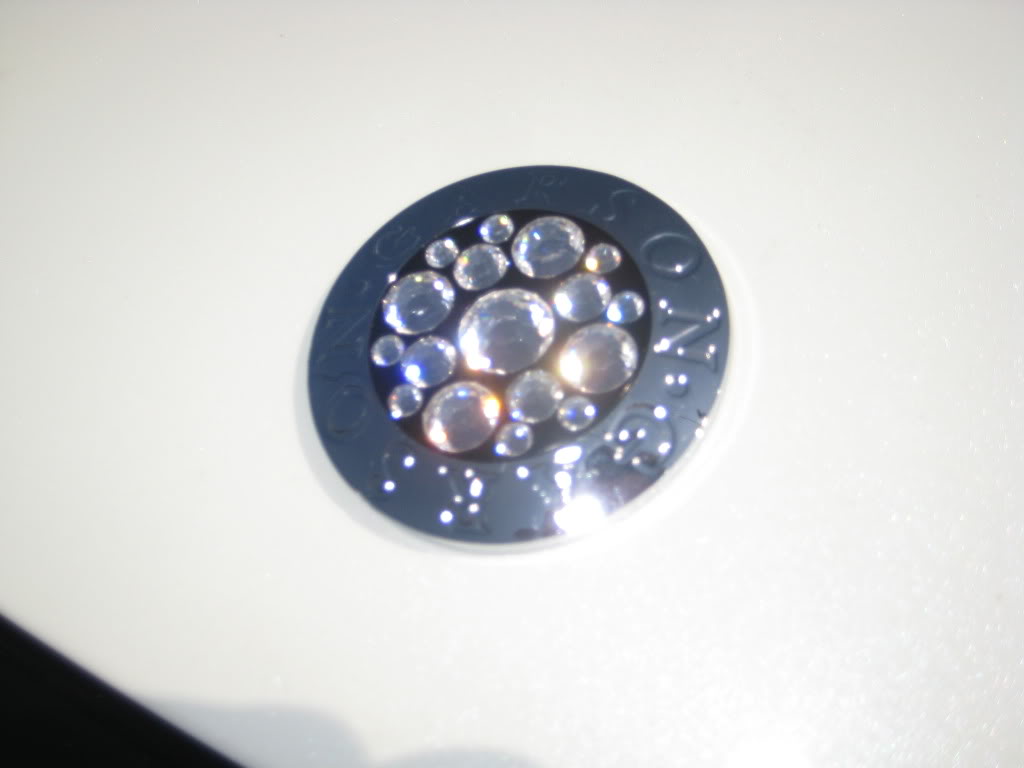
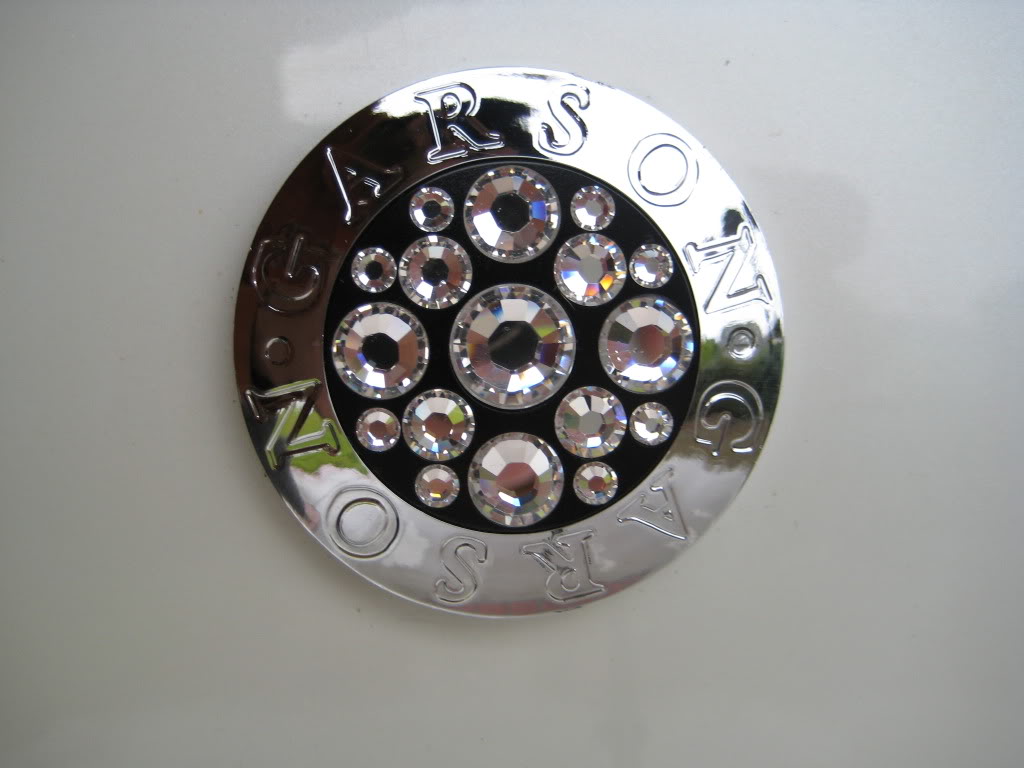
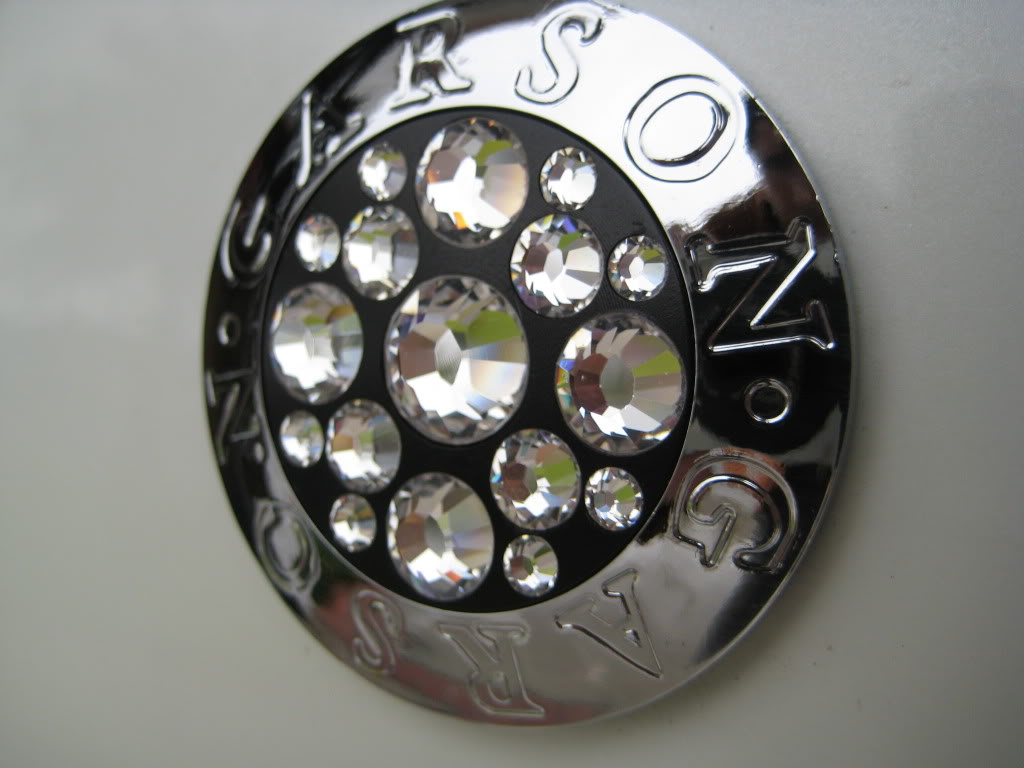
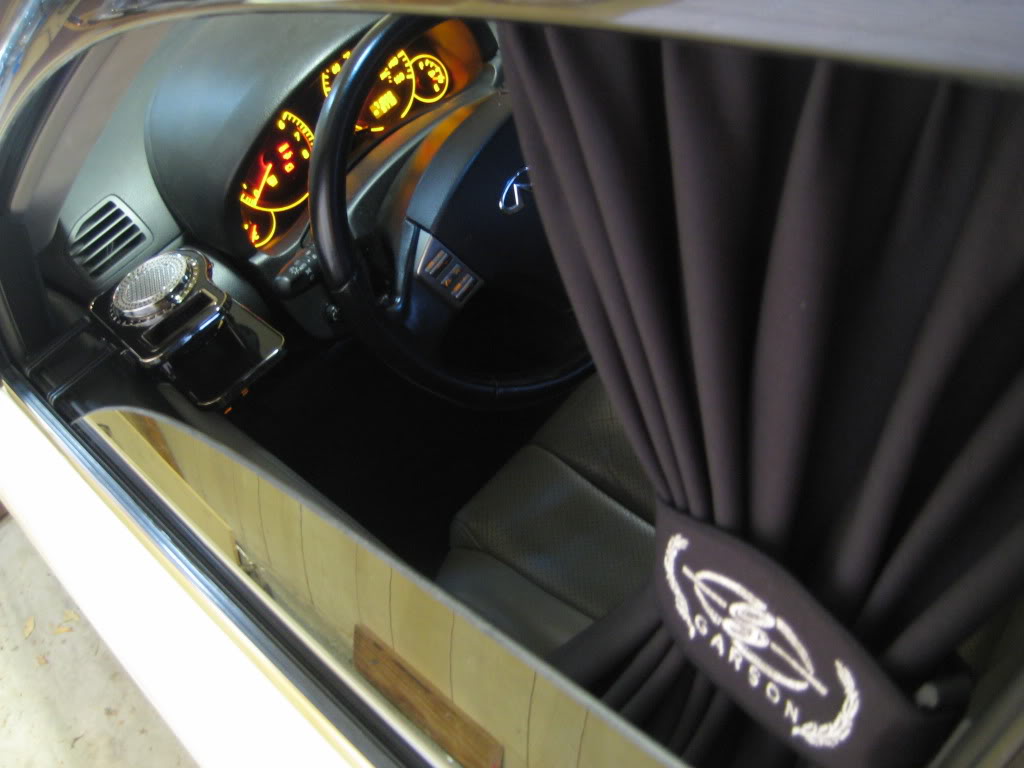
Garson Curtains & Garson Hood Badge


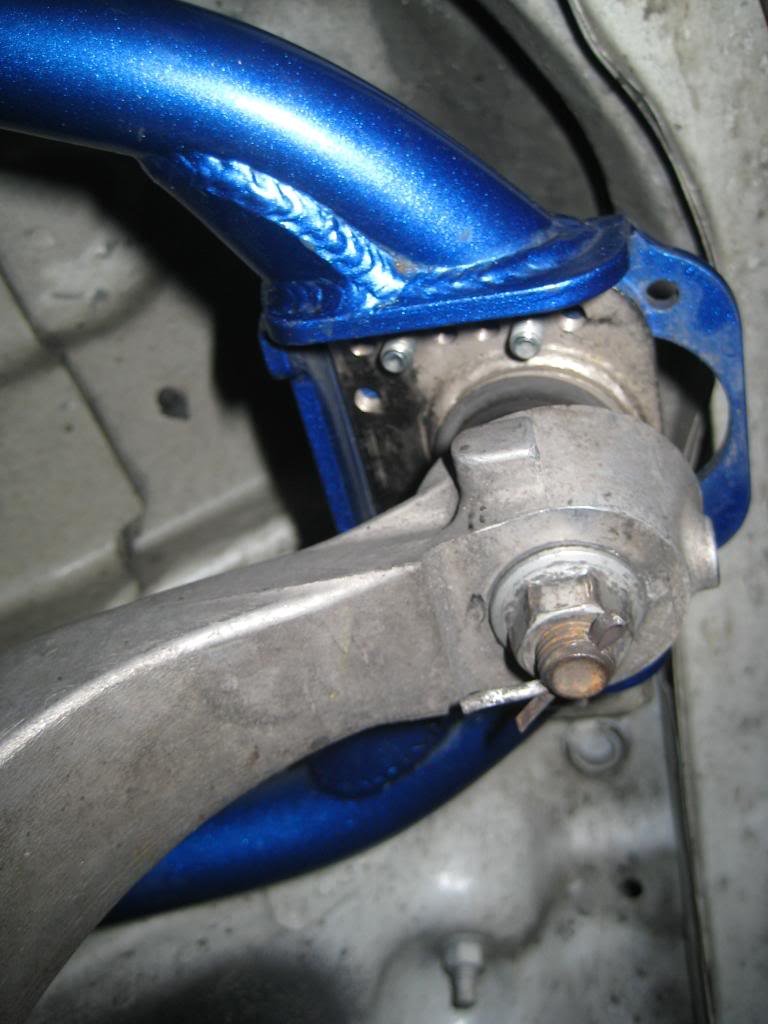
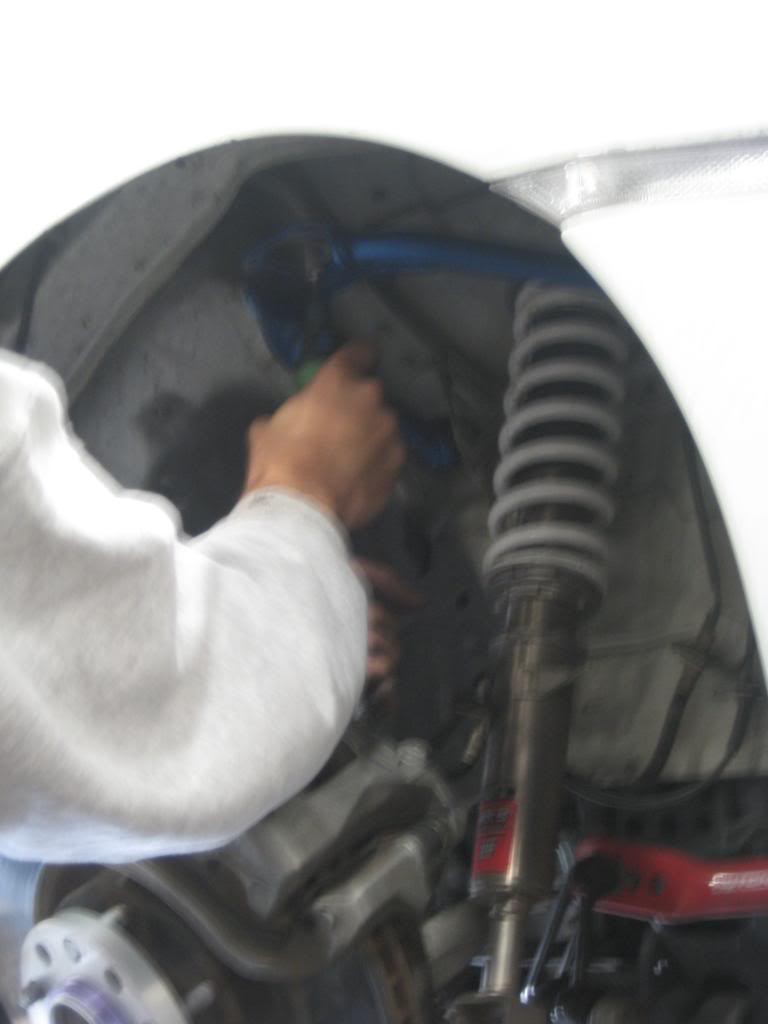
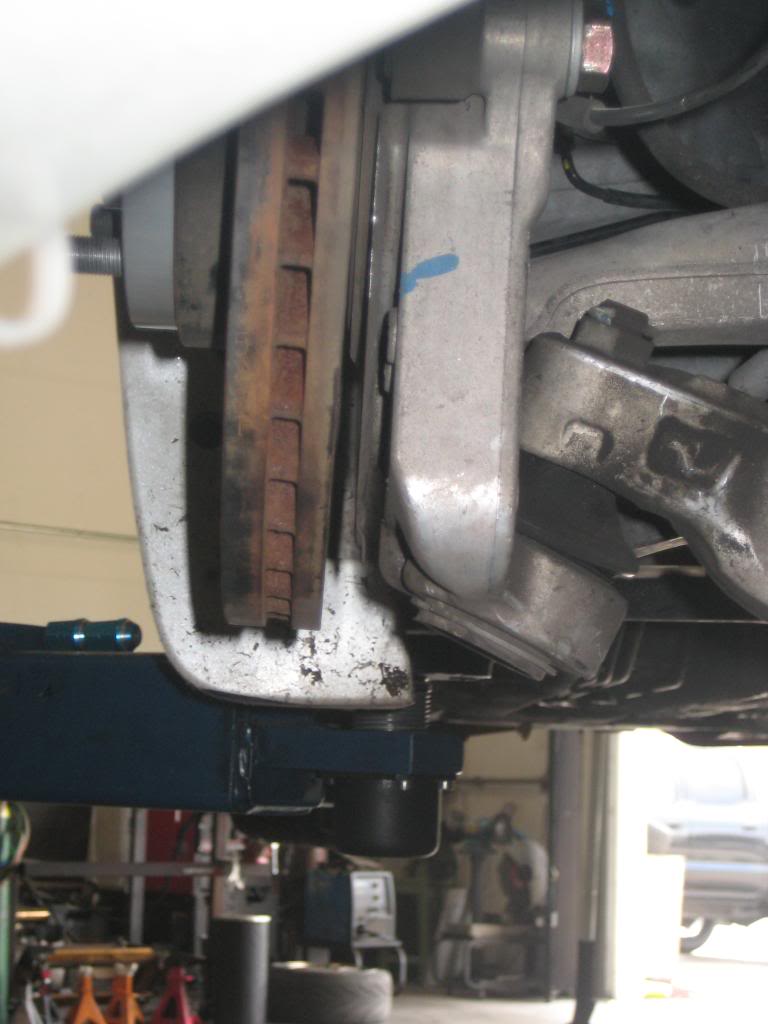
Installed & Modified Cusco Front Upper A Arms, Cambered Front More
Got some work done last week, and again thanks to Alex from Battle Version for hookin it up
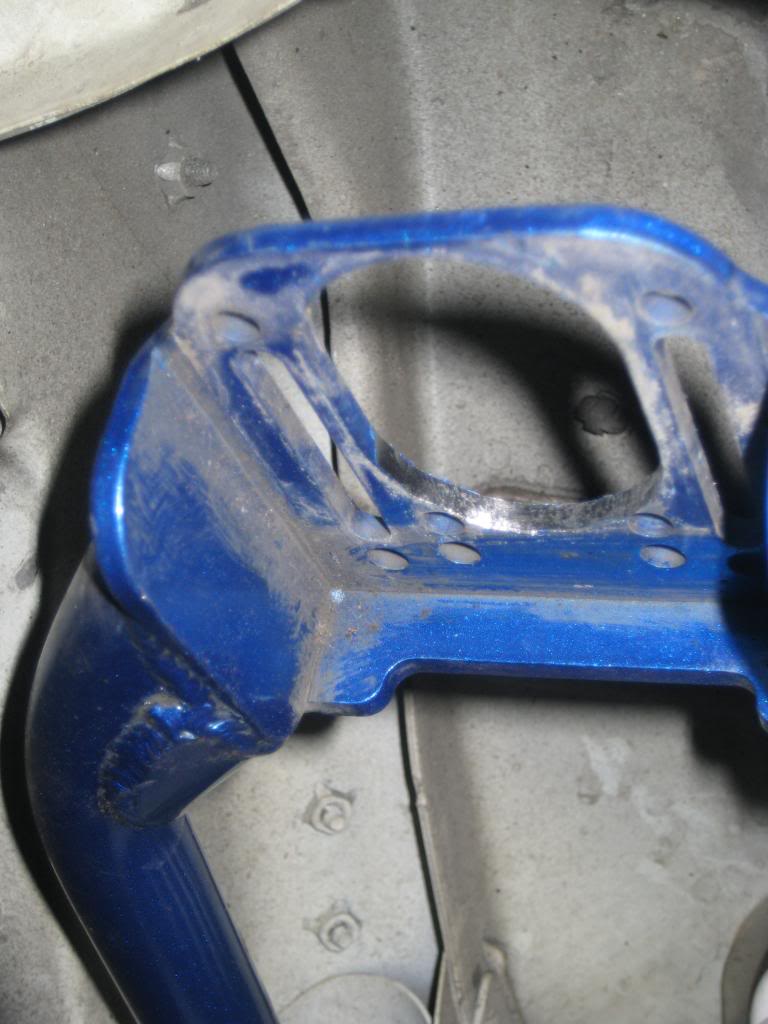
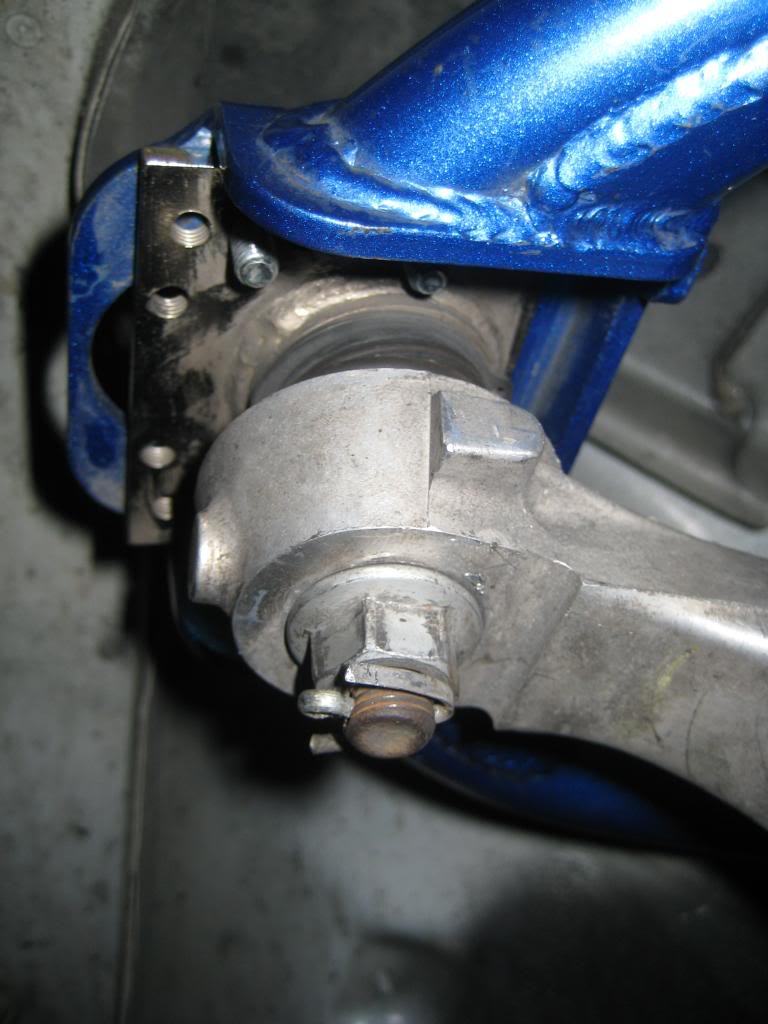
I got some Cusco Negative A Arms for the front, got -4.1 degrees of camber but it wasn't enough. The metal plate was flipped around and the inner part of the camber arm was dremeled out to get the plate to fit. Doing so got me an extra 0.6 degrees of negative camber.
I also put on some 15mm spacers up front, now having a -12 offset on a 9.5. Had some rubbing issues where the sidemarker bracket is so Alex trimmed some of it off and now I have virtually no rubbing (unless the car rebounds alot).
I also decided to fix my bumper. On the both the left and right side on the bottom it had split open from scraping so I fiberglassed a couple layers and made it good as new.
How pretty much everyone's upper A arms look
In progress modification
Ahhh....nice. Another 0.6 degrees of camber achieved.
Before upper A arms installed
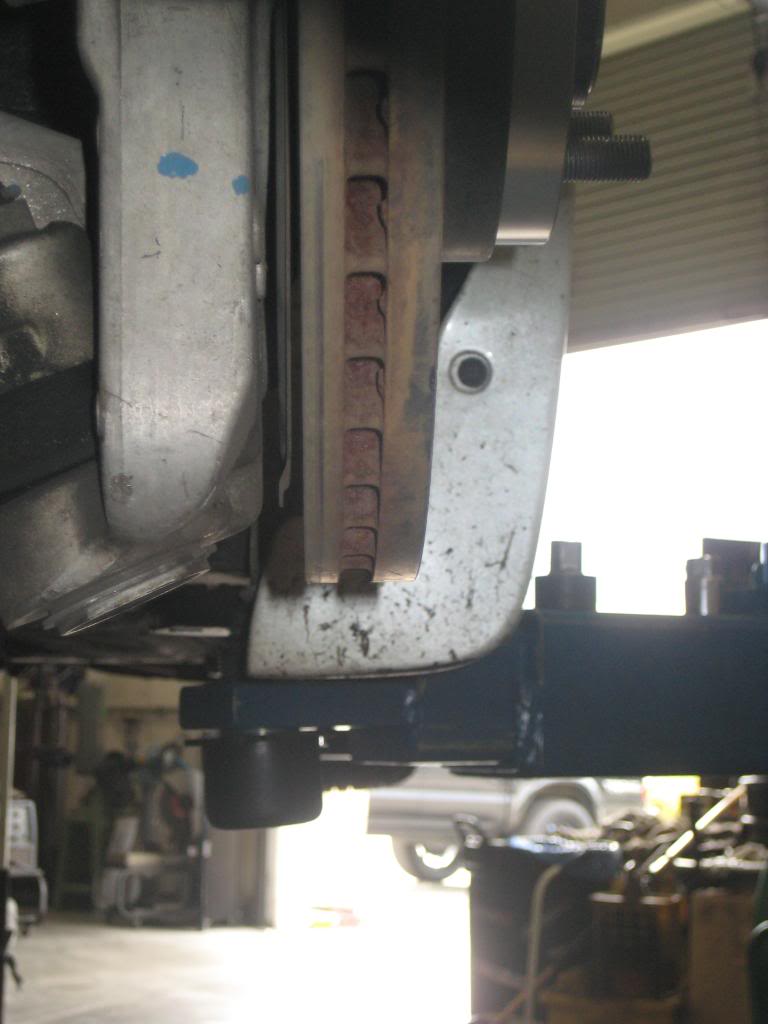
After upper A arms installed
Some temporary pics

Looks like I got spotted by someone on the Zilvia (240 forums) on my way to get some fatter tires put on in the rear. I was careless and didn't check my air at all since they were mounted. Low pressure + stretched tire = tire comes off. Luckily my rims were ok and so are the tires, but to play it safe, I ordered new tires since I wasn't sure...now that I have an extra set, I can use the ones I had in the rear up front. Rears are now 235/35's.
On the way to City Tire in South Gate...Props to John and the tire guys for squeezing me in last minute. Also thanks to 4Dr.Madness. for letting me borrow the donut so I could use my spare (which I left at home) and silverg35sport for bringing a jack (which I also had at home).


Updated pics with wider tires in the rear to come soon.
Also, a couple days ago I removed the roof overlay. Thinking about keeping it clean, more luxury, and the black overlay made it look more sporty. For some reason, in person the car looks lower.
Wheel specs: (F)9.5 +3 w/225/35 tires, (R)10.5 +0 w/225/35 tires. Fronts are HKS still since I have an issue with the damper clicker, should be fixed soon. This is when I started wanting to go with the VIP look.
Camber & Fender Work and Battle Version Toe Arms Installed
Tires rubbed on the fender so I added some negative camber. Currently at -7.5 degrees. Had some more fender work done, lots of pull and a little flare. This is the point where I was truly inspired to go with the VIP theme, basically go all out. Before I was just testing the waters.
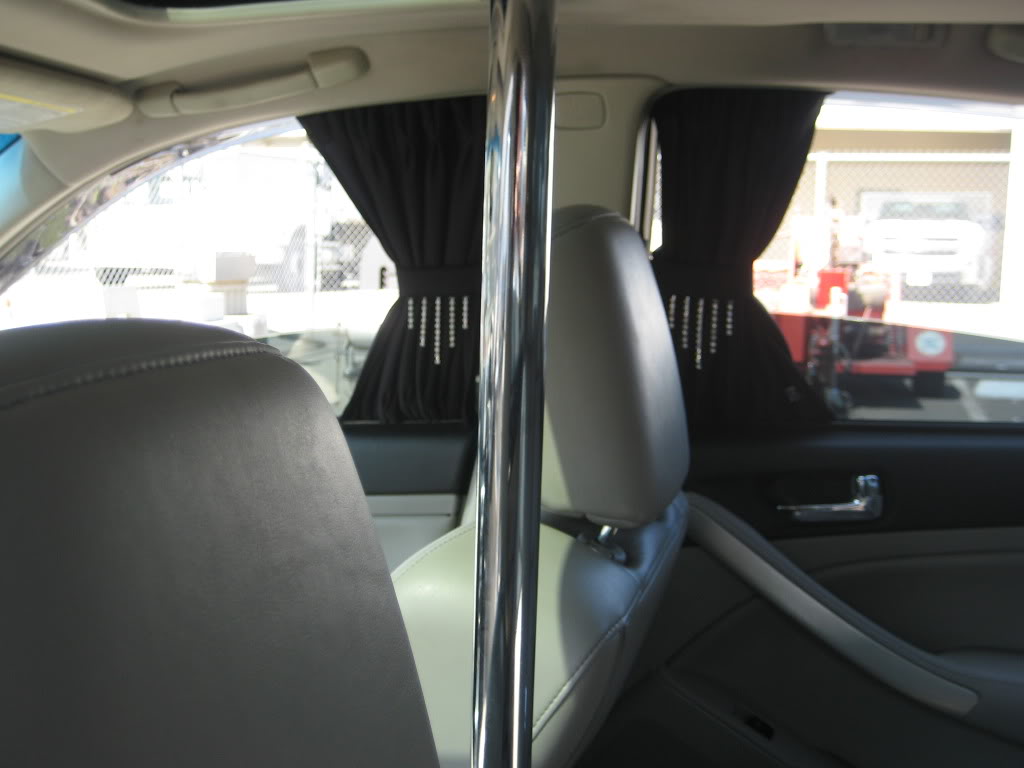
Stripper Pole
Garson Curtains & Garson Hood Badge
Installed & Modified Cusco Front Upper A Arms, Cambered Front More
Got some work done last week, and again thanks to Alex from Battle Version for hookin it up
I got some Cusco Negative A Arms for the front, got -4.1 degrees of camber but it wasn't enough. The metal plate was flipped around and the inner part of the camber arm was dremeled out to get the plate to fit. Doing so got me an extra 0.6 degrees of negative camber.
I also put on some 15mm spacers up front, now having a -12 offset on a 9.5. Had some rubbing issues where the sidemarker bracket is so Alex trimmed some of it off and now I have virtually no rubbing (unless the car rebounds alot).
I also decided to fix my bumper. On the both the left and right side on the bottom it had split open from scraping so I fiberglassed a couple layers and made it good as new.
How pretty much everyone's upper A arms look
In progress modification
Ahhh....nice. Another 0.6 degrees of camber achieved.
Before upper A arms installed
After upper A arms installed
Some temporary pics
Looks like I got spotted by someone on the Zilvia (240 forums) on my way to get some fatter tires put on in the rear. I was careless and didn't check my air at all since they were mounted. Low pressure + stretched tire = tire comes off. Luckily my rims were ok and so are the tires, but to play it safe, I ordered new tires since I wasn't sure...now that I have an extra set, I can use the ones I had in the rear up front. Rears are now 235/35's.
On the way to City Tire in South Gate...Props to John and the tire guys for squeezing me in last minute. Also thanks to 4Dr.Madness. for letting me borrow the donut so I could use my spare (which I left at home) and silverg35sport for bringing a jack (which I also had at home).
Updated pics with wider tires in the rear to come soon.
Also, a couple days ago I removed the roof overlay. Thinking about keeping it clean, more luxury, and the black overlay made it look more sporty. For some reason, in person the car looks lower.
Last edited by The Stimulation; Oct 27, 2009 at 02:28 AM.
Joined: Aug 2007
Posts: 10,850
Likes: 158
From: Los Angeles
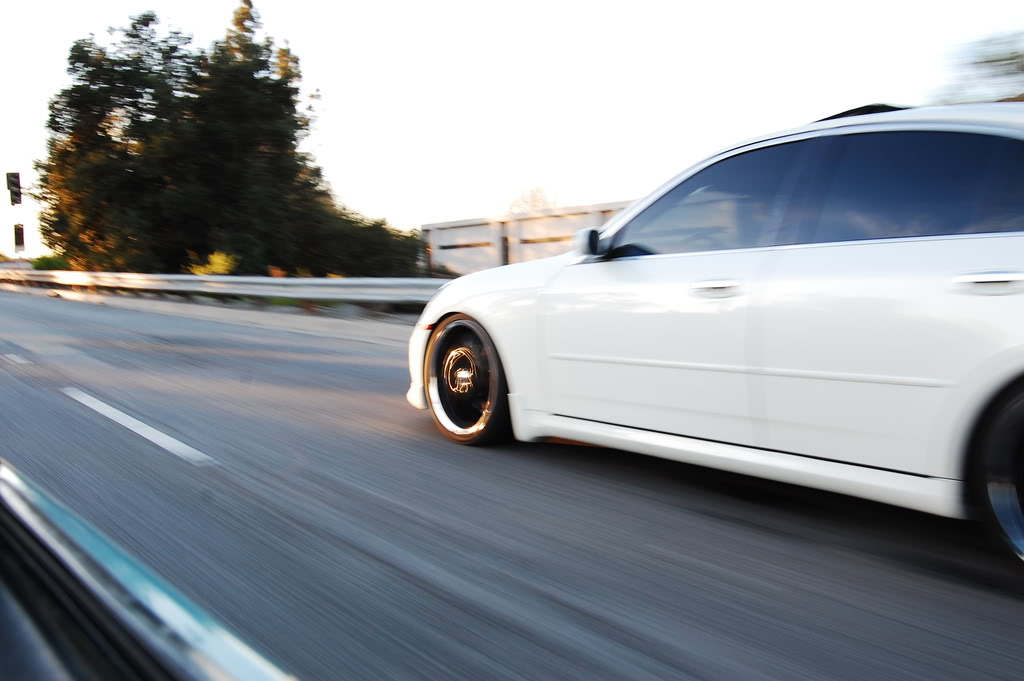
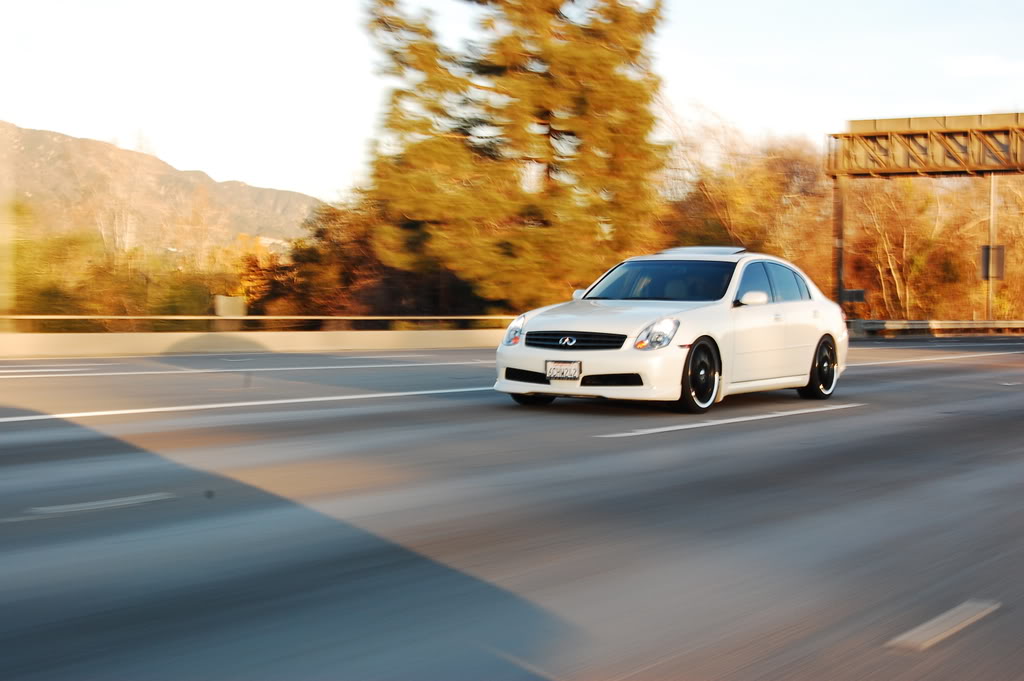
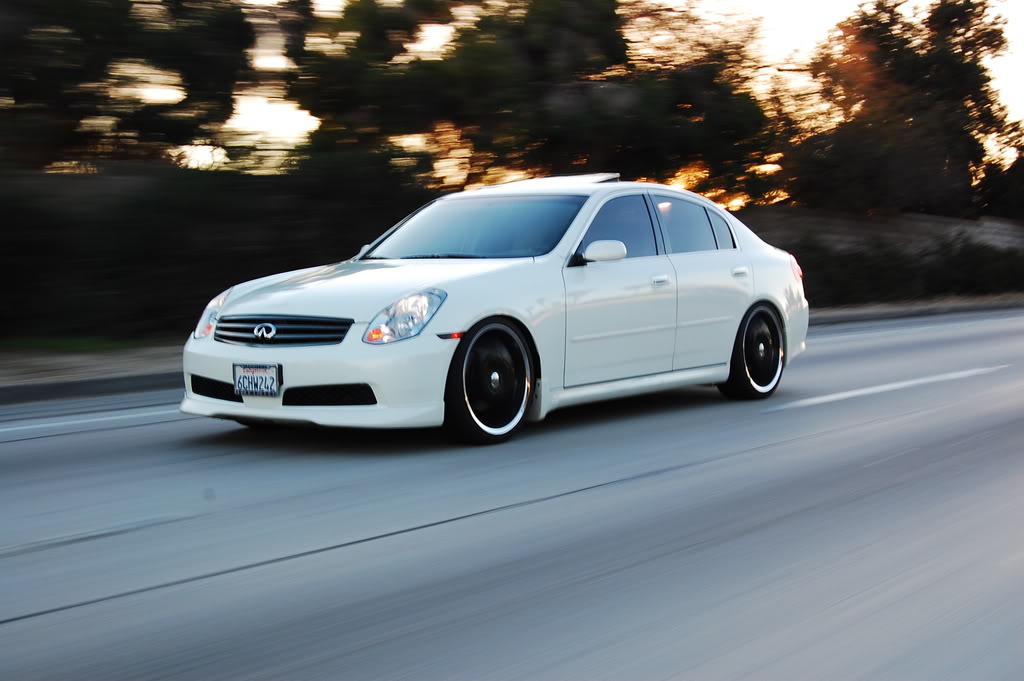
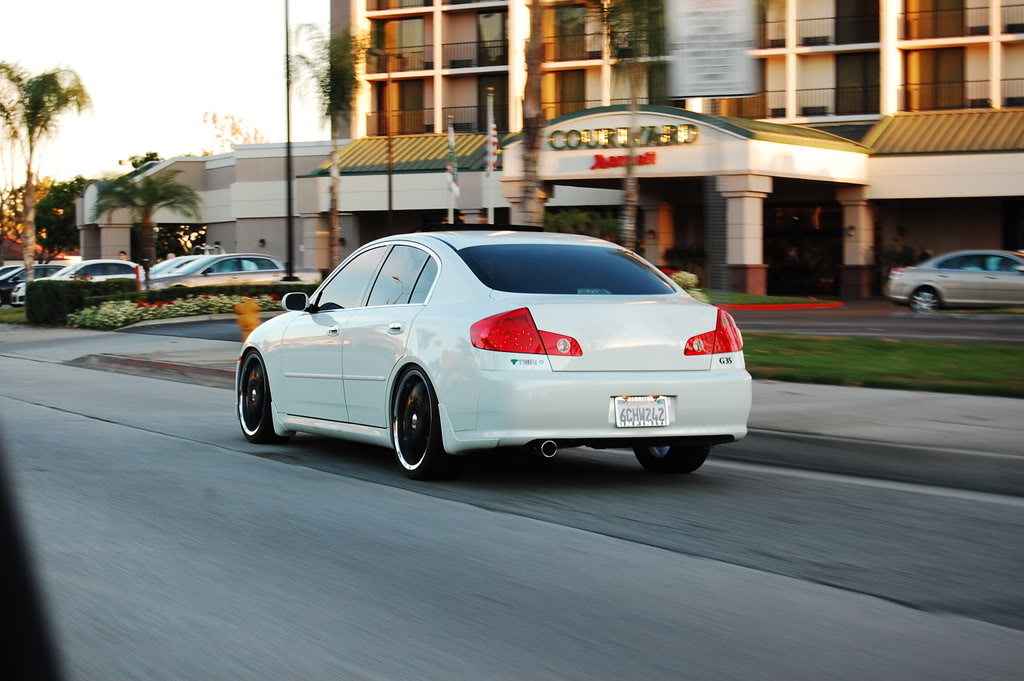
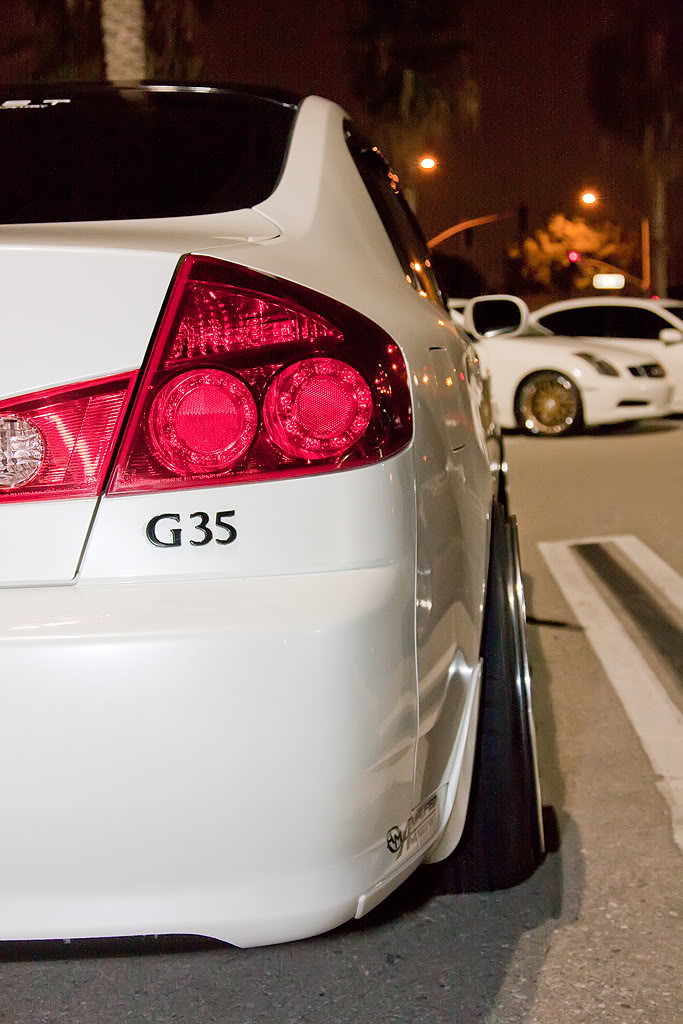
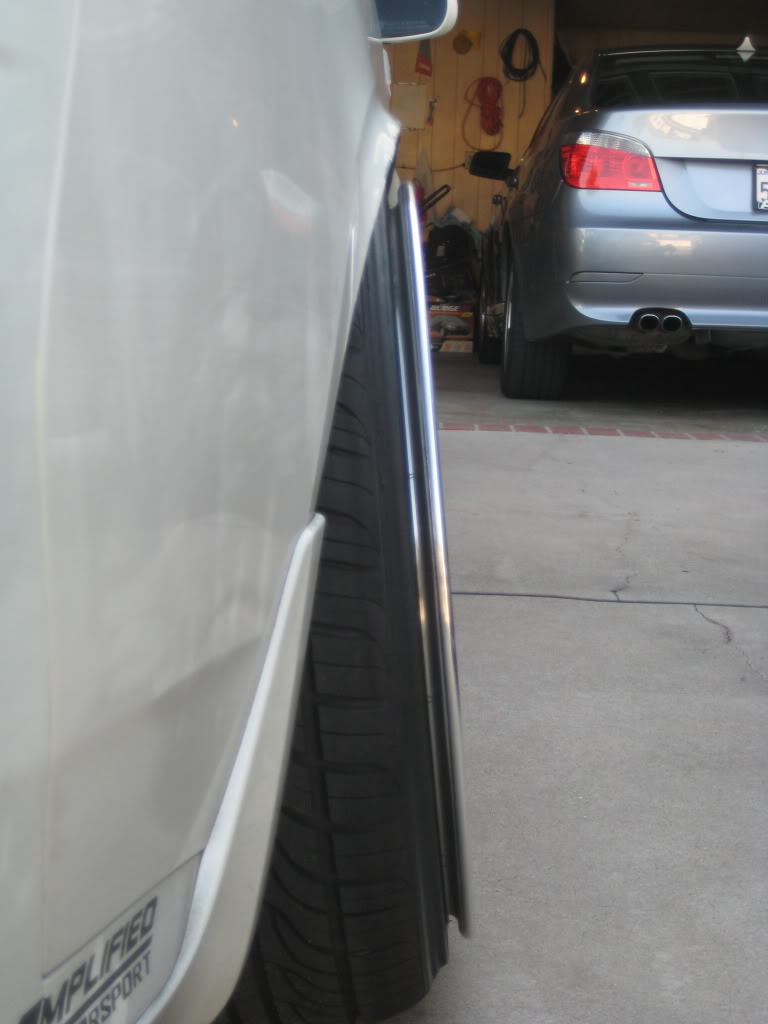
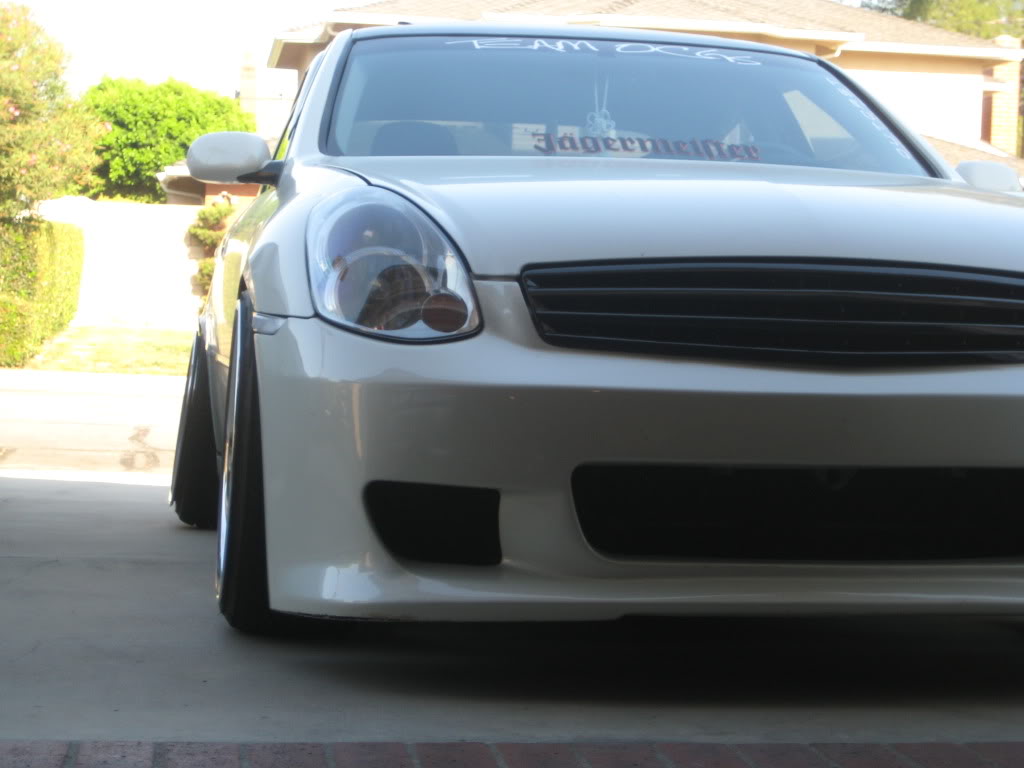
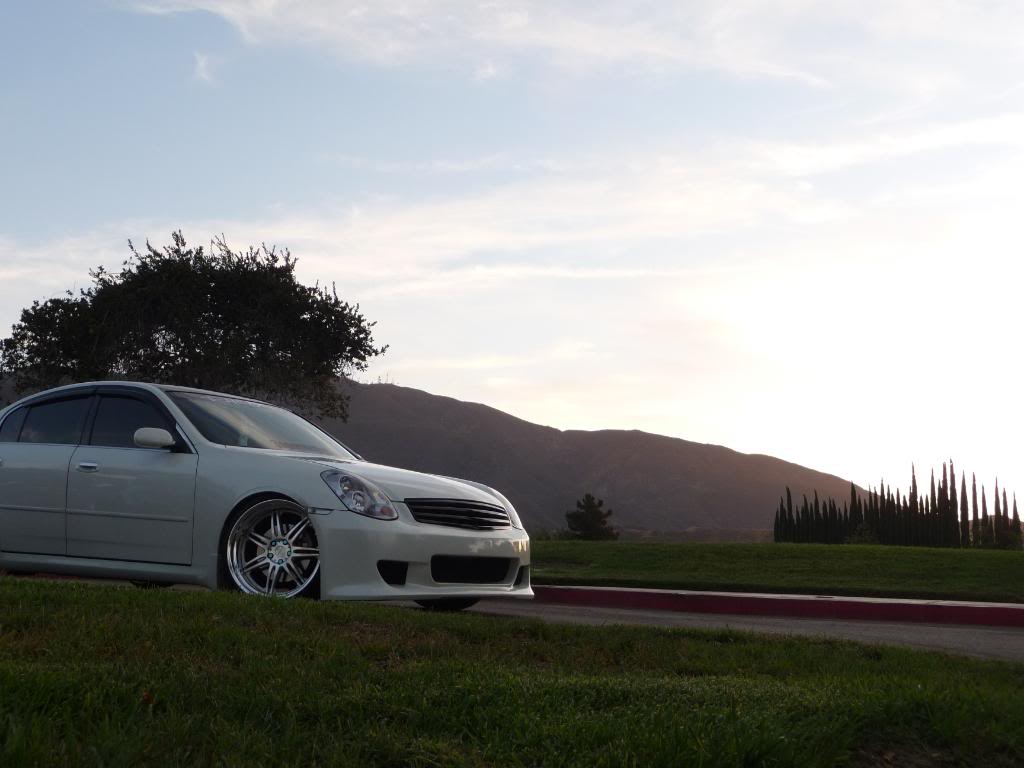
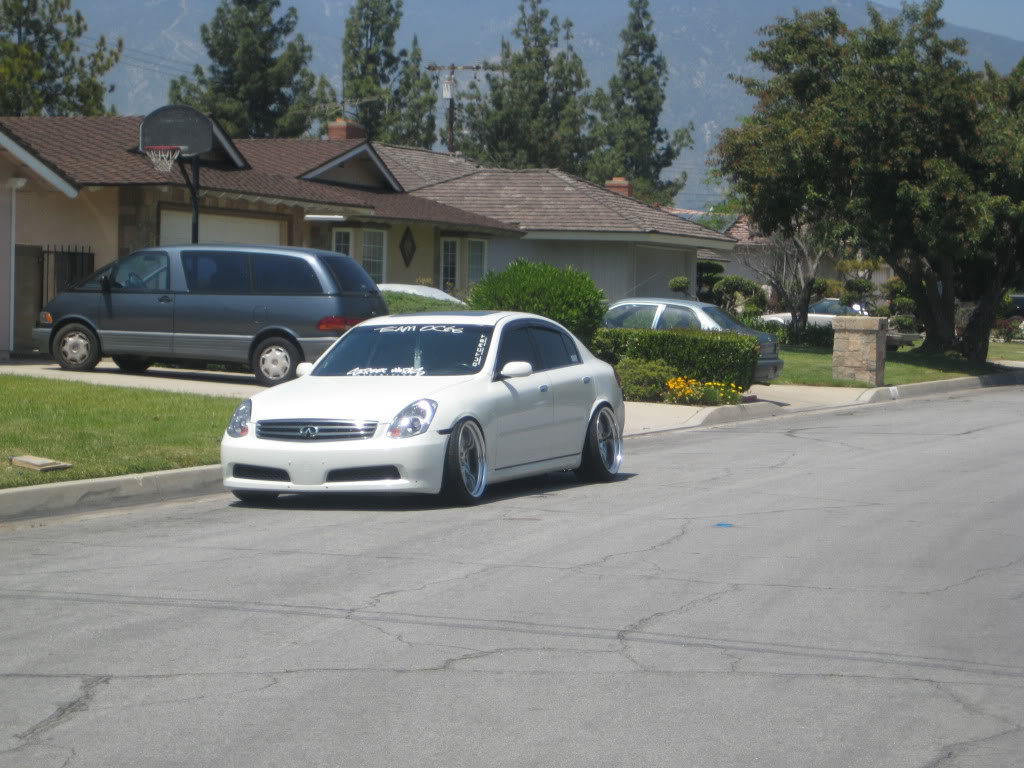
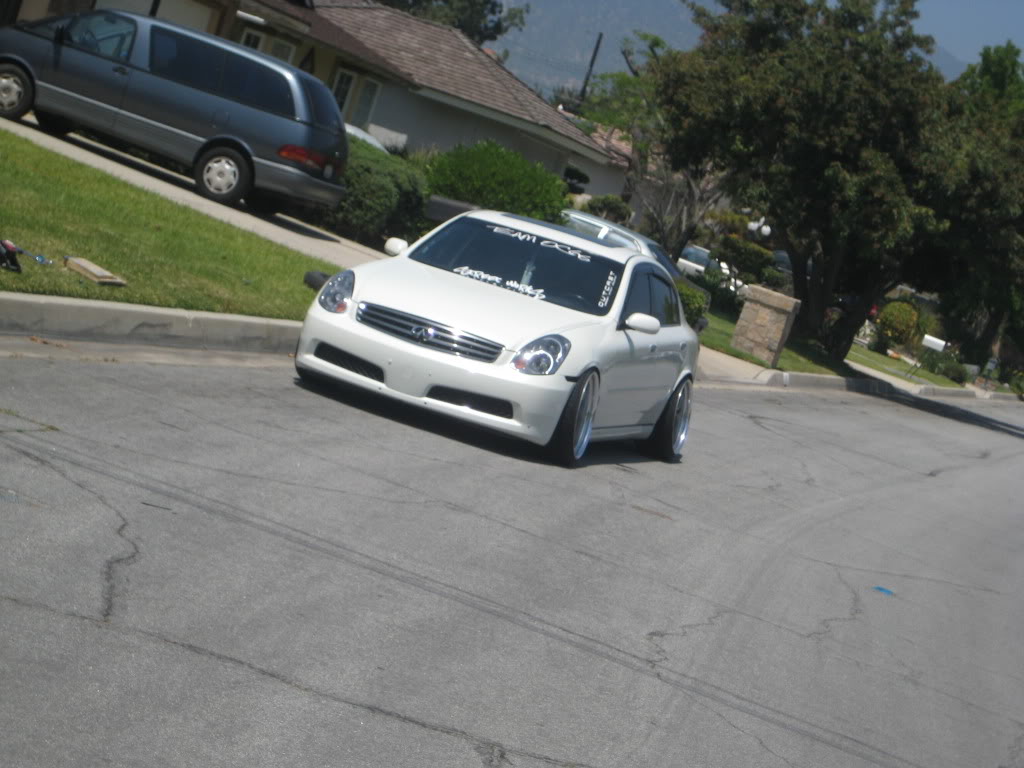
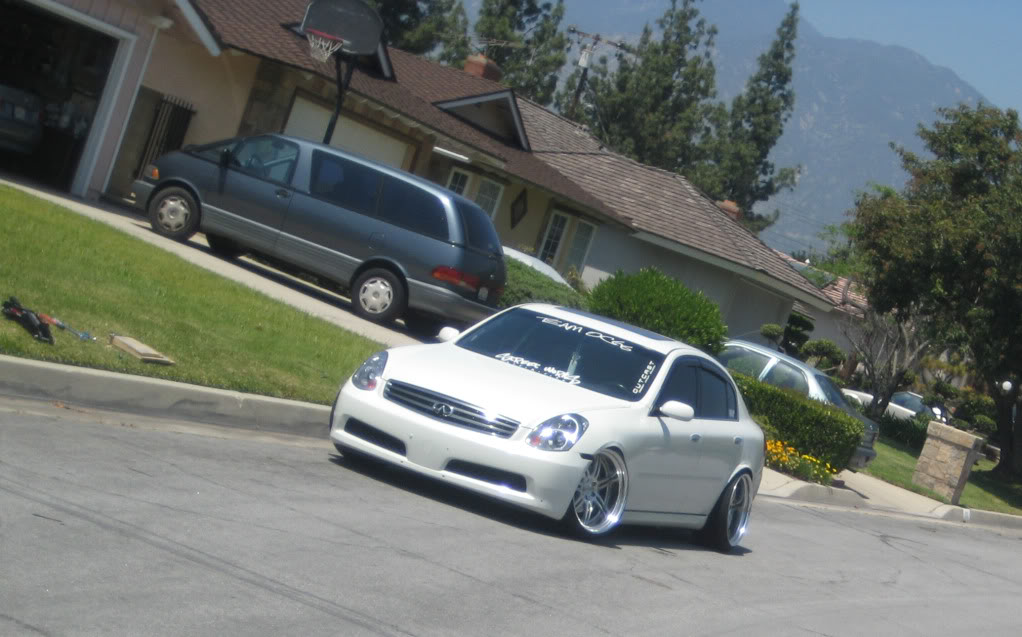
October 30, 2009
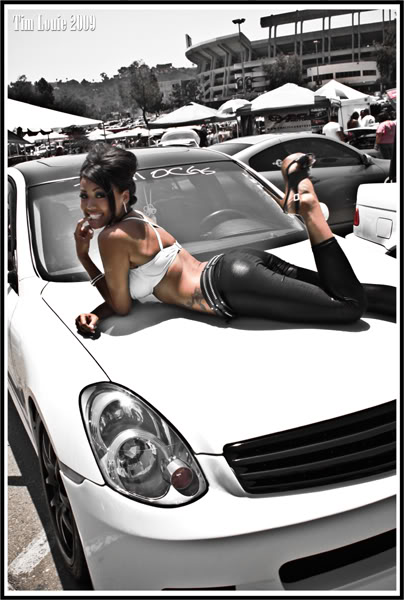
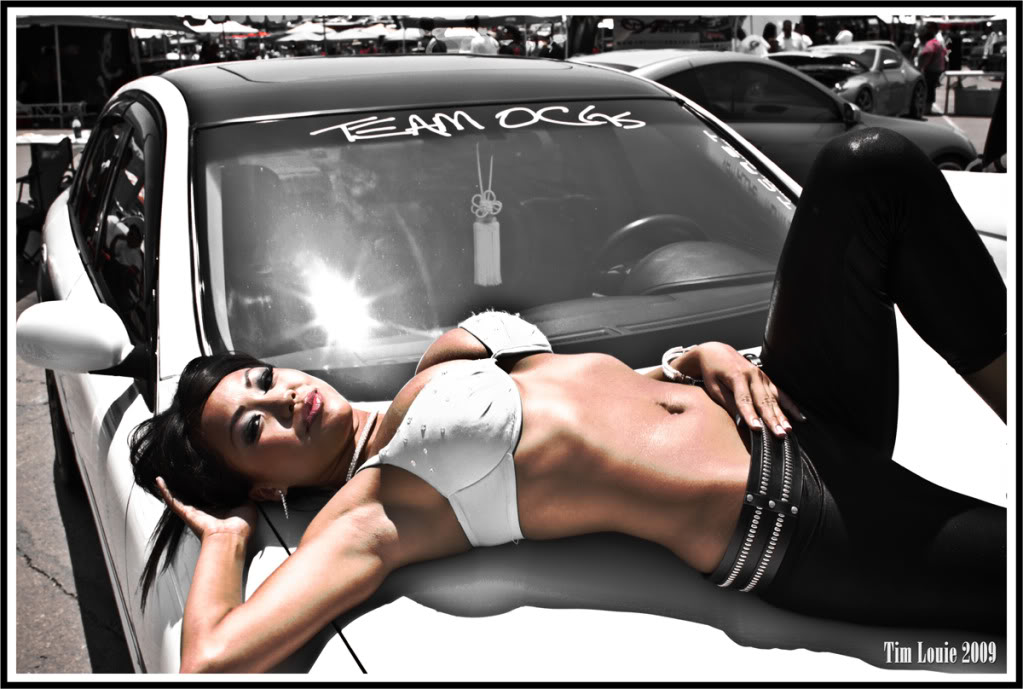
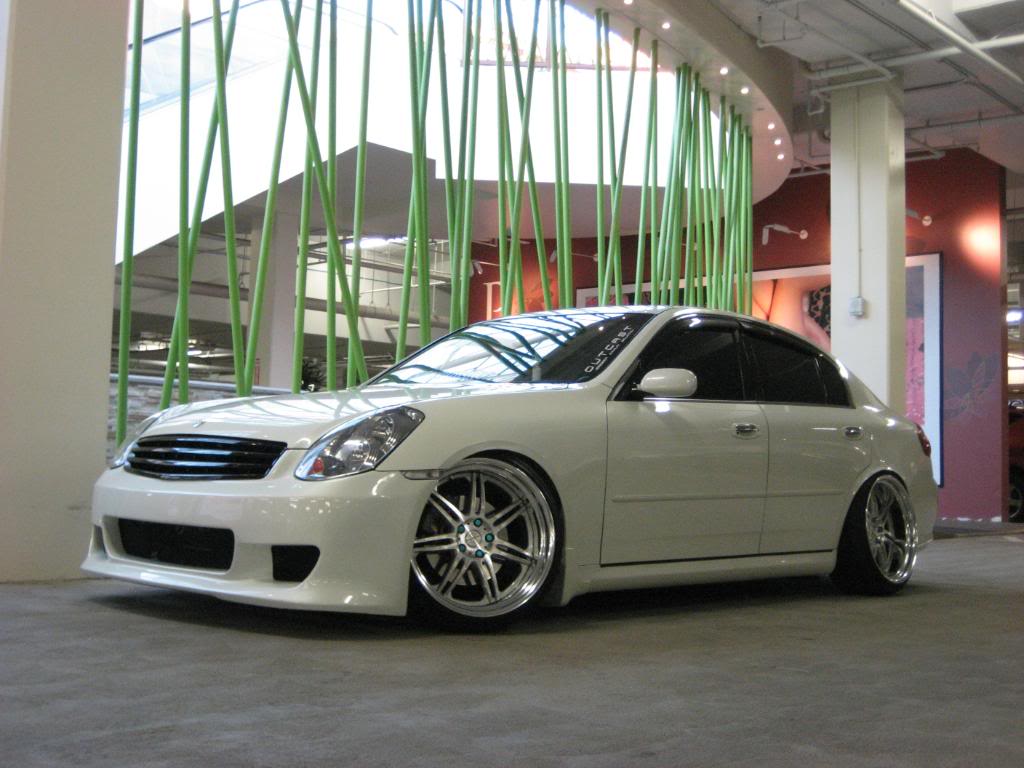
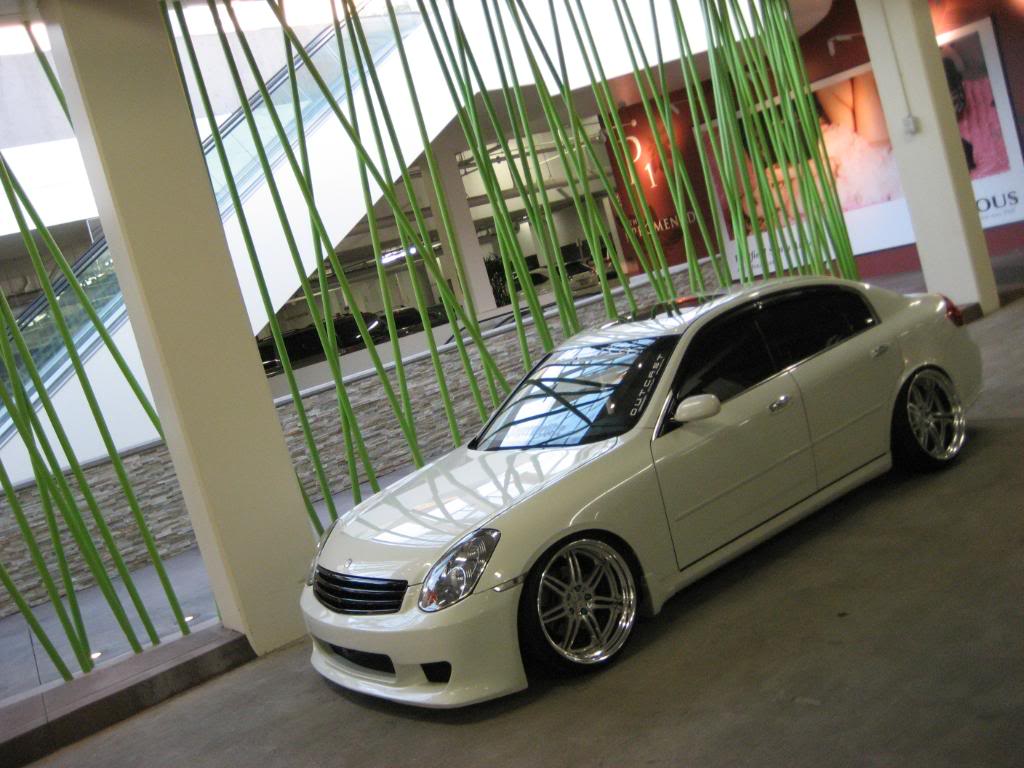
Some random pictures I took at the infamous spot where a bunch of VIP modded cars do photoshoots at:
December 4, 2009
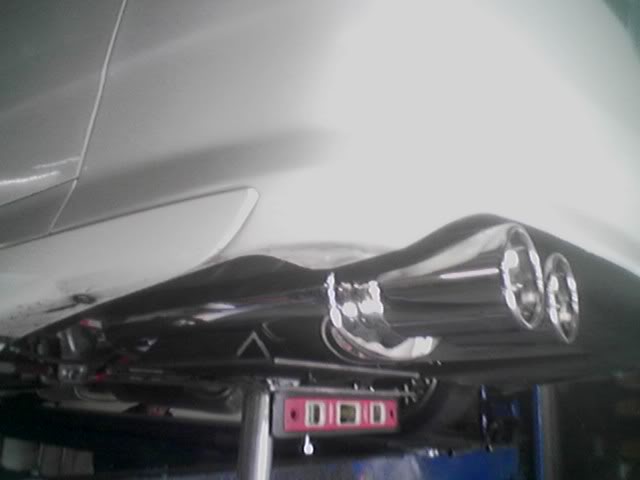
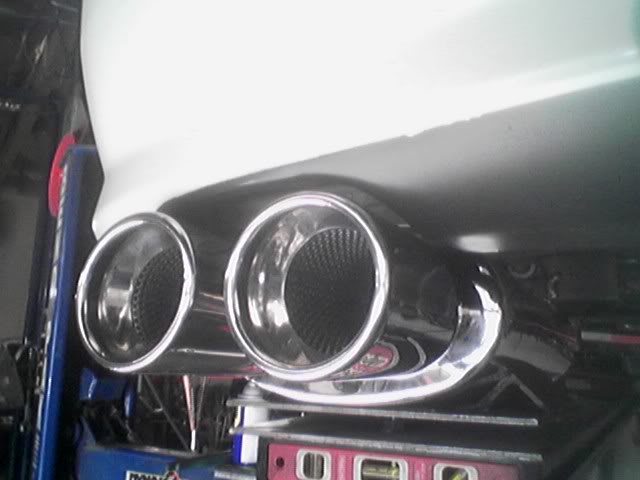
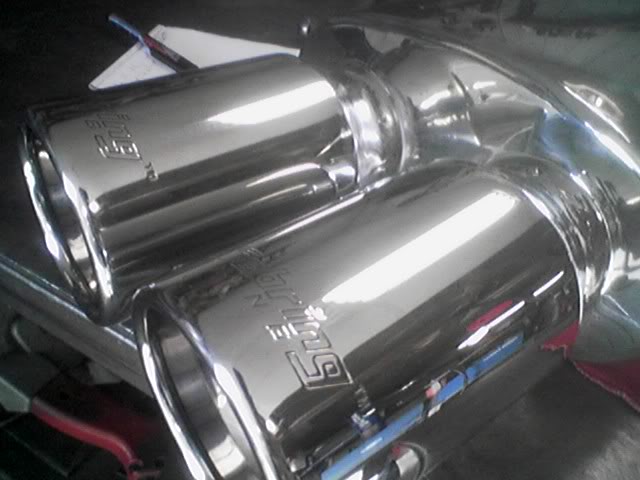
New muffler.
Been a while since I've done much with the car. Finally got a muffler on, Sebring, and it is sick. I'll get sound clips and better photos soon. I'm going to end up doing a full exhaust with the shop down the line.
Here's a clip, but quality is not that great audio wise...gonna redo it.
January 17, 2010:
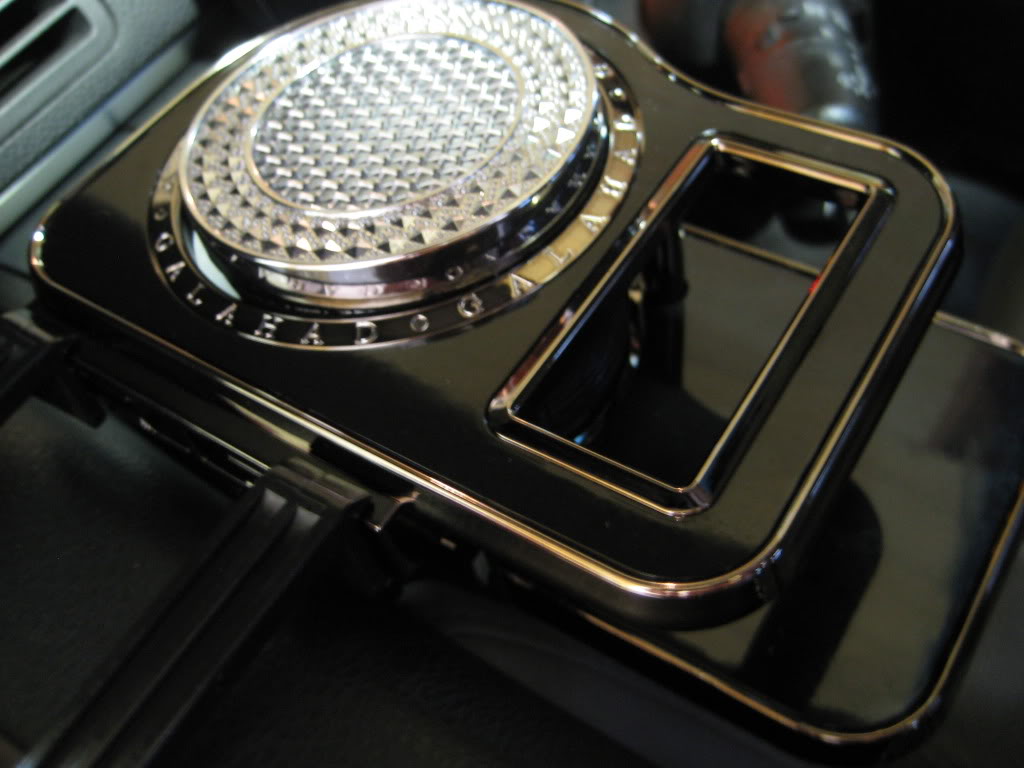
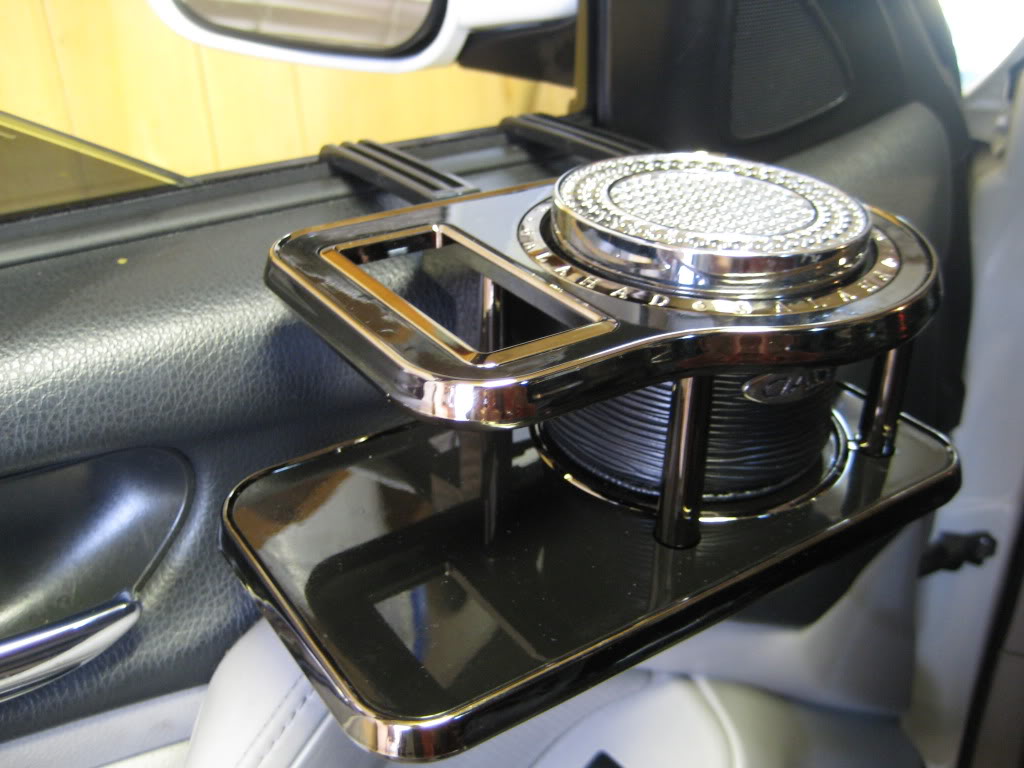
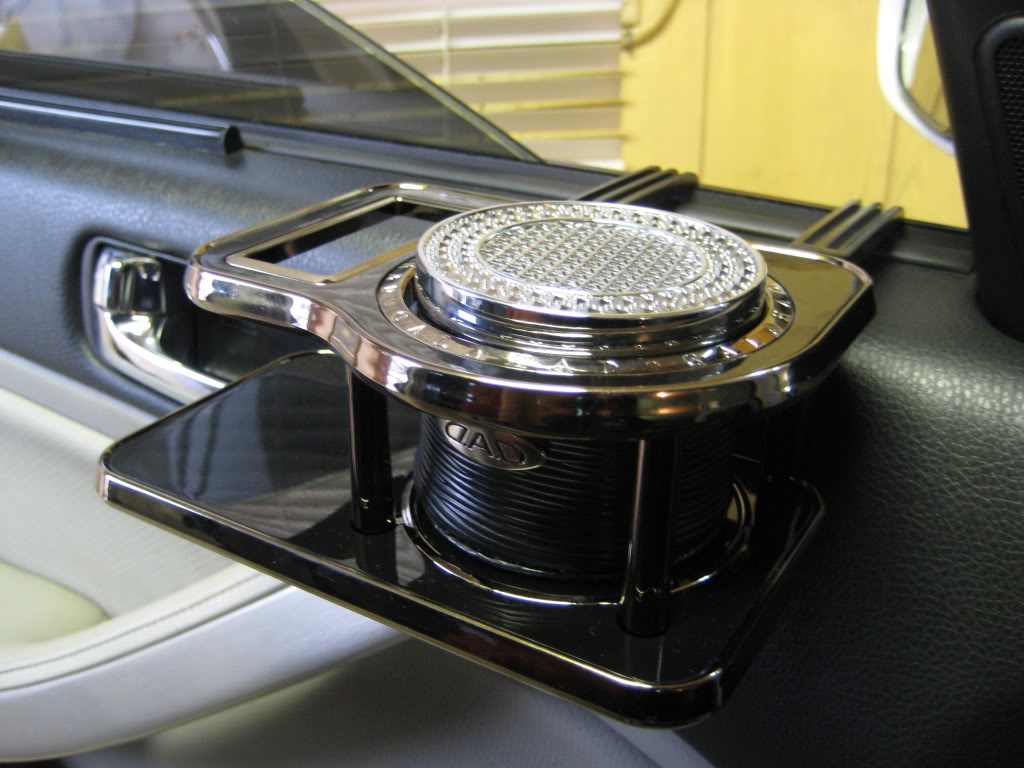
Haven't done too much, but I've been getting some pretty neat ideas checking out some VIP mags. Anyhow, getting some JDM cigarette/ash tray holders...i don't smoke but they can be used as cupholders too. They'll match my table that I'm going to have made for me.
Also added some chrome trimmings to certain areas, I'll get pics of them if I can tomorrow. Also relocated the Garson hood badge to the trunk to cover up the holes . For the fenders, I messed up, but gonna redo, you can see one piece where I cut off the trimming and there was a gap so I put another piece there. Too lazy to take off and redo at the moment. The other side came out just fine though. Also some better pics of the cupholder.
January 7, 2010:
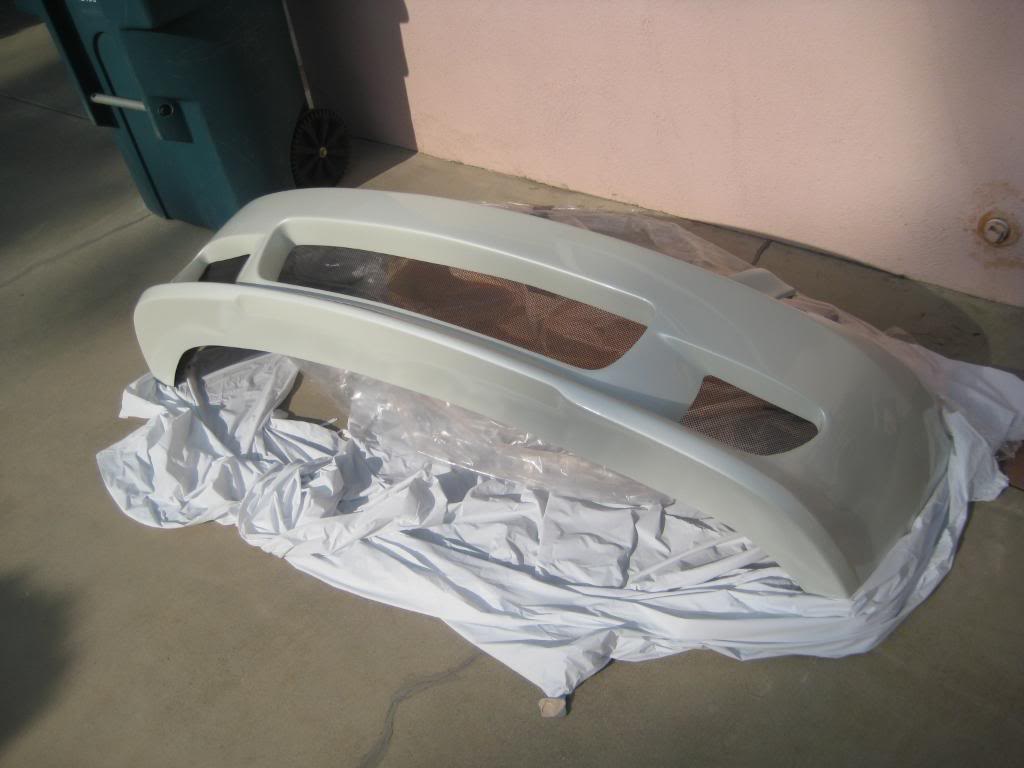
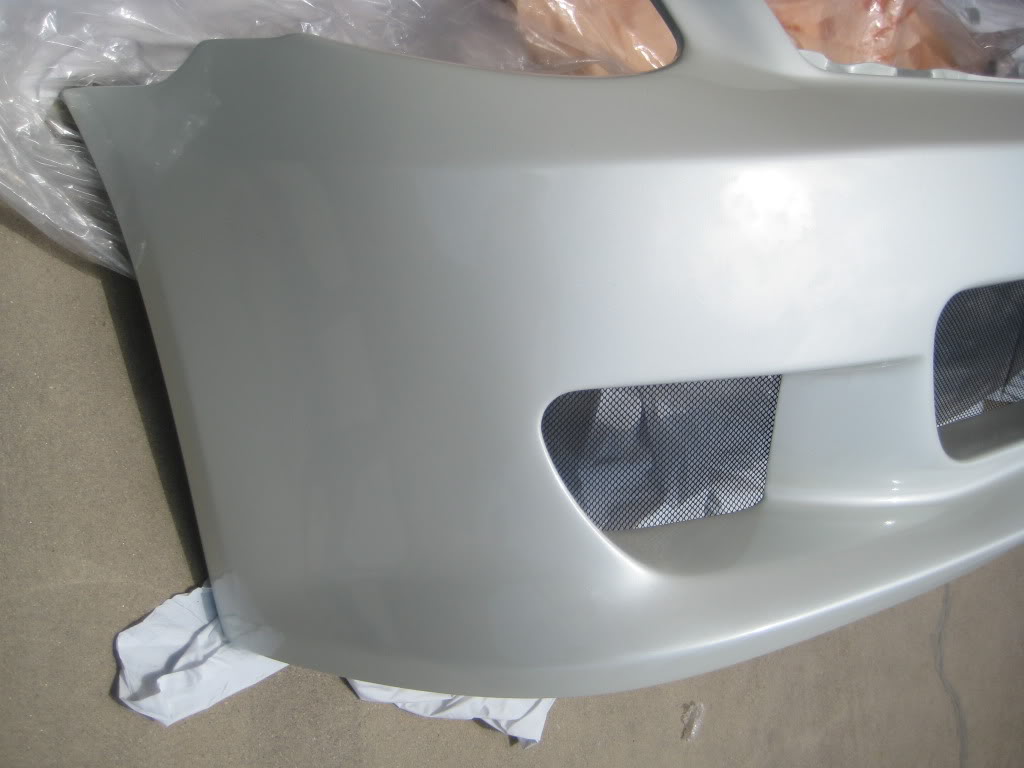
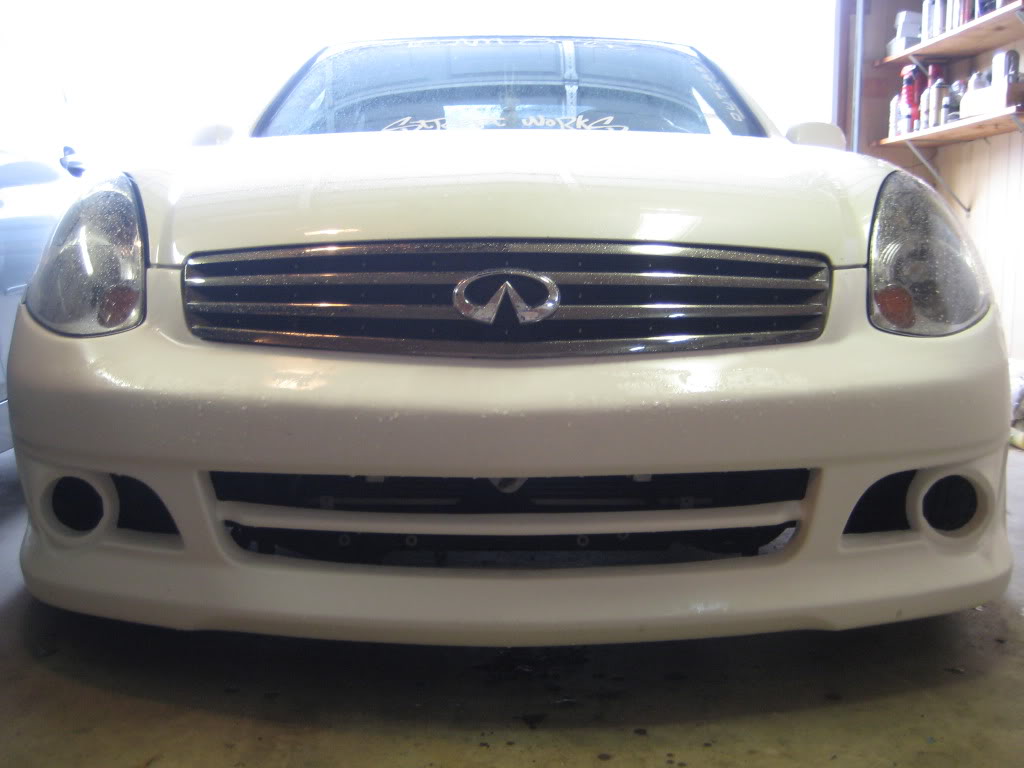
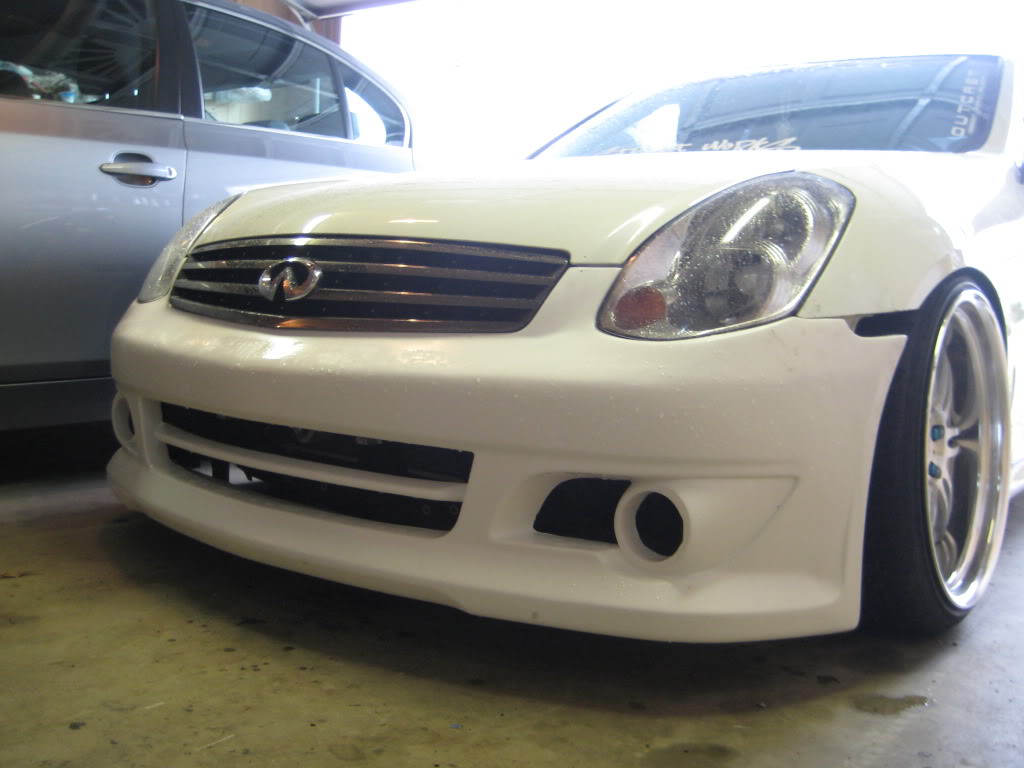
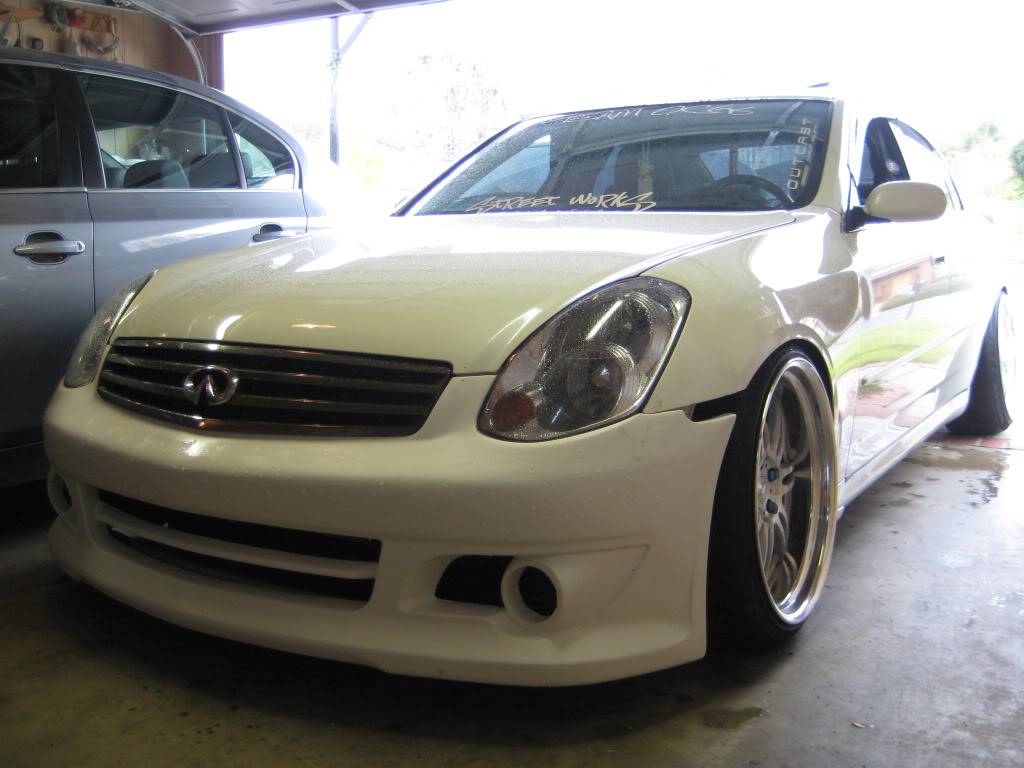
Decided I'm gonna go through with meshing the two bumpers together..makes it easier, saves some money since buying two sets of projectors and HID kits for them will run some coin.
Gonna use the FX projectors, but any thoughts on whether I should do 8k or 10k? I have 8k HID's and I don't want yellow fogs...some pics of a "test fit". basically just let the bumper hang there for a visual.
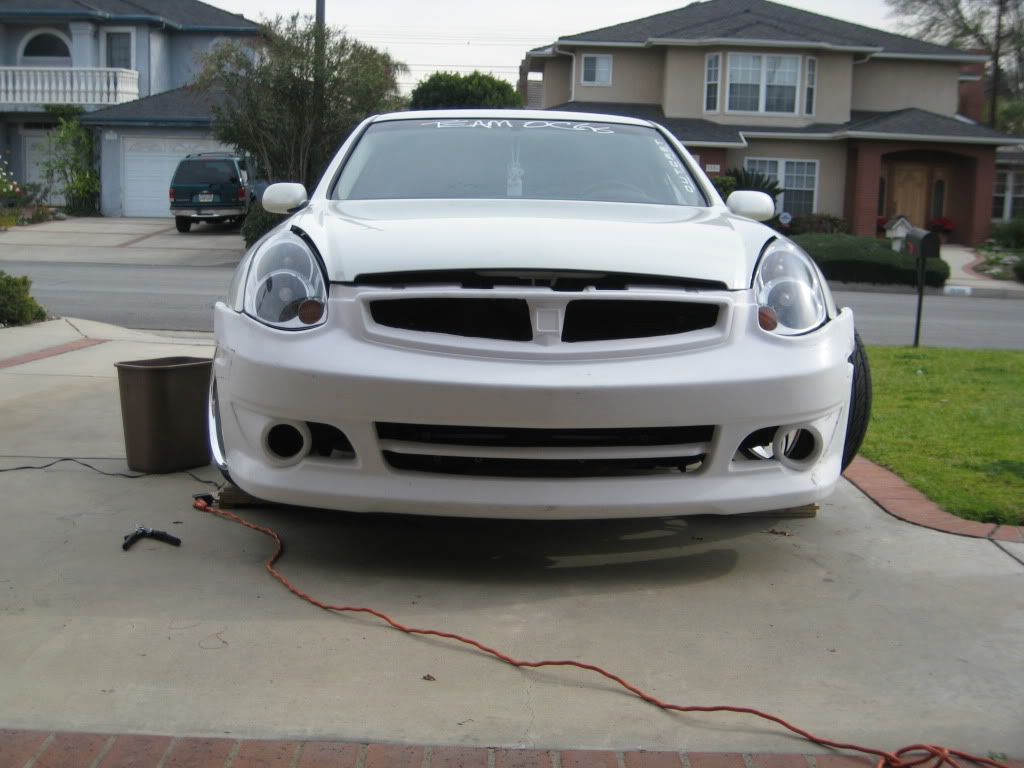

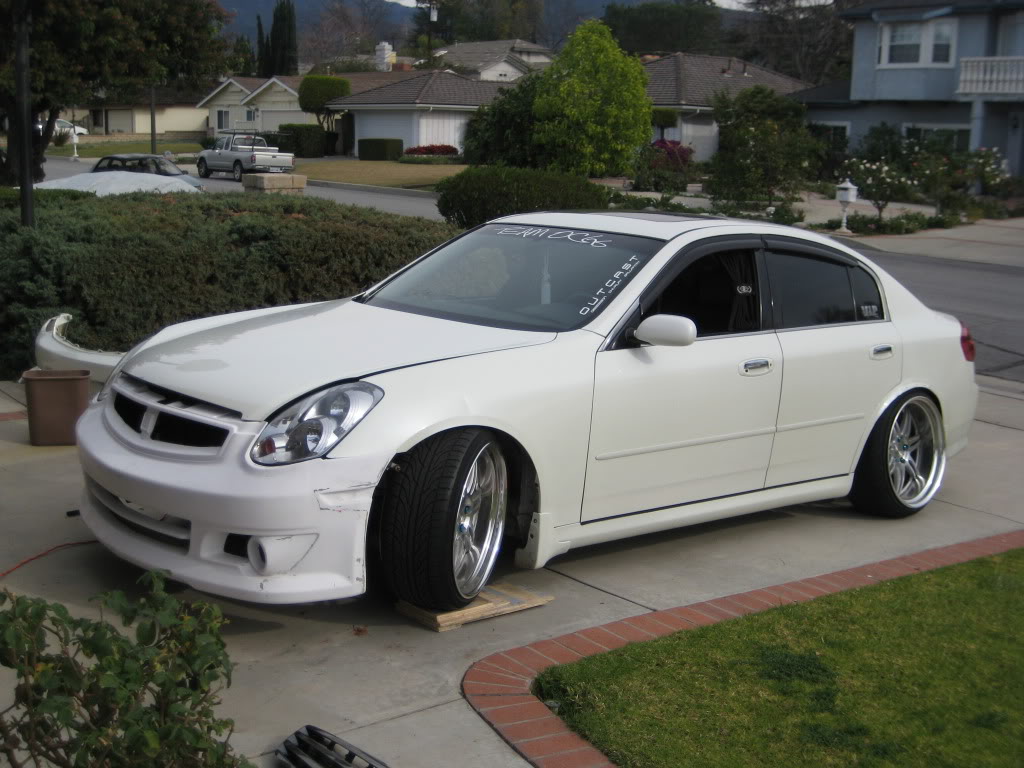
I won't have that grill though, I'll have the OEM grill and I'm going to make a piece right above the grill just like the M45's have.
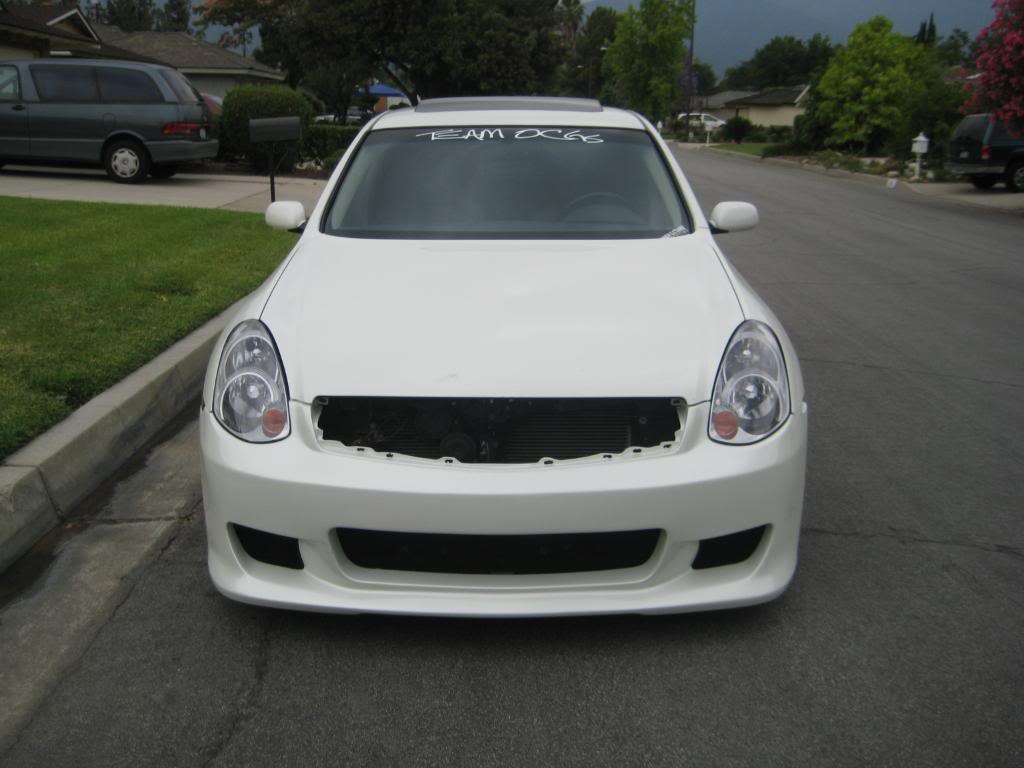
February 6, 2010:
Got my car back from JT Autobody in Rosemead...Mad props to Big Brotha Tony...he hooked it up! Currently needs paint and FX proejctors to be put in for fogs, should get done before the end of this month.
It's raining right now so had to take in garage pics, but nonetheless, here they are. Feel free to comment in any way
Here's some pics thanks to Cookie Monster.


February 28, 2010:
Quick vid I snapped today....
March 3, 2010:
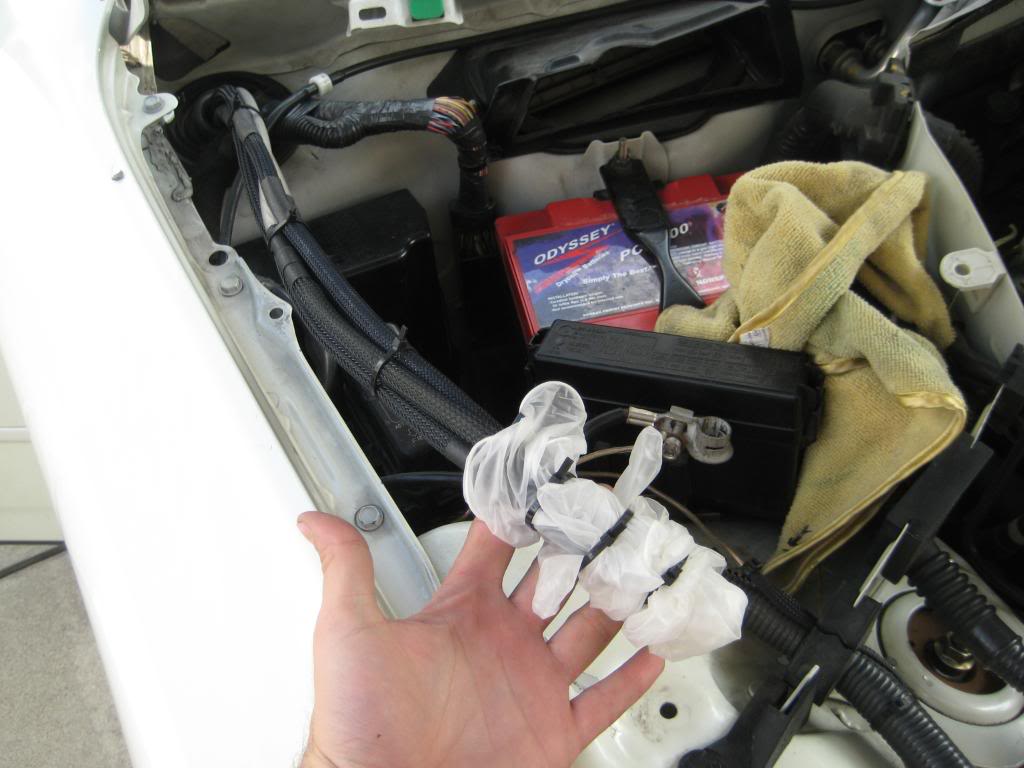
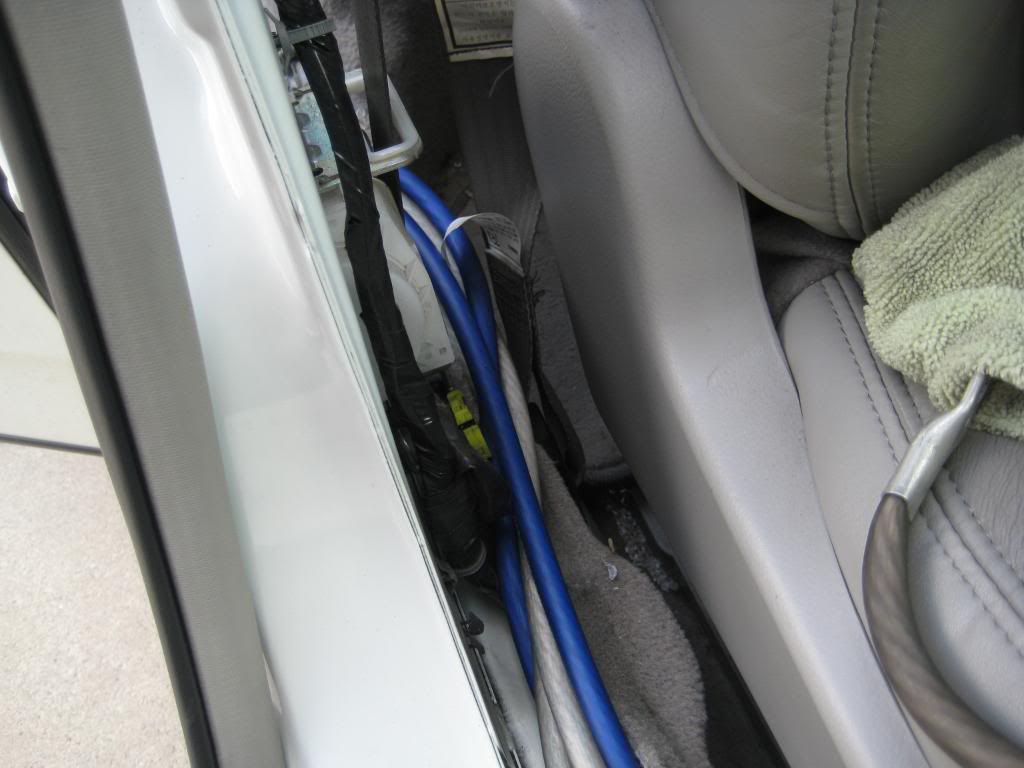
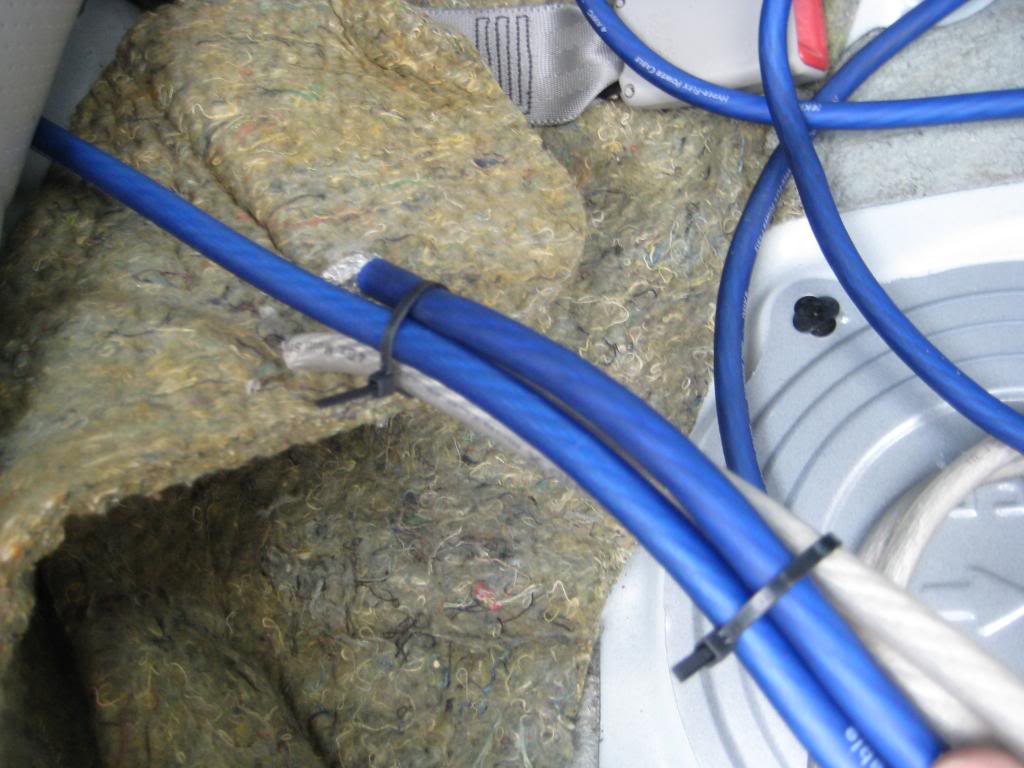
Quick update. I'm starting to run the wires. I figured I have plenty of wire so might as well put it to use. Rather than do a single run of power cable from batt to trunk and ground somewhere in trunk....or even do a full run of each like the occasional people do...I figured to do two full runs of each. One for each amp.
I'll also be replacing the Odyssey PC 1200 with a redtop group 35 and throwing the Odyssey in the trunk with a Yellowtop group 35. I was gonna use a Batcap 3000 up front and 2000 in the rear but I don't have that much money for batteries, even with my sponsorship pricing, so unfortunately I had to go with Optima cos I got sponsored by them as well....probably order those batteries in a couple weeks.
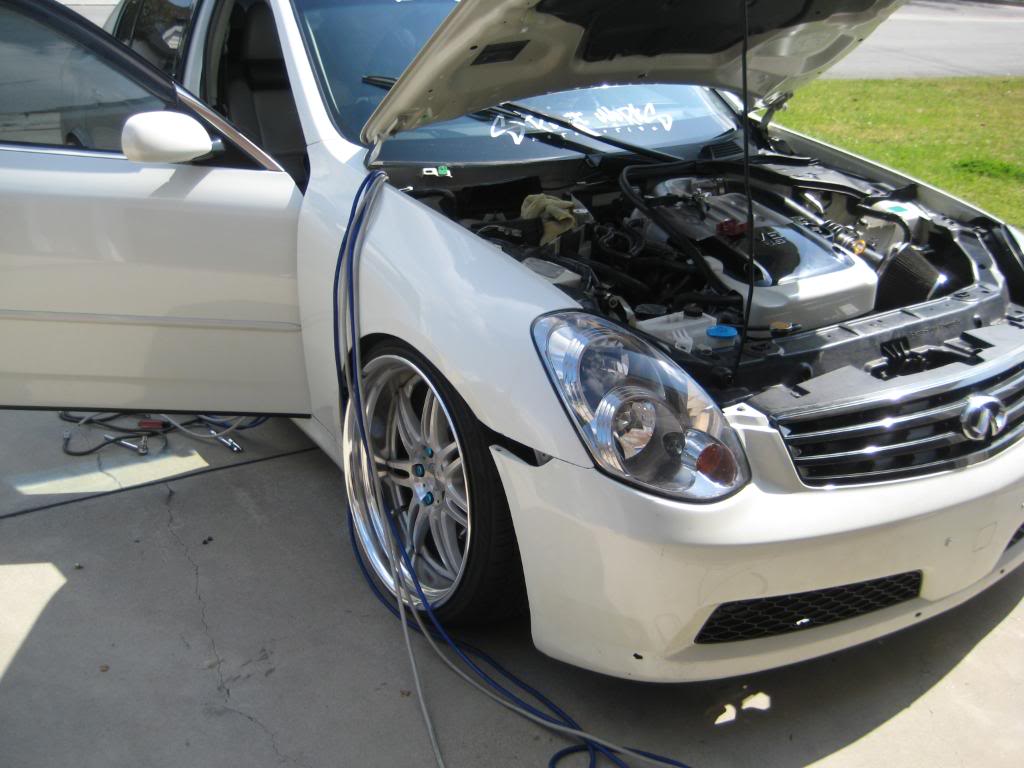
Here's some progress pics...
80 ft of 4 awg wire:

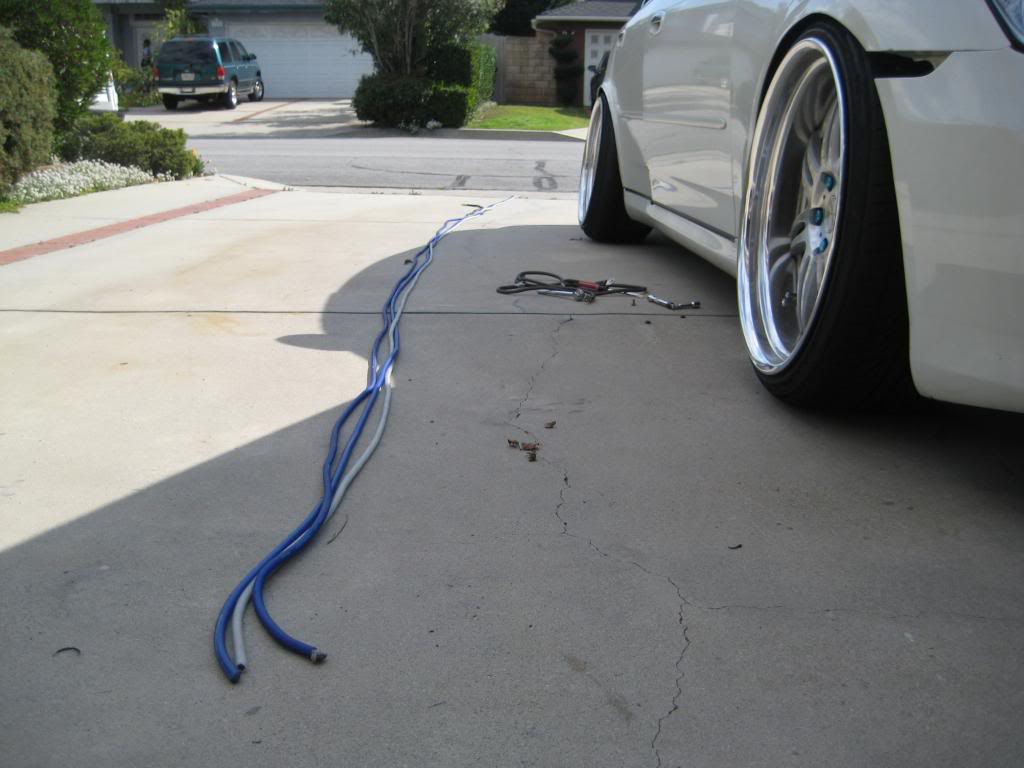
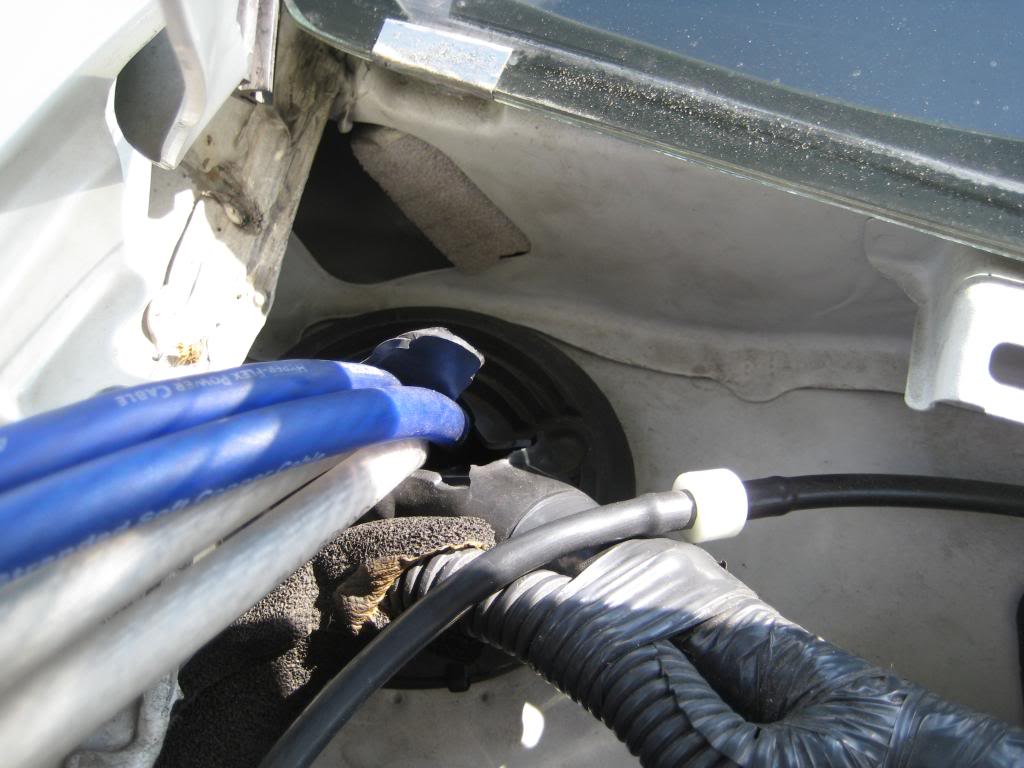
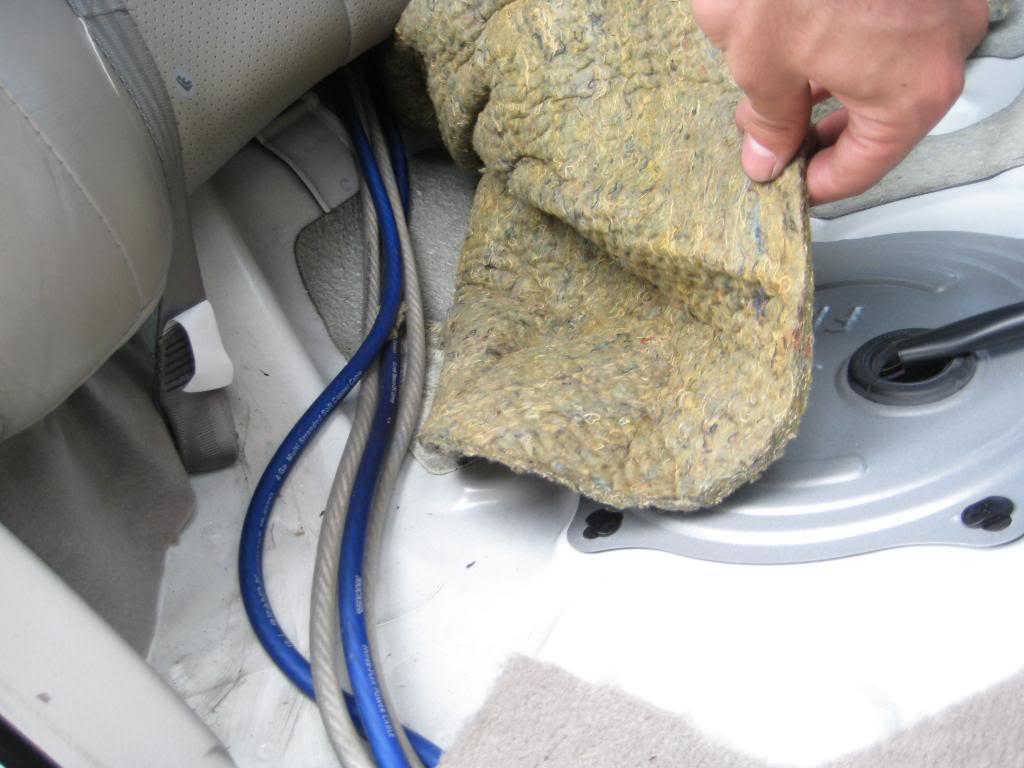
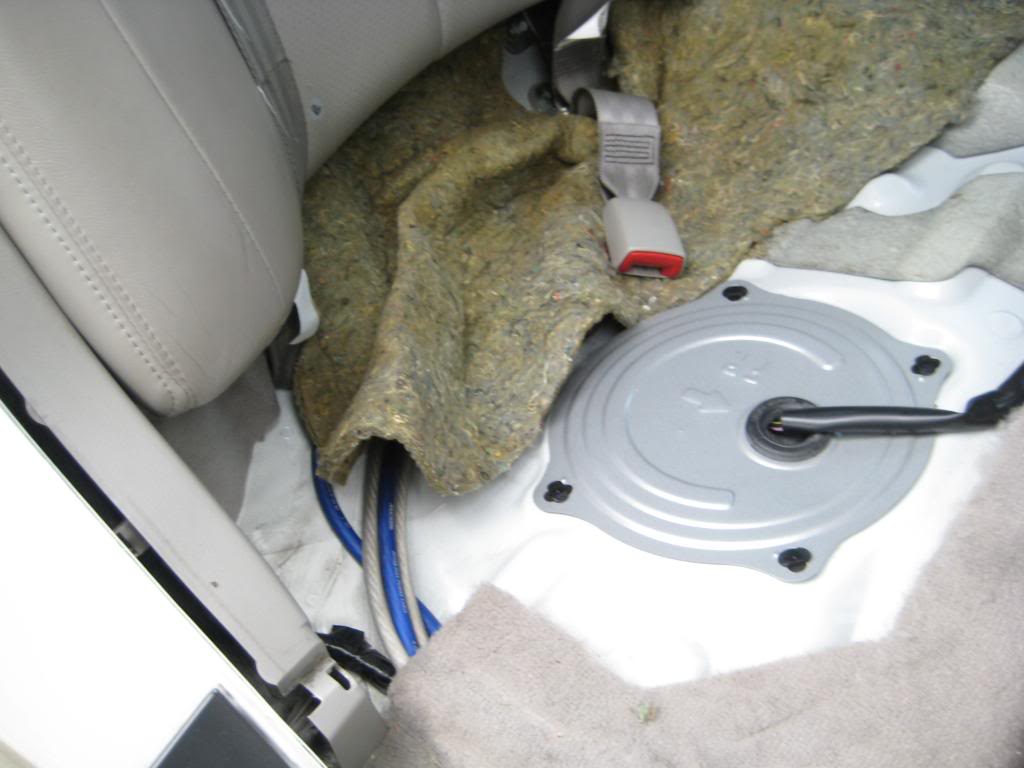
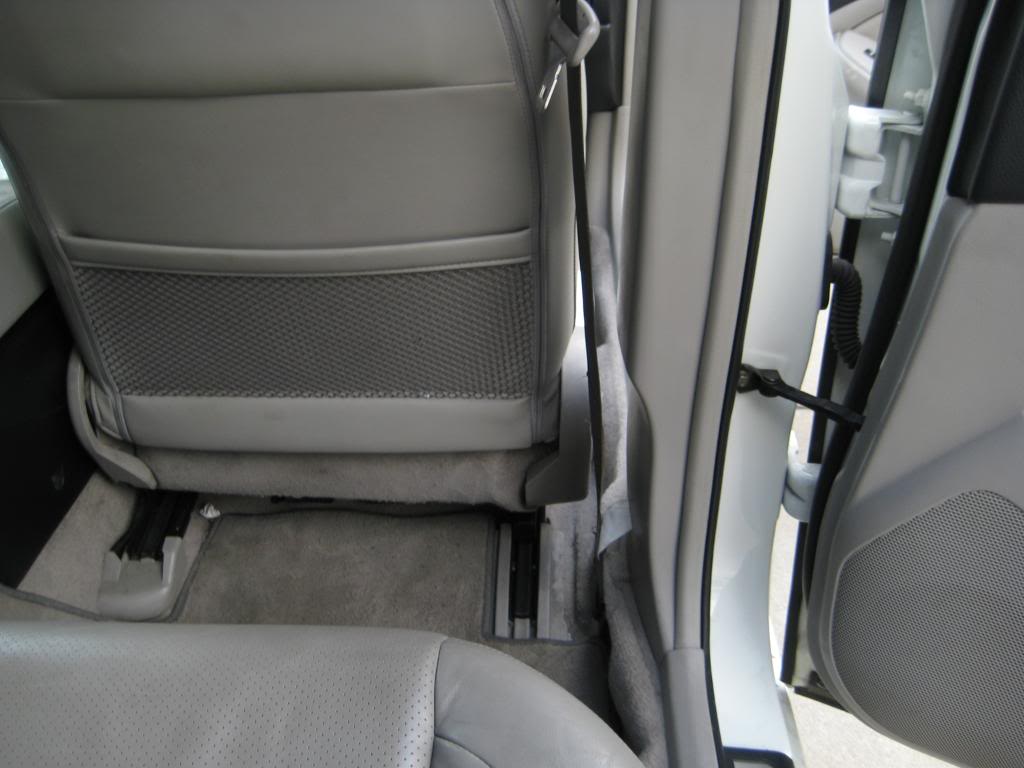
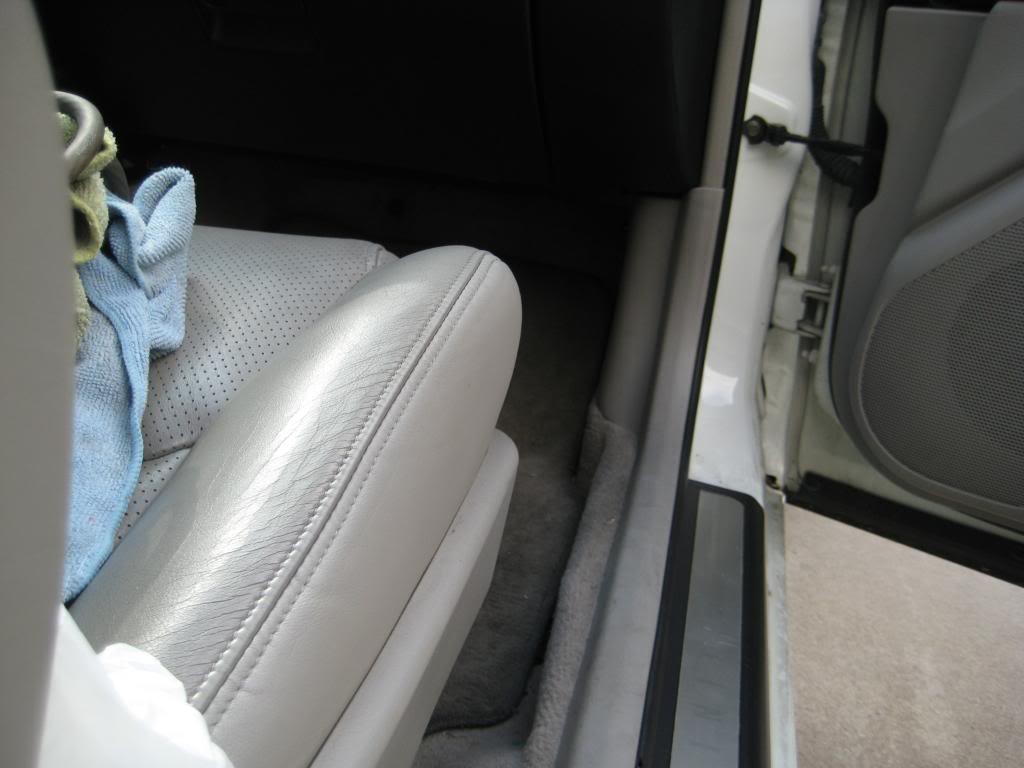
Gonna run the wire on the passenger side. Grommet slit open to get all the wire in:

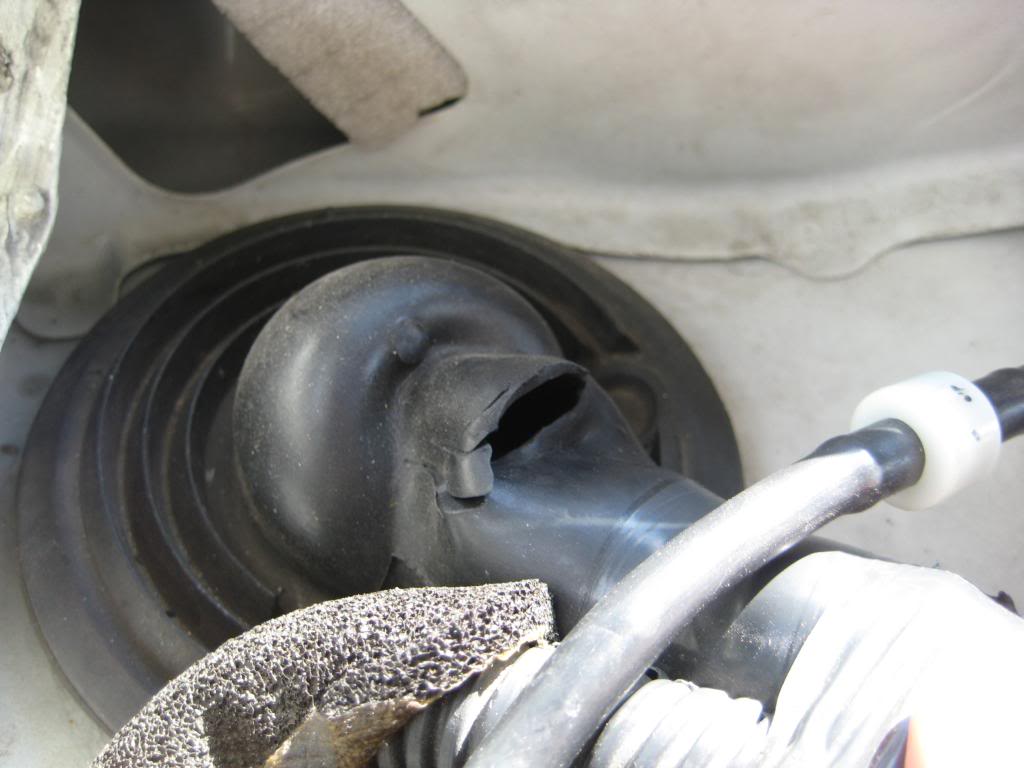
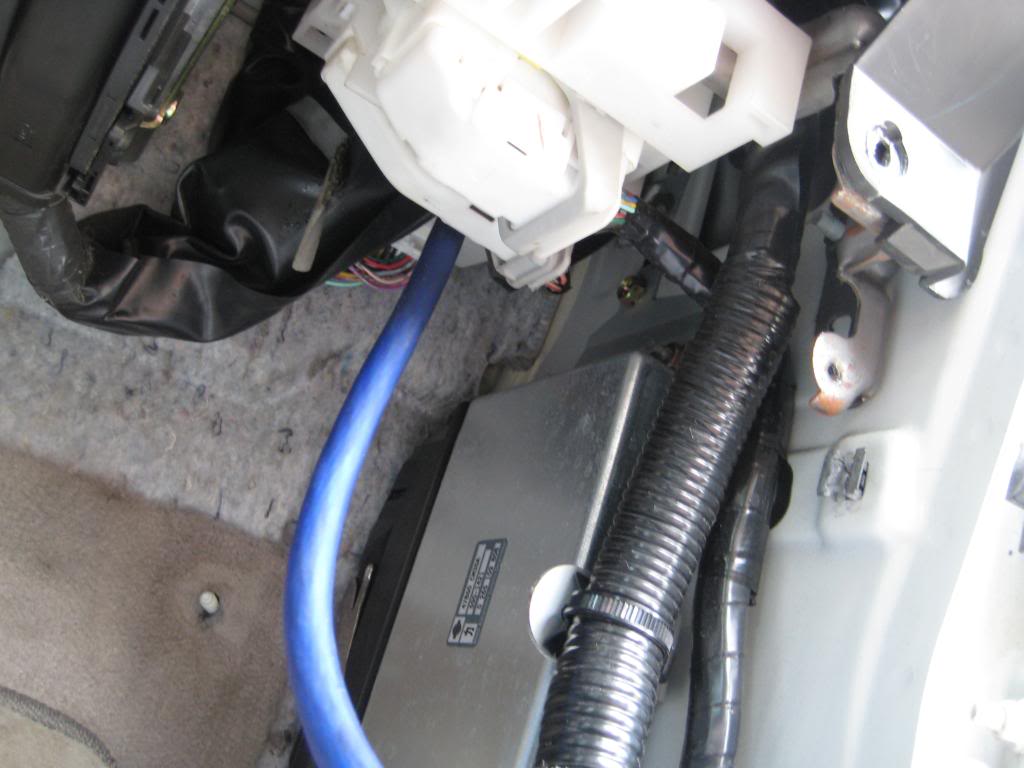
Got one in and one out:

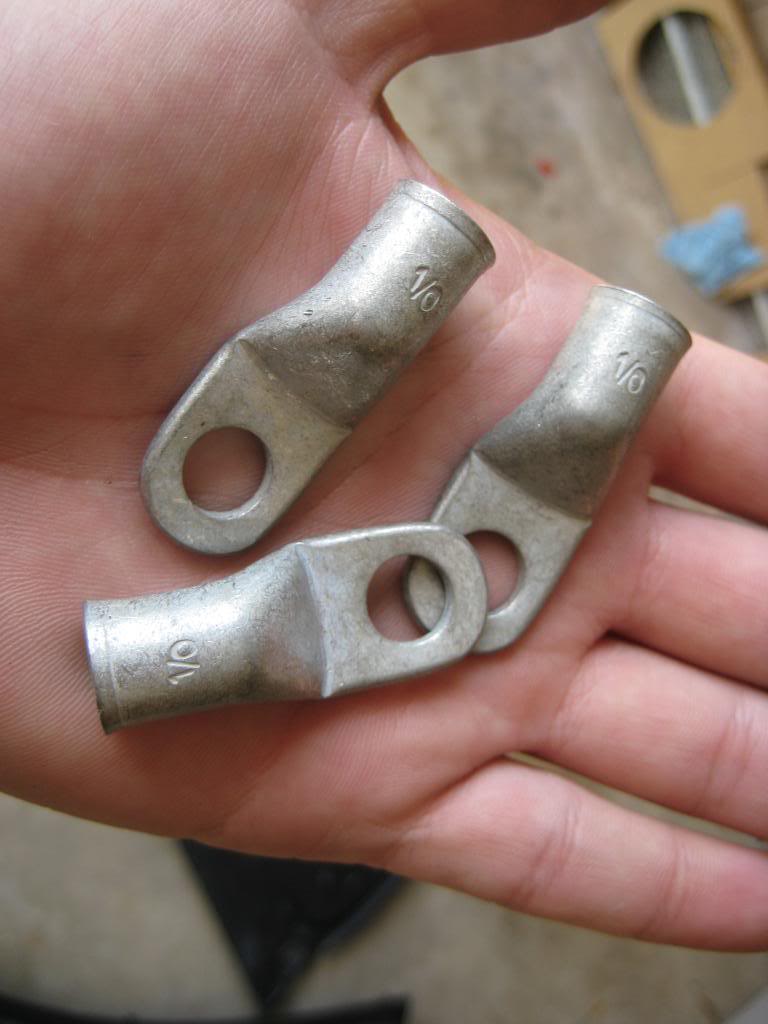
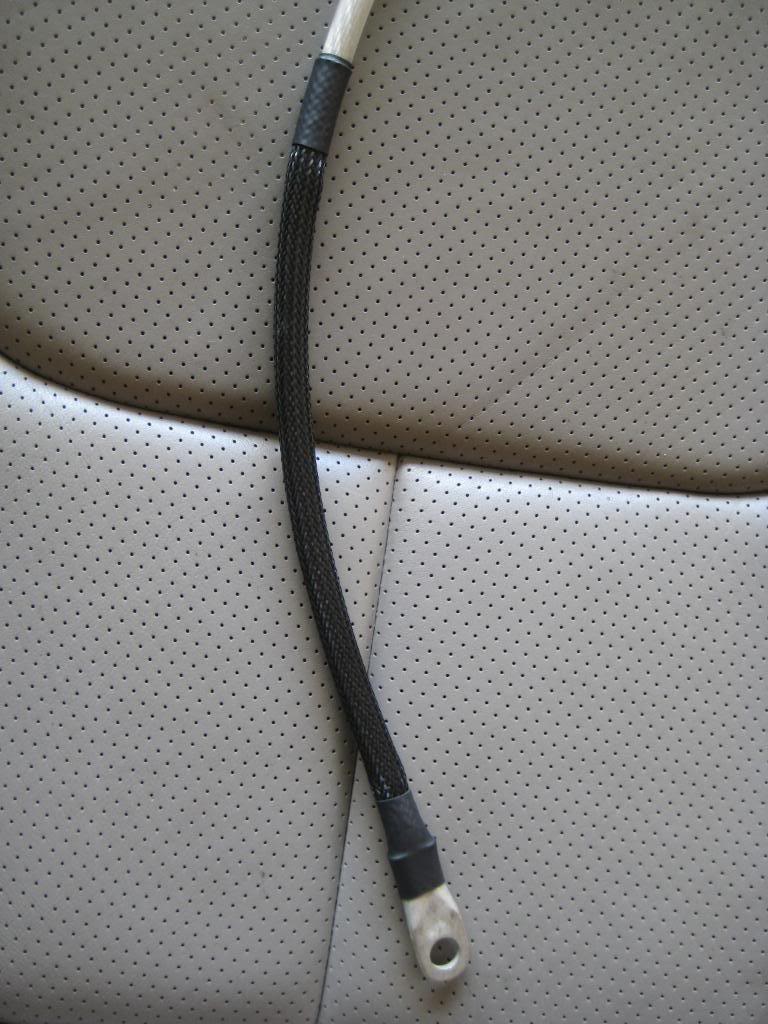
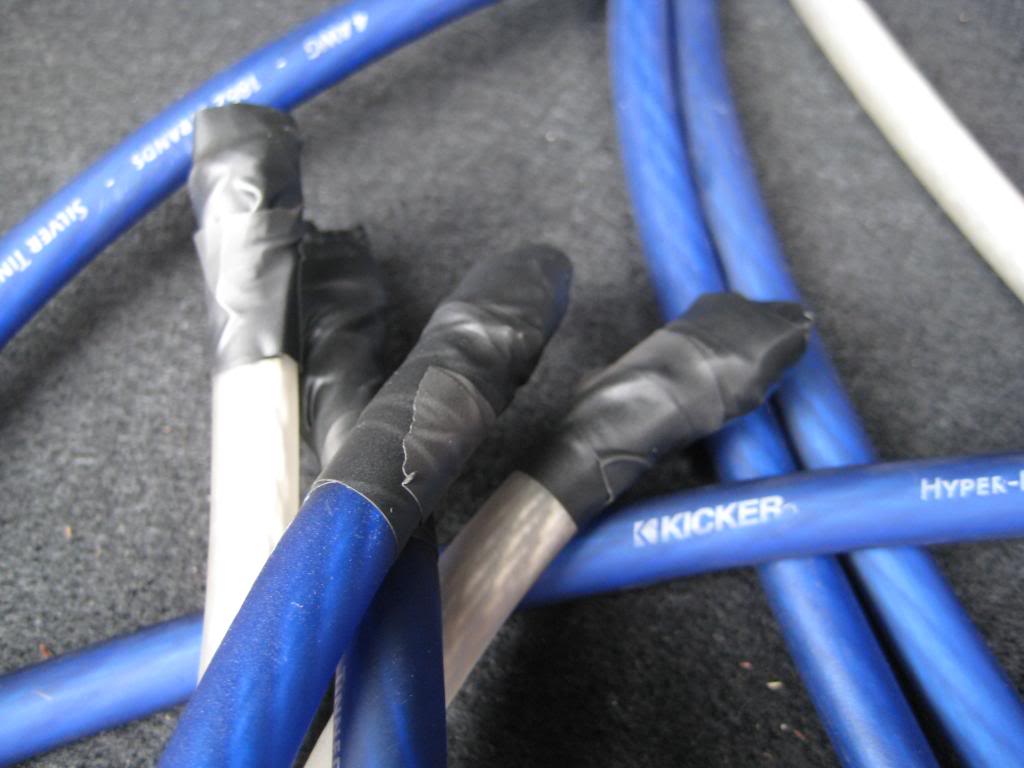
Tinned Copper Ring terminals:
A little techflex and heat shrink to make it look all purrdy:
All four wires in and out:
Since I'm going to be swapping the battery I figured I'd leave some slack for the wires. All I could find was some latex gloves..then I found some electrical tape and wrapped it around (not pictured is the electrical tape).
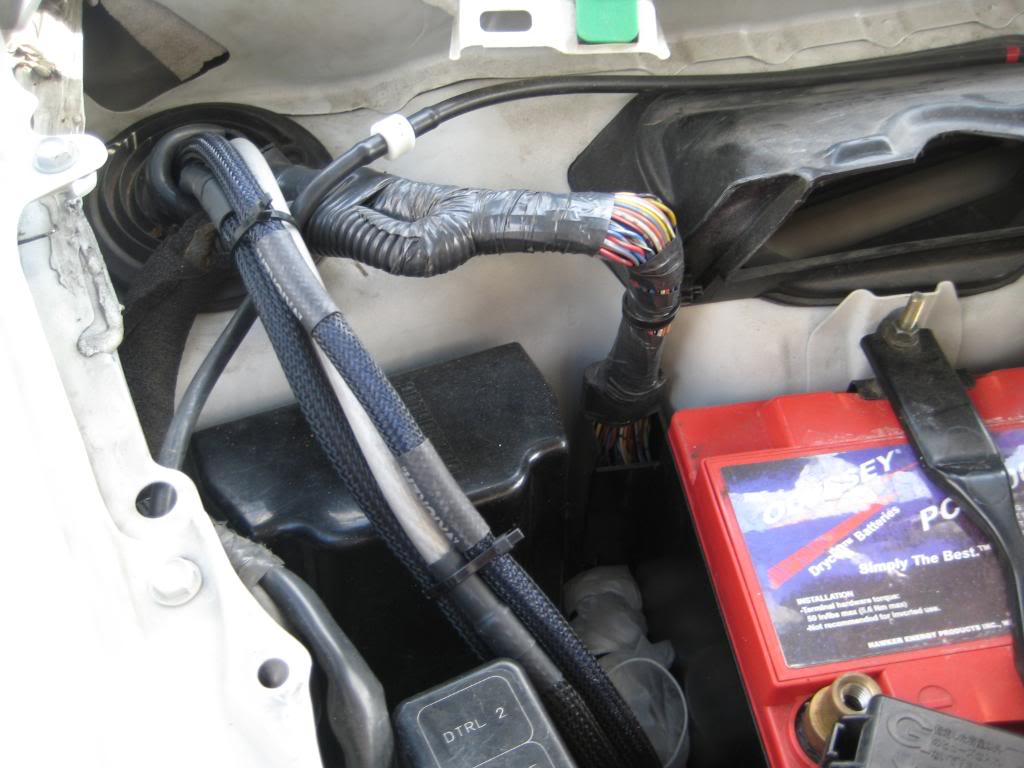
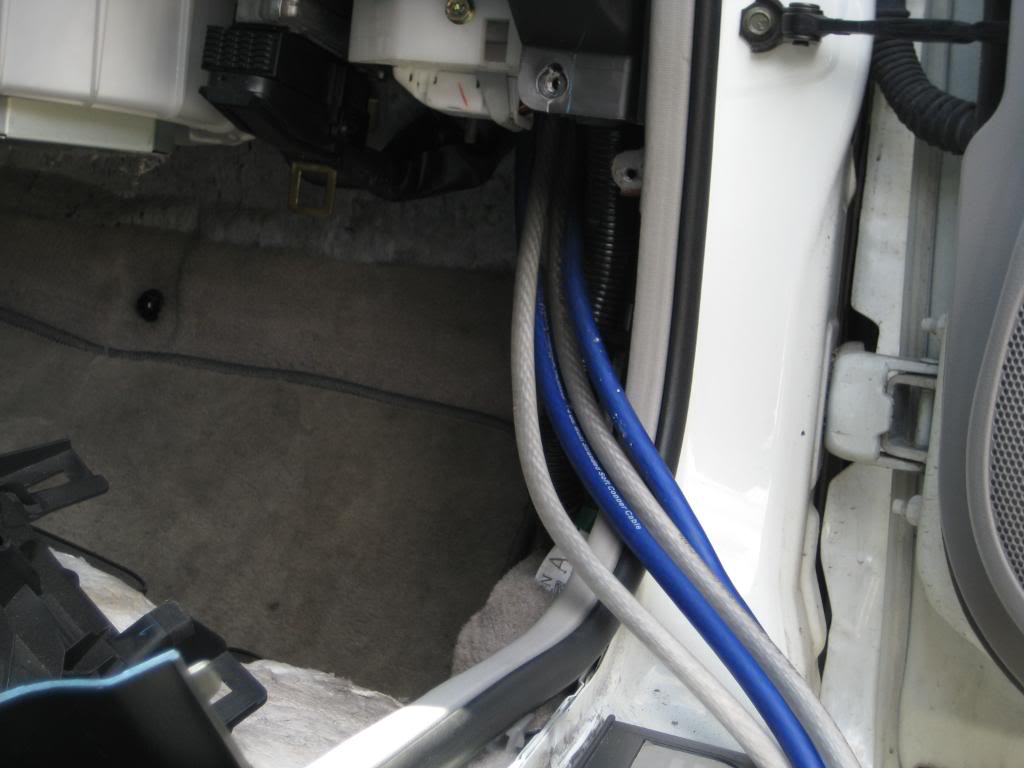
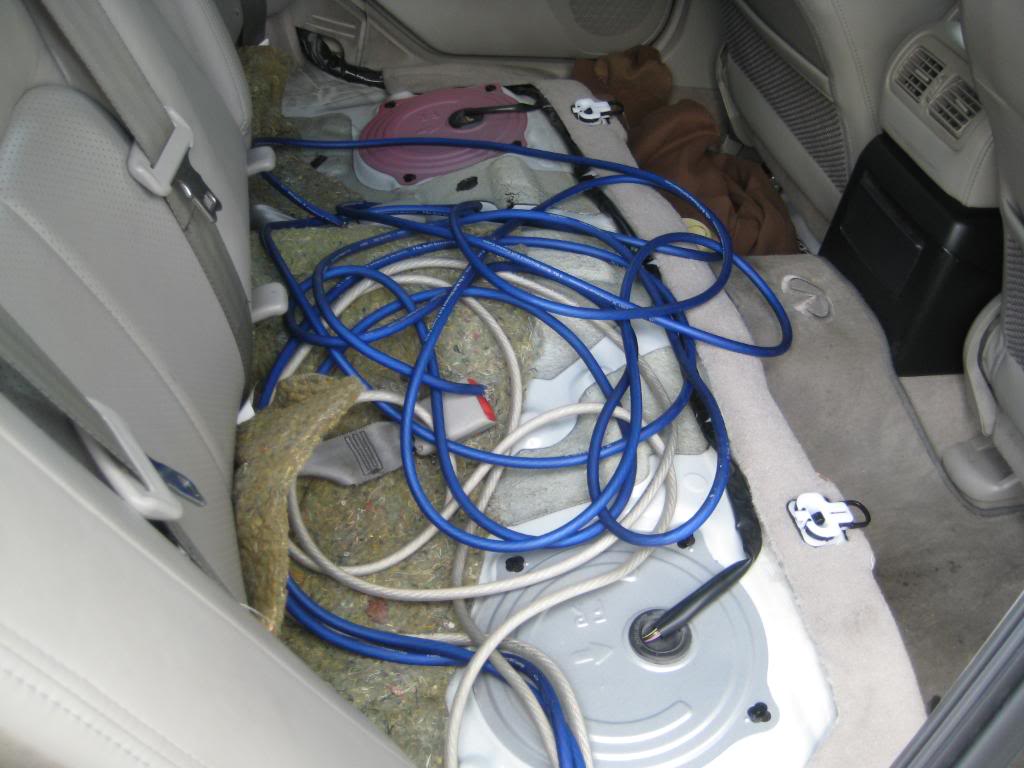
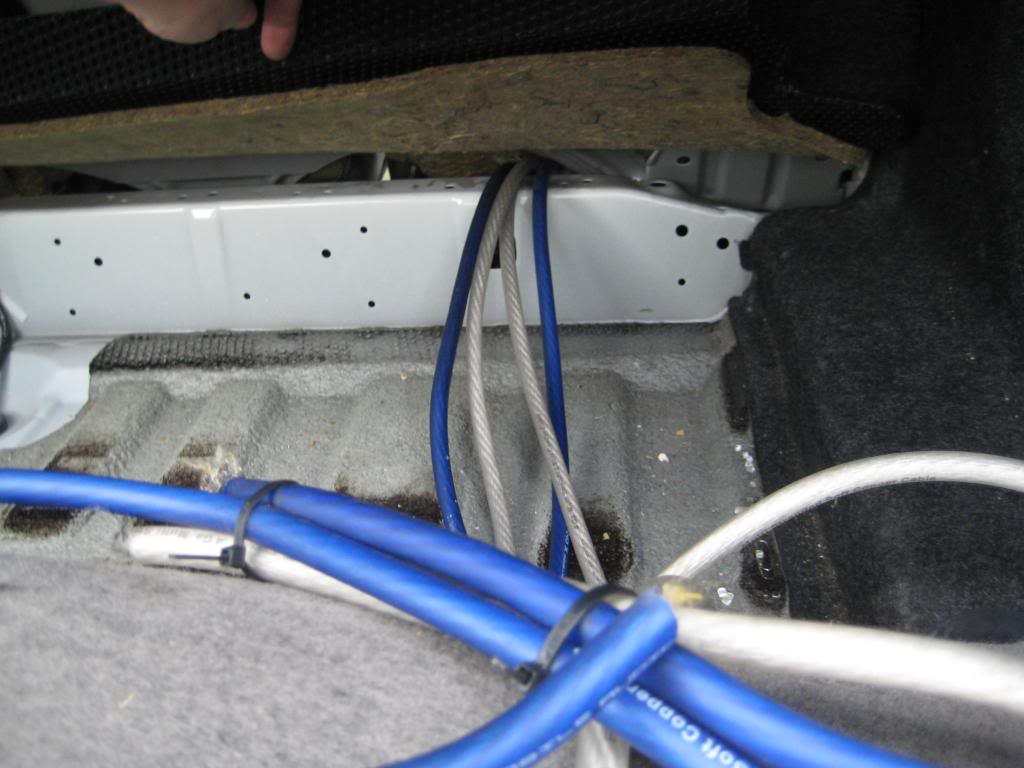
Progress of running all 4 wires
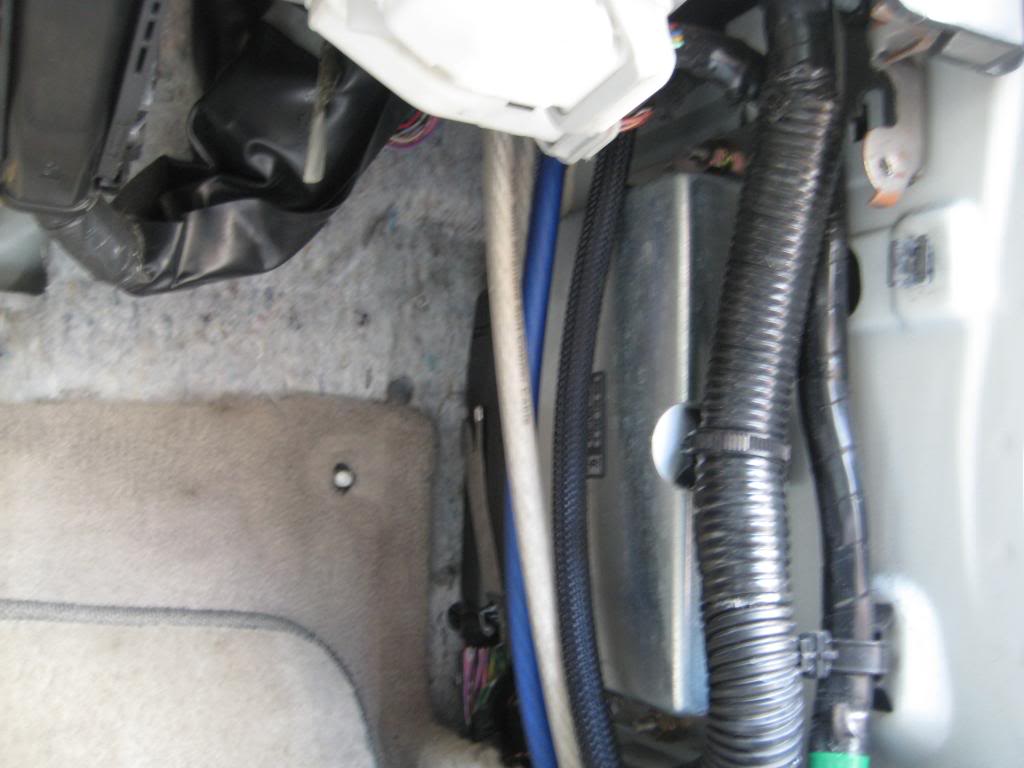
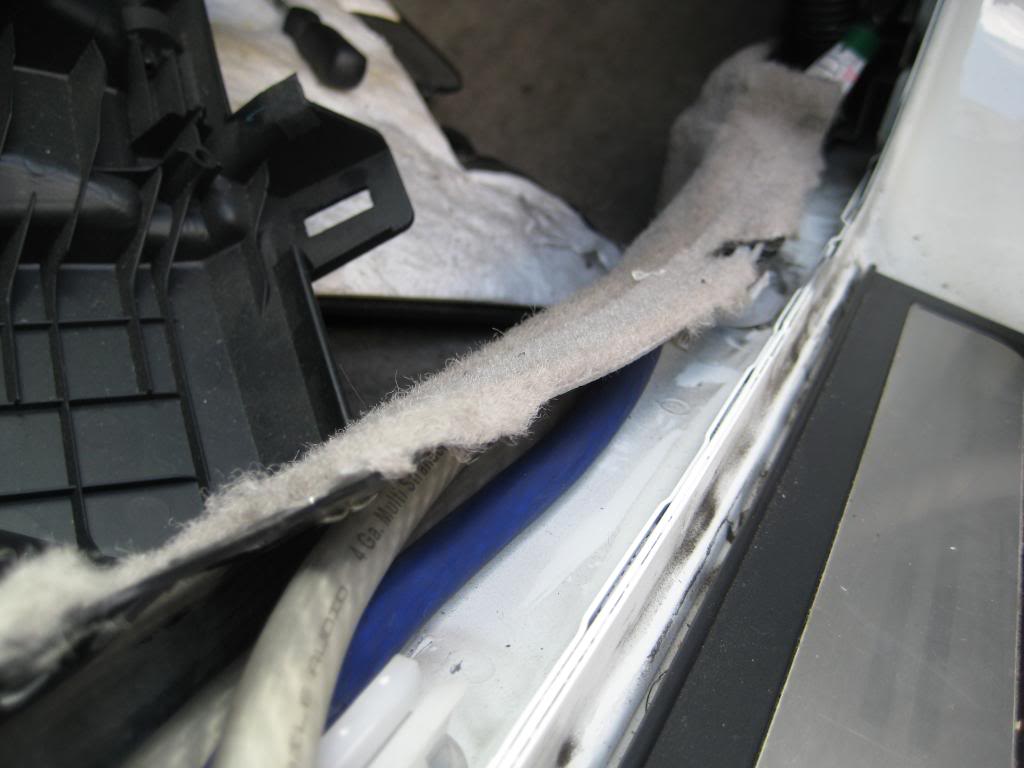
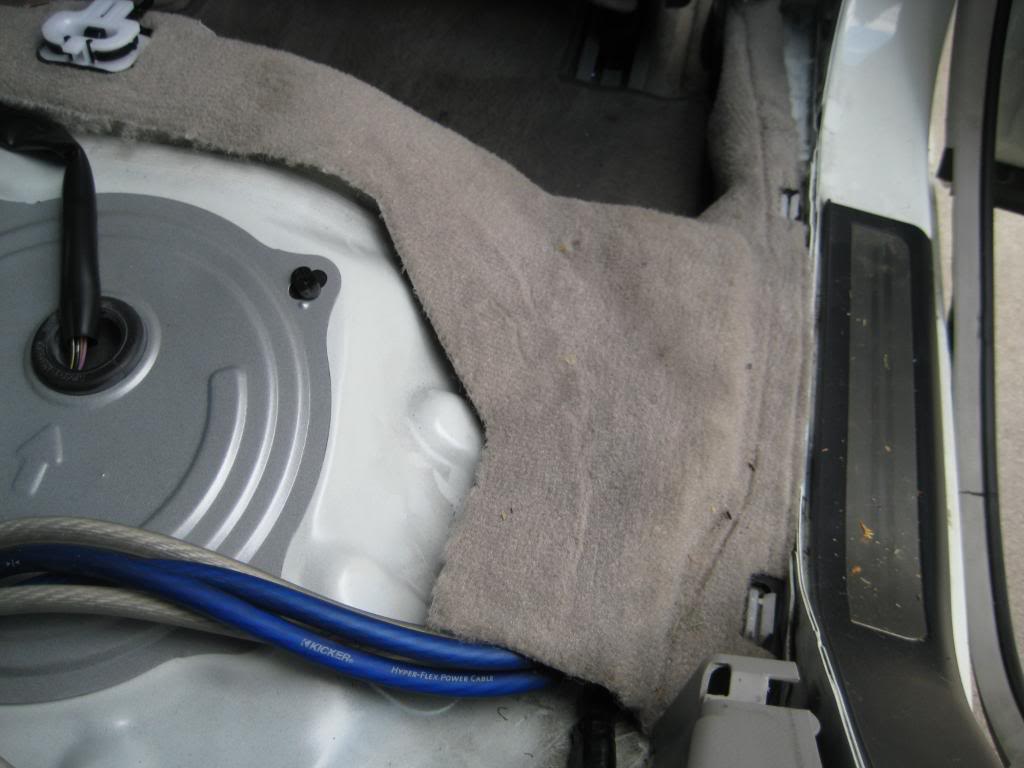
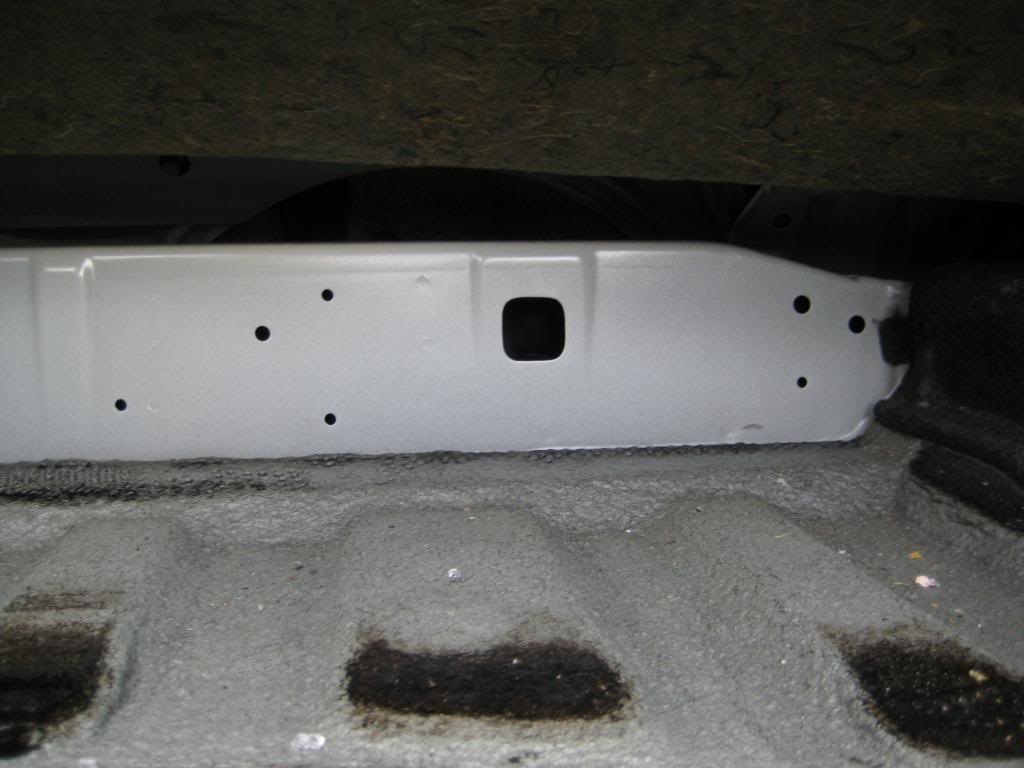
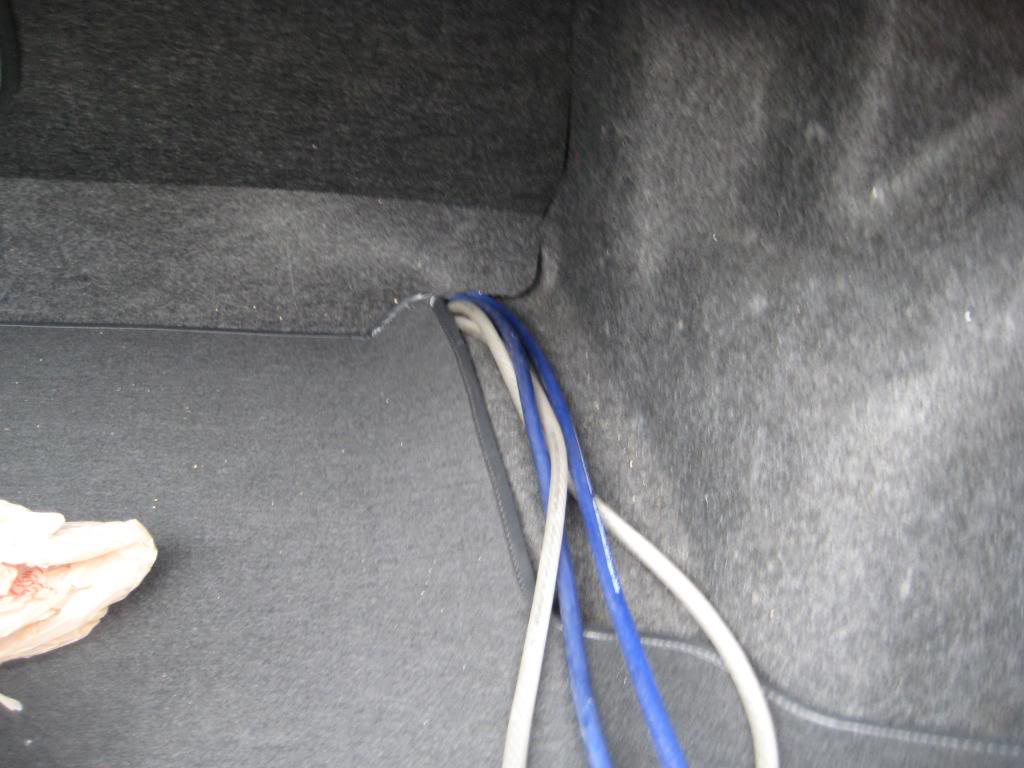
Time to head to the trunk and find that opening
Fed one through. Then zip-tying them and pulling through made it much easier.
Putting everything back together and taping off the opposite end of the wires with electrical tape.

April 11, 2010:
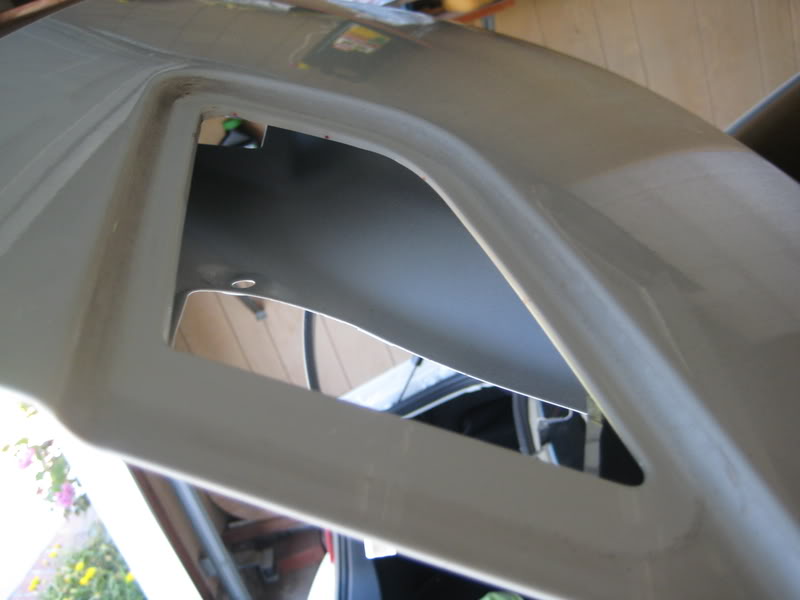
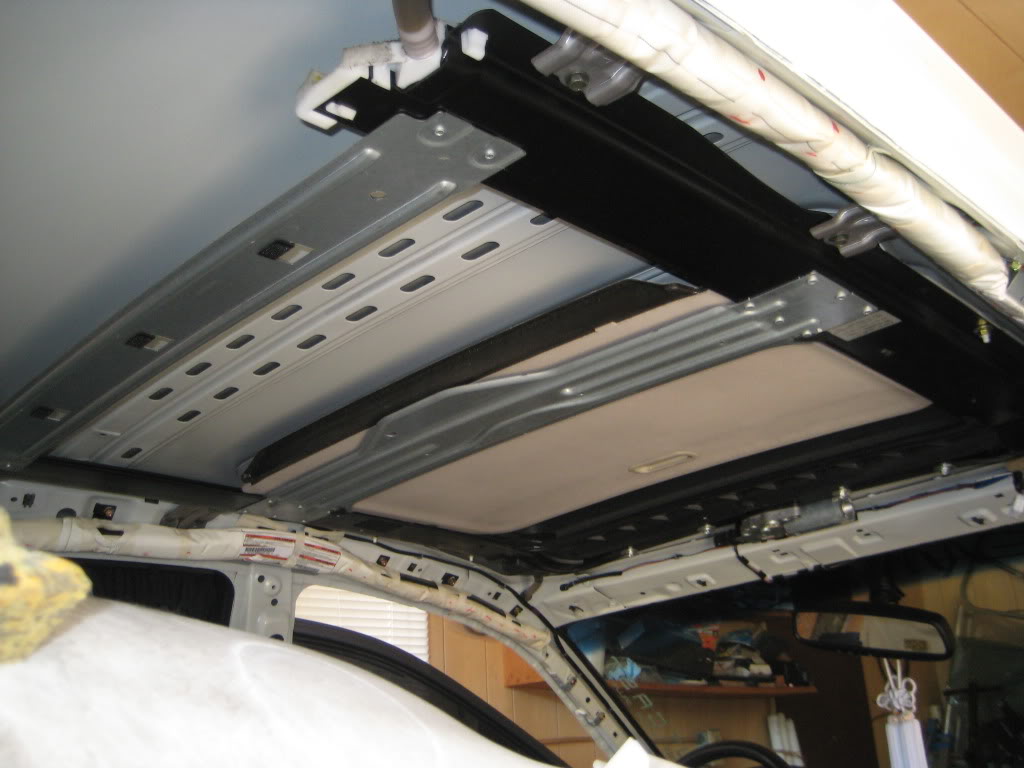
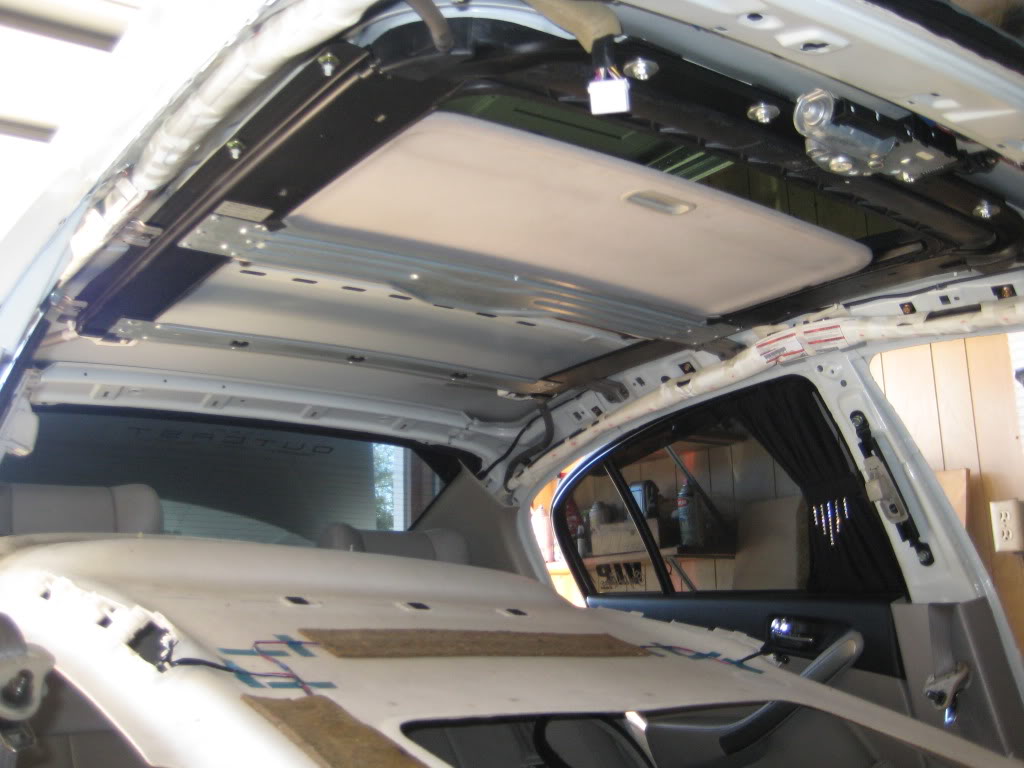
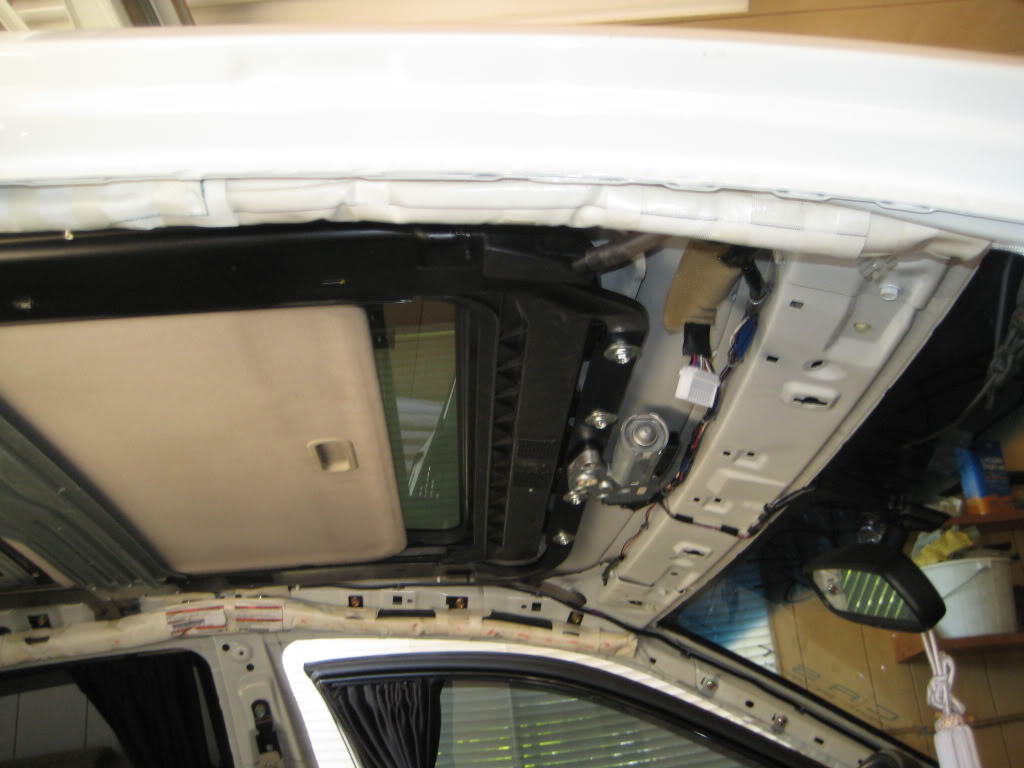
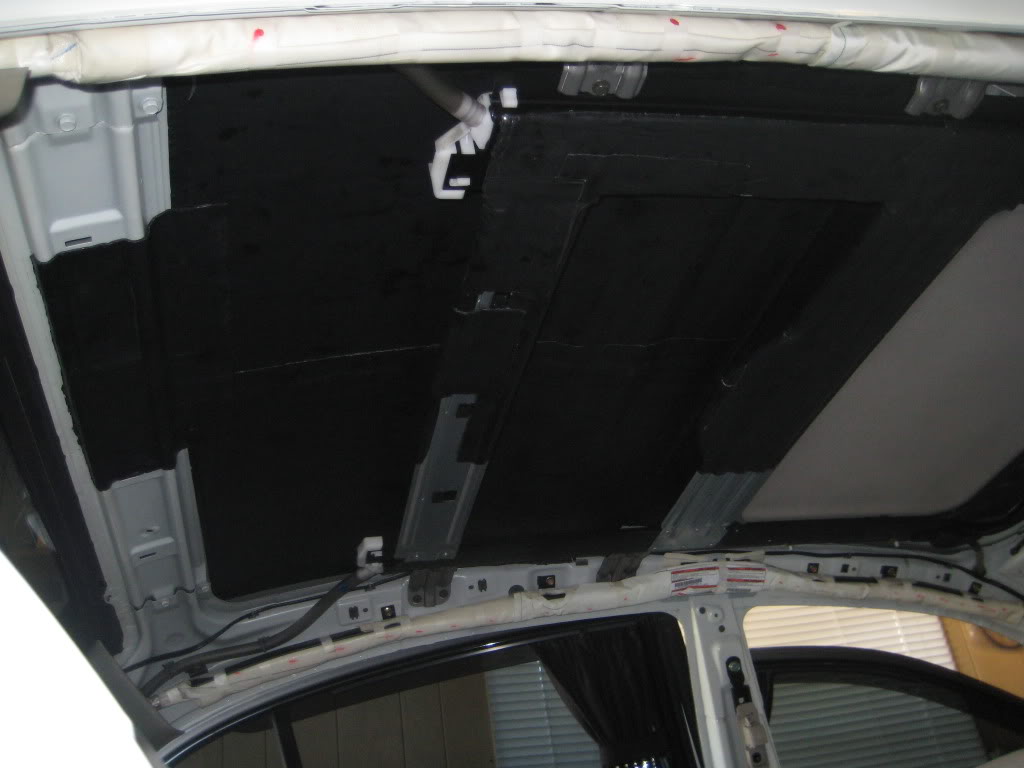
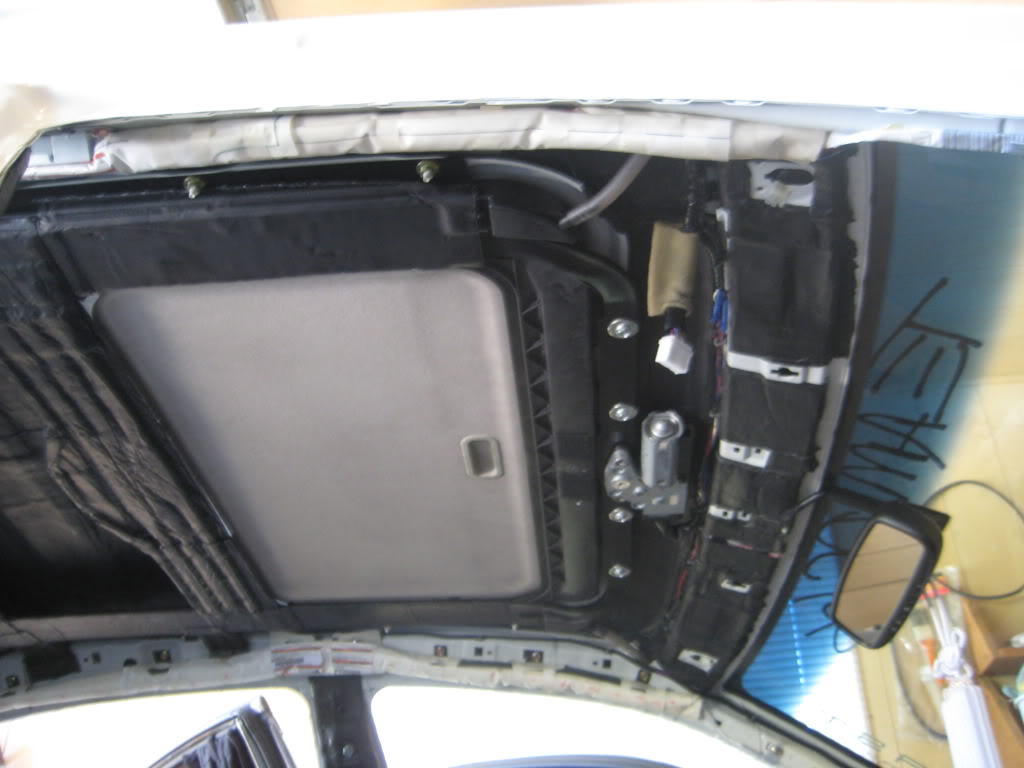
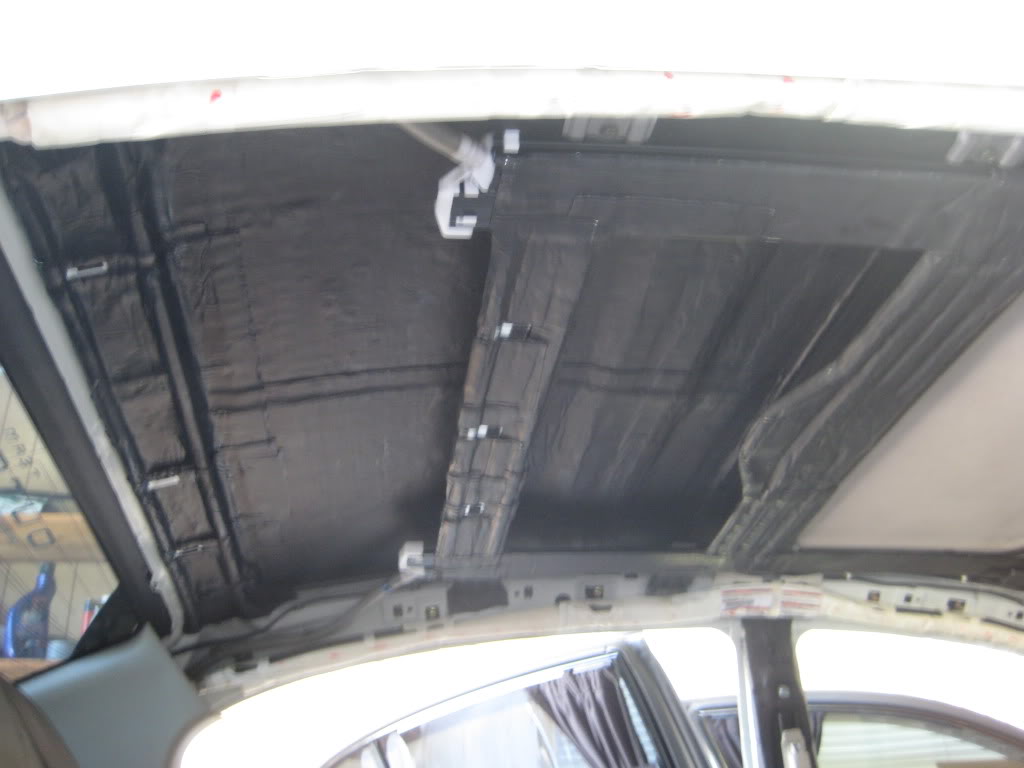
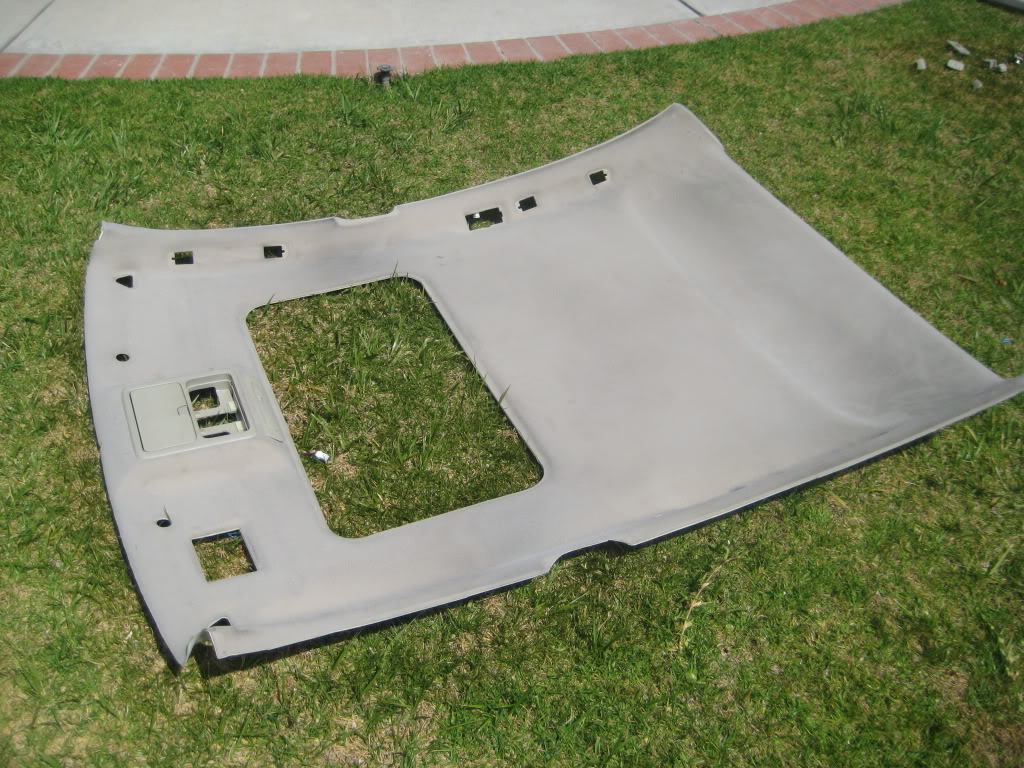
Installed deadener on roof.
Copy and pasting from my build log on an audio forum. Started on Thursday, continued and finished on Friday.
Started deadening the roof today. My gosh it was a pain in the rear. I got the headliner off without much trouble, but getting it out of the car was another story. Didn't get it out till I stopped doing some work and a friend came over and helped me out. Thanks Robby
Anyway, majority of the roof is done. Just need to finish up the driver side in the rear and do the front a little. Hopefully I'll have enough for my trunk, but I don't think I'll have anything left for my doors. Using a shop pack already. BTW, I'm using two layers and I'll be finishing this up tomorrow.

Some random pictures I took at the infamous spot where a bunch of VIP modded cars do photoshoots at:
December 4, 2009
New muffler.
Been a while since I've done much with the car. Finally got a muffler on, Sebring, and it is sick. I'll get sound clips and better photos soon. I'm going to end up doing a full exhaust with the shop down the line.
Here's a clip, but quality is not that great audio wise...gonna redo it.
January 17, 2010:
Haven't done too much, but I've been getting some pretty neat ideas checking out some VIP mags. Anyhow, getting some JDM cigarette/ash tray holders...i don't smoke but they can be used as cupholders too. They'll match my table that I'm going to have made for me.
Also added some chrome trimmings to certain areas, I'll get pics of them if I can tomorrow. Also relocated the Garson hood badge to the trunk to cover up the holes
. For the fenders, I messed up, but gonna redo, you can see one piece where I cut off the trimming and there was a gap so I put another piece there. Too lazy to take off and redo at the moment. The other side came out just fine though. Also some better pics of the cupholder.January 7, 2010:
Decided I'm gonna go through with meshing the two bumpers together..makes it easier, saves some money since buying two sets of projectors and HID kits for them will run some coin.
Gonna use the FX projectors, but any thoughts on whether I should do 8k or 10k? I have 8k HID's and I don't want yellow fogs...some pics of a "test fit". basically just let the bumper hang there for a visual.
I won't have that grill though, I'll have the OEM grill and I'm going to make a piece right above the grill just like the M45's have.
February 6, 2010:
Got my car back from JT Autobody in Rosemead...Mad props to Big Brotha Tony...he hooked it up! Currently needs paint and FX proejctors to be put in for fogs, should get done before the end of this month.
It's raining right now so had to take in garage pics, but nonetheless, here they are. Feel free to comment in any way
Here's some pics thanks to Cookie Monster.
February 28, 2010:
Quick vid I snapped today....
March 3, 2010:
Quick update. I'm starting to run the wires. I figured I have plenty of wire so might as well put it to use. Rather than do a single run of power cable from batt to trunk and ground somewhere in trunk....or even do a full run of each like the occasional people do...I figured to do two full runs of each. One for each amp.
I'll also be replacing the Odyssey PC 1200 with a redtop group 35 and throwing the Odyssey in the trunk with a Yellowtop group 35. I was gonna use a Batcap 3000 up front and 2000 in the rear but I don't have that much money for batteries, even with my sponsorship pricing, so unfortunately I had to go with Optima cos I got sponsored by them as well....probably order those batteries in a couple weeks.
Here's some progress pics...
80 ft of 4 awg wire:
Gonna run the wire on the passenger side. Grommet slit open to get all the wire in:
Got one in and one out:
Tinned Copper Ring terminals:
A little techflex and heat shrink to make it look all purrdy:
All four wires in and out:
Since I'm going to be swapping the battery I figured I'd leave some slack for the wires. All I could find was some latex gloves..then I found some electrical tape and wrapped it around (not pictured is the electrical tape).
Progress of running all 4 wires
Time to head to the trunk and find that opening
Fed one through. Then zip-tying them and pulling through made it much easier.
Putting everything back together and taping off the opposite end of the wires with electrical tape.
April 11, 2010:
Installed deadener on roof.
Copy and pasting from my build log on an audio forum. Started on Thursday, continued and finished on Friday.
Started deadening the roof today. My gosh it was a pain in the rear. I got the headliner off without much trouble, but getting it out of the car was another story. Didn't get it out till I stopped doing some work and a friend came over and helped me out. Thanks Robby
Anyway, majority of the roof is done. Just need to finish up the driver side in the rear and do the front a little. Hopefully I'll have enough for my trunk, but I don't think I'll have anything left for my doors. Using a shop pack already. BTW, I'm using two layers and I'll be finishing this up tomorrow.
Last edited by The Stimulation; Nov 15, 2010 at 12:27 PM.
Joined: Aug 2007
Posts: 10,850
Likes: 158
From: Los Angeles
Here's some before and in progress videos of the difference.
Before:
In Progress:
I have plans for the headliner, might do them black, but then my pillars won't match. Not doing suede, I don't like it. But I do have some neat ideas. Some may say it's tacky but I think it'll fit the look of my car quite well. I'll be putting fiber optic lights like you would see on the roof a limousine.
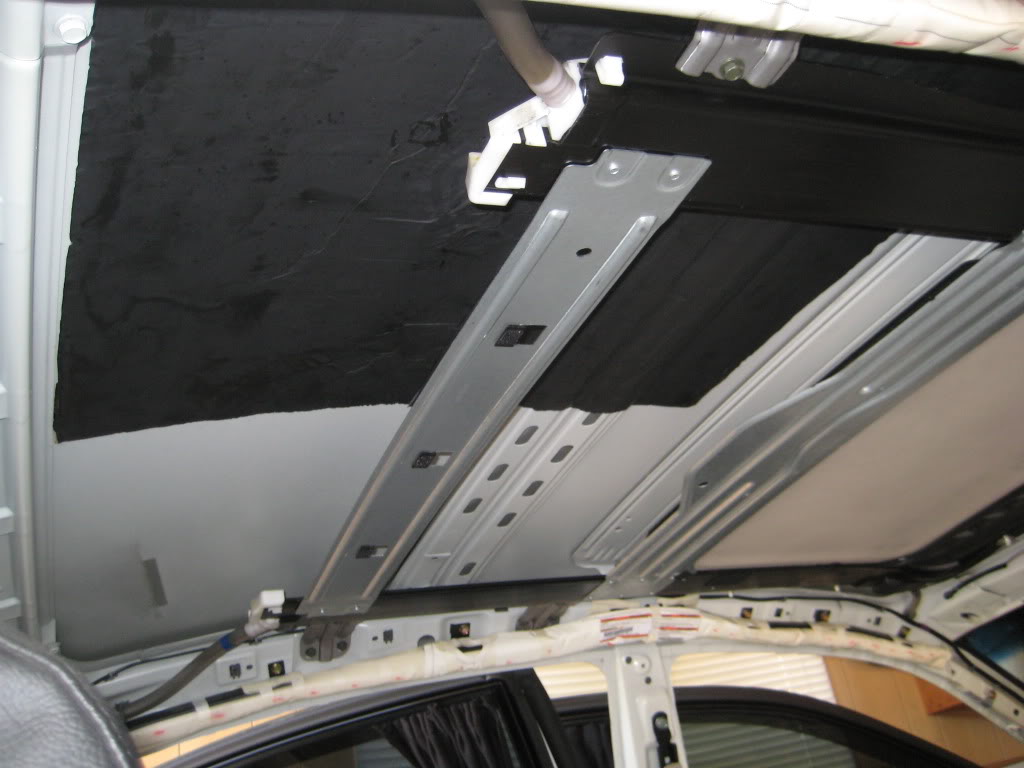
Roof is completed with 2 layers. Here are some pics...

Also a vid:
April 26, 2010:
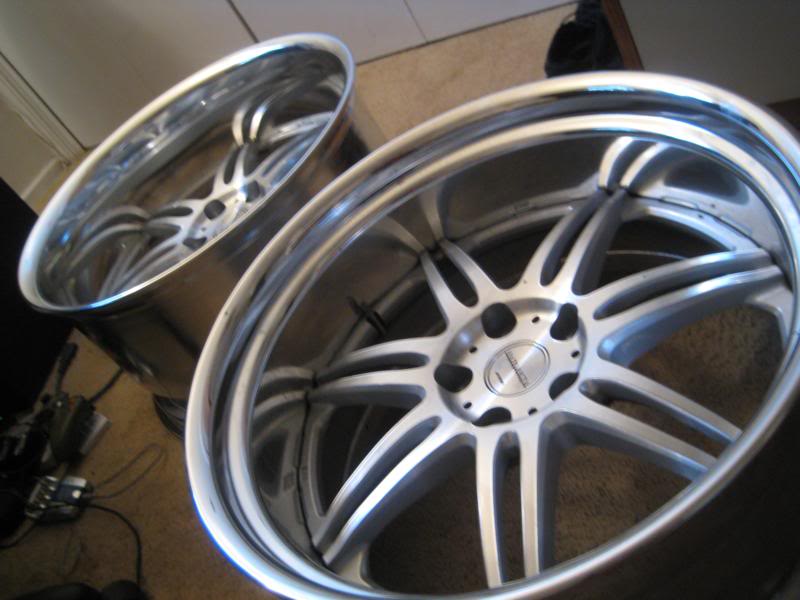
New setup in the works. Will take some time to complete, but since I had the time I decided to try part of it out.
20x10.5 +0 fronts. (5 inch lip)
Rears are yet to be determined. Looking to go anywhere between 15 and 35 mm more aggressive. I want to get between a 5.5 and 6" lip in the rear. Will be doing it without wide body or by cutting the fenders and adding sheet metal.
Videos:
Don't mind the rattle, it's my OEM cats. Need new ones.
June 10, 2010:
I'm doing some interior work, bought a crap load of vinyl and fabric spray paint, although I should have bought some dye instead. Carpets were painted black (will get pictures later) and already started on the a pillars, headliner, b pillars and some other little pieces. Painting everything above the dash black to keep a nice two tone.
I'll probably wrap the pillars with some leather vinyl or maybe something that matches the headliner. As for the headliner, I'm not sure yet. Gonna put the fiber optic lighting project aside for the time being. Maybe some sort faux fur, but must be real short. Not gonna do suede or alcantra (or whatever it's called) because I don't like it. I wanna keep it luxury/exotic and suede is more sporty and I feel like everyone has it and I always go about doing things different from others. Or I might find something with a pattern or design that is still fully black, we'll see. I might add another coat to the headliner tomorrow. It's good enough, but maybe it can use another coat. Sucks that one spot in the middle behind where the sunroof is, is a different shade. It was dirty from before (another reason why I wanna wrap).
Anyway, here are some pics.
Headliner before cleaning and painting:
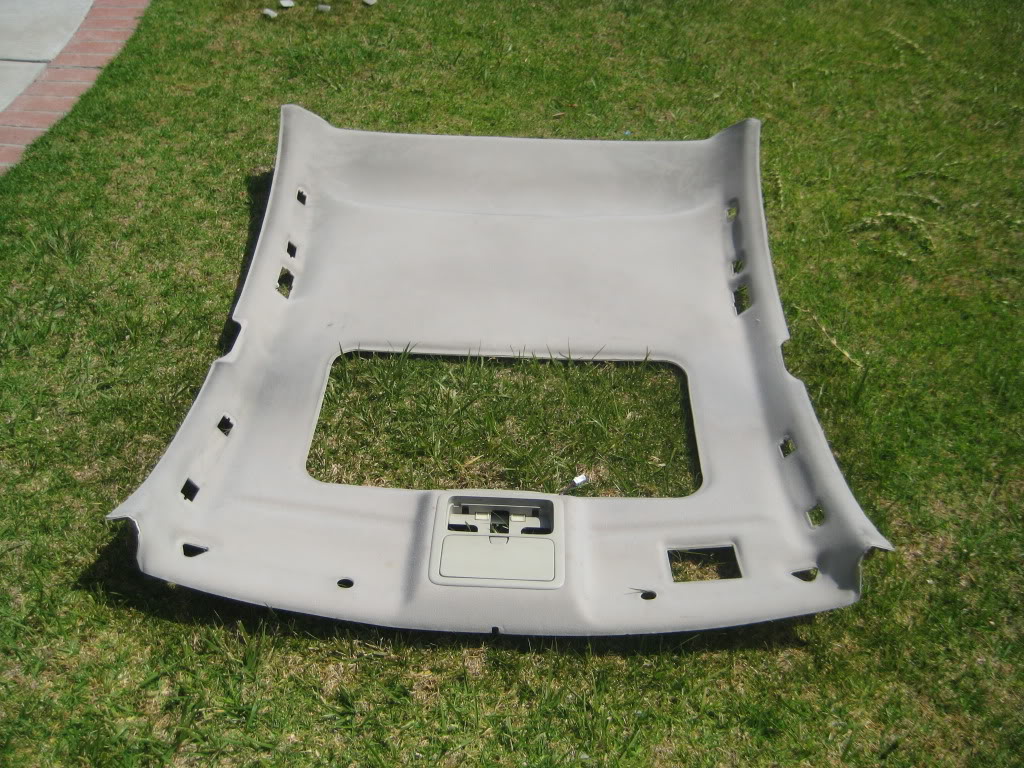
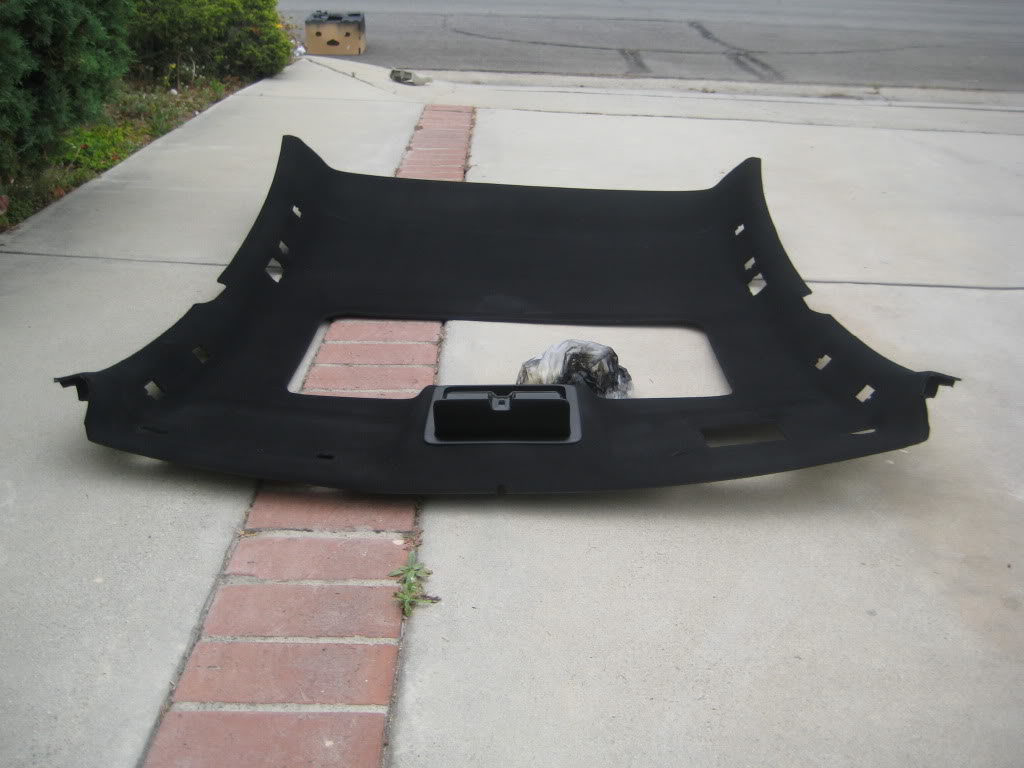
Headliner after painting:

Snapshot of the a pillar completed:
July 18, 2010:
Had some time to change the oil. So pissed because when I went to get the oil filter, I usually get the Puralator PureOne for the Maxima. Well I picked up the regular kind, went back, didn't have it, went to 2 other places, didn't have it, and then come to find out I even got the wrong one. I got the G35 one...BAH!!!
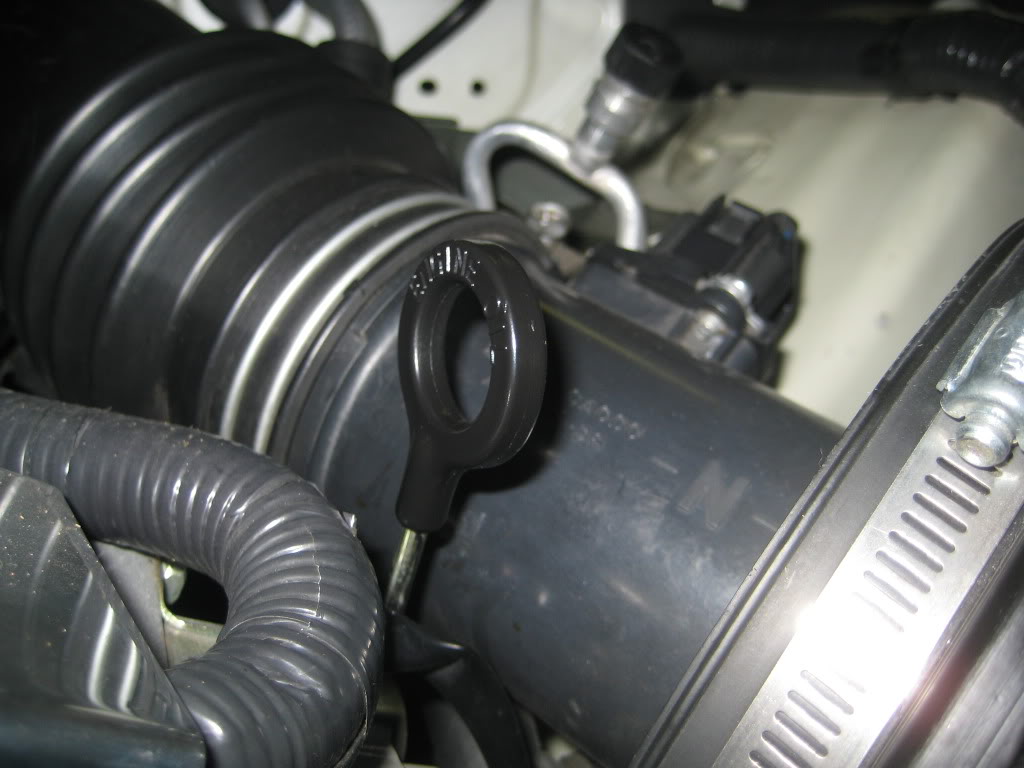
Anyway, painted the washer fluid tube, coolant tank, and the dipstick handle black.
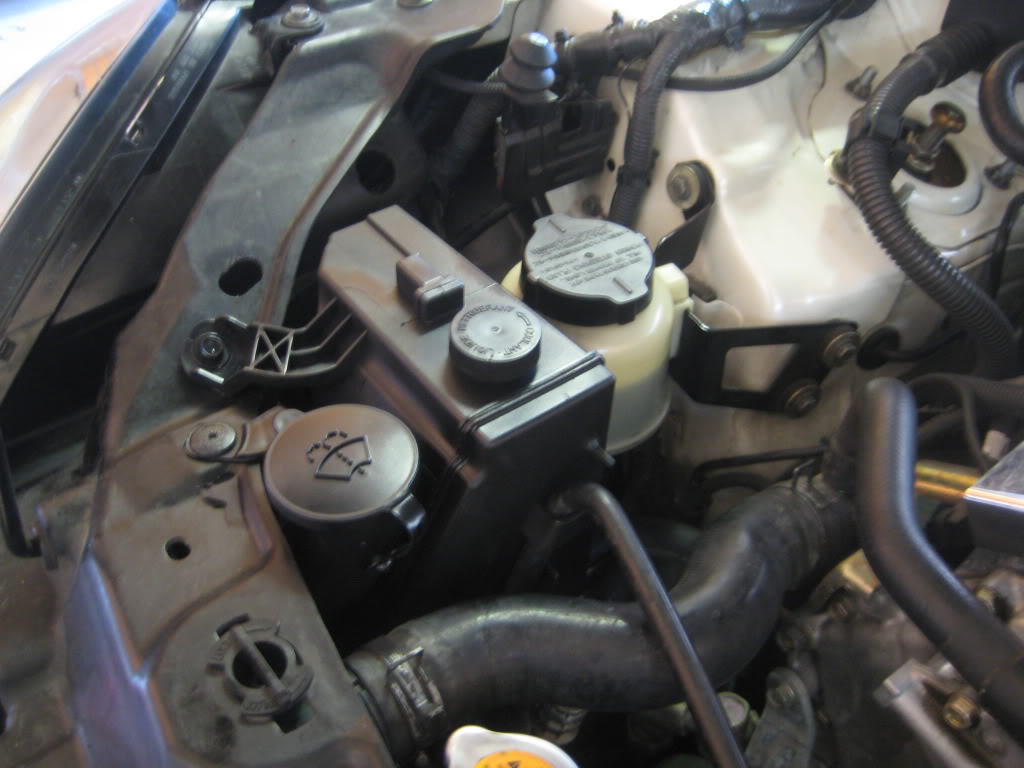
Gotta do the power steering still.
August 4, 2010:
You should see what other things I have comin up for it within the next two months
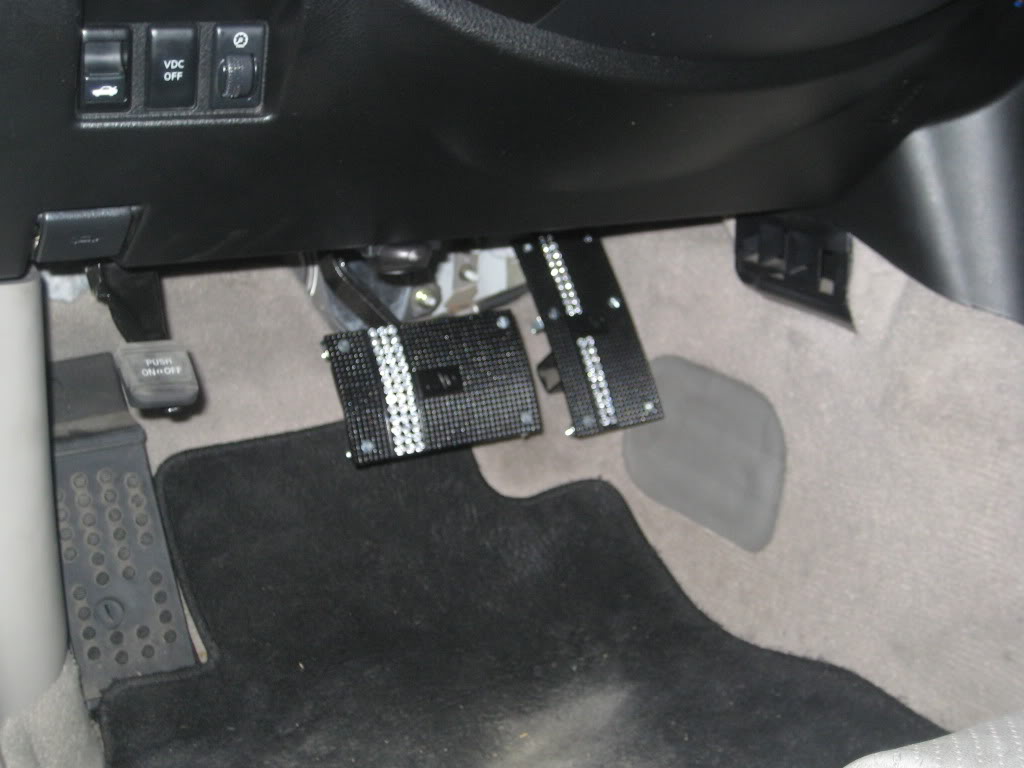
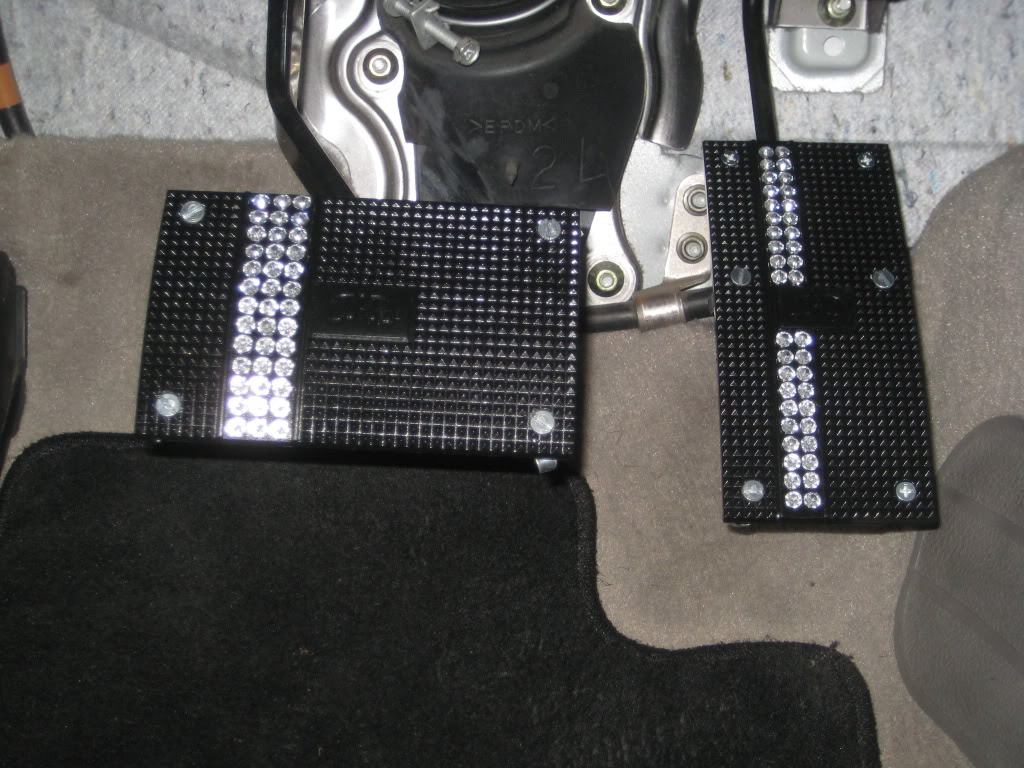
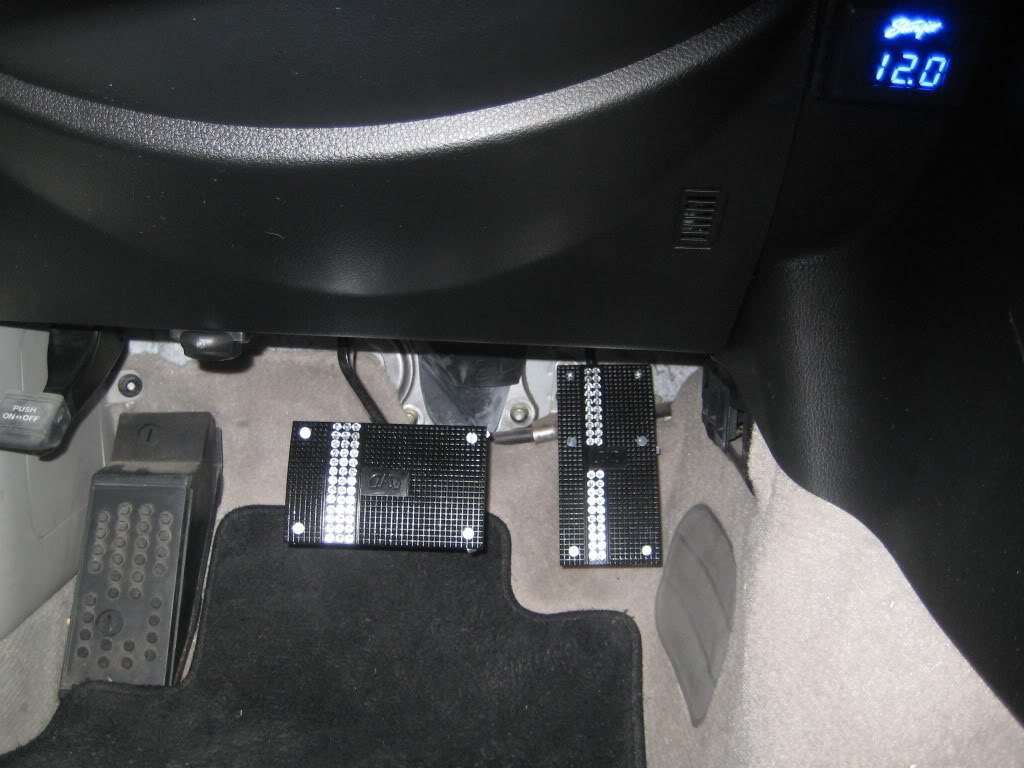
Here's a little taste....
I installed the Garson D.A.D. pedals. Seems like the accelerator pedal is off slightly. Kinda lazy to fix it, but maybe I will later. Gonna get some black touch up paint and paint the screws and the little brackets to hide it more.
August 21, 2010:
For those who haven't seen me post in some of the other threads I posted this in, these are from yesterday.
Teaser of what's goin on the sedan in a few weeks


Next to the fronts....
September 2, 2010:
Can ya guess what these are?
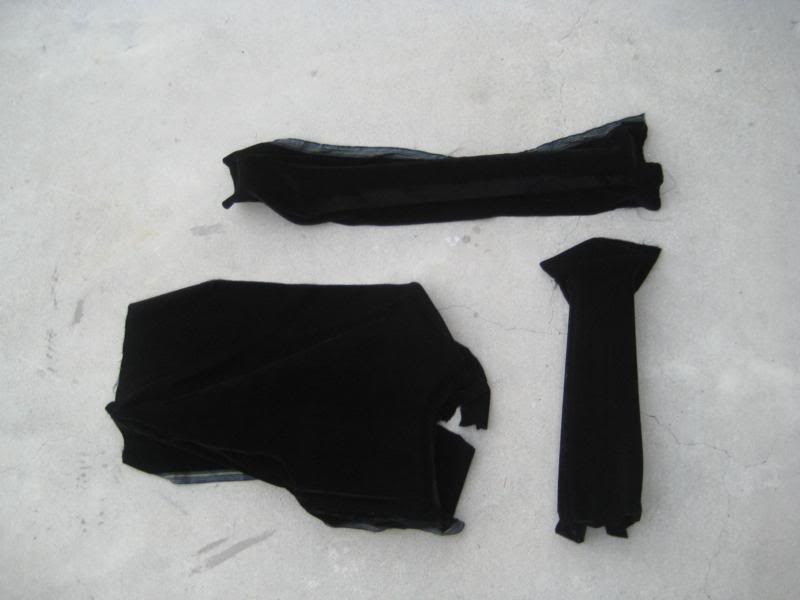
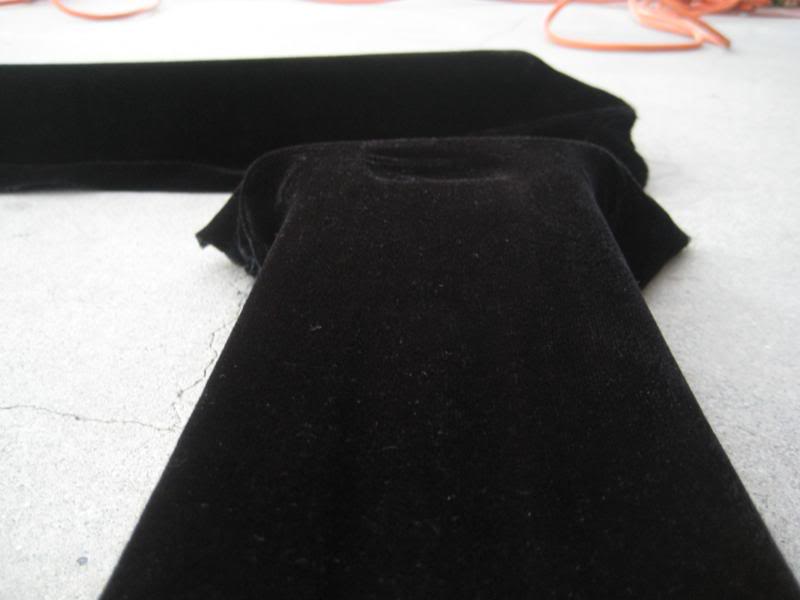
Here's a closer look at one of the pieces.

And no, that's not suede or alcantara....it's velvet Take a closer look.
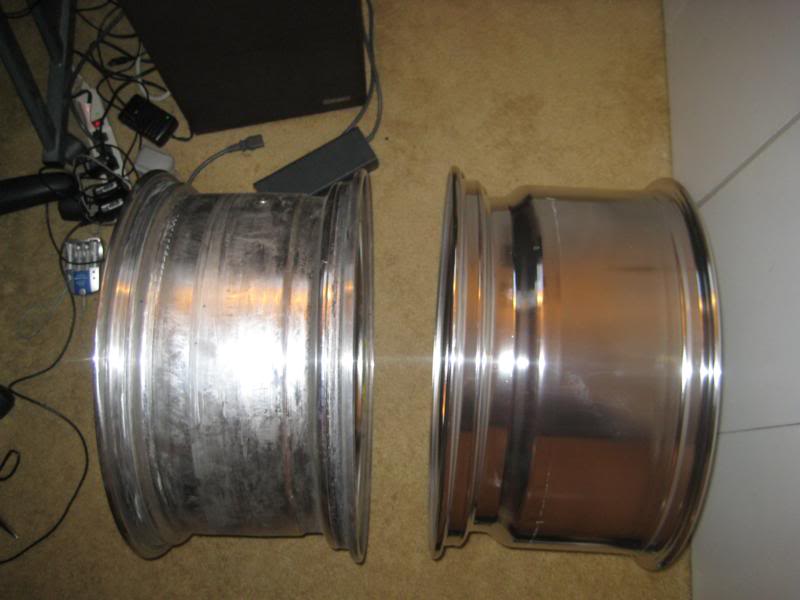
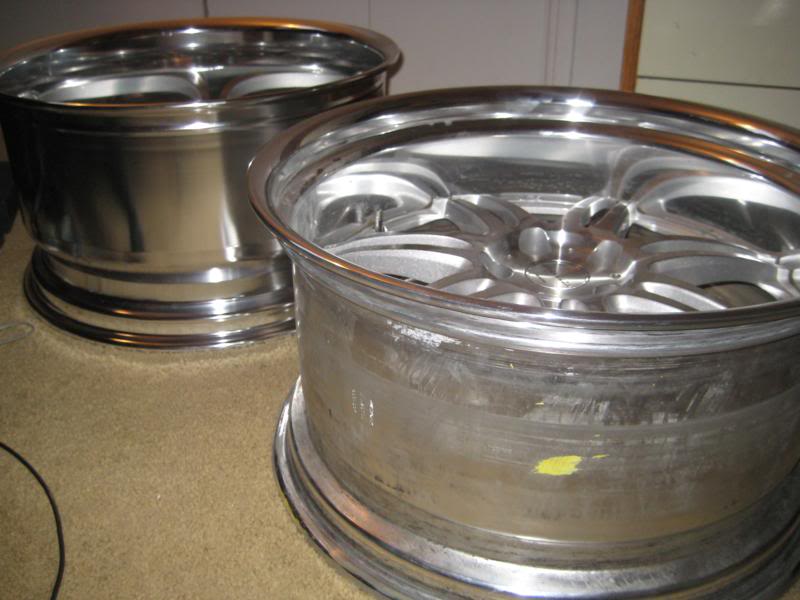
And I just got my old rears/new fronts re-finished (just the step lip portion).
Before (Got worse after this):
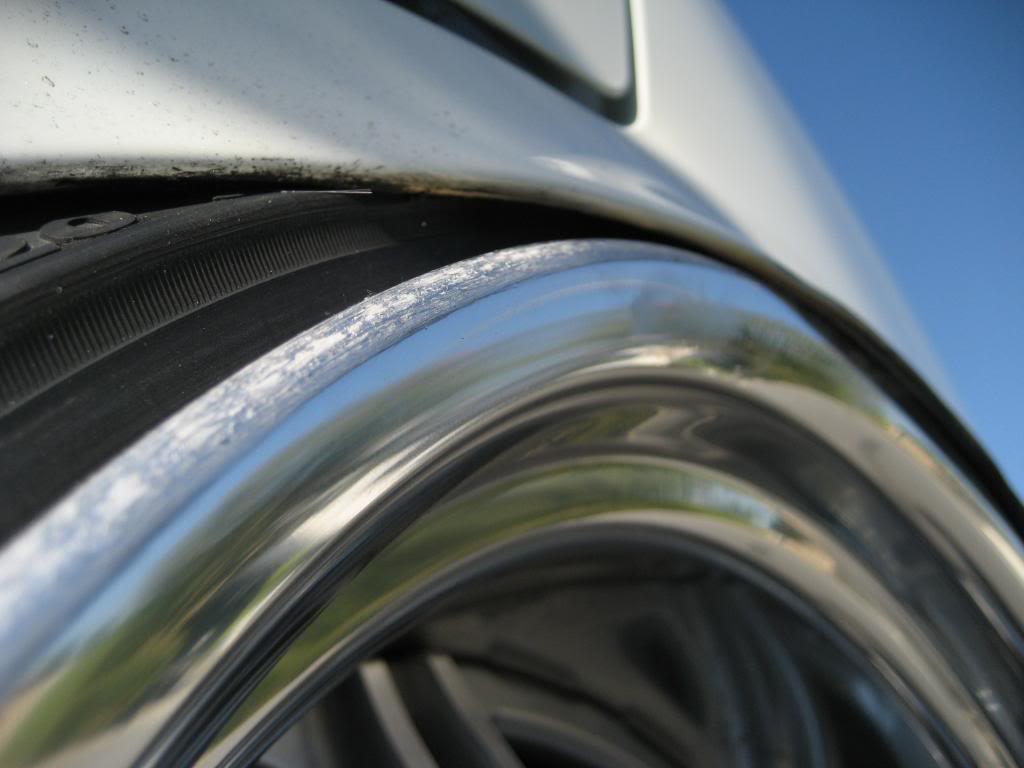
After:
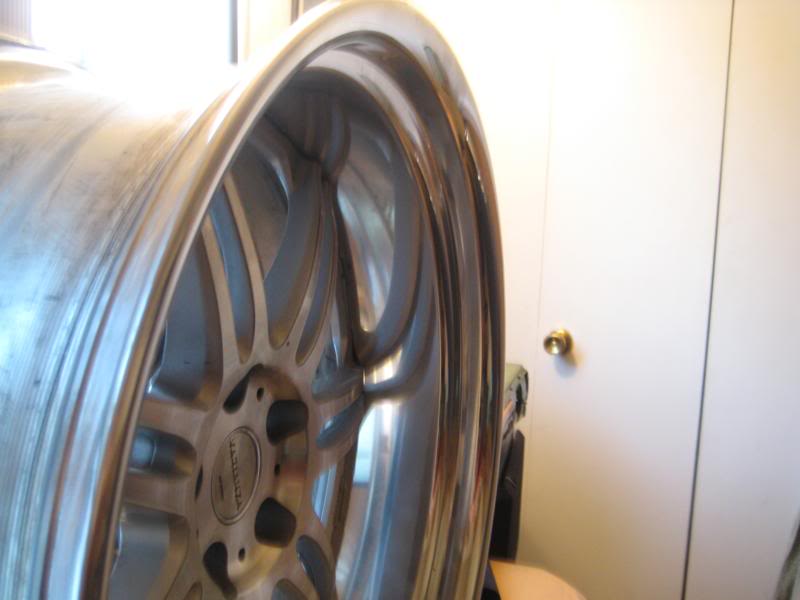
Tires will go on these two babies tomorrow:
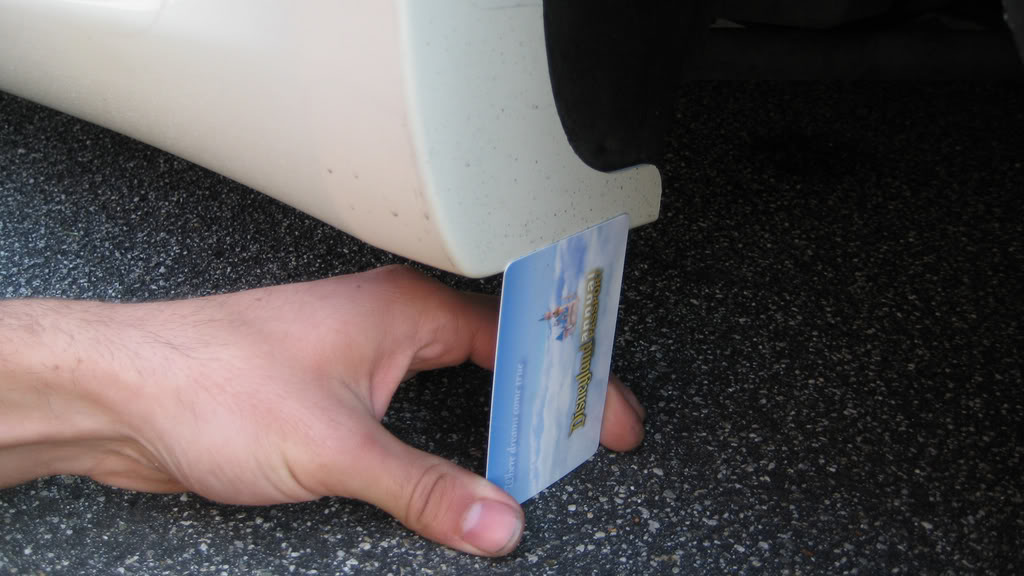
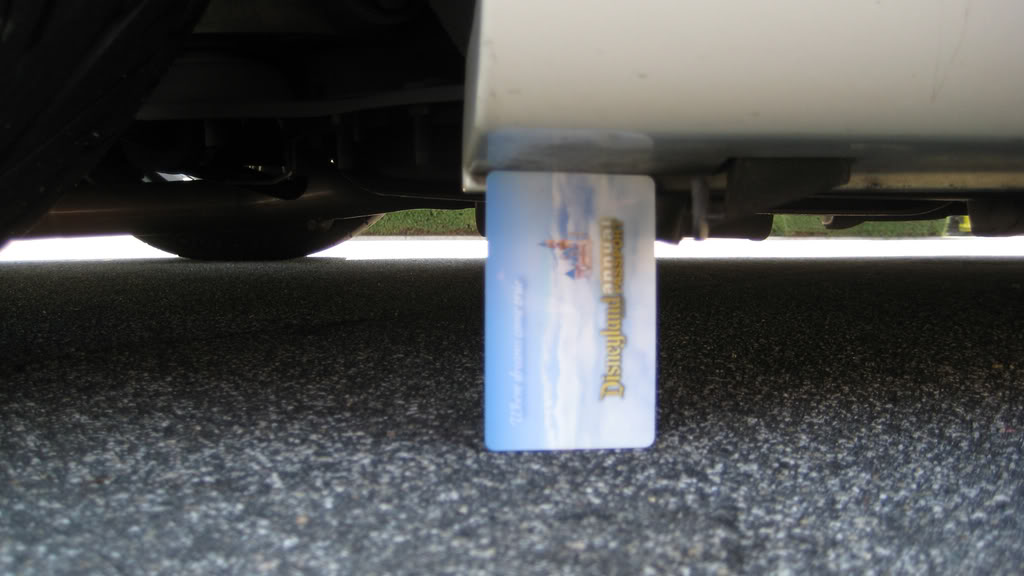
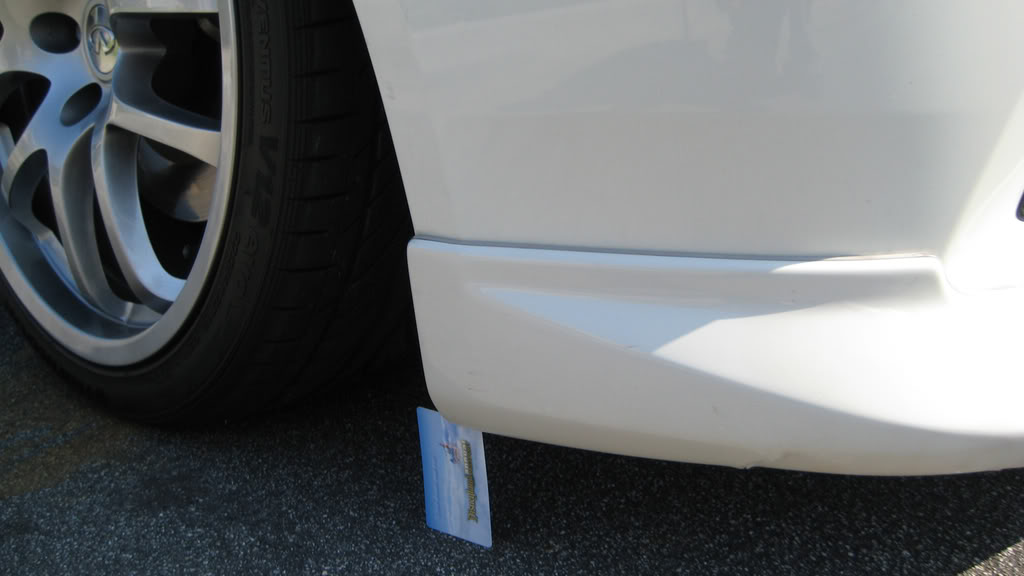
Fantasies run deep....
REAL Deep
In 3 hours I'm ordering some of these:

NOT ENOUGH ROOM LEFT TO POST UPDATES SO CLICK THE LINK BELOW TO DIRECT YOU TO MORE UPDATES (POST #433, #436, and #520 IF IT DOESN'T WORK):
https://g35driver.com/forums/5481767-post433.html
https://g35driver.com/forums/5481868-post436.html
https://g35driver.com/forums/5867476-post520.html
Before:
In Progress:
I have plans for the headliner, might do them black, but then my pillars won't match. Not doing suede, I don't like it. But I do have some neat ideas. Some may say it's tacky but I think it'll fit the look of my car quite well. I'll be putting fiber optic lights like you would see on the roof a limousine.
Roof is completed with 2 layers. Here are some pics...
Also a vid:
April 26, 2010:
New setup in the works. Will take some time to complete, but since I had the time I decided to try part of it out.
20x10.5 +0 fronts. (5 inch lip)
Rears are yet to be determined. Looking to go anywhere between 15 and 35 mm more aggressive. I want to get between a 5.5 and 6" lip in the rear. Will be doing it without wide body or by cutting the fenders and adding sheet metal.
Videos:
Don't mind the rattle, it's my OEM cats. Need new ones.
June 10, 2010:
I'm doing some interior work, bought a crap load of vinyl and fabric spray paint, although I should have bought some dye instead. Carpets were painted black (will get pictures later) and already started on the a pillars, headliner, b pillars and some other little pieces. Painting everything above the dash black to keep a nice two tone.
I'll probably wrap the pillars with some leather vinyl or maybe something that matches the headliner. As for the headliner, I'm not sure yet. Gonna put the fiber optic lighting project aside for the time being. Maybe some sort faux fur, but must be real short. Not gonna do suede or alcantra (or whatever it's called) because I don't like it. I wanna keep it luxury/exotic and suede is more sporty and I feel like everyone has it and I always go about doing things different from others. Or I might find something with a pattern or design that is still fully black, we'll see. I might add another coat to the headliner tomorrow. It's good enough, but maybe it can use another coat. Sucks that one spot in the middle behind where the sunroof is, is a different shade. It was dirty from before (another reason why I wanna wrap).
Anyway, here are some pics.
Headliner before cleaning and painting:
Headliner after painting:
Snapshot of the a pillar completed:
July 18, 2010:
Had some time to change the oil. So pissed because when I went to get the oil filter, I usually get the Puralator PureOne for the Maxima. Well I picked up the regular kind, went back, didn't have it, went to 2 other places, didn't have it, and then come to find out I even got the wrong one. I got the G35 one...BAH!!!
Anyway, painted the washer fluid tube, coolant tank, and the dipstick handle black.
Gotta do the power steering still.
August 4, 2010:
You should see what other things I have comin up for it within the next two months
Here's a little taste....
I installed the Garson D.A.D. pedals. Seems like the accelerator pedal is off slightly. Kinda lazy to fix it, but maybe I will later. Gonna get some black touch up paint and paint the screws and the little brackets to hide it more.
August 21, 2010:
For those who haven't seen me post in some of the other threads I posted this in, these are from yesterday.
Teaser of what's goin on the sedan in a few weeks
Next to the fronts....
September 2, 2010:
Can ya guess what these are?
Here's a closer look at one of the pieces.
And no, that's not suede or alcantara....it's velvet
Take a closer look.And I just got my old rears/new fronts re-finished (just the step lip portion).
Before (Got worse after this):
After:
Tires will go on these two babies tomorrow:
Fantasies run deep....
REAL Deep
In 3 hours I'm ordering some of these:
NOT ENOUGH ROOM LEFT TO POST UPDATES SO CLICK THE LINK BELOW TO DIRECT YOU TO MORE UPDATES (POST #433, #436, and #520 IF IT DOESN'T WORK):
https://g35driver.com/forums/5481767-post433.html
https://g35driver.com/forums/5481868-post436.html
https://g35driver.com/forums/5867476-post520.html
Last edited by The Stimulation; May 12, 2011 at 12:35 PM.


Trending Topics
Joined: Aug 2007
Posts: 10,850
Likes: 158
From: Los Angeles
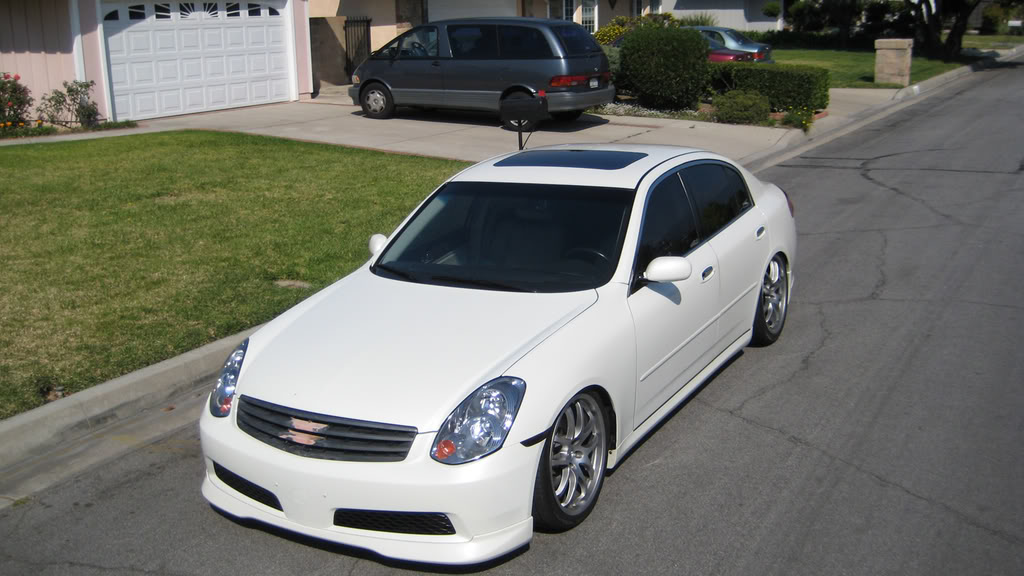
Roof is an overlay, debating on whether to paint it or not, depends on how my grill turns out, gonna redo it in chrome.
I clean the pole after each model (when possible) lol.
I clean the pole after each model (when possible) lol.


