Installed Stillen Gen3
#1
 02-10-2009, 10:20 PM


Installed Stillen Gen3
I actually got the Stillen intake a couple of weeks ago, but put off installing it because I was so excited to get the Hotchkis sway bars on. Well I had some time yesterday so on it went. Let's just say the install was a bear--just as has been reported!
Removing stock intake - easy. Removing radiator cover and grille - easy. Enlarging core support holes - easy. Hooking up the intake so it doesn't rub - so NOT easy! I spent a long while trying different ways to make the pipe fit without rubbing. I finally think I got it to where it is the best it can be. The problem is that the metal behind the core support only allows for a small amount of movement of the pipe before rubbing occurs. I finally got it to a few mm's away--but put rubber hose in the gap just in case.
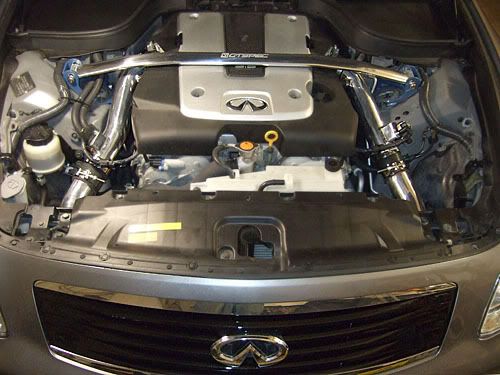
Here's the final installed pic:
Youtube Install video (overview):
Some other pics:
Core support holes after enlargement. I used a SoniCrafter (oscillating tool) which cut through the plastic like butter!
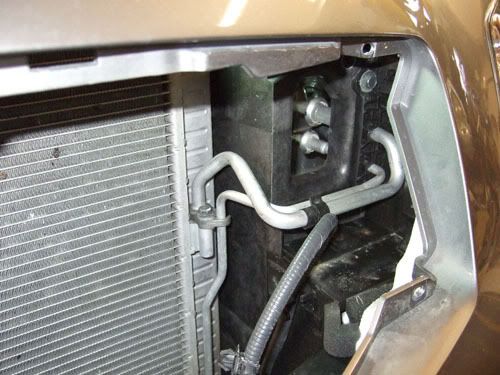
These are the core support holes before cutting.
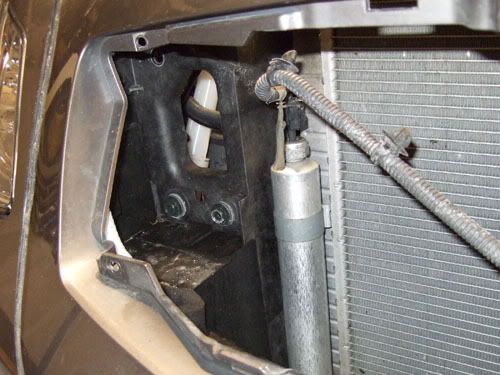
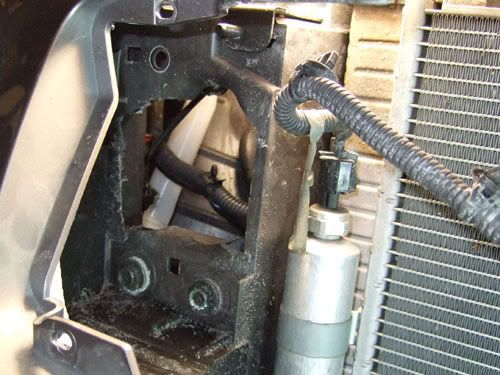
You need to watch out for all that A/C line on the drivers side. I wrapped some of it with the hose per Stillens instructions, because of contact.
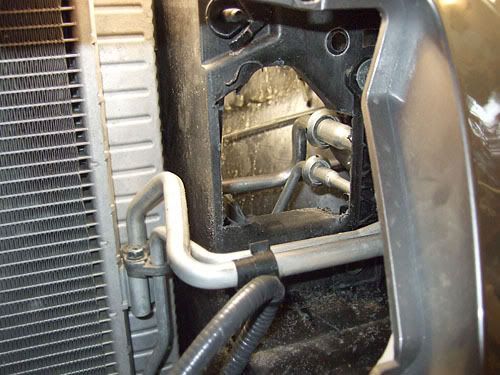
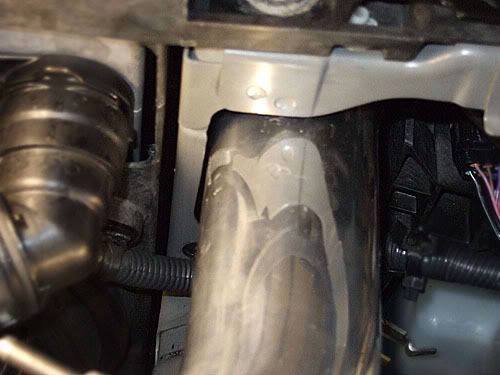
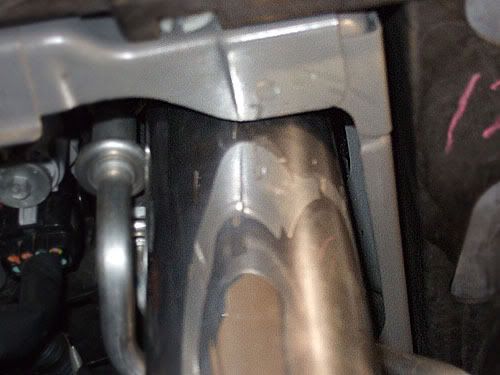
Here is a shot of the metal in back of the core support. It is strong metal and i did not want to cut it to make the opening bigger. Ended up putting rubber hose in the gap.
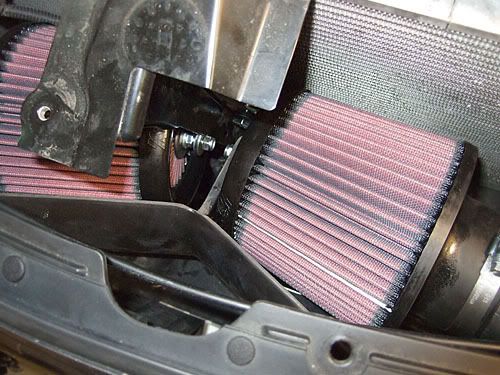
Filter pic. I attached the shield to the driver's side filter (instead of the passenger side per Stillens instructions). The center bar was in the way on the passenger side. Accordingly, I swapped filters (passenger side bolt is longer to accommodate the shield.
For those who expect perfection, the fitment isn't--and not for lack of trying. Still, I am satisfied the the install.
Sound is great--but not unlike other similar types of intakes. Loud when you get on it but quiet otherwise. Can't tell much in terms of performance just yet--too easy for my winter tires to break free! I do love how it looks in the engine bay though!
Removing stock intake - easy. Removing radiator cover and grille - easy. Enlarging core support holes - easy. Hooking up the intake so it doesn't rub - so NOT easy! I spent a long while trying different ways to make the pipe fit without rubbing. I finally think I got it to where it is the best it can be. The problem is that the metal behind the core support only allows for a small amount of movement of the pipe before rubbing occurs. I finally got it to a few mm's away--but put rubber hose in the gap just in case.
Here's the final installed pic:
Youtube Install video (overview):
Some other pics:
Core support holes after enlargement. I used a SoniCrafter (oscillating tool) which cut through the plastic like butter!
These are the core support holes before cutting.
You need to watch out for all that A/C line on the drivers side. I wrapped some of it with the hose per Stillens instructions, because of contact.
Here is a shot of the metal in back of the core support. It is strong metal and i did not want to cut it to make the opening bigger. Ended up putting rubber hose in the gap.
Filter pic. I attached the shield to the driver's side filter (instead of the passenger side per Stillens instructions). The center bar was in the way on the passenger side. Accordingly, I swapped filters (passenger side bolt is longer to accommodate the shield.
For those who expect perfection, the fitment isn't--and not for lack of trying. Still, I am satisfied the the install.
Sound is great--but not unlike other similar types of intakes. Loud when you get on it but quiet otherwise. Can't tell much in terms of performance just yet--too easy for my winter tires to break free! I do love how it looks in the engine bay though!
Last edited by mishmosh; 02-11-2009 at 07:50 AM.

#3
02-11-2009, 01:33 AM

#4
02-11-2009, 03:05 AM


#6
02-11-2009, 07:46 AM
Thanks everyone. This is not really a DIY writeup...just sharing my experience with the install.
FYI, you do not necessarily need to remove the bumper cover (fascia). However, when inserting the end tube on the drivers side, part of the tube scrapes metal as it goes in--kind of in the middle of the tube--will probably polish it out. Other than that, there should be enough room to work. Also, I enlarged the core support holes more than I needed to in retrospect. The limiting factor for fitment is not the core support but the metal behind it. Still, I don't think it hurts to make the openings a little larger so when it comes to wrangling the pipes in various positions, you can be assured that the core support is not the problem.
FYI, you do not necessarily need to remove the bumper cover (fascia). However, when inserting the end tube on the drivers side, part of the tube scrapes metal as it goes in--kind of in the middle of the tube--will probably polish it out. Other than that, there should be enough room to work. Also, I enlarged the core support holes more than I needed to in retrospect. The limiting factor for fitment is not the core support but the metal behind it. Still, I don't think it hurts to make the openings a little larger so when it comes to wrangling the pipes in various positions, you can be assured that the core support is not the problem.
#7
02-11-2009, 10:02 AM

 I enjoyed the vid..
Trending Topics

#9
02-16-2009, 03:58 AM

Join Date: Apr 2008
Location: Houston, TX
Posts: 1,112
Likes: 0
Received 0 Likes
on
0 Posts
gah I wish I was handy
do you think this is too difficult for someone without much experience? the video (which is amazing) doesnt seem all that difficult, but you say there was a lot of issues with fitment and rubbing?
I was looking at the K&N, but the huge claimed performance for these from Stillen seems more than worth the extra price - but I'd like to just intall myself.... insights?
#11
02-16-2009, 06:18 AM
Technically, the install is not difficult, BUT you will probably spend a lot of time fiddling with slight pipe twists and turns trying to get the setup not to rub. Unfortunately, you can try and try and it will never be perfect--but you almost need to convince yourself this by trying the different configurations. I wish the filter bracket was a little longer from center bracket to the front and could be height adjusted--that would have helped with fitment a lot.
#13
02-21-2009, 11:29 PM

Registered User
Join Date: Jan 2007
Location: Austin, Tx
Posts: 155
Likes: 0
Received 0 Likes
on
0 Posts

