DIY 06 HU Removall

#1
 03-16-2006, 05:41 PM


DIY 06 HU Removall
Okay.. this is a working DIY. First I will cover the removal procedures for a 2006 6MT Coupe.
What you will need - A Phillips Screwdriver
A Towel or soft cloth
Okay I tried to take pictures and put notes on them to help.
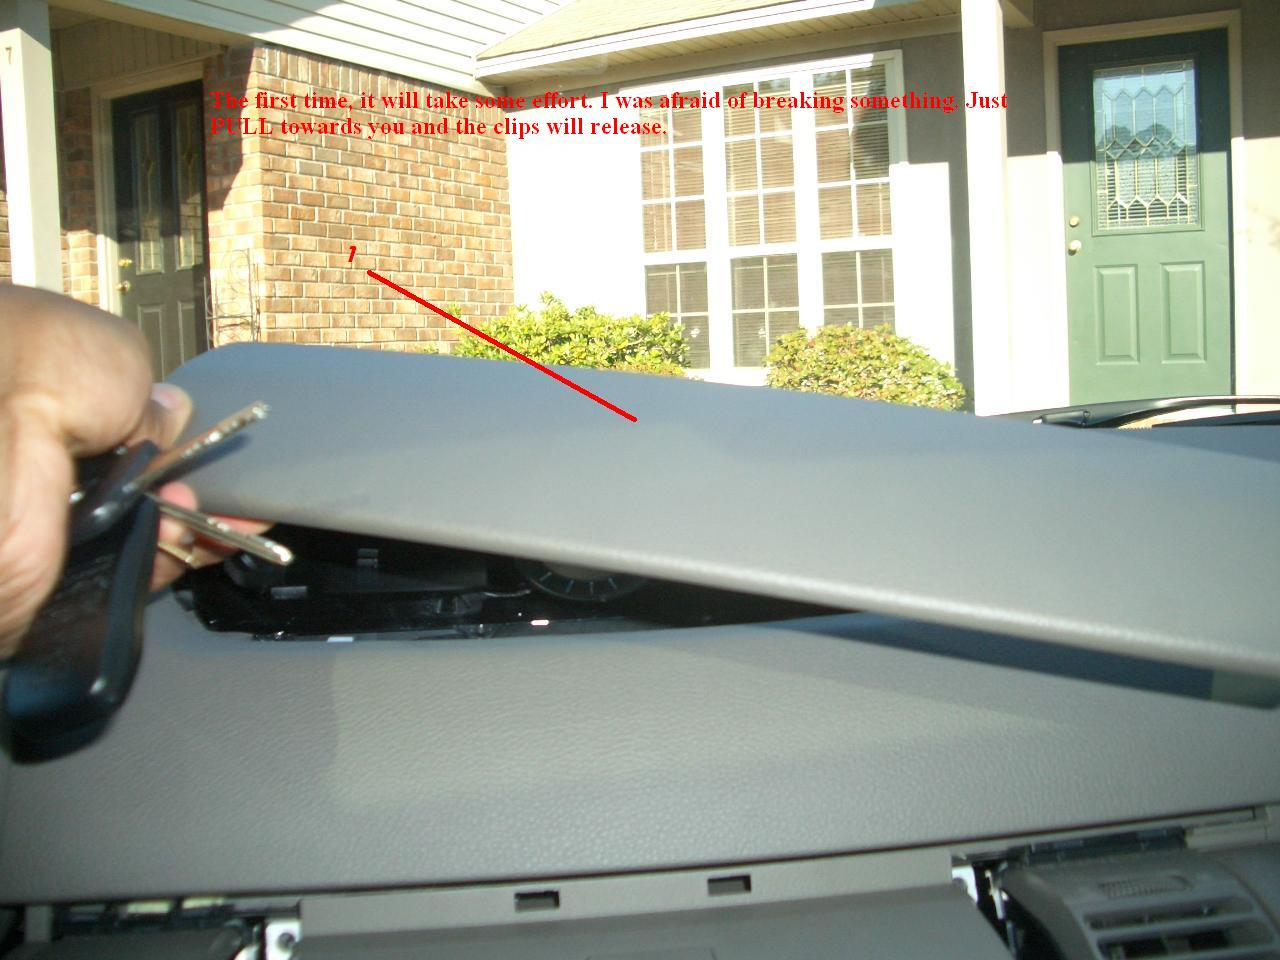
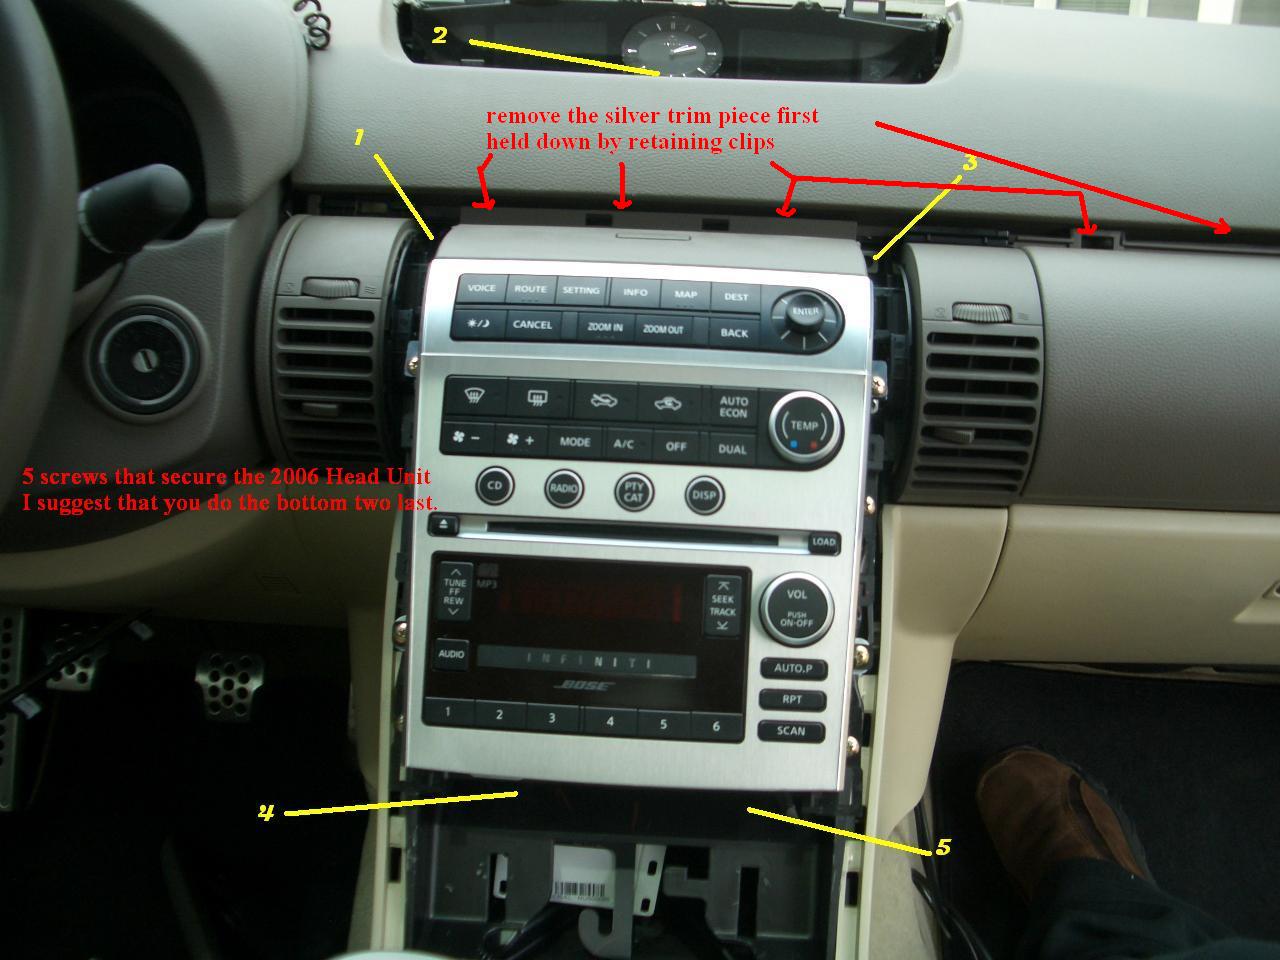
First you want to remove the clock shroud to gain access to the screw at the top of the Head Unit. (if you have a NAV screen, store it)
1. Pull hard to remove the shroud, I was afraid at first of breaking something, but just PULL towards you, the retaining clips will give. (picture 1)

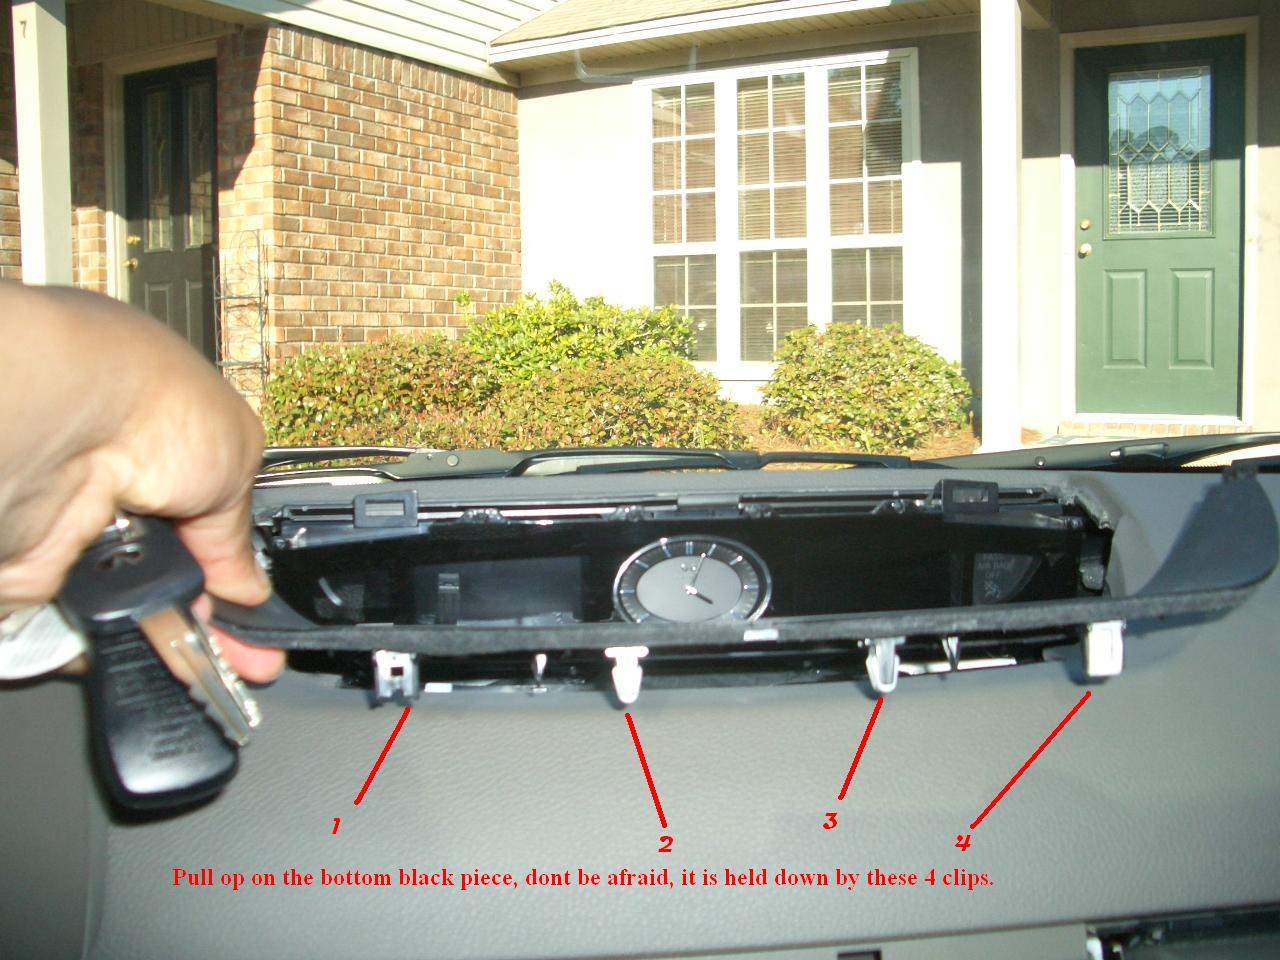
2. Next you will remove the bottom black piece. (see picture) it too is held by 4-5 retaining clips. The main thing is not to be afraid to break something, just pull!! (picture 2) After this step you can see the screw at the top of the Head Unit.

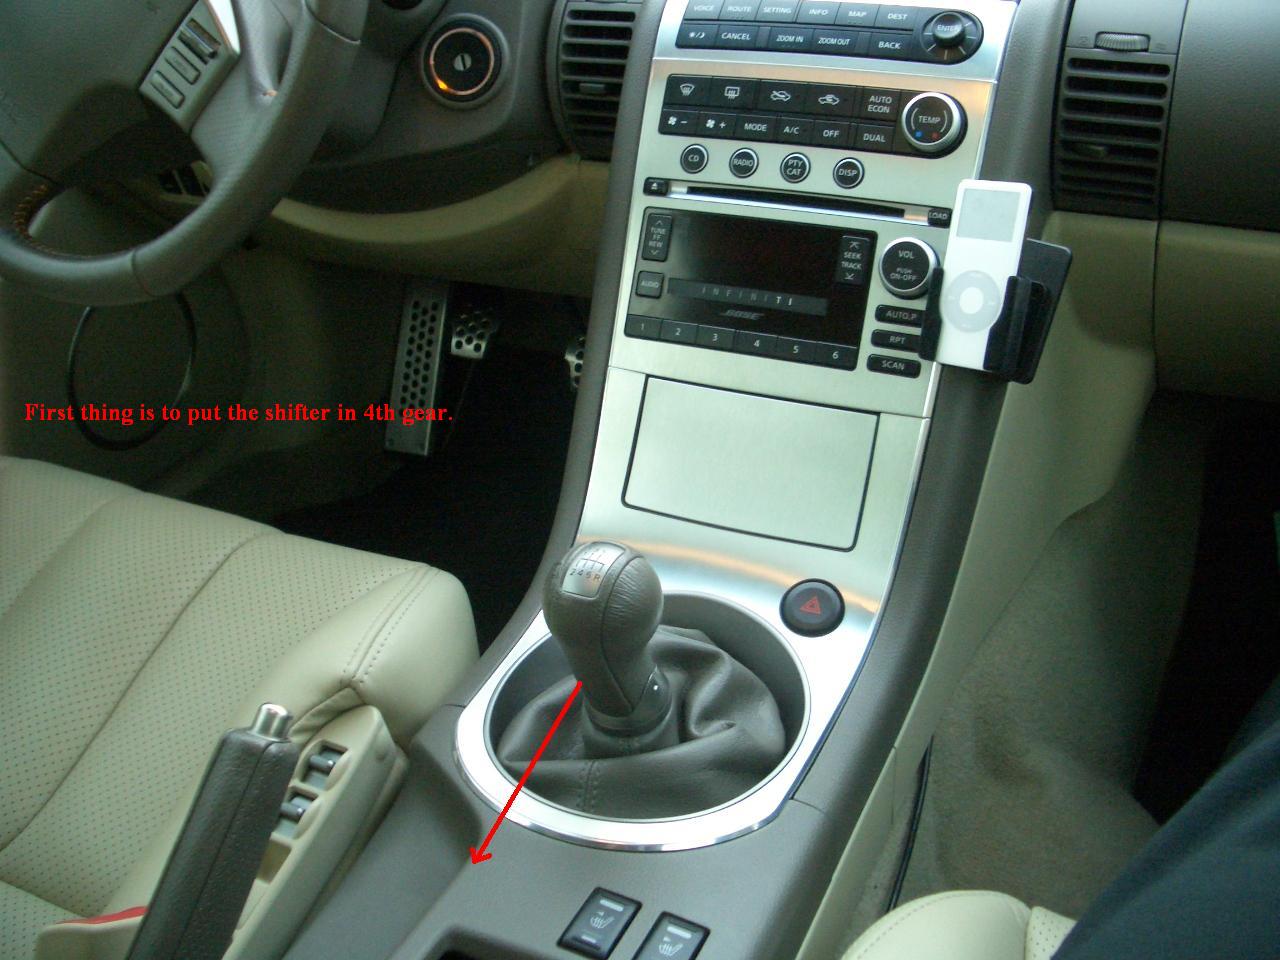
3. Next put the gear shift into 4th gear. (picture 3)

4. Now you want to grip the base of the shifter trim and pull up. (see below)

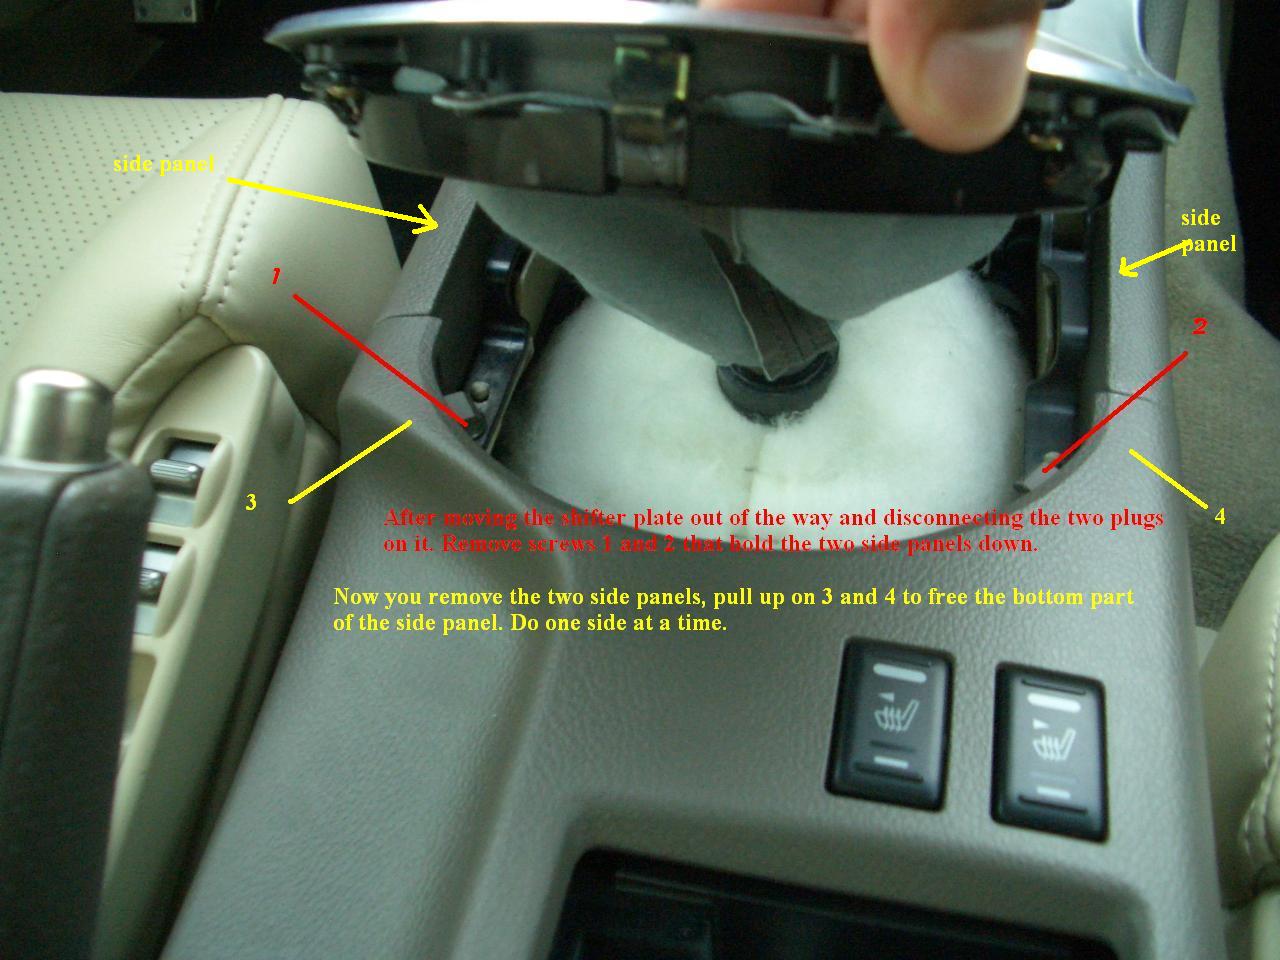
6. Now you need to remove the two side trim pieces. Remove two screws (as in photo below) and then pull up on one side of the console base and pull the side trim free. Repeat on other side. THere are also 2 plugs on the bottom trim piece you must disconnect.

What you will need - A Phillips Screwdriver
A Towel or soft cloth
Okay I tried to take pictures and put notes on them to help.
First you want to remove the clock shroud to gain access to the screw at the top of the Head Unit. (if you have a NAV screen, store it)
1. Pull hard to remove the shroud, I was afraid at first of breaking something, but just PULL towards you, the retaining clips will give. (picture 1)
2. Next you will remove the bottom black piece. (see picture) it too is held by 4-5 retaining clips. The main thing is not to be afraid to break something, just pull!! (picture 2) After this step you can see the screw at the top of the Head Unit.
3. Next put the gear shift into 4th gear. (picture 3)
4. Now you want to grip the base of the shifter trim and pull up. (see below)

6. Now you need to remove the two side trim pieces. Remove two screws (as in photo below) and then pull up on one side of the console base and pull the side trim free. Repeat on other side. THere are also 2 plugs on the bottom trim piece you must disconnect.
Last edited by Real_G; 03-16-2006 at 05:47 PM.
The following 3 users liked this post by Real_G:
#2
03-16-2006, 05:42 PM
5. Now it should look like this . Remove the trim piece from the top. and then the 5 screws. (see photo)

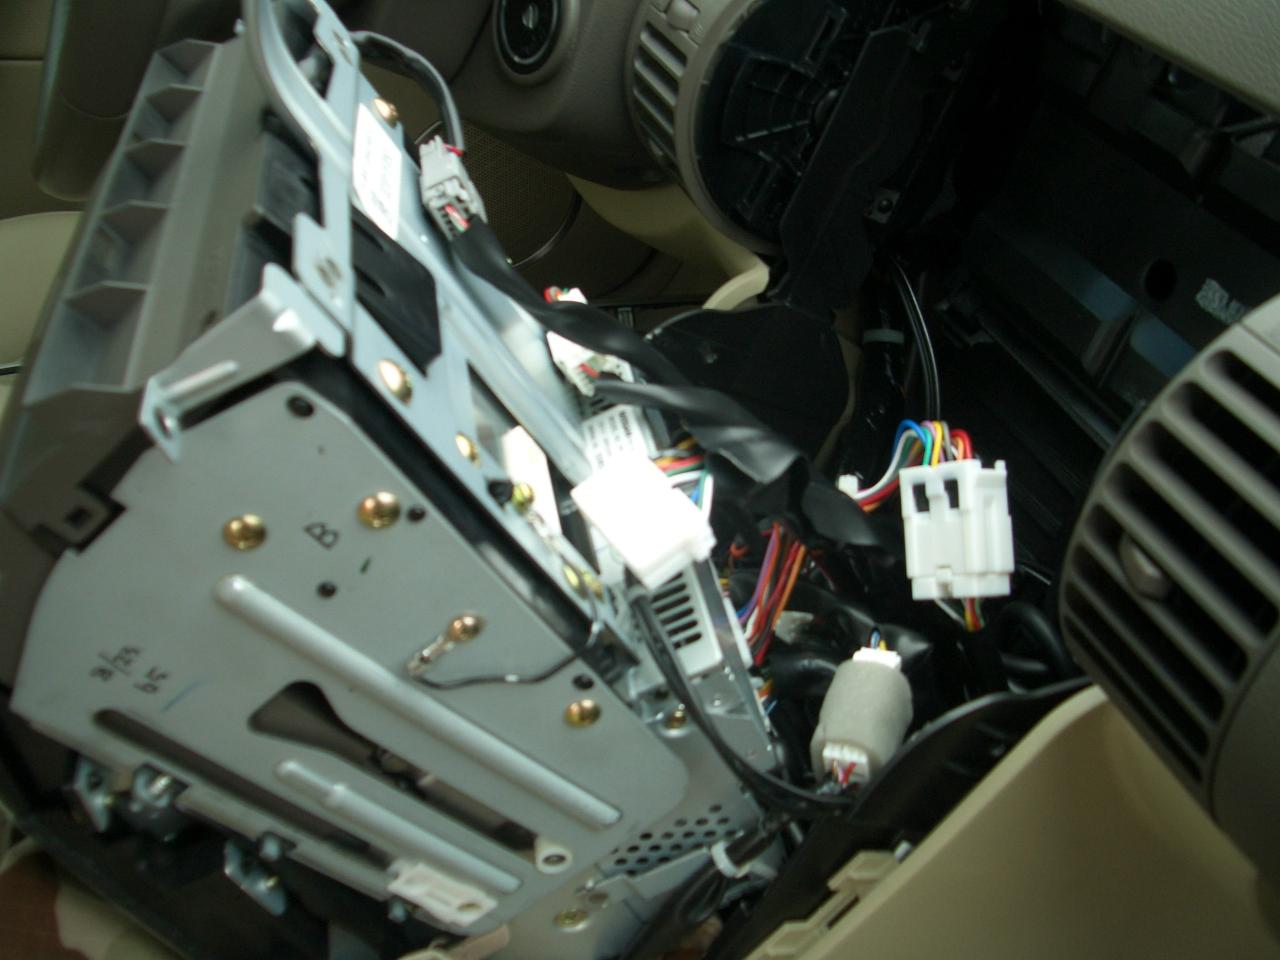
Now the radio will come out.. ensure that you use the towel to protect the front of the headunit when you lean it forward.
Here is the back of the radio.

Any questions.. Feel free to PM me. Mods please make this a sticky! (and move it to the DIY forum!)
Now the radio will come out.. ensure that you use the towel to protect the front of the headunit when you lean it forward.
Here is the back of the radio.
Any questions.. Feel free to PM me. Mods please make this a sticky! (and move it to the DIY forum!)
Last edited by Real_G; 03-16-2006 at 05:49 PM.
The following users liked this post:
Wrathernaut (06-09-2011)


#6
03-16-2006, 11:27 PM


#7
03-16-2006, 11:30 PM

Join Date: Jan 2005
Location: Irvine, California
Posts: 727
Likes: 0
Received 0 Likes
on
0 Posts
Trending Topics

#9
03-17-2006, 08:43 AM

#10
03-17-2006, 09:01 AM
#11
03-17-2006, 10:19 AM
#12
03-17-2006, 12:50 PM
#14
03-17-2006, 03:59 PM
Originally Posted by GRider35c
...a quick DIY for the AT
pull the leather boot down by the chrome ring(?) then pull out the wire safety paperclip thingy and the top of the shift **** should pull up and out.
then lift up the whole bottom piece like the 6mt DIY...
any questions??
pull the leather boot down by the chrome ring(?) then pull out the wire safety paperclip thingy and the top of the shift **** should pull up and out.
then lift up the whole bottom piece like the 6mt DIY...
any questions??
Do you have to remove anything before take the leather off? In other words, is this the first step?
Does the shift lock have to be fooled with?
#15
03-17-2006, 04:29 PM
