
Installing JBL MS-8 in '04 G Sedan


Thread Starter
|
Registered User
Joined: Feb 2010
Posts: 65
Likes: 1
From: OB, MS
MS-8 - Planet Audio - ID - HAT Install in '04 Sedan
I've already posted this over on DIYMA where I spend more time but figured I would post here also.
I'm scraping the stock Bose amp in the system but kept everything else. The stock speakers, and headunit stayed. I've already got speakers for the front stage to replace the stockers. I'll be using Hybrid Audio L1Pro with some Image Dynamics CX62 mids. The sub on the rear deck will be getting replaced with an old school 8" W6 that will be bolted to the underside of the rear deck in a seal box.
On to the pictures!
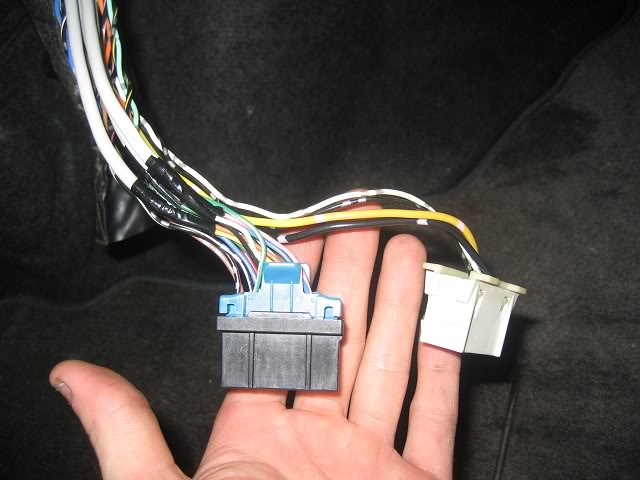
Here are the factory plugs that plug into the Bose amp that is located under the rear deck. I'll be tapping into the factory speaker wire and remote wire to tie into the MS-8.
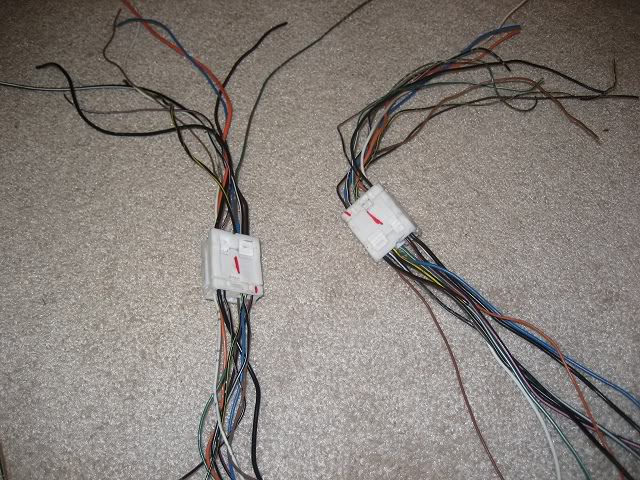
I'm a tech for Nissan so I have access to plugs off of bad harness' and factory colored wire. These are the plugs I made to tap into the factory wire and keep everything color coded as well as easily removable.
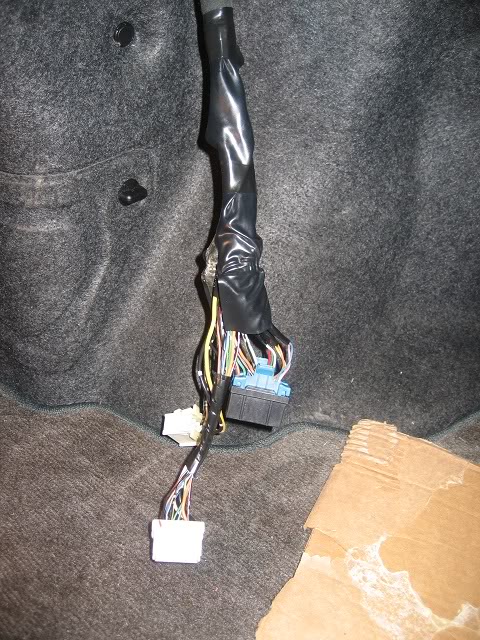
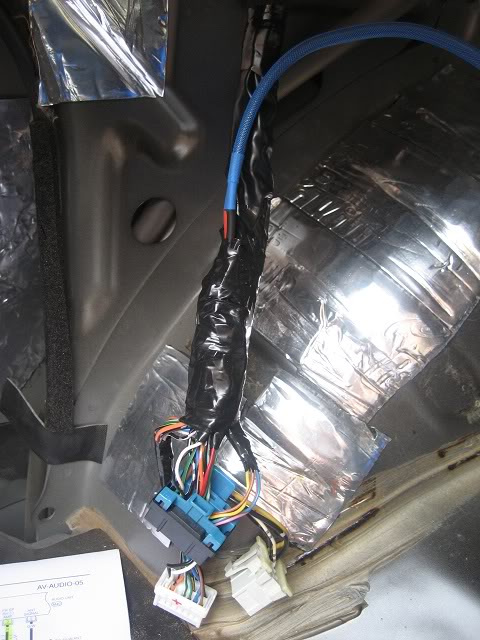
I didn't snap any shots of cutting, soldering, and heat-shrinking any of this but if you don't know how to do that, you don't have any business around anything electrical. Here's a shot of the harness all buttoned up!
Here's a shot of the MS-8 Harness attached to one end of the harness pictured above.
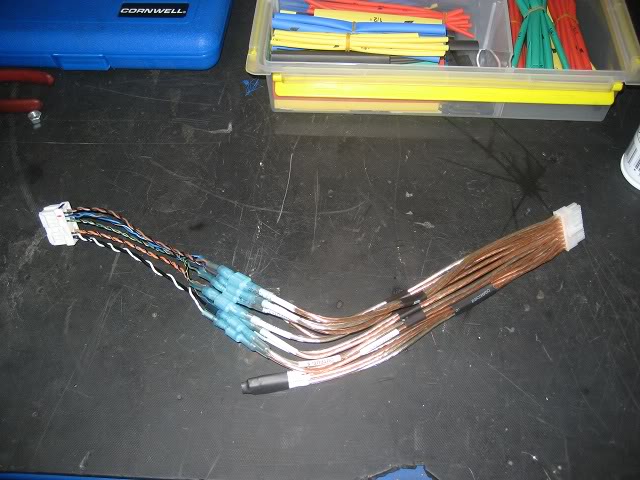
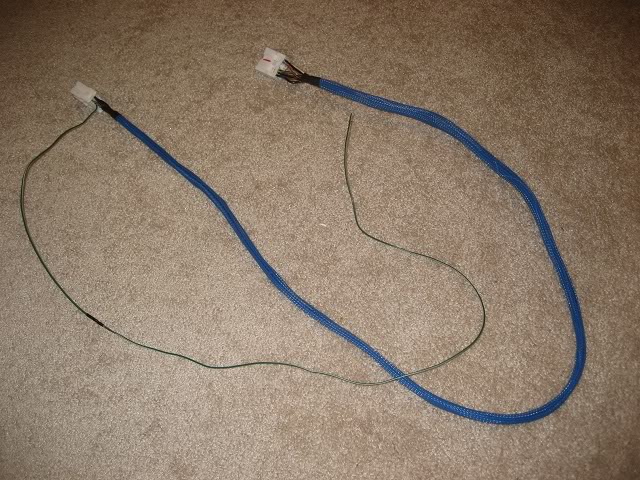
Here is a shot of the harness that will attach the above plug to the harness that was soldered into the factory wire. As you can see It is wraped in blue techflex. The loose wire is the remote turn on wire.
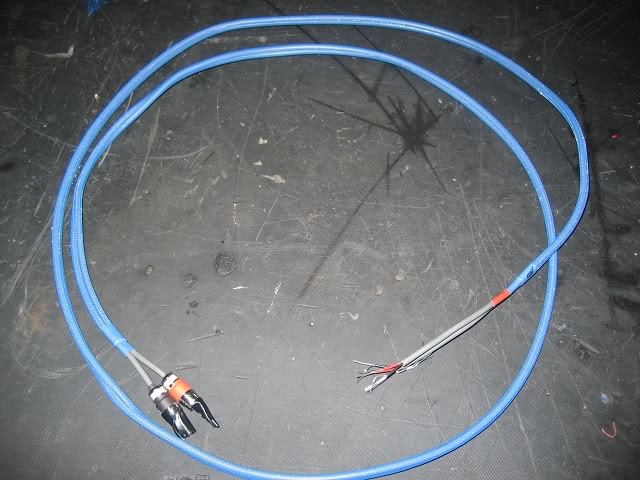
Here is the harness that ties into the factory balanced signal. I used Gepco 6180EZ wire with switch craft ends. With the Gepco your able to tie into the factory shielding. This harness was also techflexed.
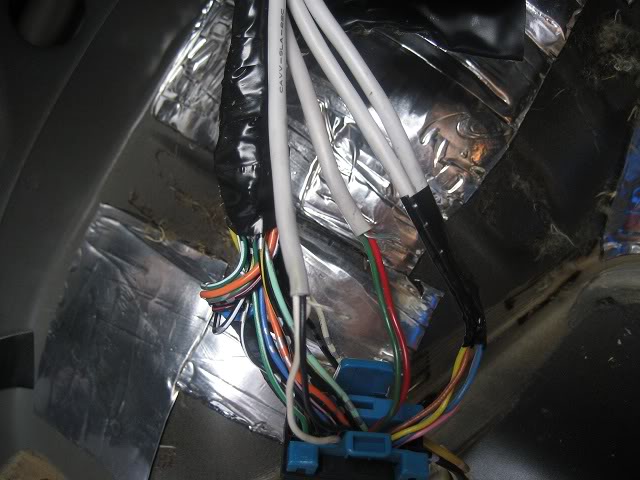
This is the factory low level signal sent to the bose amp. The wire really looks like the Gepco but just different wire color on the inside. The wire's to tap into are the white & black for the left front signal and the green and red for the right hand signal
Here's a shot of the harness all together. It is very important that you observe the proper polarity when doing all of this with the RCA's and speaker leads. Everything inside the RCA harness was double layered in heatshrink.

Here's another shot of the harness done completely. The extra plug added and the RCA harness in.
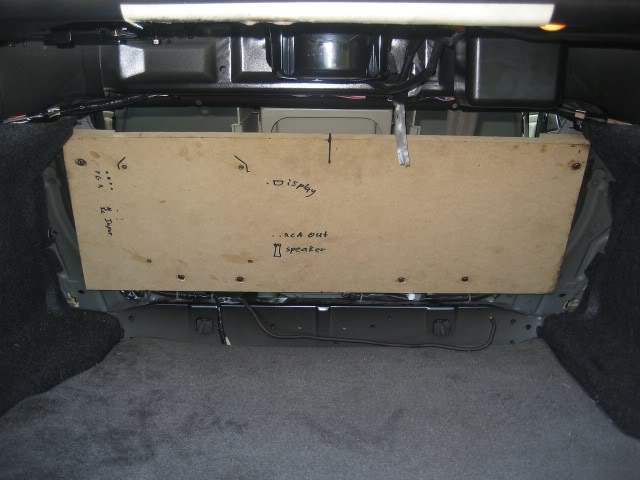
I made a board from 1/2" MDF that will hold the MS-8. I bolted the board to the factory bracing behind the back seat. I counter sunk the bolts so they don't get in the way. I installed threaded inserts into the wood so the MS-8 will stay more secure then using wood screws.
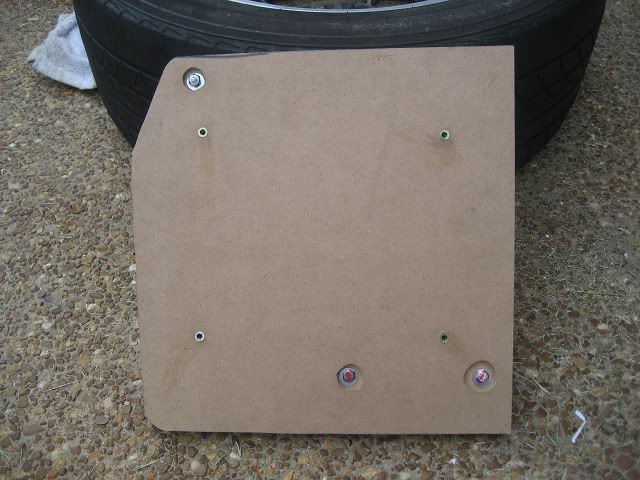
Here you can see where it will be mounted.
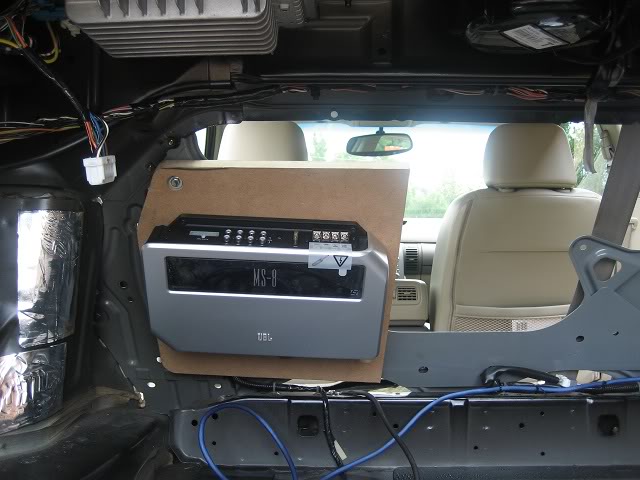
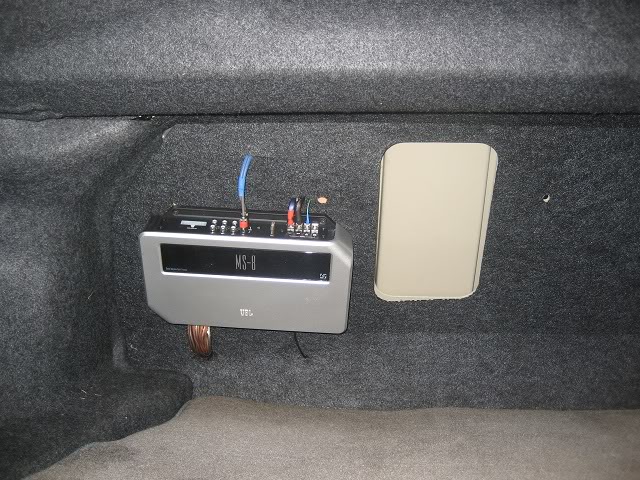
Well here is a final shot with it all wired up and installed! I mounted the board behind the factory covering. I'll be remaking the board this weekend to cover the whole seat area and to allow mounting of an amp on the other side.
I'm scraping the stock Bose amp in the system but kept everything else. The stock speakers, and headunit stayed. I've already got speakers for the front stage to replace the stockers. I'll be using Hybrid Audio L1Pro with some Image Dynamics CX62 mids. The sub on the rear deck will be getting replaced with an old school 8" W6 that will be bolted to the underside of the rear deck in a seal box.
On to the pictures!
Here are the factory plugs that plug into the Bose amp that is located under the rear deck. I'll be tapping into the factory speaker wire and remote wire to tie into the MS-8.
I'm a tech for Nissan so I have access to plugs off of bad harness' and factory colored wire. These are the plugs I made to tap into the factory wire and keep everything color coded as well as easily removable.
I didn't snap any shots of cutting, soldering, and heat-shrinking any of this but if you don't know how to do that, you don't have any business around anything electrical. Here's a shot of the harness all buttoned up!
Here's a shot of the MS-8 Harness attached to one end of the harness pictured above.
Here is a shot of the harness that will attach the above plug to the harness that was soldered into the factory wire. As you can see It is wraped in blue techflex. The loose wire is the remote turn on wire.
Here is the harness that ties into the factory balanced signal. I used Gepco 6180EZ wire with switch craft ends. With the Gepco your able to tie into the factory shielding. This harness was also techflexed.
This is the factory low level signal sent to the bose amp. The wire really looks like the Gepco but just different wire color on the inside. The wire's to tap into are the white & black for the left front signal and the green and red for the right hand signal
Here's a shot of the harness all together. It is very important that you observe the proper polarity when doing all of this with the RCA's and speaker leads. Everything inside the RCA harness was double layered in heatshrink.
Here's another shot of the harness done completely. The extra plug added and the RCA harness in.
I made a board from 1/2" MDF that will hold the MS-8. I bolted the board to the factory bracing behind the back seat. I counter sunk the bolts so they don't get in the way. I installed threaded inserts into the wood so the MS-8 will stay more secure then using wood screws.
Here you can see where it will be mounted.
Well here is a final shot with it all wired up and installed! I mounted the board behind the factory covering. I'll be remaking the board this weekend to cover the whole seat area and to allow mounting of an amp on the other side.
Last edited by nar93da; Aug 1, 2010 at 12:22 PM.


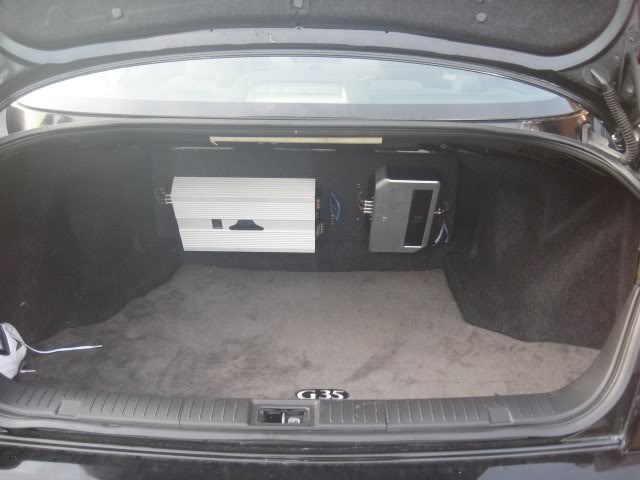
Your board looks like you spent a little more time than I did with mine, but I did both sides for my JL 500/1v2 and JL 300/4v2:

Yes, I know, I need to wipe the amps down.
Yes, I know, I need to wipe the amps down.
Thread Starter
|
Registered User
Joined: Feb 2010
Posts: 65
Likes: 1
From: OB, MS
Looks good man with the JL amps.
I forgot to put a picture of where I put the display.
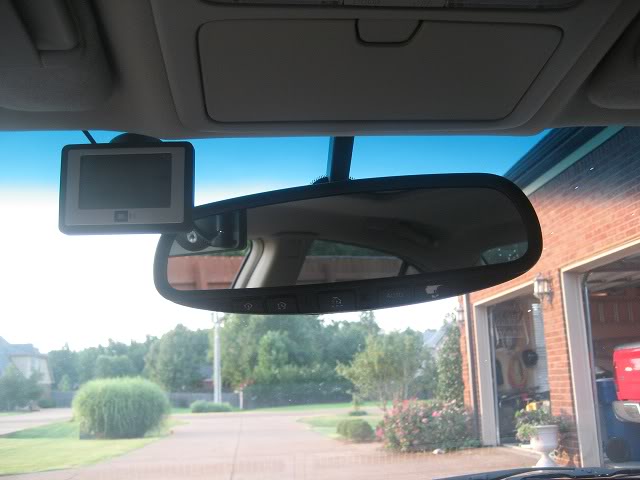
Here's a shot of the custom tweeter pods I'm building to house the L1 Pro's.
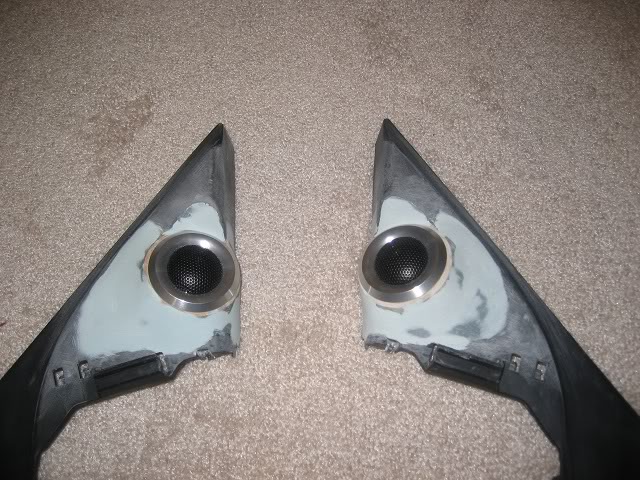
I started out by cutting a hole using a hole saw. I then epoxyed MDF rings in at the desired angle. I probably did that a good 5-6 times to get the desired aiming on the tweets. I scruffed up the plastic panel with 80 grit and drilled some holes for some Evercoat fiberglass filler. I then used some Evercoat body filler to smooth everything out. That is the stage their at in the pitcture. I've still got to spray them with a filler primer to remove all the small pinholes and such.
I forgot to put a picture of where I put the display.
Here's a shot of the custom tweeter pods I'm building to house the L1 Pro's.
I started out by cutting a hole using a hole saw. I then epoxyed MDF rings in at the desired angle. I probably did that a good 5-6 times to get the desired aiming on the tweets. I scruffed up the plastic panel with 80 grit and drilled some holes for some Evercoat fiberglass filler. I then used some Evercoat body filler to smooth everything out. That is the stage their at in the pitcture. I've still got to spray them with a filler primer to remove all the small pinholes and such.
I was going for stealth look with my tweeters, may have sacrificed a little quality for it though, and did the mounting all in the back, surprisingly, the rather large tweeters for the BA Pro60SE's fit fine back there, but there's no way to tell they're even installed if the stereo's off.
Thread Starter
|
Registered User
Joined: Feb 2010
Posts: 65
Likes: 1
From: OB, MS
Well I figured I'd give a little of an update. I got the sail panels done! I'm overall pretty happy with them other then where the ring meets the build-up just at the edge.
Here's a shot of them after some coats of filler primer to remove any small scratches and pinholes.

And here is a shot of them all done. I used SEM Landau Black with the low luster clear. It is a very good match for the stock panel.
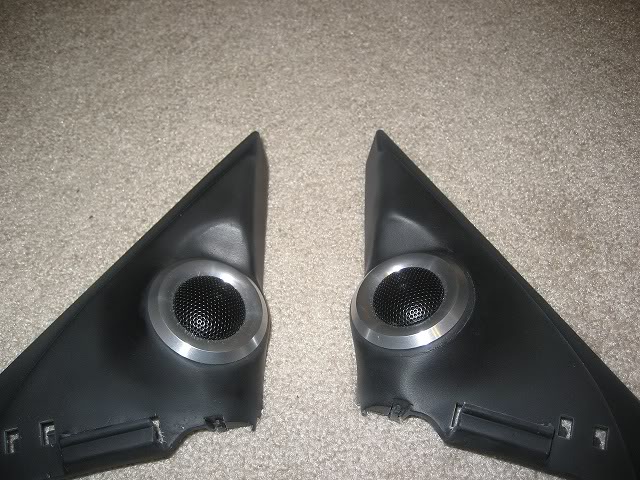
I have yet to install them because I'm waiting for my Planet Audio Tube amp to get back from Zed Audio that will power the front stage and I've got to run speaker wire for them.
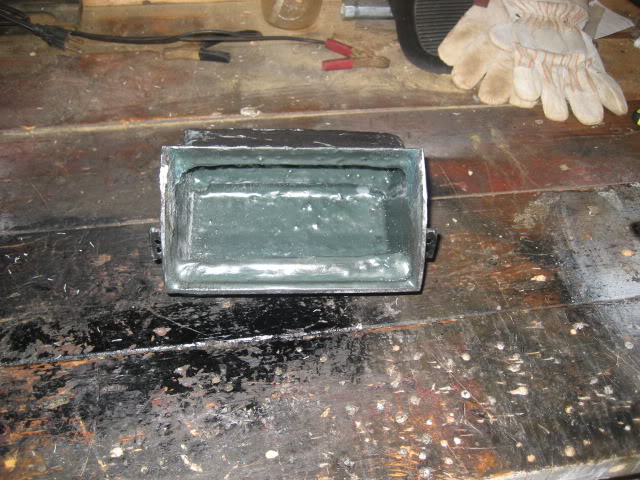
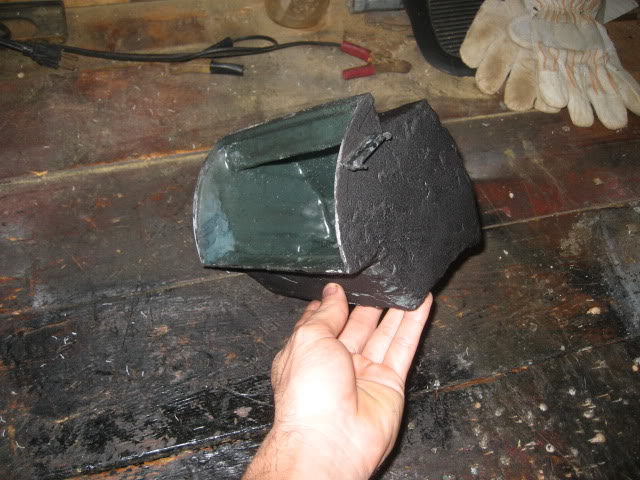
Since I didn't get any response from anyone about my thread asking if anyone had used the storage pocket above the A/C controls for a center channel. I decided to tackle it myself, I've increased the size of the pocket from around 1.2L to roughly 1.6L. I didn't take any build pics, just shots of the expansion done. If you've ever had the pocket out you'll see what I added to. I added the triangular sections on the front and back. it clears everything when installed. I sprayed the outside with some Duplicolor bed liner/sound deadener stuff. I used "milkshake" fiberglass filler and resin mixed to seal up the inside.

Here's a shot of them after some coats of filler primer to remove any small scratches and pinholes.
And here is a shot of them all done. I used SEM Landau Black with the low luster clear. It is a very good match for the stock panel.
I have yet to install them because I'm waiting for my Planet Audio Tube amp to get back from Zed Audio that will power the front stage and I've got to run speaker wire for them.
Since I didn't get any response from anyone about my thread asking if anyone had used the storage pocket above the A/C controls for a center channel. I decided to tackle it myself, I've increased the size of the pocket from around 1.2L to roughly 1.6L. I didn't take any build pics, just shots of the expansion done. If you've ever had the pocket out you'll see what I added to. I added the triangular sections on the front and back. it clears everything when installed. I sprayed the outside with some Duplicolor bed liner/sound deadener stuff. I used "milkshake" fiberglass filler and resin mixed to seal up the inside.
Thread Starter
|
Registered User
Joined: Feb 2010
Posts: 65
Likes: 1
From: OB, MS
Gonna Try and get mostly everything done in a week or 2 since I'm starting to get some items to finish the build. Not much of an update other then have the board fabbed up in the car and have the whole back half ripped out.
Here's a shot of the new board that the MS-8 and Amp for the front stage will power. I use threaded inserts for everything as you can see. It makes removal easier and I'm afraid regular screws wouldn't hold either item at the angle the board is at.
And here is a shot of the very rare Planet Audio amp. It's a HVT754, it is a tube amp that was built by Zed audio. I just got it back today after I had to send it to Stephen at Zed for repair.

I'm blocking off the ski pass to put the distribution block in it's place. I'm using a Streetwires CBR44S that will be flushed in the ski pass hole.
I'm gonna concentrate on the center channel after I get finished with everything else. The entire floor and behind the back seats are also getting covered in MLV also. Using a sound deadener like dynamat and Second skin is overrated for use on floors. Your floor is not going to resonant due to all the bends and welds. All 4 doors are already dampened as well as the truck lid and will also get a layer of MLV.
More Pictures to follow this weekend!!!
Here's a shot of the new board that the MS-8 and Amp for the front stage will power. I use threaded inserts for everything as you can see. It makes removal easier and I'm afraid regular screws wouldn't hold either item at the angle the board is at.
And here is a shot of the very rare Planet Audio amp. It's a HVT754, it is a tube amp that was built by Zed audio. I just got it back today after I had to send it to Stephen at Zed for repair.
I'm blocking off the ski pass to put the distribution block in it's place. I'm using a Streetwires CBR44S that will be flushed in the ski pass hole.
I'm gonna concentrate on the center channel after I get finished with everything else. The entire floor and behind the back seats are also getting covered in MLV also. Using a sound deadener like dynamat and Second skin is overrated for use on floors. Your floor is not going to resonant due to all the bends and welds. All 4 doors are already dampened as well as the truck lid and will also get a layer of MLV.
More Pictures to follow this weekend!!!
Last edited by nar93da; Aug 2, 2010 at 08:30 PM.
Trending Topics
Thread Starter
|
Registered User
Joined: Feb 2010
Posts: 65
Likes: 1
From: OB, MS
Well, I've really only have some wiring to finish up and everything will be done. I've got a few pictures but I'm sure they'll go unnoticed.
The Board is all in with the HVT754 mounted next to the MS-8. I've still got to finish up the speaker wire from the amp and the speaker wire to the MS-8. I'm also waiting on some spade terminals that I ordered as well.
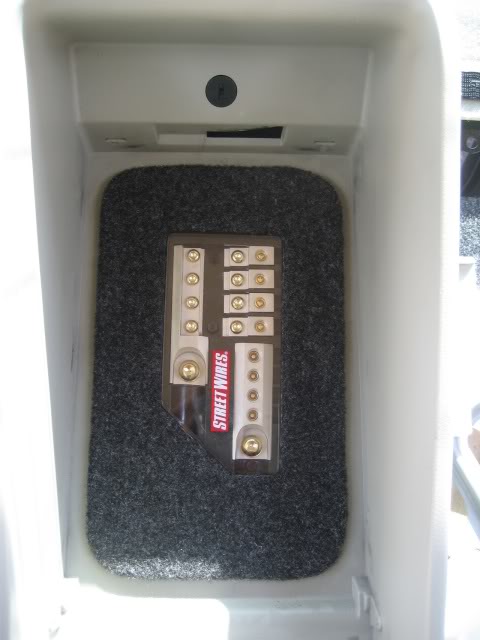
Here is a picture of the fuse block in the ski pass. I was wanting to flush mount it but it was to tall and the board wouldn't go down due to the wires.
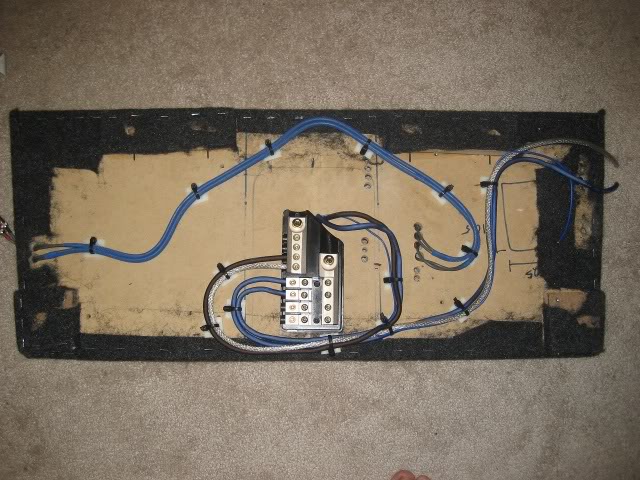
Another shot of the wire runs on the backside of the board.
The Board is all in with the HVT754 mounted next to the MS-8. I've still got to finish up the speaker wire from the amp and the speaker wire to the MS-8. I'm also waiting on some spade terminals that I ordered as well.
Here is a picture of the fuse block in the ski pass. I was wanting to flush mount it but it was to tall and the board wouldn't go down due to the wires.
Another shot of the wire runs on the backside of the board.
I've noticed and appreciated the pictures.
I mounted my distribution block where the Bose woofer used to go, which let all the wires stay hidden until they popped out right by the power terminals of my amp.
I mounted my distribution block where the Bose woofer used to go, which let all the wires stay hidden until they popped out right by the power terminals of my amp.

Thread
Thread Starter
Forum
Replies
Last Post
joedaddy1
Engine, Drivetrain & Forced-Induction
0
Jul 28, 2015 02:58 PM