DIY: How to Polish Your Headlamps
#1
 07-11-2007, 11:53 PM


DIY: How to Polish Your Headlamps
Okay here goes. Have you ever waxed your car and got to the wheels thinking man look at that! Look at this sexiness only to walk to the front of the car and stare at your headlamps thinking hot dammit why can't you guys look like the rest of the car?
FEAR NOT my luxury-import friends! There is hope! First you'll need about 25 dollars and a way to get to a Murray's, Autozone or Walmart near you ( or any Auto store that sells carcare items for all our farm country friends )...
Second here's what you wil have to buy ( feel free to take a look at my thread about the 06 custom trimmed lamps for pics )
1. A good plastic rubbing compound. I prefer the one made by 3M ( 9.99 )
2. Plastic Cleaner....Again I prefer the one made by 3M. ( 6.99 )
3. Plastic Polish ( you guessed it...3M again) ( 6.99 )
4. Terry cloths or pads ( the more the better....but at least 3-4 you'll find out why very soon ). Last week upon a routine visit to my local Murray's I discovered the 3-pack Terry Cloth pad set with the Velcro Applicator Handle ( for a clean polish ). I forgot the brand name of it but I'll look it up for you guys and post it up before bedtime. My set ran about 3.99 for the 3 pack with free Velcro Applicator included.
Now....what do you do once you have all these things in hand.......? Stay tuned to part 2 coming up in jus a sec.( I'm taking a short break because I'm typing on my Motorola Q lol)
#3
07-12-2007, 10:16 AM
Originally Posted by sfgr415
you left me hanging...lol
Part II
While searching for Murray's Auto Parts online, (for more info on the Terry Cloth Applicators) I came across this section on one of their sister sites and figured it's relevant to the plastic polishing. Feel free to check this out as well. I haven't read everything yet but they seem to be talking about plastic polishing your headlamps too.
http://www.advanceautoparts.com/engl...20020701pp.asp
As for the applicators...they look like this

http://www.autozone.com/selectedZip,.../selectZip.htm
Here's a link to autozone's version of the same product.
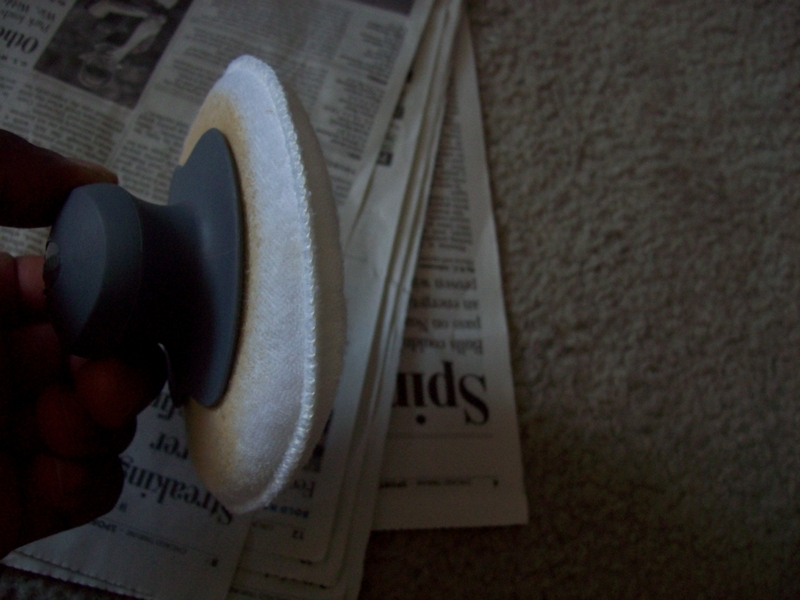
Here's mine
Ok..back to the situation at hand....lets see by now you should have everything in hand

and be ready to do this...
 here
hereThe entire process of polishing your headlamp's lenses is pretty easy and in fact can be done without removing them from your car. Once you have everything in hand, wash your lamps with a non abrasive soap. For me, I like to use a dishwashing detergant that's soft on your hands like Pomolive or a laundry cleaner like Tide with Colorsafe bleach.
[B]1. Wet the lamps.
2. Massage the soap onto your lamps by hand. Do this in a circular pattern for about 30-secs to one minute per headlamp. Make sure they're wet while you do this!
3. Rinse with a hose or by pouring clean warm water on them. Let them air dry for a couple minutes. Once most of the water's off, feel free to gently pat them down a bit with one of the free Terrycloth Applicator Pads.
4. Take the Rubbing Compound and squeeze a small amount the size of a quarter and massage the pad onto the headlamp. Do this in a circular motion and vary the pressure you place down on the pad while you do this from really gentle to slightly firm and vice versa. Keep going until the rubbing compound begins to dry a little bit. Flip the pad over to the clean non brown side and wipe down the excess rubbing compound off the lamps in the same manner you just applied the rubbing compound with and keep going until you wipe all of the compound stuff off the headlamp lense.
5. Now it should look clear again. Some experienced people prefer to sand their outside portions of their headlamp lenses with 1500, 2000 and then higher grit sand papers before they apply the compound. This usually is used for headlamps that have severe scratches and chips etc.
I don't recommend people do this unless they're skilled with sanding headlamps or plastics. For today, we'll leave these steps out for simplicity sake. However if you happen to fall into the category where your lamps are having some of the more severe symptoms mentioned above, PM me and I can provide further tips on how to get rid of the chips, scratches etc. Since most of us won't be in this category we'll leave this out for now.
6. Apply the plastic cleaner next by doing the same thing you did in step 4. Use a new seperate Terry pad for this as well. Repeat the same circular motions from step 4 and continue to very the pressure you apply with the Terry pad. Flip the pad over to the clean side once the cleaner starts drying up a bit. Wipe off the excess cleaner from the lamps the same way you did the excess compound from step 4.
Your lenses should now look like this

7. Finally apply the polish the same way you did the cleaner from step 6. Make sure you use a new Terry pad. Flip the pad over and wipe off the excess polish the same way you took off the cleaner in step 6.
Now your lenses should look like this:

I'll have more pics up sometime this weekend when I get a chance to upload the remaining pics I have so we can visually see all the steps. But for now, you should have an idea how to visually improve the look of your headlamps and restore more lighting lost to hazy foggy looking lamps that need polish! And now the floor's open for any questionsDOMO


The following users liked this post:
arsenalgtr34 (07-25-2011)
#5
07-12-2007, 11:41 AM
I'm not sure about the Plastx coating but I'm assume you apply the plastx when the lenses/car are brand new kinda like the clear bra right?
If so, then i'm assuming perhaps the plastx may prevent the hazyness/yellowing a naked lense may incur over time. How does that stuff work?
As far as frequency with the polishing I'd recommend it a couple times a year depending on conditions in your area where you live i.e desert or heavy constuction areas where all kinds of things can attack the surface of your lenses. Some people do it like once a year others, once every couple years. It all depends on how the surface holds up and stays clean looking.
Once you go through with it initially, all you need to do on a regular basis would be, apply the cleaner then polish and you would still get great results and toss the compound in the process maybe annually if that makes sense
Last edited by tiguy99; 07-12-2007 at 11:46 AM.
#7
07-12-2007, 03:12 PM

Trending Topics


#11
07-31-2007, 12:17 PM
#12
08-08-2007, 07:35 PM

Registered User
Join Date: Dec 2004
Location: Tampa, FL
Posts: 19
Likes: 0
Received 0 Likes
on
0 Posts
Hey great DIY! My front end was hit (2003 Sedan, standard halogen, before high intensity lamps were added at the "mid-year" point) and they would only replace one, so it looks like my G has a "black eye" with the one glazed one and one that is a year old now (they must have improved the plastic, because I have not had the issue with the replacement.)
So my question first - is there a DIY or overview for replacing the entire assembly? I noticed you had the assembly removed in the pictures. I am going to suck it up for $250 and buy a new assembly. No matter how much I try, I cannot get them to match with the plastic cleaner.
If no DIY to replace the entire assembly - estimate on how long it takes?
Thanks again.
Mike

#14
08-18-2007, 12:04 PM

#15
10-02-2007, 05:00 AM