
DIY: Manual Transmission Fluid/Clutch Fluid change (with pics!)

Joined: Feb 2008
Posts: 1,923
Likes: 13
From: Tulsa, OK
DIY: Manual Transmission Fluid/Clutch Fluid change (with pics!)
Although I have seen a few manual transmission/rear diff DIY's here I haven't seen one with many pictures. I have just changed out my manual transmission fluid and my clutch fluid on my 2006 G35 6MT. My car just hit 30,000 miles and it was time for a flush. The transmission fluid change was VERY simple, the clutch fluid required the help of my 10 year old son.
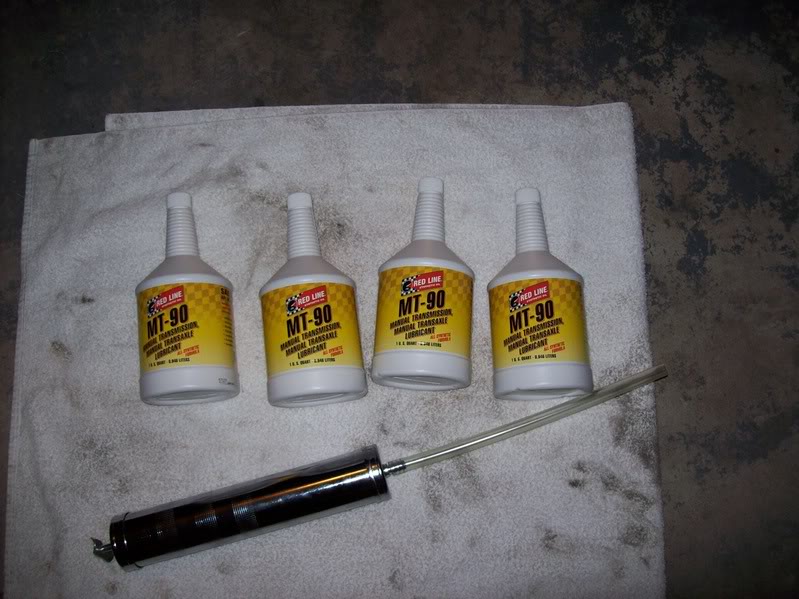
Here's what I used for the manual transmission change:
4 quarts of Redline MT-90 75w90 Manual Transmission Fluid ($10 per quart)
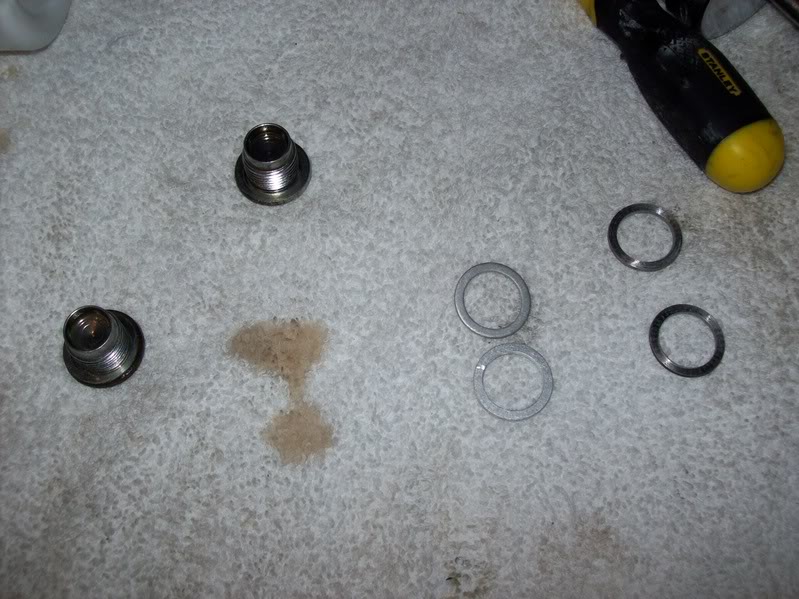
2 new MT drain/fill plug crush washers from the Nissan Dealership (they are cheaper than the Infiniti dealership for some reason).
Fluid pump from any auto parts store (mine was .5 qt capacity)
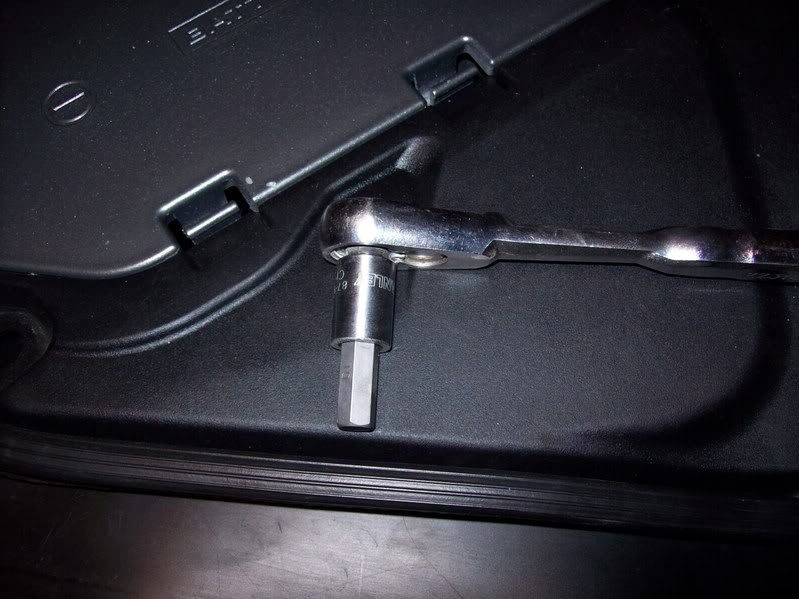
10mm allen head socket
onto the process!
Get everything layed out,
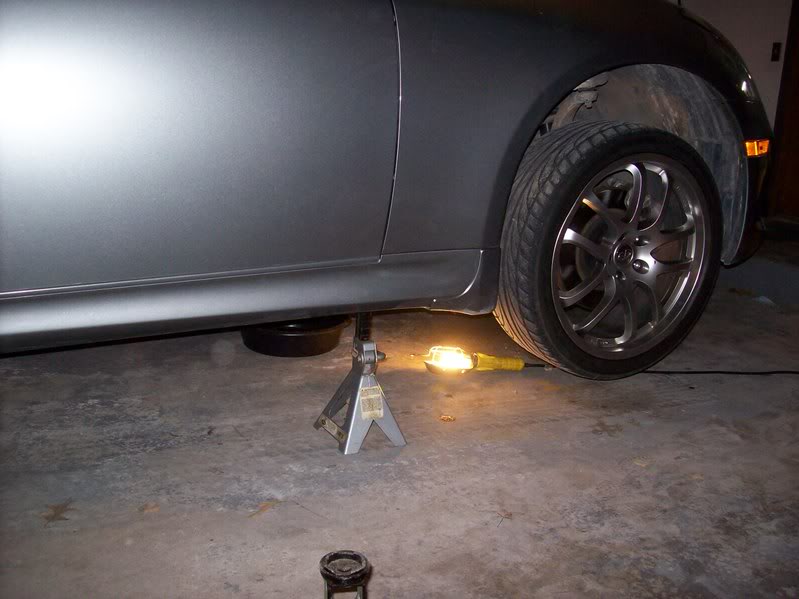
Jack the car up and put on jack stands
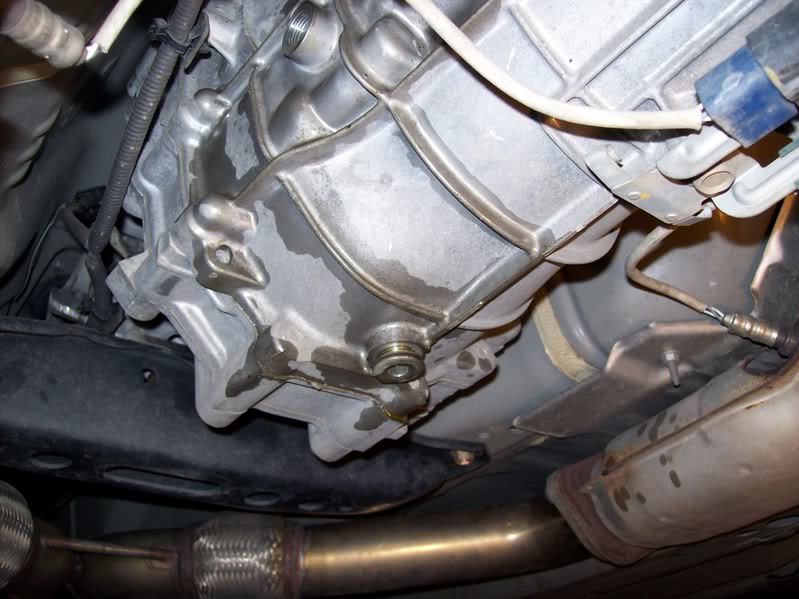
get your drop light and 10mm allen socket ready and remove the fill plug first. The fill plug is the upper plug and is located on the passenger side of the transmission. The reason to remove this first is you will be in trouble if you remove the drain plug and the fill plug is siezed for some reason.
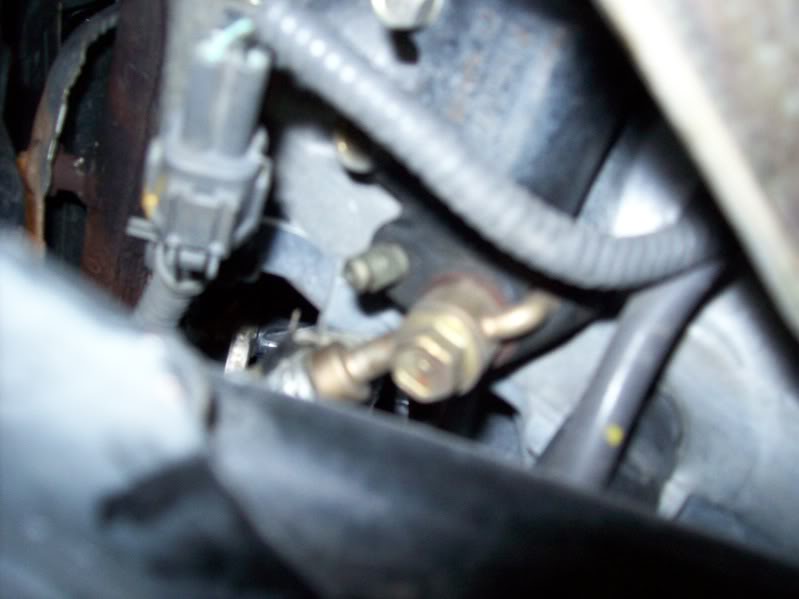
Fill plug is actually removed in this pic, it's near the top of the 02 sensor wire. I sprayed both plugs with PB Blaster prior to removal.
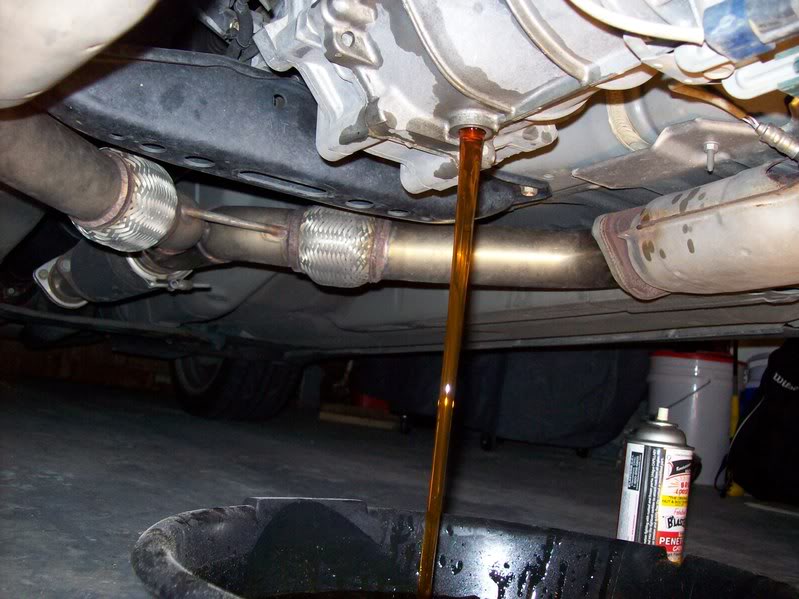
Now with the fill plug removed you can remove the drain plug. Place your drain pan underneath and remove the drain plug.
Remove the old crush washers, a small flathead screwdriver sometimes helps. Put new crush washers on.
Put the drain plug back in. Torque specs are in the service manual...I'll update the post later with the correct torque specs
Fill your fluid pump with the new tranny fluid and begin pumping into the fill plug. I had to repeat this process 8 times. Do this until the new fluid starts spilling out of the fill plug.
Put the fill plug back in and torque to spec.
************************************************** *****
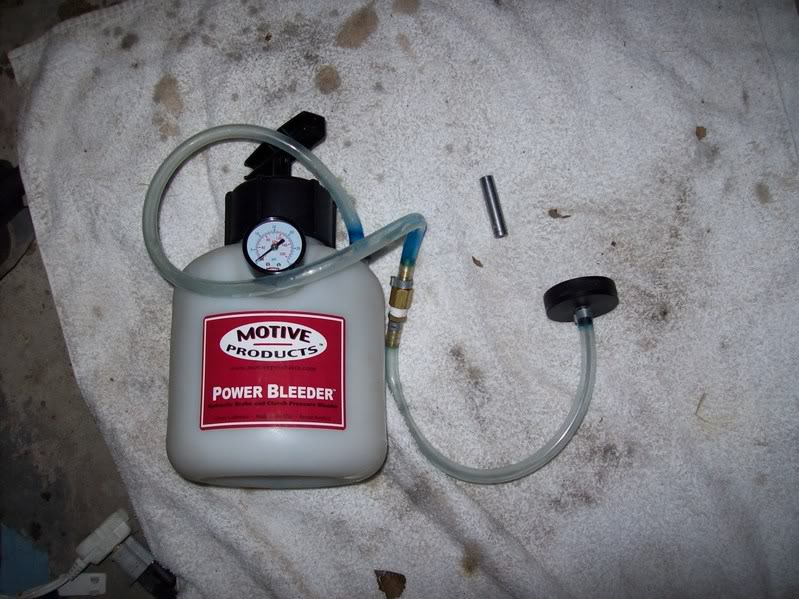
Now onto the clutch fluid. I used a Motive pressure pot to aid in this. However, the cap of the pot kept popping off my clutch fluid reservoir....this is where my 10 year old came in.
WARNING: I think we all should know this by now, but if you don't...
DO NOT GET BRAKE FLUID ON YOUR PAINT!!! it is highly corrosive and will eat through your paint quickly.
Tools needed for this.
8mm socket for clutch bleeder screw, can be a short wall or long wall.
1/4" ID hose or larger, about 10 inches long.
a quart or so of DOT 3 brake fluid.
This is very similar to bleeding the brakes with the Motive bleeder. Simply fill the pot with brake fluid, attach cap to clutch fluid reservoir, pump the pot to 8-10psi, get under the car and loosen the bleeder valve, wait until the new fluid is nice and clear with no bubbles and you are done.
Here's a few pics.
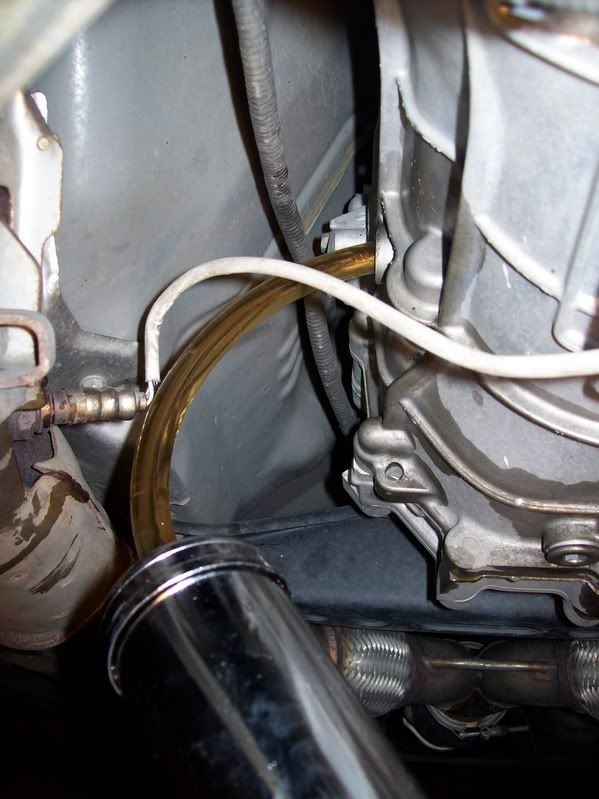
The bleeder valve is on the drivers side of the transmission, just between the catalytic converter brace and the crossmember. It's much easier to see if you remove the rear underbody cover (five 10mm bolts and two clips).
Here's the Motive pressure pot.
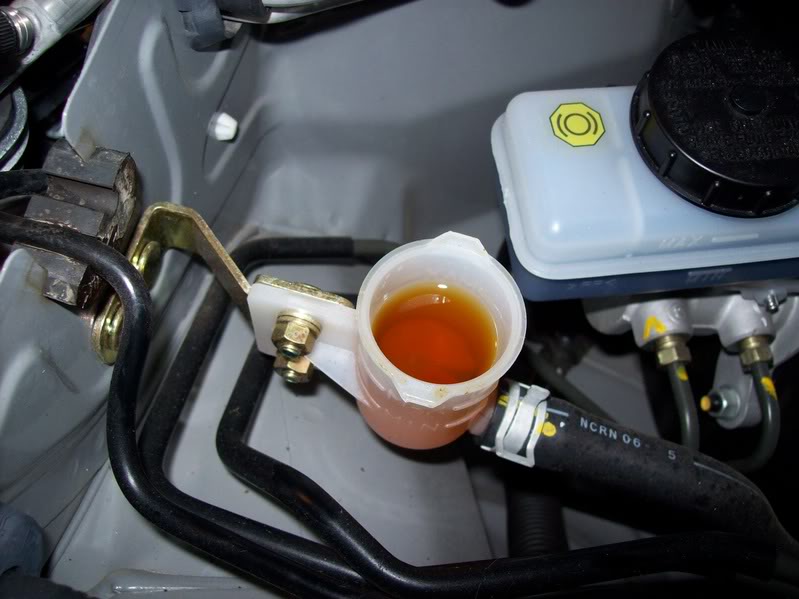
Old clutch fluid in reservoir
After bleeding (sorry, no in-process pics of this..it was kind of messy)

That's about it. Pick everything up and take the car for a drive now!
Here's what I used for the manual transmission change:
4 quarts of Redline MT-90 75w90 Manual Transmission Fluid ($10 per quart)
2 new MT drain/fill plug crush washers from the Nissan Dealership (they are cheaper than the Infiniti dealership for some reason).
Fluid pump from any auto parts store (mine was .5 qt capacity)
10mm allen head socket
onto the process!
Get everything layed out,
Jack the car up and put on jack stands
get your drop light and 10mm allen socket ready and remove the fill plug first. The fill plug is the upper plug and is located on the passenger side of the transmission. The reason to remove this first is you will be in trouble if you remove the drain plug and the fill plug is siezed for some reason.
Fill plug is actually removed in this pic, it's near the top of the 02 sensor wire. I sprayed both plugs with PB Blaster prior to removal.
Now with the fill plug removed you can remove the drain plug. Place your drain pan underneath and remove the drain plug.
Remove the old crush washers, a small flathead screwdriver sometimes helps. Put new crush washers on.
Put the drain plug back in. Torque specs are in the service manual...I'll update the post later with the correct torque specs
Fill your fluid pump with the new tranny fluid and begin pumping into the fill plug. I had to repeat this process 8 times. Do this until the new fluid starts spilling out of the fill plug.
Put the fill plug back in and torque to spec.
************************************************** *****
Now onto the clutch fluid. I used a Motive pressure pot to aid in this. However, the cap of the pot kept popping off my clutch fluid reservoir....this is where my 10 year old came in.
WARNING: I think we all should know this by now, but if you don't...
DO NOT GET BRAKE FLUID ON YOUR PAINT!!! it is highly corrosive and will eat through your paint quickly.
Tools needed for this.
8mm socket for clutch bleeder screw, can be a short wall or long wall.
1/4" ID hose or larger, about 10 inches long.
a quart or so of DOT 3 brake fluid.
This is very similar to bleeding the brakes with the Motive bleeder. Simply fill the pot with brake fluid, attach cap to clutch fluid reservoir, pump the pot to 8-10psi, get under the car and loosen the bleeder valve, wait until the new fluid is nice and clear with no bubbles and you are done.
Here's a few pics.
The bleeder valve is on the drivers side of the transmission, just between the catalytic converter brace and the crossmember. It's much easier to see if you remove the rear underbody cover (five 10mm bolts and two clips).
Here's the Motive pressure pot.
Old clutch fluid in reservoir
After bleeding (sorry, no in-process pics of this..it was kind of messy)
That's about it. Pick everything up and take the car for a drive now!
Last edited by twin001; Feb 21, 2009 at 05:35 PM.

Joined: Feb 2008
Posts: 1,923
Likes: 13
From: Tulsa, OK
I just hit 30k this week. I'm hoping this clutch fluid switch will help the squishy pedal. If not I may just buy a braided clutch line.
Also, I'm going to use this method next time for the clutch fluid,
http://www.rangeracceleration.com/Clutch_Care.html
Also, I'm going to use this method next time for the clutch fluid,
http://www.rangeracceleration.com/Clutch_Care.html

wow, very nice write up. good pics too. have you noticed a difference with the new fluids compared to Nissan fluid? TSB's out there say to stick to Nissan fluids because it can void the warranty. your thoughts on this?
i never would've thought about that. you put any anti-seize compound on the plugs to avoid that in the future?
get your drop light and 10mm allen socket ready and remove the fill plug first. The fill plug is the upper plug and is located on the passenger side of the transmission. The reason to remove this first is you will be in trouble if you remove the drain plug and the fill plug is siezed for some reason.
Joined: Feb 2008
Posts: 1,923
Likes: 13
From: Tulsa, OK
wow, very nice write up. good pics too. have you noticed a difference with the new fluids compared to Nissan fluid? TSB's out there say to stick to Nissan fluids because it can void the warranty. your thoughts on this?
i never would've thought about that. you put any anti-seize compound on the plugs to avoid that in the future?
i never would've thought about that. you put any anti-seize compound on the plugs to avoid that in the future?
As far as the warranty goes, Redline meets or exceeds all requirements set forth per Nissan. They, Nissan, would have a tough time voiding the warranty should a problem arise.
As far as a difference, I've only driven about 15 miles with the new fluids. I want to go back and re-bleed the clutch fluid. The pedal does seem a bit more firm now, we'll see what happens with higher temperatures in the near future. Also, there is still a slight 1-2 grind. I'll drive for a few more days and see if it improves.


"Put the drain plug back in. Torque specs are in the service manual...I'll update the post later with the correct torque specs
Fill your fluid pump with the new tranny fluid and begin pumping into the drain plug. I had to repeat this process 8 times. Do this until the new fluid starts spilling out of the fill plug.
Put the fill plug back in and torque to spec."
Ok you're losing me here. If you put the drain plug back in how are you pumping fluid into it?
Trending Topics

Joined: Feb 2008
Posts: 1,923
Likes: 13
From: Tulsa, OK
"Put the drain plug back in. Torque specs are in the service manual...I'll update the post later with the correct torque specs
Fill your fluid pump with the new tranny fluid and begin pumping into the drain plug. I had to repeat this process 8 times. Do this until the new fluid starts spilling out of the fill plug.
Put the fill plug back in and torque to spec."
Ok you're losing me here. If you put the drain plug back in how are you pumping fluid into it?
Fill your fluid pump with the new tranny fluid and begin pumping into the drain plug. I had to repeat this process 8 times. Do this until the new fluid starts spilling out of the fill plug.
Put the fill plug back in and torque to spec."
Ok you're losing me here. If you put the drain plug back in how are you pumping fluid into it?
You first remove the fill plug, then the drain plug. All the fluid will now drain out of the drain plug. Replace the drain plug and tighten. Now, while the fill plug is out you fill the transmission using your siphon gun.
The reason you remove the fill plug first is because you don't want to remove the drain plug and then move to the fill plug just to find out it is seized (not likely, but could happen). You simply can't fill the transmission or differential via the drain plug....If you did then Bernoulli would roll over in his grave. The drain plug is at the very bottom of the transmission.

Registered User
Joined: Feb 2006
Posts: 208
Likes: 1
From: Vancouver, BC, Canada
Hey twin awesome right up, I was reading this earlier as well, and the reason the other user is confused is there is a typo in your print above. Since the picture is inverted it kinda makes it look like you are filling the fluid via the drain plug which is obviously not correct (if you read the rest) as you've stated filling is done via the fill plug.
Hey twin awesome right up, I was reading this earlier as well, and the reason the other user is confused is there is a typo in your print above. Since the picture is inverted it kinda makes it look like you are filling the fluid via the drain plug which is obviously not correct (if you read the rest) as you've stated filling is done via the fill plug.
Joined: Feb 2008
Posts: 1,923
Likes: 13
From: Tulsa, OK
hahahh, my bad. I'll fix it.
Ya, the pic is sideways, I never rotated it . I was laying on my back trying to get a good angle. I'll fix the post and rotate the pic.
Ya, the pic is sideways, I never rotated it . I was laying on my back trying to get a good angle. I'll fix the post and rotate the pic.

I tried the motive power bleeder on my clutch fluid reservoir a few months ago, and for some reason it just pushed in a bunch of air into the reservoir. I ended-up doing the manual method to get all the air out. Just a warning...
for me changing clutch fluid is an only if you really need to thing, not an it's been in there a couple years better change it kinda thing.
Closed system. Unless a seal goes bad and you leak or suck air there is really no reason to change it.
Closed system. Unless a seal goes bad and you leak or suck air there is really no reason to change it.

Joined: Jan 2004
Posts: 21,095
Likes: 47
From: Toronto, GTA north
It's not a closed system, it's vented to atmosphere.
The fluid is hygroscopic & takes on moisture.
It's a very good idea to change periodically.