
DIY: cam position sensors


Joined: Jan 2005
Posts: 648
Likes: 7
From: norfolk, va
DIY: cam position sensors
haven't seen one of these but seen a few questions on this. so ill try to explain it this is my 1st DIY thread so bear with me.
they could have make the sensors the same and saved money but they didn't the only difference is the angle of the plug. and you could swap them is the grooves on the connectors weren't reversed
TOOLS: 10mm socket, 10mm box end wrench, flat head screw driver.
1. disconnect batt.
2. get to work remove intake and (engine cover 2 bolts and 2 nuts)
3. remove upper plenum
4. remove lower plenum
5. move wire bundle to access bank 1 sensor
6. remove 1 10 mm bolt and pull the sensor out
7. replace with new sensor
8. remove breather hose from valve cover (forgot to circle that one but youll see it. if you dont get some glasses)
9. remove 1 10 mm bolt and pull out bank 2 sensor
10 . replace sentor
11. re-assemly, johnny 5
12. reconnect batt.
13. turn her on.
PIC 1: Upper plenum (remove bolts(alot), nuts and 3 or 4 hoses,i think there is one one the bottom of the TB, circled)
PIC 2: lower plenum (remove 6 bolts in center, 2 nuts and 1 hose, circled)
PIC 3: sensor positions (left side = passenger)
PIC 4: sensor before removal(1 10mm bolt holds that sucker in and an "O" ring gotta wiggle it to get it out)
PIC 5: sensor after removal
Last edited by snakes1021; Jun 29, 2009 at 10:47 PM.
Joined: Jan 2005
Posts: 648
Likes: 7
From: norfolk, va
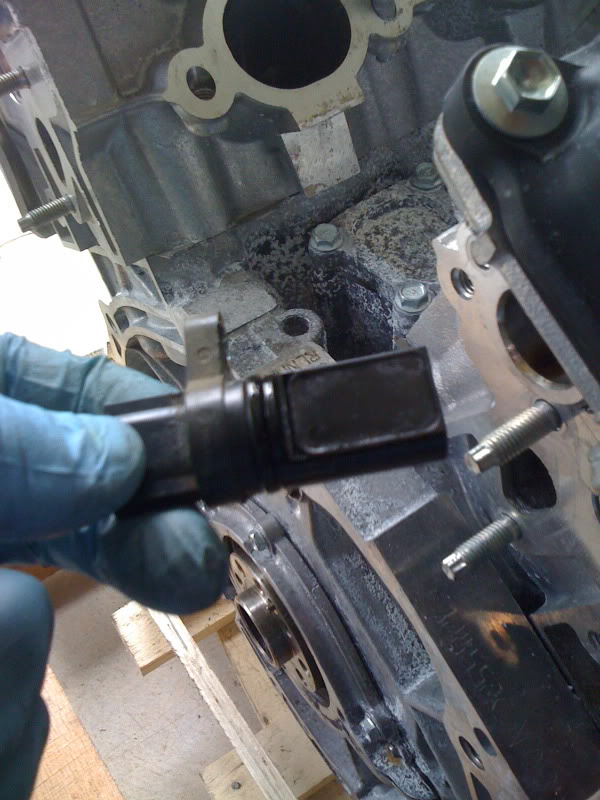
Bank 2 is similar except the sensor has an angled connector(and is on the opposite side)
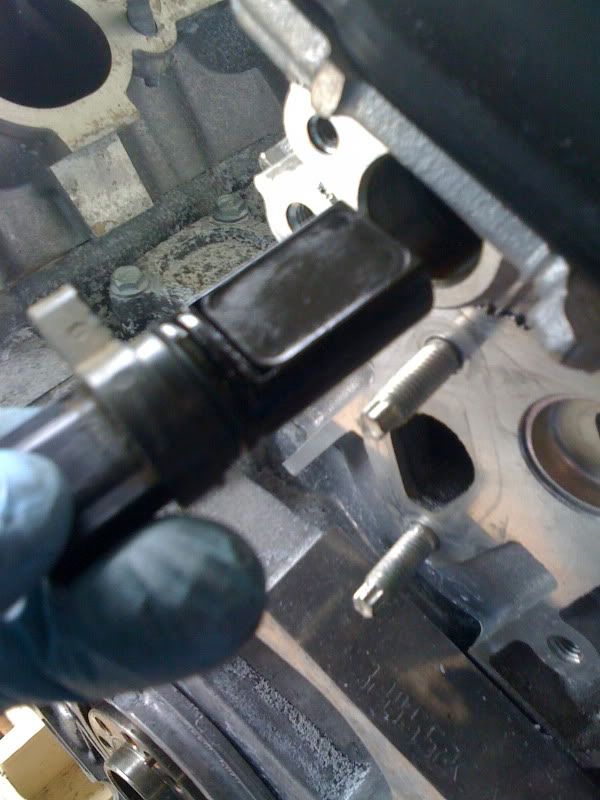
PIC 1: shot of empty sensor location(back shot)
PIC 2: top shot of empty sensor location
PIC 3: shot of bank 2 sensor with angled plug
PIC 1: shot of empty sensor location(back shot)
PIC 2: top shot of empty sensor location
PIC 3: shot of bank 2 sensor with angled plug

It helped a lot! I took of my airbox and intake and waited for my engine to cool down. Turns out that Nissan sold me the wrong part. They gave me the one for Bank 1, not Bank 2. Looks like they're different enough for it to not work...
Oh well, at least I didn't have the manifold off already.
Oh well, at least I didn't have the manifold off already.

Registered User
Joined: May 2008
Posts: 40
Likes: 1
I used your diy post. I have to say thank you and good job! The car is back to normal and since i did it myself i'm sure it pisses off mechanics/stealerships everywhere that they went to school for this crap and couldn't screw me over on labor charges!! Once again, thanks!

Trending Topics
Has anyone experienced start up problems after the DIY. Did the DIY which went great but when I start the car everything is fine (no service engine light, slip light or VDC) then later the idle drops and engine shuts off with only the battery light on. I restart it no problem but same thing happens, now when I give it gas or a slight touch on the pedal the engine stays on. Anyone might know the cause?
Joined: Jan 2005
Posts: 648
Likes: 7
From: norfolk, va
well geee thanks, why dont you write a DIY with pics for everyone?
because just telling us it can be done isnt going to help anyone.
because just telling us it can be done isnt going to help anyone.


Nice DIY, If I ever did this I might like to see the alternate method covered in a DIY.


Registered User
Joined: Sep 2009
Posts: 249
Likes: 2
Has anyone experienced start up problems after the DIY. Did the DIY which went great but when I start the car everything is fine (no service engine light, slip light or VDC) then later the idle drops and engine shuts off with only the battery light on. I restart it no problem but same thing happens, now when I give it gas or a slight touch on the pedal the engine stays on. Anyone might know the cause?

Registered User
Joined: Oct 2010
Posts: 2
Likes: 0
Awesome DIY thank you so much. I was able to use this site (1youngowner's post) to diagnose my problem and then use this DIY. It really is almost as easy as it looks and it will save you time and about 300 from the dealership. Also a tip that I found while i was doing it, if you only have to replace bank 2 (driver's side) then you can leave on the lower part of the plenum.
-proud new member
-proud new member