

04 coupe vk56 engine swap and build


Thread Starter
|
Registered User
Joined: May 2011
Posts: 99
Likes: 5
From: CT
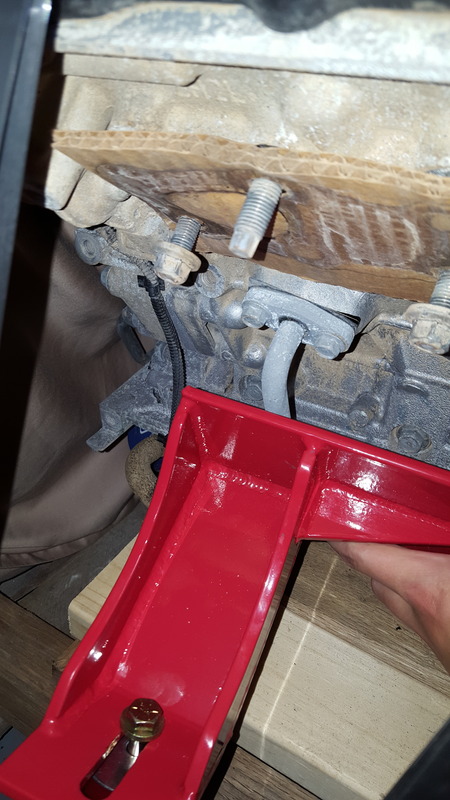
Ok so onto the real updates.
Sorry there are not that many big updates, but for me, significant.
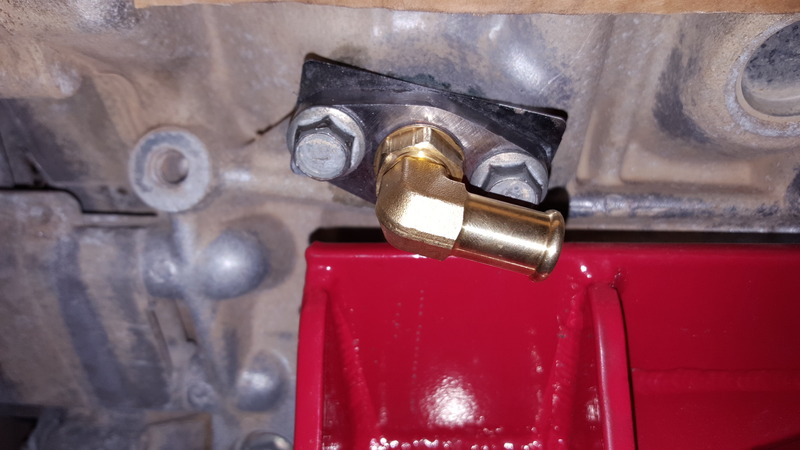
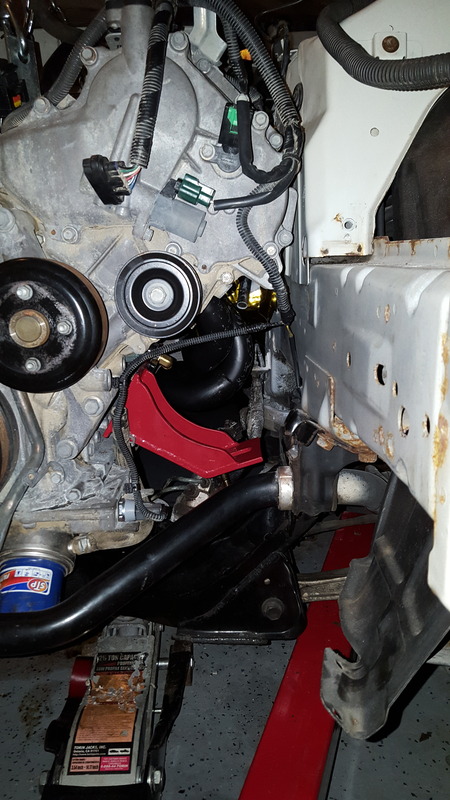
So if you recall back I had an issue with a coolant line that exited the block. and directly into the new motor mount. So here is how I fixed that.
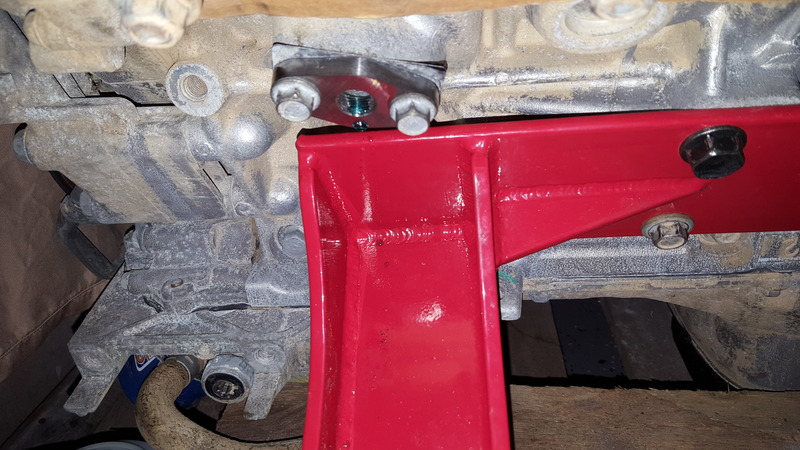
I tapped it with a 9/16 18 thread count. I will put a hose barb into it and reroute it around the motor mount. Problem solved!
Sorry there are not that many big updates, but for me, significant.
So if you recall back I had an issue with a coolant line that exited the block. and directly into the new motor mount. So here is how I fixed that.


I tapped it with a 9/16 18 thread count. I will put a hose barb into it and reroute it around the motor mount. Problem solved!
Thread Starter
|
Registered User
Joined: May 2011
Posts: 99
Likes: 5
From: CT
AND HURRY!!!!!
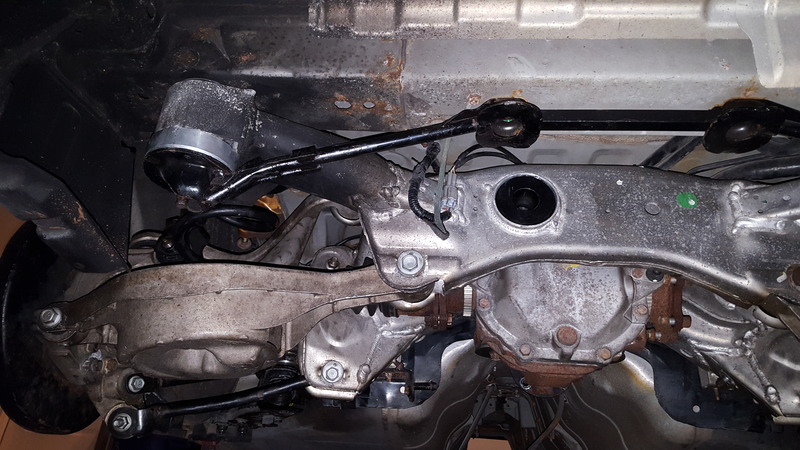
I finally, after 5 attempts and have cut, drilled, cut, drilled, cut, and hack-sawed the damn rear subframes out. So I can finally clean the spots out. Pop the solids it, mount it back up and put that all back together.
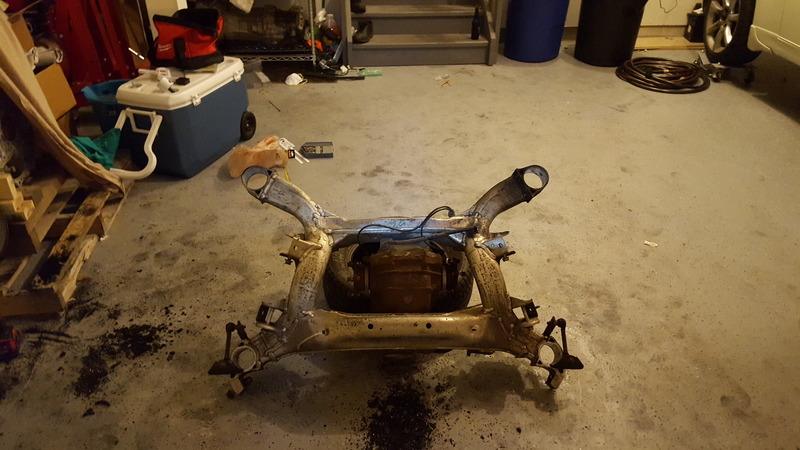
I finally, after 5 attempts and have cut, drilled, cut, drilled, cut, and hack-sawed the damn rear subframes out. So I can finally clean the spots out. Pop the solids it, mount it back up and put that all back together.

Thread Starter
|
Registered User
Joined: May 2011
Posts: 99
Likes: 5
From: CT
Ok so here is a little update.
I was in TX for 2 weeks so I haven't touched anything to right now, so its a small update, more to follow this coming week.
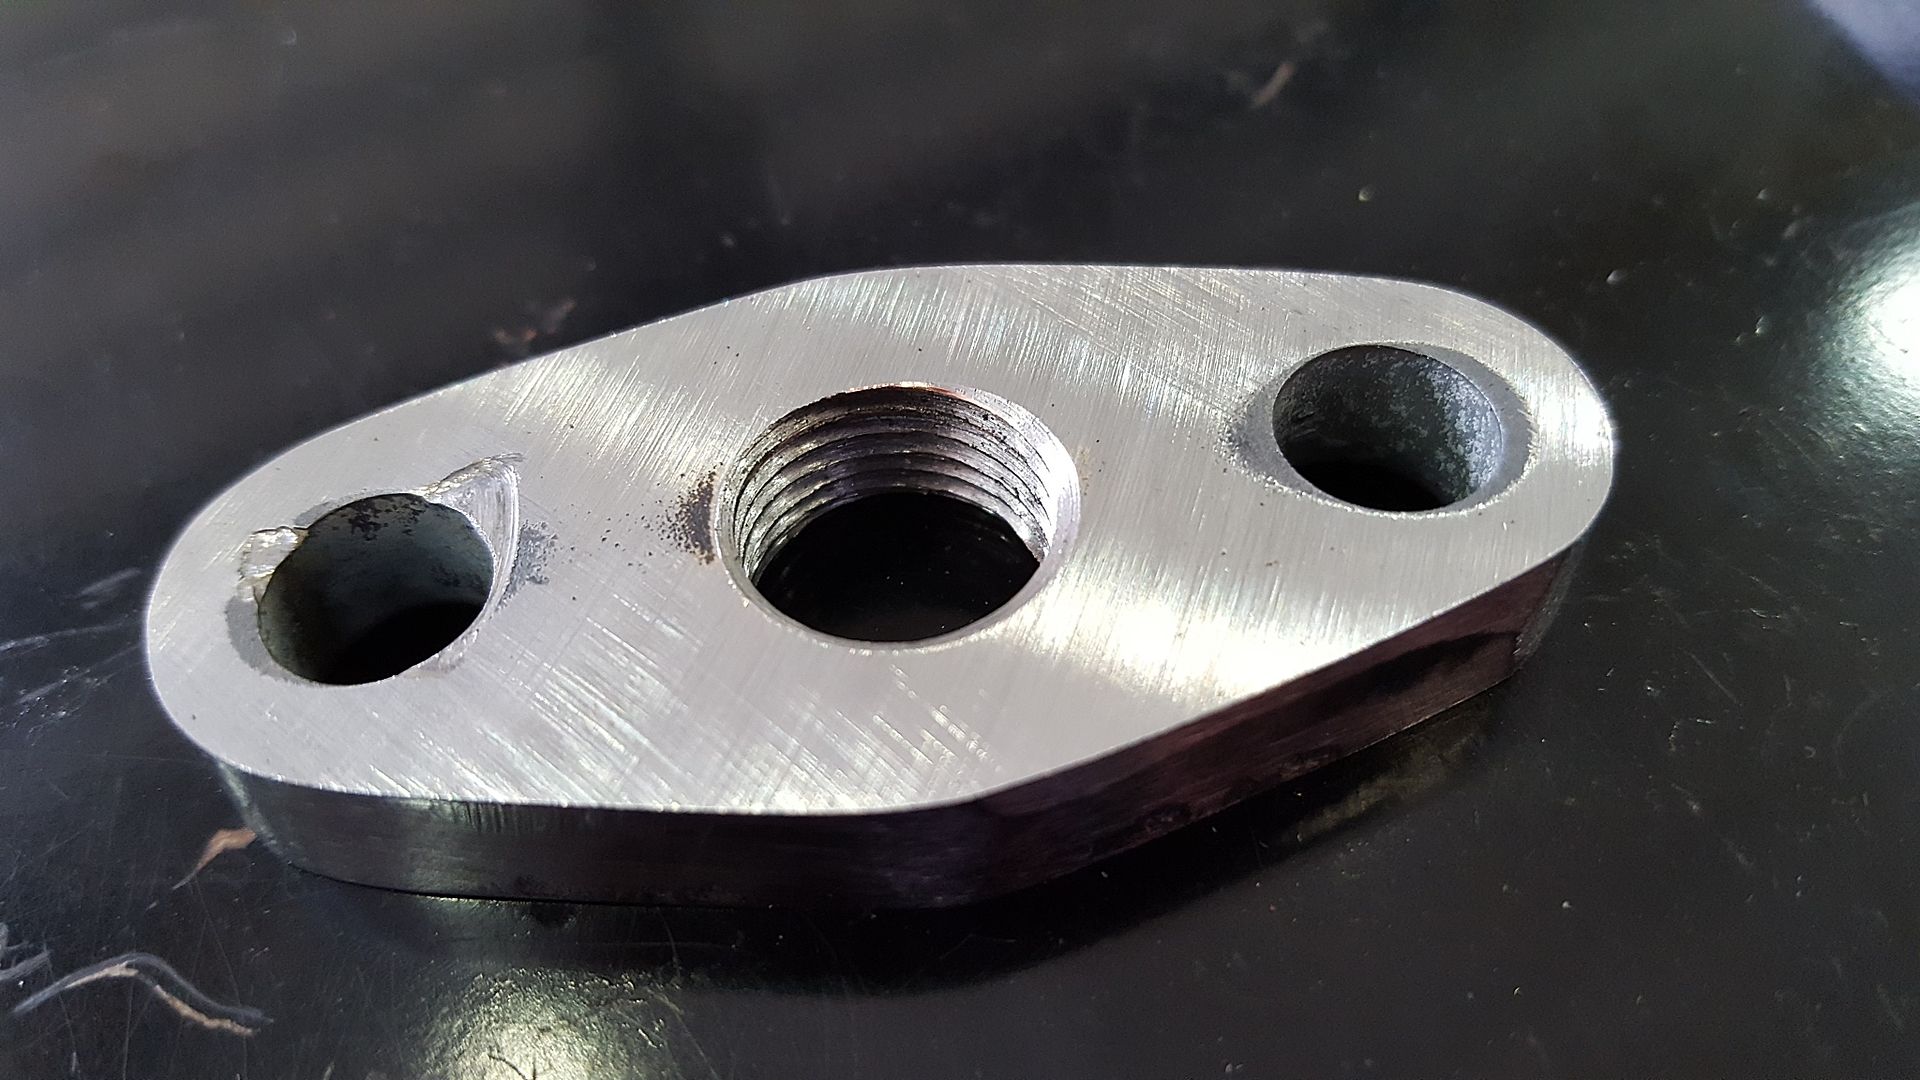
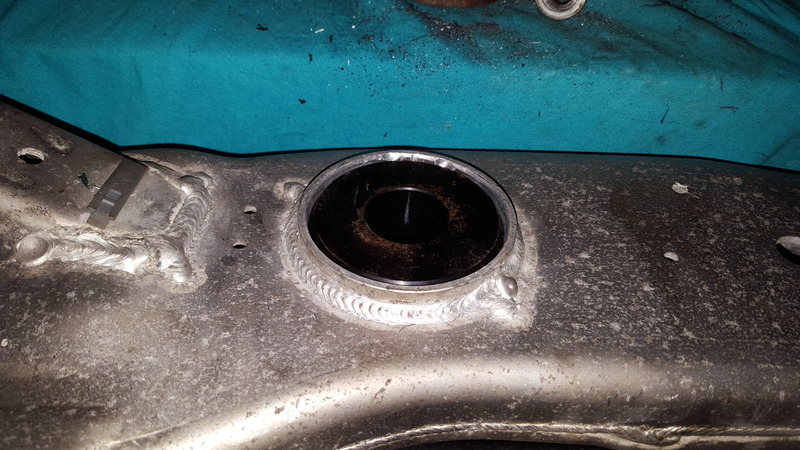
I corrected the little water outlet issue and here is what I came up with.
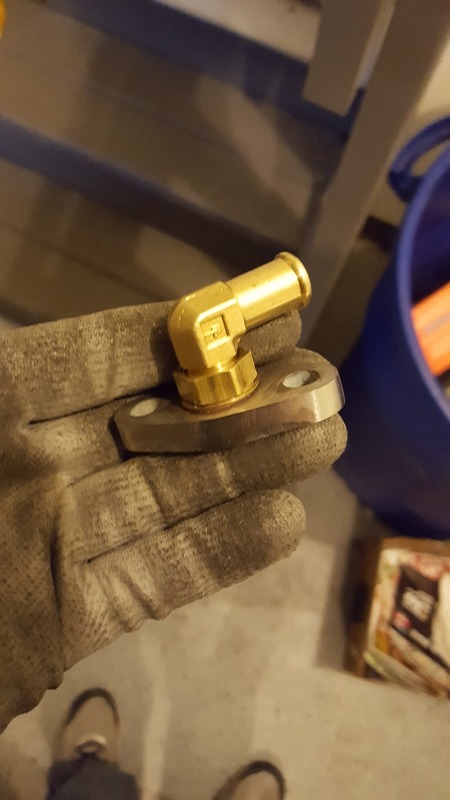
Here is the original item.
I was in TX for 2 weeks so I haven't touched anything to right now, so its a small update, more to follow this coming week.
I corrected the little water outlet issue and here is what I came up with.


Here is the original item.

Thread Starter
|
Registered User
Joined: May 2011
Posts: 99
Likes: 5
From: CT
So Friday and today on Sunday I made a great deal of progress with the transmission.
Soooo. After getting the run around from multiple machine shops and talking to a transmission shop, I said, "F**k" it
There are 2 raised lines around the bellhousing on the transmission. An upper and lower one. So I took my angle grinder and put a cutting wheel on it and traced the line with the wheel on forward side. That was low enough, so I cut a sliver off which was the underside of that line and still not enough. I made a mark about 1/8 inch under and traced around under the previous cut and cut that and that worked fine. So after 2 cans of brake clean to clean all the crap off it and in the creases so as to not get anything inside the case.

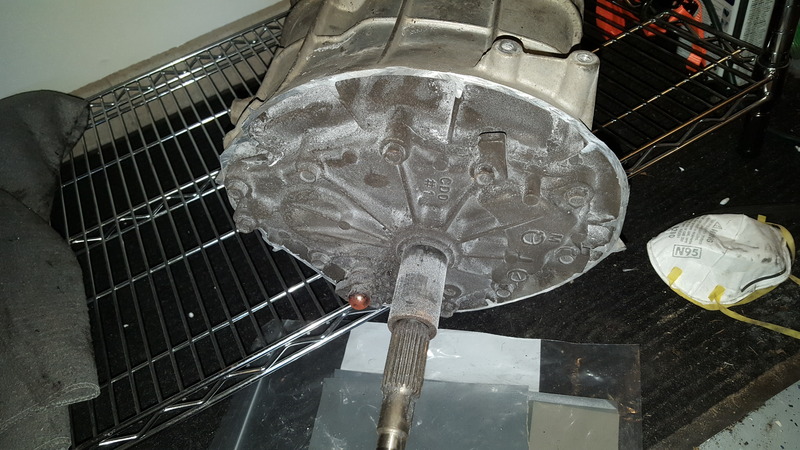
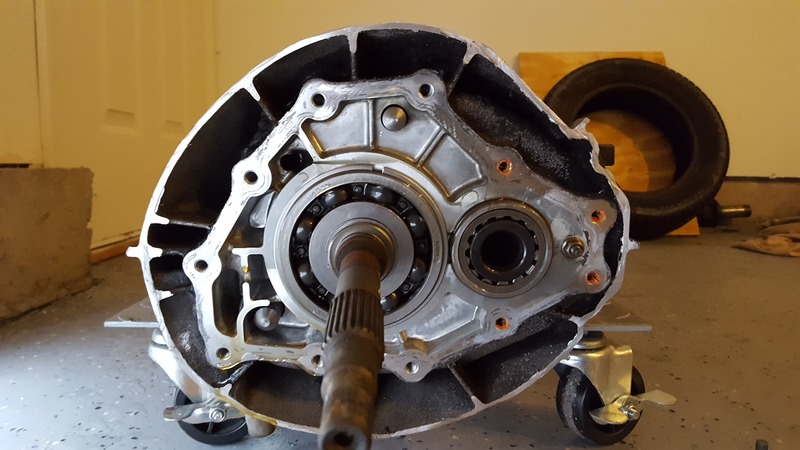
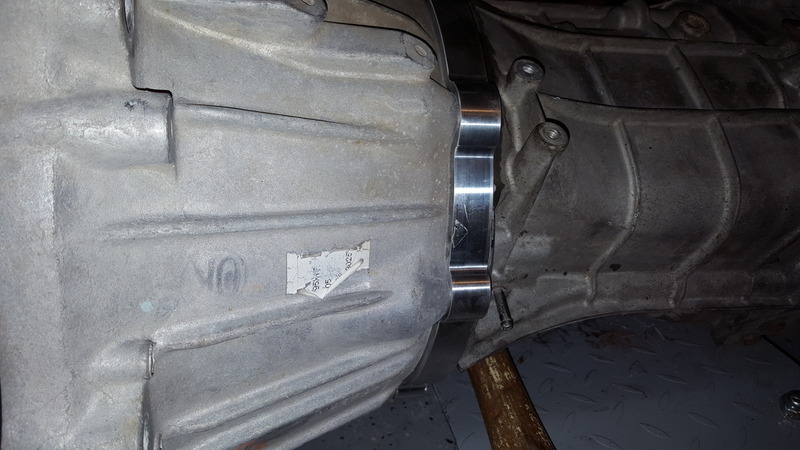
The front cover came off very easily, but the adaptor plate fit over the raised around by the slip ring. So I had to use a few bolts to pull it down and then took them out to put all the bolts in and torque them down. the VK56de auto bellhousing just slipped right onto the adapter and all fit nicely on that side.
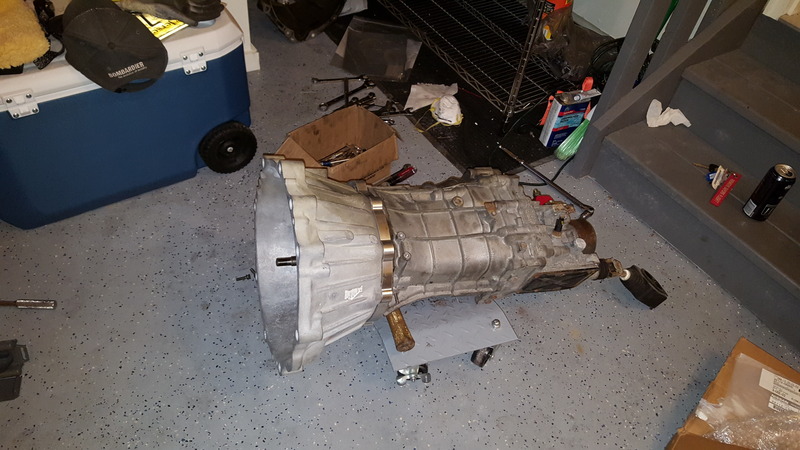
All that's left to mate the transmission to the engine is to buy the slave and clutch plate.
I still have no decided on one yet...
Soooo. After getting the run around from multiple machine shops and talking to a transmission shop, I said, "F**k" it
There are 2 raised lines around the bellhousing on the transmission. An upper and lower one. So I took my angle grinder and put a cutting wheel on it and traced the line with the wheel on forward side. That was low enough, so I cut a sliver off which was the underside of that line and still not enough. I made a mark about 1/8 inch under and traced around under the previous cut and cut that and that worked fine. So after 2 cans of brake clean to clean all the crap off it and in the creases so as to not get anything inside the case.


The front cover came off very easily, but the adaptor plate fit over the raised around by the slip ring. So I had to use a few bolts to pull it down and then took them out to put all the bolts in and torque them down. the VK56de auto bellhousing just slipped right onto the adapter and all fit nicely on that side.


All that's left to mate the transmission to the engine is to buy the slave and clutch plate.
I still have no decided on one yet...
Thread Starter
|
Registered User
Joined: May 2011
Posts: 99
Likes: 5
From: CT
Ok so here is a small update.
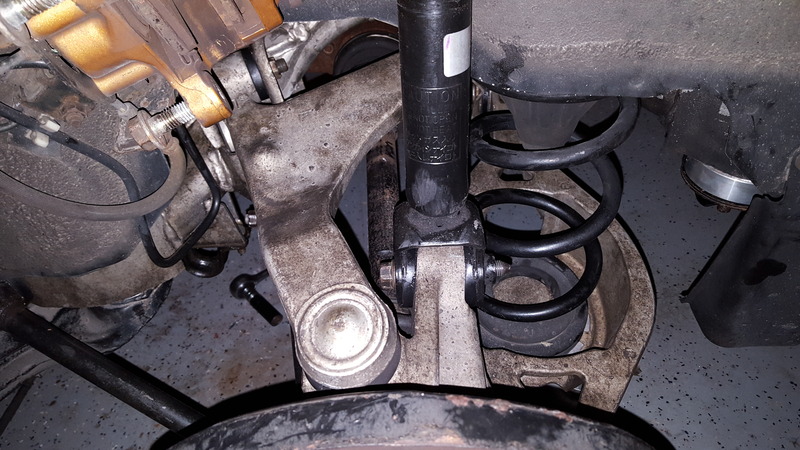
I finally did all the solid bushing, or finally was able to........

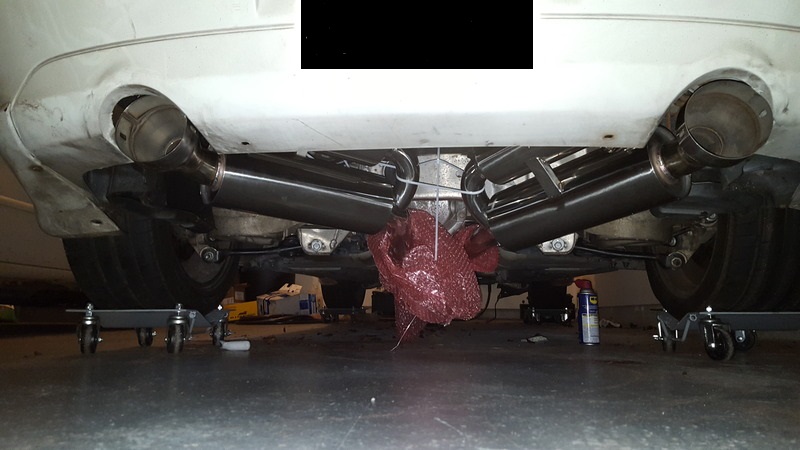
I also reassembled the rear and was able to drop it back down of the jack stands it was sitting on for months. I also picked up a cheap godspeed exhaust for 250 from ebay as something for now while breaking the car in before modding the engine.

YES YES YES YES YES, I know I need coilovers.
Drive the car first.... Than coil overs
I finally did all the solid bushing, or finally was able to........


I also reassembled the rear and was able to drop it back down of the jack stands it was sitting on for months. I also picked up a cheap godspeed exhaust for 250 from ebay as something for now while breaking the car in before modding the engine.


YES YES YES YES YES, I know I need coilovers.
Drive the car first.... Than coil overs
Thread Starter
|
Registered User
Joined: May 2011
Posts: 99
Likes: 5
From: CT
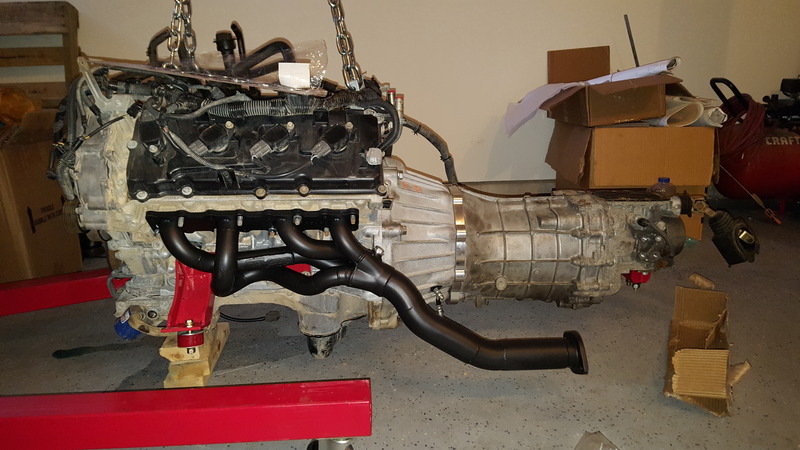
Ok, first real update to gettting this motor in the car. I am aiming for pocono's 26-27.
Ok so I finally got my headers after harassing Doug for months. While these headers started out decent looking the look like **** after the collectors, pieced together different sizes of pipe. I am not f**king happy. It took 1 year and the look iffy, but I finally have them. Oh not to mention the do not have v-bands like her promised, they do not have 3 inch collectors like her promised...... But I have them....
Finally


Also, he told me full length.... and low and behold I have flipping shorties....
Again, not happy, but I can move forward to driving it and have better made later.
Ok so I finally got my headers after harassing Doug for months. While these headers started out decent looking the look like **** after the collectors, pieced together different sizes of pipe. I am not f**king happy. It took 1 year and the look iffy, but I finally have them. Oh not to mention the do not have v-bands like her promised, they do not have 3 inch collectors like her promised...... But I have them....
Finally
Also, he told me full length.... and low and behold I have flipping shorties....
Again, not happy, but I can move forward to driving it and have better made later.
Last edited by quickdiversion; Apr 12, 2017 at 09:11 PM.
Thread Starter
|
Registered User
Joined: May 2011
Posts: 99
Likes: 5
From: CT
So lets get to matting all the clutch bs and slave cylinder so I can mount them together and drop it all in.
Here is the flex plate and 1 inch spacer to match the adapter plate.

Fodenza flywheel, 1 inch spacer, stock flexplate, and 80mm studs

ACT 6 puck sprung flywheel

ACT heavy duty pressure plate

Tilton internal slave with "custom" bearing


I will be working on this all weekend.
STAY TUNED!!!!!!
Here is the flex plate and 1 inch spacer to match the adapter plate.
Fodenza flywheel, 1 inch spacer, stock flexplate, and 80mm studs
ACT 6 puck sprung flywheel
ACT heavy duty pressure plate
Tilton internal slave with "custom" bearing
I will be working on this all weekend.
STAY TUNED!!!!!!
Thread Starter
|
Registered User
Joined: May 2011
Posts: 99
Likes: 5
From: CT
It was about 400 because the lines ends were re-done and remaked, according to Doug. and the throw out bearing it came with was scratched and the shaft was milled to accommodate a 68 mm throw out bearing.
matting the bellhousing alone and holding the bearing and slave on the forks and measure to where the mating surface would be yields .196 inch. Recommended is .170 to .250.
So it sits nice!!!
So,................. Zfever in their infinite wisdom pre-drilled the Tilton holes. Not a ****ing clue what the measured them with cause the were off center and 1/4 off. So after remeasuring and re-drilling. I finally have a throwout bearing.

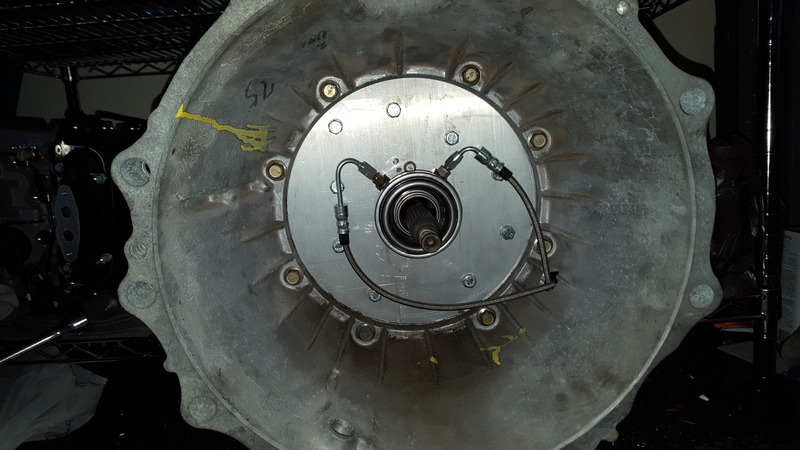
It looks like I took all day to get no where, but I spent over 7 hours correcting small stupid errors.
THANK GOD I OWN A DIGITAL MICROMETER........................................ .....

Tomorrow, it goes in the car!!
matting the bellhousing alone and holding the bearing and slave on the forks and measure to where the mating surface would be yields .196 inch. Recommended is .170 to .250.
So it sits nice!!!
So,................. Zfever in their infinite wisdom pre-drilled the Tilton holes. Not a ****ing clue what the measured them with cause the were off center and 1/4 off. So after remeasuring and re-drilling. I finally have a throwout bearing.


It looks like I took all day to get no where, but I spent over 7 hours correcting small stupid errors.
THANK GOD I OWN A DIGITAL MICROMETER........................................ .....


Tomorrow, it goes in the car!!
Thread Starter
|
Registered User
Joined: May 2011
Posts: 99
Likes: 5
From: CT
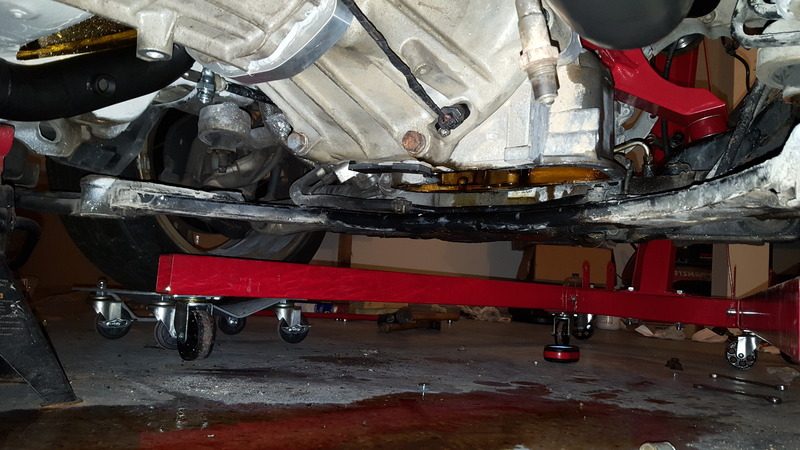
So today I started into new territory.
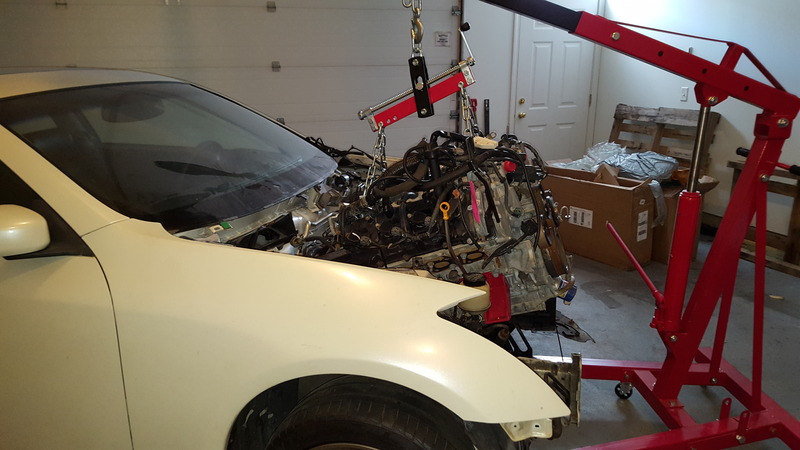
This motor is a huge pain in the D*ck to put in. Almost completely in and I notice that the oil pan will not clear, so I removed the oil pan, The motor slide in further, but not far enough! It was caught on the steering rack lines. SOooooooOOOoooo I pulled those also. Still did not go in.
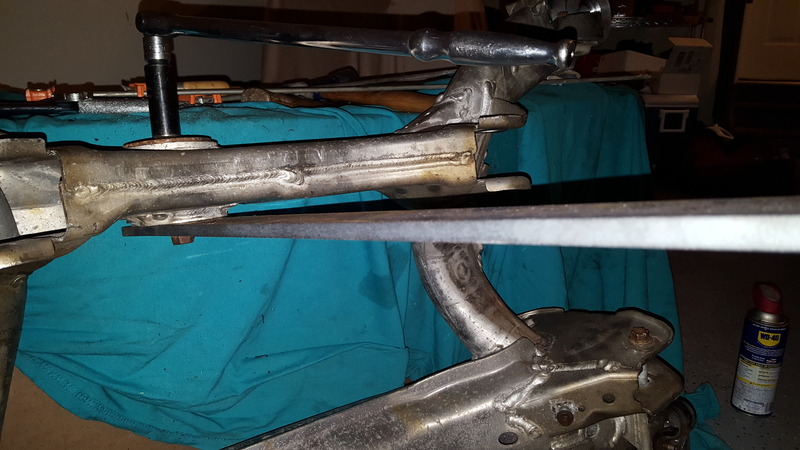
I finally had to drop both pieces of forward subframe and than it slide in.

Next step was installing the headers. It was a good thing that I dropped all the subframe out, because the driver side header would not even slide in between the subframe and rocker.
I was kinda pissed that that the motor had no accessories at first, but it was a blessing in disguse. The a/c compressor would block the way to the driver side header for install and tightening. The passenger side was was much easier. Each had a single nut that was unable to be tightened at this point with all the support equipment.
Then after it is 98% in I notice that The subframe won't go back in. It slides up about and inch and then I am looking all over for hangups and I notice that the oil pan actually sit right on top of the rear half of the front subframe. ANd I mean with no pan and no strainer, about 1 inch off. SOOOOOOO not even a shallow oil pan will fix that.
SOOOOOO (again),I will be chopping and welding the rear part to not block the are and move the horizontal support further aft to accommodate the oil pan.

This motor is a huge pain in the D*ck to put in. Almost completely in and I notice that the oil pan will not clear, so I removed the oil pan, The motor slide in further, but not far enough! It was caught on the steering rack lines. SOooooooOOOoooo I pulled those also. Still did not go in.
I finally had to drop both pieces of forward subframe and than it slide in.

Next step was installing the headers. It was a good thing that I dropped all the subframe out, because the driver side header would not even slide in between the subframe and rocker.

I was kinda pissed that that the motor had no accessories at first, but it was a blessing in disguse. The a/c compressor would block the way to the driver side header for install and tightening. The passenger side was was much easier. Each had a single nut that was unable to be tightened at this point with all the support equipment.
Then after it is 98% in I notice that The subframe won't go back in. It slides up about and inch and then I am looking all over for hangups and I notice that the oil pan actually sit right on top of the rear half of the front subframe. ANd I mean with no pan and no strainer, about 1 inch off. SOOOOOOO not even a shallow oil pan will fix that.
SOOOOOO (again),I will be chopping and welding the rear part to not block the are and move the horizontal support further aft to accommodate the oil pan.

