Need help with popcharger/z-tube install
#1
 01-10-2007, 04:18 PM

Need help with popcharger/z-tube install
Alright, I've used the vast resources on this site and it allowed me, an amateur mechanic to install this sweet beaut:
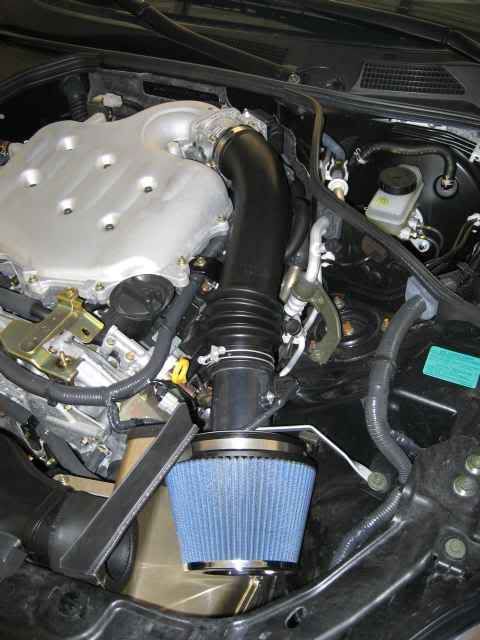
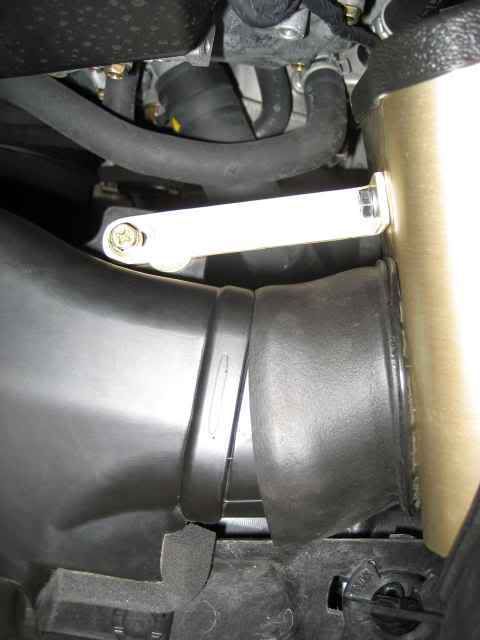
I have some spacing issues though from the air vent to the heat shield:
How important is it that this be completely sealed and how can I fix it?
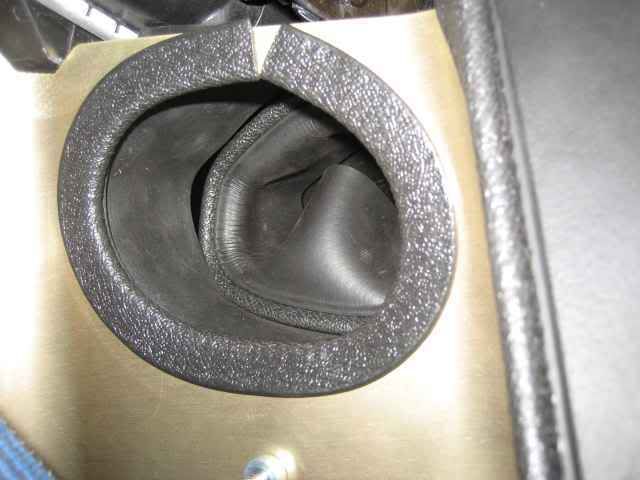
I have some spacing issues though from the air vent to the heat shield:
How important is it that this be completely sealed and how can I fix it?


#3
01-10-2007, 04:33 PM
#5
01-10-2007, 04:43 PM

#6
01-10-2007, 04:52 PM
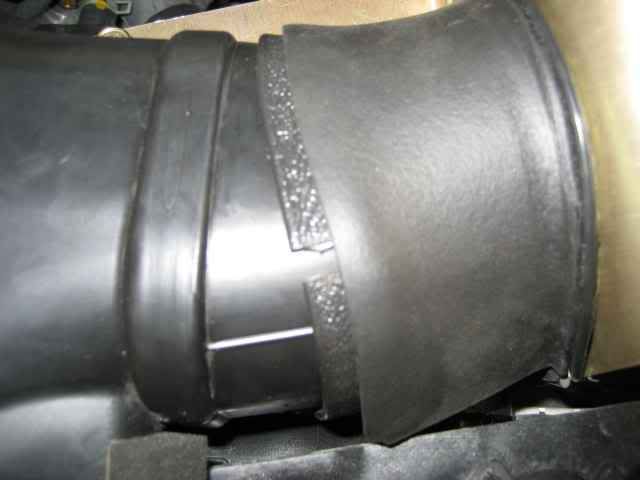
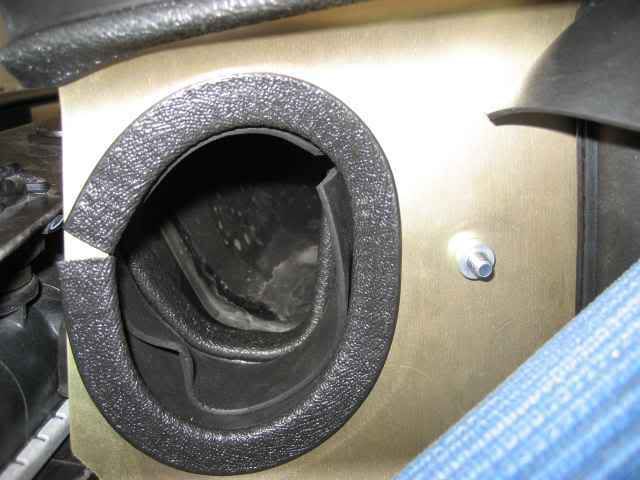
OK, so there's a second hole in the back of the air vent. Not sure what it's for but I'm putting it to use. I moved the heat shield over some, removed the bolt and then put it through the second hole. Readjusted the rubber trim. What do you think now?
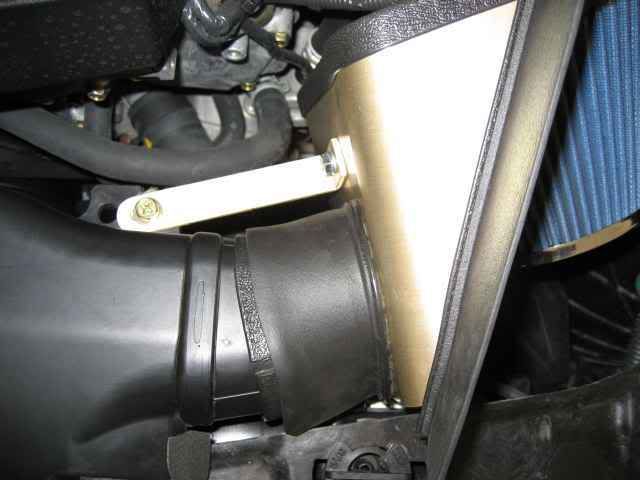
Now I just need to find a nut to go thread somehow on the back of the bolt. This look like it'll work? Or should I just try to drill a new hole in the bracket? If I redrill, I'm worried the bracket will then be to long and I'll have to carve off the end of it. Again, just an amateur, wasn't looking for all this extra work.
Now I just need to find a nut to go thread somehow on the back of the bolt. This look like it'll work? Or should I just try to drill a new hole in the bracket? If I redrill, I'm worried the bracket will then be to long and I'll have to carve off the end of it. Again, just an amateur, wasn't looking for all this extra work.
#7
01-10-2007, 05:04 PM

NOOOO! The only peices that overlap are the foam rubber. In the second pic your foam is inverted (the piece attached to the plastic duct). I just did mine last weekend, this is the best pic I have now.

I tried to keep the gap from the foam on opposite ends, granted, it's not an airtight fit, but I don't think it's supposed to be. If you need better pics later let me know.
Hope this helps,
I tried to keep the gap from the foam on opposite ends, granted, it's not an airtight fit, but I don't think it's supposed to be. If you need better pics later let me know.
Hope this helps,
Trending Topics
#8
01-10-2007, 05:06 PM

#9
01-10-2007, 05:07 PM

#11
01-10-2007, 05:33 PM
OK I fixed it...
Alright, I got it fixed:

G35driver does it again! I love this site with all of it's info and supportive people. Thanks ttrank and DVatz.
X-vert, I apologize for not coming out of the womb with amazing car maintenance, repair and install knowledge. Some of us have to make a mistake or two to learn and luckily I have a site like this to help me. You are a useless part of it.
#12
01-10-2007, 05:37 PM
 !
!
#13
01-10-2007, 07:50 PM

#14
01-10-2007, 08:23 PM
Originally Posted by marty315
X-vert, I apologize for not coming out of the womb with amazing car maintenance, repair and install knowledge. Some of us have to make a mistake or two to learn and luckily I have a site like this to help me. You are a useless part of it.

#15
01-10-2007, 08:25 PM
Just took it for a test drive and it sounds great! I can already see the MPG going down as time at WOT goes up! 
Now for the next two projects to be knocked out this weekend:
Hopefully the headlights go much easier but I'll be using this site to help me do it. Thank you again ladies and gentlemen of g35driver.com
Now for the next two projects to be knocked out this weekend:
Hopefully the headlights go much easier but I'll be using this site to help me do it. Thank you again ladies and gentlemen of g35driver.com