
I Need DIY for Aerocatch FLUSH PLUS install on Seibon hood


Hey Everyone,
I've been looking forever to find a DIY that shows how to install aerocatch hood pins and the right mounting place for my 04 g35 coupe, I've got a Seibon TS hood.
Does anyone know where I'd be able to find one? I've found one for an altima but its obviously not the same vehicle...I've seen tons of demand from lots of members wanting the same DIY and I know theres lot of poeple out there that have done it, help a brotha out!
Thanks!


Registered User
iTrader: (2)
Joined: Apr 2005
Posts: 276
Likes: 13
From: Ft. Benning, TX; Atlanta, GA; Shelby, NC
I used a diy from an 240sx a few years ago.
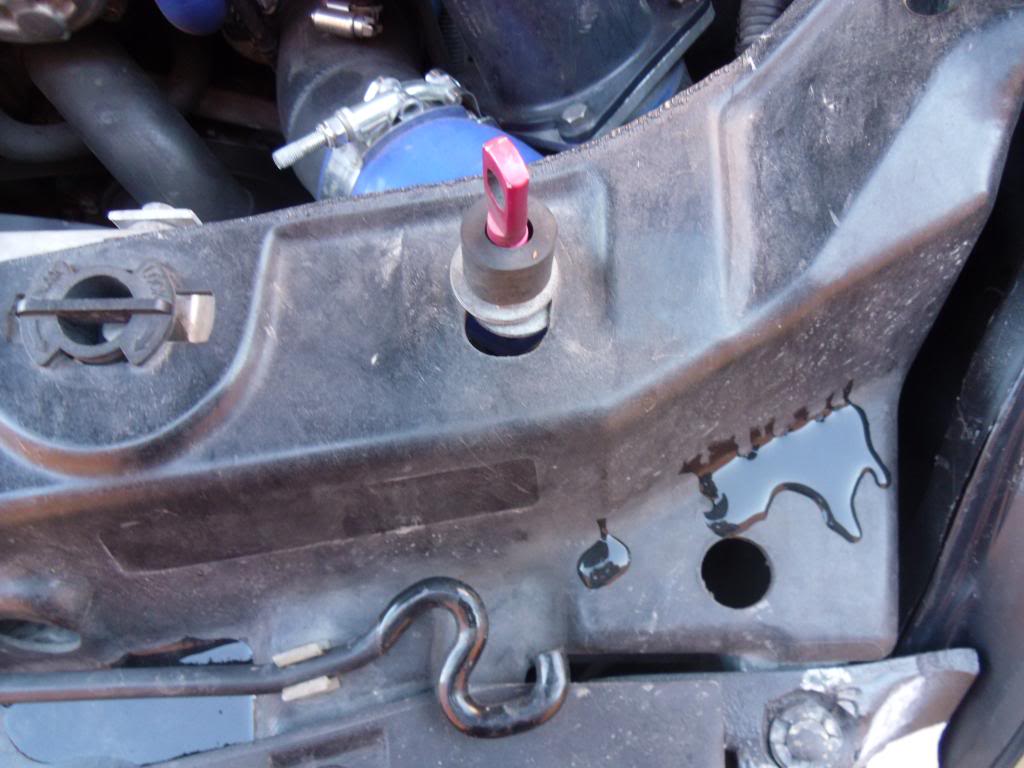
There are two holes in the the front composite member that are equidistant from the headlights and were the best holes for me. I installed the pins first and made sure they were the same distance front to back.
Then I used some clay on the pins and push the hood down to mark the drill points. Use several layers of painters tape on the topside before you drill or cut. Once you drill your hole then you lay down the template and trace it out. Dremel cut inside of the template lines with the cutoff wheels in "square" chunks from the straight edges then use a sanding wheel for the round edges.
I had it easy with the VIS hood because I could line up the latches on the edge of the vents. I will take a few pics and post them of where the pins are and such. The biggest thing with anything like this is verifying your measurements.
Last edited by suprasam; Feb 2, 2013 at 05:32 PM.
Ok cool that would help. I think the biggest thing is the placement of where you anchor your hood pins onto under the hood, like on a support or something? The guy I took it to put on the hood didnt have experience with these types of installs and he said the aerocatch pins would be on a weird curve of the hood and the plus flush isn't flexible so he was scared he was gonna crack the hood. So I decided to wait, the hood is pretty tight to the latch right now, it feels solid when its hood. But I don't want to risk it.
If you had pictures that would help for sure.
If you had pictures that would help for sure.
Registered User
iTrader: (2)
Joined: Apr 2005
Posts: 276
Likes: 13
From: Ft. Benning, TX; Atlanta, GA; Shelby, NC
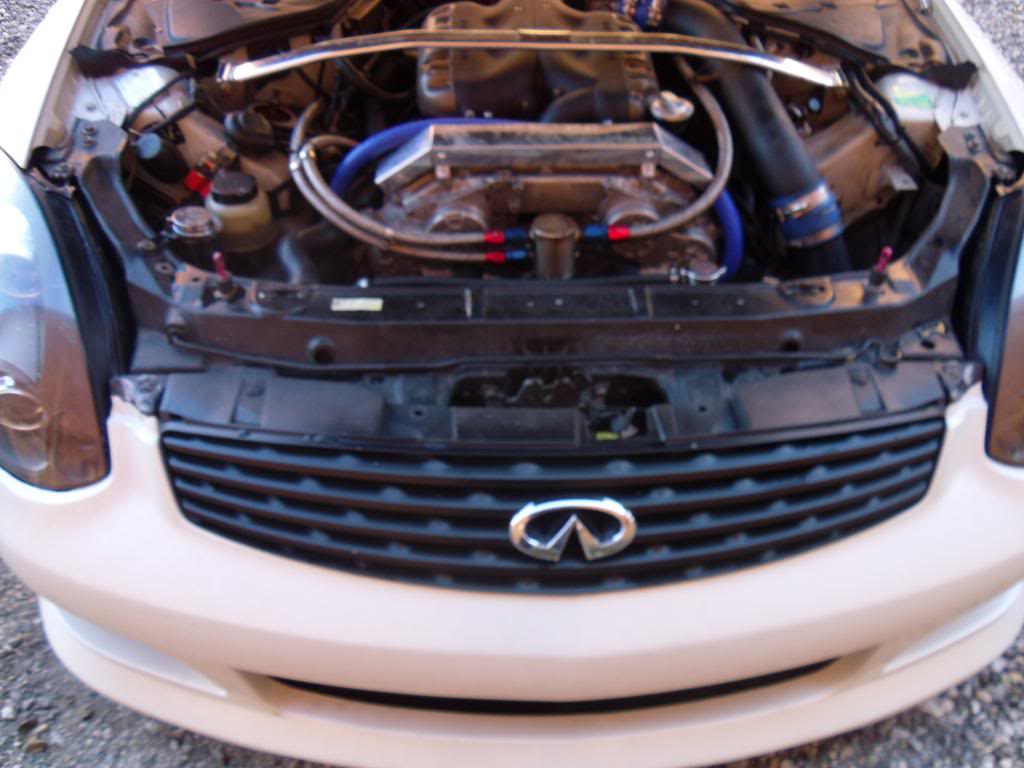
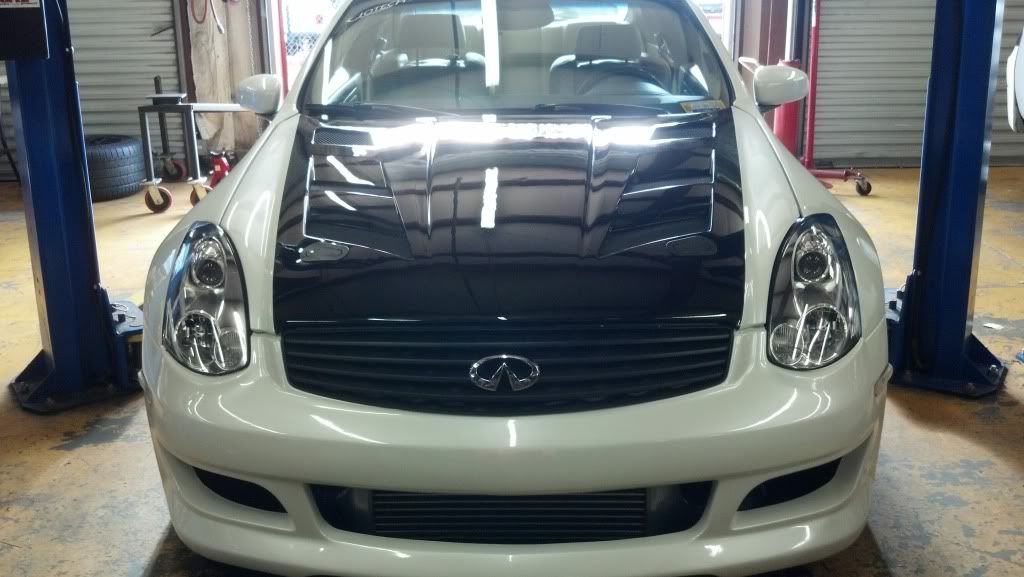
Here are some pics. I hope they help. FYI I use my factory latch as well, but you cant be too sure with these aftermarket hoods so the latches are nice too.
Wide shot so you can see where both pins are.
Driver's side
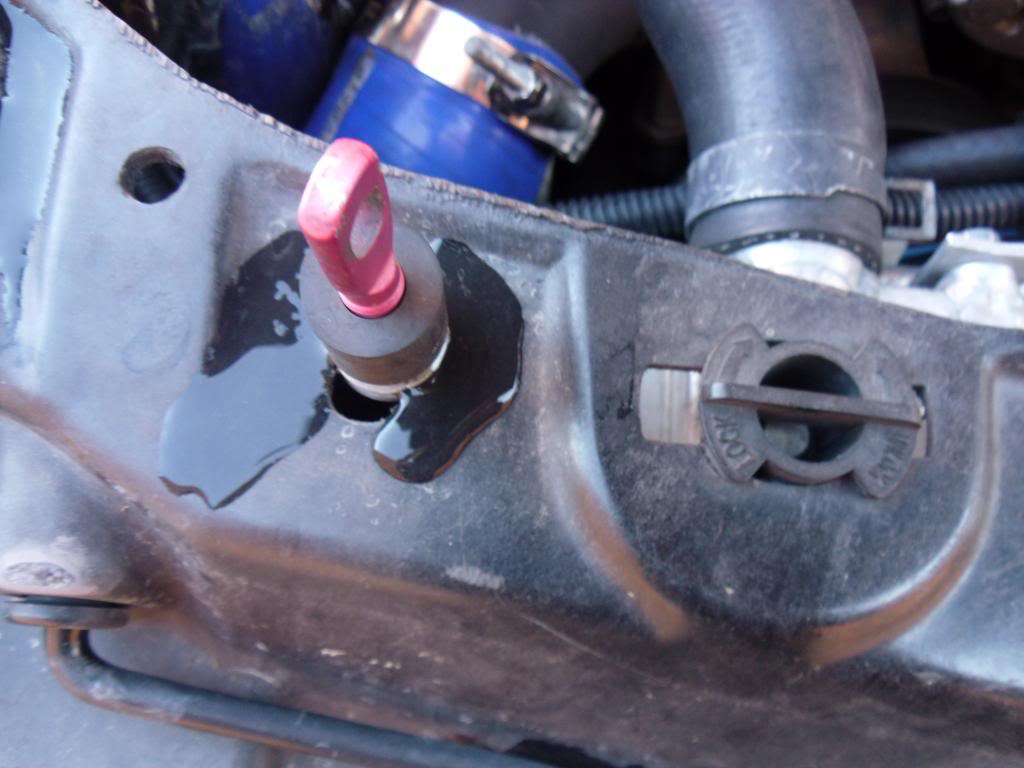
passenger's side
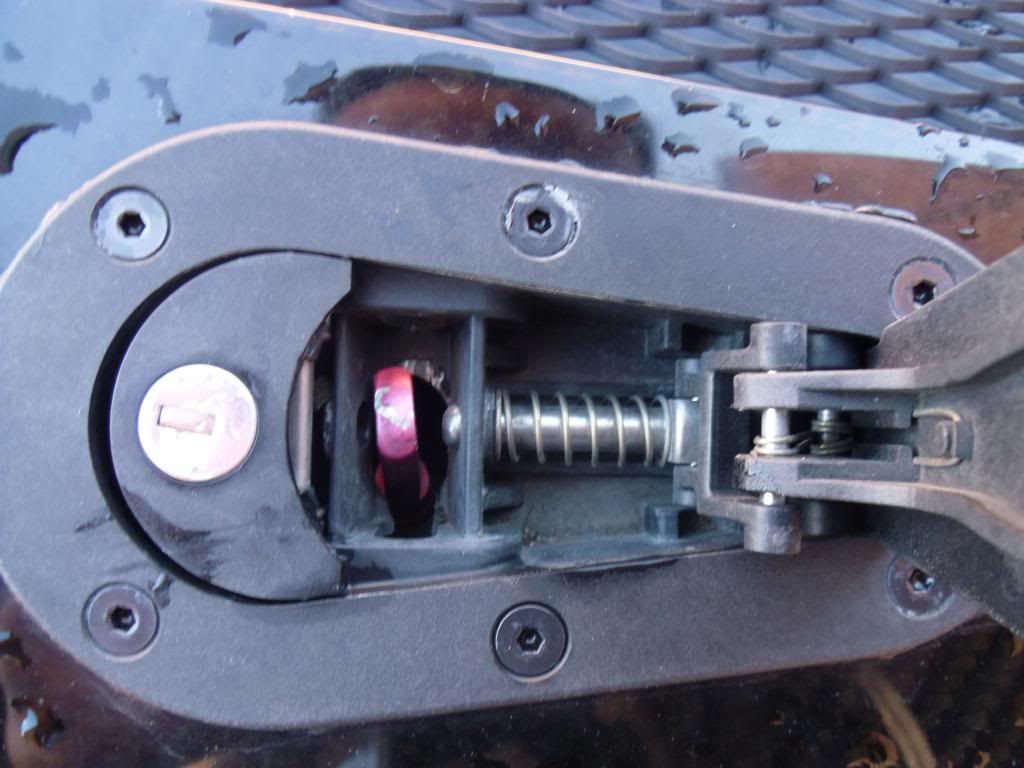
latch open

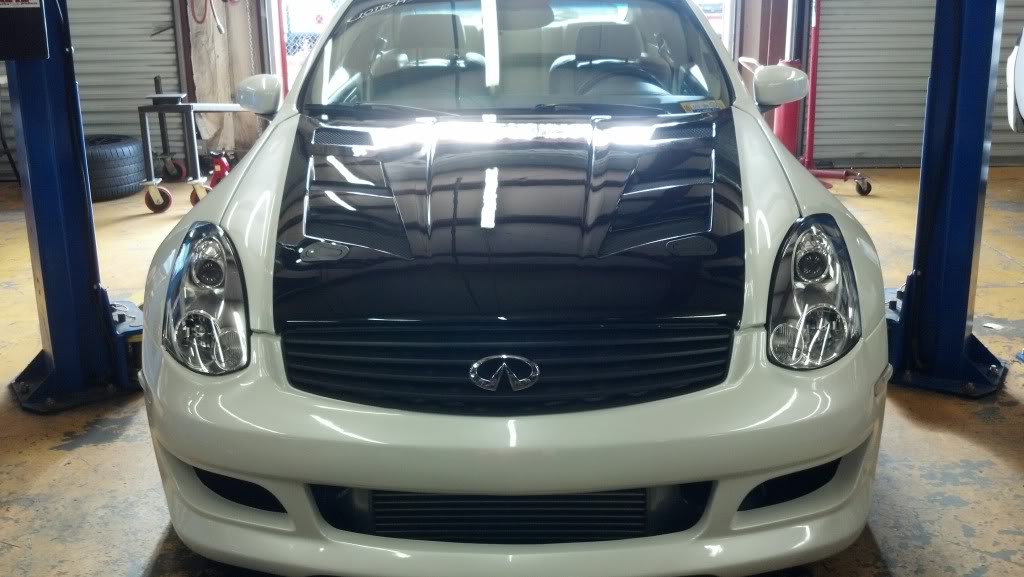
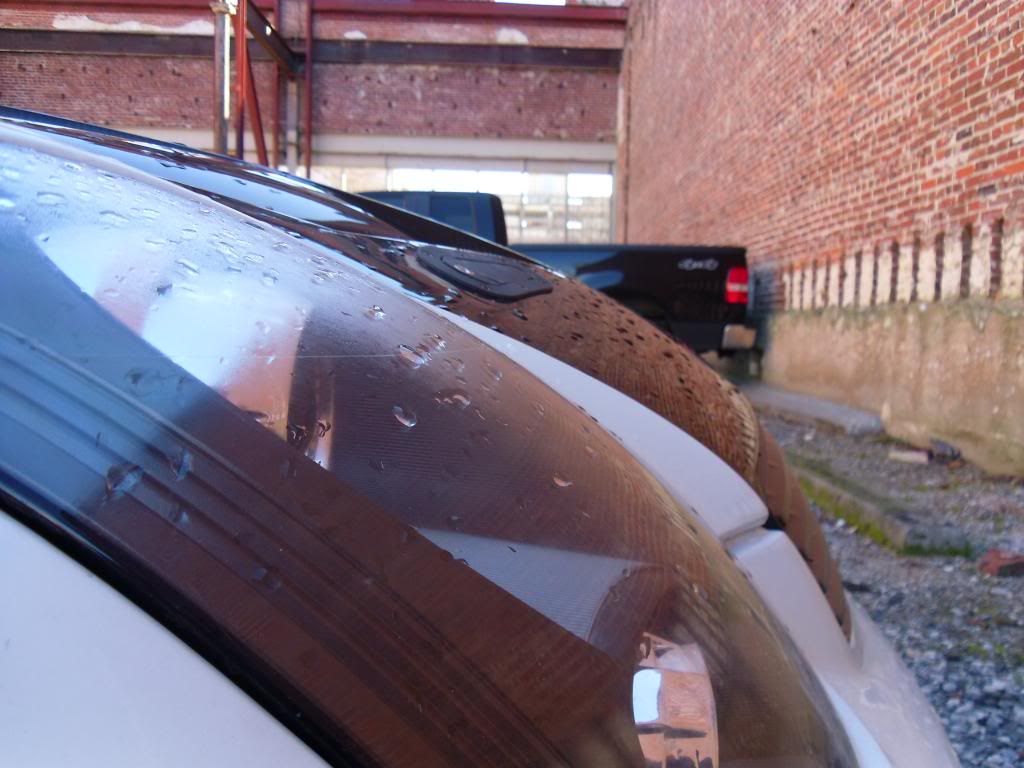
profile. My hood has a high slope too. If you can see in the previous pic, you can just make the pin hole bigger on the black part to accommodate a higher angle.

Here is a pic to show how they line up on my hood.
Wide shot so you can see where both pins are.
Driver's side
passenger's side
latch open
profile. My hood has a high slope too. If you can see in the previous pic, you can just make the pin hole bigger on the black part to accommodate a higher angle.
Here is a pic to show how they line up on my hood.
Trending Topics
Here are some pics. I hope they help. FYI I use my factory latch as well, but you cant be too sure with these aftermarket hoods so the latches are nice too.
Wide shot so you can see where both pins are.

Driver's side

passenger's side

latch open
profile. My hood has a high slope too. If you can see in the previous pic, you can just make the pin hole bigger on the black part to accommodate a higher angle.
Here is a pic to show how they line up on my hood.
Wide shot so you can see where both pins are.
Driver's side
passenger's side
latch open
profile. My hood has a high slope too. If you can see in the previous pic, you can just make the pin hole bigger on the black part to accommodate a higher angle.
Here is a pic to show how they line up on my hood.
Do you know anything about the way the hood pin latches are suppose to go? It shows you have them sideways, I think Aerocatch recommends the big part towards the windshield.
But in this picture its different.
Ps. Thats a slick looking G. I just bought a pair of the upgraded projectors for my 04 G. I like what you've done with them

Registered User
iTrader: (2)
Joined: Apr 2005
Posts: 276
Likes: 13
From: Ft. Benning, TX; Atlanta, GA; Shelby, NC
yea make the hole that the pin goes in on the bottom.of the latch bigger for the angle. also look into password jdm mounting brackets. i think they are worth it
i dont think it matters which direction you put them.on. just whatever is best your setup.
i dont think it matters which direction you put them.on. just whatever is best your setup.
Did you install on your car?
Registered User
iTrader: (2)
Joined: Apr 2005
Posts: 276
Likes: 13
From: Ft. Benning, TX; Atlanta, GA; Shelby, NC
yeah i did the install. i was nervous when i started the first cut but they turned out how i wanted. it helped i had the vents as a reference point.
So did you use mounting brackets? If so does it really cut down on install time..?

Thread
Thread Starter
Forum
Replies
Last Post
R1 Autoworks
Exterior-Vendor
1
Jul 3, 2019 07:16 PM
Tolboothwilley�
Exterior-Vendor
6
Jul 28, 2016 12:42 AM
yassy
G35 Sedan V35 2003-06
3
Aug 9, 2015 07:31 PM